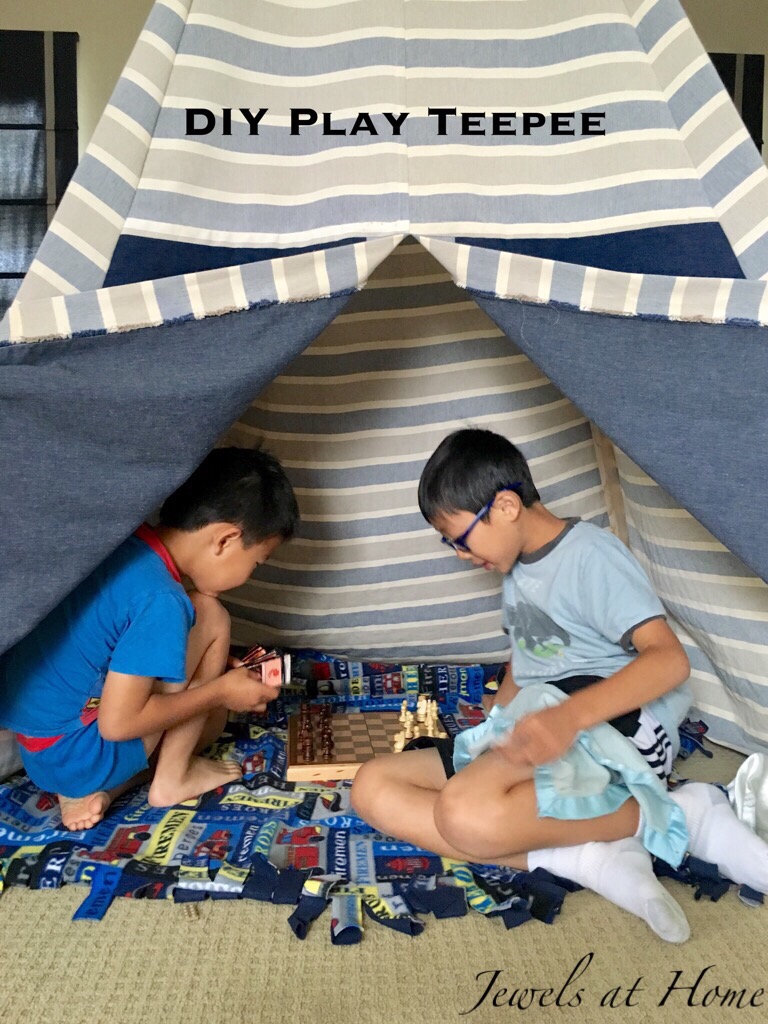
You’ve probably seen these adorable kids’ reading tents on Pinterest or your favorite blogs. I’ve had this project in the back of my mind for a while now and, with a little help with the boys, finally made it happen!
I browsed tons of pictures and tutorials to come up with the version I wanted for our family. Here’s what I know I wanted to include:
- 4 poles with dip-painted tips
- Rope at top and bottom to create the structure
- Contrasting fabric for the door
There are lots of methods out there for making a play teepee. I decided to sew ours. Don’t get me wrong, I love my glue gun and staple gun, but since I can handle the sewing, I wanted to go with something more durable and removable for washing (not that my kids ever get anything dirty, but…).
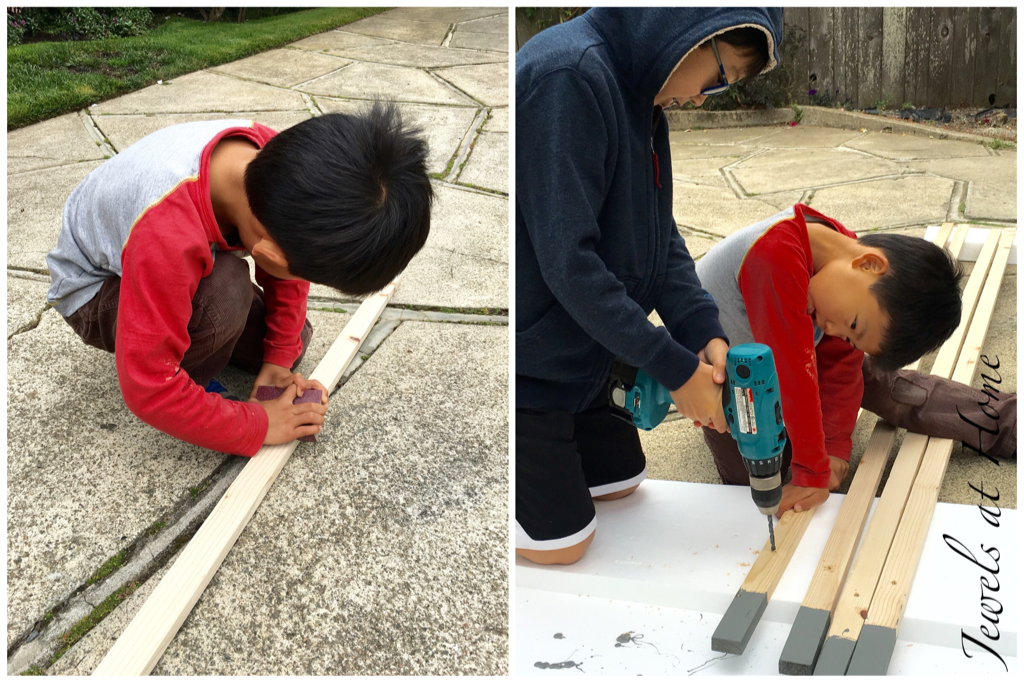
I started with four poles made from 1″ x 2″x 8′ wood molding. These were only $0.91 each! Since we had all the other supplies already, this whole project cost us less than $4!!
Here are the steps to your new favorite hideout!
1. Lightly sand the wood
2. Paint the tips of the poles
3. Drill holes 8″ from the top and 1.5″ from the bottom of each pole. I did the pilot holes and the kids finished up. It was fun seeing them use the tools.
4. I threaded rope through the top holes and wound the rope around to create our structure. Next, I threaded rope through the bottom of the poles and knotted it to keep the poles evenly spaced. I didn’t put rope across the opening, to prevent tripping!

5. When the poles were arranged the way we wanted, I measured for the panels. I measured the openings and added 2″ to all the measurements for hems and seams and finished everything with French seams, since you can see them from the inside.
When your tent is done, you can accessorize with pillows, blankets, bunting, lights, or anything else your heart desires!


“Jewels”
