You know how much I love faux bamboo furniture! My collection includes these Chippendale chairs and this Thomasville dresser-turned-bar cabinet. When I recently acquired an older bookcase, which I chose for its solid wood construction and low price, I noticed … Continue reading →
There are a few furniture painting projects that I’ve always wanted to do, like this mid-century dresser, or this faux bamboo bar cabinet. A big Chinese-style wedding armoire has been on my list, and my chance finally came! I found … Continue reading →
I dressed up this wooden desk organizer to create some pretty storage in my kitchen. You could use it for a bathroom, office or craft space also! I love tea – and throwing tea parties – so this is perfect … Continue reading →
A few years ago, I made an accordion album to hold photos for my dad. Now, here’s a more dressed-up version that I made as wedding cards from our work for two coworkers who are both getting married this summer. … Continue reading →
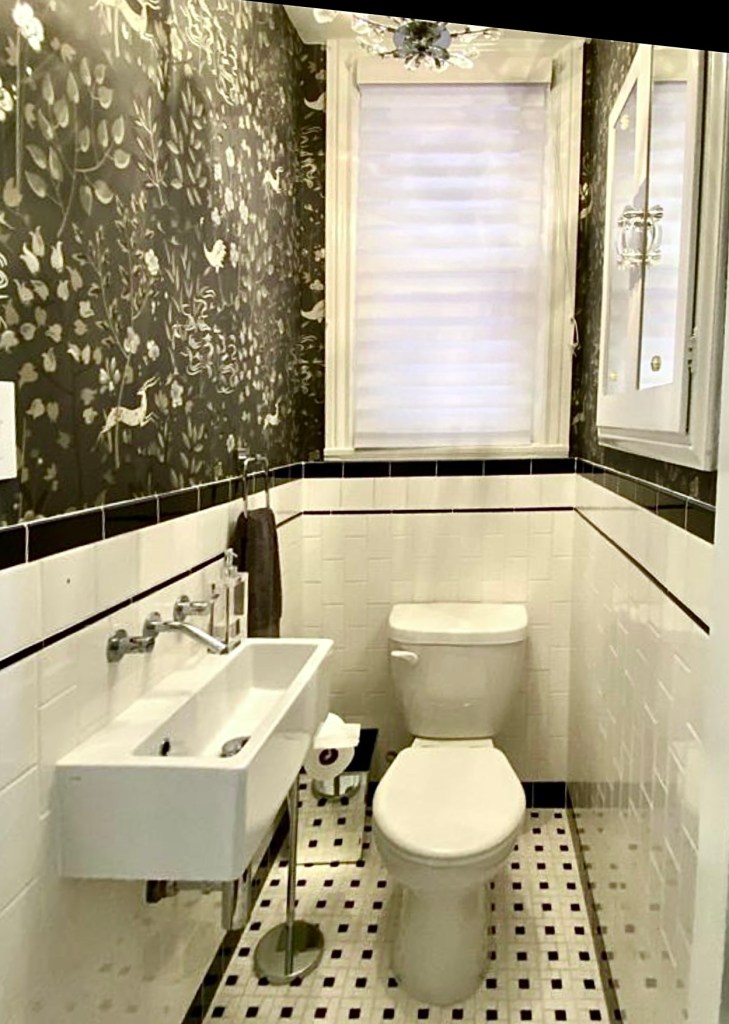
Since I chose a smaller project for this challenge, I have some time to show you all the details! Wallpaper is a really popular right now, and I’m loving this new-again trend! Ever since I wallpapered an accent wall in our bedroom, I’ve been looking for my next project. The choices are nearly endless, which made picking a pattern for our mini-mudroom both daunting and fun! Here are some of my favorites, including high vs. budget options.
My criteria were:
Blue or green, of course!
A bold print – a small space is the perfect spot to try something brave!
A modern twist on a traditional pattern, with a nod to chinoiserie
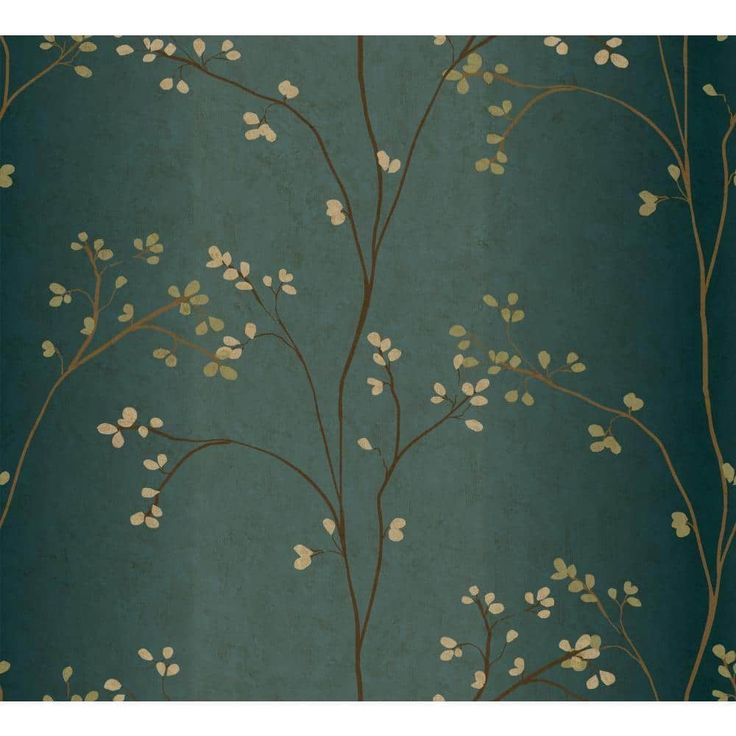
First, I was really drawn to these patterns with metallic branches on a dark background. The “high” option on the left is Nutcracker by Juliet Travers. It’s so elegant, and the little squirrel adds a whimsical touch! The “budget” version on the right is Colby Floral wallpaper. I think either of these would be beautiful, but I decided I wanted something a littler bolder for this project.
I was really considering these next two favorites: a “budget” version is Crown Sherwood Woodland in Dark Blue on the left, and the “high” version is Rifle Paper Co. Menagerie Toile in Navy and Metallic Silver. They have a bit of a chinoiserie feel to them, and I really like how the patterns are very elaborate, but they don’t feel too busy, because of being two-toned. I was definitely tempted by the metallic finish of the Rifle Paper one, also!
I was also very drawn to this Toile pattern by Borastapeter in green or blue. Ultimately, I think the scale would be better for a bigger space. I would love this in a dining room!
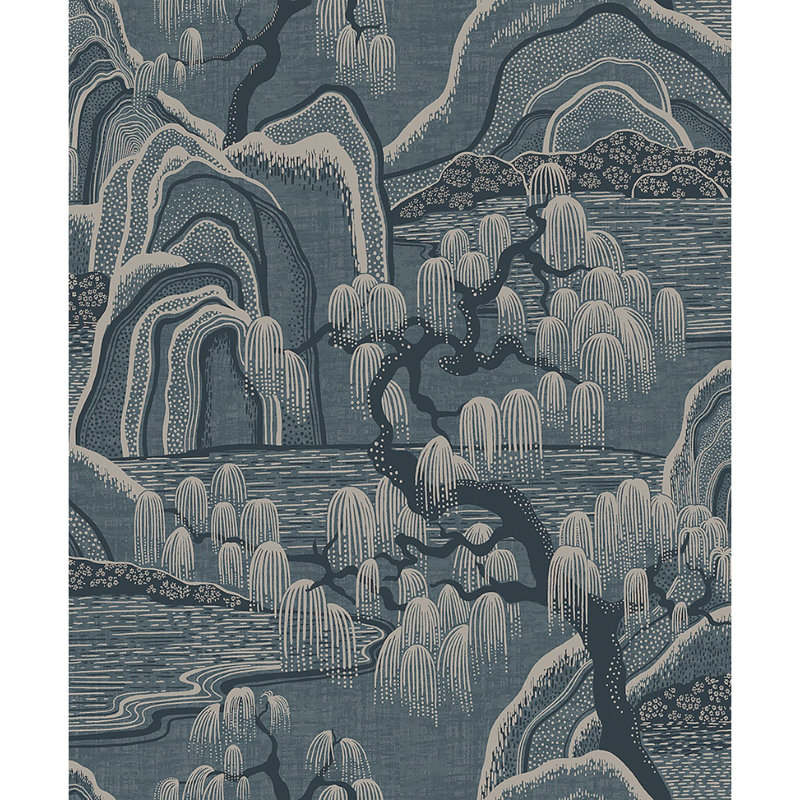
Finally, I decided to go with this beautiful print, the Ronald Redding Aspen wallpaper in dark blue. I love the mix of classic and whimsical and the dark teal blue color with light brown accents that will be brought out by the wood cabinet and the brass coat hooks. I knew it was meant to be when I realized that this is the same pattern that was in the powder room of our rental house. I always loved it, and I am very sentimental , so it makes me really happy to have that connection between the two homes.
Stay tuned to see the wallpaper installed in the mini mudroom next week! In the meantime, head on back to the One Room Challenge site to see some more room transformations!
Making these decorative paper storage boxes makes me so happy! Like many of my other creations, it started by seeing something beautiful and wondering “how could I make that?!” In this case, it started by seeing these gorgeous Antoinette Poisson … Continue reading →
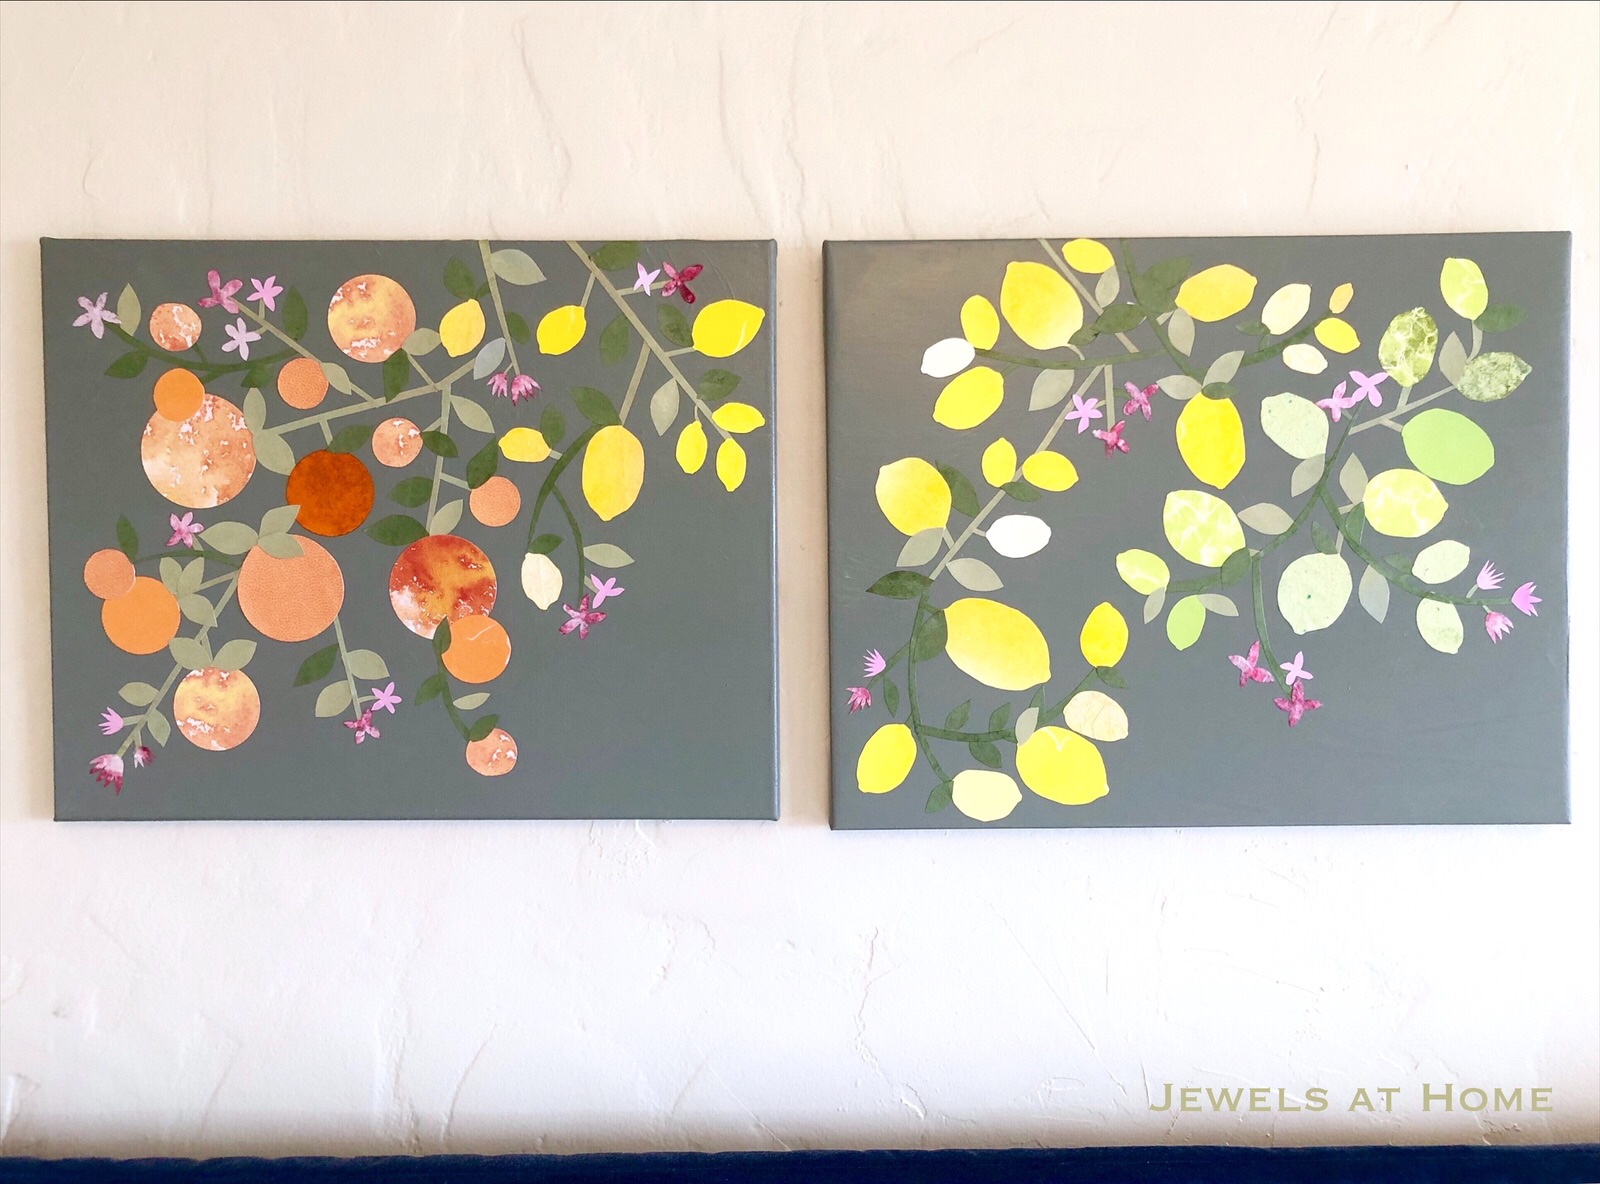
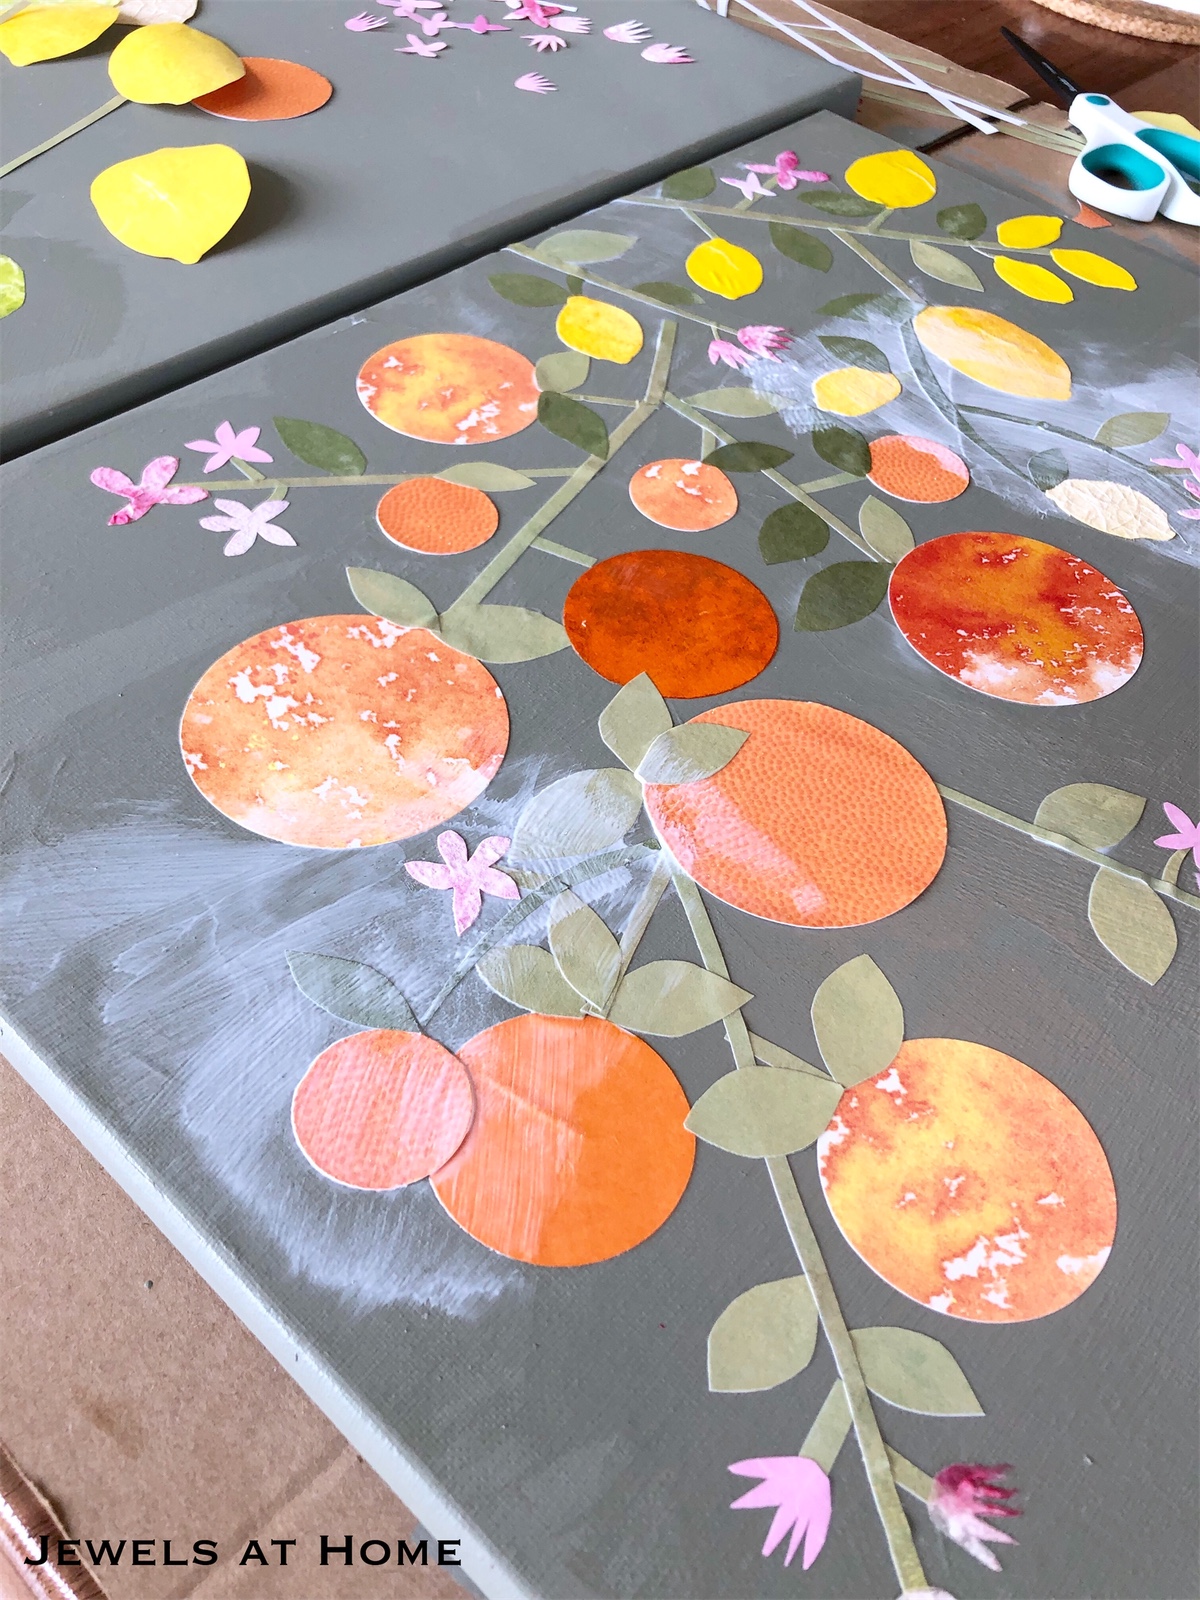
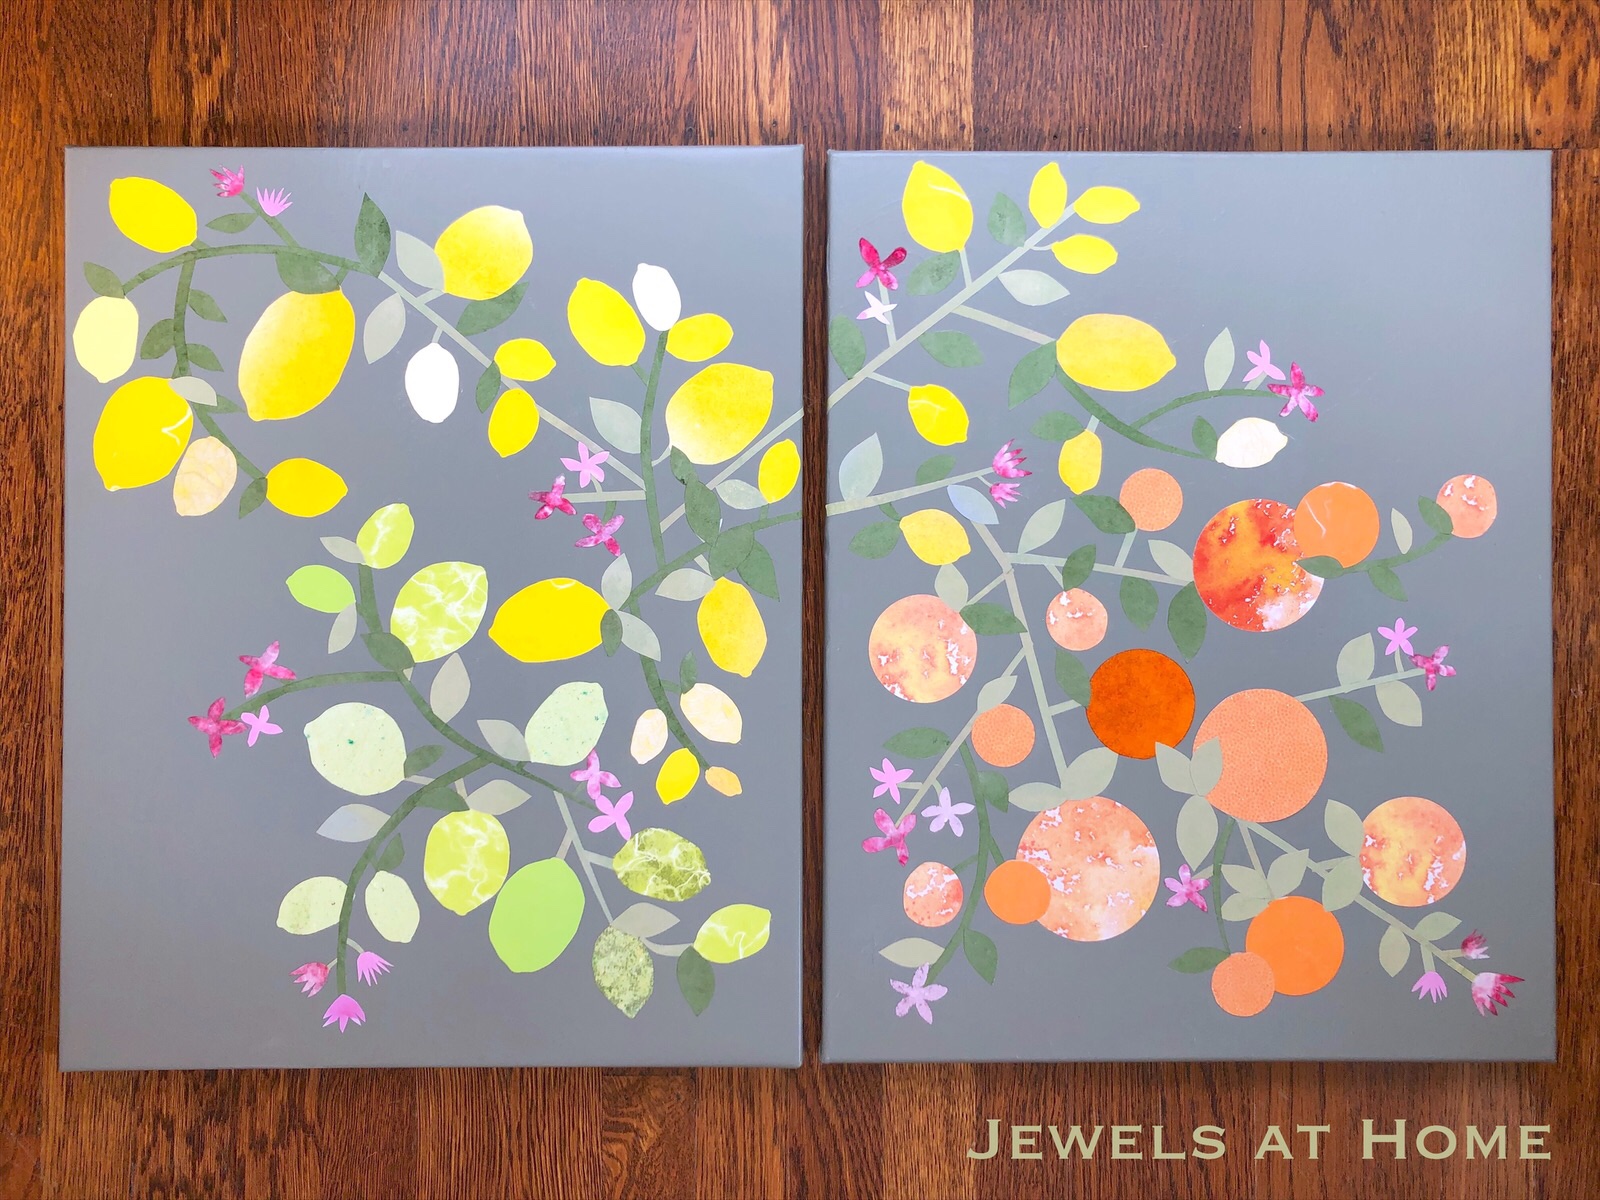
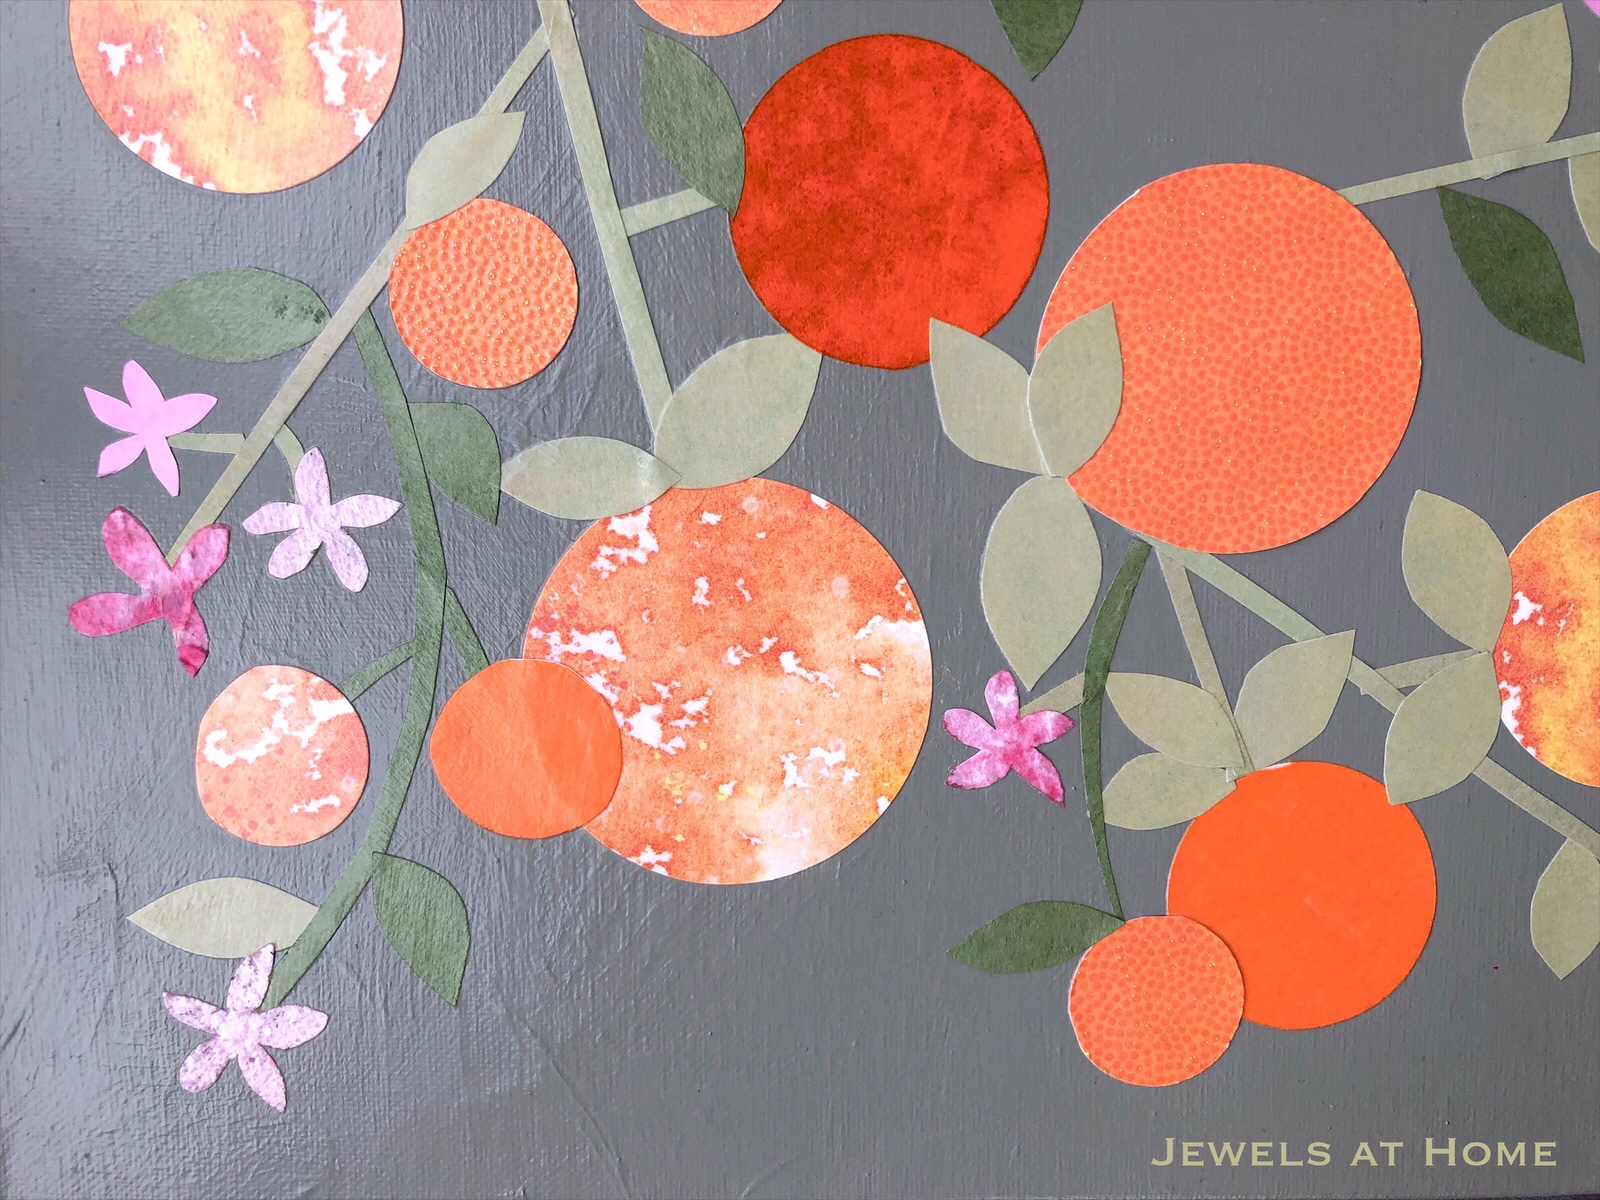
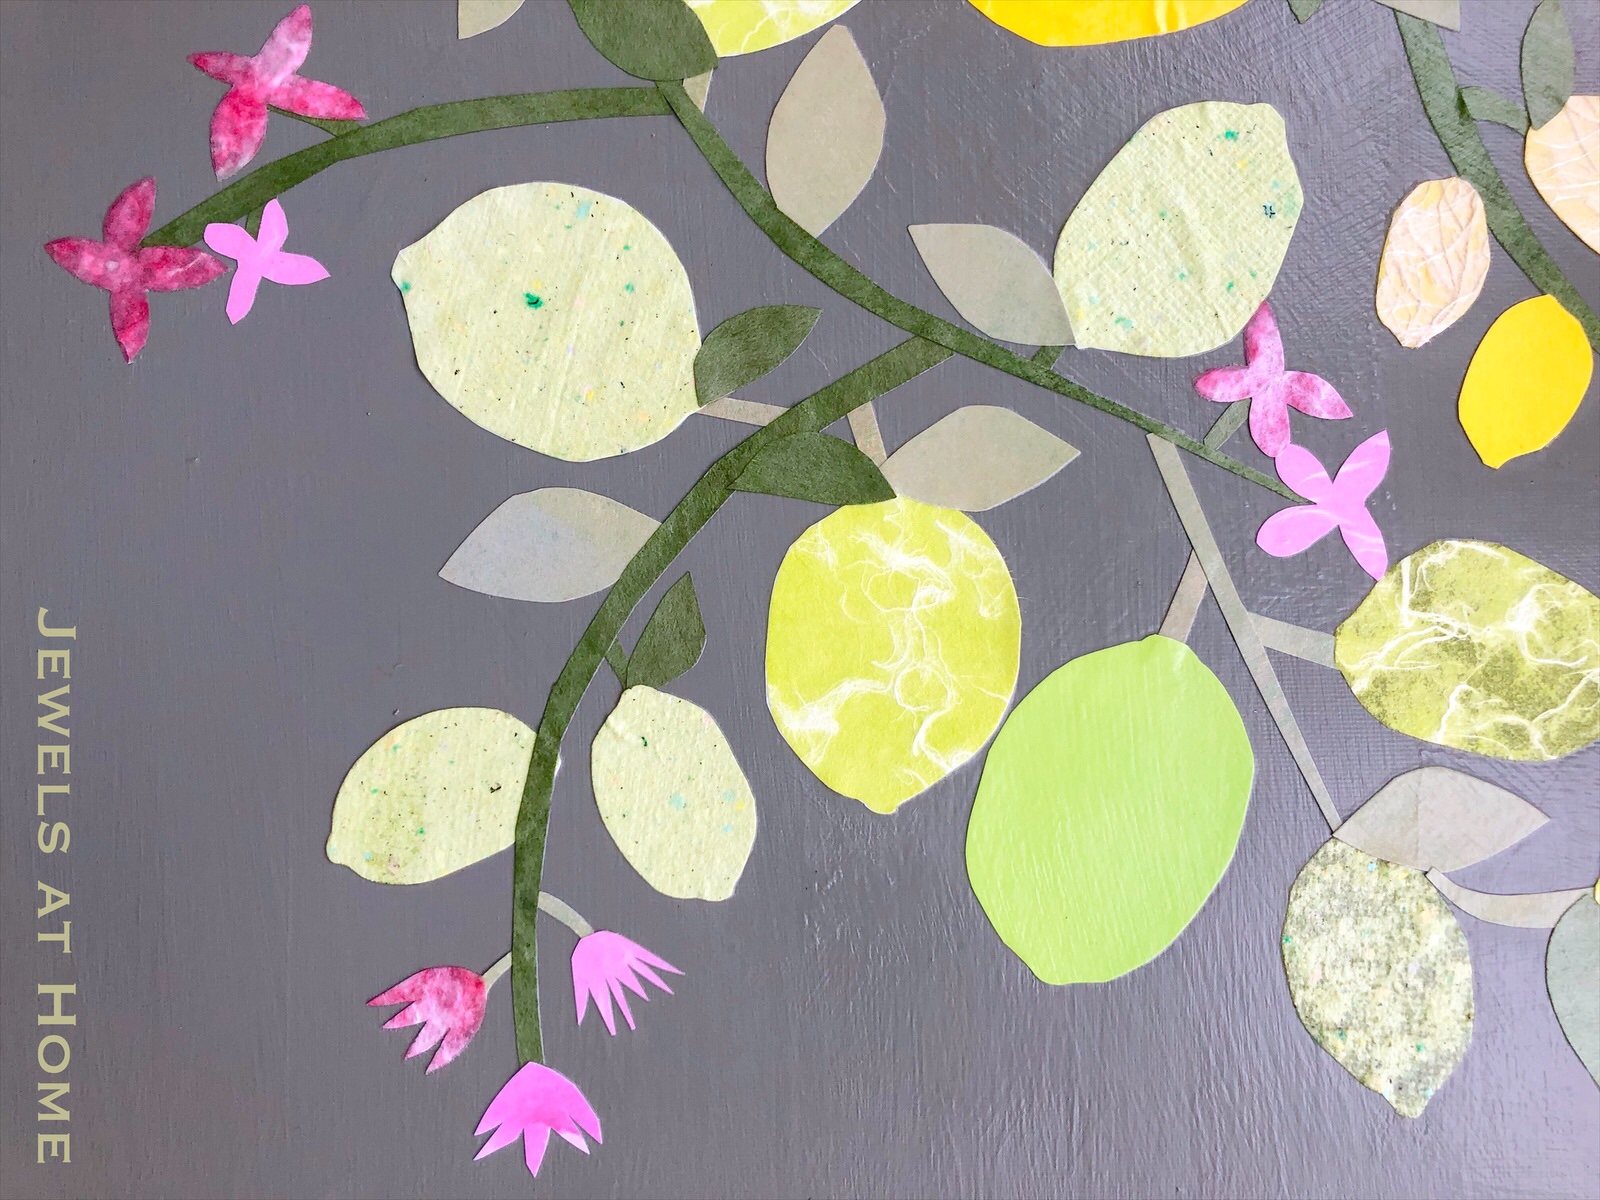
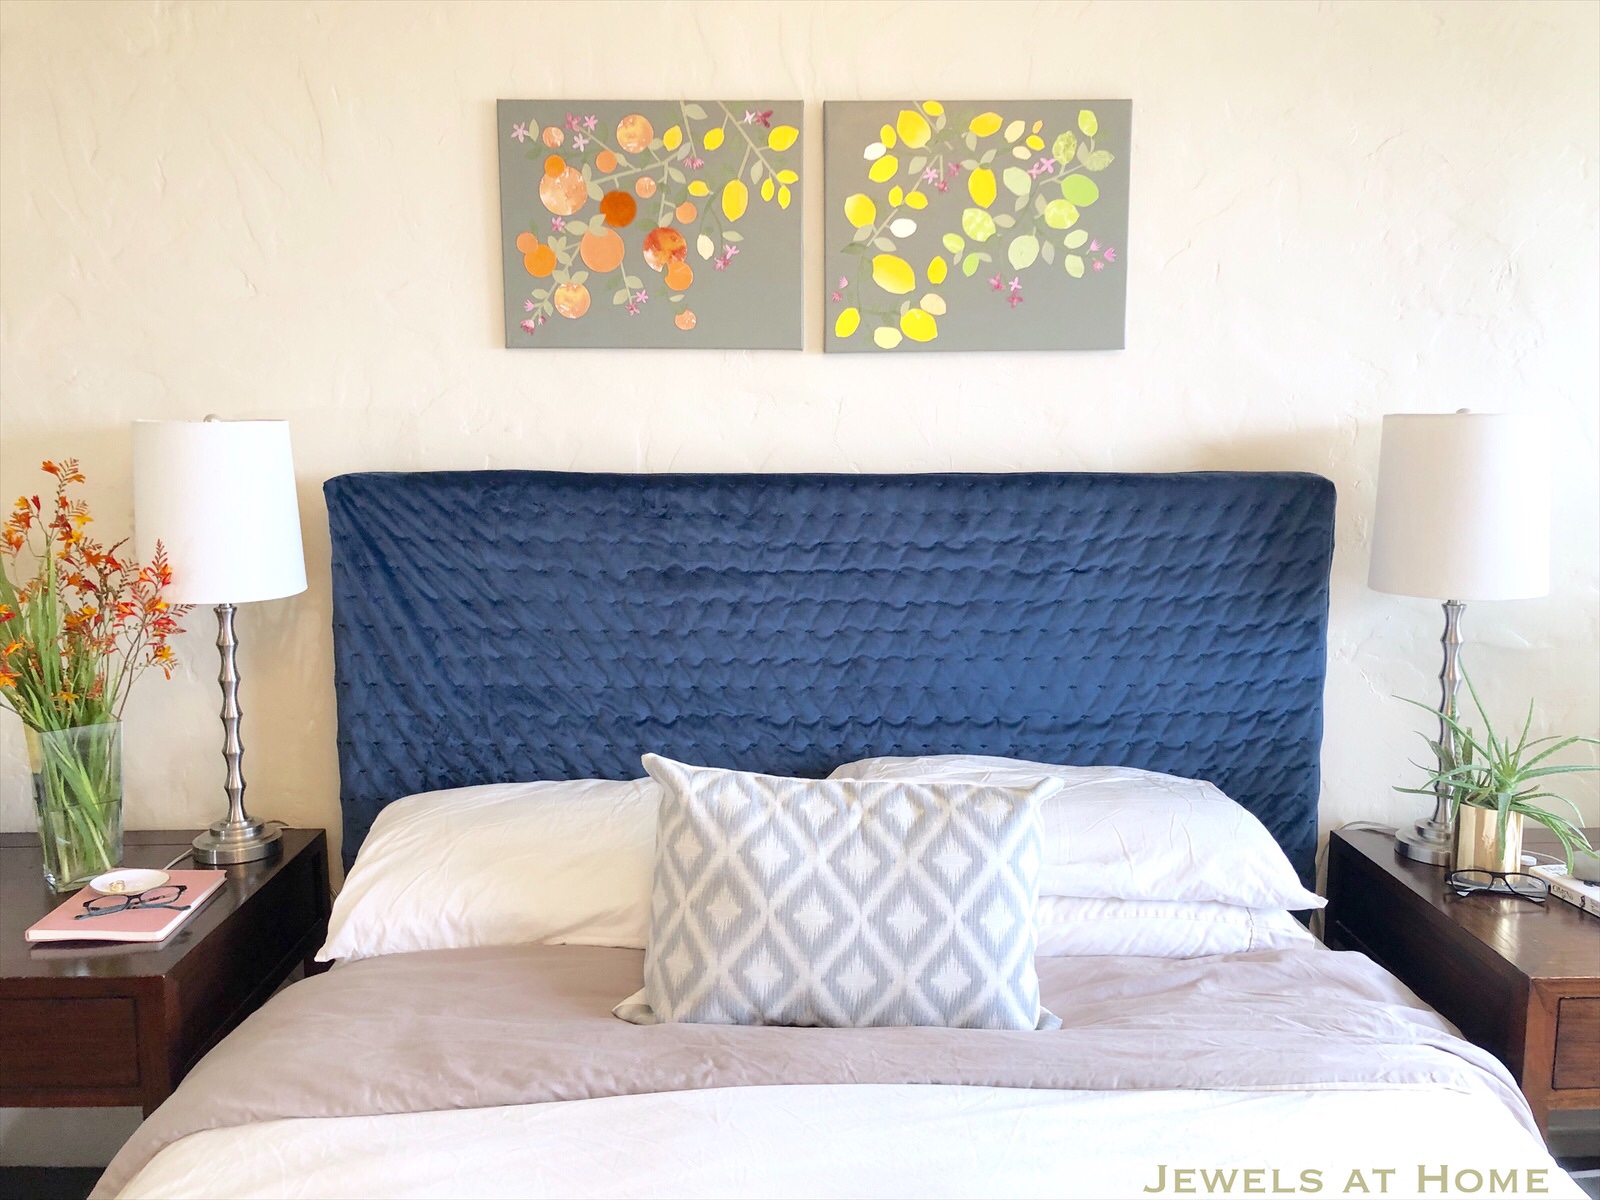
San Francisco’s fog is not the best climate for gardening, but my little lemon tree is getting established, and I wanted to create something citrus-inspired! I had some old canvases lying around (let’s just say that for me, paint-with-wine events are more about the experience than the product!), so I decided to transform them into something new!
I have a lot of craft projects “incubating” – I get excited, I buy supplies, and then… I wait for the perfect moment to create them! We could also call this hoarding of craft supplies, but that’s not in the spirit of the season!
We’ve got an enthusiastic new social committee at work, and they organized a “Secret Snowflake” exchange for the holidays. “Handmade is encouraged,” they instructed. Now that’s my kind of challenge. My gift recipient loves to host dinner parties, so I found her a cute serving bowl, some holiday dish towels, and I am finishing off the package with these DIY coasters!
Here’s what you’ll need:
White 4″ square tiles – very inexpensive at the hardware store, or you can order online
Decorative paper – choose thinner paper that absorbs the adhesive and molds to the tile
Letting dry between layers, add one or two more coats of Mod Podge
Add three or more coats of varnish, for a more durable finish
Add silicon bumpers to bottom
Here they are in my home and getting ready to go spread cheer in my friend’s home!
Next time, I’d like to try making these coasters, with the paper sandwiched between glass, because I think they’ll hold up even better. Next year’s teacher and coworker gift? Maybe!
Hope you are having fun sharing treats and gifts this season!
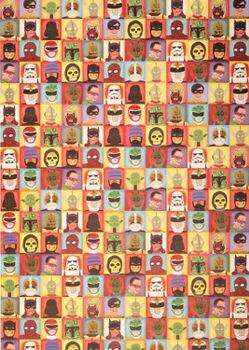
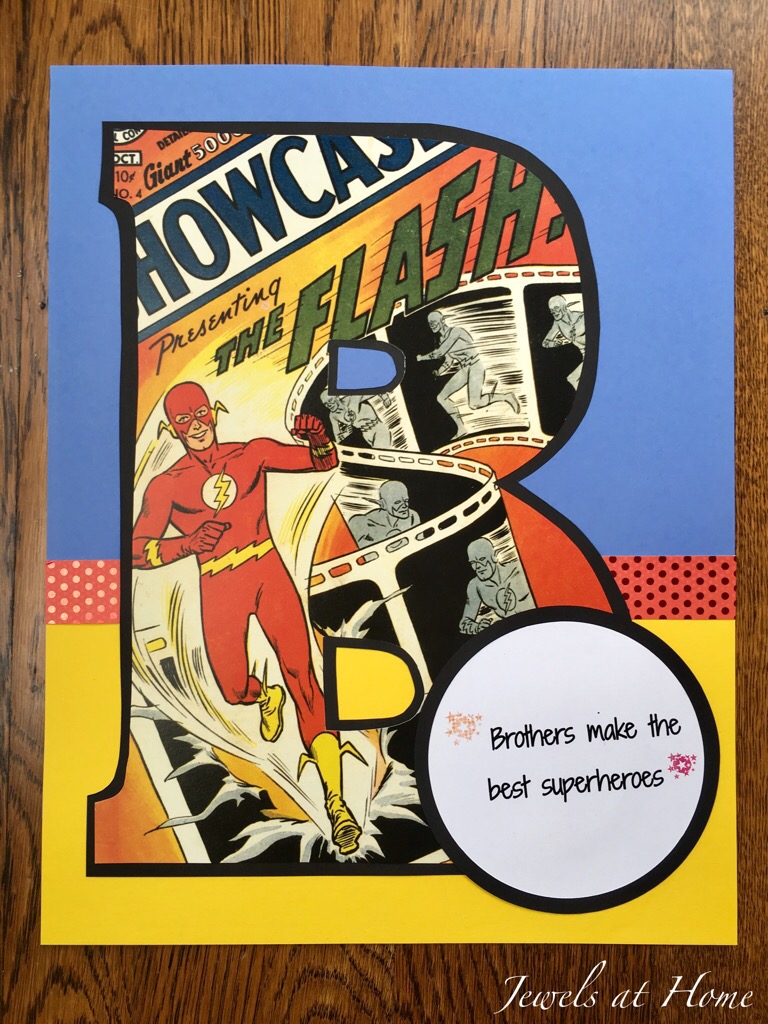
Superheroes have been capturing our imagination for decades, and the recent revival of superhero movies shows they are truly timeless. And since everything else with kids changes way too fast, superheroes make a great and enduring theme for their decor. I really enjoyed making these art projects for our kids and our friends’ boys.
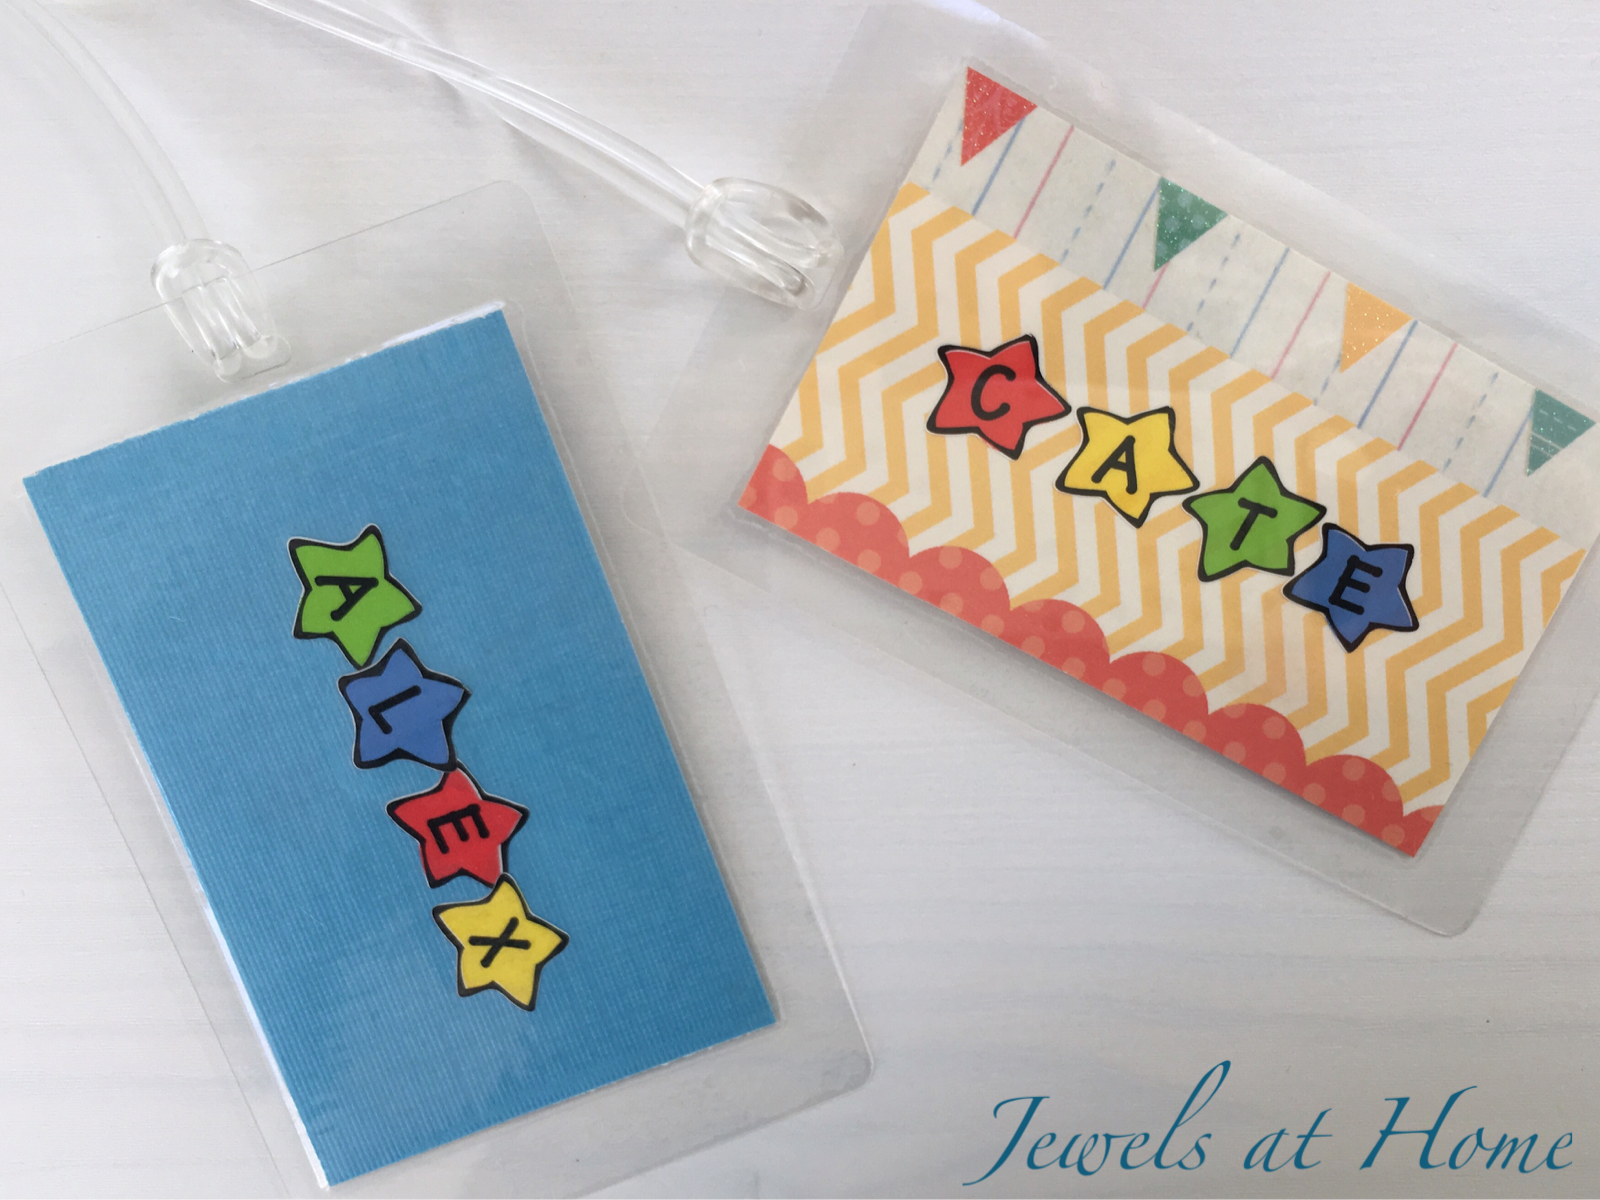
These little luggage tags make wonderful gifts that are quick to make and practical!
Every kids loves having something with their name on it, and every adult fears taking the wrong bag at the airport. I’ve actually done this – and it was a huge pain, because I had to spend hours and $$ going back to LAX to exchange the bag, but I was relieved that at least the woman whose bag I accidentally took was really nice about it.
I love all the ways you can customize these luggage tags. I am showing these with scrapbook paper, but I’ve also made some out of wedding invitations to give as a gift to the couple, and you could use photos or lots of other ideas!
I’ve made tags with two different types of lamination:
There’s really nothing better than a beautiful combination of scrapbook paper and stickers, is there? … Well, maybe dark chocolate and red wine… or world peace… okay, but these are really fun and pretty, so go and make some, because world peace may take a while to achieve.