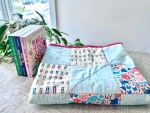
We are having a real baby boom in my “work family”! I started a tradition of making quilts for the new babies on our team, and there are a lot! I’ll share some of the past designs at the end … Continue reading
We are having a real baby boom in my “work family”! I started a tradition of making quilts for the new babies on our team, and there are a lot! I’ll share some of the past designs at the end … Continue reading

Sometimes, milestones are measured in unusual ways. I know my kids are getting big, because it’s finally possible to take a picture of JJ’s room that is not a total disaster! We (I) were focused on finding a new house … Continue reading
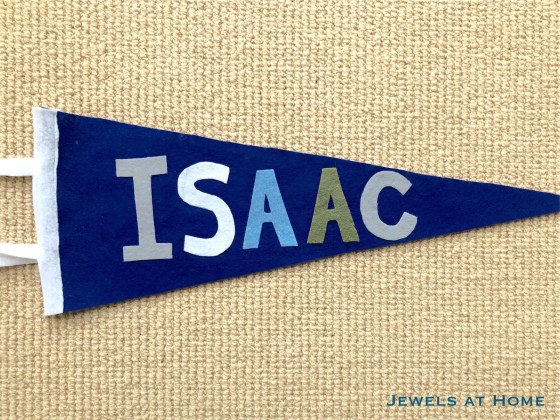
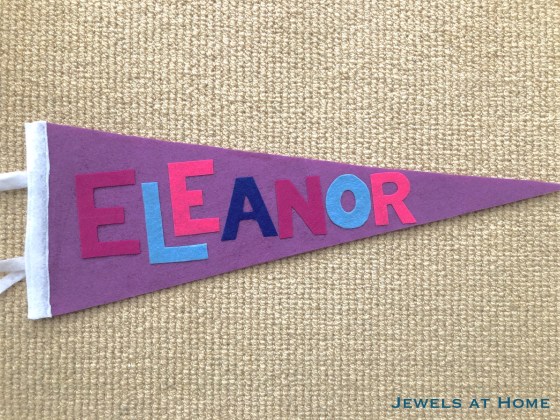
I recently made these vintage-style pennants to celebrate special places in our family. It was so fun that I went on to make personalized name pennants for my nephew and niece.

Here’s what you’ll need:
Here’s how to do it:
Here’s how the pennants turned out. I love all the color variations!
Julie aka “Jewels”
I’m really excited to be a Guest Participant again in the One Room Challenge! This is a great way to get inspiration and motivation for your home. This spring, I re-decorated our boys’ bathroom. For this fall’s challenge, I’m transforming our teen’s bedroom. His new space is inspired by an industrial loft, with an exposed brick wall and other great features! Thanks for following along!
![]()
Recap:
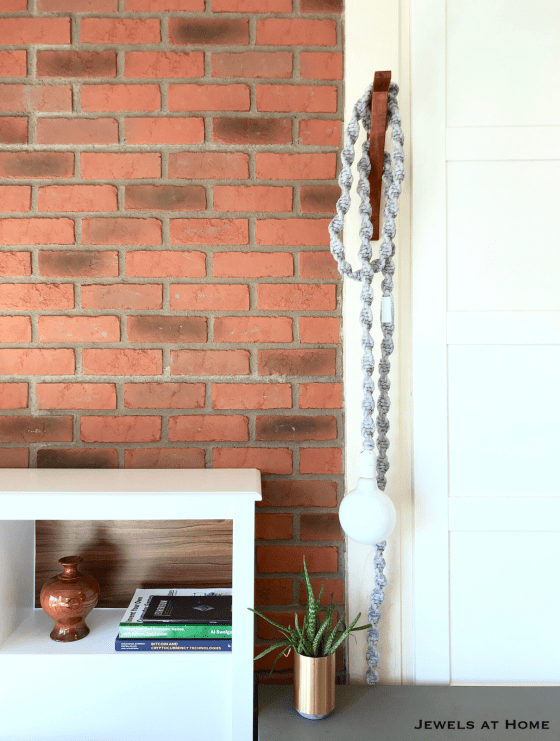
This week, I’m so excited to show you the lighting projects for this space. These are both moderately easy DIYs, and that’s exactly what I need right now with everything else going on at home and work!

Macrame Cord Hanging Lamp:
TOTALLY in love with this project. More details, including materials and instructions, in this post. For now, just enjoy the pictures!


Stenciled Drum Pendant Lamp Shade:
This is actually one of the first projects I did, when I started blogging. The detailed instructions are in the original post. This room used to be my craft room, so I gave myself some license to use more feminine touches. Kai’s not picky, but I did want to update this lamp for him. I originally thought I might be able to just change the shade, but it was fixed in place. While changing out the light bulbs, I realized that the room looked a lot brighter – and the light looked a bit less feminine – without the bottom glass and finial, so I left it that way for a little update.
Here’s an earlier before-and-after of the light.

And here’s how it looks without the bottom finial and with some fun Edison-style bulbs inside.


Oh, and one more look at my friend the macrame cord light…
Not sure what I’ll tackle this coming week. The answer might be nothing, because I’m co-hosting a big crazy birthday party this weekend…
A huge thank you to Linda for creating the One Room Challenge community, and high fives to all my fellow bloggers whose hard work and creativity were great inspirations! Be sure to go back to the One Room Challenge page to check out all the other projects!
Julie aka “Jewels”
These little luggage tags make wonderful gifts that are quick to make and practical!
Every kids loves having something with their name on it, and every adult fears taking the wrong bag at the airport. I’ve actually done this – and it was a huge pain, because I had to spend hours and $$ going back to LAX to exchange the bag, but I was relieved that at least the woman whose bag I accidentally took was really nice about it.

I love all the ways you can customize these luggage tags. I am showing these with scrapbook paper, but I’ve also made some out of wedding invitations to give as a gift to the couple, and you could use photos or lots of other ideas!
I’ve made tags with two different types of lamination:


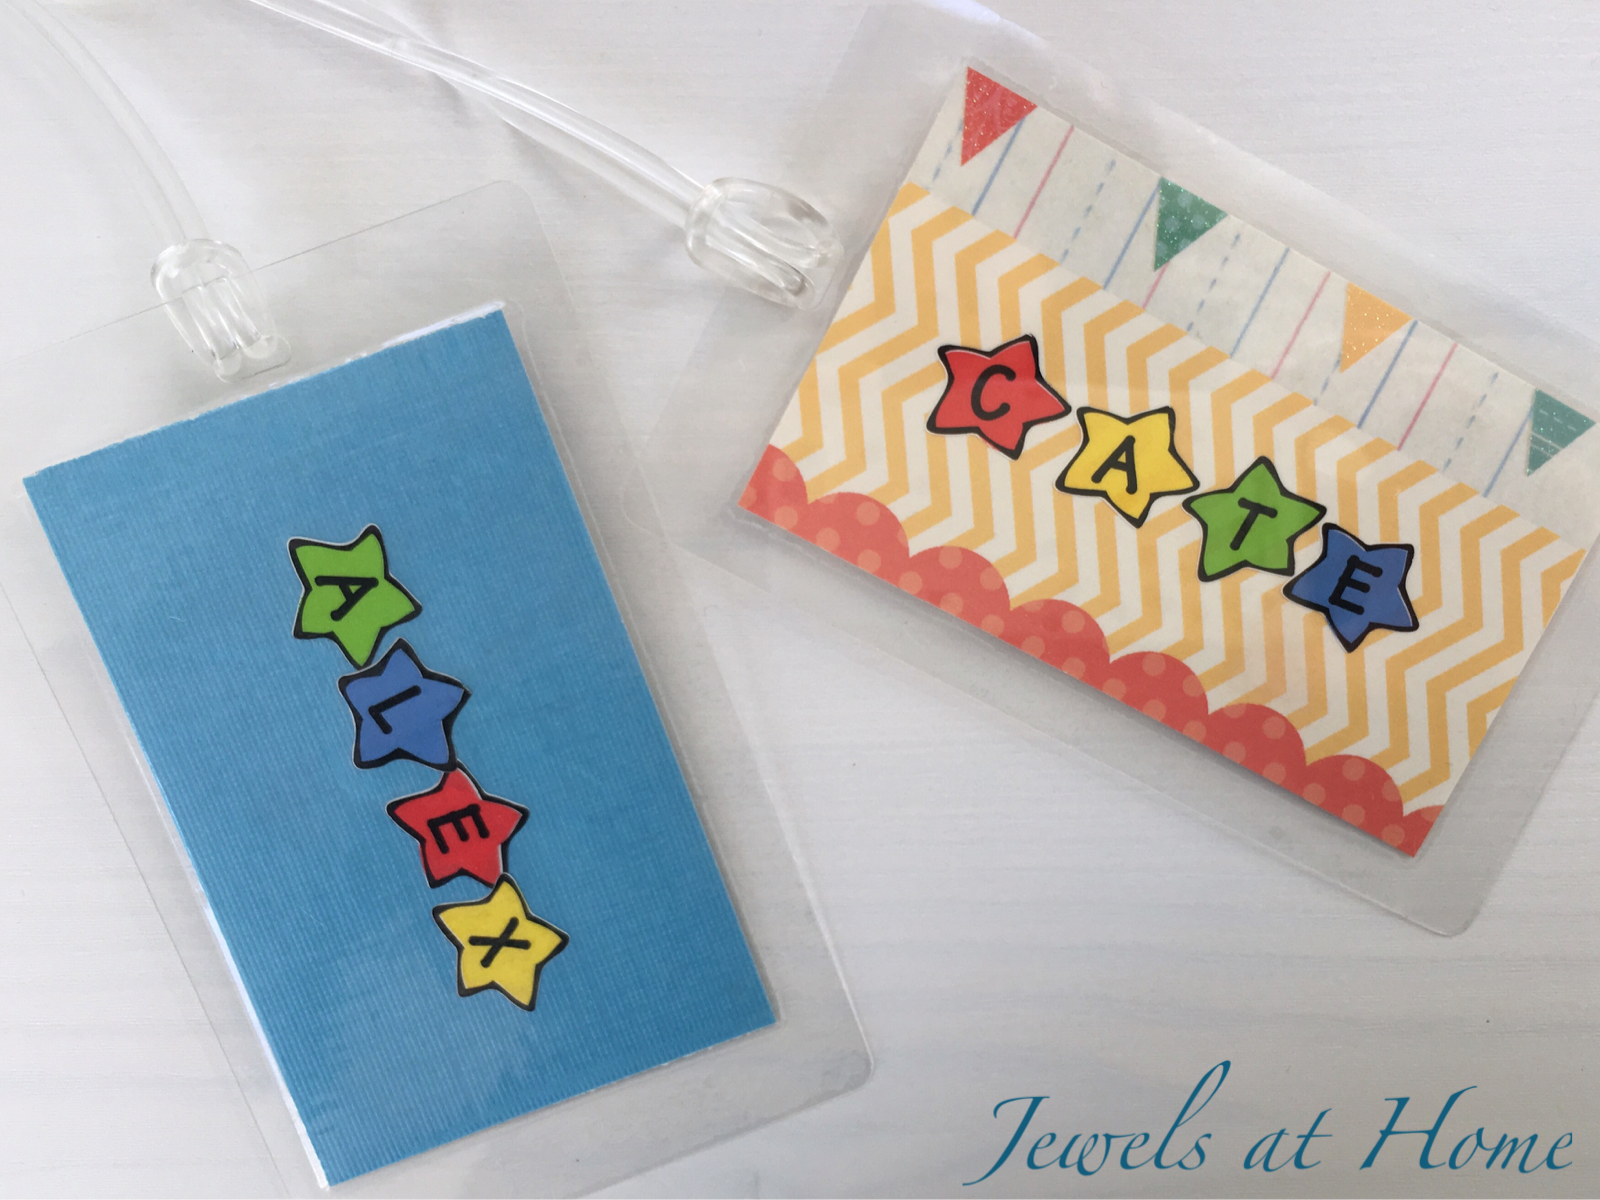
There’s really nothing better than a beautiful combination of scrapbook paper and stickers, is there? … Well, maybe dark chocolate and red wine… or world peace… okay, but these are really fun and pretty, so go and make some, because world peace may take a while to achieve.
“Jewels”
It’s so fun to get the boys involved in a creative project for Father’s Day. Remember when we made the mugs and aprons? Or even these simple cards?
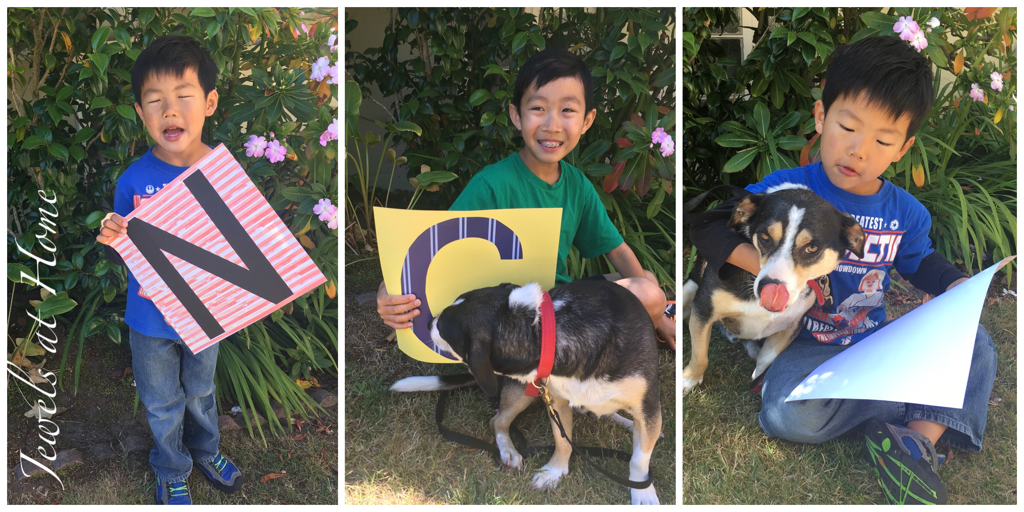
This year, the boys and I created these portraits for Steve and their grandfathers. You know by now that I have an endless supply of scrapbook paper, which I used to create the letters. The boys were really good sports (they aren’t always!) with taking the pictures, and I love the final products.

I printed individual pictures and put them in a frame with three openings and a matte that the boys signed.
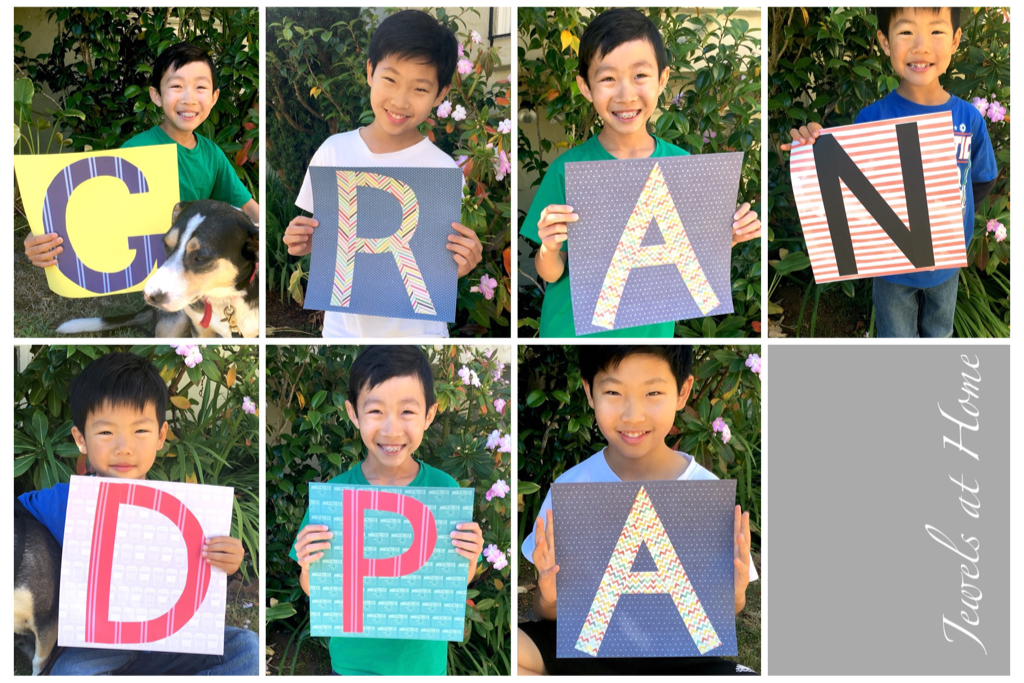
And you couldn’t take pictures of three boys and a rascally pup without some outtakes!
Wishing the best to all the hard-working and loving fathers out there!
“Jewels”
You’ve probably seen these adorable kids’ reading tents on Pinterest or your favorite blogs. I’ve had this project in the back of my mind for a while now and, with a little help with the boys, finally made it happen!
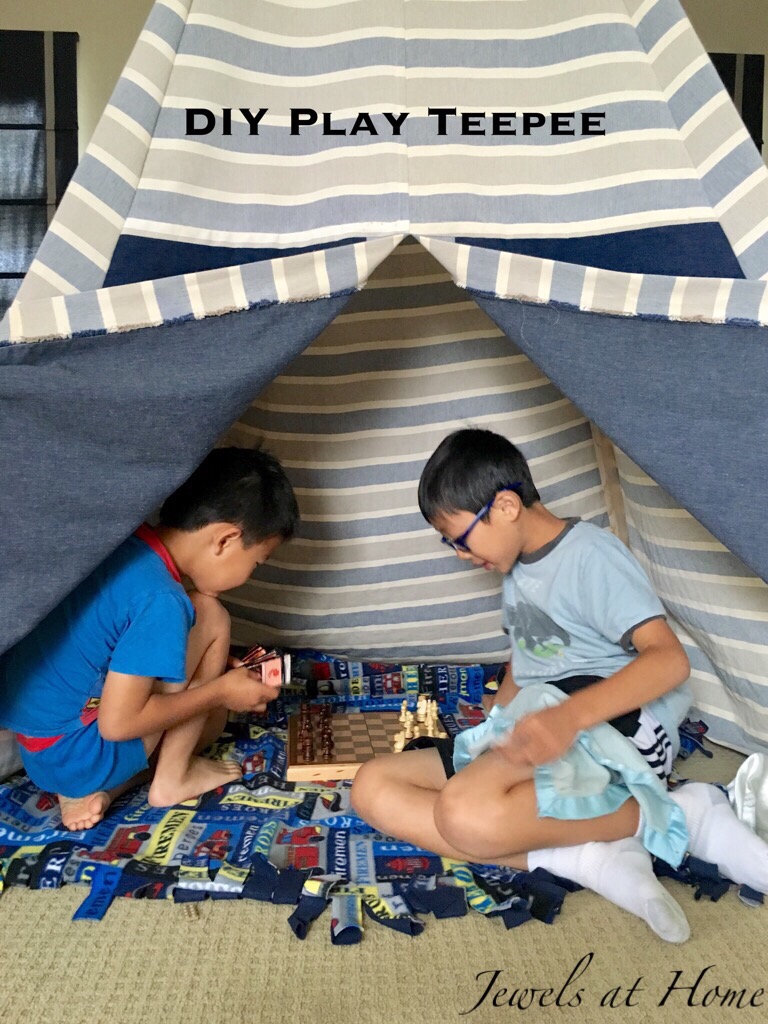
I browsed tons of pictures and tutorials to come up with the version I wanted for our family. Here’s what I know I wanted to include:
There are lots of methods out there for making a play teepee. I decided to sew ours. Don’t get me wrong, I love my glue gun and staple gun, but since I can handle the sewing, I wanted to go with something more durable and removable for washing (not that my kids ever get anything dirty, but…).
I started with four poles made from 1″ x 2″x 8′ wood molding. These were only $0.91 each! Since we had all the other supplies already, this whole project cost us less than $4!!
Here are the steps to your new favorite hideout!
1. Lightly sand the wood
2. Paint the tips of the poles
3. Drill holes 8″ from the top and 1.5″ from the bottom of each pole. I did the pilot holes and the kids finished up. It was fun seeing them use the tools.
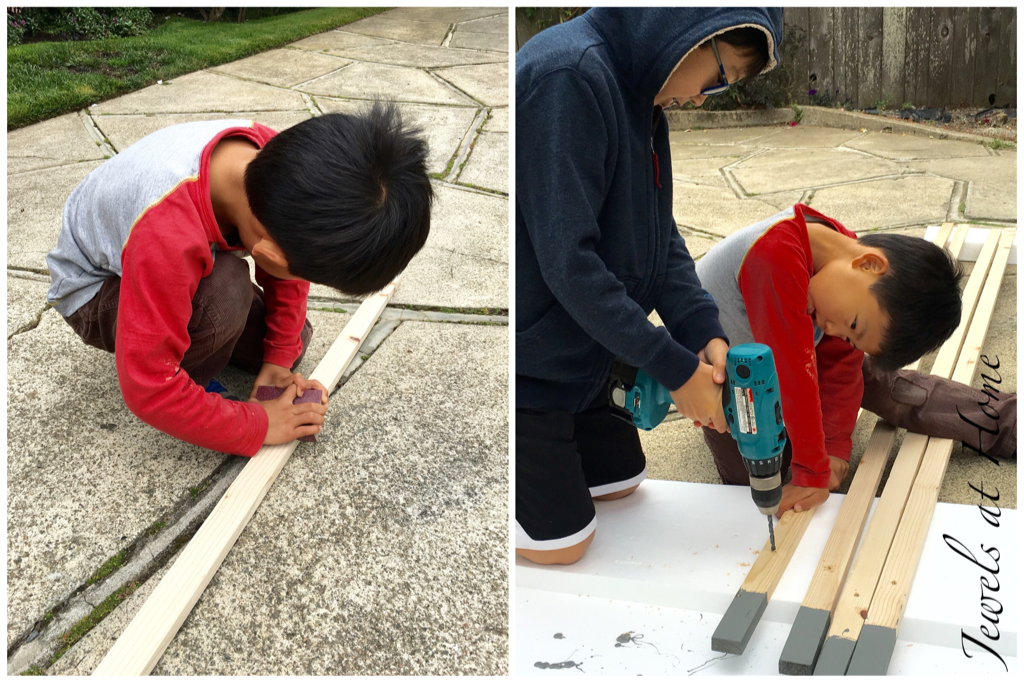
4. I threaded rope through the top holes and wound the rope around to create our structure. Next, I threaded rope through the bottom of the poles and knotted it to keep the poles evenly spaced. I didn’t put rope across the opening, to prevent tripping!

5. When the poles were arranged the way we wanted, I measured for the panels. I measured the openings and added 2″ to all the measurements for hems and seams and finished everything with French seams, since you can see them from the inside.
When your tent is done, you can accessorize with pillows, blankets, bunting, lights, or anything else your heart desires!


“Jewels”
We have two rooms for the three boys: one big shared room and a small bedroom that was J’s nursery and is now our tween’s.
The big room has been slow to come together. Little boys interests change so often, not to mention that they are tornadoes that leave a mess in their wake.
I’m now ready to make a push to polish their space. As I discussed in this post on my steps for designing a room, and inspired by the Design Cookbook, here’s my recipe for the little boys’ room.
I developed this recipe by collecting my favorite images on a Pinterest board.
Here are some of my favorite inspiration rooms:

Photo by Julia Lynn design by Jenny Keenan

From Design Sponge

From New York Cottages and Gardens
And here’s a list of projects I’ve already done for our boys’ room:
I’m looking forward to showing you the latest updates soon!
“Jewels”
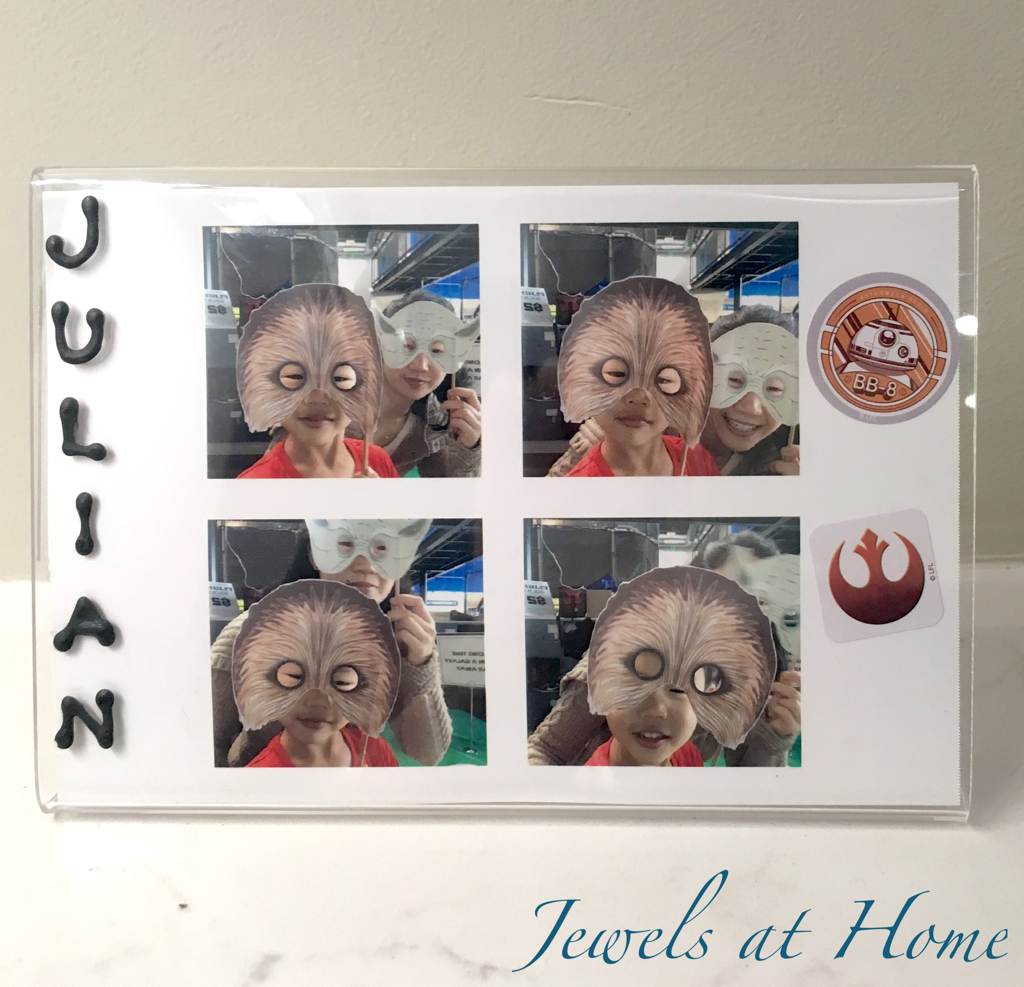
Our photo booth that made its first appearance at our Mad Men party a few years ago is becoming a staple at our parties.
I started with an iPad for the camera, backdrops, and props. As time has gone on, we have added more backdrops and props, as well as a tripod and a Canon SELPHY Photo Printer
for instant gratification!
For L’s birthday this year, we decorated with a Star Wars theme – like everyone else, we were all just a little excited about The Force Awakens!
I found some printable Cut-out masks for props: 
As a party favor, I decorated simple picture frames for the kids, so they could display the photos from the booth. For this project, I used

Add some Star Wars stickers, and the kids were able to bring home some very special souvenirs!
I’m looking forward to trying out more fun themes at parties to come! What ideas do you have?
“Jewels”

The little boys just moved into a bunk bed, and L needs a place to stash his book and glasses at the end of the day. I let him pick some favorite fabrics out of the stash, and I like … Continue reading
