
I’ve been decorating our new bedroom addition for this spring’s One Room Challenge. It’s a small room, so I used a lot of creative tips to make the most of the space! Here’s a round-up of the strategies to help … Continue reading
I’ve been decorating our new bedroom addition for this spring’s One Room Challenge. It’s a small room, so I used a lot of creative tips to make the most of the space! Here’s a round-up of the strategies to help … Continue reading
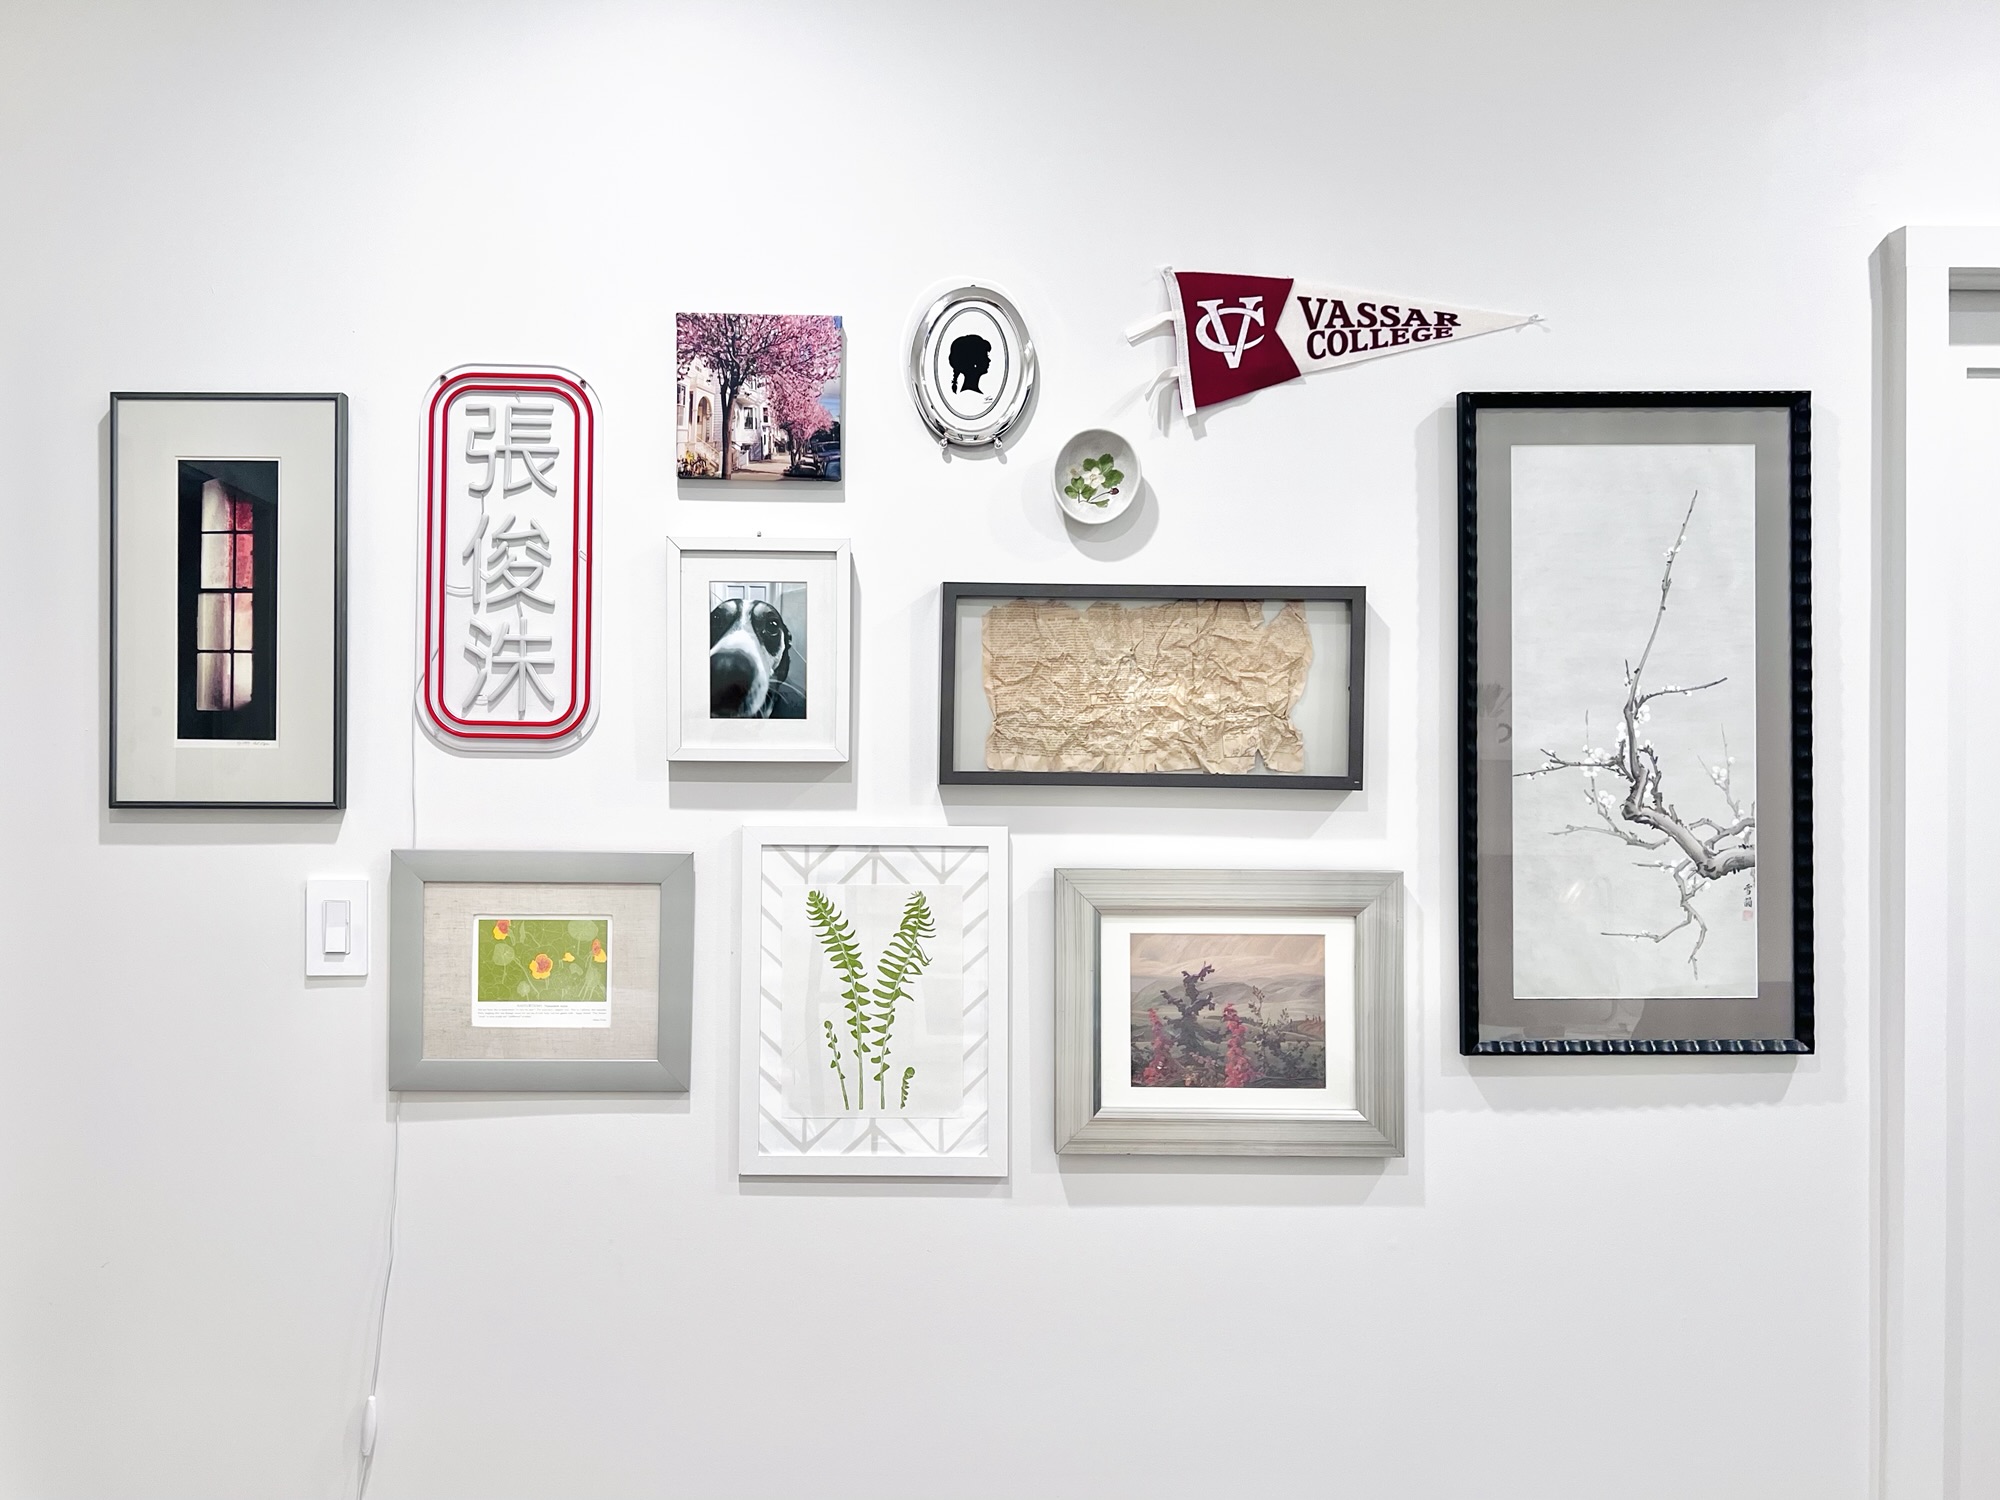
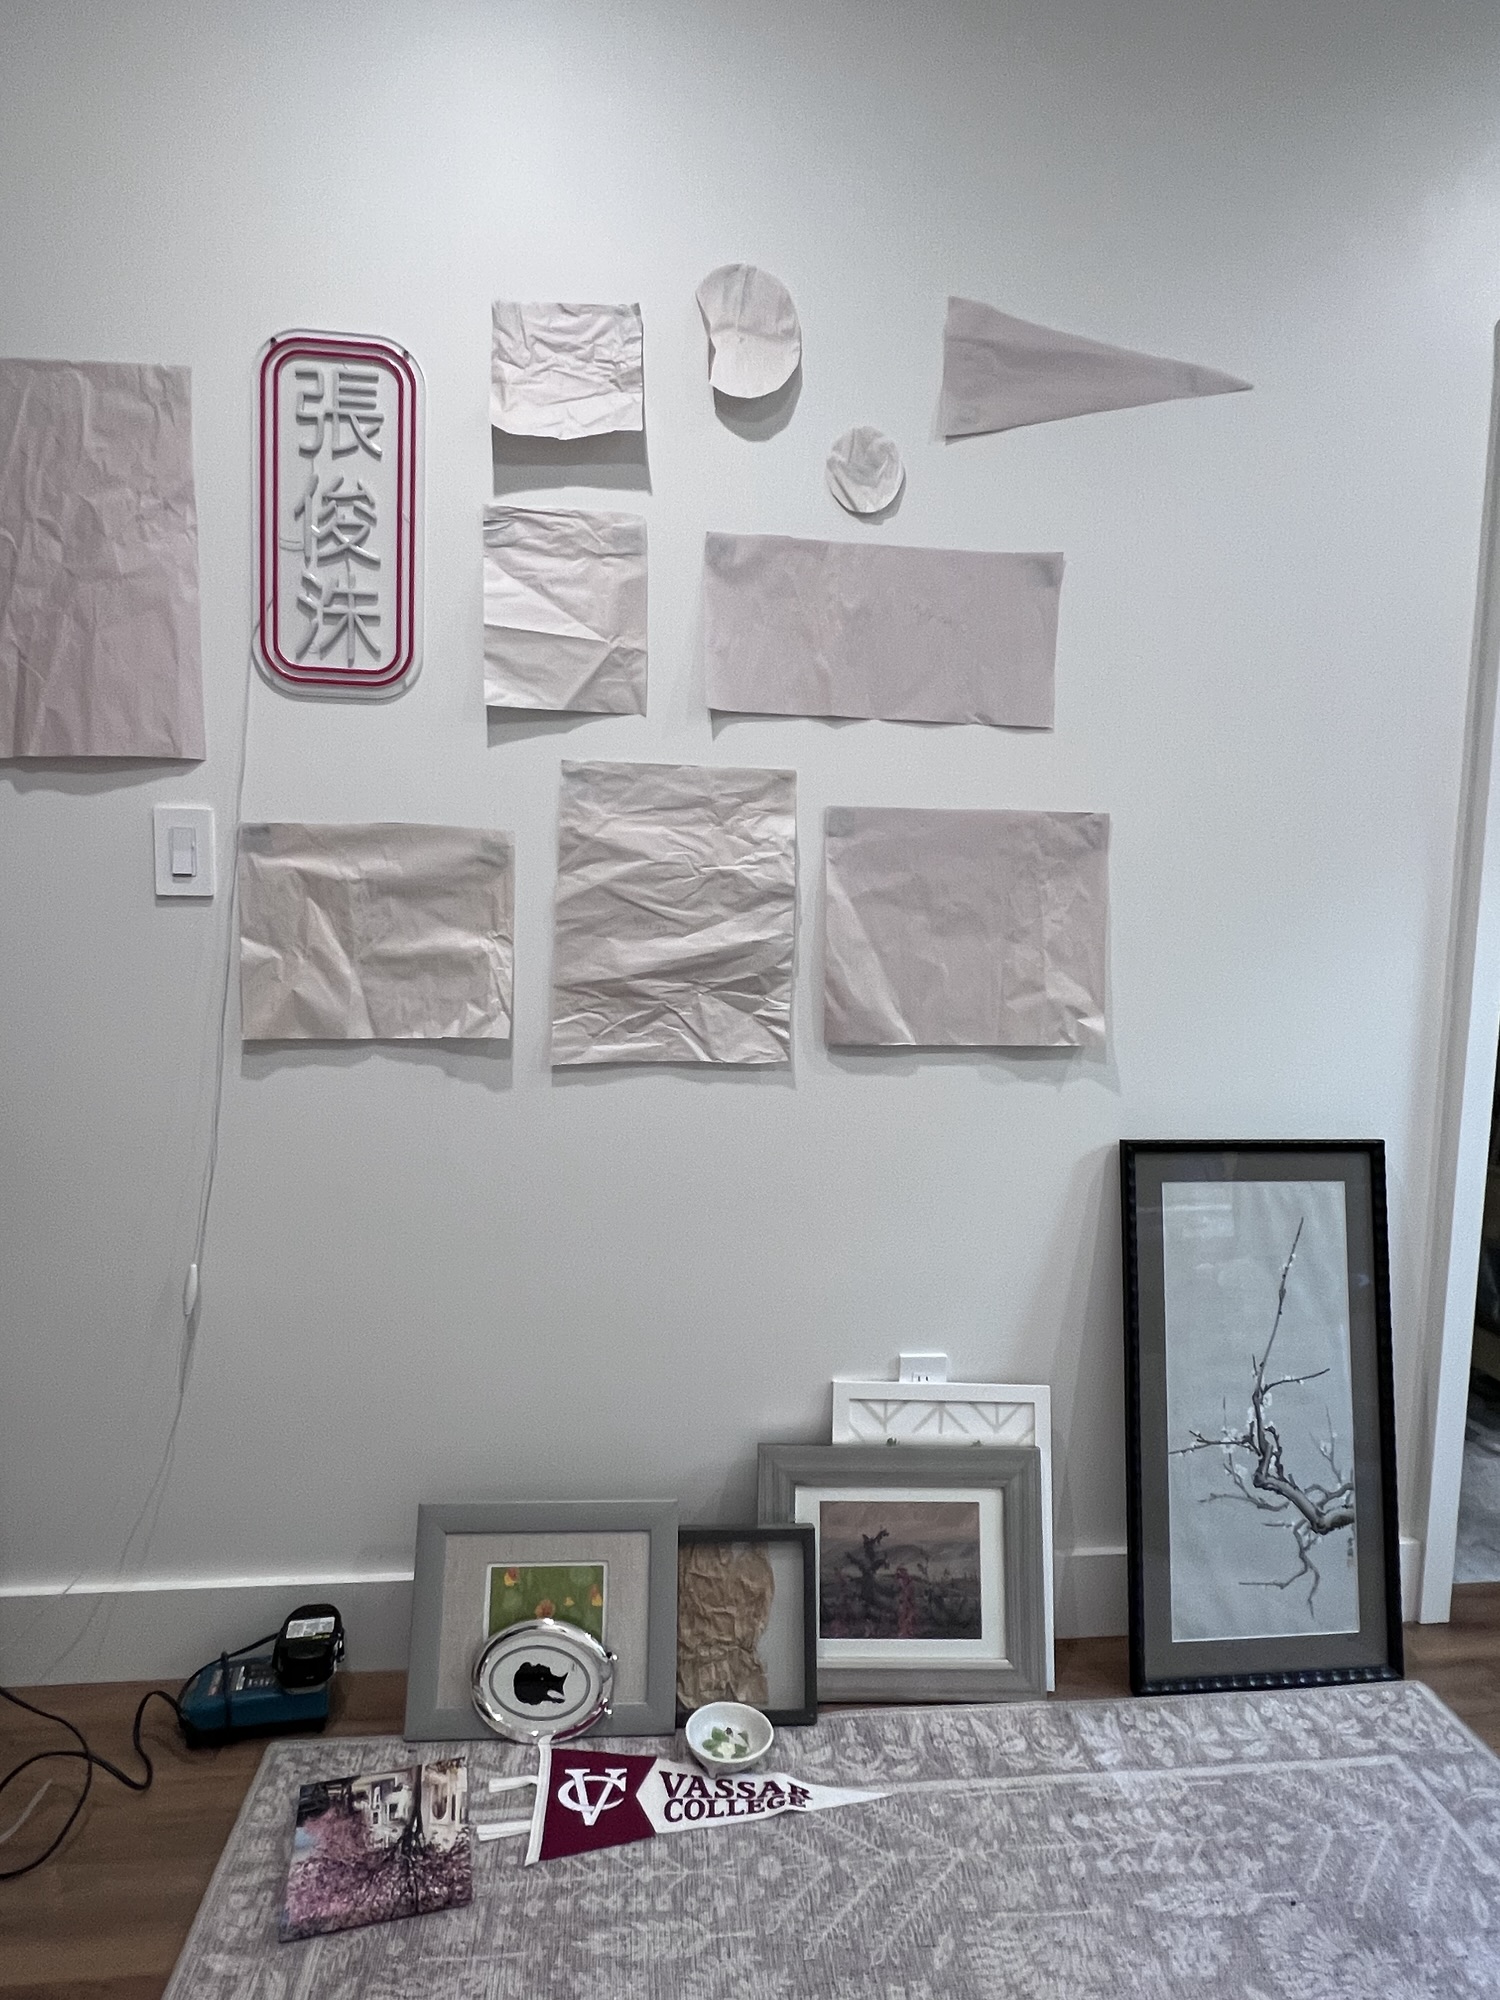
I seriously love the One Room Challenge. It’s just the motivation I need to finish off projects. I’ve been puttering away preparing the gallery wall in our new bedroom, and with this week’s progress update launching, I got the energy to finish hanging everything after work today!
As a reminder, this room is bedroom addition we built last year. It’s going to be a room for our oldest, when he’s home, and also serve as a guest room or lounge! It’s a petite space, but I had big plans for this wall, and I really feel like it opens up the room!
If you are looking for tips for your own gallery wall, here are some ideas to consider:
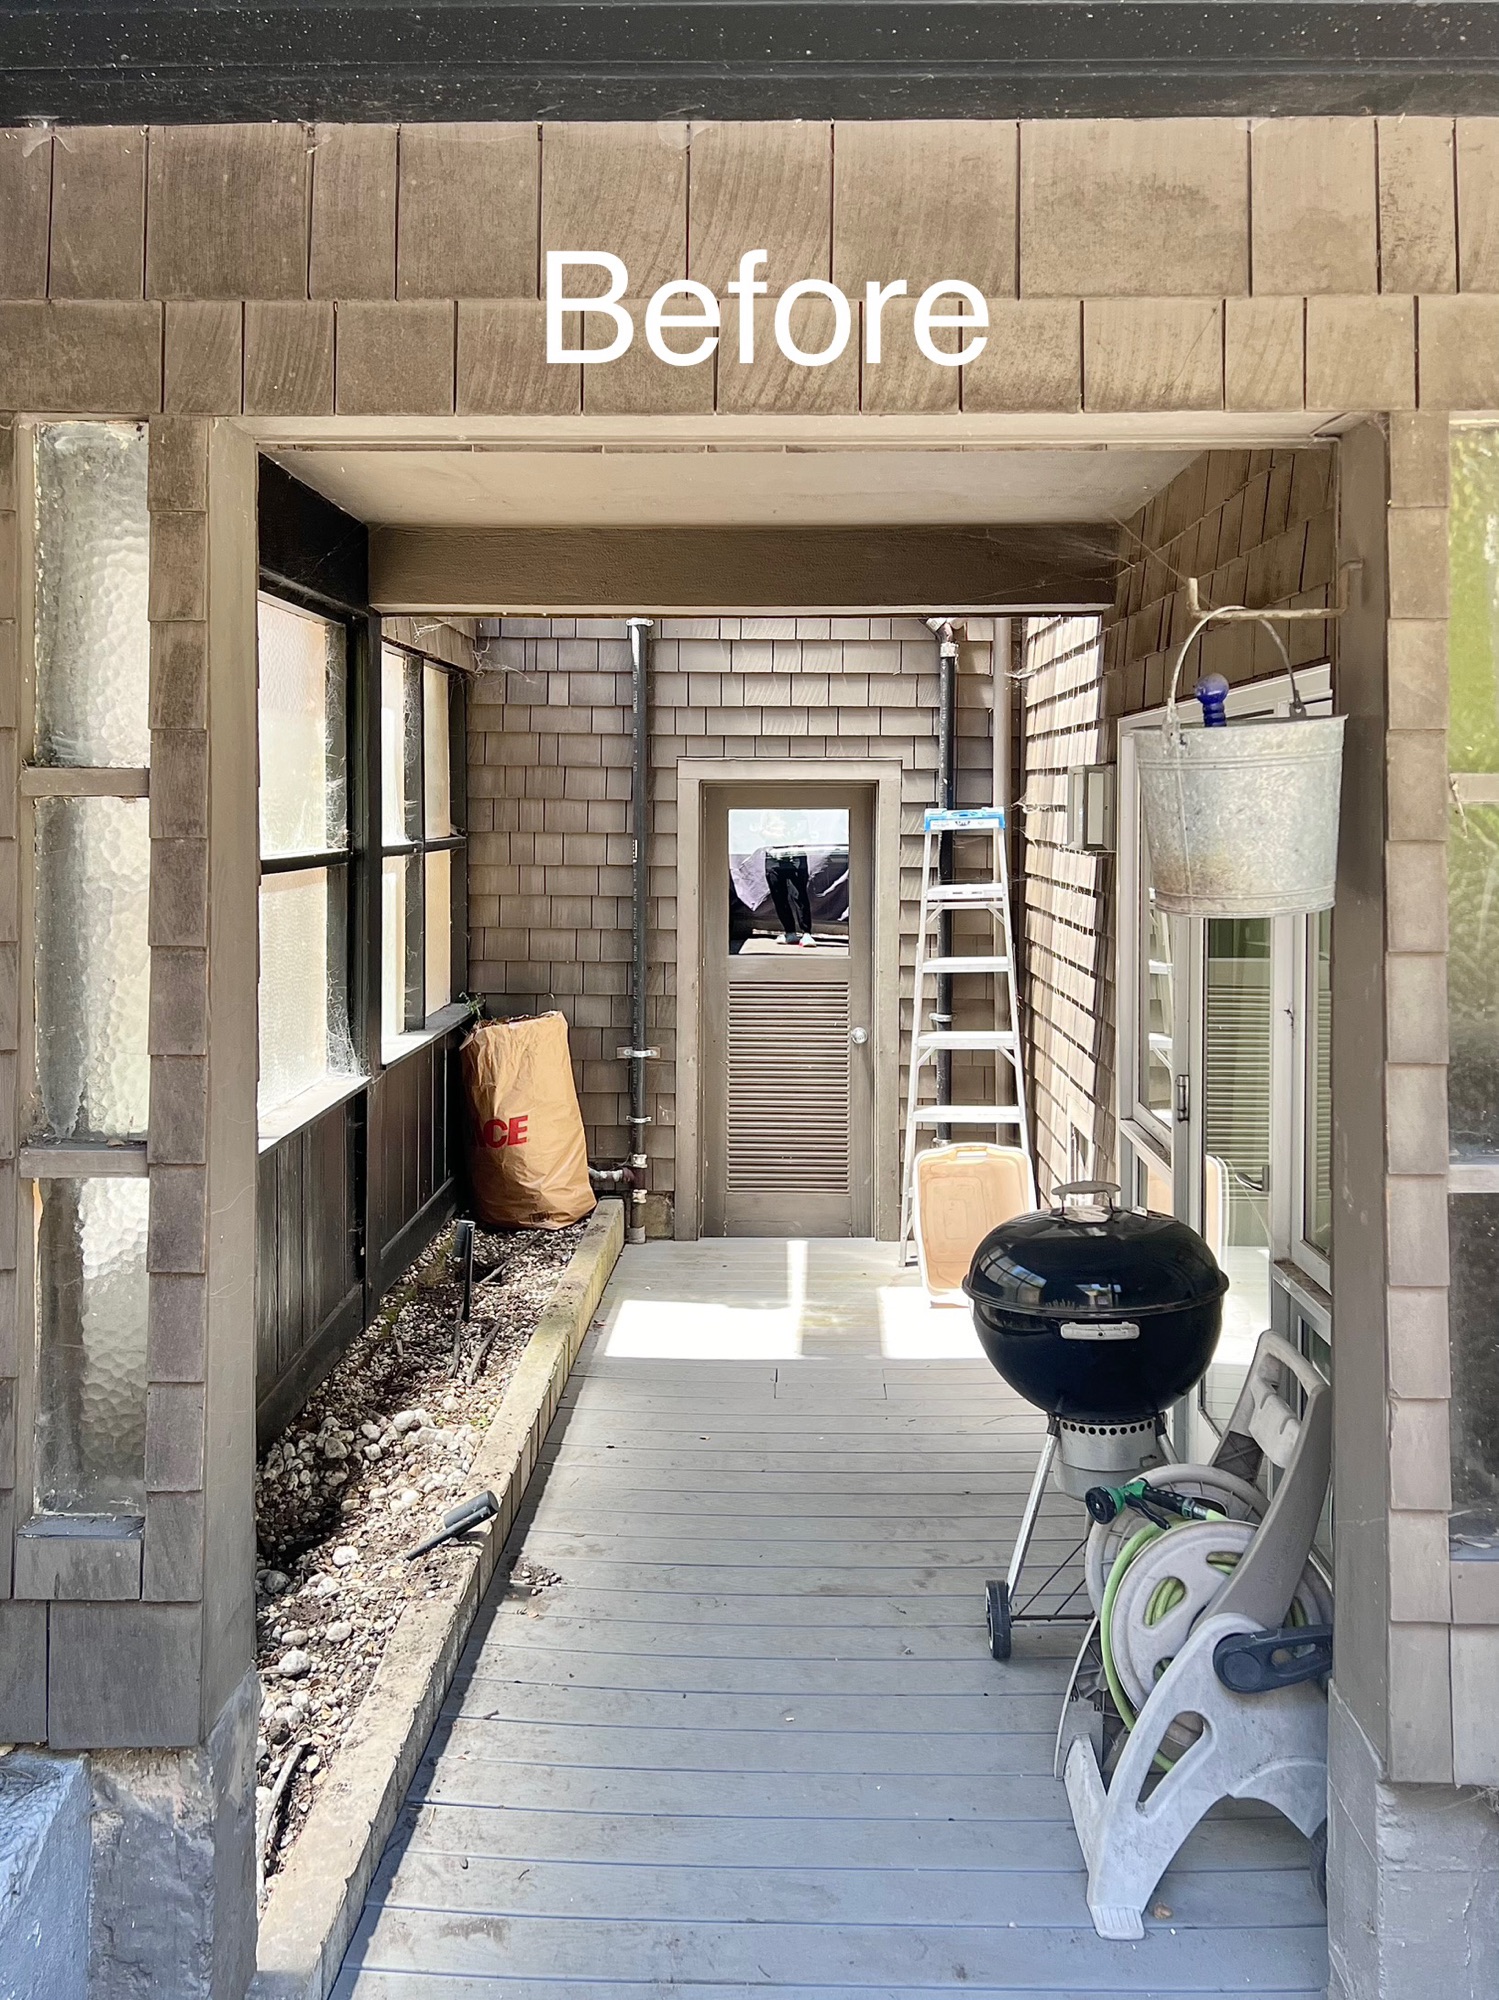
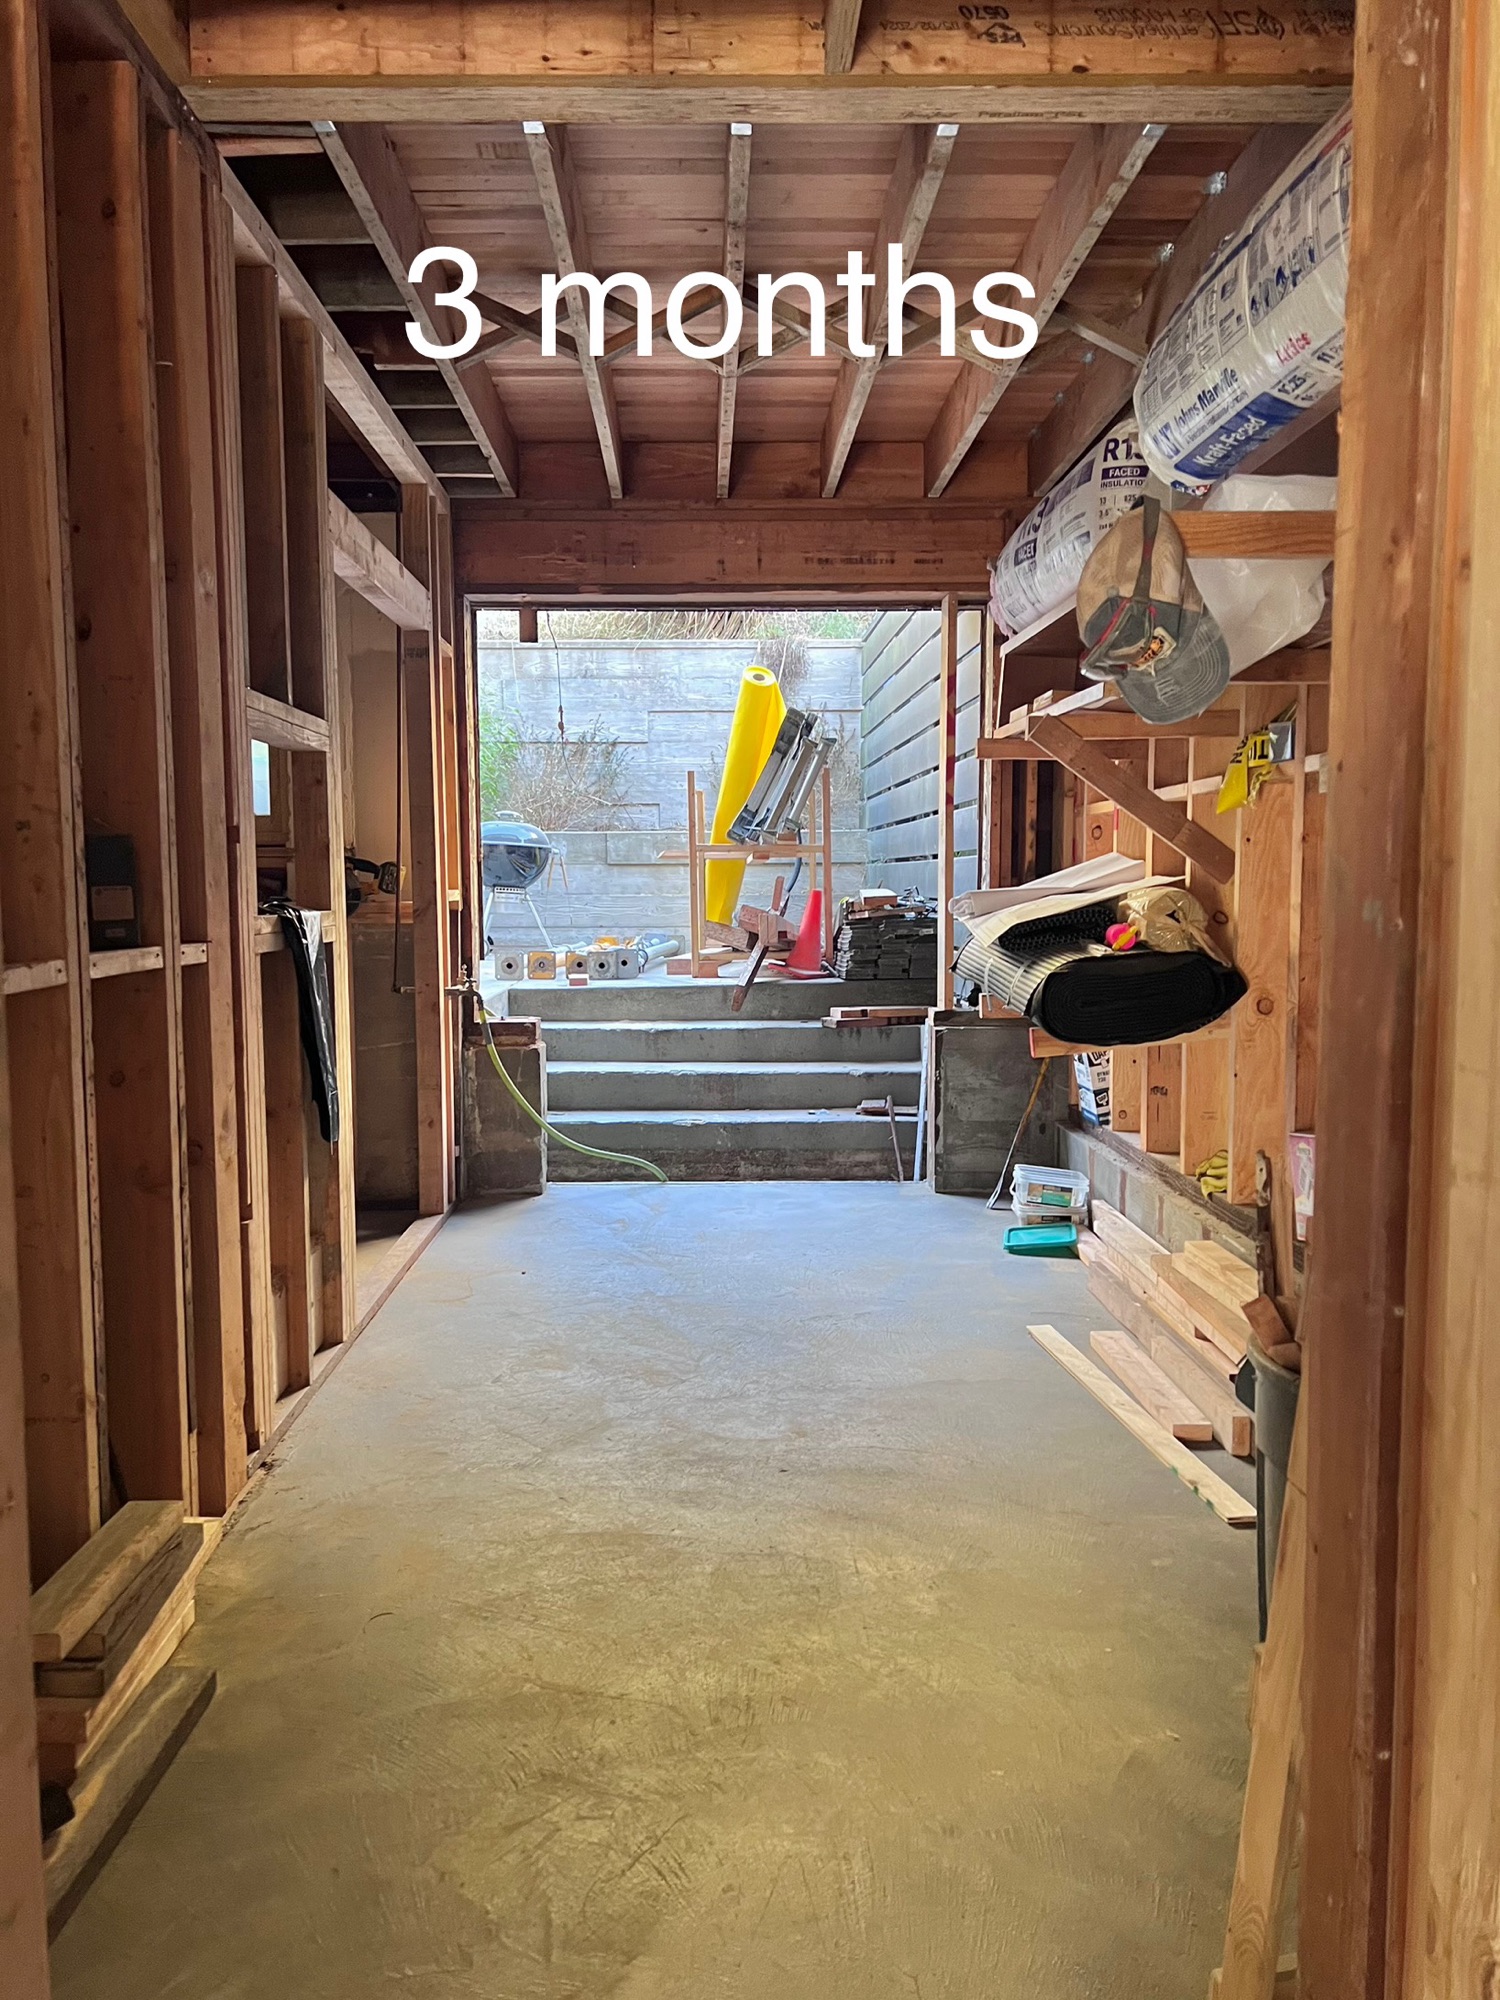
Here’s a before-and-after look at the space:
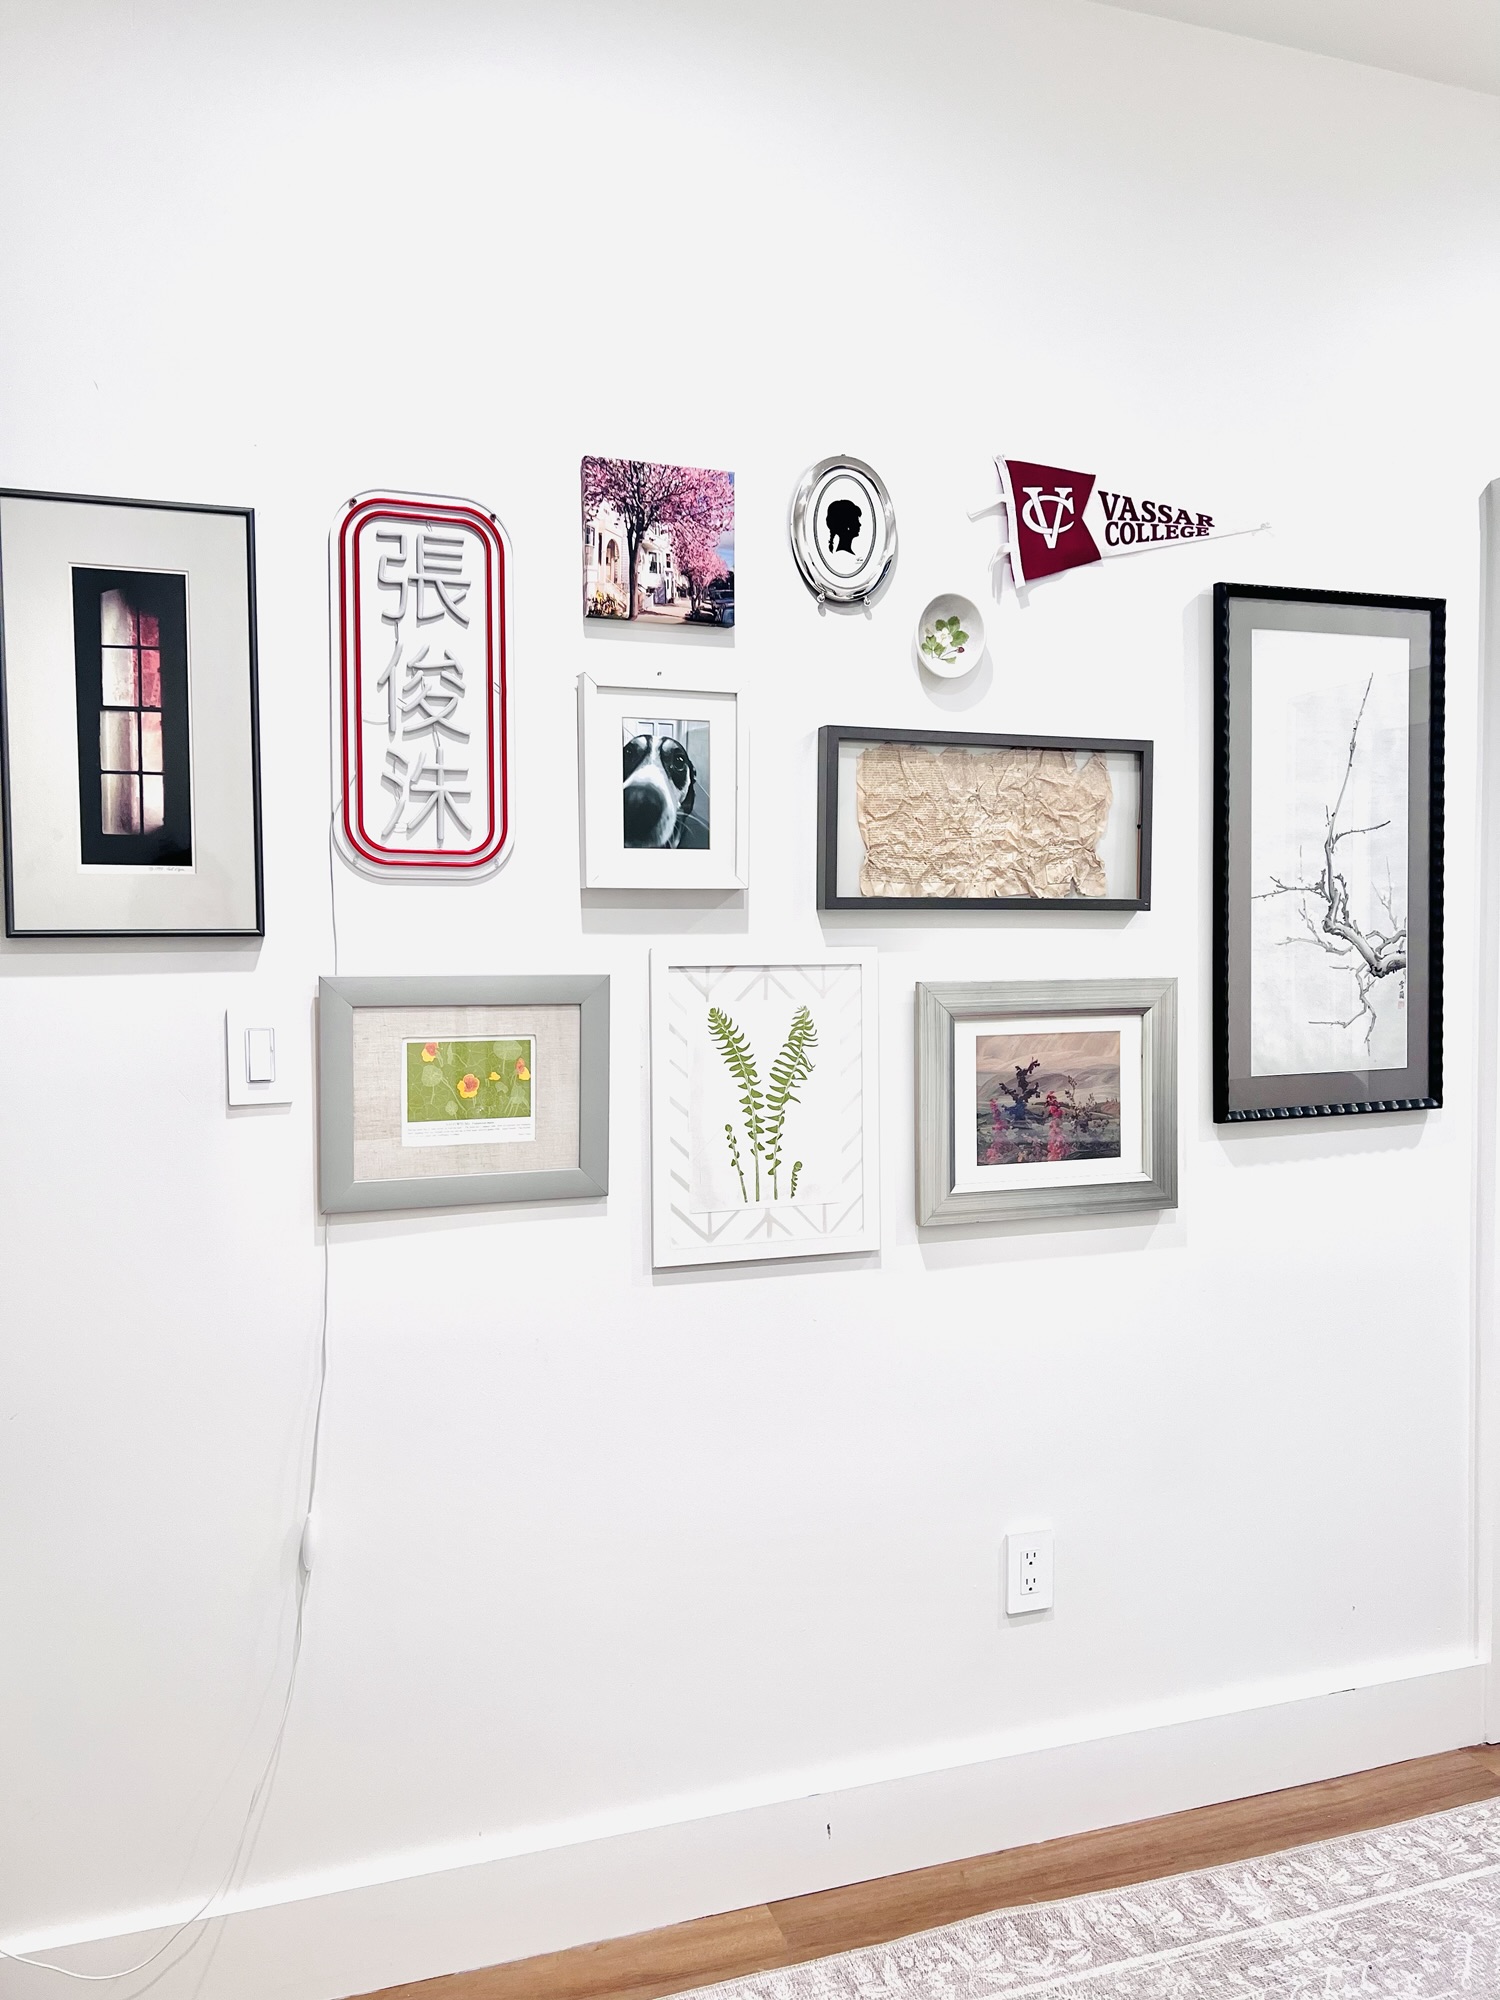
This collection includes a DIY fabric-covered picture mat and a photo I took of Finn and printed at the local drugstore.


As I said, these walls can talk! Clockwise from left, a photograph taken from Fort Point, under the Golden Gate Bridge, that Steve and I bought at an art fair ~25+ years ago; an LED sign with my son’s name that my sister sent from Hong Kong; a small canvas print of a photo I took, featuring spring blossoms and Victorian houses; photo of Finn I took and printed; nasturtium print by Henry Evans calendar under a DIY fabric mat. My friend Penny gifts me a Henry Evans calendar every Christmas!

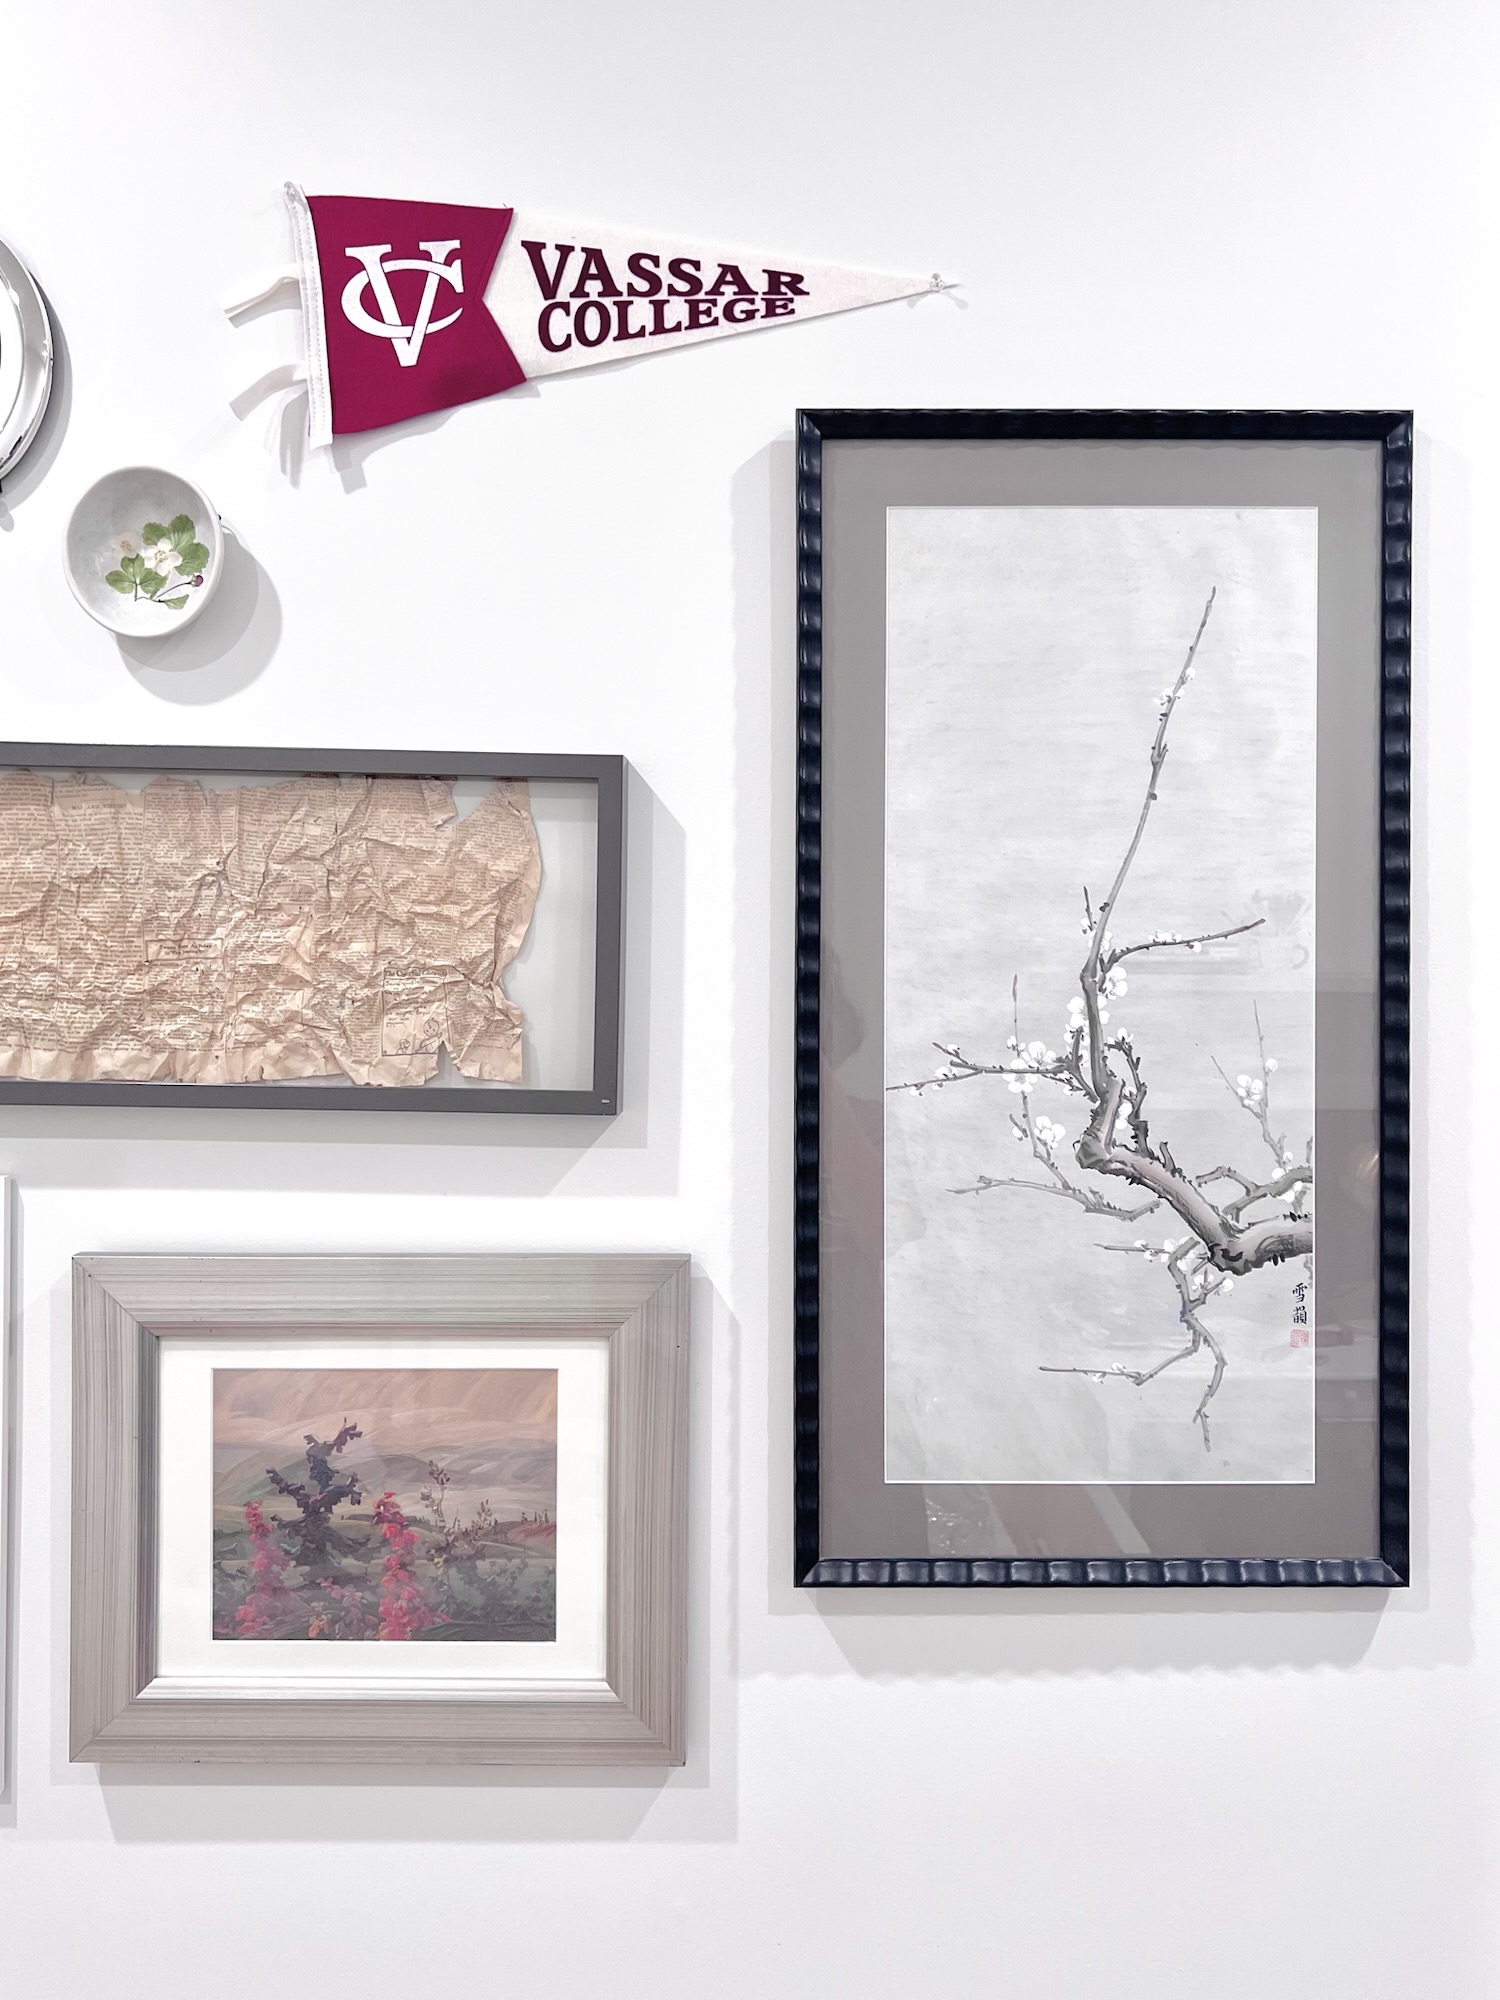
More treasures: paper silhouette cut-out from the Canadian National Exhibition when I was a child; strawberry ceramic bowl I bought at an art fair with a friend ~25 years ago; Vassar College pennant for my oldest; 1924 newspaper found in the walls of our last house; replica Group of Seven Canadian landscape painting my parents got on an Air Canada flight ~30 years ago; fern print from another Henry Evans calendar.

Last of the treasures: a beautiful branch painting by my mom ❤

I’m working away on some other projects that I hope to share with you soon! In the meantime, you can see all the other fun room transformations on the One Room Challenge website!
Julie AKA “Jewels”
I seriously love the One Room Challenge. It’s just the motivation I need to finish off projects, and the community is always really positive. I love finding new accounts to follow for inspiration and encouragement! I’ll link my prior ORC projects at the end of this post.
This Spring, I’m going to be decorating a new bedroom addition we built last year. It’s going to be a room for our oldest, when he’s home, and also serve as a guest room or lounge!
I can’t take credit for the construction work, but I will take credit for the inspiration – I very literally had dreams about finding space for just one more room in our house, to accommodate our family of five, with regular visits from my dad. After turning ideas around and around in my head, I figured out that we could enclose a little unused patio and reconfigure the adjacent rooms to make a new bedroom and bathroom. Some of us lived through the months of noise and dust, but you can just enjoy the pictures!

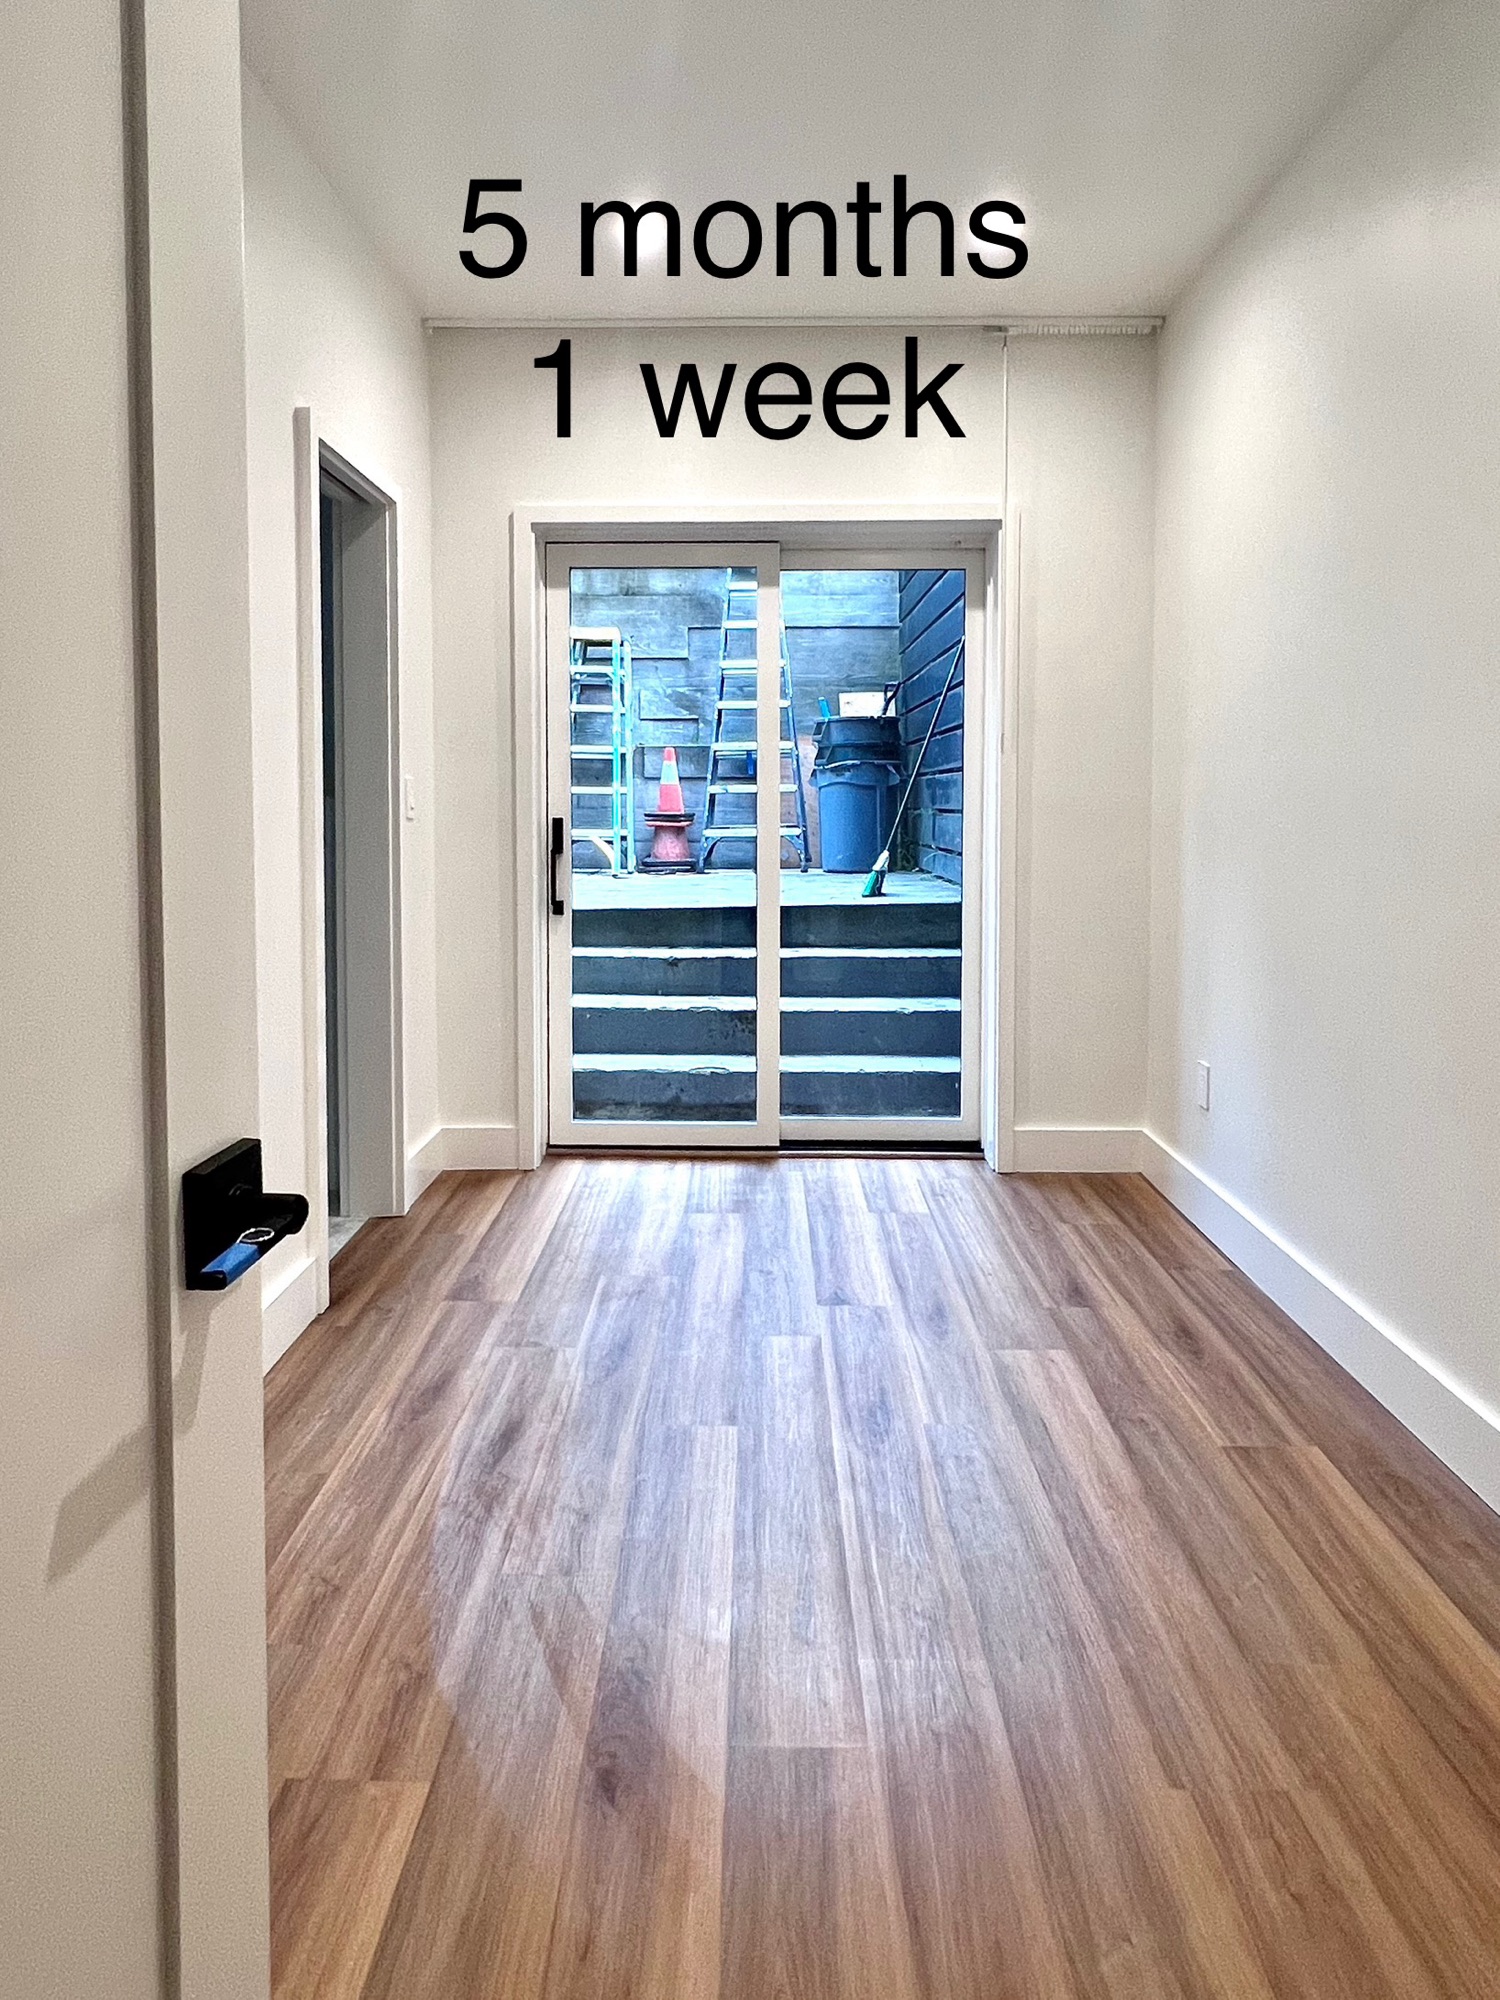
The result is a small bedroom and bathroom that make a big change to how we live in our house. While I couldn’t give our oldest a lot of square footage, I wanted to give him a lot of style and function in this cozy space. I got design inspiration from a lot of places, but my biggest inspirations were Designer Timothy Whealon’s living room featured by New York Social Diary and the Woodlark Hotel in Portland, where we enjoyed a stay a couple of years ago.


When I find a space that really inspires me, I try to describe the key elements, like a recipe, to help me recreate it. And when I am looking at a few spaces, I try to find the common elements that I love. For this project, I was drawn to:
I’m so excited (and nervous!) to tackle this project – hope you’ll follow along!
You can see all the other fun room transformations on the One Room Challenge website!
Julie AKA “Jewels”

So, my weakness (talent?!) for finding home decor on the street is well-established. Remember when I made over this cute Chinese end table? Well, I was walking over to meet a friend for lunch today, and I saw this mirror … Continue reading

We recently moved into our new house, and I’ve been busy arranging and re-arranging things to get us settled. In this process, I was fortunate to receive a beautiful new sideboard cabinet from Hernest.com. This item was generously gifted, but … Continue reading
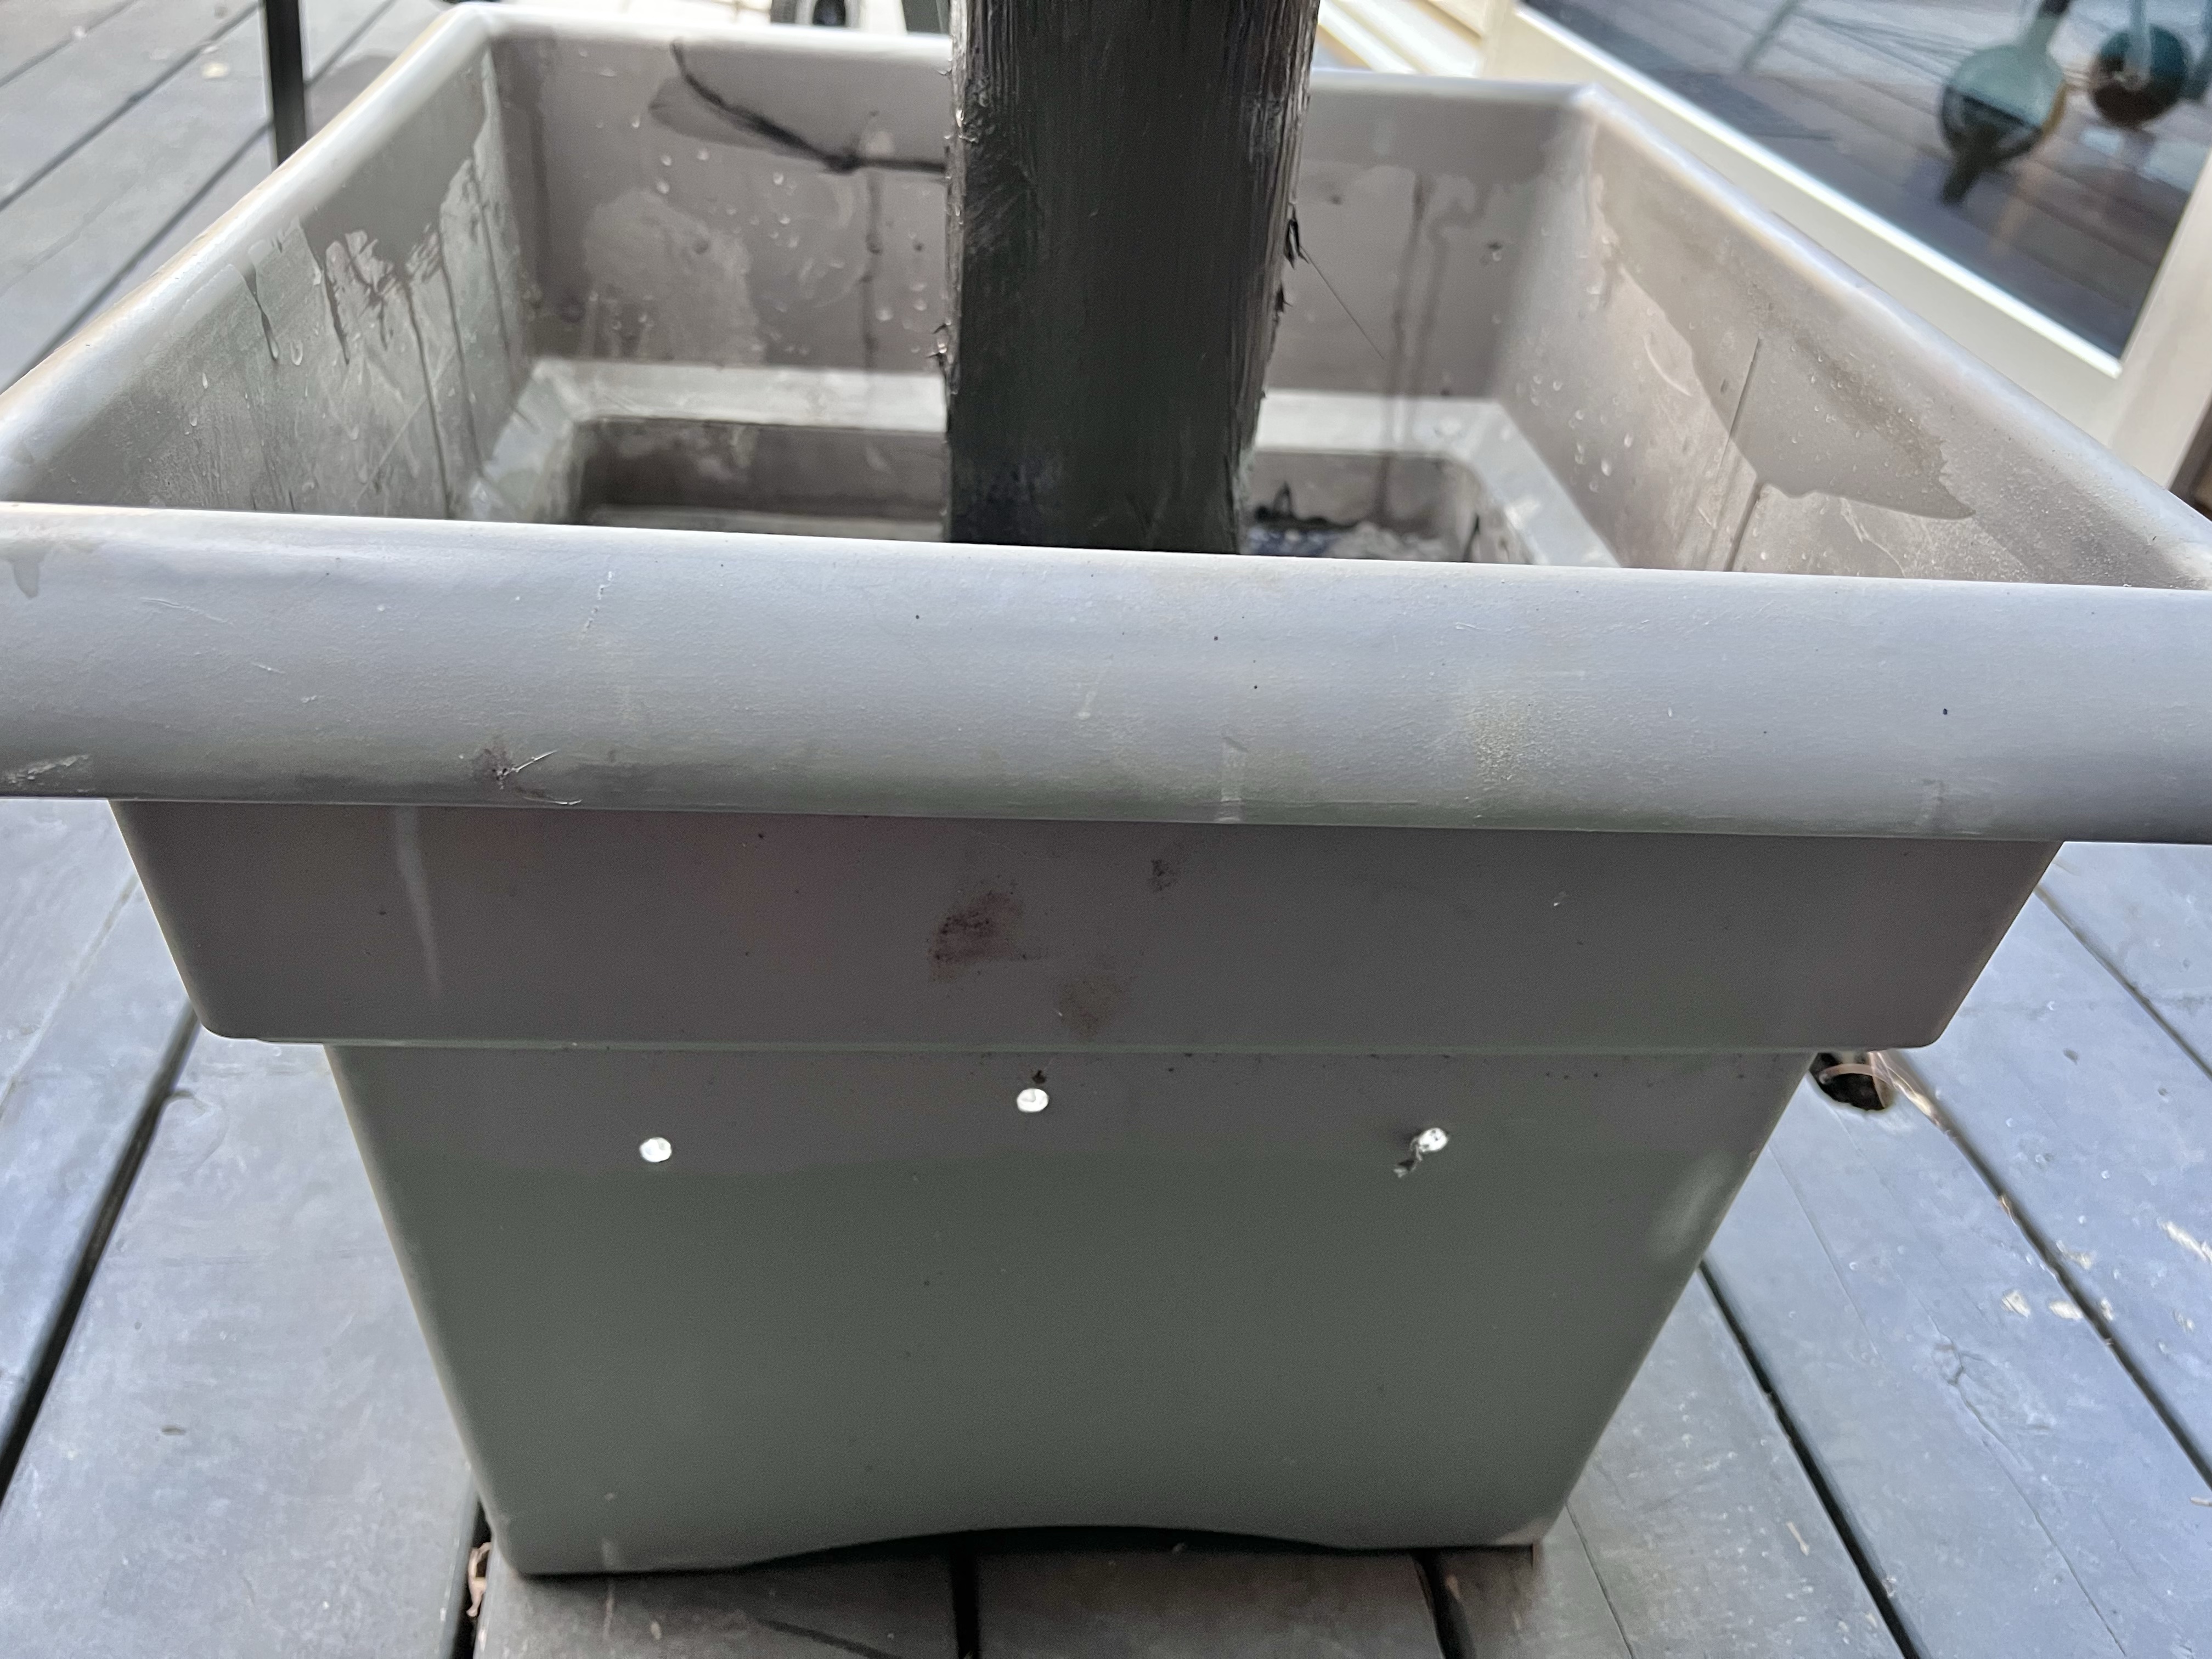
I have been in love with patio string lights for so long. Unfortunately, our last house didn’t really have a respectable outdoor entertaining space, but our rental house last year and our new house both have great patio spaces! I have been waiting to do this project creating posts to hang our lights, and I am so excited that we finally did it! It’s not hard (you do need some muscles!), and I am excited to share the how-to and our results!

Here’s what you’ll need:
Here’s how to do it:

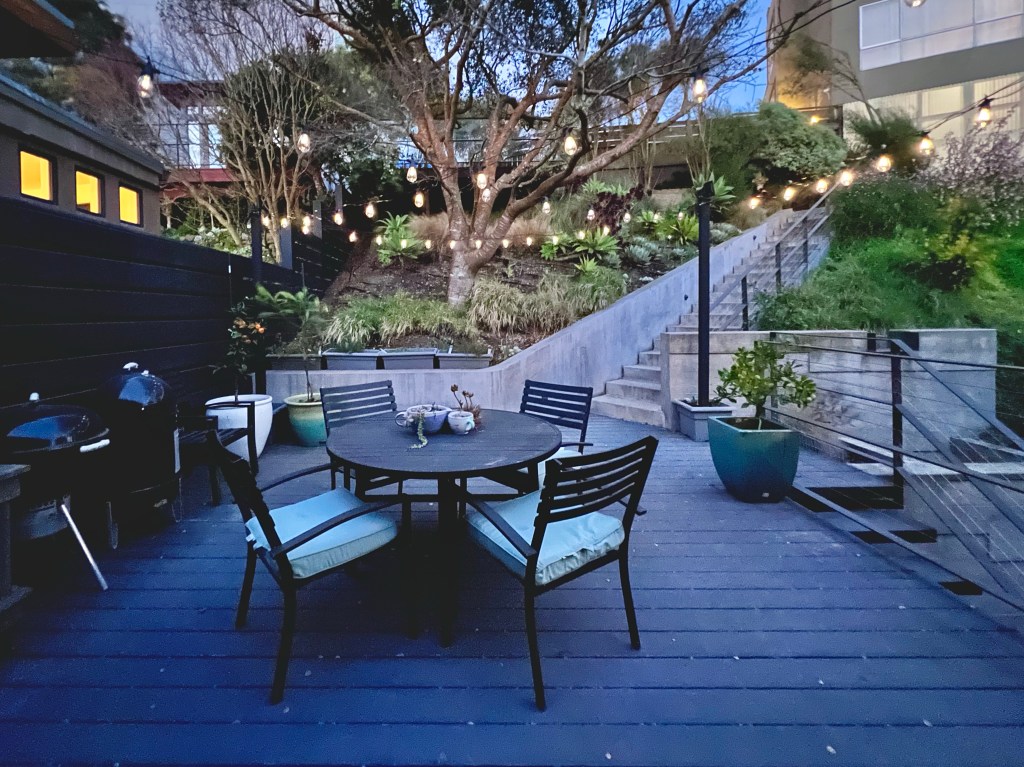
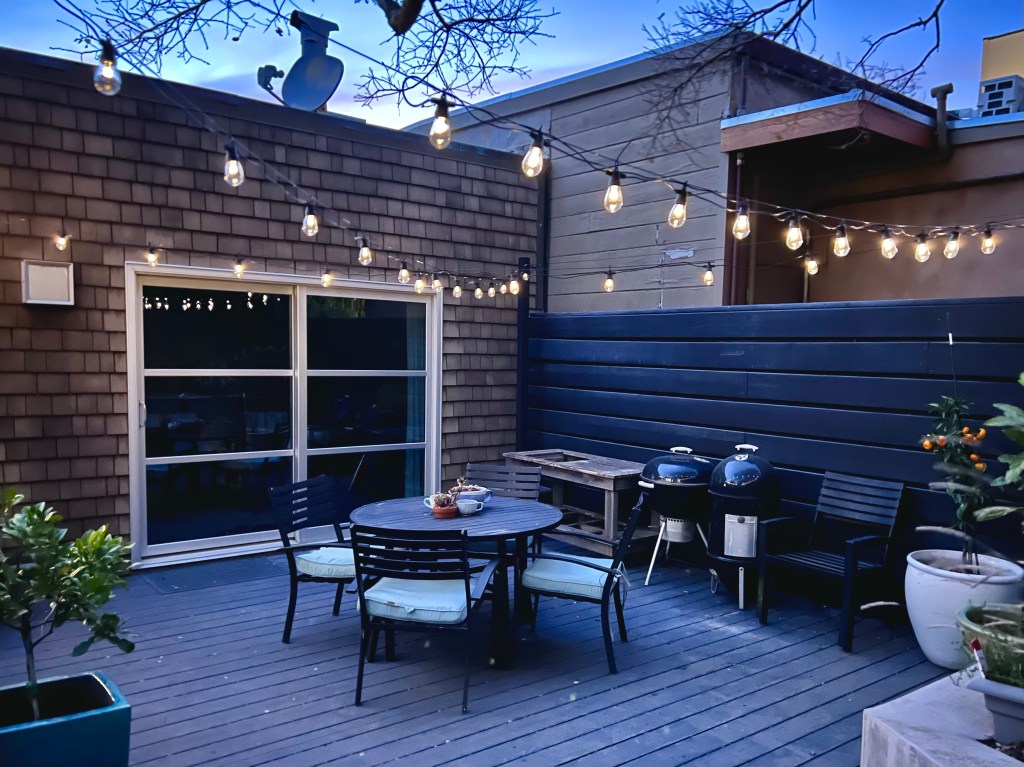


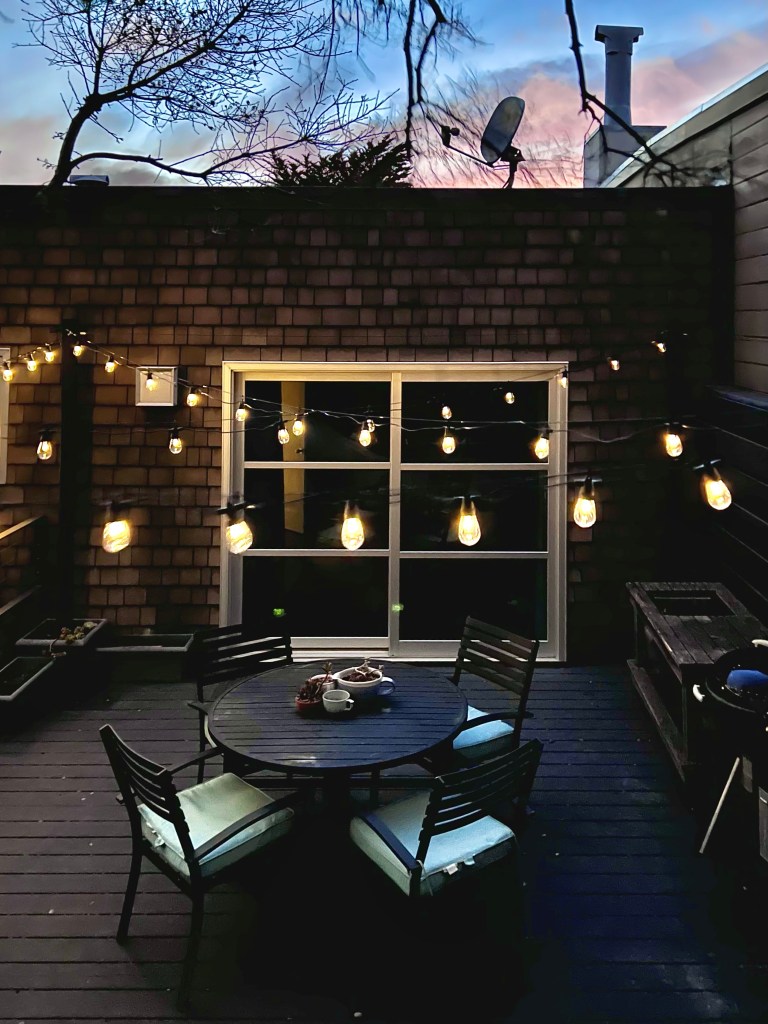
Of course, we had a warm spell last week and it’s cooled off again, so we’ll have to wait a bit longer to hang out here!
Julie AKA “Jewels”
I fell in love with fiddle leaf fig trees a few years ago. I bought three plants that first year, and since then, I have propagated SO many. Most went to new homes with my friends, and a few were added to my collection. A few of my trees have gotten SO big, that I wanted to try propagating by air layering. I’m excited to share this technique with you, and I’ll also put links at the bottom of this post to all my other posts on pruning, propagating, caring for fiddle leaf fig trees!
When I have previously propagated new plants off my fig trees, it was by cutting off 2-3 leaves at a time and putting them in water until new roots formed (all the details in this other post). This works quite well, but you can only make plants from small cuttings, because they need to survive until the new roots form. Air layering is great for propagating larger branches, and while it takes a little patience up front, you end up getting a mature new plant much faster!
The principle behind air layering is that you set up conditions for your plant to form new roots, while it is still attached to the original plant.
Here’s what you’ll need:
Here’s how to do it:
Choose the section of the plant that you want to eventually cut off for a new plant. I tried this with approximately 2-foot section of my biggest plant – it was hitting the ceiling! It went really smoothly, and I’m now trying with a 3-foot section.
At the base of what will be your new tree, remove a leaf or two to create an open section of stem. Use a knife or vegetable peeler to remove the top layer of the stem – you want to remove the bark and the darkest green layer, but leave a little green and the white section of the stem. This will allow nutrients to continue to flow up into your plant, while it forms roots from the outside of the stem. See the picture on the left below:

Next, spread some rooting hormone on the bare stem.
Wrap your plastic around the bottom of the bare stem and secure with string or elastic.
Pack wet sphagnum moss into the pouch you have formed and secure the top with string or elastic (see right picture above)
Right around two months, I saw the first roots inside my ball of moss. Within three more weeks, the moss ball was full of roots!

Once I started seeing roots, I did check the moisture level of the moss and add water every week or so.
When the roots are filling up the bag of moss, as shown in the last picture above, it’s time to cut off the new plant and plant it in soil. It helps to stake the new plant, as it is top heavy. Here’s how my new plant looked, when I first planted it – much bigger and healthier than the new plants you can get by cutting and rooting in water!

A couple of months later, I passed this plant on to a friend as a housewarming present. As I was repotting, it I found that the roots had quickly grown to fill a large pot (see picture below)!

I’m so excited to keep trying this technique for creating healthy new plants while keeping my jungle in check. Here’s how my “mother” plant looked, hitting the ceiling, before I made a new plant from the top section.

And here’s how it looks now, starting to come back into shape. You can see that a new bud formed where I cut off the new plant, and the branch is starting to grow back. I’m already working on air layering that back branch, so that will get trimmed off soon, too. My favorite stage of this plant was when the two big side branches arched together into a heart shape, so I am hoping to get back to that in a few weeks.
Looking for more information on fiddle leaf figs? Check out these other posts:
If you have a big plant, I definitely recommend trying the air laying. I’m sure I am not the only one who feels that time is moving slowly being at home during the pandemic, and watching these new plants grow has been a silver lining.
Happy plant vibes!
Julie aka “Jewels”
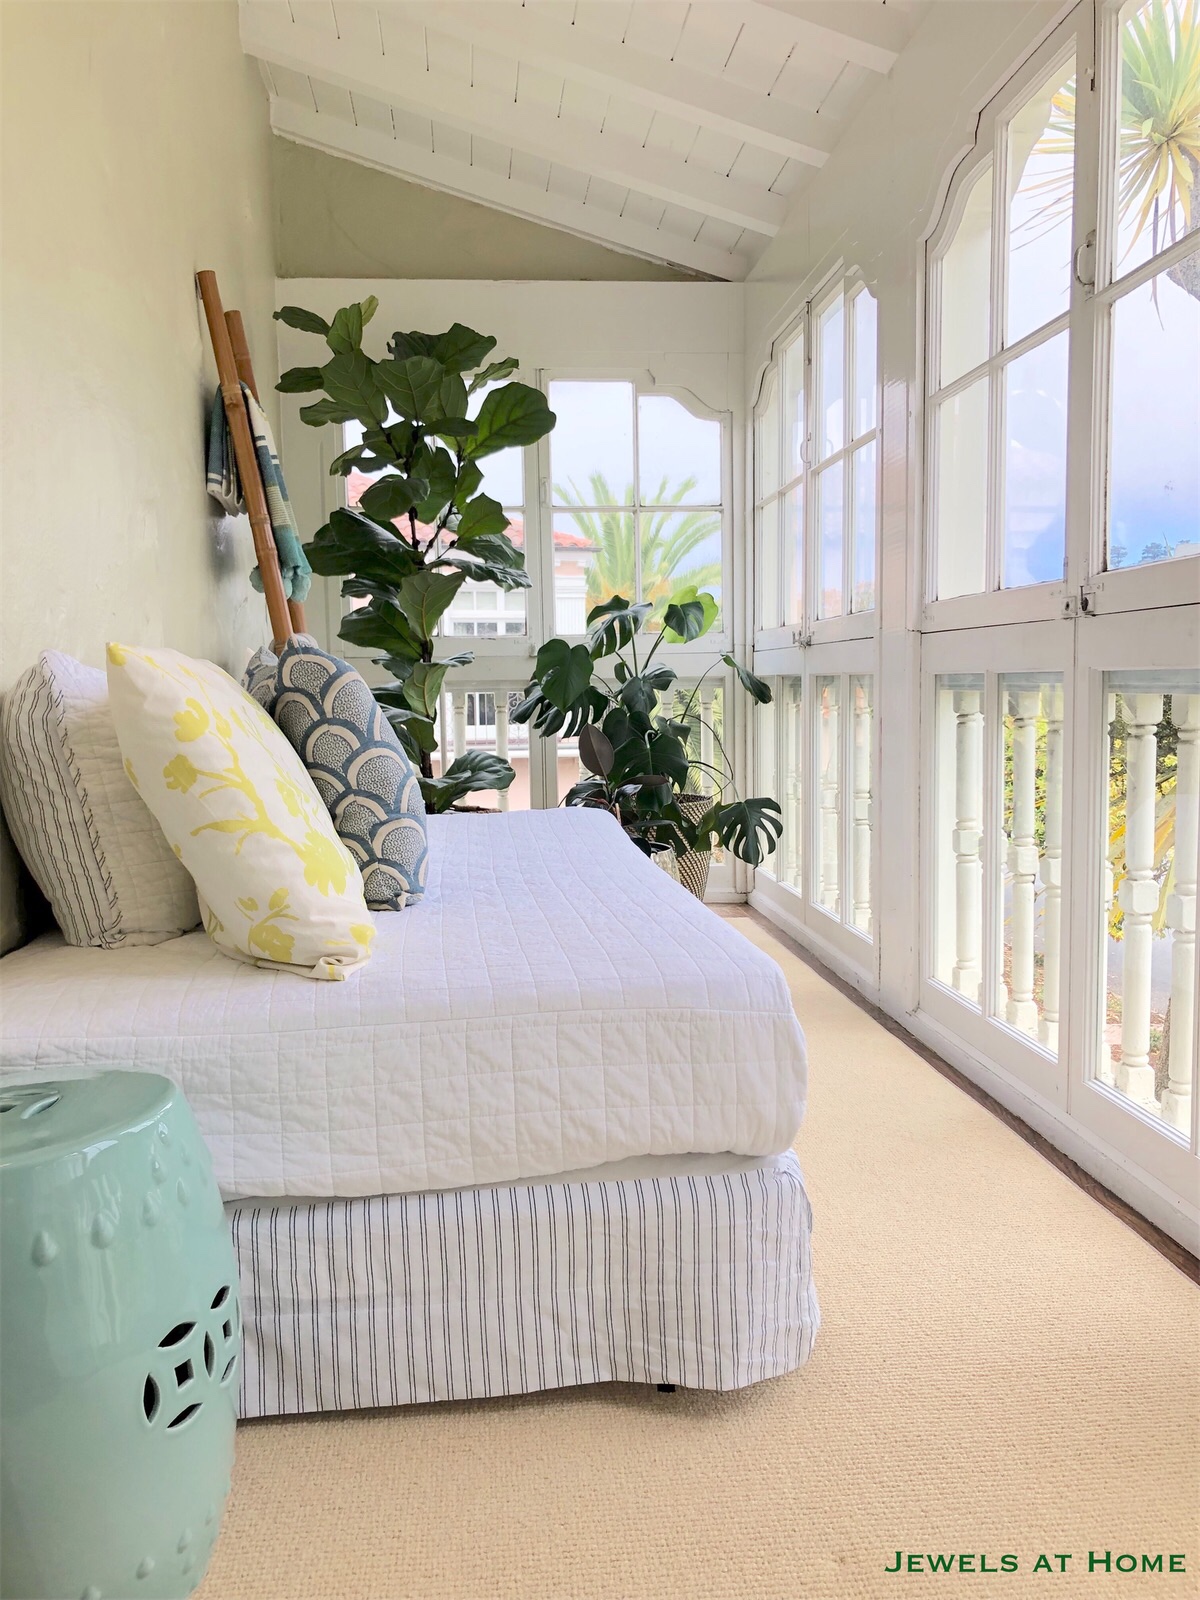
When we moved into our house, the small enclosed balcony became a place for LEGO, board games, and other toys. Now that the boys are older, I’m excited to reclaim this room as a more grown-up space for reading, lounging,… maybe even napping!
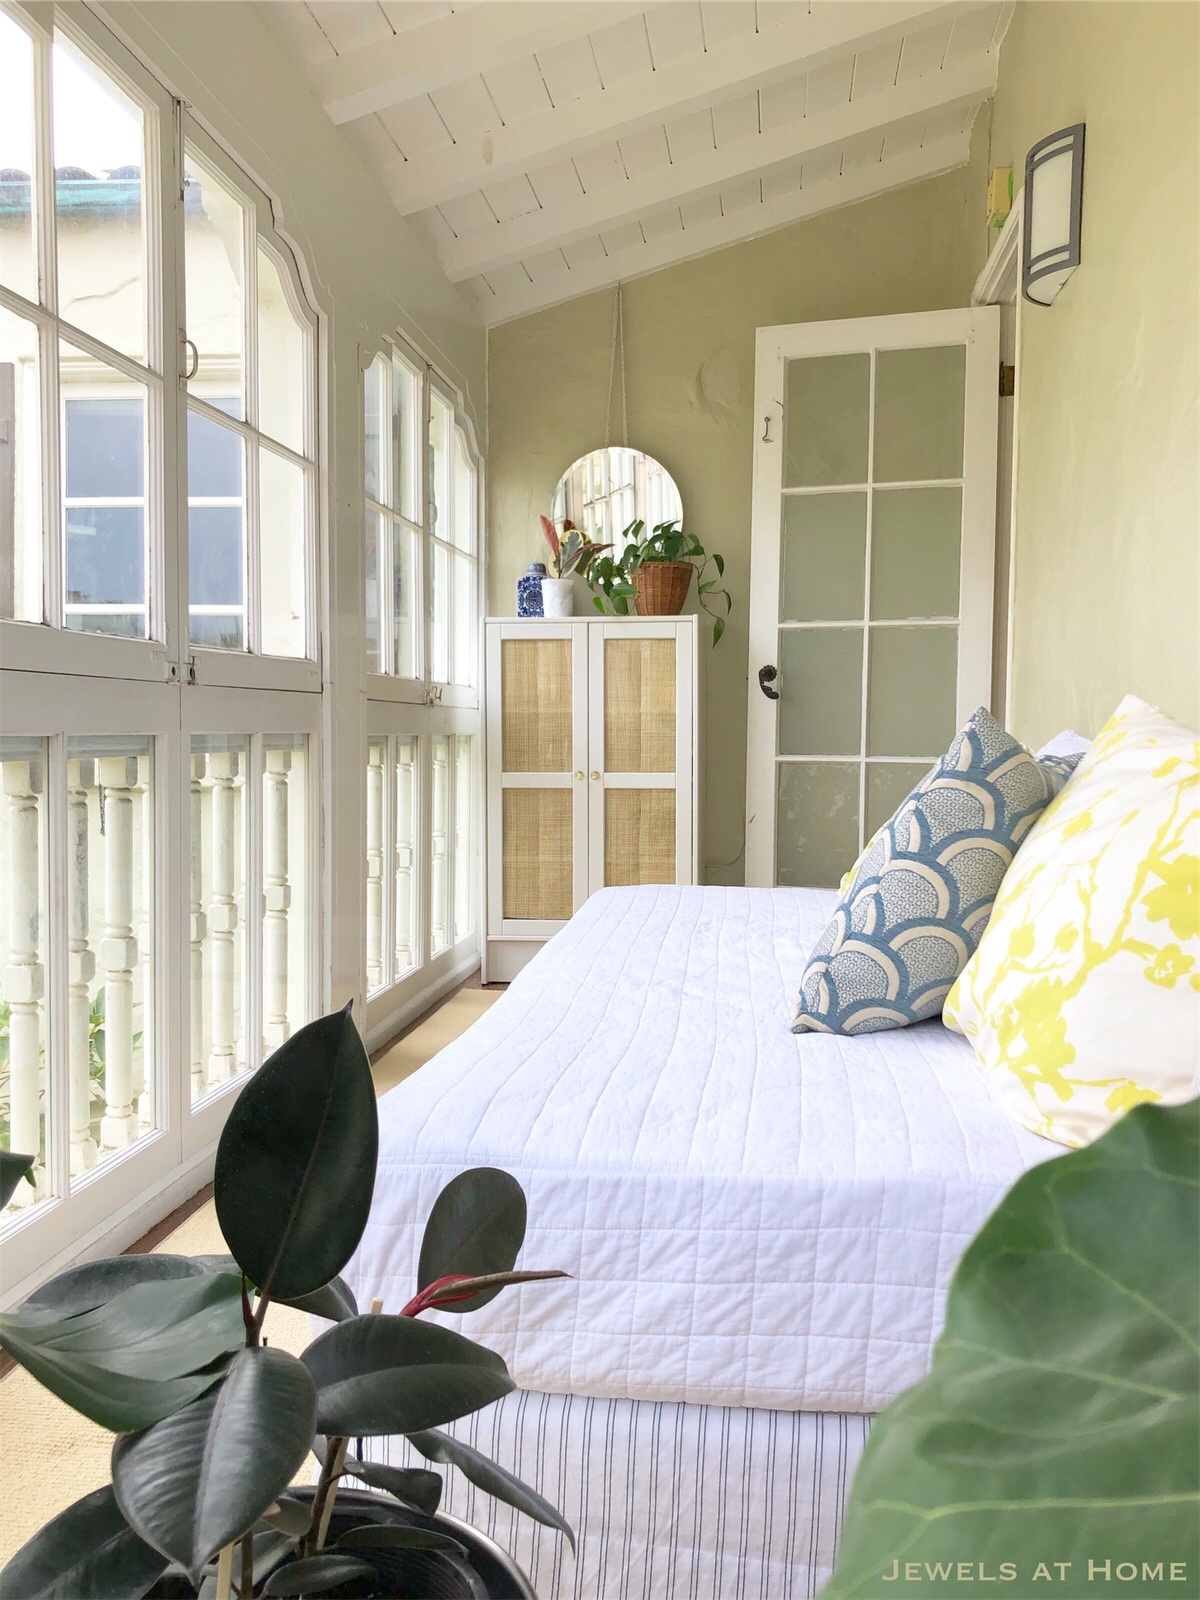
At 5’x15′, there is not much space in here, which made this a quick project! The key elements I wanted to include were:
The look I wanted to achieve included:
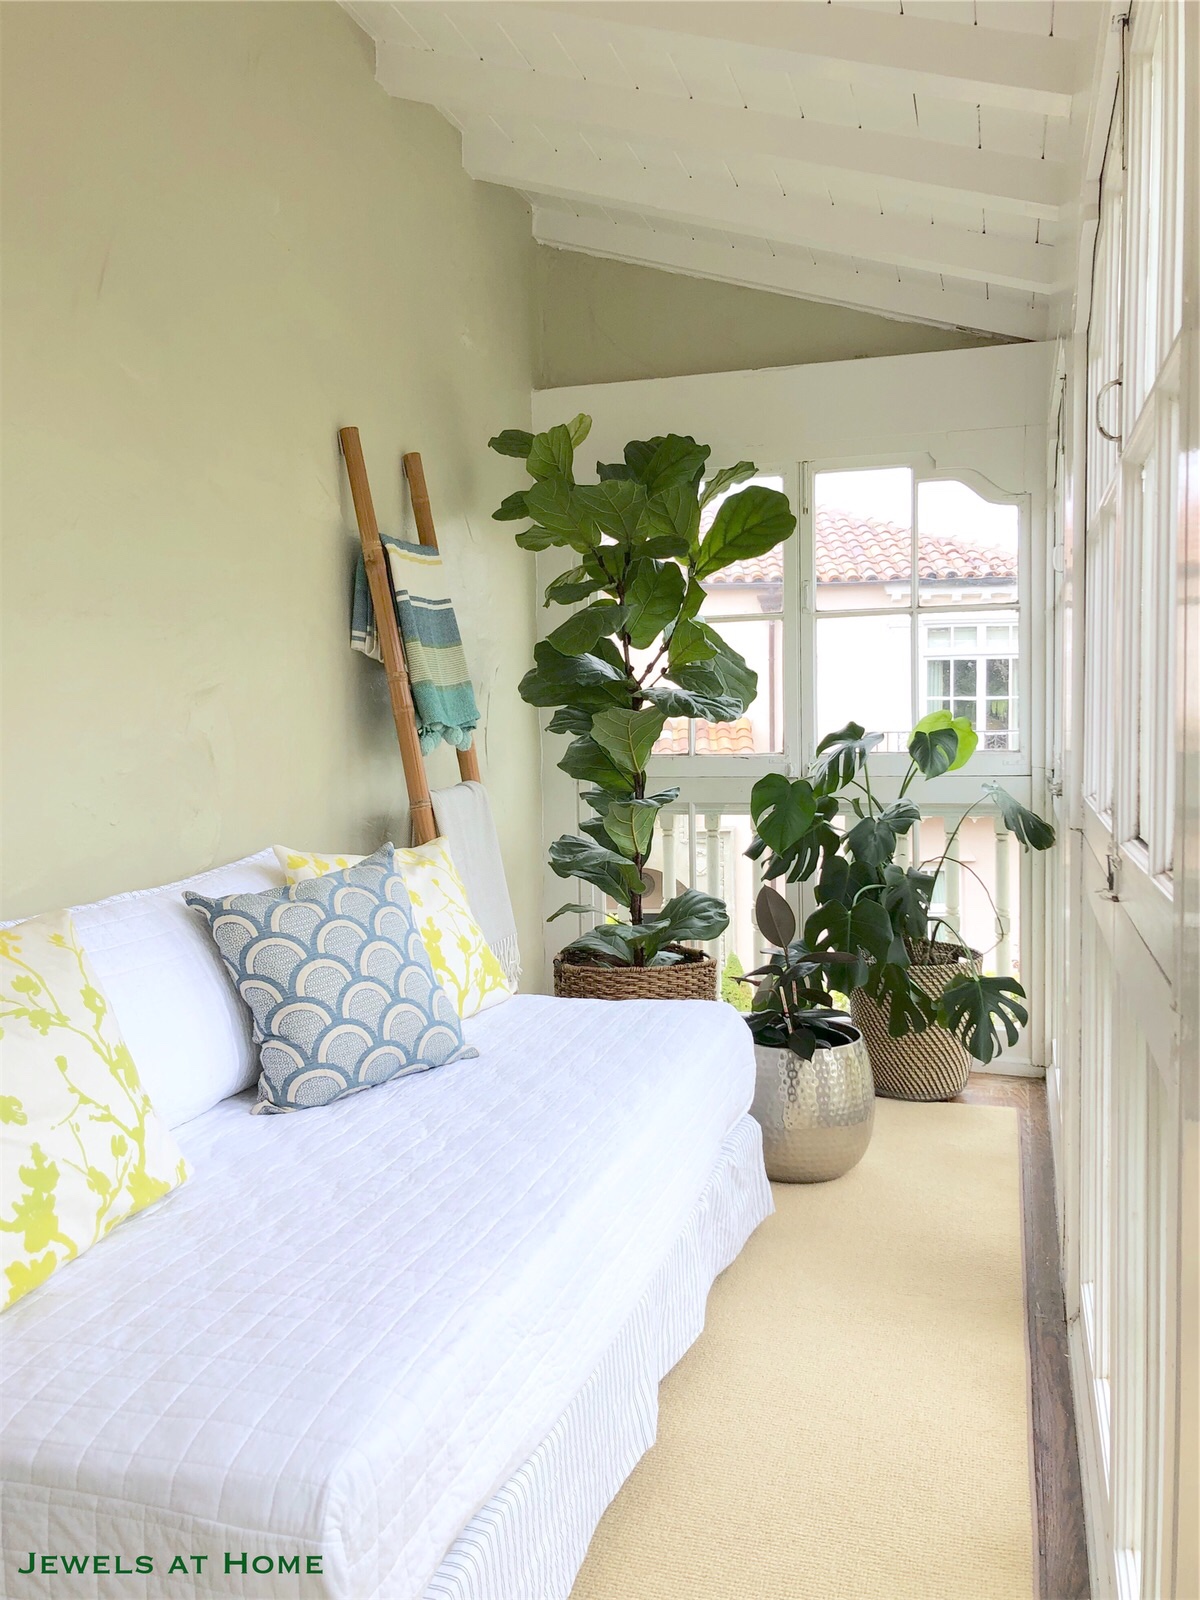
Here are some pictures of how it has all come together. I did buy this daybed quilt set, but otherwise, everything in the room we already had in our house!

I love this ceramic garden stool, but I have been looking for the right spot for it – what could be better than this indoor-outdoor room?!
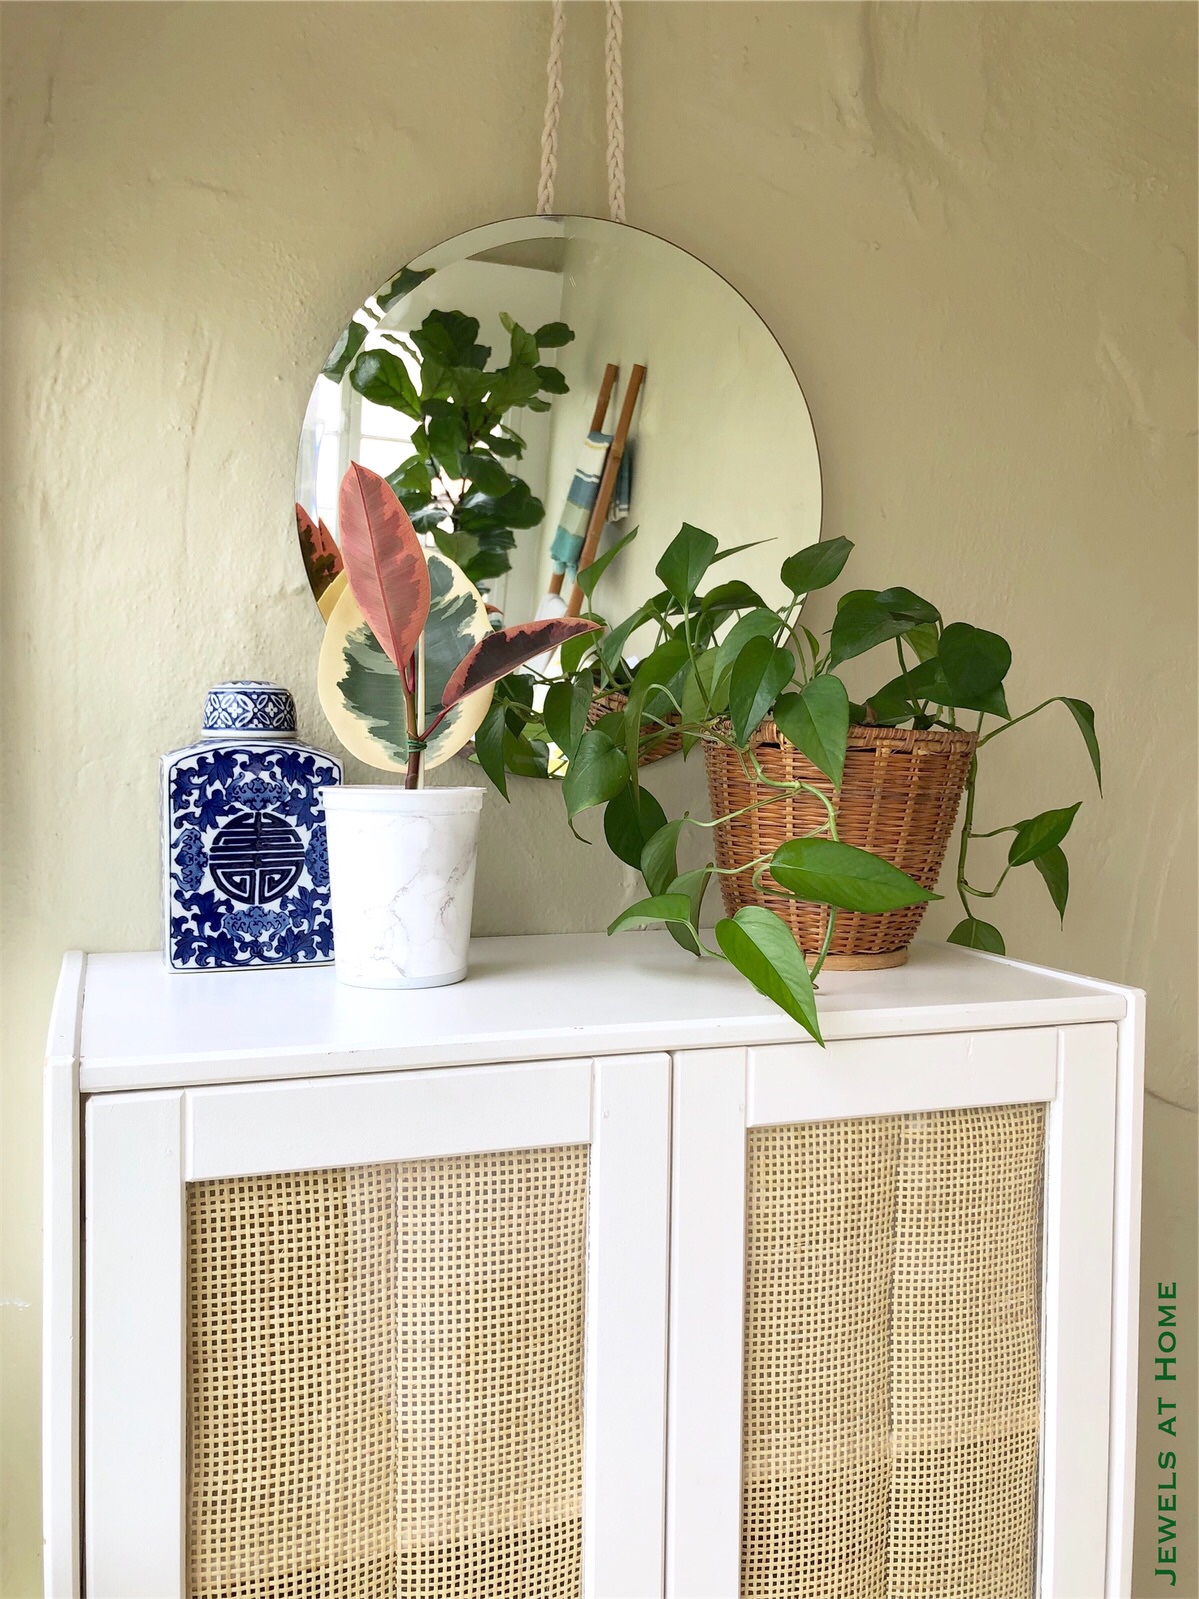
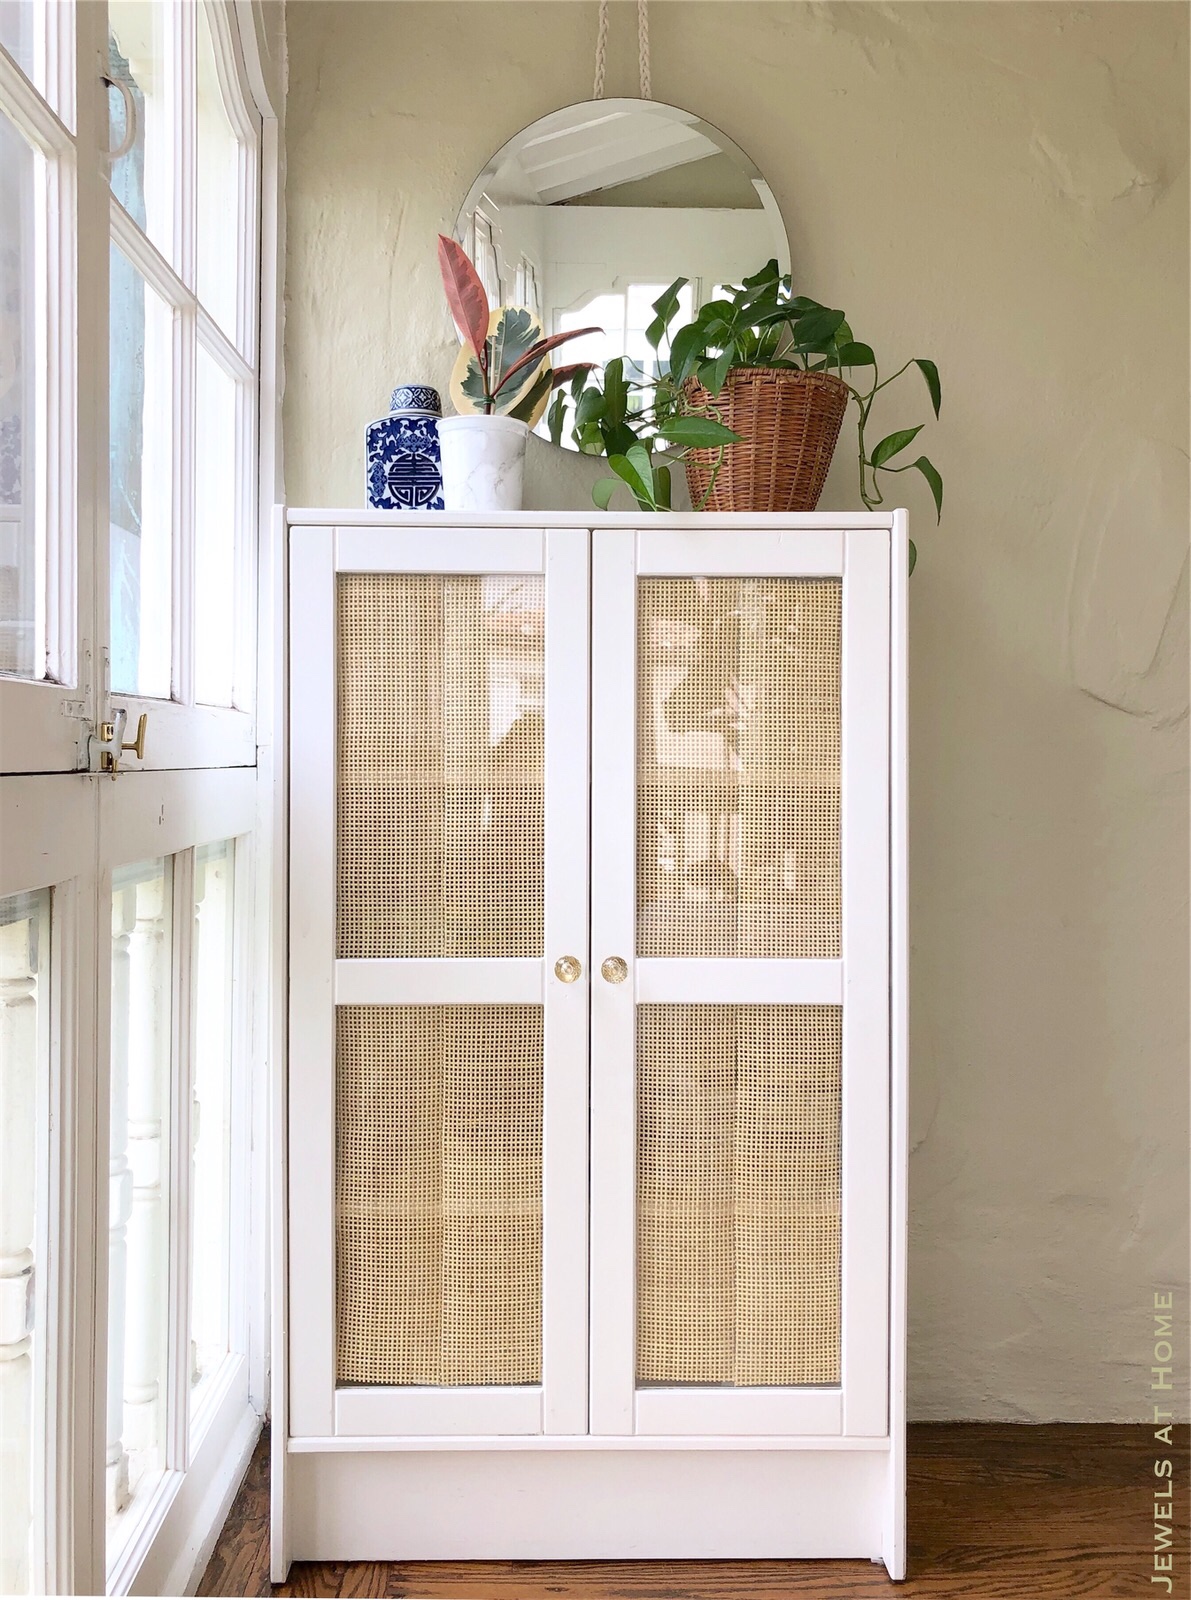
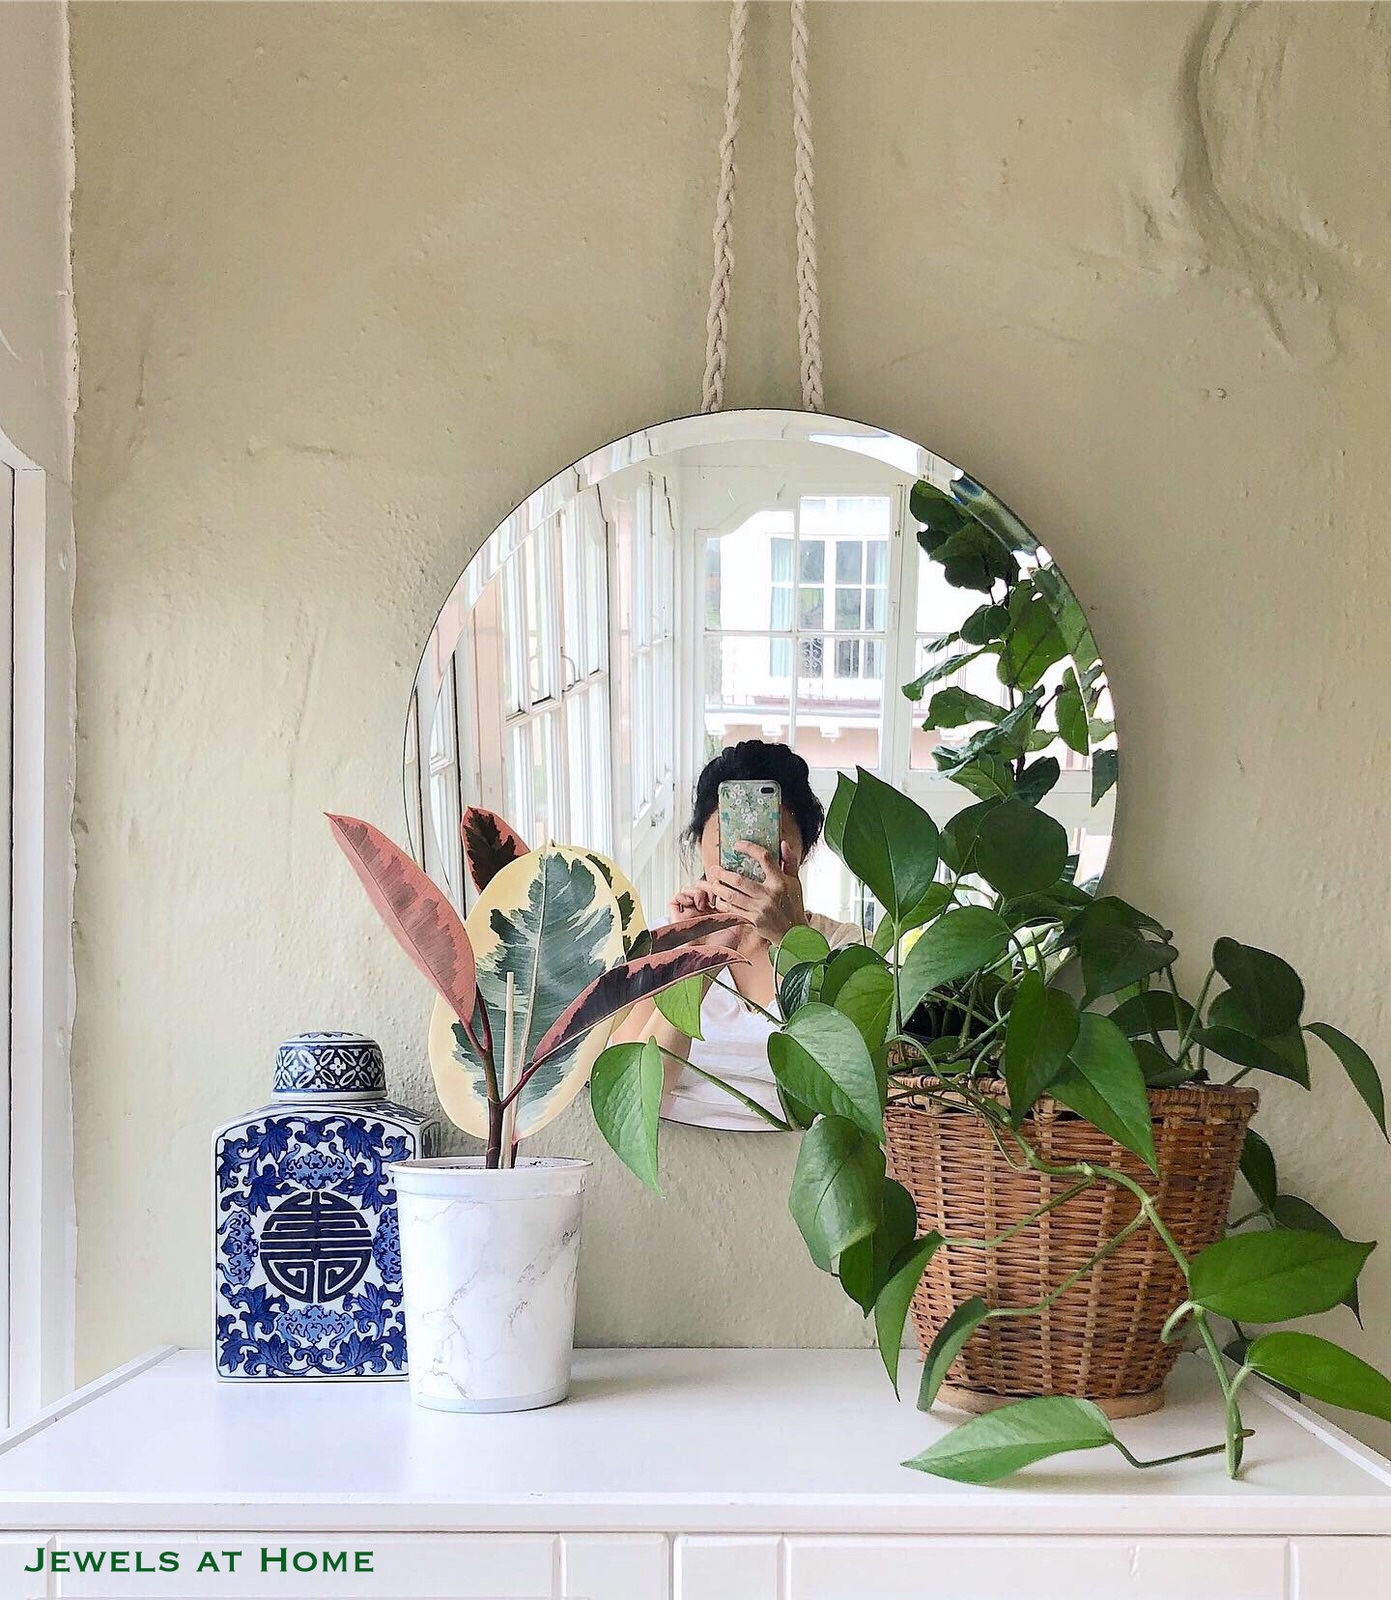
This bookcase was my grandmother’s. I repainted it about 20 years ago and added the caning (post coming soon) for this space, to create a tropical feel.
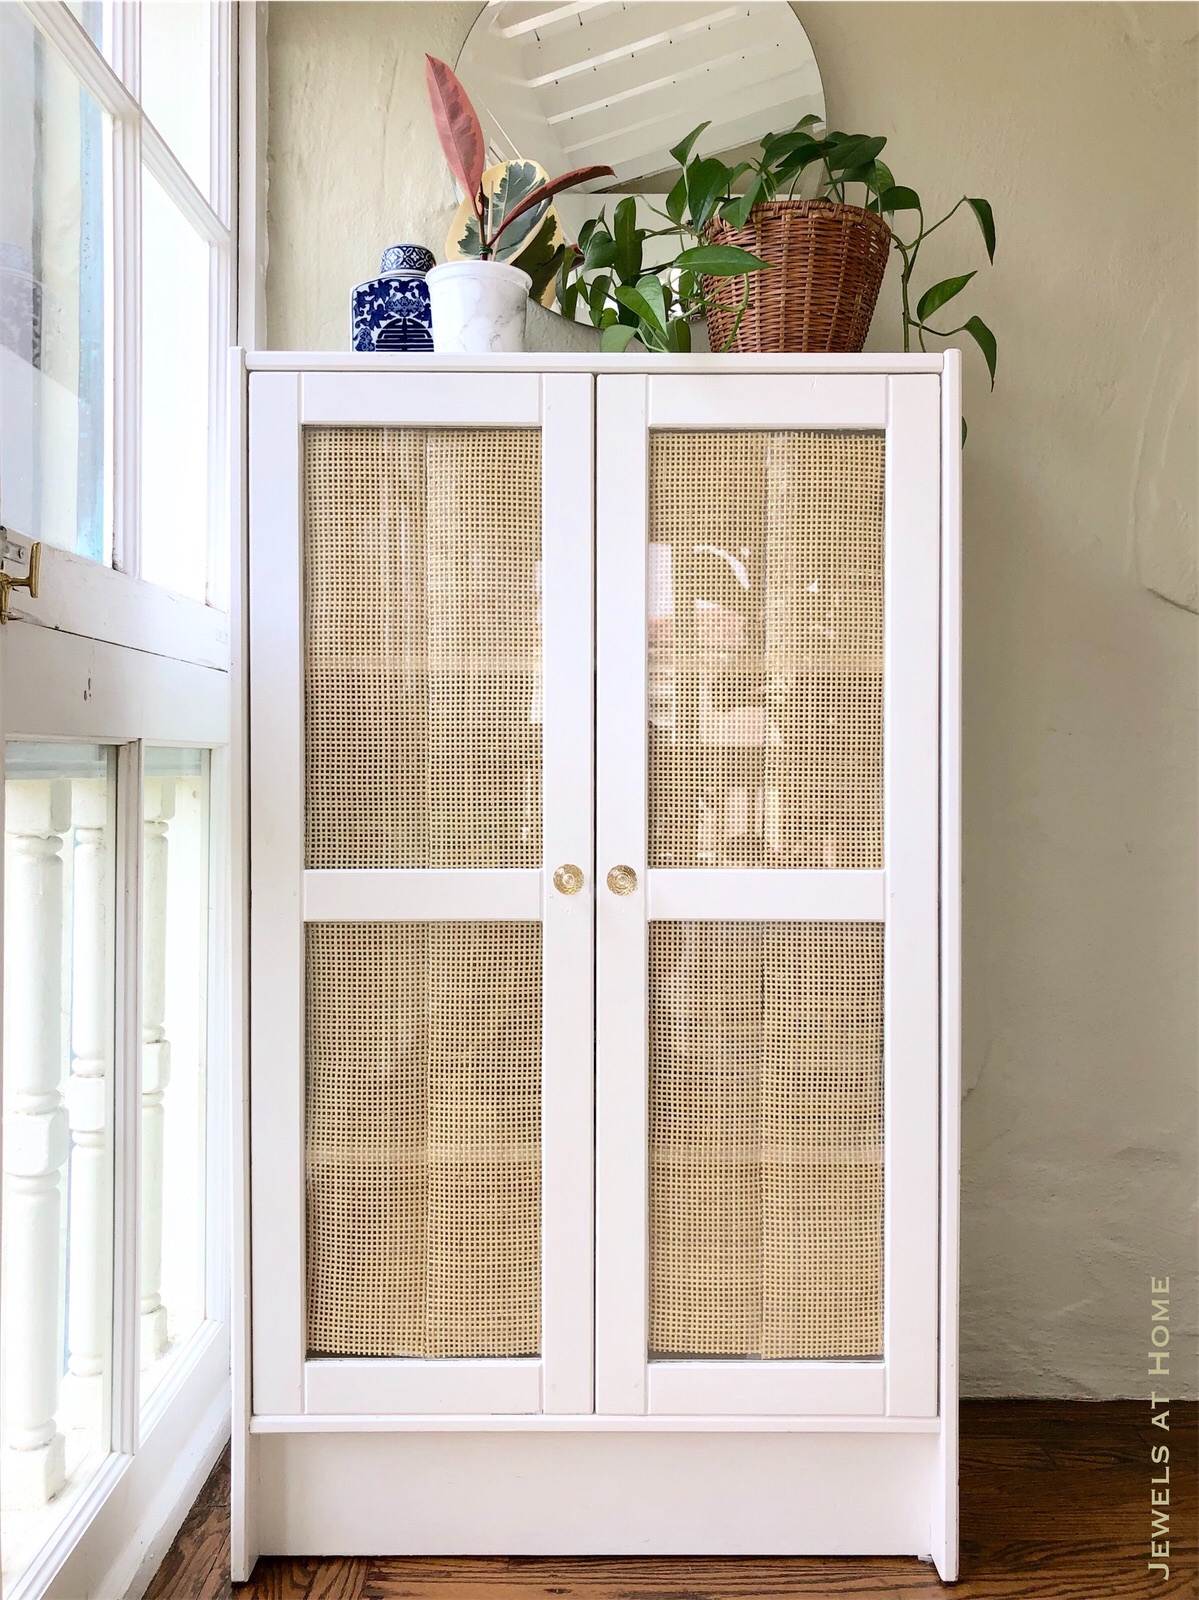
We’ve had this round mirror for a while, and it’s a bit small for where it was hanging before, but it works perfectly here. The walls in this room are crazy hard to drill into (which makes sense, because they are actually exterior walls), so I braided some rope from my macrame days and hung it from a hook in one of the ceiling beams. I like how it adds to the outdoorsy, bohemiam vibe in here!

This room is a win-win with the plants – they love all the light, and they definitely help make me feel like I’m outside in nature!


This daybed is a magnet for people who love to snuggle!
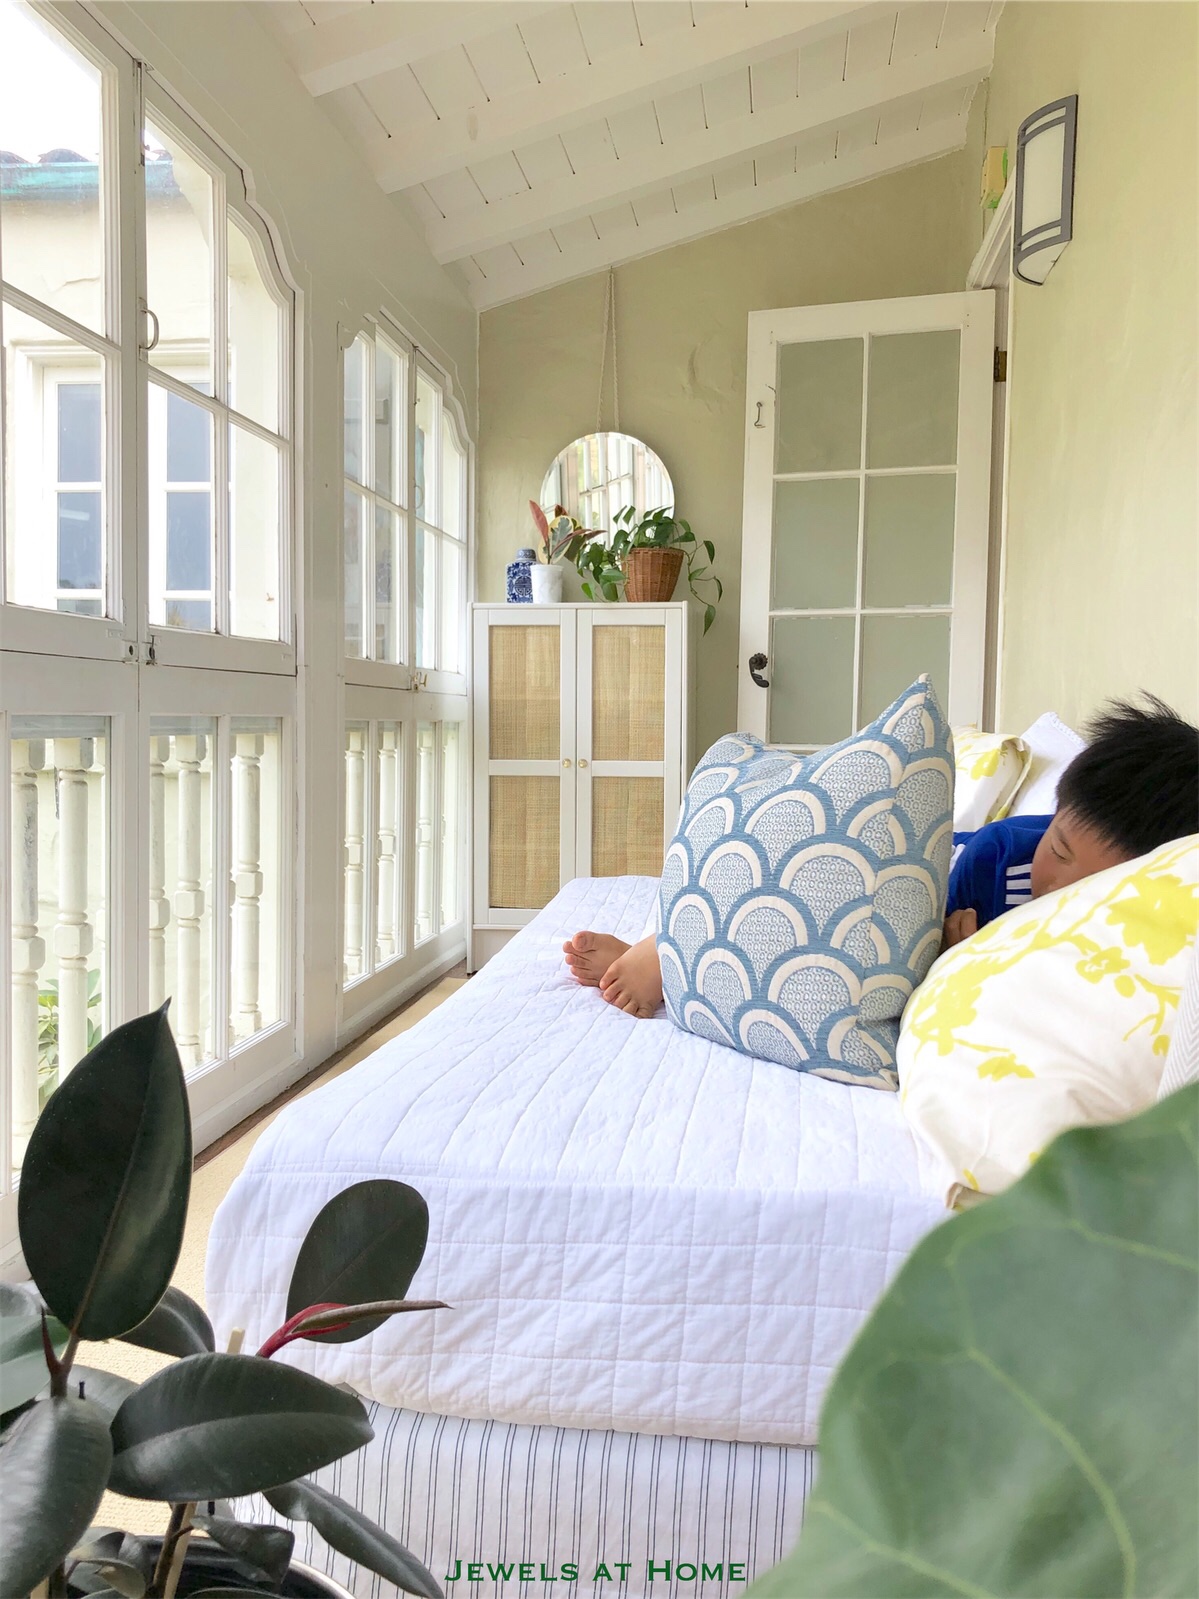
Finn would also like to snuggle on the daybed. This is his mildly dissatisfied face, because he had to stay on the rug…

Last couple of close-ups of this vignette. I love how everything old feels new again, when you find just the right combination!

So excited to read, and snuggle, and knit, (and nap) in our new sunroom!
Julie aka “Jewels”

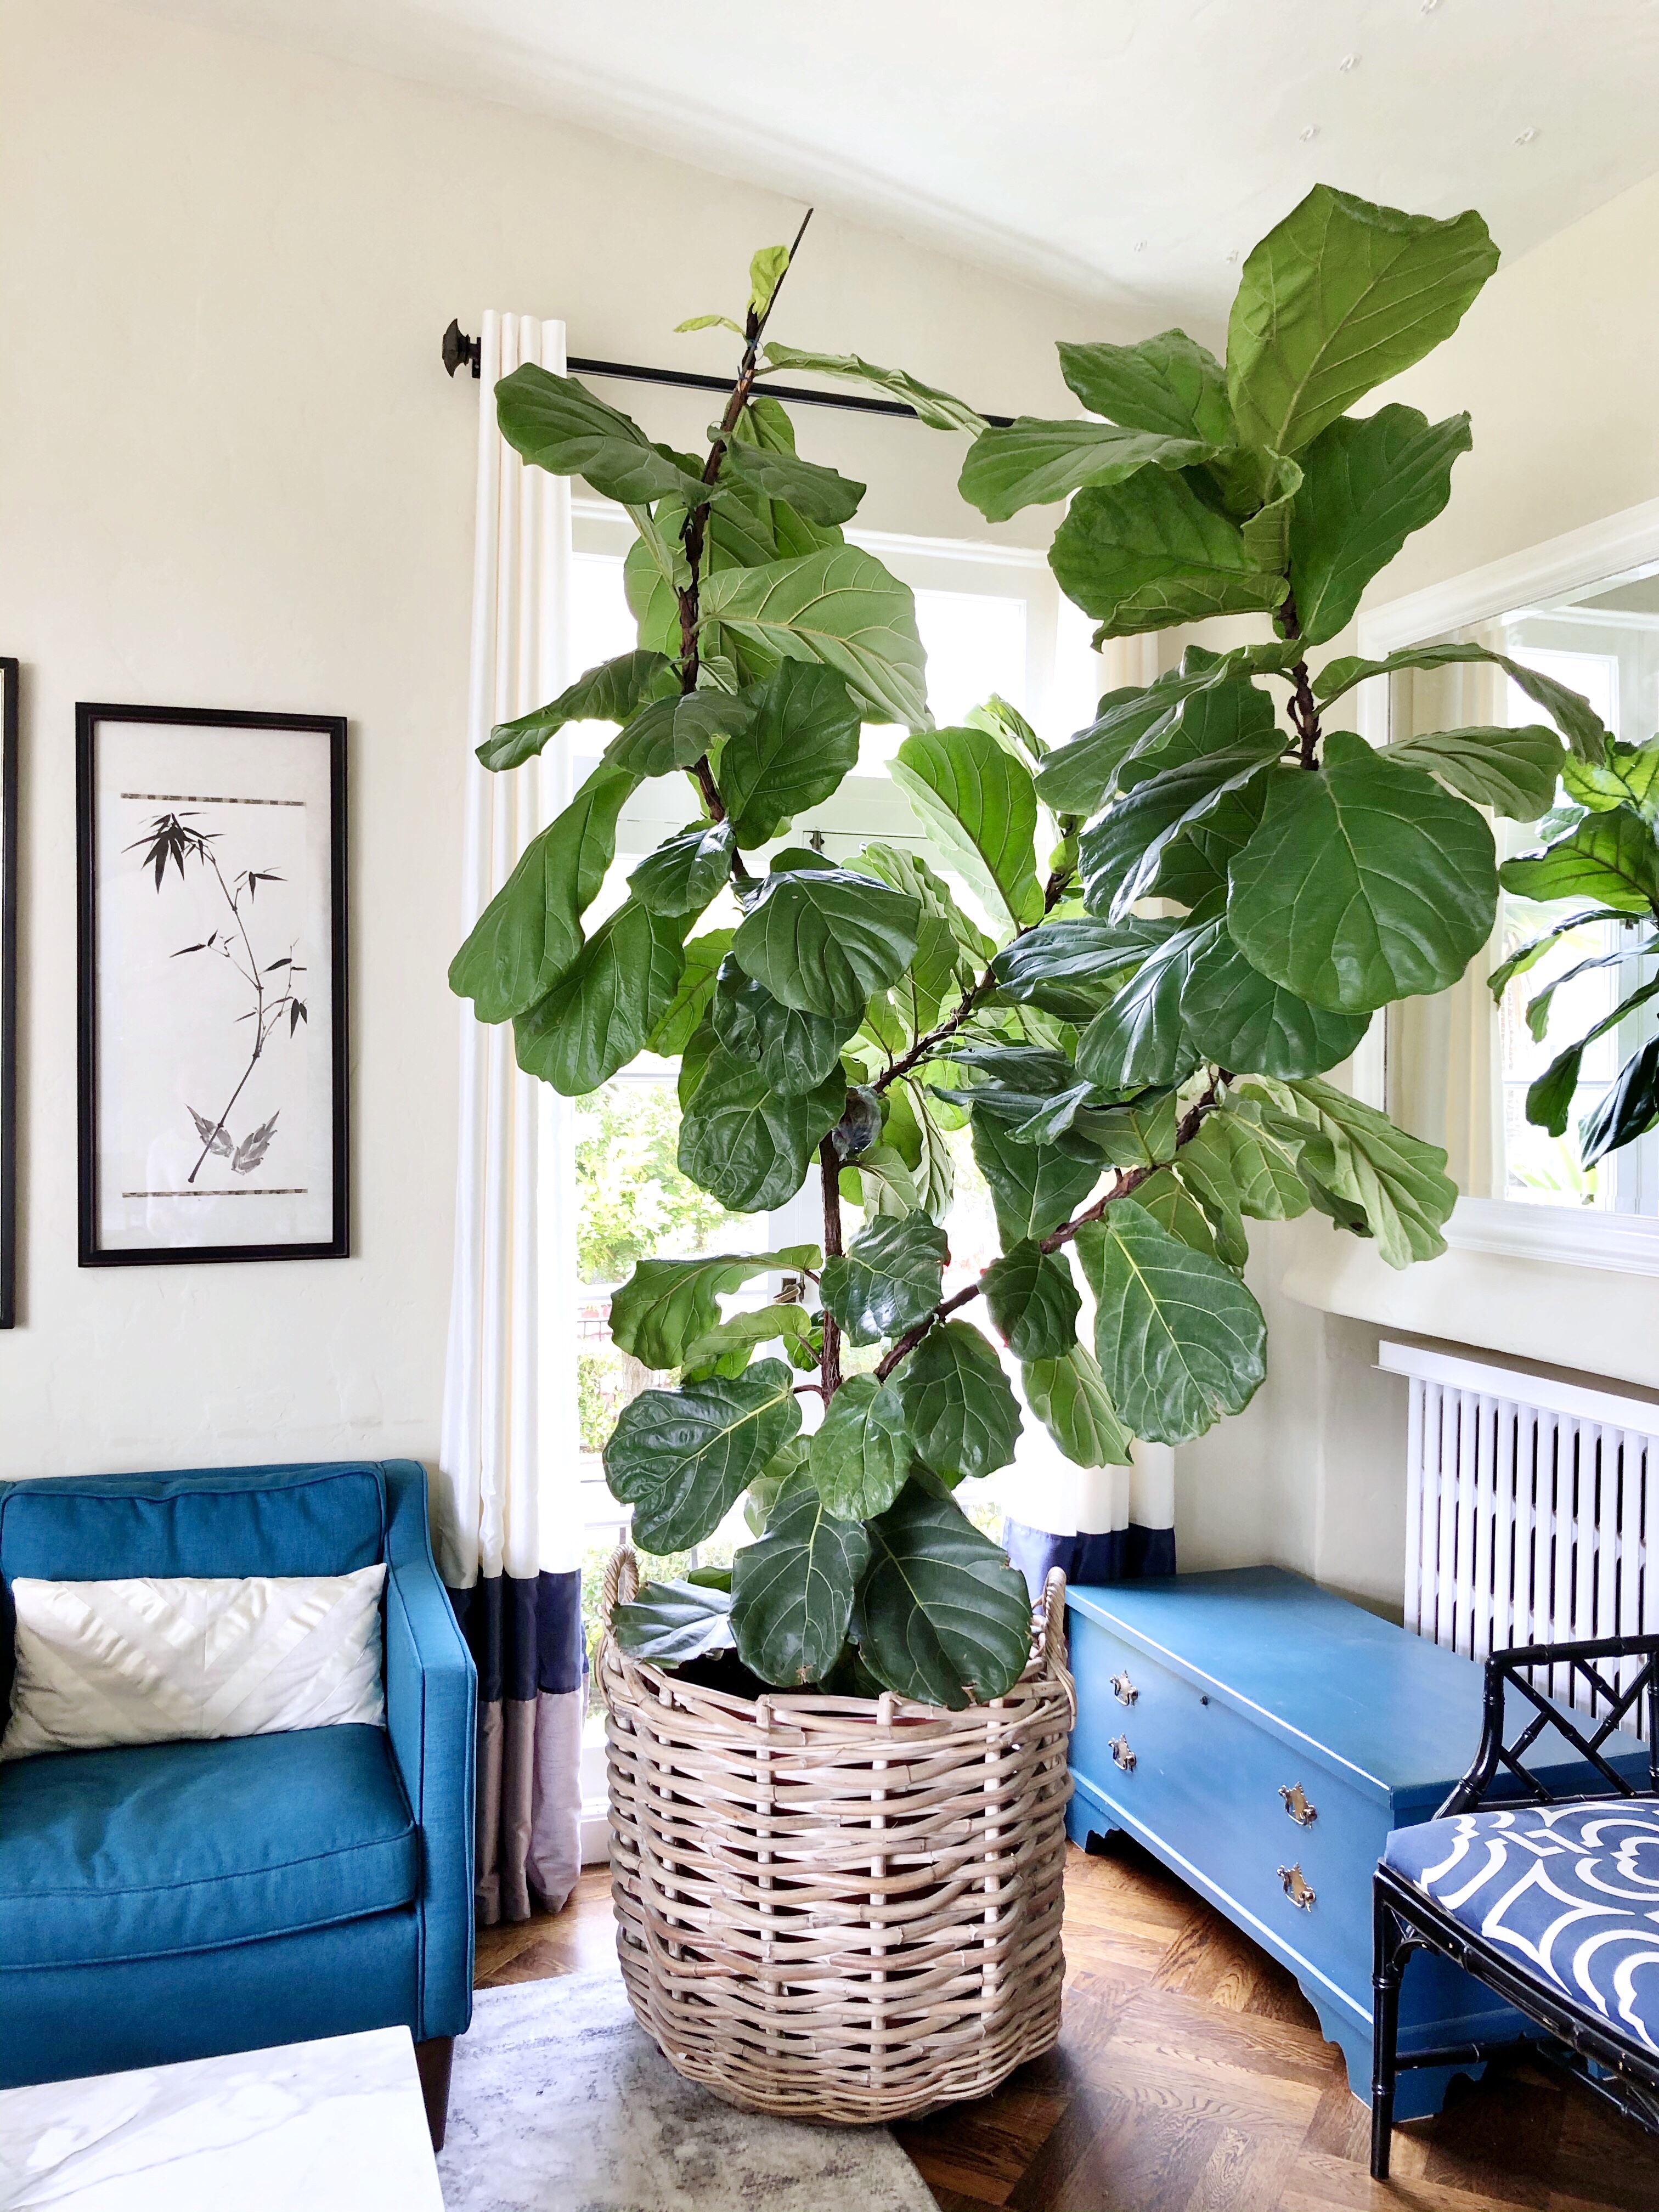
I threatened this punny post title last year, when I sewed a planter bag for one of my big fiddle leaf figs. That fig and another have outgrown their pots again, so I’m sewing new planter bags for them. I’ve … Continue reading
After years of professing to have a black thumb, I have been pleasantly surprised to discover over the past couple of years that fiddle leaf figs seem to love me as much as I love them.
Other posts in my fiddle leaf fig series are:
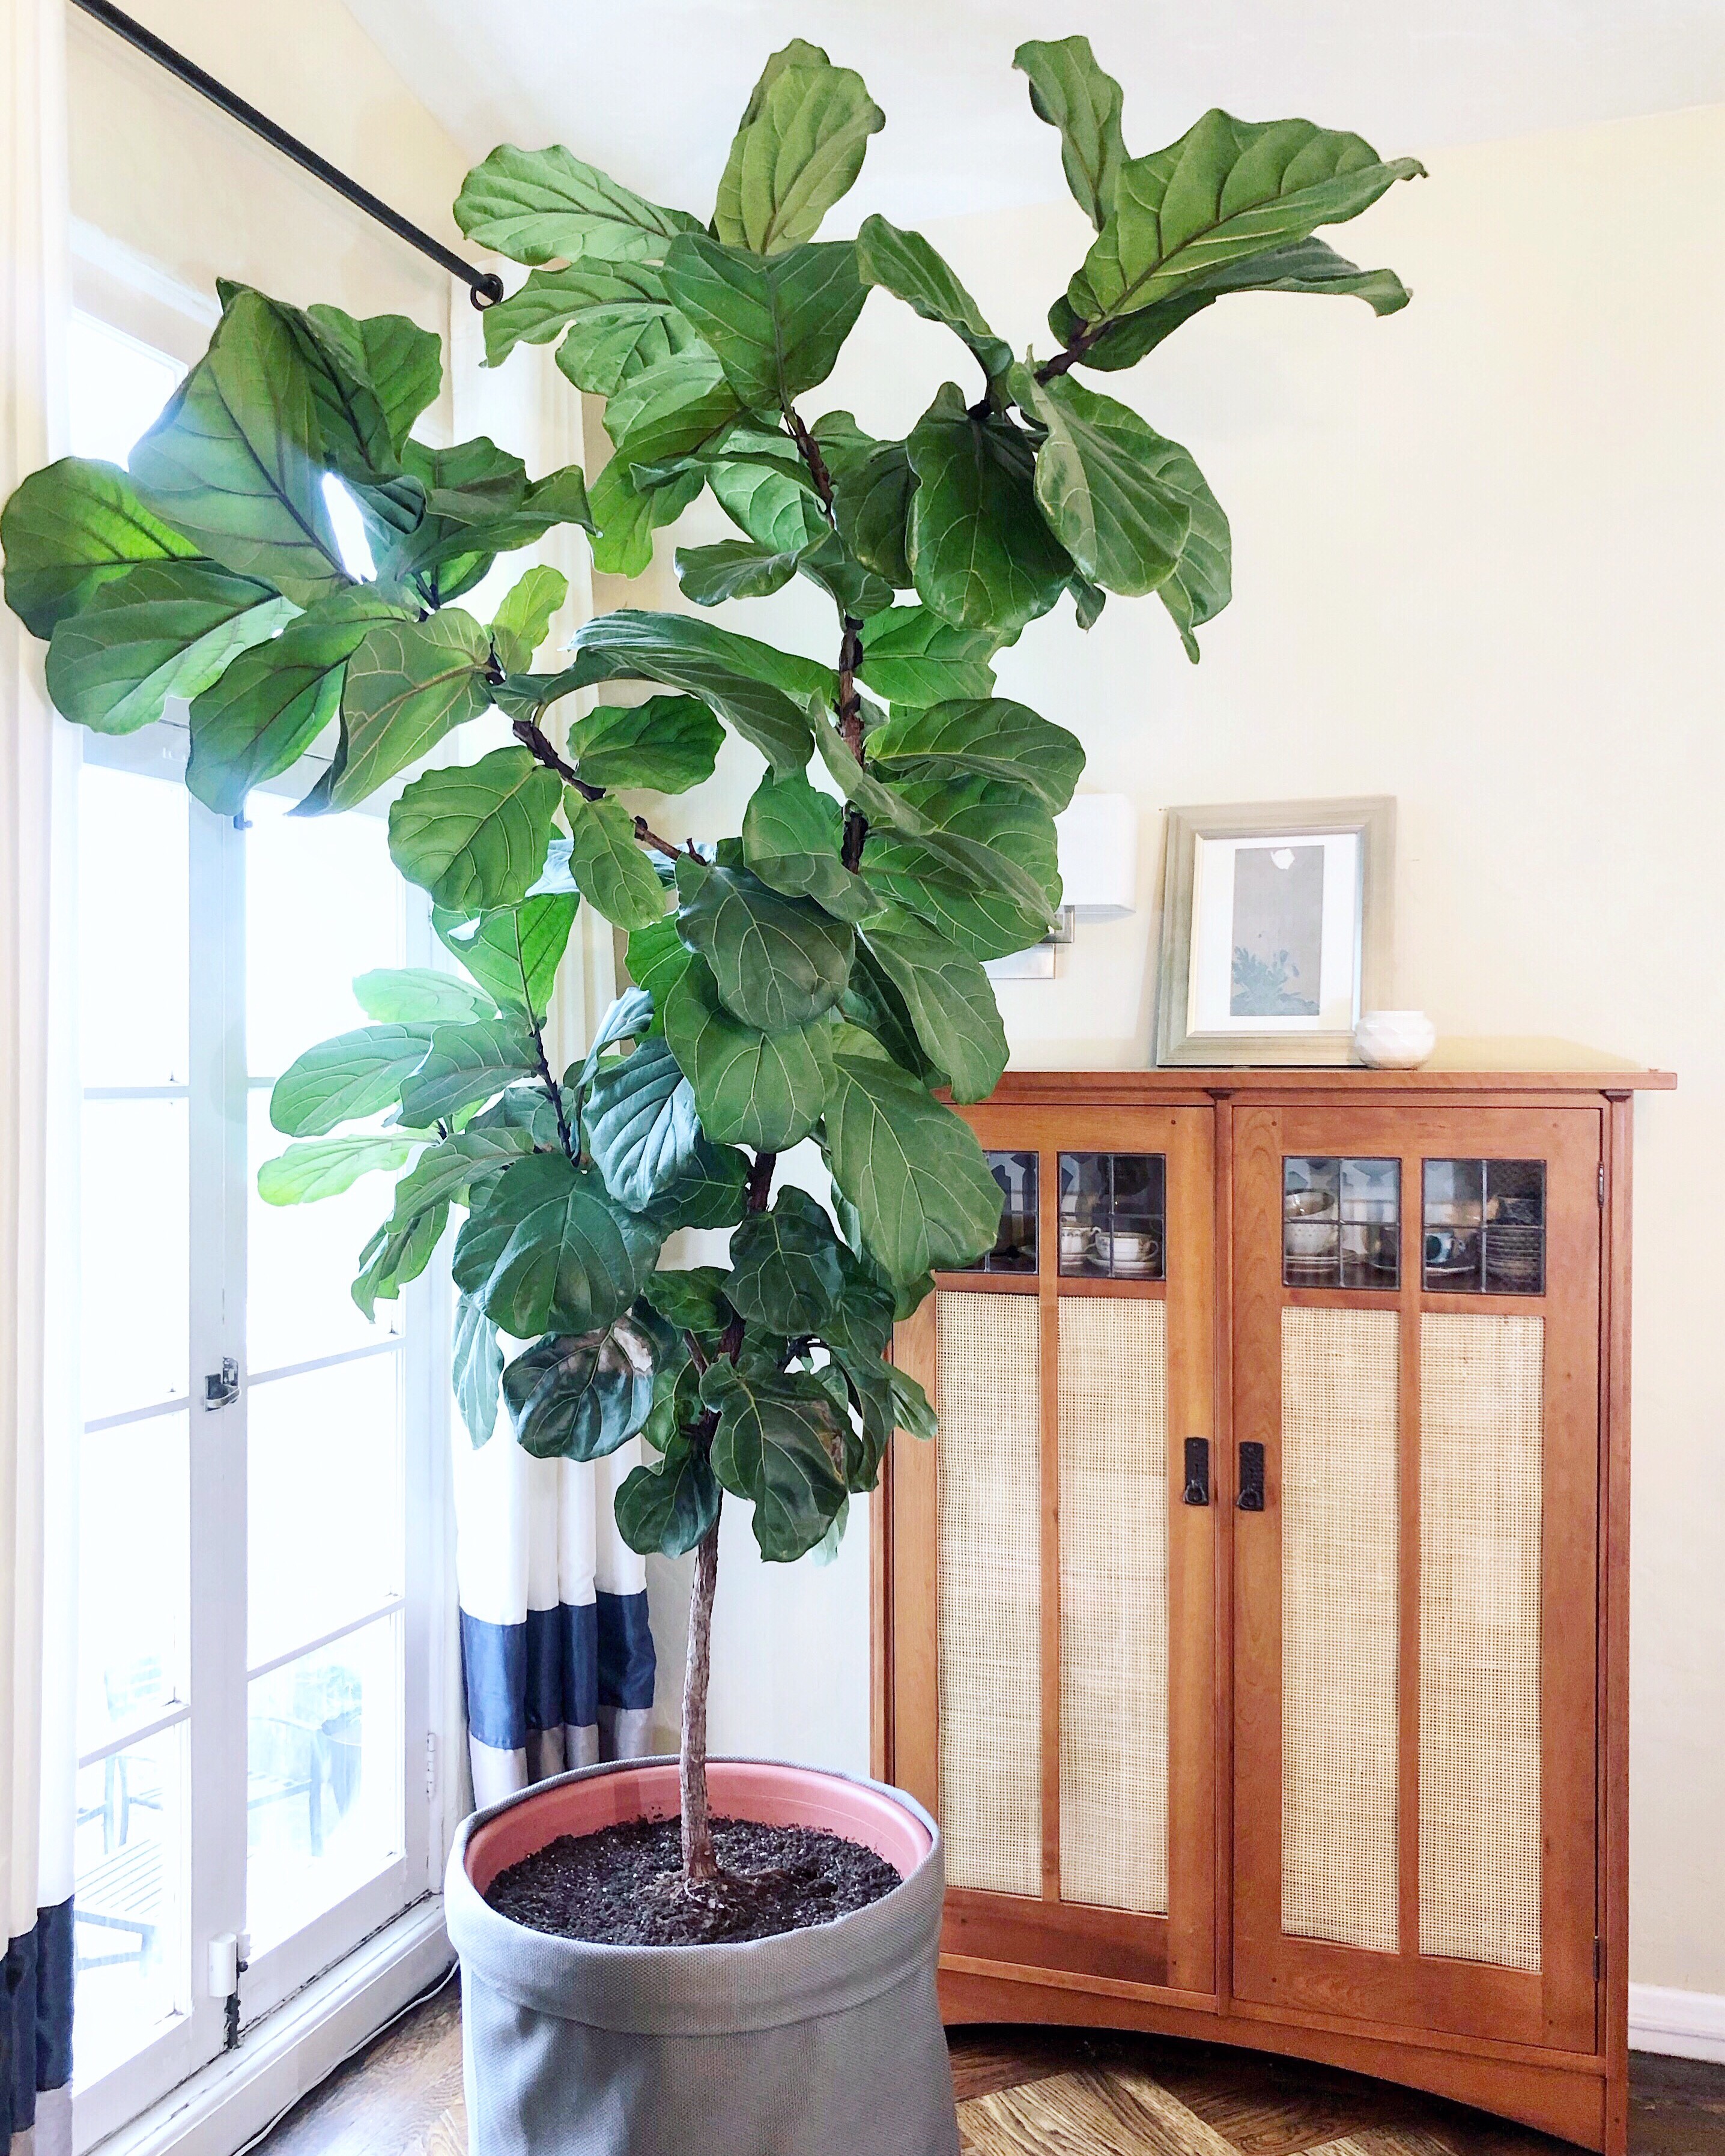
Today, I’m sharing tips on repotting your plants. I just repotted my two largest plants, which actually turned out to be a serious workout! (Or so I told myself when I had dessert later…)
What are some signs it’s time to repot your plant?
This plant had been in the same pot for about 20 months, and it was definitely time to repot it!

Tips for repotting your plant:
Ideally, try to repot in the spring or summer, when your plant is growing fastest, as this will help it recover more easily. Since we’re in California, where winters are shorter and milder, I’ve been able to repot in winter without issues – this was out of necessity, when I suddenly realized my plants were suffering from outgrowing their pots.
Pick a pot that’s a few inches bigger than the previous pot. Going up too far in size will leave too much empty soil and risk overwatering. Ideally, use a pot with good drainage, though I have do have several growing successfully in pots without drainage holes – I did put more rocks at the bottom of those, to create a space for water to drain within the pot.
If the roots are really matted and tight (left picture below), you can gently loosen and trim them (right picture below). If you can’t or don’t want to use a larger pot, you can also gently trim the roots, brush off as much of the soil as possible, and use the same pot, though this might limit your plant’s growth overall. I’ve just put my biggest two plants into 24″ diameter pots, which I think is as big as I’ll go, so I’ll need to try just trimming the roots next time. I had to look in a few places before finding this size at Flowercraft in San Francisco.

Line the bottom of your pot with small rocks to keep the soil from leaking out and add extra drainage. Add a layer of fresh potting soil on top of the rocks, and put your plant back in. Adjust the height by adding or removing soil until the top of the root ball sits a little below the rim of your pot, remembering that the soil will compact a bit over time.
Fill in soil around the root ball until about two inches from the top. Add some slow release fertilizer pellets – I use this one from Osmocote – and the continue filling in soil until it’s even with the top of your root ball.
Give your plant a good watering, and watch it grow!
Here’s a picture of the craziness while I was in the middle of repotting the two big trees – it’s a jungle in here!

My plants sure seem happy in their new pots! I have a plan to sew some giant planter bags for them, similar to this one, which is now going to be handed down to a younger FLF! UPDATE: Here are some pics of the plants in their new planter bags, and here’s a link to the tutorial for the new giant planter bags!


Let me know if you have any questions, and happy gardening!
Julie aka “Jewels”
