I’m really excited to be a Guest Participant again in the One Room Challenge! This is a great way to get inspiration and motivation for your home. This spring, I re-decorated our boys’ bathroom. For this fall’s challenge, I’m transforming our teen’s bedroom. His new space is inspired by an industrial loft, with an exposed brick wall and other great features! Thanks for following along!
![]()
Recap:
- In week one, I shared my favorite inspiration spaces and mood board
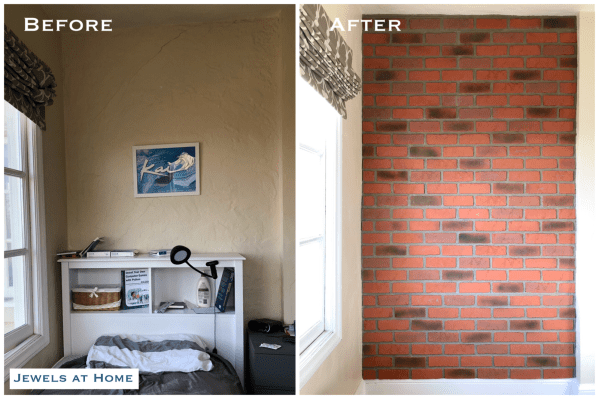
- This week, I’m adding a (faux) exposed brick wall!!!

I am OBSESSED with exposed brick. It just speaks to me of history, warmth, and home. This room has the perfect spot for “exposed brick,” a small recessed area, where the plaster was cracked and uneven and in want of some repair anyway.
If you’re also in love with this look, there are a lot of options out there – real brick, obviously, brick veneer, which is thin bricks applied like tile, brick wallpaper, and brick paneling. I was originally thinking of doing the brick veneer, but it was brought to my attention by a couple of people that this was kind of risky to install in earthquake country… over a bed. So, I set out to research some other options. I normally have a negative association with brick paneling, because it can look pretty cheesy, but after a lot of research, I was excited to find this realistic option from Texture Plus. You can order two free samples to see in person, and I decided on Antique Brick in Burnt Orange.
Here’s what you’ll need:
- Texture Plus brick panels
- Matching grout – don’t skimp on this. This is what makes the wall look authentic. I tried ordering just one tube and ended up having to order more. There are a lot seams, and don’t forget the outside edges!
- Liquid nails to attach the panels
- Screws to attach the panels
- Caulking gun
- Drill, screwdriver
- Saws – I used a table saw for most of the cuts, and a hacksaw for some smaller/ finer cuts
I followed the easy instructions on the Texture Plus website and watched a few of their videos. There’s not much more to it than that. It took me almost a full day to do this wall, and I’m kind of moderately handy. It wasn’t hard, just a bit repetitive, but it’s so exciting to watch the project come together. It really transformed our space!
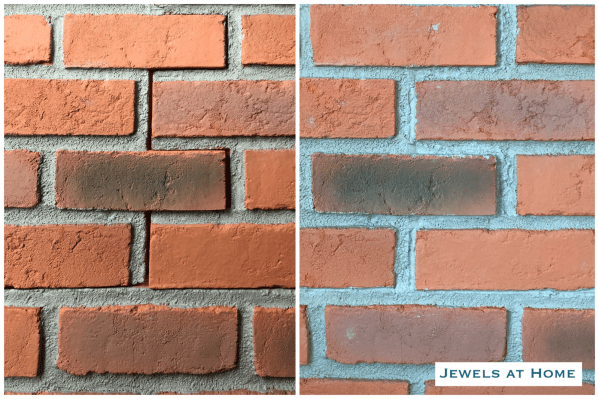
Here’s a random progress shot I took, because I was getting excited. It’s pretty cool to see how it transforms from the pre-made panels to an authentic-looking brick wall!

The matching sanded caulk that you use to fill in the seams really is like magic. You can hardly see the cracks at all, unless you know they are there. I might go over one more time, now that I bought more caulk!
And here’s the finished wall. So excited! This falls in the category of projects that make me so happy that I peek in the room just to see it, even when I don’t need to go in there for any other reason. That’s a weird thing I do. Kai’s being a good sport about it. Maybe he thinks I’m visiting him…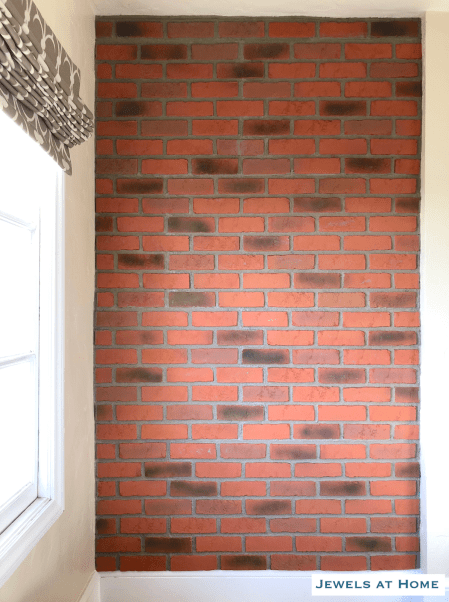

A huge thank you to Linda for creating the One Room Challenge community, and high fives to all my fellow bloggers whose hard work and creativity were great inspirations! Be sure to go back to the One Room Challenge page to check out all the other projects!
Julie aka “Jewels”
