- Week One – Elegant and Airy Dining Room Inspiration
- Week Two – Favorite Modern Dining Chandeliers
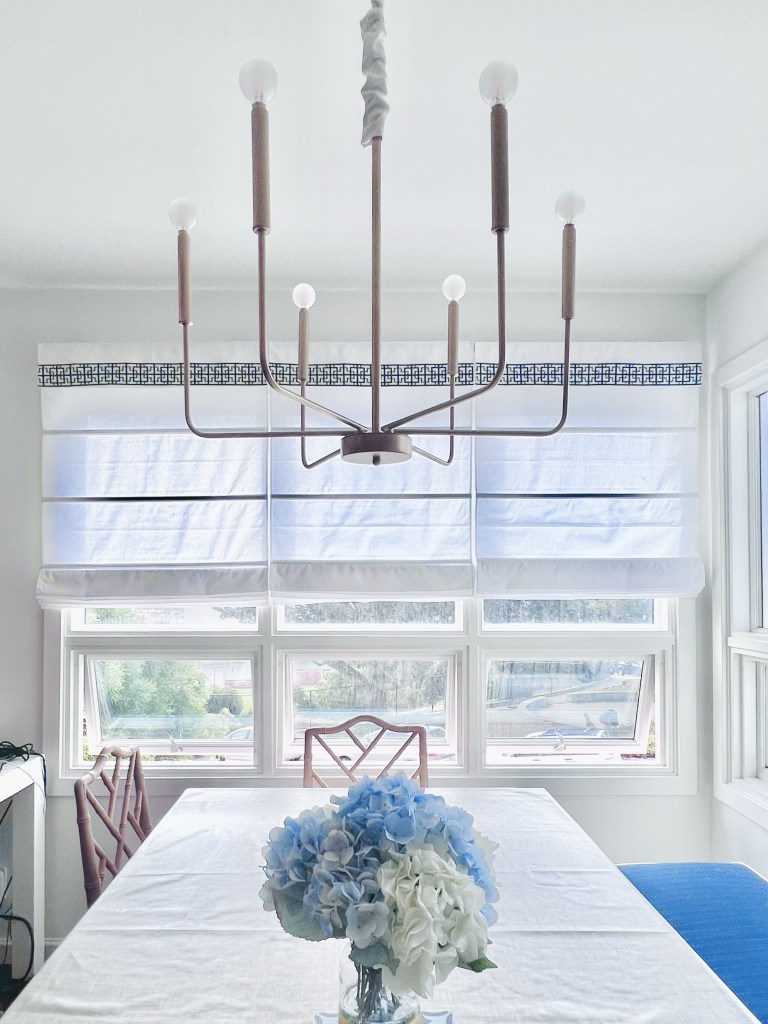
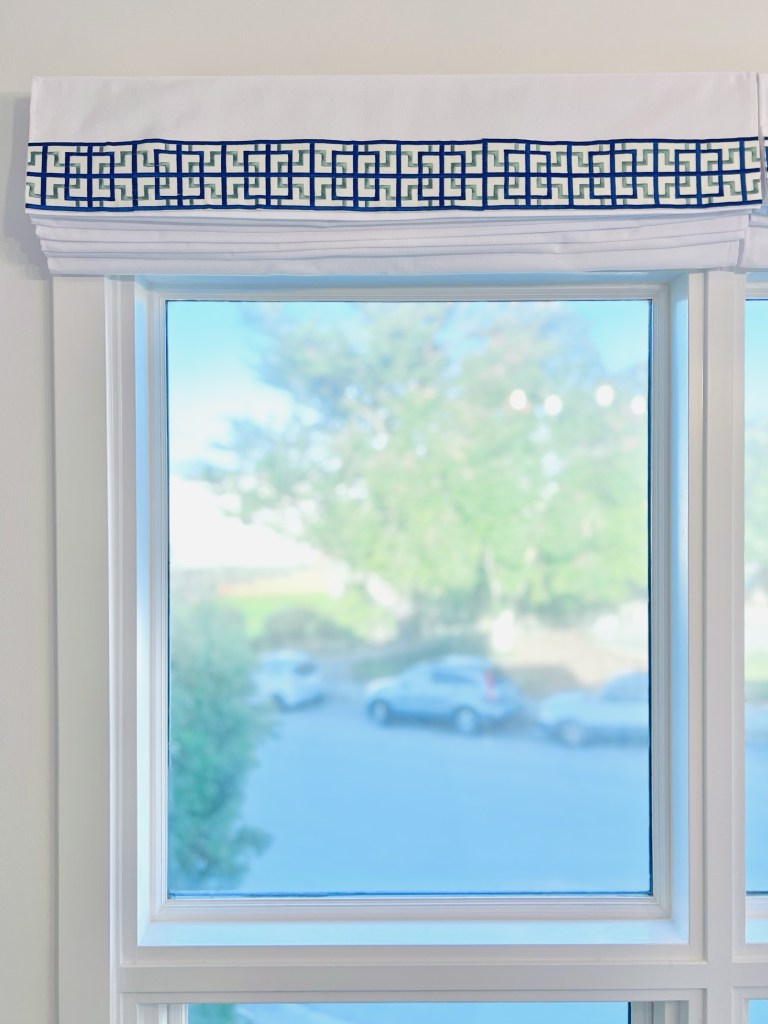
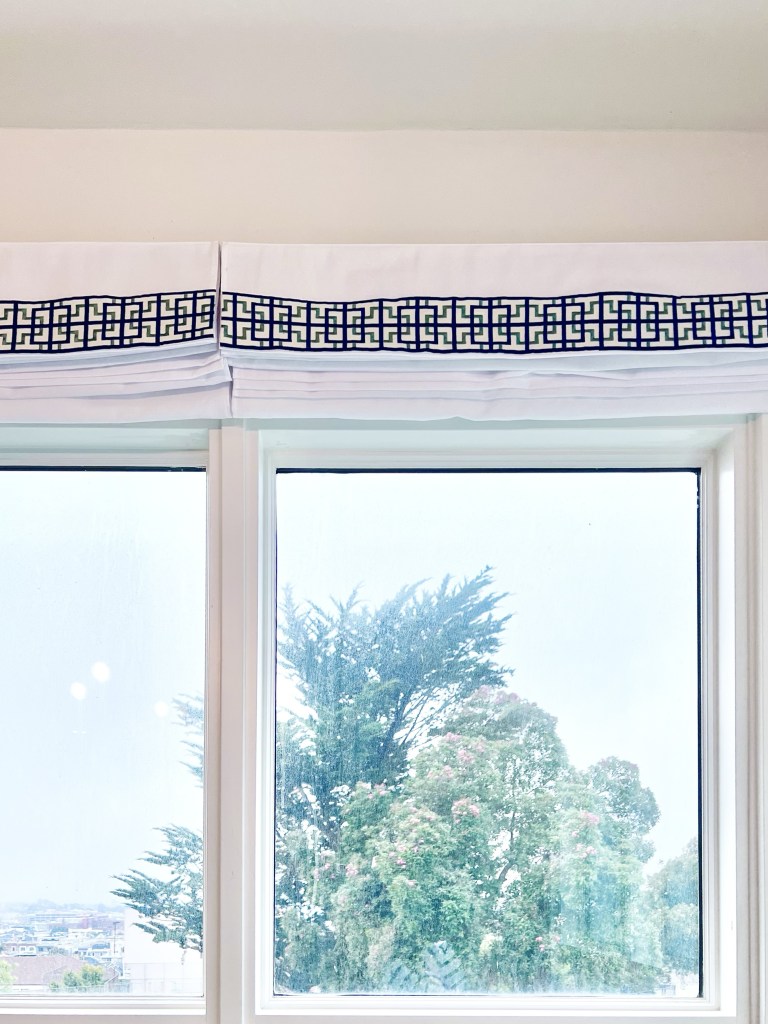
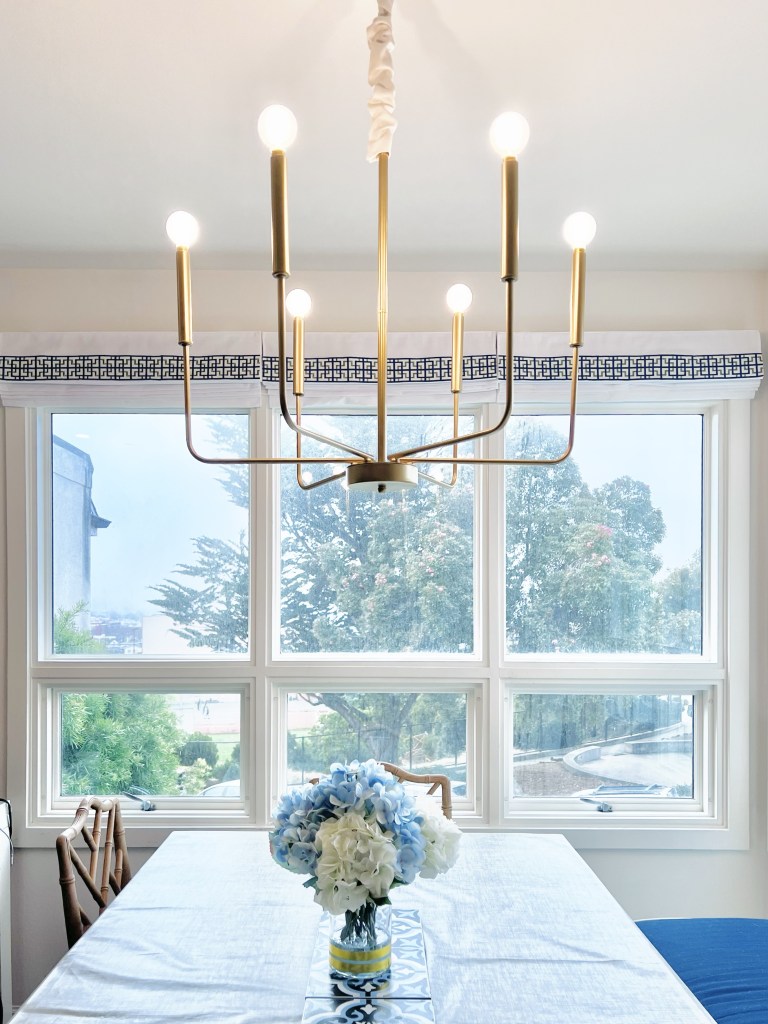
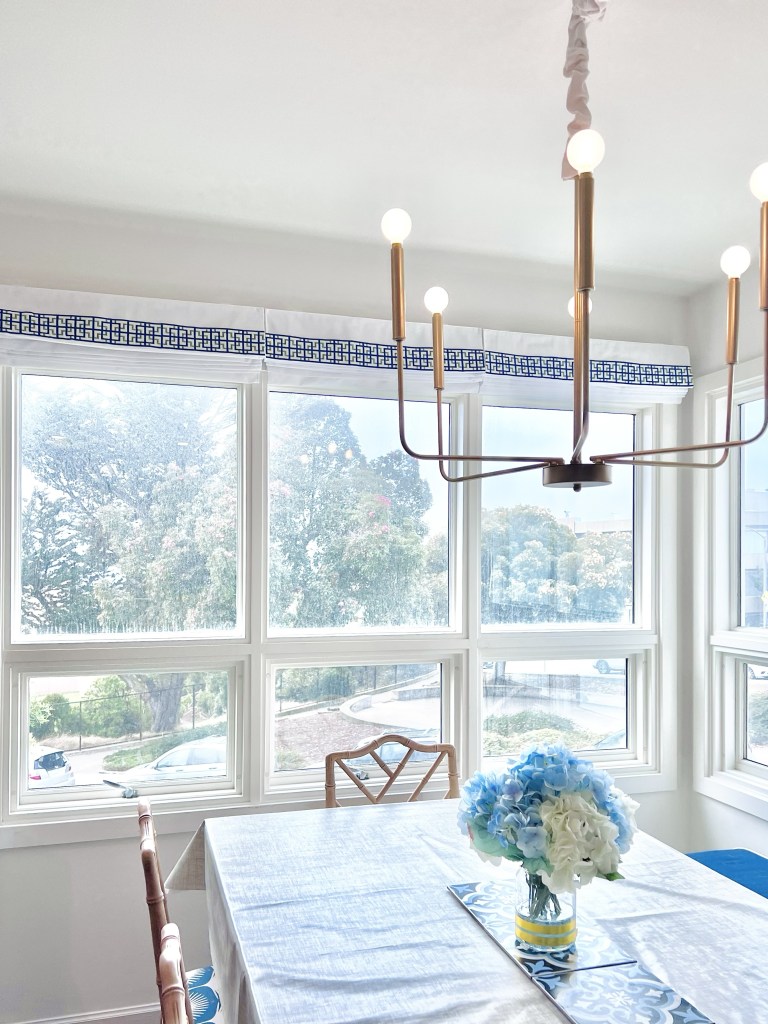
“Elegant and Airy” is my inspiration for our dining room. One of the projects was to switch out the Roman shades. I wanted something more formal-looking, and I also wanted to install my shades above the windows – a classic tip to make your windows feel larger and let all the natural light come in! I love the look of ribbon-trimmed shades and decided to customize my own. I’ve done this before adding trim along the sides and bottom of Roman shades for our kids’ room and a Greek key pattern on shades in my bathroom in our old house.
Here’s What You’ll Need
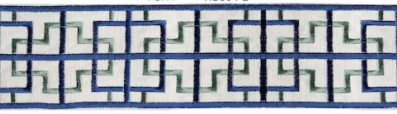
- Ribbon – I chose this blue and green ribbon trim from Romeo Home Store on Etsy
- Heat ‘n Bond Ultra Hold Iron-on Adhesive
- Clear nail polish or Fray Check
- Plain Roman shades – I tried three different shade options, and I’ll review and compare them below
I tried a few different shade options. All are cordless and light-filtering. I liked the fabric of the Sunfree shades the most, but I ended up choosing the Lumi shades, because they had the highest quality construction, and I liked the valance feature.
Of course, your needs may differ from mine – I’d recommend ordering just one sample shade to check it out, as you may need to try a few to find the one you want to use – as I learned from experience!
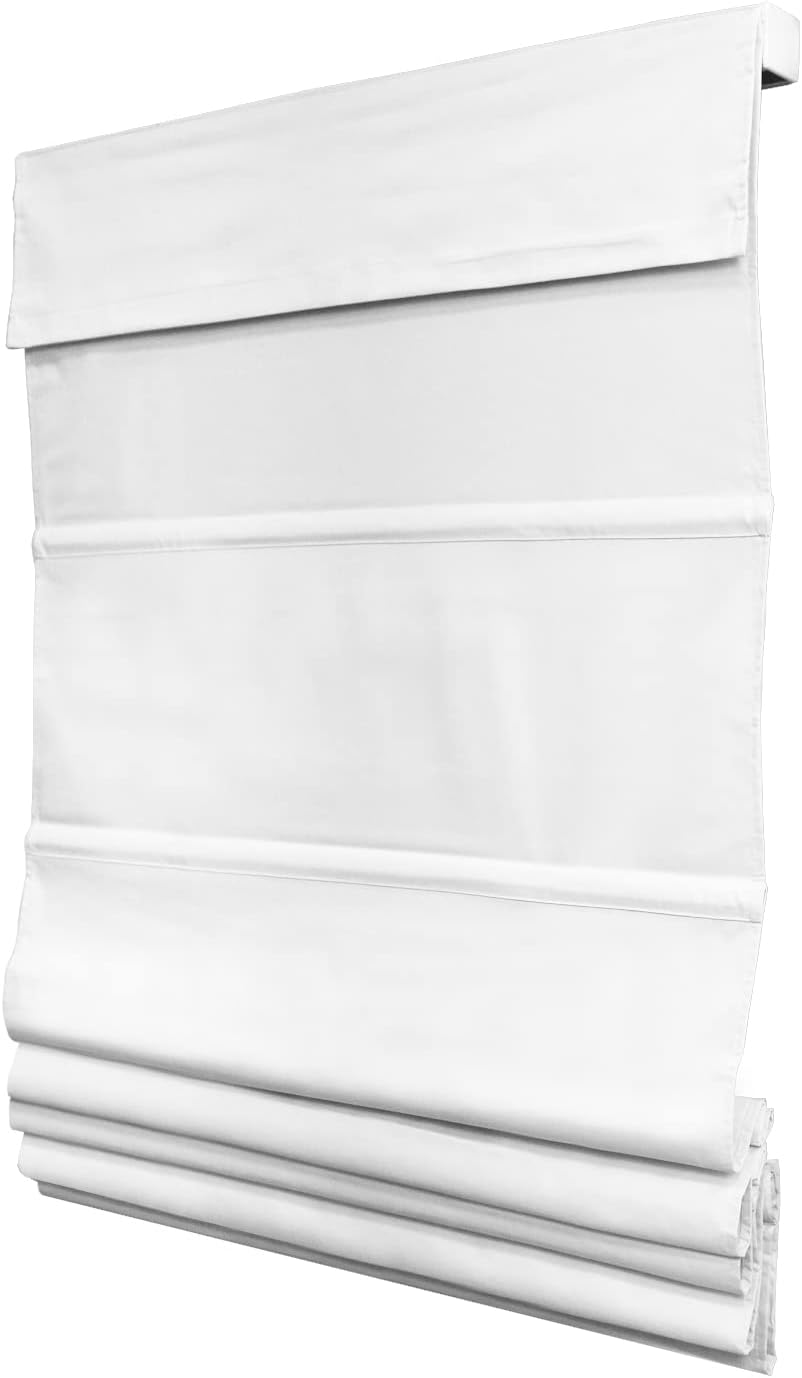
Cordless light-filtering shade from Lumi * My pick!
- pure white
- simple fabric with matte finish
- Nicely finished and includes valance!
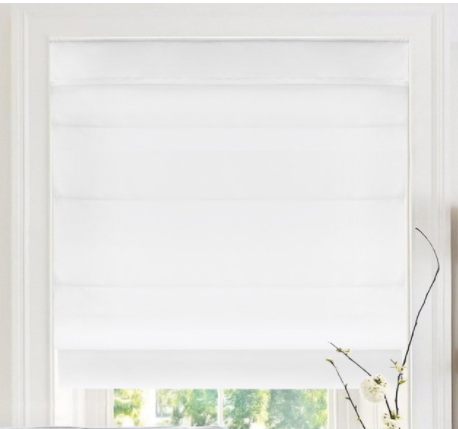
White linen-look Roman shades from Chicology
- bright white
- fabric had coarse, shiny synthetic finish
- Seams had large, visible stitching
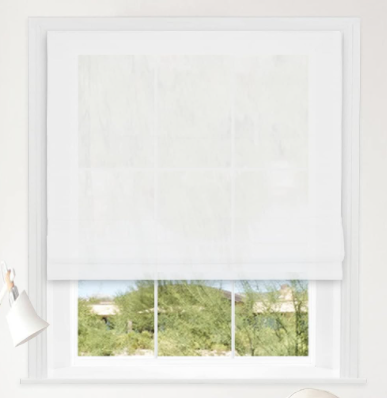
Sunfree Light-Filtering Roman Shades
- warm white/ ivory
- synthetic fabric with natural woven texture
- some puckering at the seams
Here’s How To Do It
- Iron the Heat ‘n Bond Ultra Hold Iron-on Adhesive on to the back of your ribbon
- Iron the ribbon into place on the shade – I chose to put a simple band across the valance, but you could also add trim along the sides and bottom like these shades I made for our kids’ room or a Greek key pattern on shades like I did in my bathroom in our old house
- Apply Fray Check or nail polish to edges of the ribbon
- Install your shades! To do my outside mount, I had do add blocks behind the shade brackets, so the shades would hant in the
Let’s finish this post with a walk down memory lane to the Roman shades I customized with trim along the sides and bottom:


And the Greek key pattern on shades from my bathroom in our old house


I’ll keep posting progress updates on Instagram and a weekly post here with more details! I’m enjoying this project as well as checking out the other participants’ awesome posts. You can follow the whole event on the One Room Challenge website!
Julie AKA “Jewels”

Pingback: DIY Built-in Dining Banquette – Week Four – Fall 2023 One Room Challenge | Jewels at Home
Pingback: DIY Dining Banquette Cushions – Week Five – Fall 2023 One Room Challenge | Jewels at Home
Pingback: DIY Built-in Desk – Week Seven – Fall 2023 One Room Challenge | Jewels at Home
Pingback: Dining Room Bar and Final Look – Week Eight – Fall 2023 One Room Challenge | Jewels at Home