It’s graduation season! Somehow (well, I guess we know how), I ended up with boys graduating from middle school, elementary school, and Kindergarten all in one year. This calls for some crafting. I decided to make graduation leis for the boys and their friends using ribbon.

I researched a ton of ideas, which you can browse on my Pinterest page. Some of those ideas are definitely for the expert level lei-maker, and I am a humble beginner. However, I did find inspiration for something that is both easy and pretty over at Sakacon.com. These spiral ribbon leis don’t require advanced skills, but they do take some time. I modified the method a little, and I love how you can mix and match so many ribbons for infinite ideas!
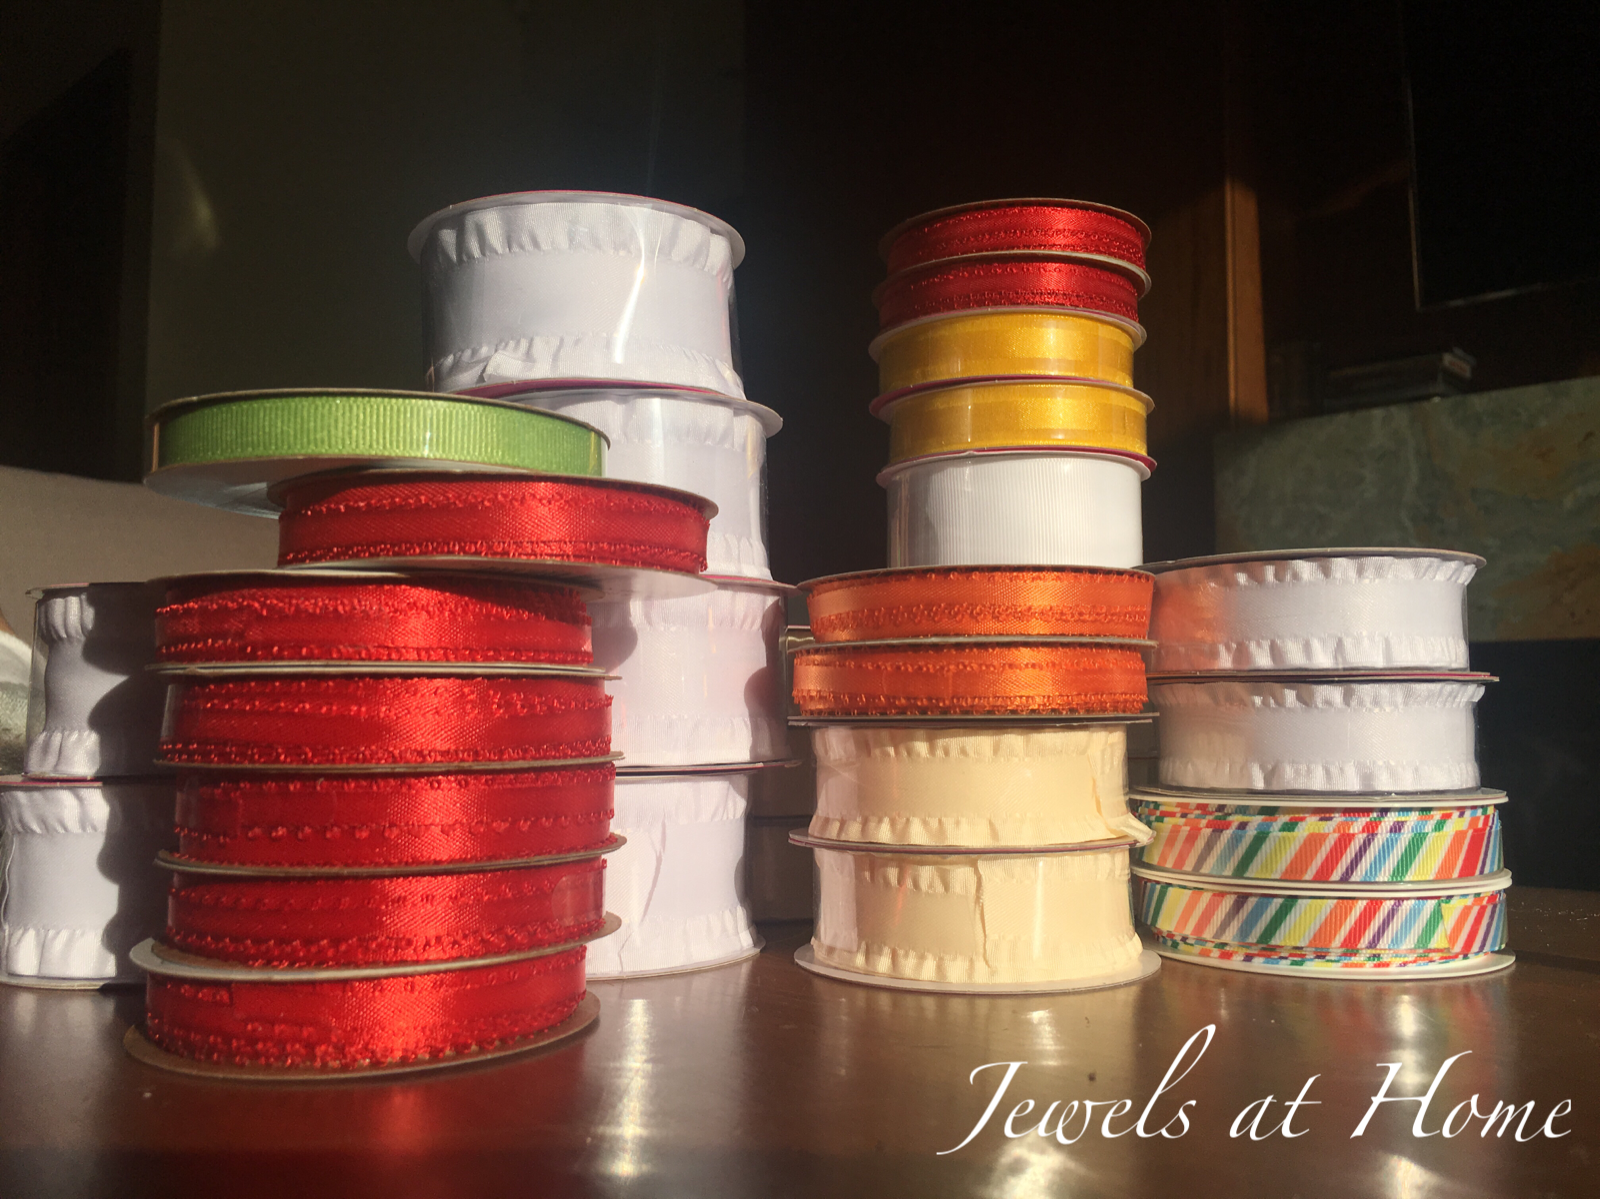
Materials:
- wide ribbon 7/8″ to 1.5″ (8-10 yards). This is the ruffle-edge ribbon I used.
- narrower accent ribbon(s) 3/16″ to 1/2″ (same yardage). This is the picot ribbon I used.
- embroidery floss to match the accent ribbon
- clear nail polish to finish the ends of the ribbon
- needle, scissors
Instructions:
First, go to your local craft store and go crazy! I actually feel like I have accomplished a project just by getting supplies (…but I realize this isn’t quite true). Since the design of the leis is simple, you can add a lot of detail by picking interesting ribbons. You can see i found some ribbons with ruffled edges and picot ribbon (apparently this is what you call the ribbon with the little loops in the side) that really make your “flowers” look more realistic. For fun, I bought some rainbow stripe ribbon, and the possibilities are really endless.
To make the lei, thread three strands of embroidery floss onto your needle. I used about 18″ of floss at a time. Tie a secure knot at the end of your floss.
The Sakacon version has a long tail you can use to tie the lei on with a bow. I decided to make a continuous round lei, because I thought it would be more comfortable for the boys. I still staggered the length of the wide and narrow ribbons – ie left a long tail of the wide ribbon before starting my lei – so there would not be an obvious join in the lei.
I lined up the narrow ribbon to one side of the wide ribbon, folding under the edge to avoid fraying, and sewed a few stitches in place to secure it. I then started doing a long running stitch, with stitches every centimeter (3/8″) or so.

Once you have sewn a few stitches, pull the thread to make the ruffles and guide them into a spiral shape to look like a chain of flowers. This really feels like magic!
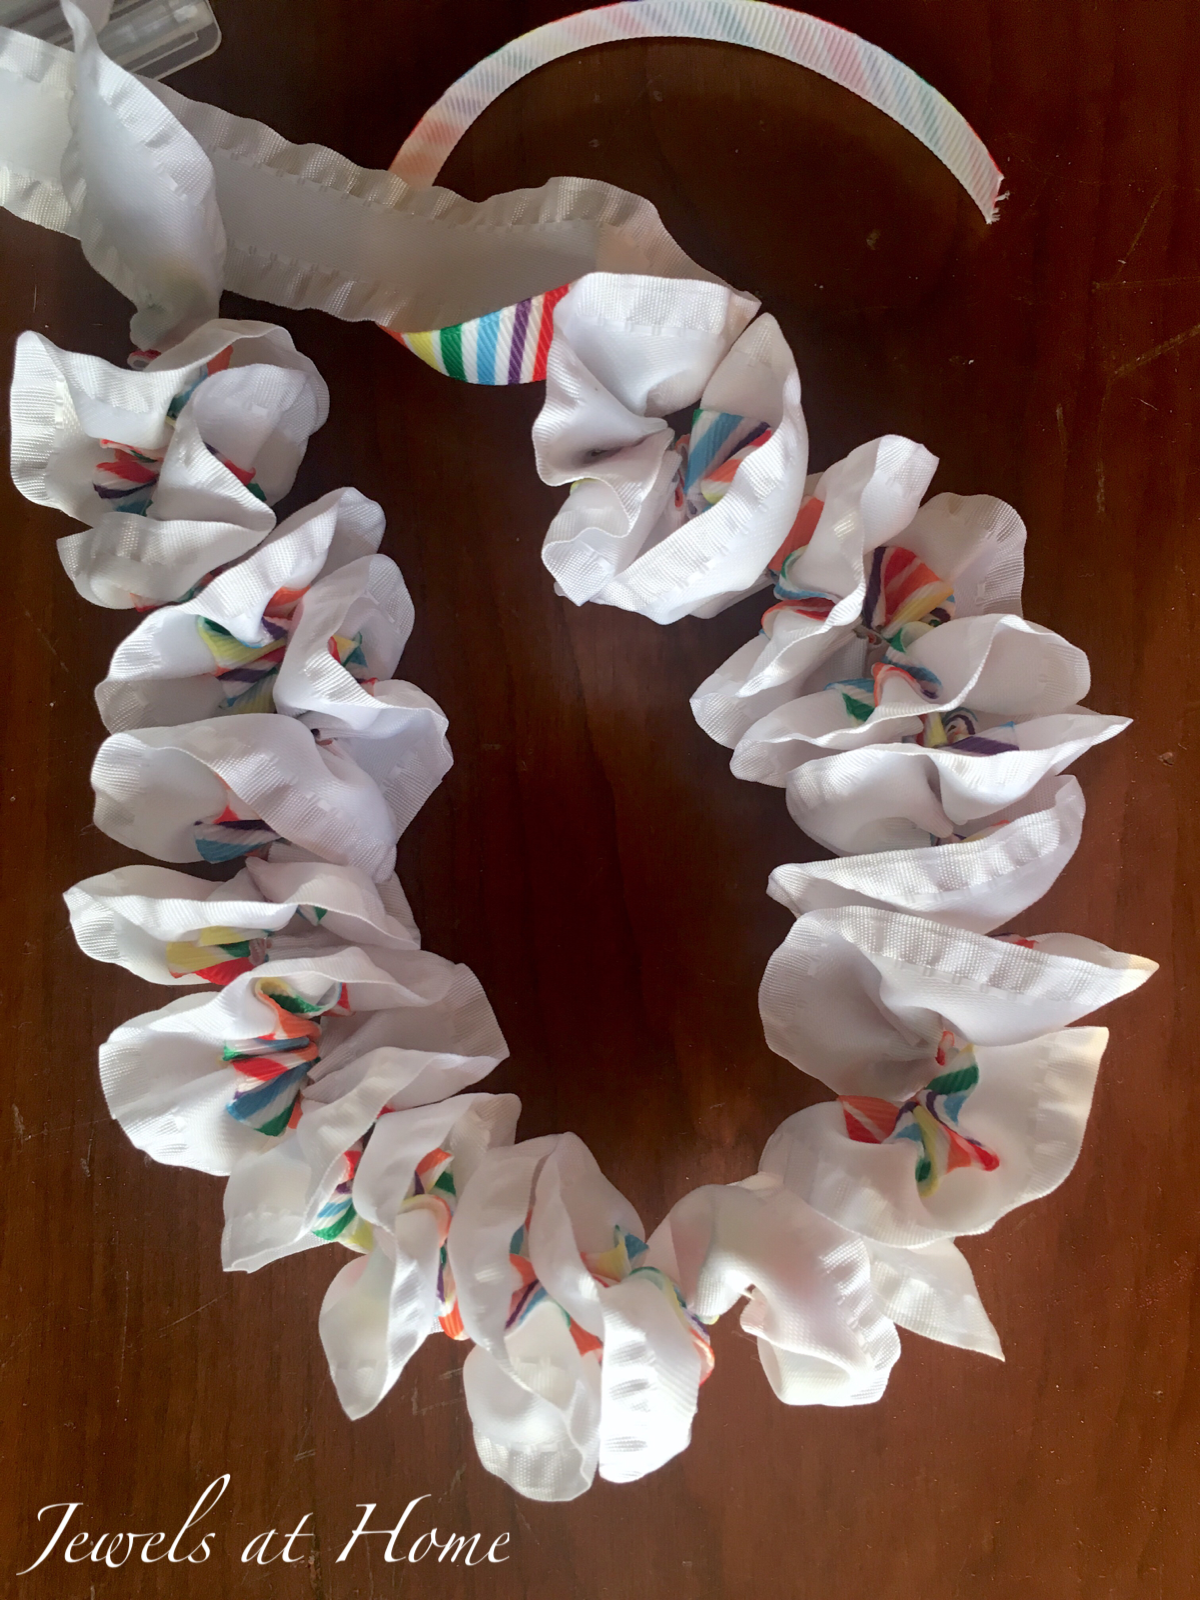
You basically continue this for a long, long time. To make the lei a continuous loop, I cut off the wide ribbon first, and picked up the section of wide ribbon I had left as a “tail” at the beginning, continuing I until I reached the start of the narrow ribbon.
I bought spools of craft ribbon, which comes in 3-6 yard sections, so there are several joins in the lei. These aren’t visible, because the ribbons are staggered, and there are so many ruffles. At the ends of the ribbon, I used clear nail polish on the wide ribbon and just folded under the ends of the narrow ribbon. I also changed embroidery floss a few times, being sure to tie secure knots and hide the ends.
Behold! Here are the finished leis. I’m still making more and will add the pictures when they are done, to give you more ideas for ribbon combinations. I can’t wait to share them with my boys and their friends in a few more weeks!


Aloha!
“Jewels”


