I love little changes that make a big difference! No, this is not a new bed – just an easy-to-sew slipcover for our headboard. I have been creating a light and neutral look in our bedroom, but something wasn’t quite right – and this new headboard slipcover has been the solution! Even a bright space needs to be grounded, and this dark and luxurious focal point does just that.

You might remember that I made a grey velvet slipcover for our headboard a few years ago. It’s fun to have an easy way to change things up!
What you’ll need:
- A blue velvet quilt. I found mine on eBay, but here are a couple of similar options:
-
- You could probably find more options in the fall or winter, but I am the weirdo who went shopping for a velvet quilt in spring…
- Sewing machine, thread, scissors
How to do it:
- So, I seriously should have read my own post about the other slipcover, and this would saved me some extra work, but you know, why make things easy?
- Here’s how I did it last time, which is easier, though the sides of the slipcover look slightly less finished, because there is a seam up the middle of the side:
-
- I measured the headboard and added 2″ to the height and 5″ to the width to create my pattern. I used the finished edges of my quilt for the bottom opening.
-
- With right sides facing, I sewed the sides and top seams of the slipcover. Then, I carefully cut away some batting from the seam allowance, so the seams would be less bulky. I squared off the top corners, and this easy project was finished!
- And… here’s how I did it this time, because apparently I get less clever with age. Or, you know the old saying, “Measure twice, cut once” and its corollary, “Measure once, add a gusset”
-
- Measure the headboard and add two inches to the height and width to cut out the front and back pieces
-
- Sew the front and back together along the top seam
-
- (Discover that there is not nearly enough fabric to wrap around the sides. Panic a little. Then realize you can add a strip of fabric to the sides)
-
- Cut out the side strips that are width of the side + 1.5″. Sew this strip to the front and back, leaving the top open. Fold the side strip under the top, and sew the top seam
-
- This version actually looks nicer, with a finished side, so I guess there is truth to that other old saying, “Necessity is the mother of invention,” also known as “Messing up is the mother of invention.”
Here’s a picture of the unplanned side gusset, which gives the headboard a finished look:

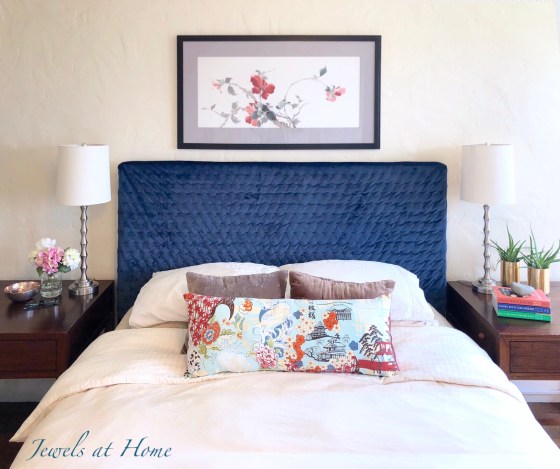
And some more pictures of the new headboard, which really changes the look of the whole bed! Blue and white is such a classic combination, and the pink throw pillow ties in the painting above our bed, which was done by my mom.

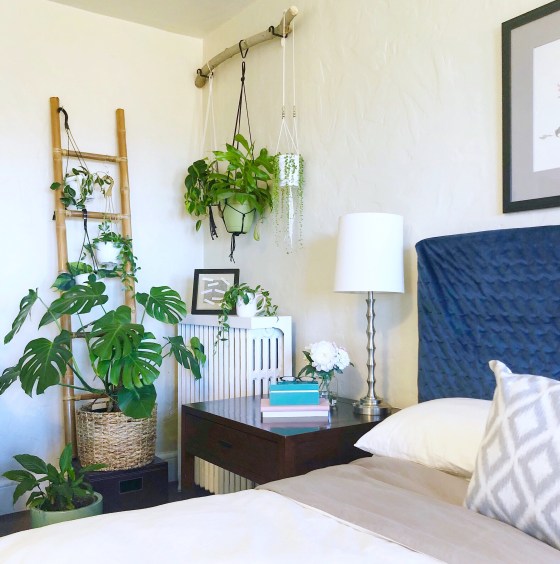
I think we have masted the his-and-hers night stand accessories… Can you guess which side is whose? Oddly, something about having three boys has made me love the color pink!

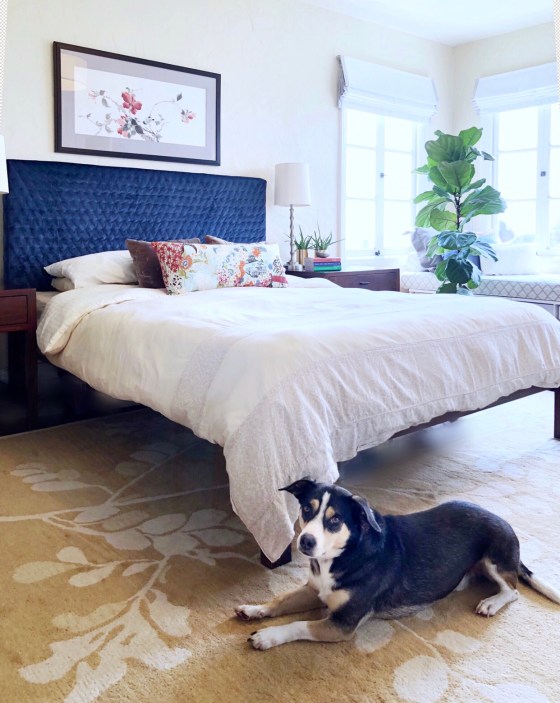
And no room is complete without one (or two) of my beloved fiddle leaf fig plants. They love this south-west corner of our house. You can check out my posts on pruning and propagating these lovelies.

Are you ready for a mini-makeover for your bedroom?
“Jewels”

Pingback: DIY Hanging Pillow Headboard | Jewels at Home
Pingback: DIY Caned Cabinet Doors | Jewels at Home
Pingback: A Boy’s Room in Blue Full of DIY Treasures | Jewels at Home