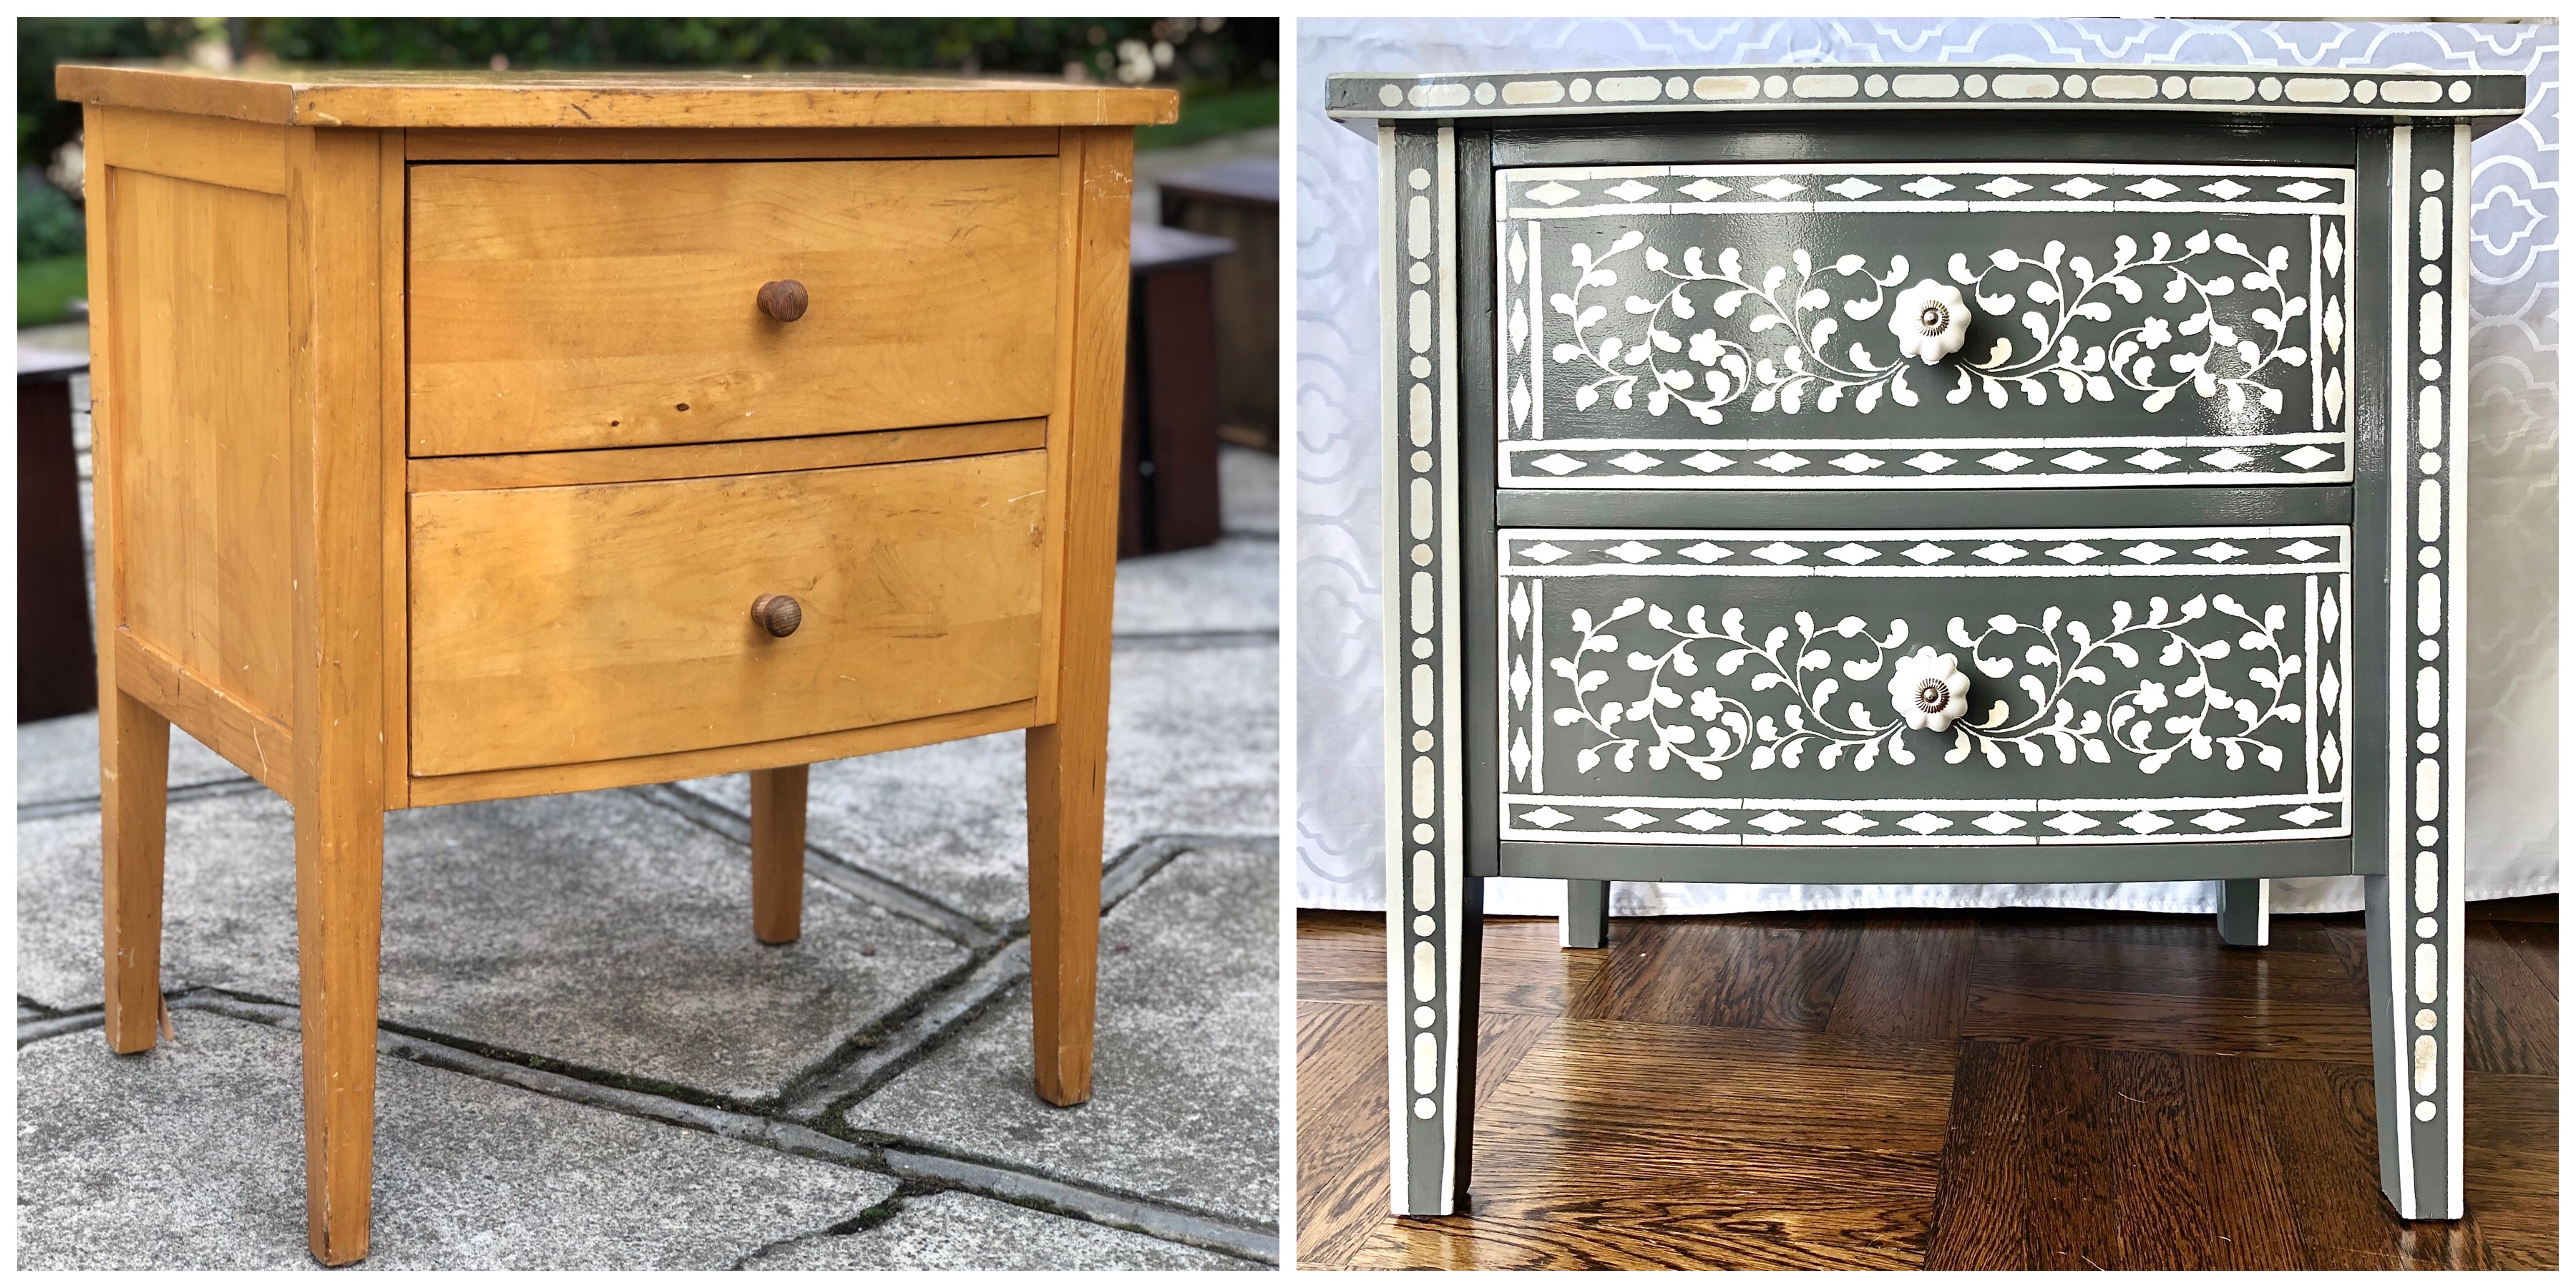
Here is the third and final (for now) installment of my dresser painting trilogy. First was the mid-century dresser; next came the faux campaign dresser; and last but not least is this faux bone inlay project!
If you are thinking of trying this project, I’m not sure if I should tell you to keep reading or run away. This project took such a long time (like rewatching-three-seasons-of-Mad-Men-long-time) and involved a ton of washing of stencils and brushes and patient touch-up. I started to joke that it would have been easier to carve actual bone, but that seems like an exaggeration, in retrospect. It just felt that way… Anyway, I would file this under Extreme DIYing, but it was satisfying to finish, and I am very happy with the results!
If you are still reading…
Here’s what you’ll need:
- High quality paint brush
- 4” foam paint roller set or try out this amazing painting pad I found – it paints quickly and gives a great smooth finish!
- Stencil sponges and fine paint brushes for stenciling and touch-ups
- Rags
- gloves
- TSP or other deglossing solution
- Sandpaper – medium and fine grit
- Bonding primer designed for slick surfaces
- Flat latex paint for the base color
- Flat latex paint and/or craft paints in white/ off-white/ gold for the stencils
- Painter’s Tape
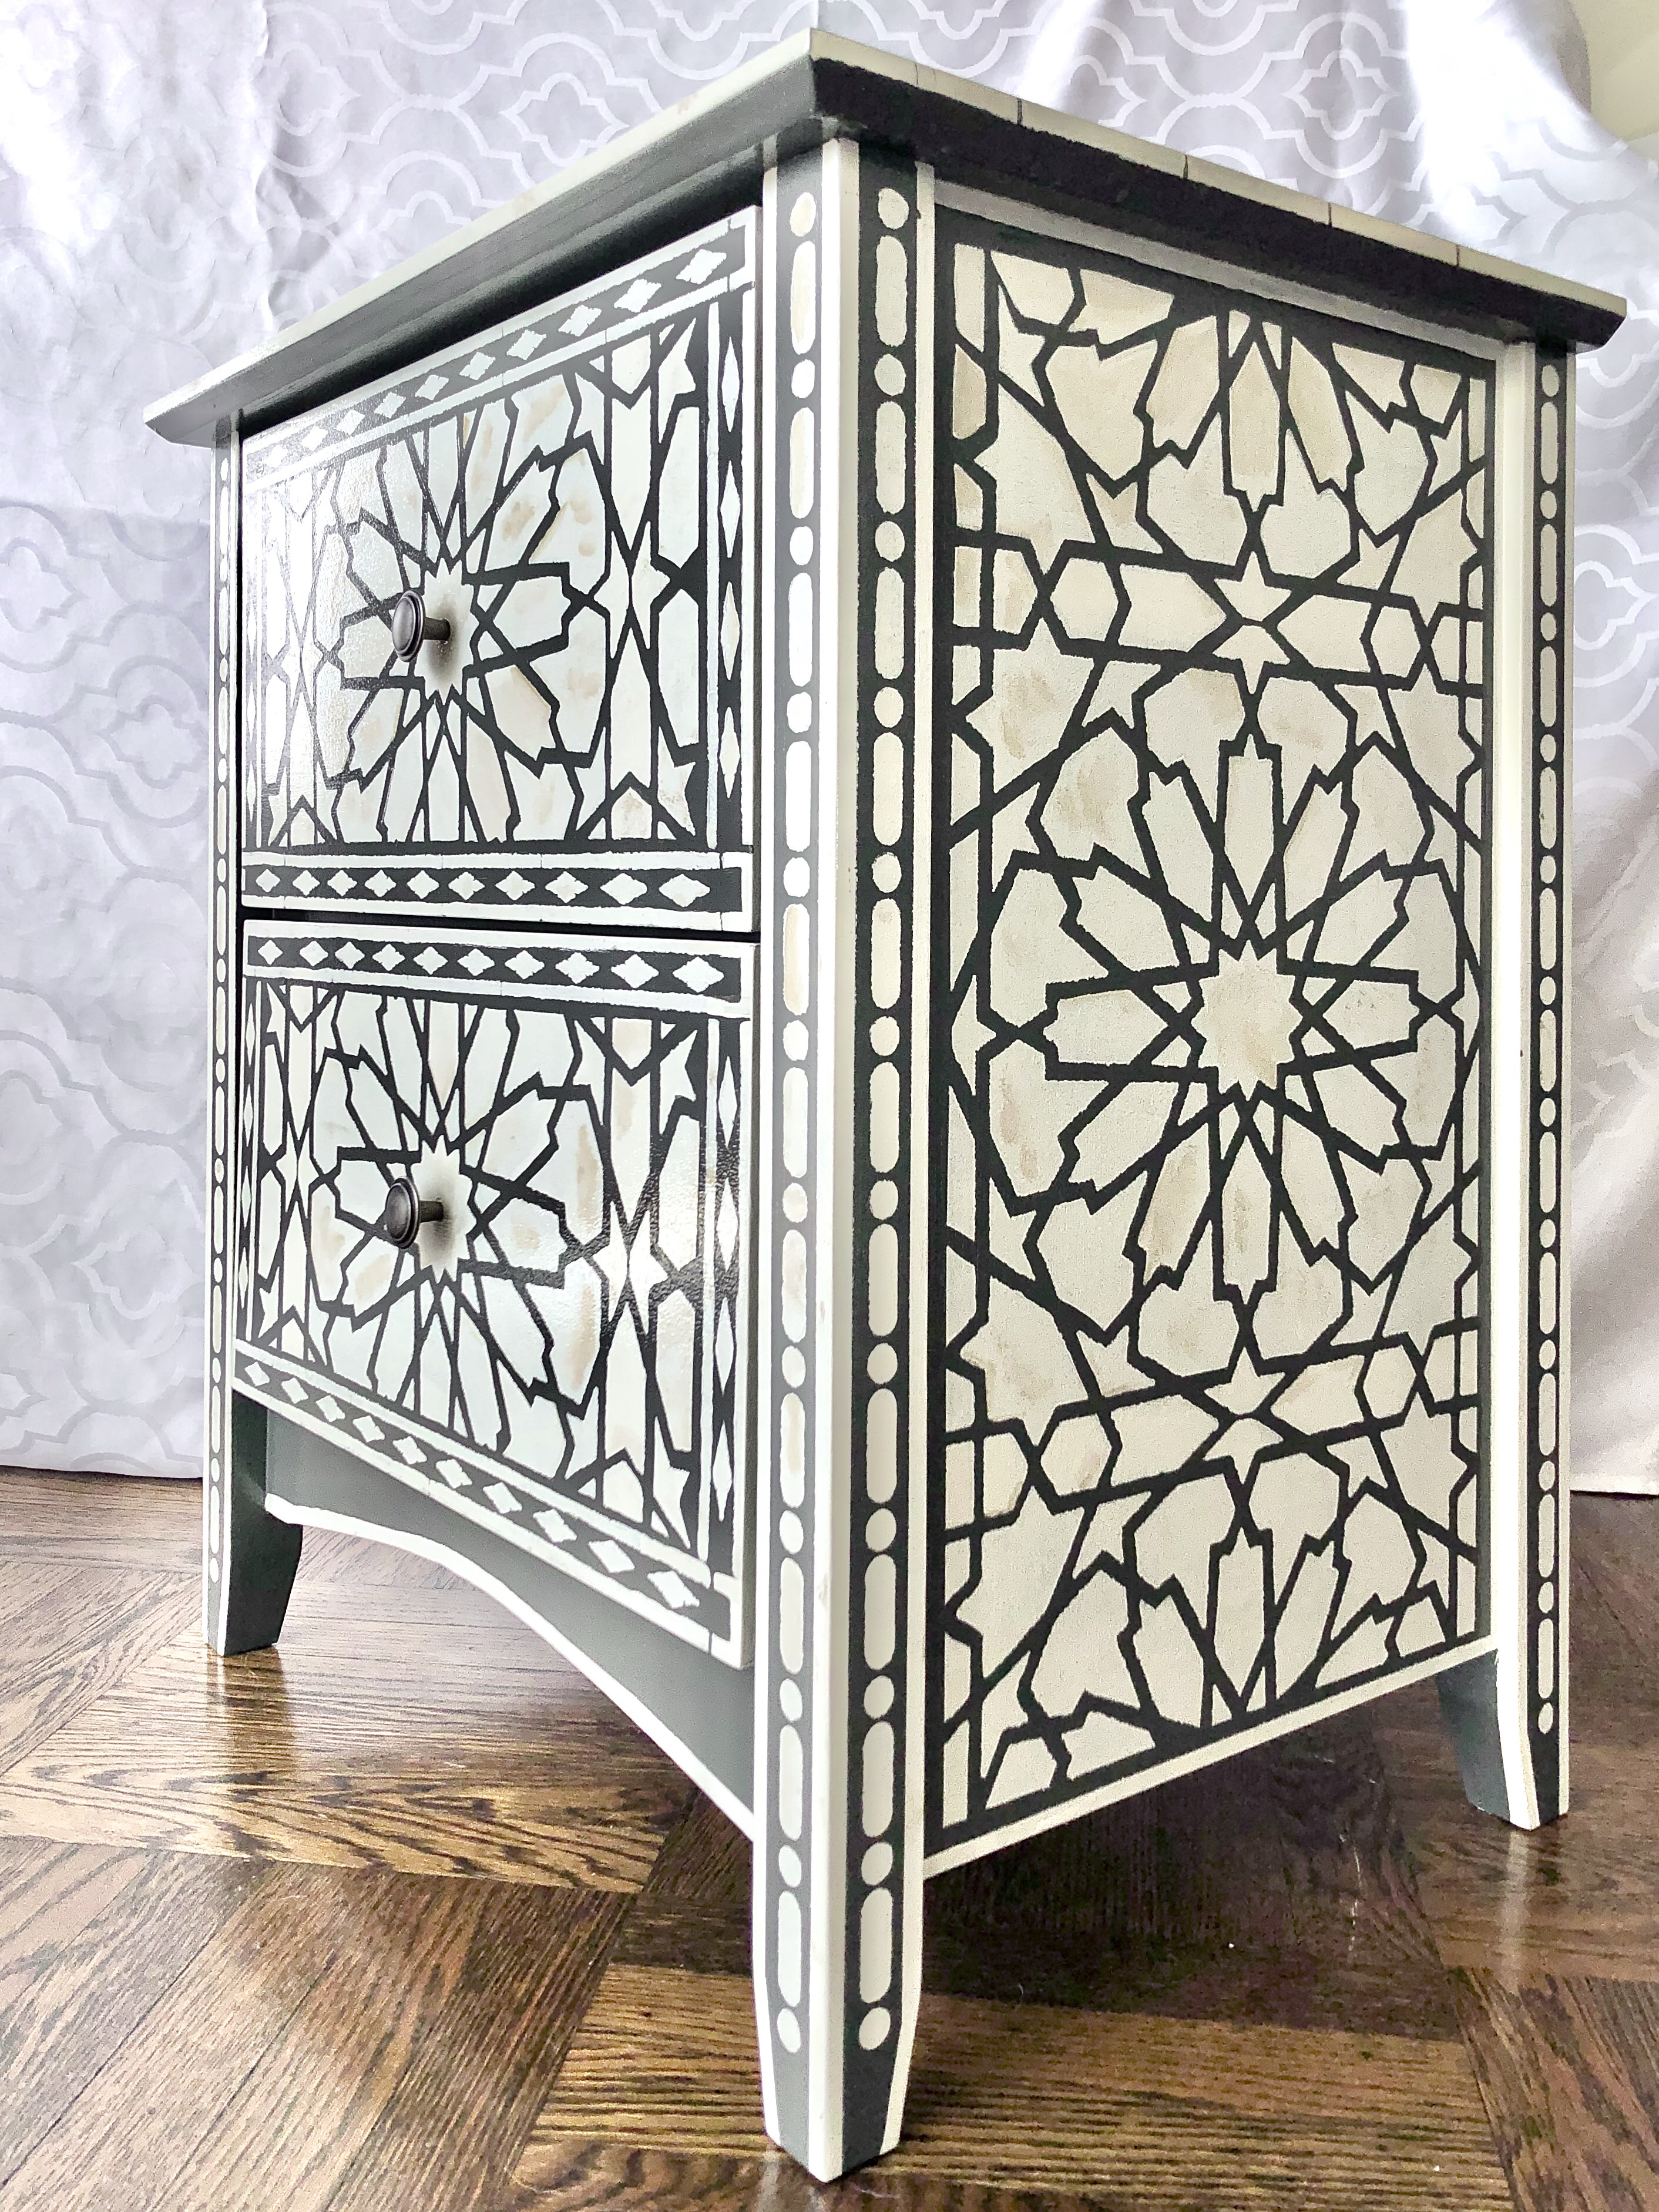
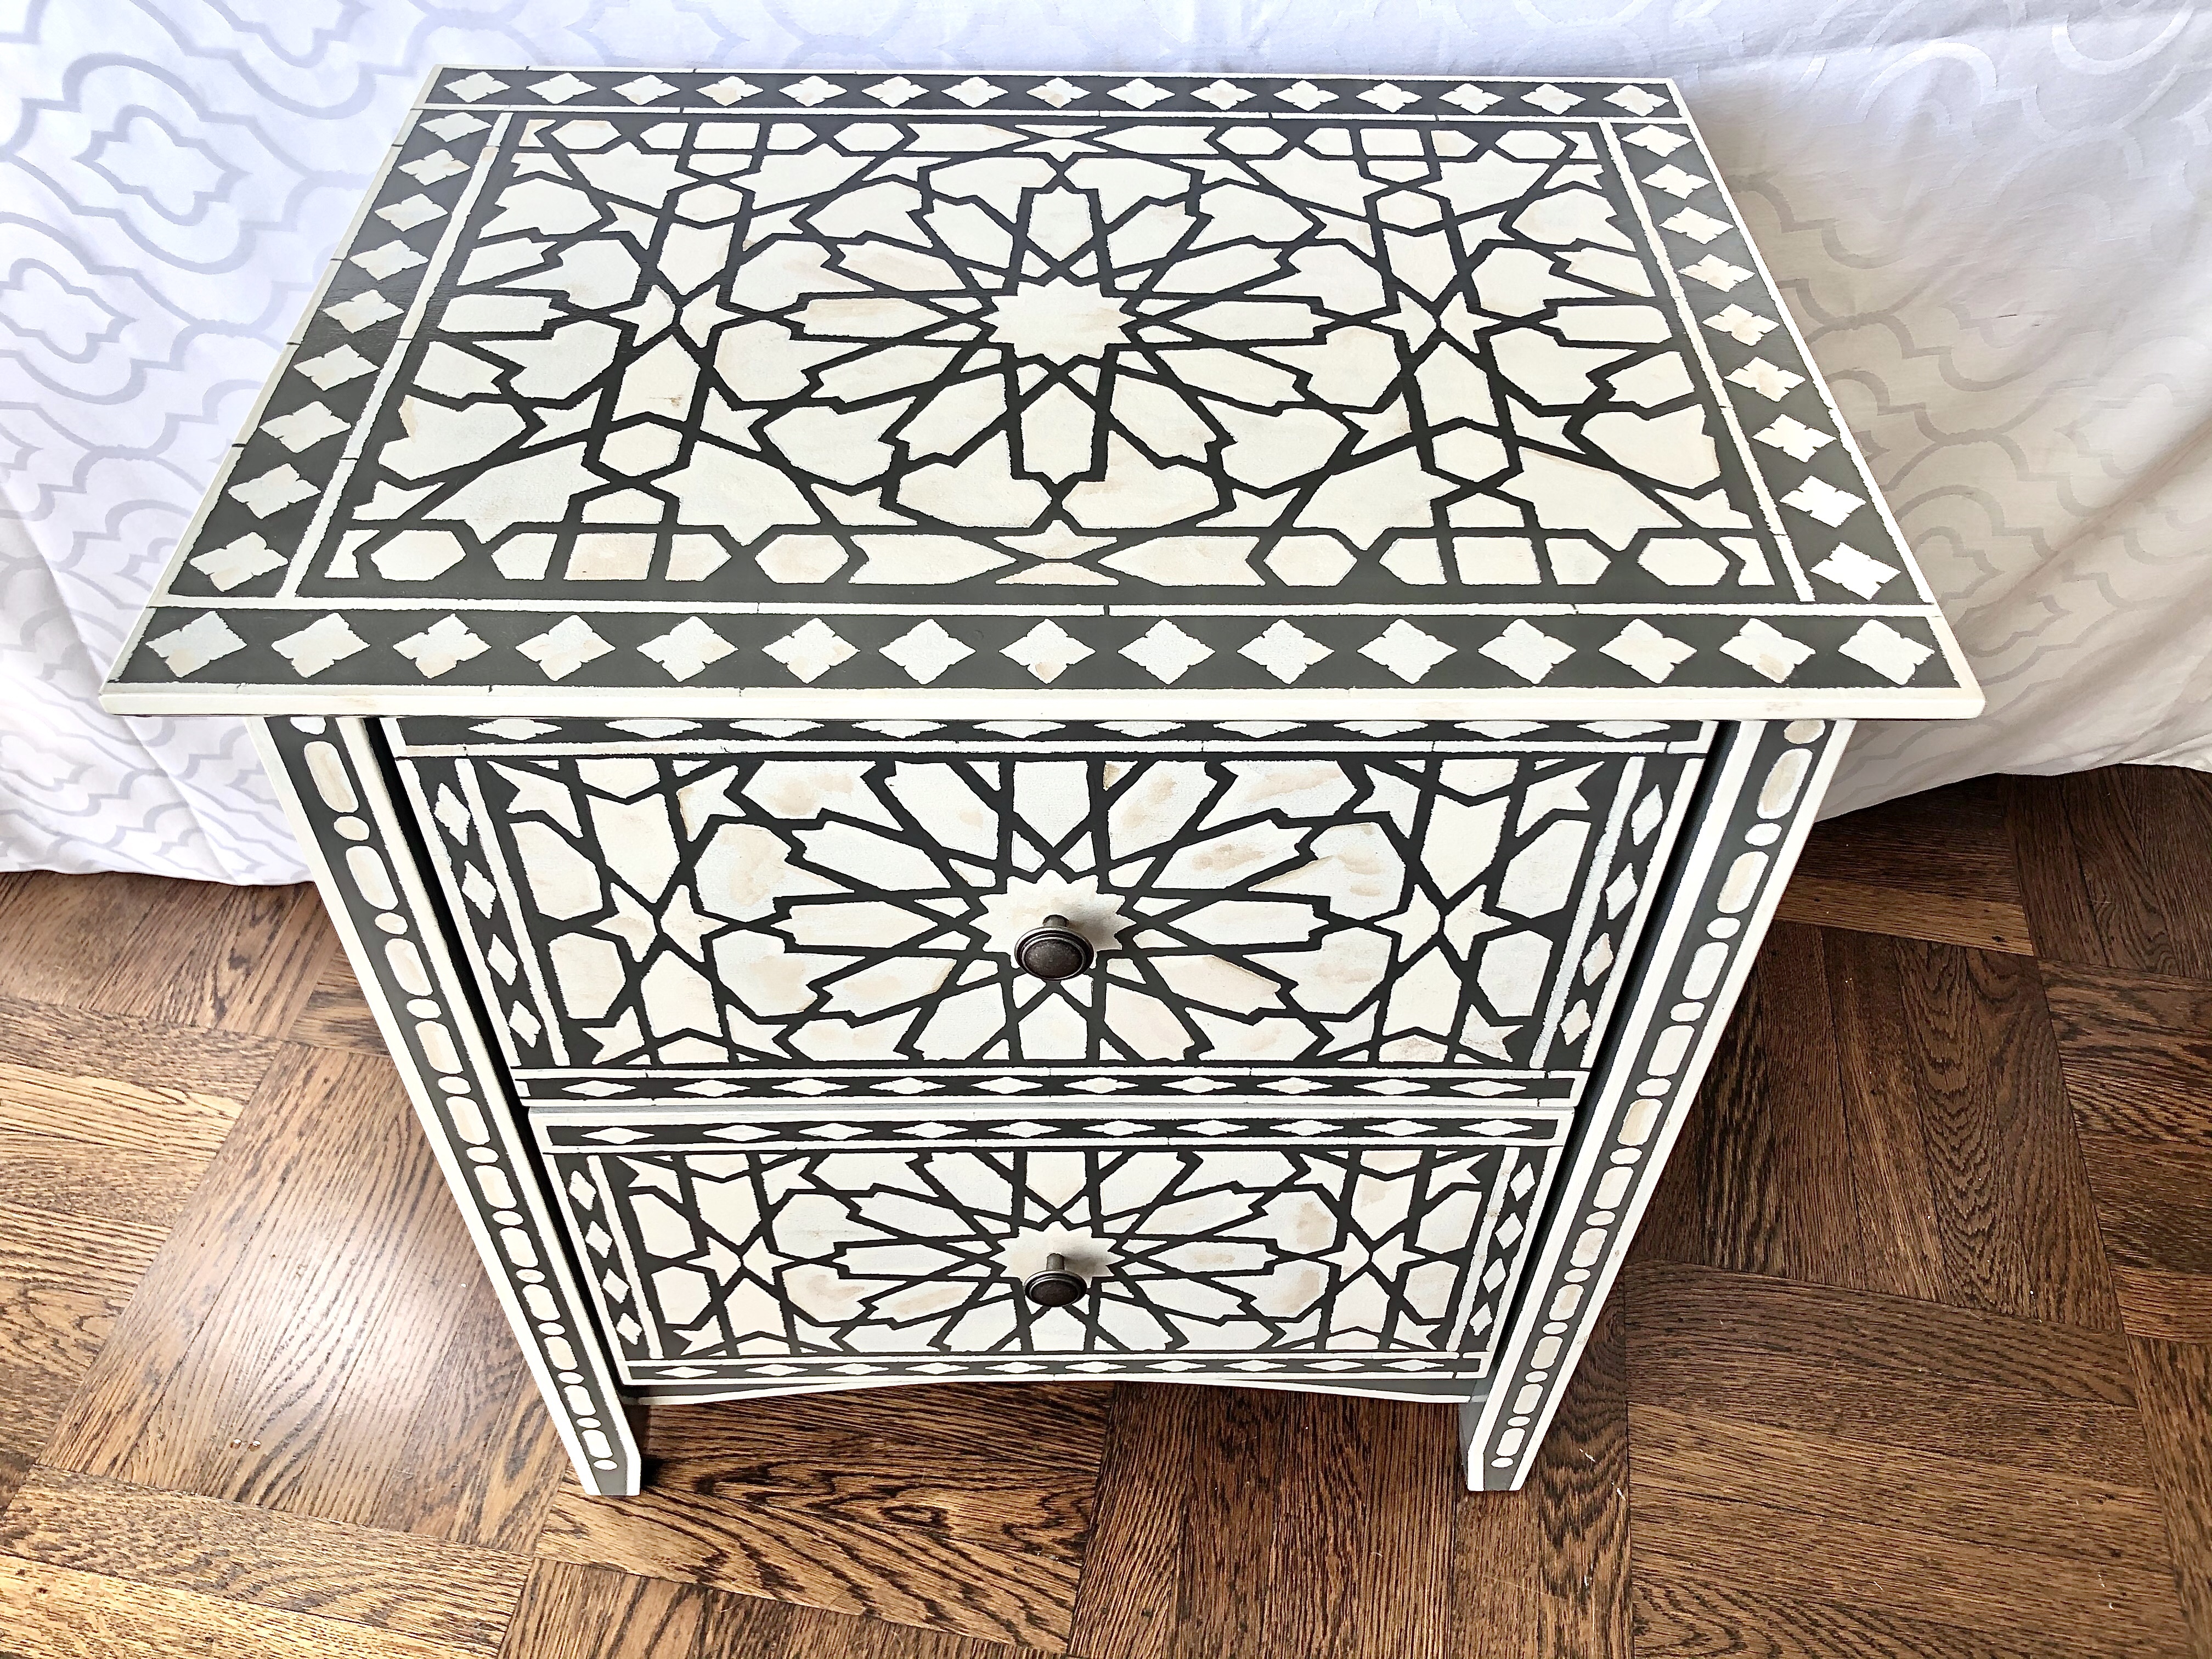
- Stencils – I got mine from Cutting Edge Stencils. I used the Indian Inlay stencil set and the Morrocan Tile I had from when I stenciled tote bags
- Clear polyurethane sealer
- If you want, new drawer knobs – I used this style, called pumpkin knobs
Prepping Your Dressers:
- Clean off dirt and dust
- Remove drawer pulls
- If you are changing hardware, fill in the old holes and drill the new ones
- Wipe with surface with deglosser such as Gloss-off or TSP
- Apply the primer using a brush for small corners or details, followed by the roller or paint pad for as smooth a finish as possible. I did two coats of primer and let it dry thoroughly overnight
- Sand lightly with 400 grit sandpaper and wipe off dust with a rag
- Paint two coats of flat latex paint using your brush and roller or painting pad and let dry thoroughly
Stenciling Tips:
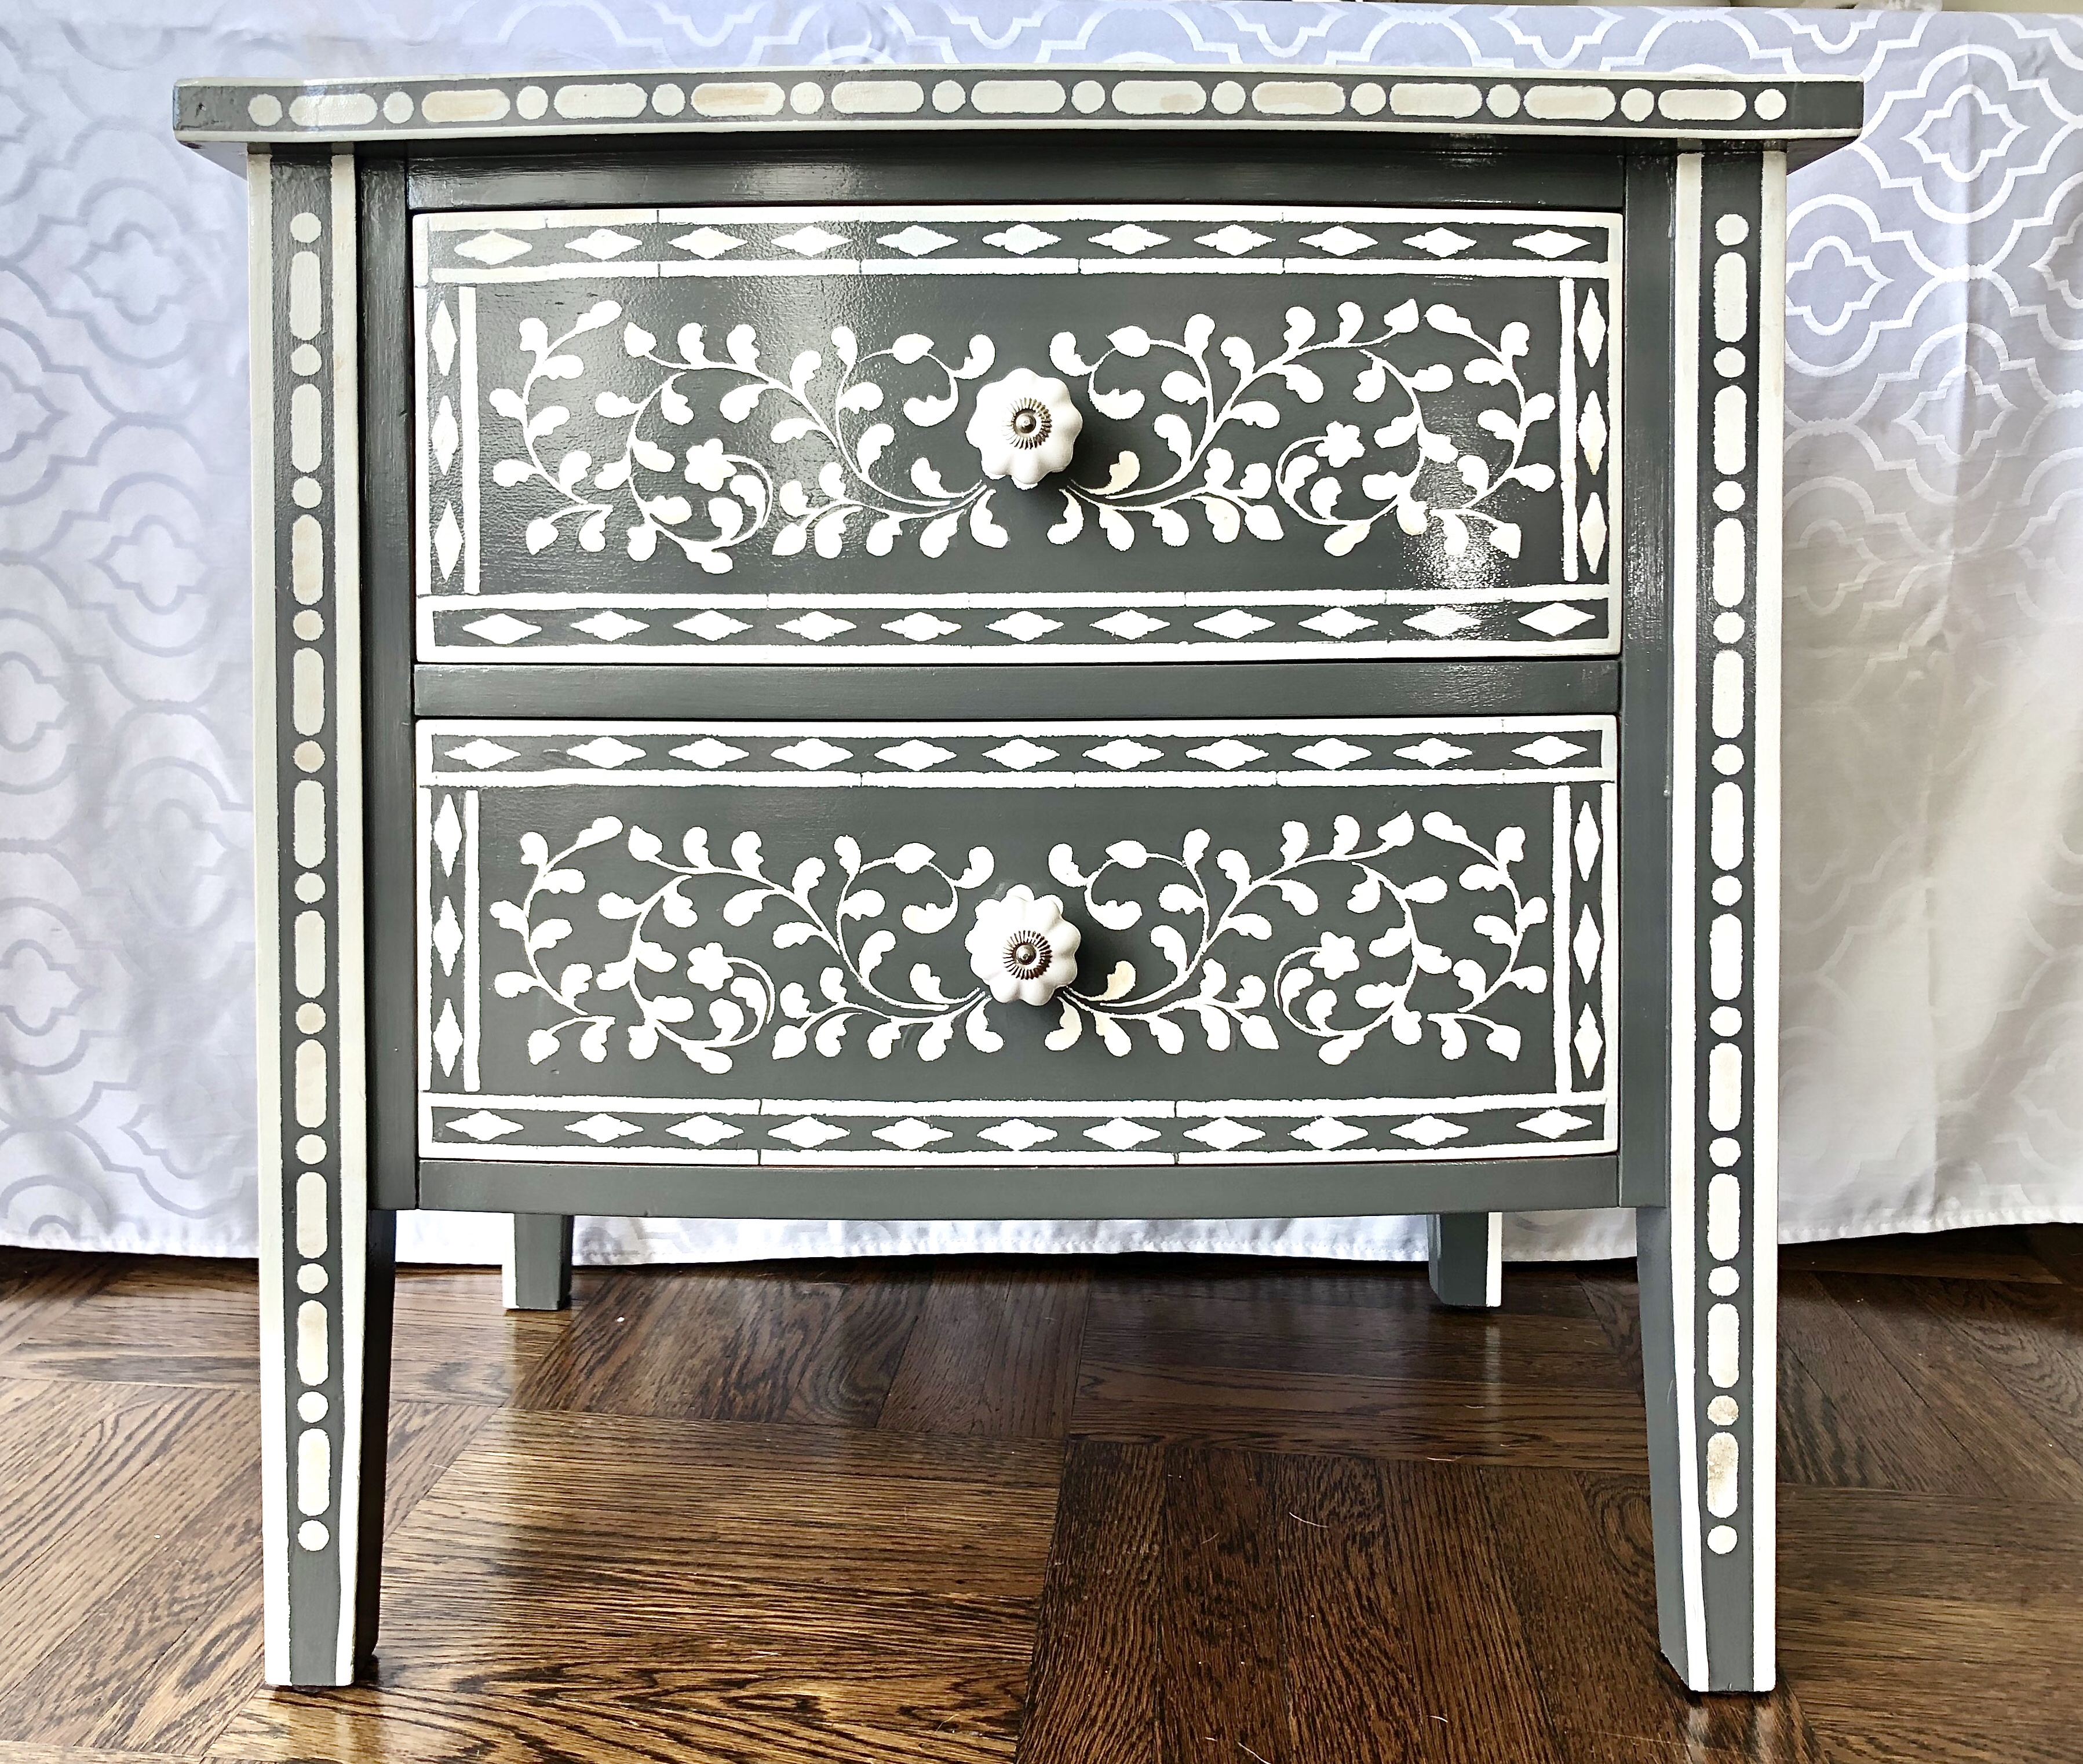
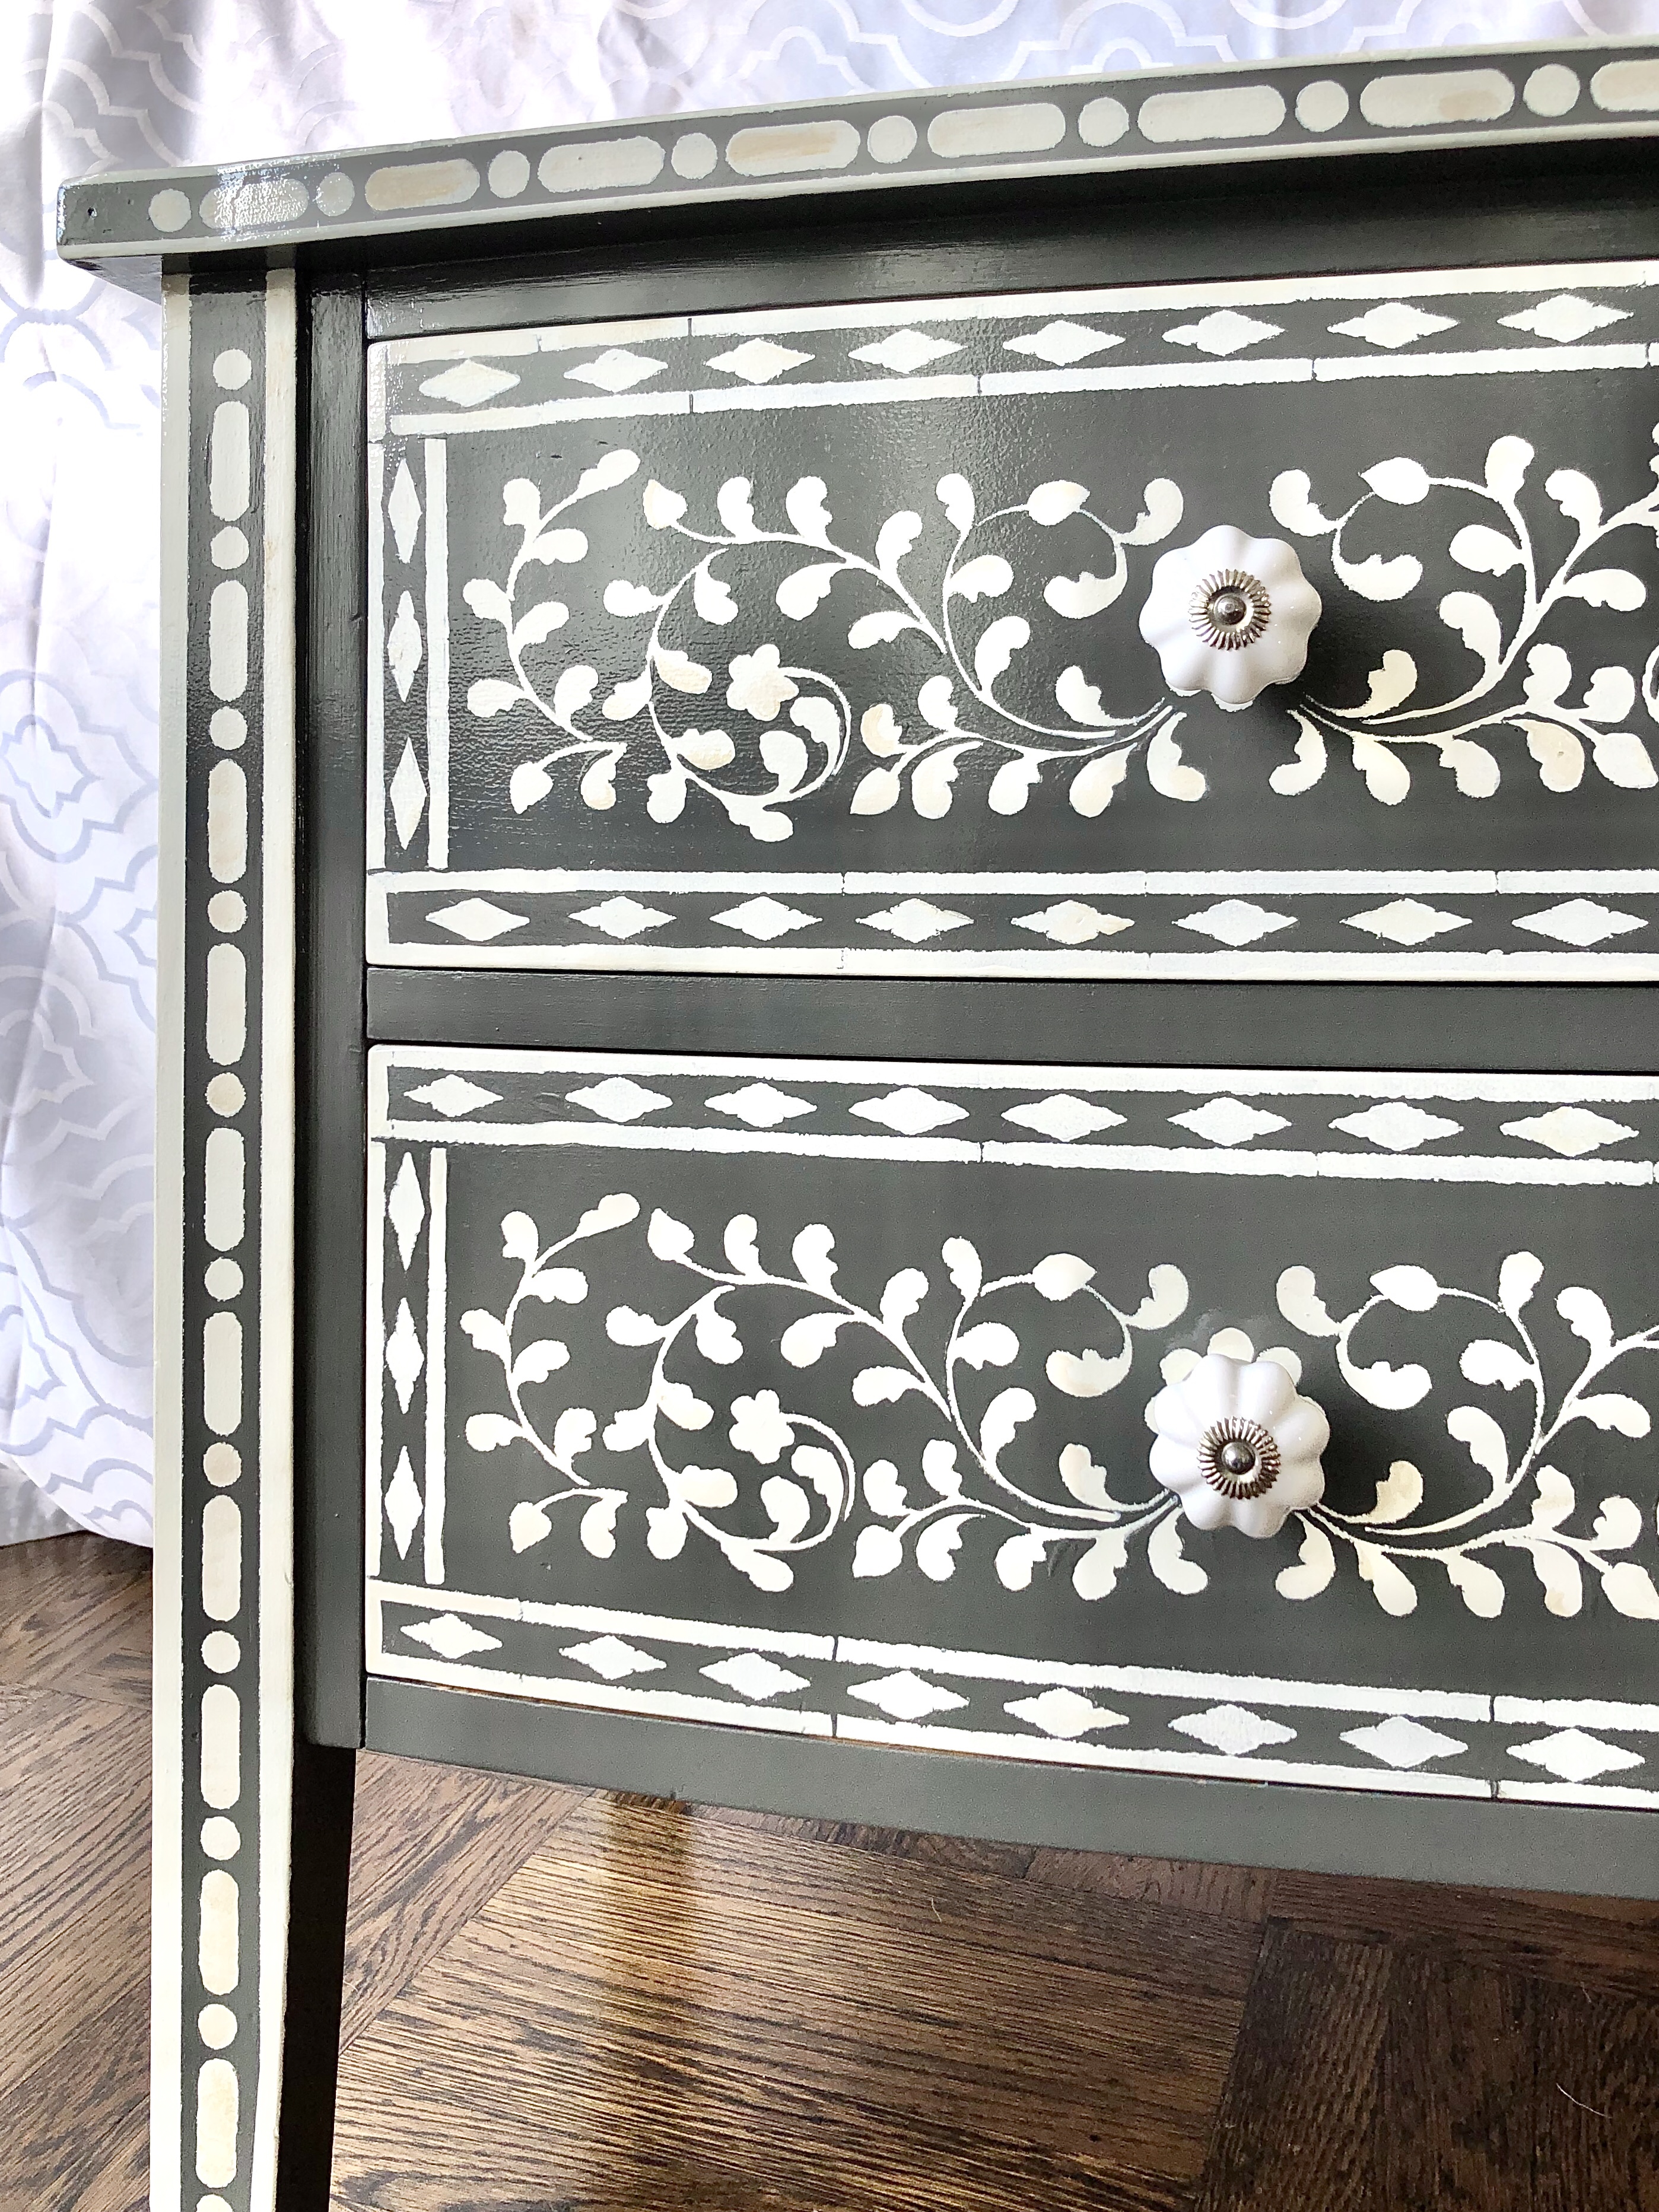
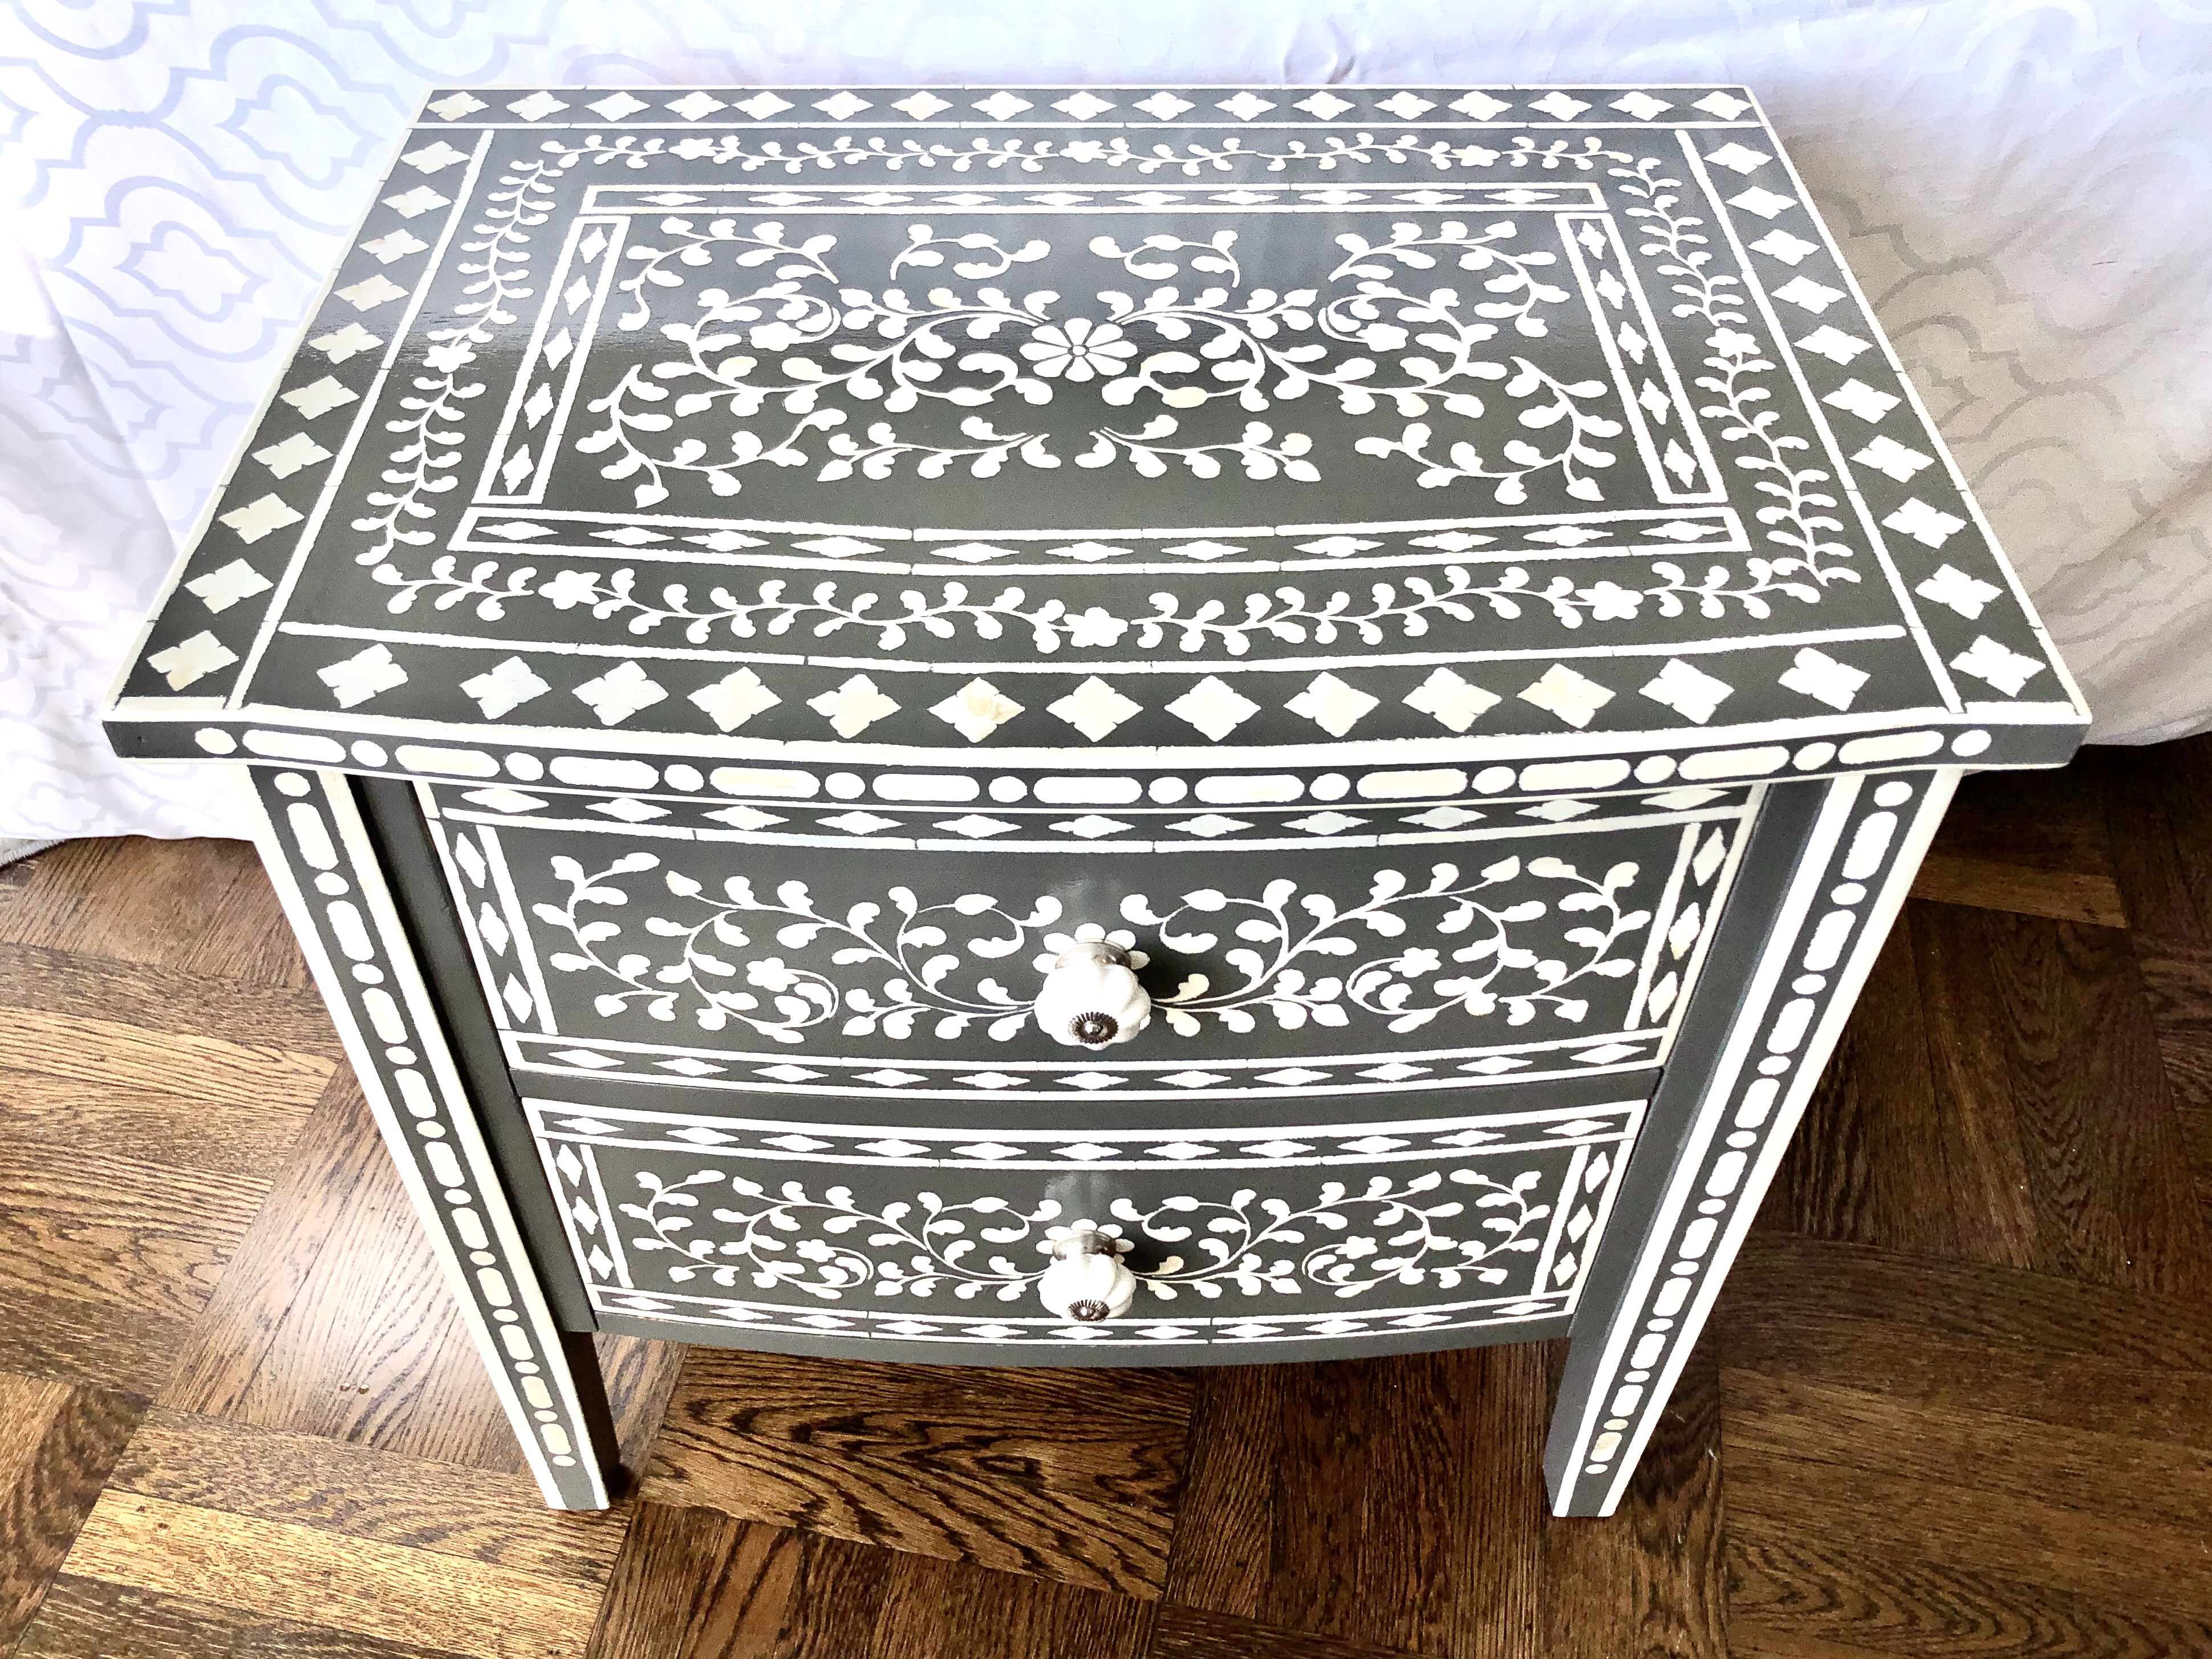
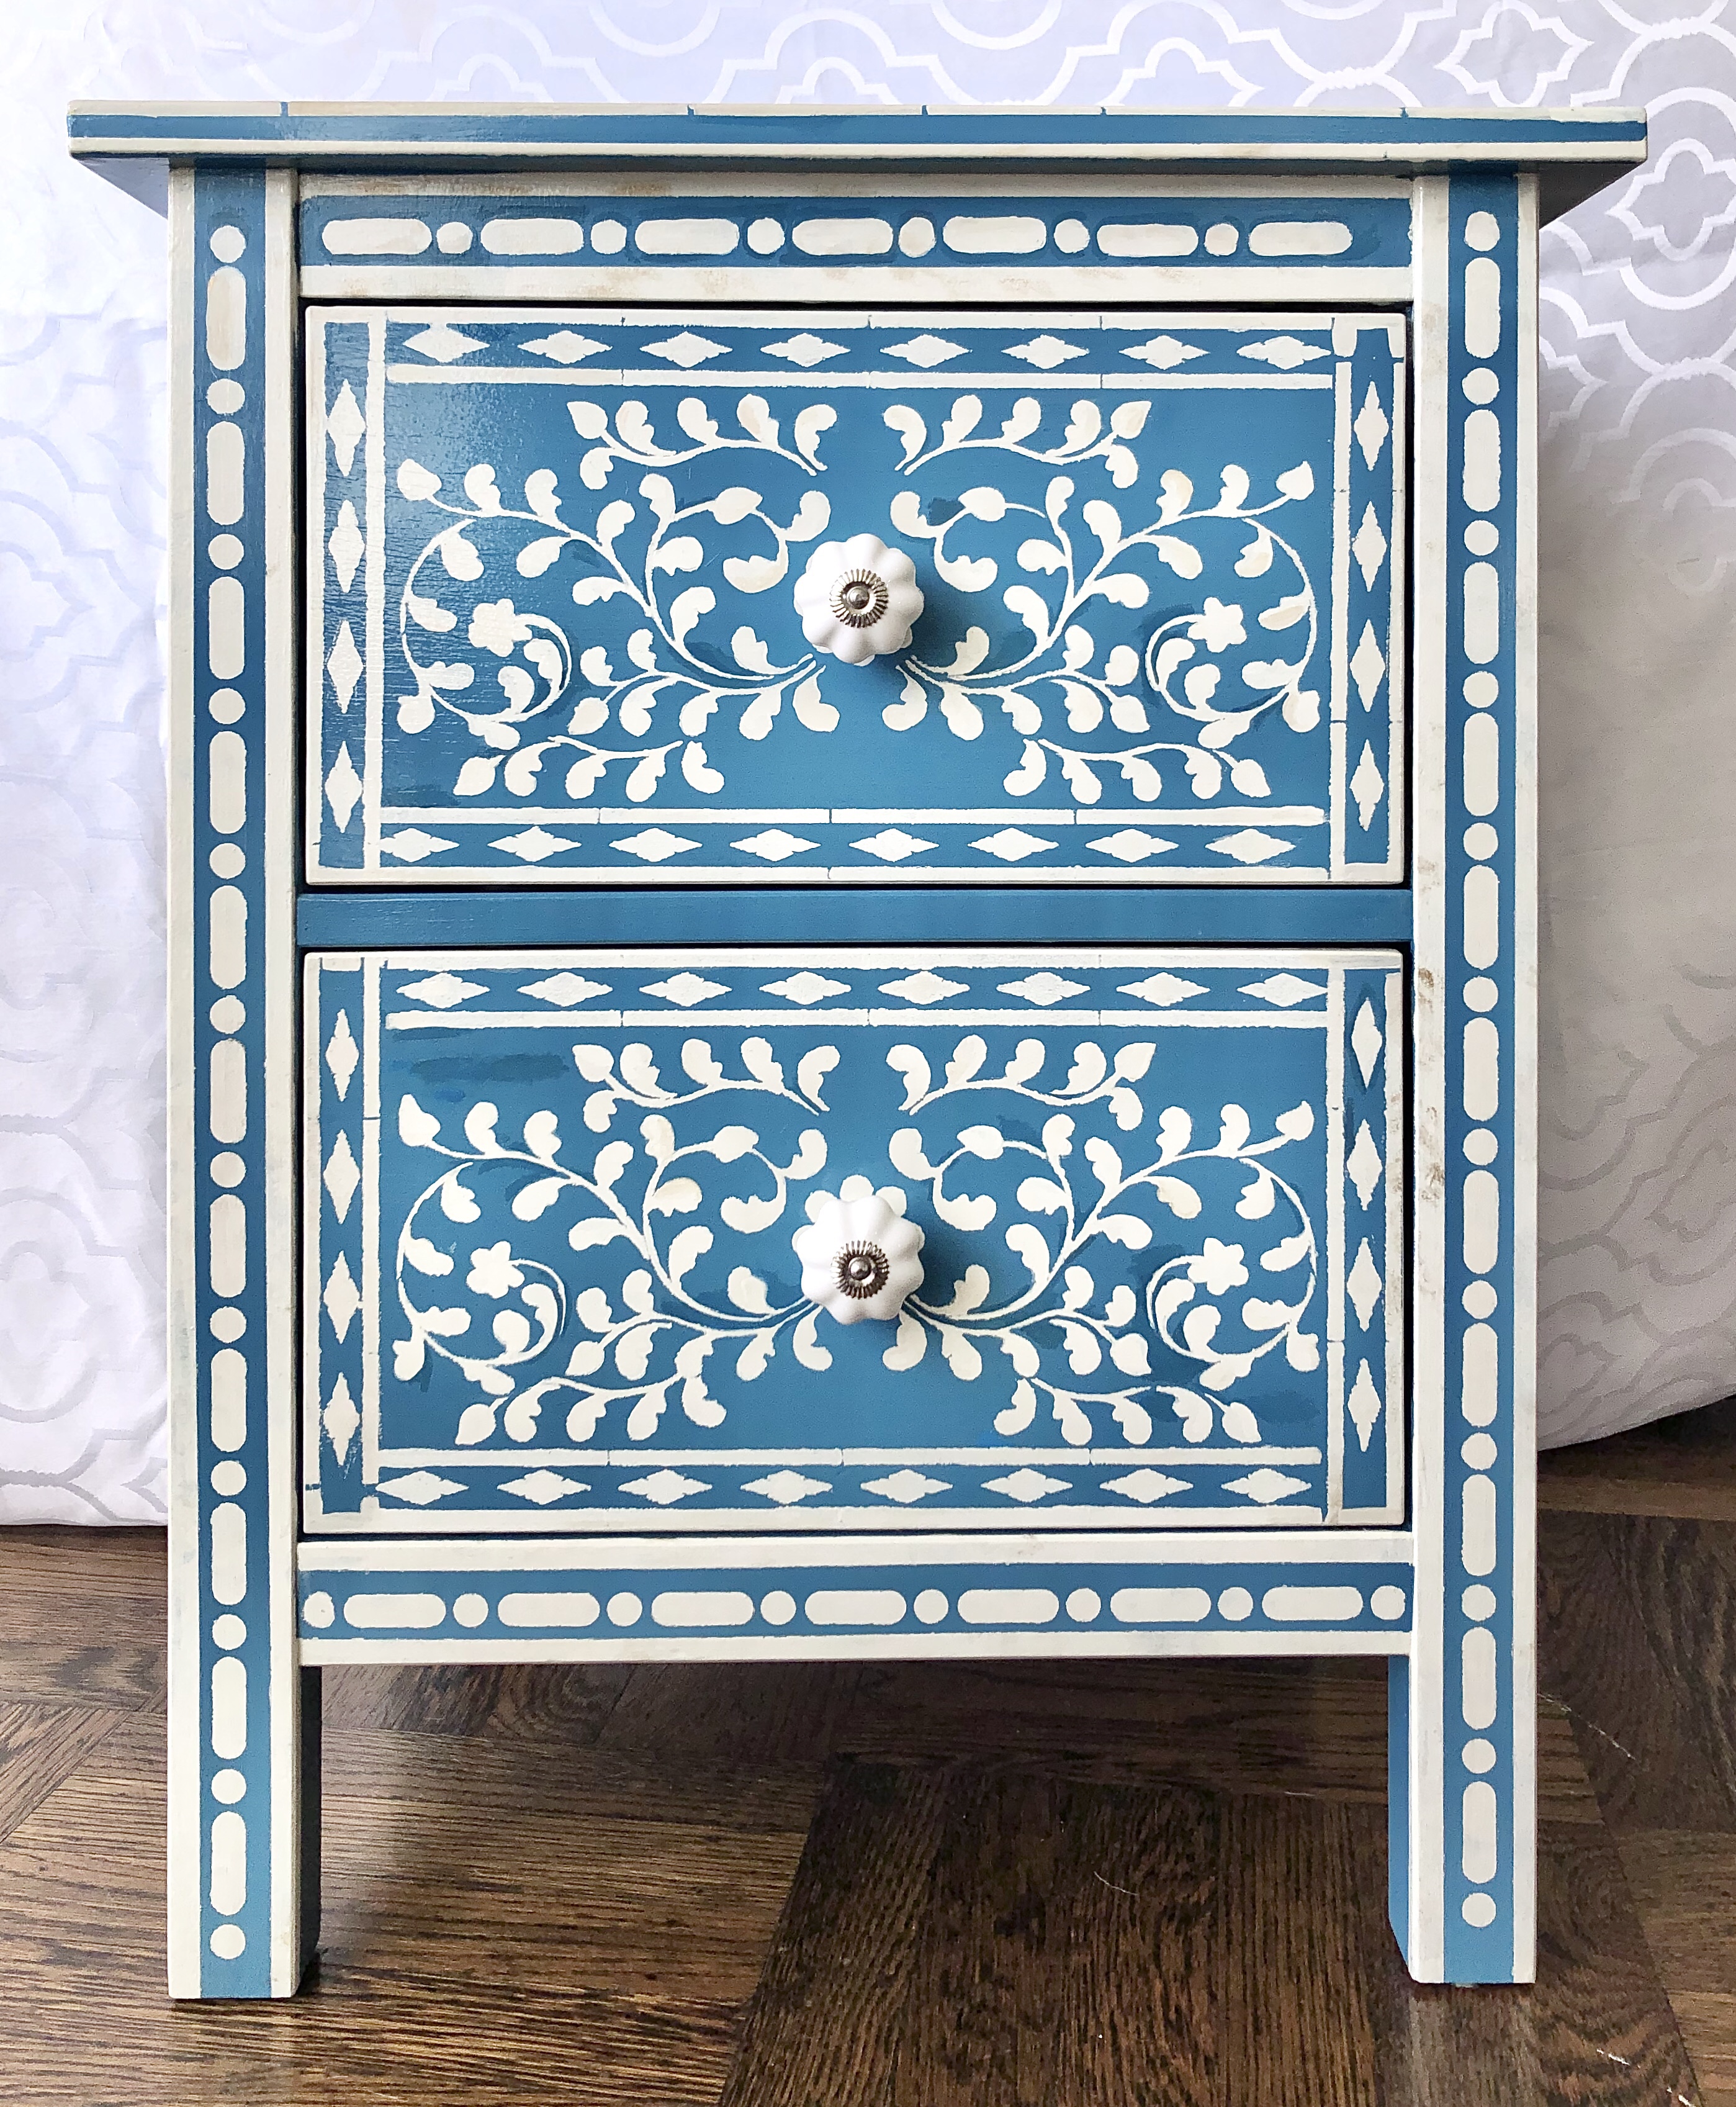
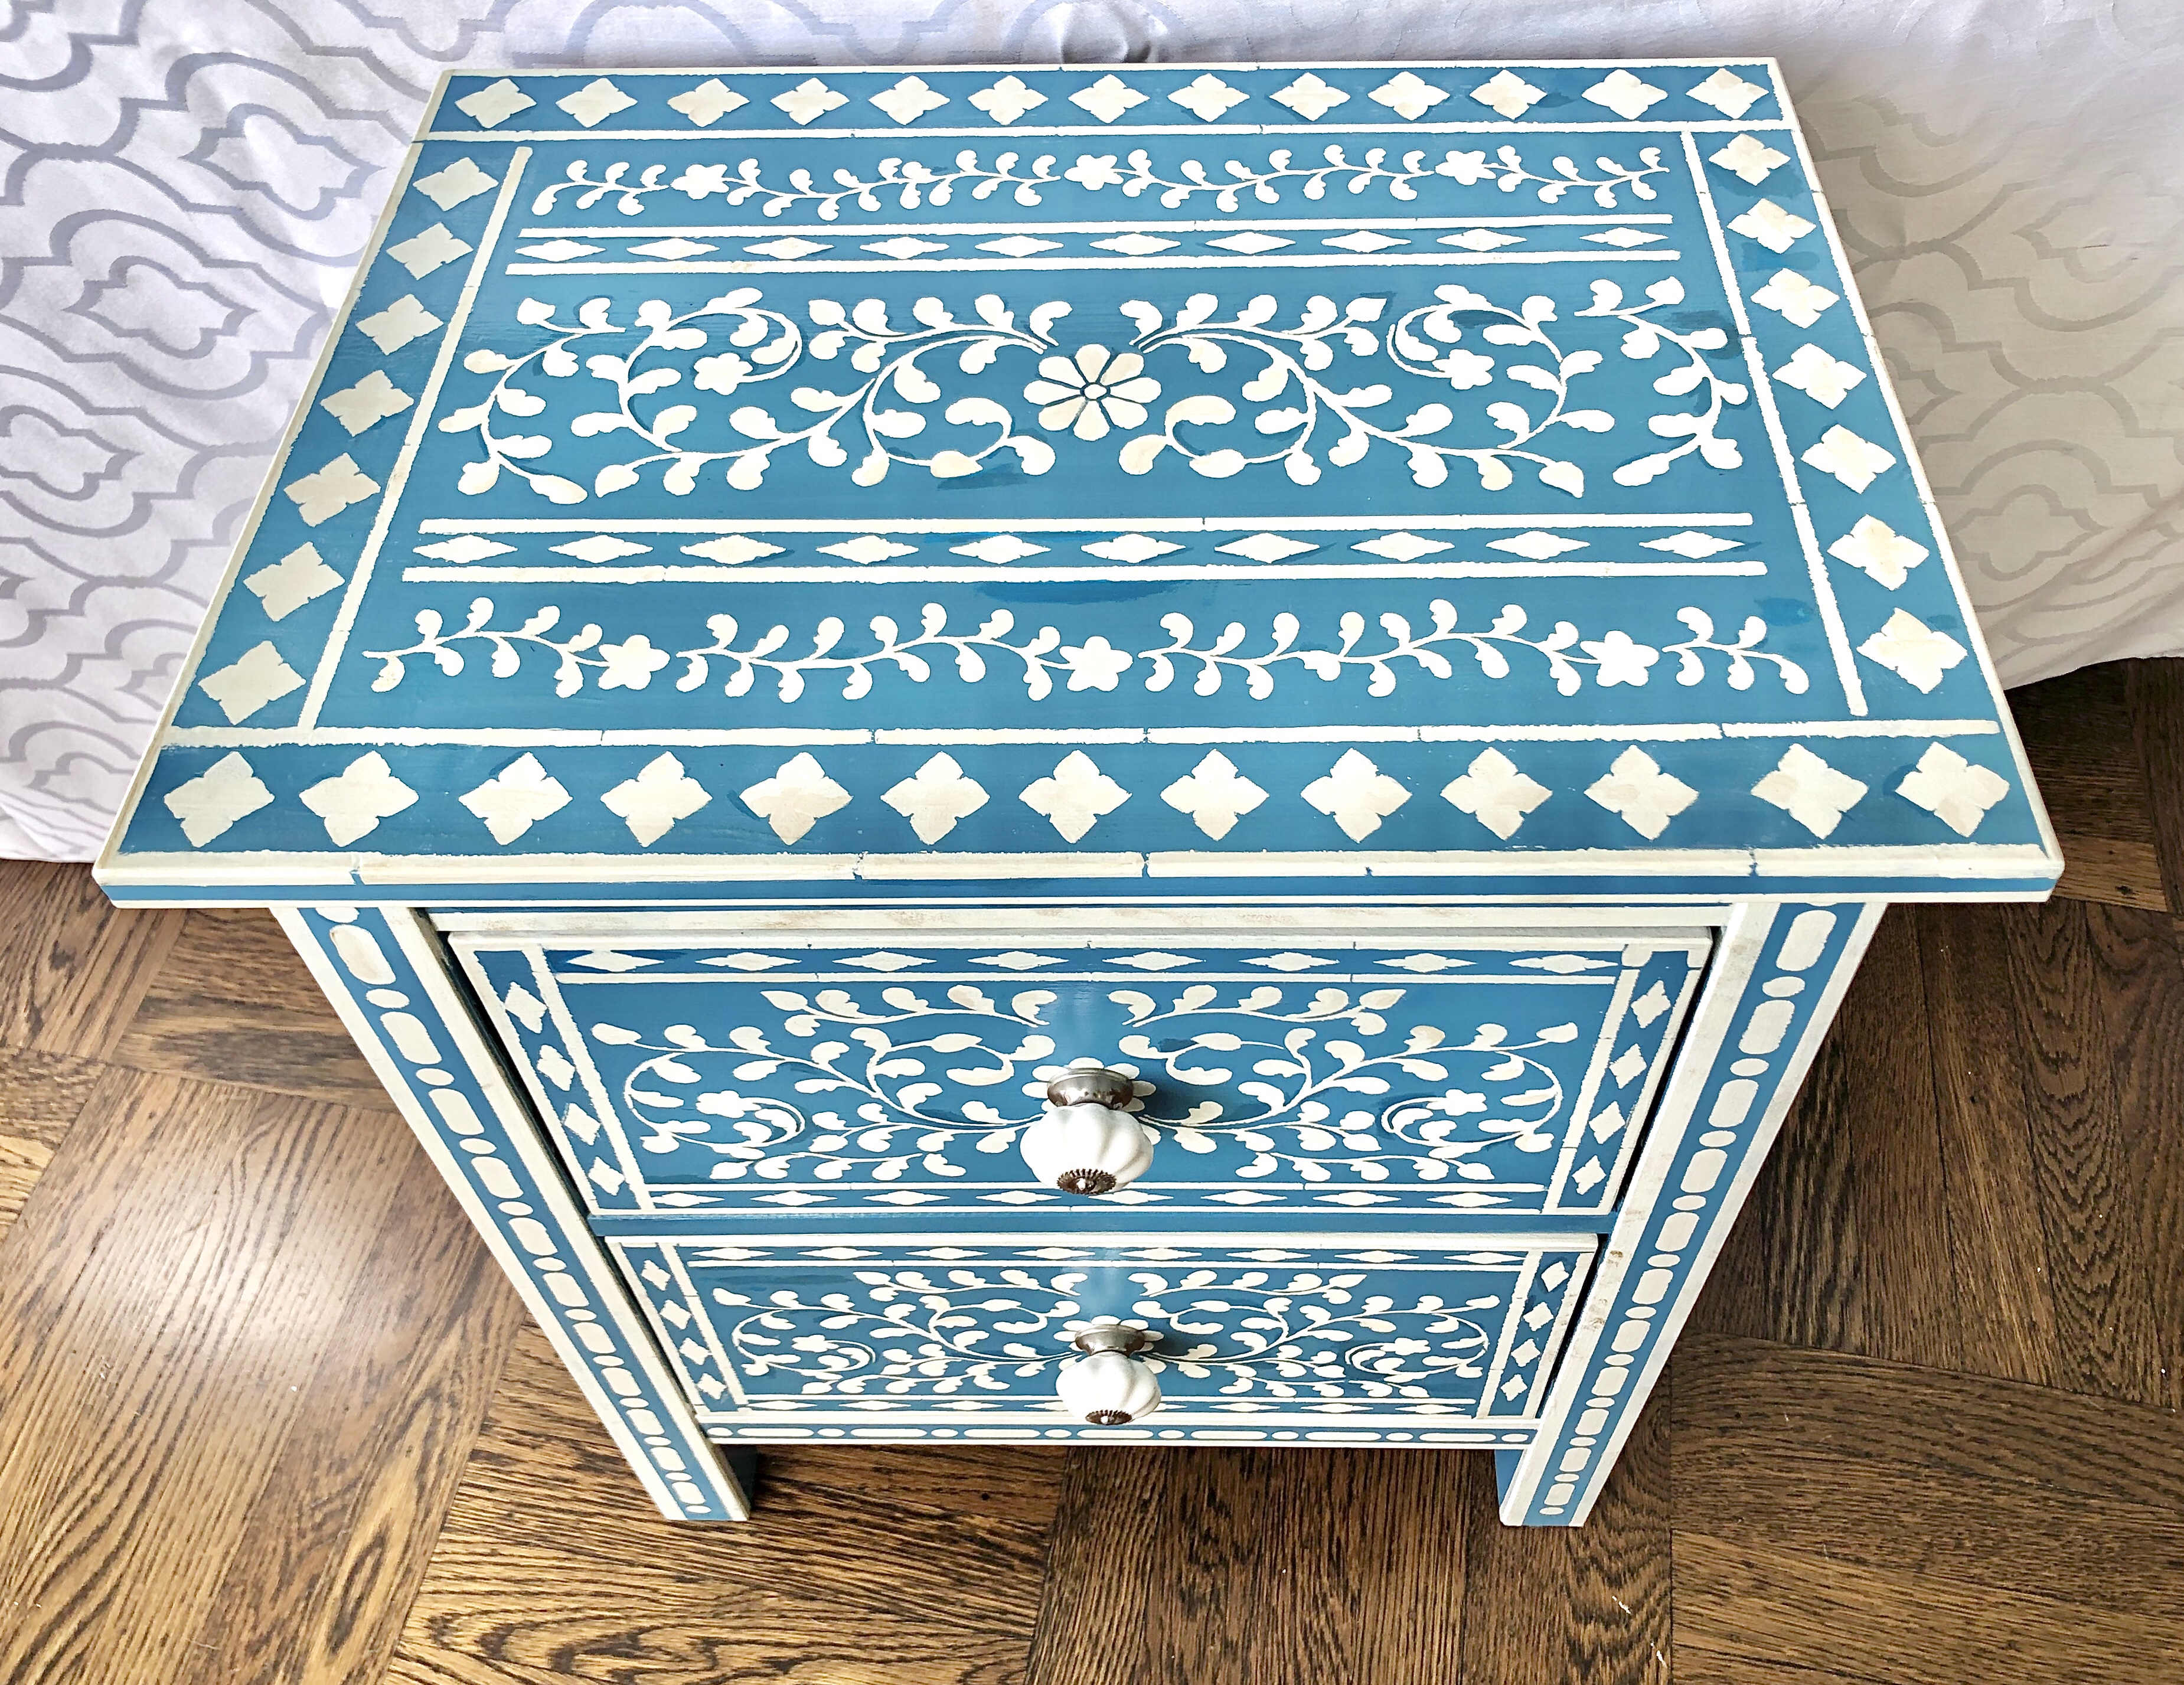
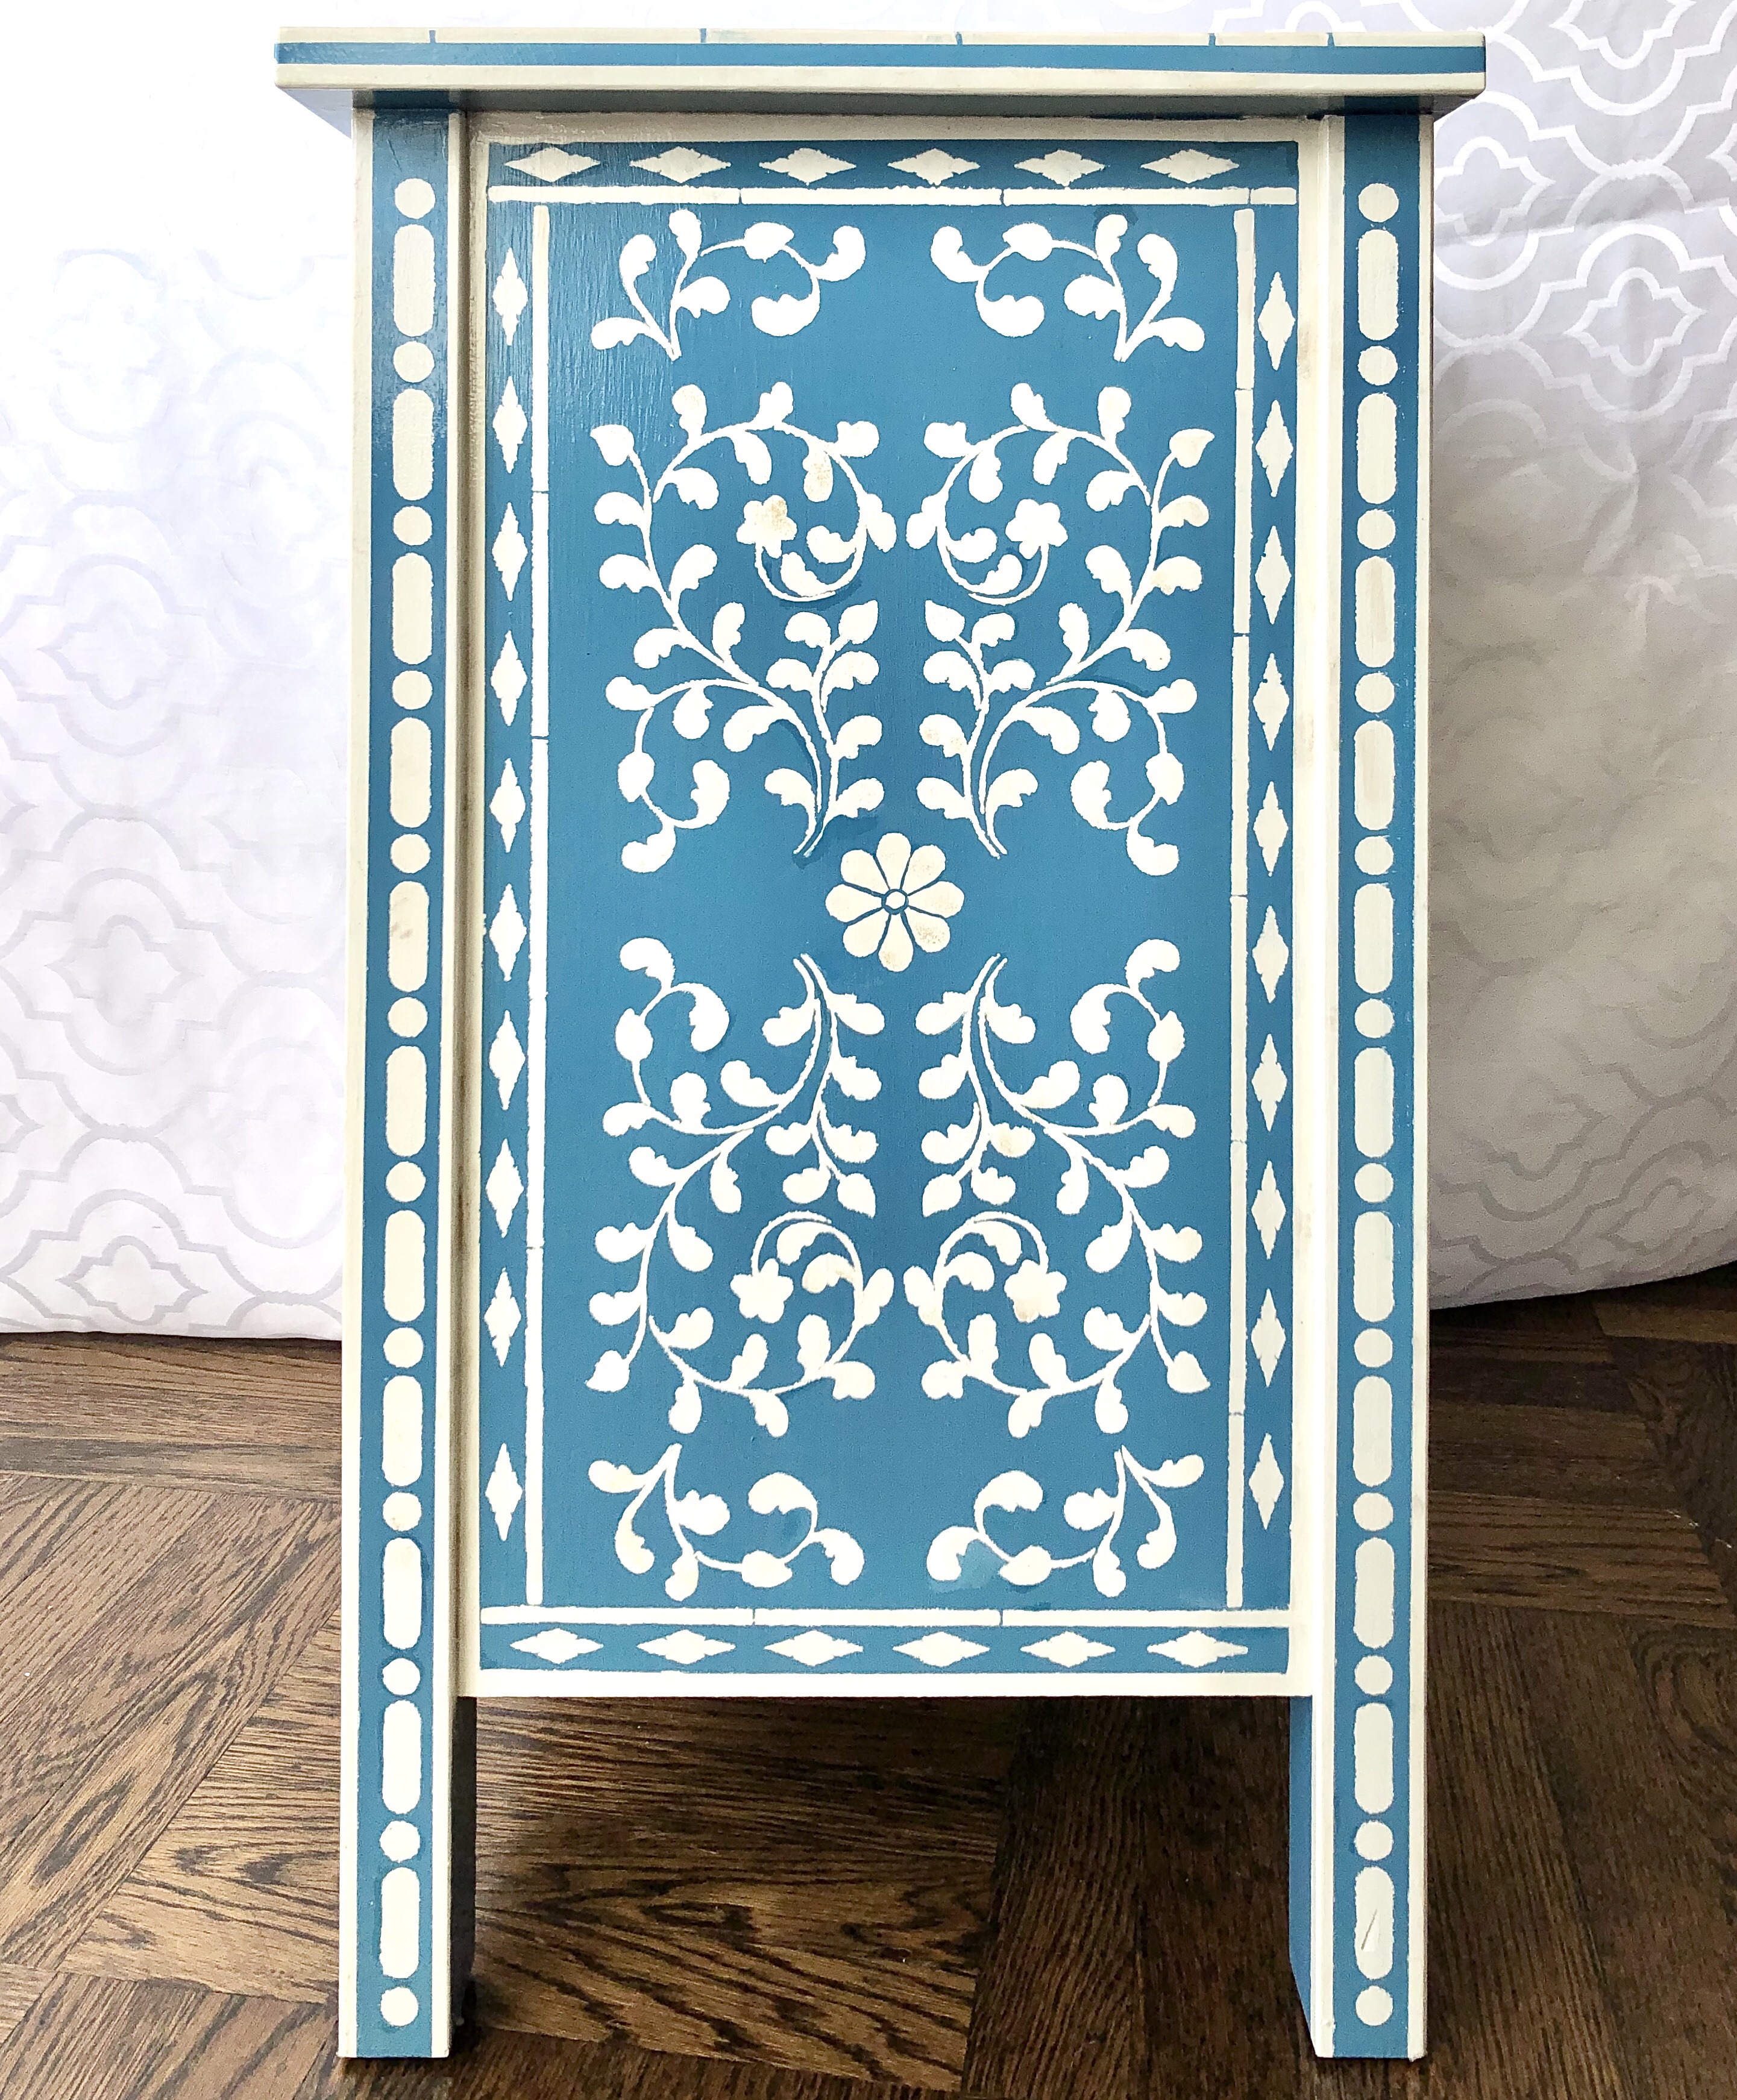
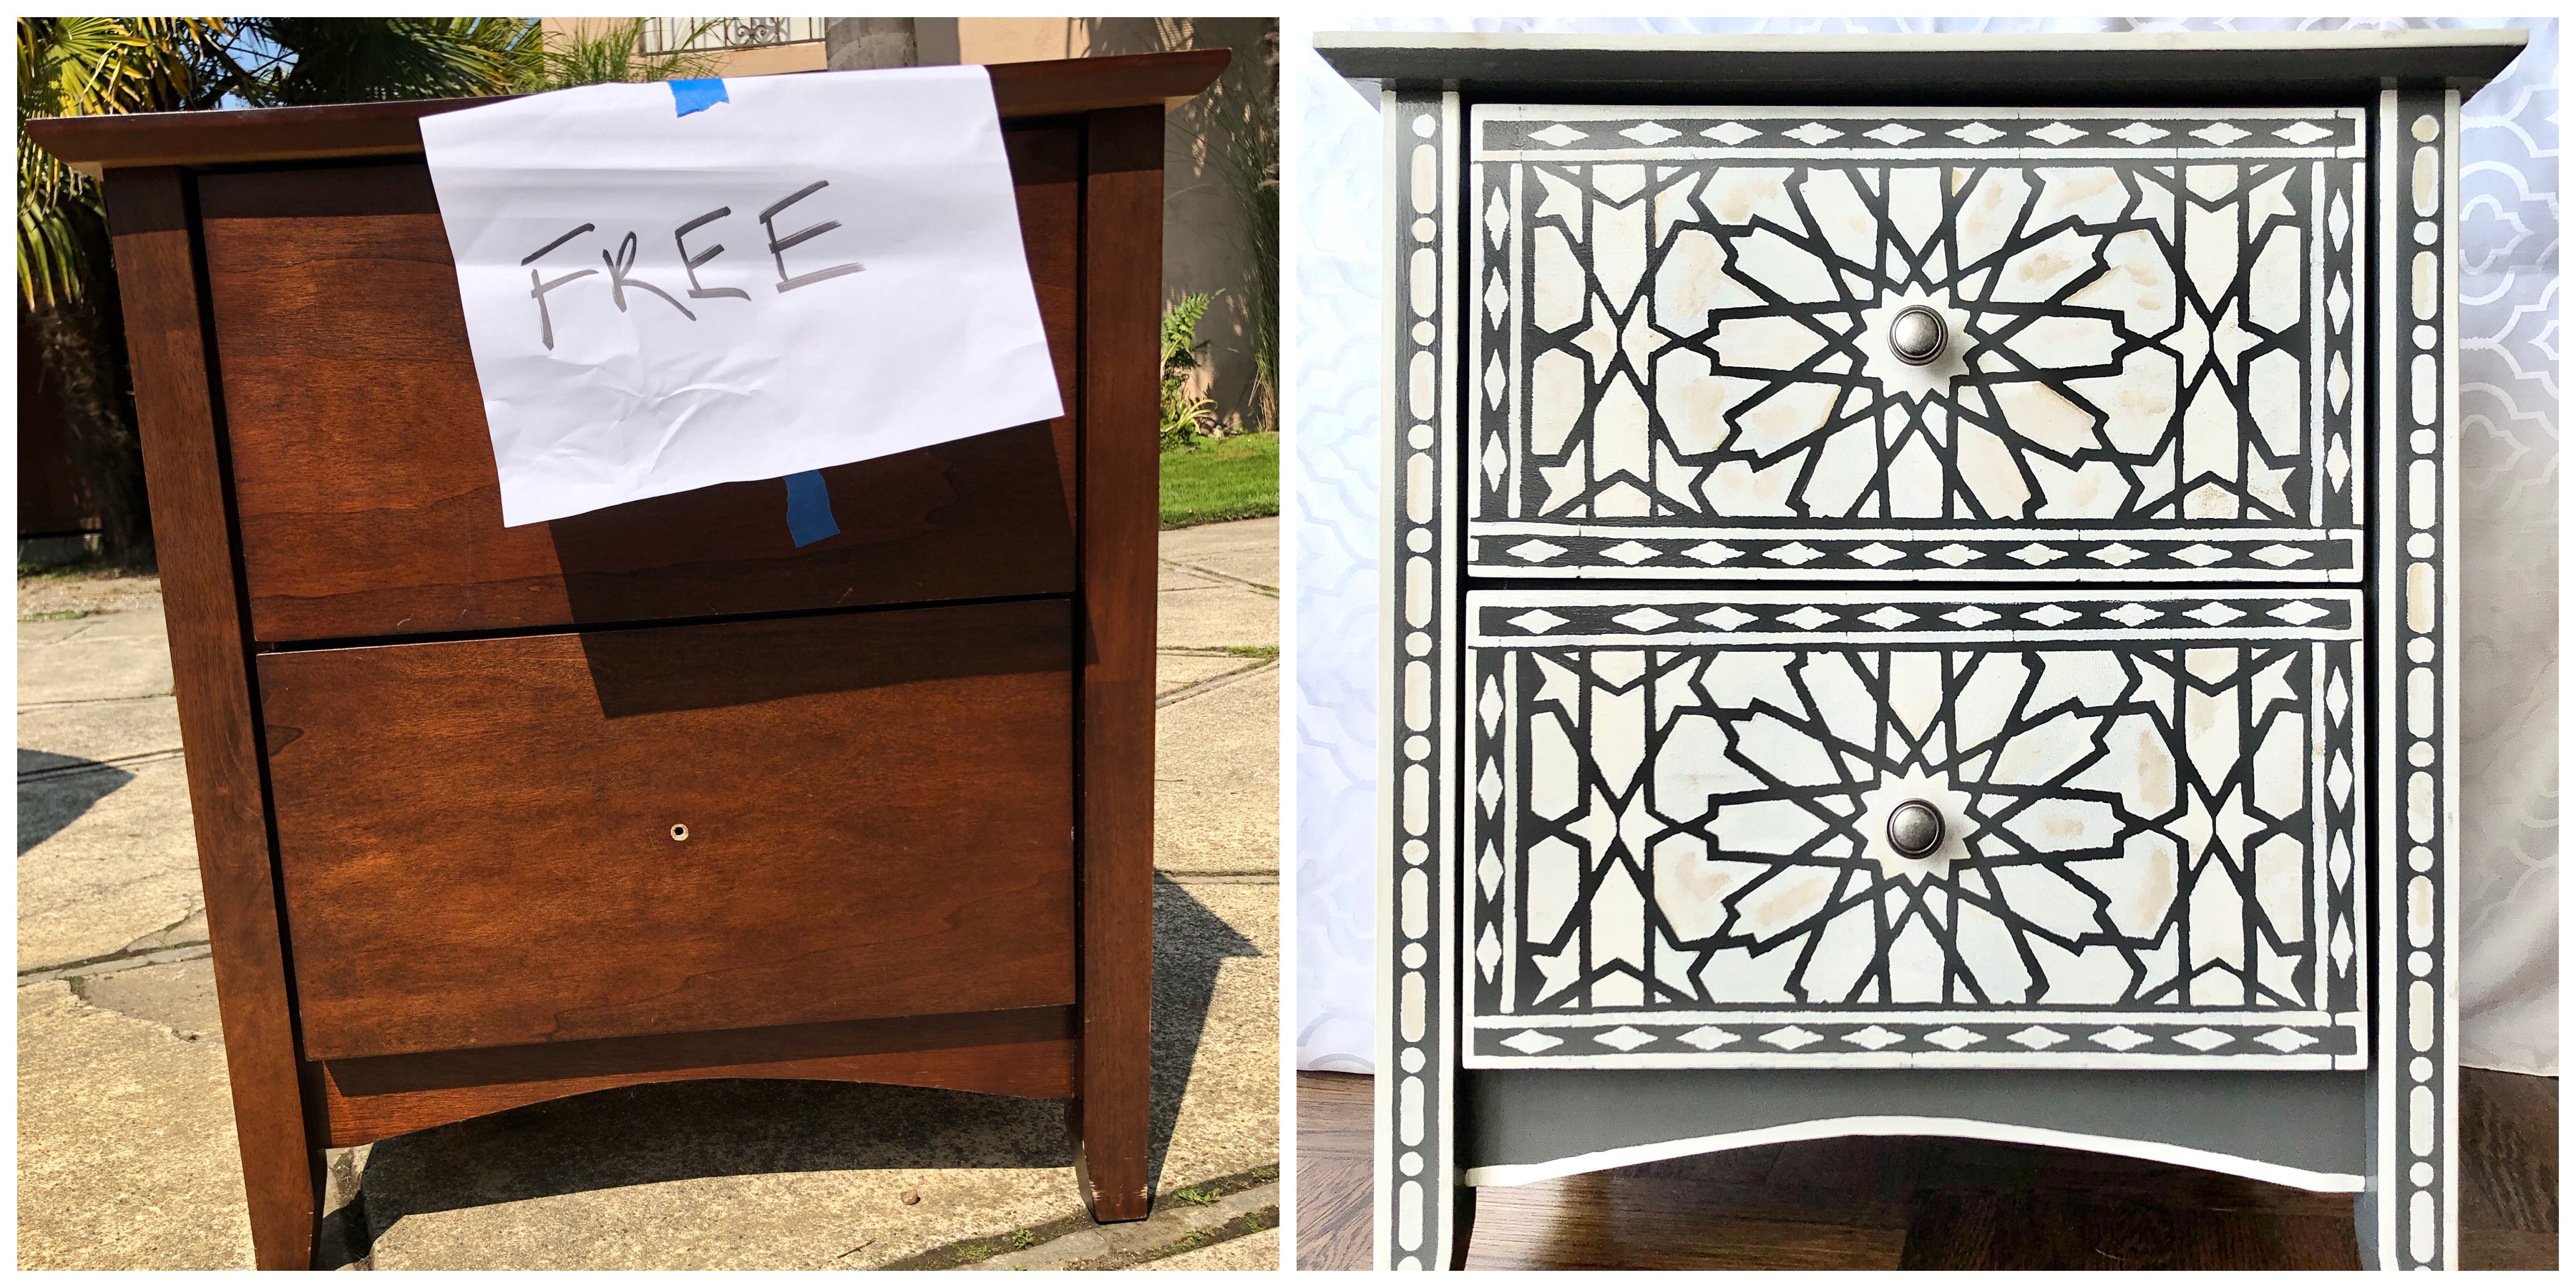
I looked at a lot of pictures of authentic bone inlay furniture to get ideas of how to lay out the design. Anthropologie has a lot of drool-worthy examples! Each piece is different, but here are some tips:
- Use painter’s tape to create white borders on the edges of the furniture and drawers
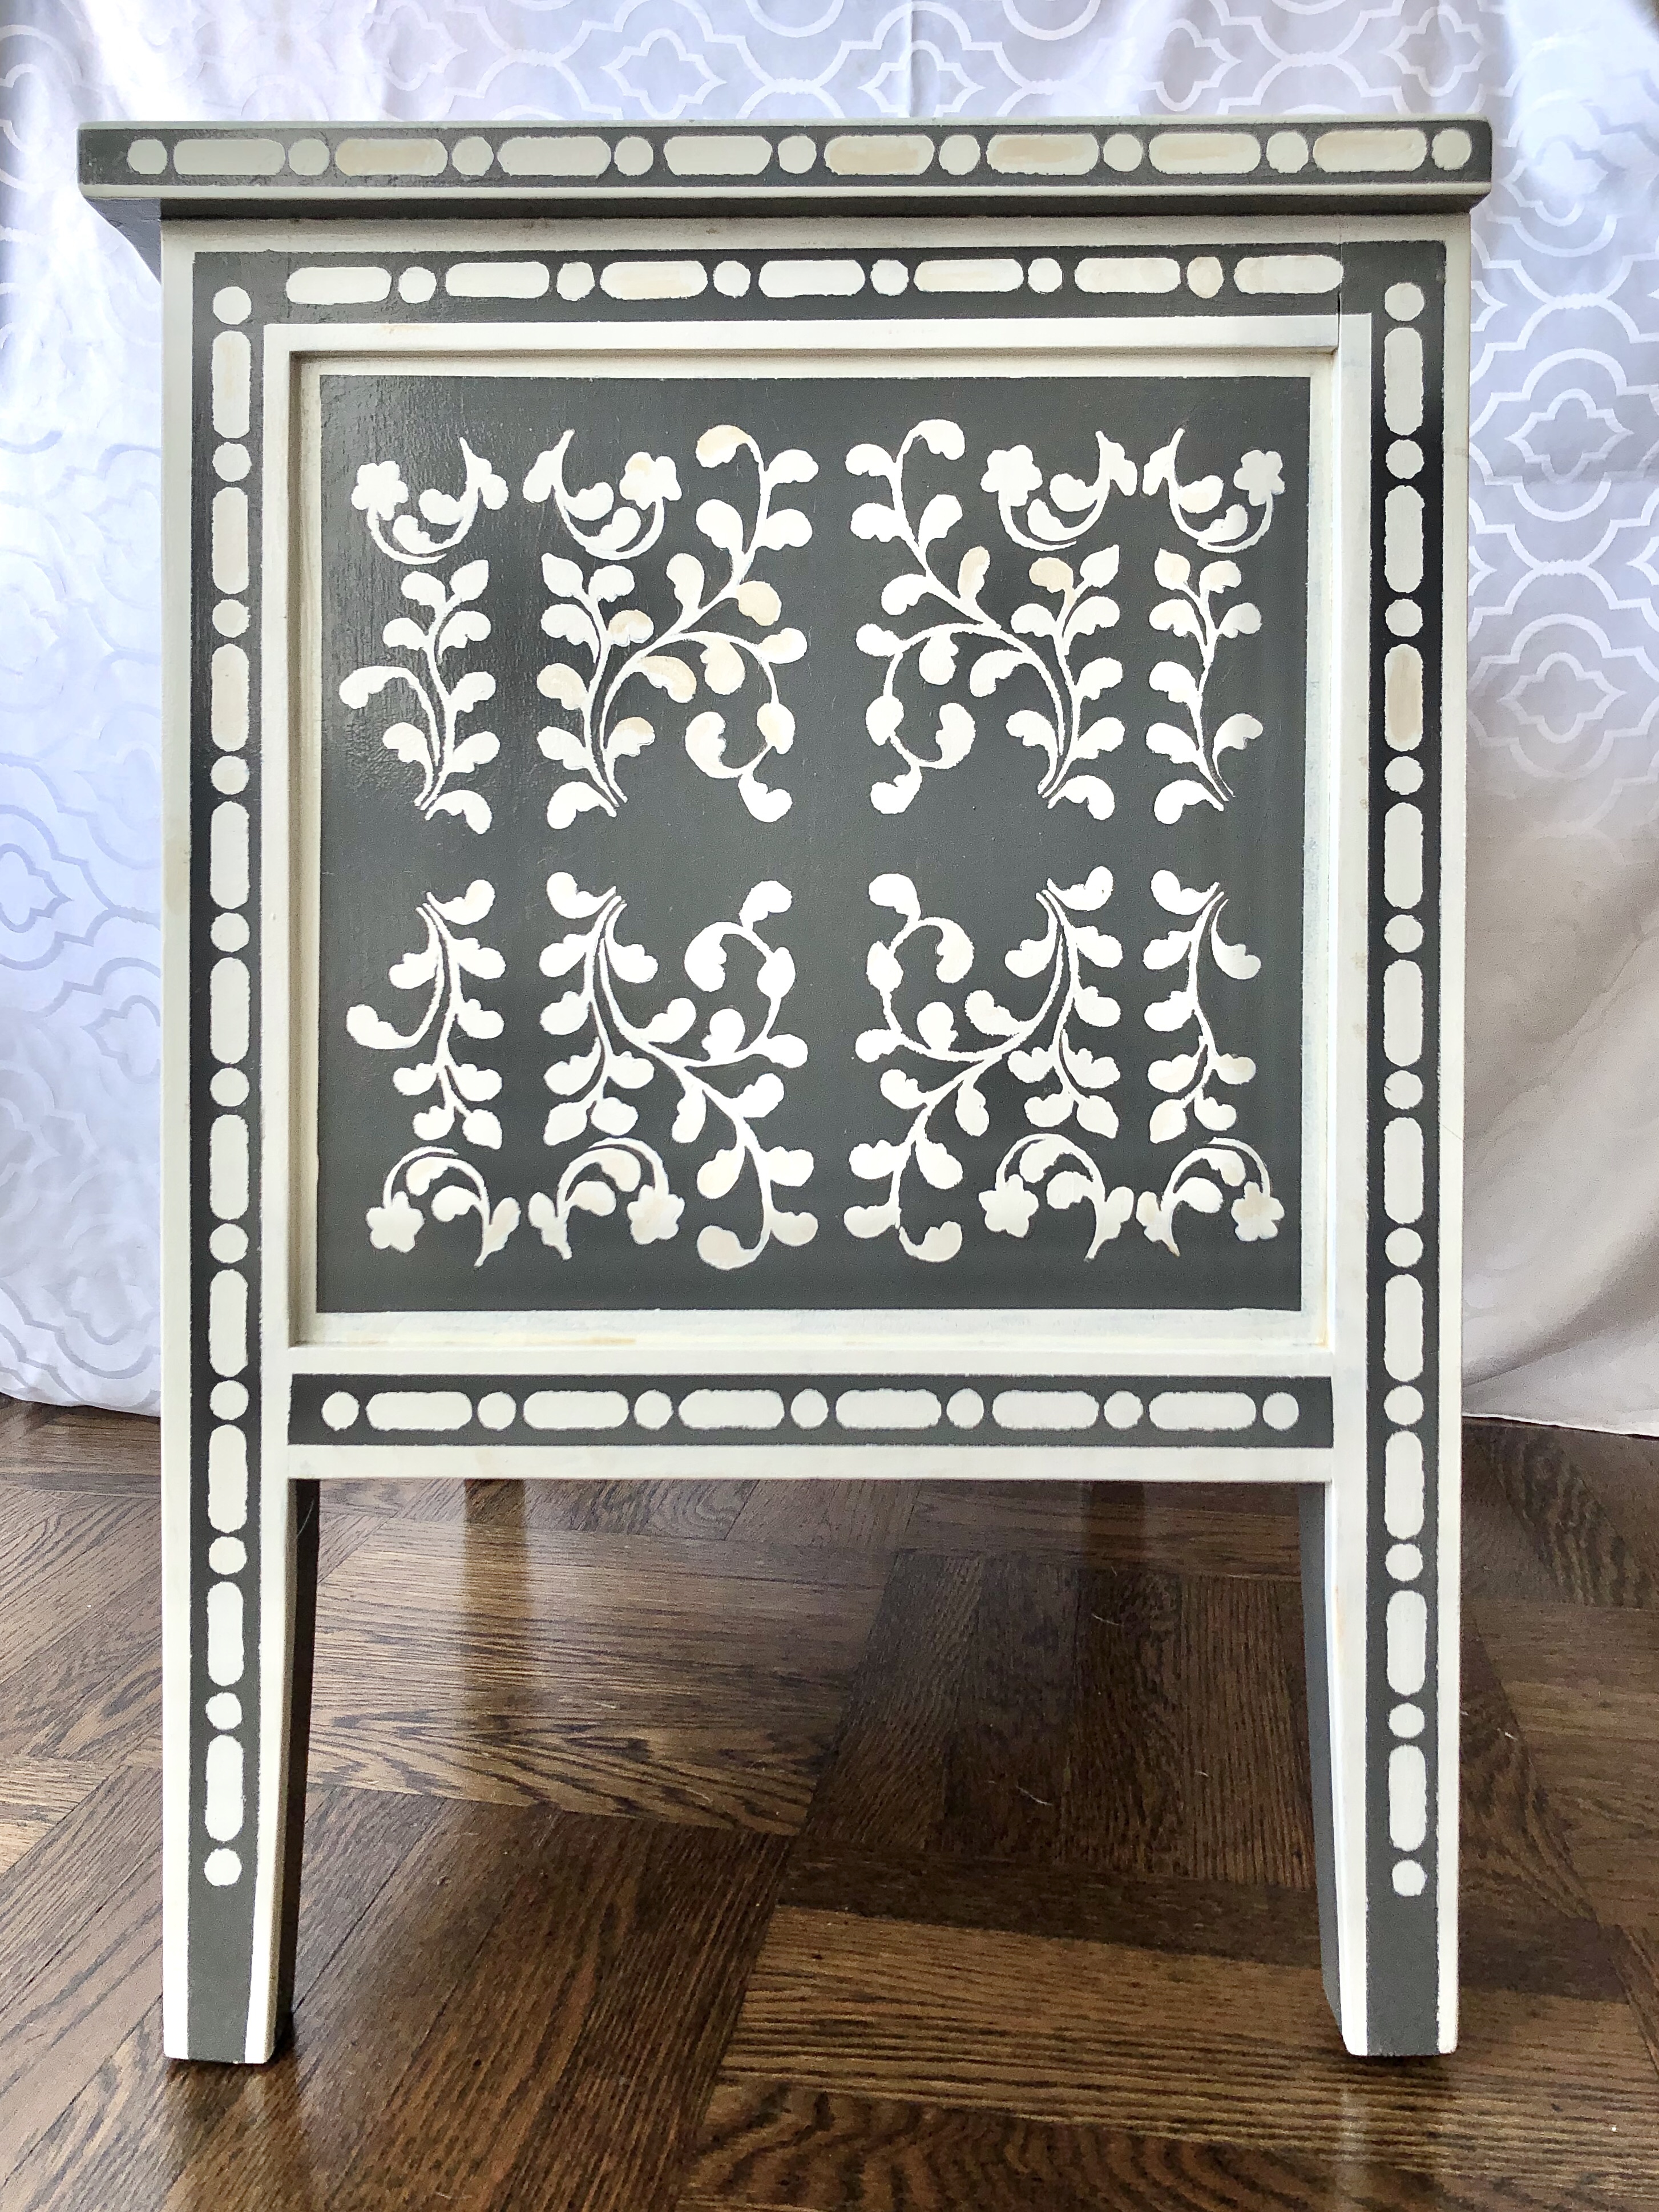
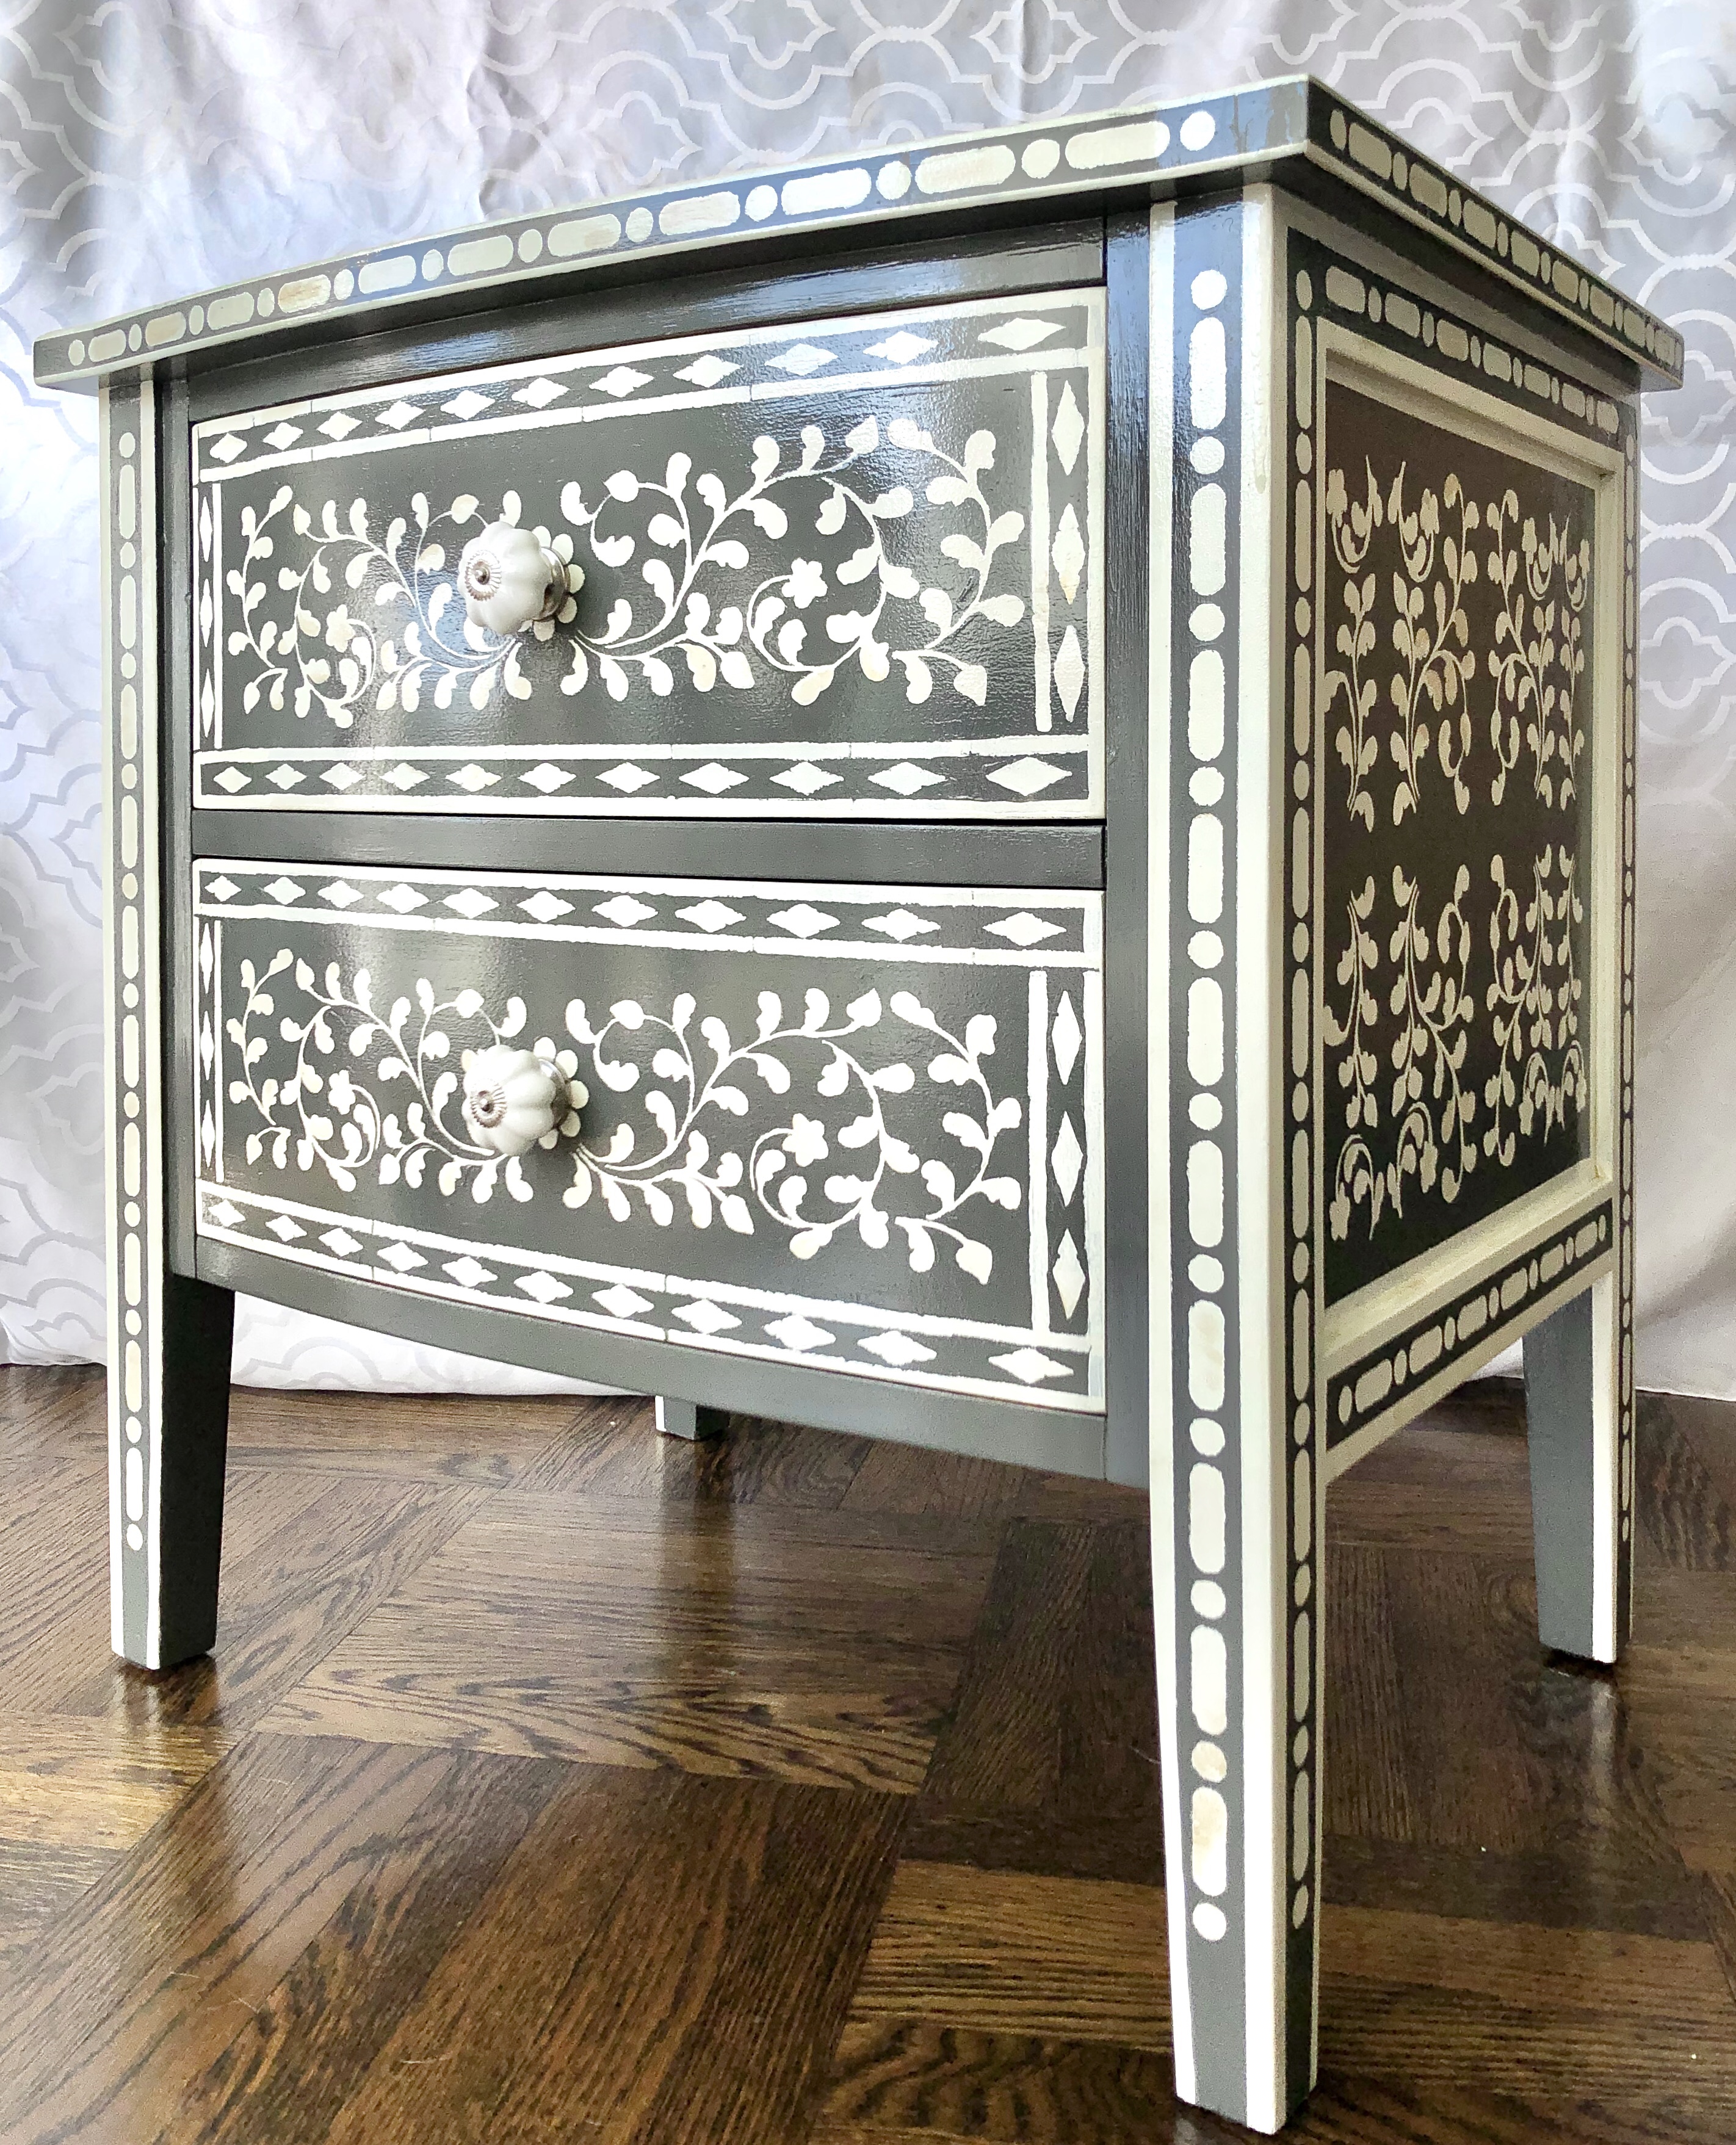
- Lay out your stencils to cover as much of the surface as possible
- The dash and dot stencil is good for the legs of the dresser
- The square diamonds work well around the top of your piece
- The smaller diamonds work well around the drawers
- For large areas, such as the top of the dresser, you can create multiple layers of borders
- To fill in large areas on the sides and top, I used smaller sections of the main floral stencil oriented in different directions, so the pattern coordinated with the main floral stencil but didn’t look like an exact repeat
As for stenciling, I mixed cream, white, and gold paint to create a more varied, natural-looking color. Do as I say and not as I do – dab off as much paint as possible from your stencil brush before applying. The result will be much cleaner and require less touch-up.
When done, I applied several coats of clear polyurethane to seal the finish, and ta-da! (That sounds like it was magic, when in fact it was some serious elbow grease :))
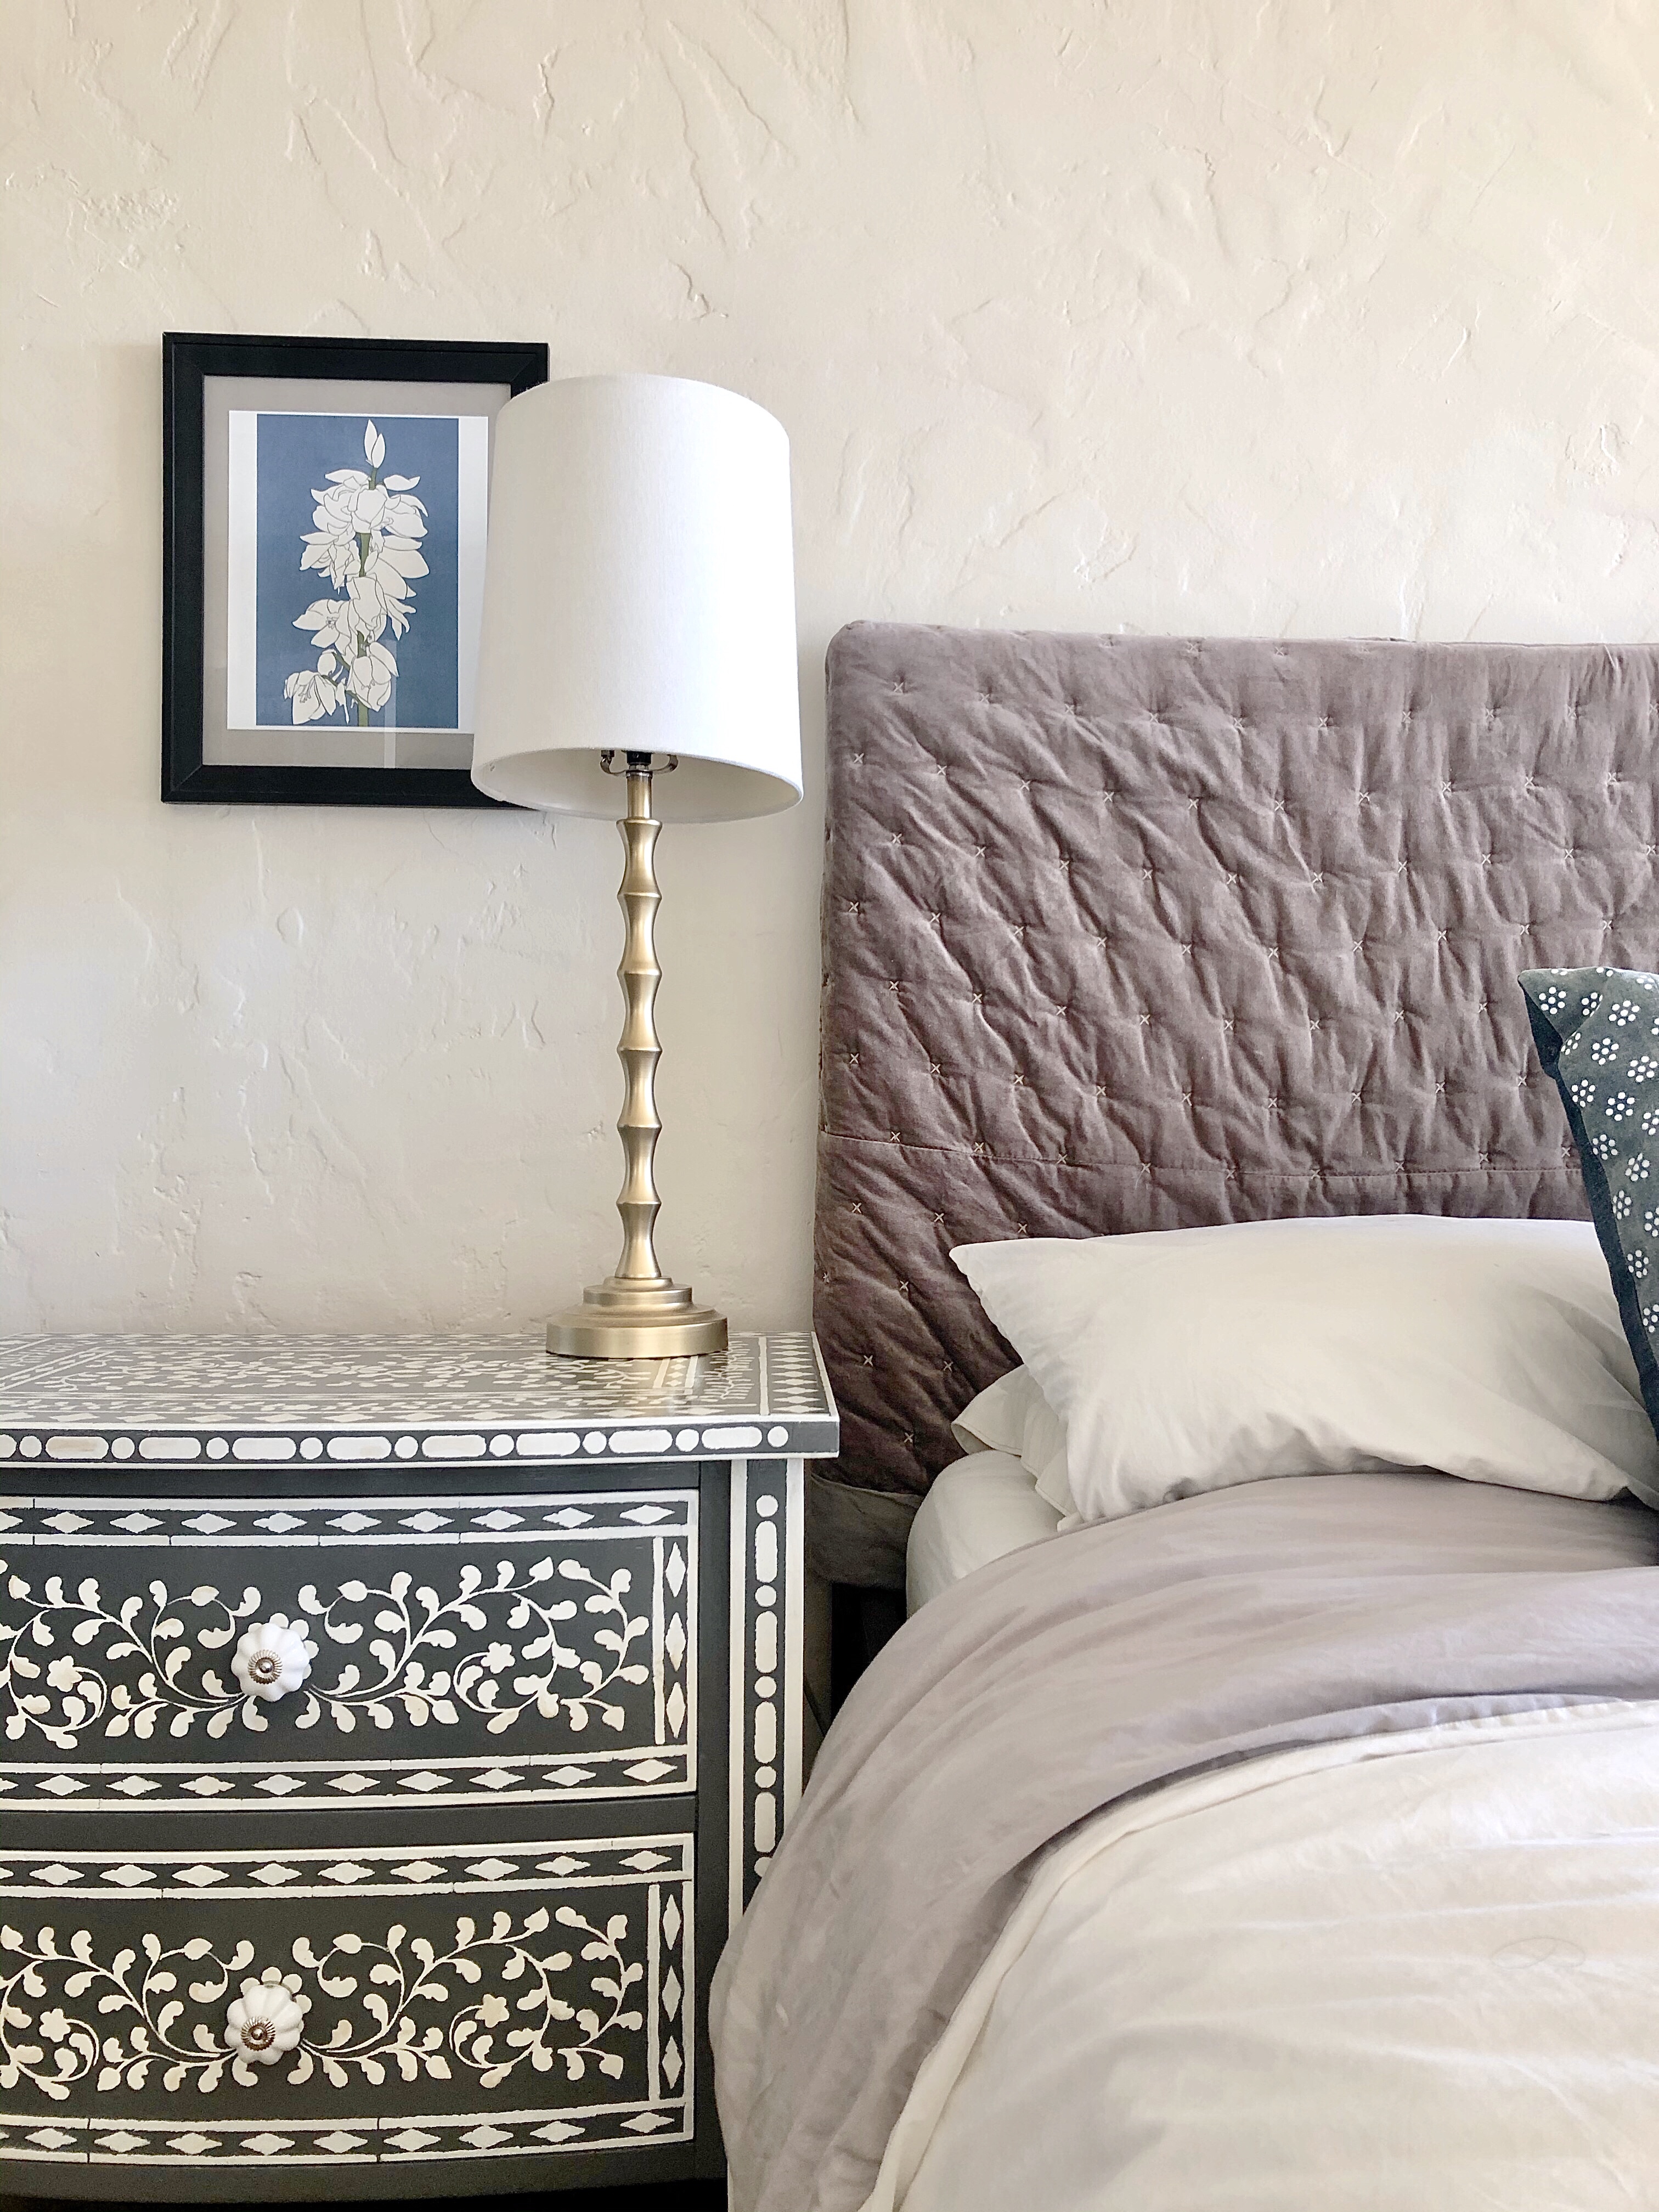
This is my new nightstand. I picked up the original piece for $30 on Craigslist.


Here’s Steve’s nightstand – I found the original for free on Craigslist!


I didn’t need this third nightstand, but I bought it before I found the other two…


Everyone loves a good before and after, right?
Here are a few pictures of the new his-and-hers nightstands!

So, are you brave enough to try it?!
Take care,
Julie AKA “Jewels”

Julie- this is absolutely amazing. I just sent it to my artist friend, Carol Maguire. She will take on the challenge. I don’t know where you get the time to do ALL that you do.
Miss you all.
Peggy Conrad
peggy.conrad@gmail.com http://www.twitter.com/GoGenesGo
>
Miss you, too! I hope you are still friends after she does this project – haha! I probably should be doing other things with all the time I spend on crafts… but we do have more time at home these days – that’s for sure! Take care! Julie
Hi I’m going to give this a try! But I have a question. When you say you used three paint colors, does that mean you mixed them together into one, or you put the colors on in layers, e,g, first latex down white, then layered on gold and cream?
Your projects are a HUGE inspiration!!
Thanks!
Hi Kim, Thanks so much for the kind note! This was a lot of work, but also very cool. To get a more natural look, I used mostly off-white paint and then would swirl in some gold in each batch. I’d also emphasize the advice to put very little paint on your sponge, to minimize it leaking under the stencil. I often went too fast and then had to do a lot of touch-up afterward. Good luck!
Pingback: Customizing an IKEA Hemnes China Cabinet | Jewels at Home
Pingback: (A Free) Ugly Duckling Cabinet Becomes a Swan! | Jewels at Home
I’d send you a picture of mine but I can’t seem to upload in comments. I’m interested in how you used the gold and cream paint. Did you stencil in white then do random dobs of gold and cream?
Is the blue one painted with a flat Matt paint? It seems to have a richer effect, almost watercolour, than the black and white ones
They all look lovely, though the blue is my favourite
Fiona, Nottingham, UK
Hello Fiona, thank you so much for your comment. I’m glad that you did your project! I’d love to see a picture – you could email it to me at jewels at home blog at gmail.com. To answer your questions, I swirled the gold and cream paint on the paint tray before I stenciled. The variation on the blue is actually an accident. I was basically mixing paint as I went, and then would run out and have to mix some more, and it wouldn’t match perfectly, but I’m glad that it turned out well!