Do you have a DIY bucket list? Finding a vintage dresser with mid-century details has been on my list for years, and finally, the perfect project came along!

It started when I was browsing NextDoor and came across a dark and blurry picture of this little dresser that was being given away for free. I took a chance and quickly claimed it. I knew there was a chance that this was laminate, so I did a bunch of reading on research on how to paint this smooth plastic finish.
Here’s what you’ll need:
- High quality paint brush
- 4” foam paint roller set or try out this amazing painting pad I found – it paints quickly and gives a great smooth finish!
- Rags
- gloves
- TSP or other deglossing solution
- Sandpaper – medium and fine grit
- Bonding primer designed for slick surfaces
- Latex paint – mine is a semi-gloss in Benjamin Moore 1623 Britannia Blue, which is a deep blue-grey
- Clear polyurethane sealer
- As needed, new hardware or metallic spray paint for your old hardware
- If you need new holes for your hardware, some filler material for the old holes
- For the “dipped” legs, painters tape, paper, and metallic paint
Here’s how to do it:
- Clean off dirt and dust
- Remove hardware
- If you are changing hardware, fill in the old holes and drill the new ones
- Sand the laminate surface lightly with medium grit sandpaper. Don’t sand too aggressively, because you don’t want to damage the laminate or make it peel
- Wipe with surface with deglosser such as Gloss-off or TSP
- Apply the primer using a brush for small corners or details, followed by the roller or paint pad for as smooth a finish as possible. I did two coats of primer and let it dry thoroughly overnight
- Sand lightly with 400 grit sandpaper and wipe off dust with a rag
- Paint several coats of latex paint using your brush and roller or painting pad and let dry thoroughly
- To create the dipped legs, use masking tape to define your dipped area and paper to protect the surrounding areas from overspray
- Once all the paint is dry, coat with sealer to protect the finish
I found my new brushed brass hardware on Etsy – I chose hexagon knobs that complement the curved detail on the upper drawers and simple pulls for the lower drawers. The dresser was free, and I spent about $80 on hardware and painting supplies. Not bad for a finished product that makes me swoon!

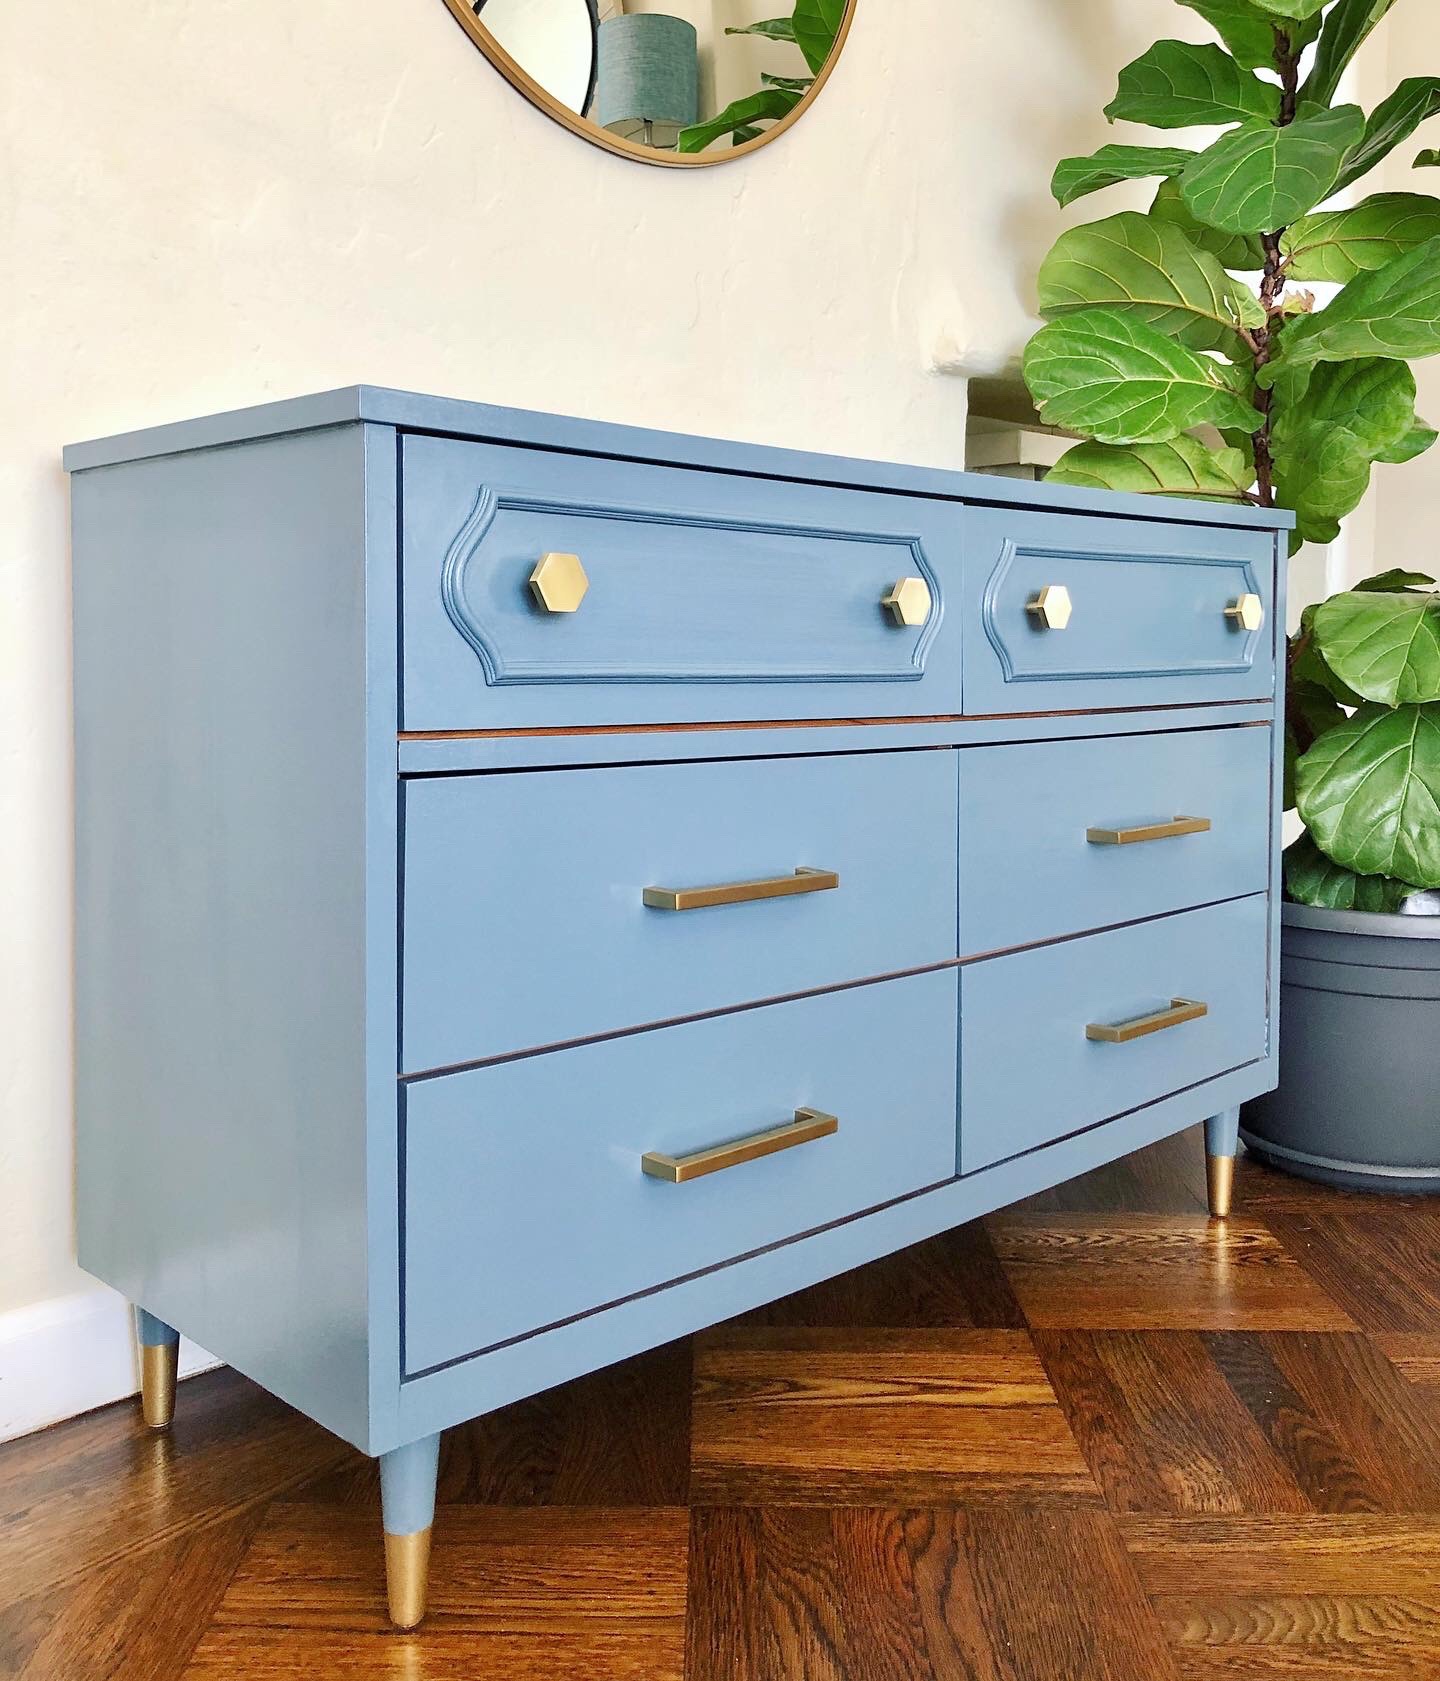
Also, my husband noticed that the hardware looks like little faces, so now I always feel like my dresser is smiling at me 🙂
In truth, it is a bit under-sized for this space, so stay tuned for the reveal of my next dresser makeover project (yes, I am addicted!)
As the saying goes these days, stay safe and well!
Julie aka “Jewels”

Pingback: Faux Campaign Dresser Makeover | Jewels at Home
Pingback: Nightstands with Faux Bone Inlay Stencils | Jewels at Home
Pingback: From Thomasville Dresser to Dining Room Bar Cabinet | Jewels at Home
Pingback: A Boy’s Room in Blue Full of DIY Treasures | Jewels at Home
Pingback: Customizing an IKEA Hemnes China Cabinet | Jewels at Home
Pingback: (A Free) Ugly Duckling Cabinet Becomes a Swan! | Jewels at Home
Pingback: Chinese Armoire in the Perfect Blue | Jewels at Home
Pingback: Faux Bamboo Ikea Hack Daybed – Week Five – Spring 2025 One Room Challenge | Jewels at Home