Gifts in a Jar – Put a Lid on it!

Steve likes to say that everything sounds better when spoken in a British accent… My version is that everything tastes better when it came in a pretty package. I love a project that can reuse an old item in a beautiful way – upcycling at its best! For the holidays this year, I decided to make a variety of gifts in a jar to give to our neighbors and the kids’ teachers. I saved glass jars of various shapes and sizes, and I’ll show how to clean and prep them below.

Here are a few ideas for how to make your own gifts in a jar:

How to clean jars for reuse:

  • start by peeling off as much of the label as possible
  • soak the jar in some water and peel off more of the label
  • if there’s sticky residue left, spray the jar with Goo Gone or vegetable oil and let it sit before a rubbing off the rest of the label
  • run the jars and lids through the dishwasher, using a mesh laundry bag to keep the lids from flying around
  • I finished off by spray painting any lids that had printing on them, for a clean look
Great ideas for gifts in a jar. Step one: clean and prep your jars. {Jewels at Home}

There are so many ideas for gifts in a jar. Step one: clean and prep your jars.

Tips and recipes for gifts in a jar. {Jewels at Home}

Another tip: make a funnel from clean card stock to help layer ingredients more neatly.

Some more pictures of our dressed up holiday gifts:

Ideas, tips, and recipes for DIY gifts in a jar. {Jewels at Home}

Homemade apothecary jars filled with bath salts make a wonderful gift for a shower, hostess, or any occasion.

Ideas, tips, and recipes for DIY gifts in a jar. {Jewels at Home}Ideas, tips, and recipes for DIY gifts in a jar. {Jewels at Home}
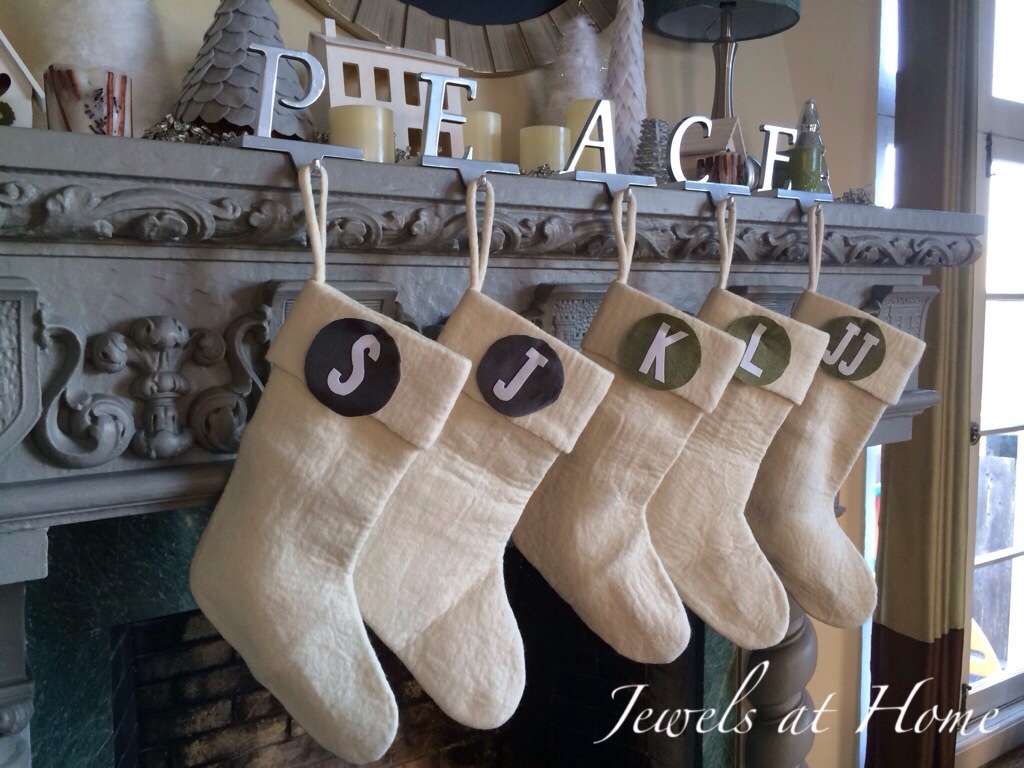
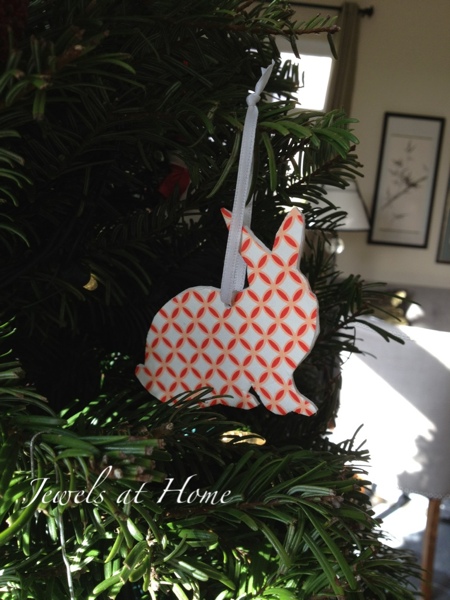
I really love having something handmade for the holidays, and making several of the same gifts made the project more doable.  The only real-world caveat I have is that these were very heavy to carry into school.  Add our toddler in the baby carrier on my back, and I definitely broke a sweat.  It was all worth it, though I might recommend a wagon if you are trying this…
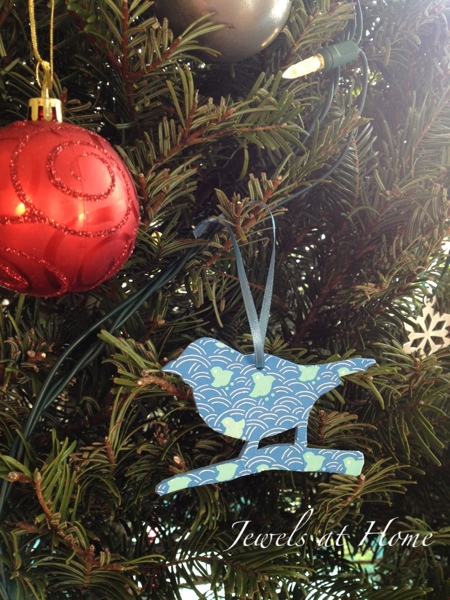
“Jewels”

Sesame Noodles with Chicken

I’ll admit I’m not the main cook in our family – thanks, Steve! – but I do have a few dishes that I rely on to get a good, healthy meal on the table, and this is one of them. Our whole family loves the taste of this take on Chinese sesame noodles, and I love that you can pack it full of veggies that the kids will eat.  Since it can be served cold, it’s also a good meal to make ahead for hectic weeknights.

Ingredients:

For the noodles:

  • 5 medium carrots
  • 1.5 bundles buckwheat noodles
  • 1 cucumber
  • 2 stalks green onions
  • 1 1/3 pounds boneless, skinless chicken meat

For the sauce:

  • 1/2 cup tahini, peanut butter, sunflower butter or a combination of these
  • 2 Tbsp sesame oil
  • 1/4 cup soy sauce
  • 1/2 tsp garlic powder
  • 1/2 tsp ground ginger powder
  • 1 Tbsp rice vinegar
  • 2 tsp chili paste (I leave this on the side, when cooking for the kids)

Instructions:

  • Boil the chicken until cooked. Cool and shred
  • Shred carrots to similar width as noodles using mandolin or food processor.  Boil until soft, about 10 minutes.
  • Slice cucumbers into thick strips with a mandolin or knife.
  • Slice green onions into long strips with a knife.  Place in the bottom of a colander or sieve.
  • Boil noodles according to instructions.  Drain in a colander over the green onions, to soften the green onions.
  • Mix all the above in a large bowl and then prepare the sauce (see below)

Here are the ingredients (sans chicken), waiting to be mixed:

Recipe for sesame noodles full of vegetables!  {Jewels at Home}

Sesame noodles full of vegetables!

Mix the ingredients for the sauce together and then stir into the noodle mixture.  You can serve this dish hot, cold, or anywhere in-between.

Asian sesame noodle recipe with lots of veggies the kids will eat! {Jewels at Home}

Asian sesame noodle recipe with lots of veggies the kids will eat!

H0pe you enjoy this addition to your family’s menu!

“Jewels”


My Favorite French Toast – Panettone French Toast

I don’t spend that much time in the kitchen, so if you find a recipe here on Jewels’ blog, you be assured it will be easy to make.  I love French toast, and this is my favorite way to make it come out perfectly delicious every time!

Perfect French Toast made with panettone bread | Jewels at Home

The secret is to use Italian panettone bread.  Its rich, sweet flavor is the perfect starting point for French toast.  Here’s the easy recipe that will serve 6:

  • One panettone loaf – this time around, I actually found a loaf with chocolate chips!
  • 1 cup yogurt
  • 6 eggs, beaten
  • Butter for pan frying

To prepare the French toast,

  • slice the panettone bread into 1″ thick slices.  You can do this the night before and let the bread dry out a bit.
  • heat the pan to medium-high and melt butter
  • beat the eggs and beat in the yogurt
  • dip the slices of breast into the yogurt-egg mix
  • pan fry on both sides until lightly brown

Perfect French Toast made with panettone bread | Jewels at Home

Perfect French Toast made with panettone bread | Jewels at Home

Bon appetit!

Jewels

Pancake Mixes in a Jar

I made these pancake mixes in a jar to give as Christmas gifts, but they would be great for birthdays, hostess gifts, or just-because.  The hot chocolate mixes I made were very popular, but these pancakes are also a great option and come with a bit less sugar guilt.

Recipes for pancake mixes in a jar.  These make charming gifts for the holidays or all year 'round.  {Jewels at Home}

I made three variations: banana, banana chocolate chip, and blueberry pancakes.  I used pasta sauce jars, which hold about 2 1/2 cups.  The baking powder does lose effectiveness over time – they are best used within three months – so it’s best not to make these far ahead.

Ingredients:

Layer in a jar

  • 1/2 cup of whole wheat flour
  • 1 1/2 cups all-purpose flour
  • 1 1/2 teaspoon baking powder
  • 1/2 teaspoon kosher salt
  • 1 tablespoon sugar
  • Optional: 1/3 cup of freeze-dried bananas (not banana chips which are too crunchy), freeze-dried blueberries (not regular dried blueberries which are too hard and chewy), and/or chocolate chips.

It helped to use a clean sheet of cardstock folded into a funnel for getting the ingredients neatly into the jars:

Pancake mixes in a jar make great gifts. Recipes and instructions from Jewels at Home.

Provide the following instructions with your jar.  I printed labels and stuck them to decorative paper and tied it all on with a colorful ribbon.

Instructions:

  •  Shake the jar to mix contents thoroughly
  • Mix contents of jar gently with 2 beaten eggs beaten, 2 cups milk, 4 tablespoons oil
  • Cook in a hot greased pan

Here’s proof that a gift can look as good as it tastes!

Blueberry pancake mix in a jar.  More recipes from Jewels at Home.

Banana chocolate chip pancake mix in a jar.  More recipes from Jewels at Home.

Banana pancake mix in a jar.  More recipes from Jewels at Home.

These worked out so well for our Christmas gifts to teachers and neighbors – how will you use yours?

“Jewels”

White and Woodsy Christmas – 2013 Wrap-up

Happy New Year!  I have so much excitement putting the decorations for Christmas, that it seems to go by in a flash, but this packing up thing always seems to take longer.  Not to mention, somehow there is more to pack up each year.  I wonder how that happens… I was listening to the radio last month, and they were listing Christmas destination houses – you know the ones that take a month and a whole work crew to set up – and I had a little inkling that left unchecked, that could be me in another decade or two.  Well, “Crazy Christmas lady” wouldn’t be the worst thing to grow old as.

Anyway, I was trying to get our Christmas 2013 wrap-up (get it? ha ha!) posted on Christmas Eve, but I was having technology problems, so I hope that this cheers you up a little as you are taking down your own tree.  The last couple of years, I have tried out themes to our Christmas decor.  Christmas 2012 was all about silver and red with a burst of bright turquoise.

For 2013, our theme was snowy white.  I grew up in Canada, so Christmas was associated with cool temperatures, bare branches, and as often as not, snow on the ground. Even my kids, who grew up in California, ask for snow at Christmas. So, I decided to create a snowy Christmas for us at home.

Decorating for a white Christmas.  Many DIY ideas, including these reindeer pillow covers | Jewels at Home

I pared down my decorations to focus on the white and silver, as well as outdoorsy decorations like animals, trees, and snow. I also made several new projects in a white and woodsy theme.  I put links to all the DIY projects at the bottom of this post.

When you walk into our house, this big window is the first thing you see.  I was recently mildly traumatized by a visiting architect who called the window “tragic,” because it looks out on our driveway and into our neighbor’s house.  While his delivery was a bit quirky, I see his point, so I have some ideas for softening the view down the road, but at least for the month of December, we can focus on our Christmas tree!  Here is how it looks by day (hard to photograph with that window behind it) and night.  I picked up some new white ornaments in stores and also made many, including some that the kids did.

Decorating for a white Christmas.  Lots of decorating and DIY ideas for your tree and the whole house | Jewels at Home

Decorating for a white Christmas.  Lots of decorating and DIY ideas for your tree and the whole house | Jewels at Home

This is the new Christmas tree skirt for our simple white theme.  I sewed our previous one the year we were married more than a few years ago, so I’m enjoying the change of scene.

Decorating for a white Christmas.  Simple modern tree skirt design | Jewels at Home

Our homemade ornaments included these clay ones I created with the kids as well as some white felt poinsettias.  I got a little addicted to those and started carrying a bag of felt and beads around to work on them anywhere and any time…

Decorating for a white Christmas.  DIY ornaments and more ideas | Jewels at Home

Decorating for a white Christmas.  DIY felt poinsettia ornaments and more ideas | Jewels at Home
After the tree, the mantel is a big Christmas focal point.  I used last year’s DIY felt and feather Christmas trees mixed in with some new white houses to make a modern winter village.

Decorating for a white Christmas.  Modern Christmas village in white with lots of DIY ideas | Jewels at Home

The white felt stockings were on sale at West Elm, and I added our initials on these circles.

20131219-232526.jpg

Welcome, Santa!

20131219-232536.jpg

A few more touches around the house are below,  I like that they are more “wintery” than strictly “Christmas-y,” so I plan to leave them up a little longer.  Did I mention I’m tired of packing up?

Here are our new pillow covers:

Decorating for a white Christmas.  Many DIY ideas, including these wintery pillow covers featuring trees and a polar bear | Jewels at Home

In the front hall, I “planted” this faux birch branches.  I have in mind to adorn them a bit more next year – stay tuned!

Decorating for a white and woodsy Christmas.  DIY faux birch branches | Jewels at Home

And in our family room, I hung this DIY antler painting.  No reindeer were harmed in creating it, and s I plan to leave it up a little longer.

Decorating for a white and woodsy Christmas.  DIY reindeer antler painting | Jewels at Home

And while we enjoyed our California version of white Christmas for most of the month, we went to see the real thing in Canada, and I brought home these pictures:

White Christmas | Jewels at Home

White Christmas | Jewels at Home

As promised, here are the links to this year’s Christmas projects:

Back to those multiplying storage boxes!

“Jewels”

Home for the Holidays 2012

Christmas is sneaking up on us this year. The kids just finished school yesterday, on the 21st, and I had a packed day at work. Now, we are in full holiday mode, wearing pajamas and lounging by the fire. Just in time, I thought I’d share a peek at how Christmas decorating came together this year with a little house tour. I introduced a lot more silver and turquoise than in years past, and if I get time, I’ll post details on how to recreate the smaller details.

Come on in… starting with the front door, dressed up with a silver wreath and ornament door mat.

Silver wreath welcomes you home.  Christmas house tour from Jewels at Home.

Silver wreath and a holiday doormat welcome you home.

Silve wreath gives an elegant look to the front door.  Christmas house tour from Jewels at Home.

Silve wreath gives an elegant look to the front door.

The mantel, repainted this summer, is also a centerpiece. I made many of the trees on the fireplace in this post and this one.

Christmas mantel filled with homemade trees.  Christmas house tour from Jewels at Home.

Christmas mantel filled with homemade trees.

Christmas mantel filled with homemade trees.  Christmas house tour from Jewels at Home.

On the other side of the living-dining room, I added a tray with some candles and sprayed silver pine cones.

Simple winter coffee table decor. Christmas house tour from Jewels at Home.

Simple winter coffee table decor.

Simple winter coffee table decor. Christmas house tour from Jewels at Home.

Another little Christmas vignette with trees and a wooden Santa puzzle my mom gave me years ago.

Christmas vignette with trees and a vintage wooden Santa puzzle.  Christmas house tour from Jewels at Home.

Christmas vignette with trees and a vintage wooden Santa puzzle.

Christmas color is also in our foyer, with a wreath on our closet door and some accessories on top of the bookcase.

Simple magnolia and pomegranate wreath dressed up with silver ribbon. Christmas house tour from Jewels at Home.

Simple magnolia and pomegranate wreath dressed up with silver ribbon.

Silver, turquoise, and red Christmas accessories.  Christmas house tour from Jewels at Home.

Silver, turquoise, and red accessories set the color scheme for this year’s Christmas.

Silver, turquoise, and red Christmas accessories.  Christmas house tour from Jewels at Home.

The wreaths over the big french doors  in our family room connect the space to the outdoors, but the new fireplace keeps us cozy and warm.

SImple Christmas mantel in silver, turquoise, and red.  Christmas house tour from Jewels at Home.

SImple Christmas mantel in silver, turquoise, and red.

This wreath over a big french door can be enjoyed from the inside and out.  Christmas house tour from Jewels at Home.

This wreath over a big french door can be enjoyed from the inside and out.

This wreath over a big french door can be enjoyed from the inside and out.  Christmas house tour from Jewels at Home.

Finally, here’s our tree, with the DIY mercury glass look-alike and animal silhouette ornaments.  I think it’s a bit small for the space but it really looked bigger at the lot, I promise!  Steve and I have a gift-wrapping session/ movie night planned, so there will be lots more under the tree soon!

Christmas tree with red, silver, and turquoise.  Christmas house tour from Jewels at Home.

Christmas tree with red, silver, and turquoise.

Christmas tree with red, silver, and turquoise.  Christmas house tour from Jewels at Home.

I hope you are also starting to unwind and enjoy being home for the holidays!

“Jewels”

Hot Chocolate Mixes in a Jar

For our teacher gifts this year, I made a variety of gifts in a jar.  I’ll share the rest soon, but the hot chocolate mixes were the most popular, so let’s start there.

Beautiful and delicious recipes for hot chocolate mixes in a jar.  {Jewels at Home}

I made three different mixes:

  • double chocolate hot cocoa
  • peppermint hot cocoa
  • mocha hot cocoa

Here are the recipes. I made them a little less sweet than other recipes out there – they’re still plenty decadent, don’t worry, and I did not put in powdered milk, since many people have a preference for alternative milks like soy milk, rice milk, or almond milk. I made some in almond butter jars , which hold 1.5 cups each, and some in pasta sauce jars, which hold about 2.5 cups.  I used the same recipe but added marshmallows in the larger jars.  For each recipe, layer the ingredients for a festive look.  To finish off the jars, I printed some labels with ingredients and instructions and them stuck them on decorative papers and finished off the gift with a ribbon.

Double Chocolate Hot Cocoa Recipe

  • 3/4cup cocoa powder
  • 1/2 cup white sugar
  • 1/4 teaspoon salt
  • 1/3 cup chocolate chips (the mini chocolate chips will melt more easily)
  • optional: 1/2 cup of mini marshmallows

Beautiful and delicious recipes for hot chocolate mixes in a jar.  They make great gifts! {Jewels at Home}

Peppermint Hot Cocoa Recipe

I enjoy a hint of peppermint in my hot chocolate, but I didn’t want this recipe to be too strong. These Ghiaradelli peppermint bark chocolates made the perfect addition.

  • 3/4cup cocoa powder
  • 1/2 cup white sugar
  • 1/4 teaspoon salt
  • 1/3 cup chocolate chips (the mini chocolate chips will melt more easily)
  • 3 Ghiaradelli peppermint bark chocolates, chopped
  • optional: 1/2 cup of mini marshmallows

Beautiful and delicious recipes for hot chocolate mixes in a jar.  They make great gifts! {Jewels at Home}

Beautiful and delicious recipes for hot chocolate mixes in a jar.  They make great gifts! {Jewels at Home}

Mocha Hot Cocoa Recipe

  • 3/4cup cocoa powder
  • 1/2 cup white sugar
  • 1/4 teaspoon salt
  • 1/3 cup chocolate chips (the mini chocolate chips will melt more easily)
  • 2 servings instant coffee powder (I used decaffeinated)
  • optional: 1/2 cup of mini marshmallows

Beautiful and delicious recipes for hot chocolate mixes in a jar.  They make great gifts! {Jewels at Home}

Instructions:

These are the same for all the recipes.

For the mixes without marshmallows: “Mix ingredients thoroughly.  Add 1/4 cup mix to 1 cup of hot milk.  Stir and enjoy.”

For the mixes with marshmallows: “Mix ingredients thoroughly.  Add 1/3 cup mix to 1 cup of hot milk.  Stir and enjoy.”

Beautiful and delicious recipes for hot cocoa mixes in a jar.  Perfect gifts!  {Jewels at Home}

I will warn you that these gifts are very heavy!  I walked around school this afternoon with baby J in the Ergo carrier on my back and a tray of 15 glass jars.  Truly ’tis better to give than to receive!

It was worth it, though.  I hope our teachers enjoy their gifts.  Hot chocolate by the fire is just the best!  Trust me, I’m speaking from experience.

“Jewels”


Mercury Glass Look-alike Ornaments

This post should be subtitled “The Accidental Artist.” When I set out on this project, I just meant to repaint some old ornaments I had. Along the way, some of them turned out with a lovely mercury glass look that was an unexpected and pleasant surprise, since I have been coveting those baubles but holding off on buying them, since glass and toddlers do not mix. I wouldn’t normally have bothered painting these inexpensive plastic ornaments at all, but since I had the supplies already, I thought I might as well, and it turned out to be a good thing!

This mercury glass look-alike finish is easy to create with spray paints and makes charming Christmas ornaments.  {Jewels at Home}

I had a lot of simple red and gold ornaments left over from the Chinese “Red Egg and Ginger” party I organized for J a couple of years ago. I’ll have to blog about that later! This year, I’m trying for a red, turquoise, silver, and white -themed Christmas, so I decided to repaint some of the gold and red balls to turquoise and silver. I had plenty of other red ones.

I taped the balls upside down on some scrap cardboard with painter’s tape, sprayed a coat of primer and then a few coats of paint. The turquoise paint was initially intended for an old wooden chest. This color was actually too bright for the chest, but it came in useful here. The silver (soon to be “mercury glass”) ornaments were painted with Rustoleum metallic paint in “chrome.” I’ve been in the lookout for Krylon’s “Looking Glass” paint, and I have yet to find it in a local store, but the Rustoleum metallic chrome seems similar and has a very reflective silver finish. I would have been happy to leave the ornaments silver, but I thought I would do a clear topcoat to help protect them from chipping. The clear spray I happened to have in the garage is a lacquer, which might have more solvent in it than a regular spray paint. In any case, it left tiny dull spots on the chrome, and for a split second, I was disappointed, but I’m now as pleased as (Christmas) punch, because they have a great faux mercury glass look!

Here’s how I painted the ornaments:

Tutorial on repainting your Christmas ornaments for a fresh look, including a faux mercury glass technique!  {Jewels at Home}

An easy combination of these two spray paints will give you a beautiful faux mercury glass look for your Christmas ornaments or other projects!  {Jewels at Home}

An easy combination of these two spray paints will give you a beautiful faux mercury glass look for your Christmas ornaments or other projects!

Here are some more pictures of the “mercury glass” ornaments. They are not perfect, and I’m eager to try more of the faux mercury glass techniques out there, but as accidents go, this one was very happy (much happier than some of the mishaps that have not ended up on the blog!).

Create this mercury glass look-alike finish using spray paints. {Jewels at Home}

Create this mercury glass look-alike finish using spray paints. {Jewels at Home}

Create this mercury glass look-alike finish using spray paints. {Jewels at Home}

I’m definitely getting that festive holiday feeling! How about you?

“Jewels”

Animal Silhouette Christmas Ornaments

Well, I could happily have gone on making trees, after these Christmas trees made with trims and the felt Christmas trees, but I’m exercising some restraint, such as it is, and switching over to making ornaments.

I’ve seen some whimsical animal silhouettes with pretty prints at One Kings Lane and Raredevice.net, and I thought I’d try a DIY version.

Deer silhouette Christmas ornament from Raredevice.net

Deer silhouette Christmas ornament from Raredevice.net

Reindeer and bird silhouette Christmas ornaments seen at One Kings Lane.

Reindeer and bird silhouette Christmas ornaments seen at One Kings Lane.

If you’d like to buy something similar for a reasonable price, check out these pretty wood ornaments by Arks and Animals on Etsy.

Wooden animal silhouette ornaments from Arks and Animals on Etsy.

Wooden animal silhouette ornaments from Arks and Animals on Etsy.

I’m quite tempted by the wood ones, but, I like the prints, so back to the DIY project… The ornament from Raredevice is wood with a printed design (no can do), but the One Kings Lane ornaments are cardboard and paper (can do!!). I tried this with both cardboard and craft foam as the centers. The cardboard cut more neatly than the foam, but in the end, I preferred the foam, because it gave the cut-outs a little dimension and substance. The cardboard ones ended up looking a bit more like gift tags than ornaments.

Materials:

  • assorted scrapbook, wrapping, and origami papers
  • craft foam (no longer just for kids!) in colors to match your papers or thin cardboard (like cereal boxes)
  • Images or templates to trace, such a cookie cutters, stencils, or printed images
  • craft knife and scissors – I used both large and small scissors as well as some pattern-edged scissors
  • small hole punch
  • string or ribbon for hanging

Instructions:

  • I used a glue stick to cover both sides of a piece of craft foam with decorative paper.
  • I found silhouettes I liked on the Internet and printed them out. A good size for these ornaments is about 3-4″.
  • I laid a silhouette over a section of foam and used the scissors and craft knife to cut through the foam and paper. I started with the large scissors to get the general shape and then used the small scissors and craft knife to neaten up the edges and the pattern-edged scissors for adding details, like the feathers on the birds’ wings. Because the foam is flexible, the paper did wrinkle a bit, but I tried to bend it as little as possible. The cardboard bent less, but as I said, I didn’t find the result as substantial.
  • I punched a hole in the top and threaded a ribbon… voila!
Make these sweet animal silhouette ornaments decorated with origami paper! {Jewels at Home}

Sweet animal silhouette ornaments decorated with origami paper! In case you are wondering, the reindeer in the top row was made with a cardboard center, and the rest have the foam center.

And here are the new ornaments on our Christmas tree.  By the way, if you are in San Francisco, Lowe’s had trees for literally a third the price of the Christmas tree lots.  The ambience was somewhat lacking, but it was worth it!

Moose silhouette ornament.  O Canada! {Jewels at Home}

Moose silhouette ornament. O Canada!

Bunny silhouette ornament with instructions. {Jewels at Home}

Bunny silhouette ornament. For my sister and little nieces, who were all born in the year of the rabbit!

Make a little blue bird silhouette ornament for the tree. {Jewels at Home}

A little blue bird silhouette ornament for our tree.

These ornaments turned out very sweet and were fairly fast to make. They might show up as gifts this season!  I also found some homemade ornaments from years past that I’ll post soon.

“Jewels”

I shared this project at:

Centsational Girl’s holiday Link Party

Introduction to Magic The Gathering {by K}

I’m proud to introduce you to my first guest blogger: our oldest son! Since we always talk about writing about what you love, here he is explaining his favorite card game, Magic The Gathering. And without further ado, I give you K…

———————–

I am here to teach you how to play my favorite card game Magic The Gathering. I first learned how to play from one of my friends at school. First, I will teach you about creatures. Creatures are the cards that represent your army. In the picture below, it shows the top of a creature card. On the top left is the name of the creature card and on the top right is the amount lands or mana the card costs to cast to the battlefield.

Above it shows the middle part of a land card. Lands are the cards you use to cast creatures, and almost any other type of card in Magic The Gathering. On any card in Magic other than lands there is a mana cost you need to pay in order to cast that card. The mana cost is either a ball with a number in it or a symbol, a fireball, a water drop, a tree, a sun, or a skull or it is combination of both . If it is a ball with a number in it you can use any type of land to pay it or if it is a symbol then use the the land the symbol stands for. Fireball=mountain, water drop=island, tree=forest, sun=plains, and skull=swamp.When you use mana you tap or turn sideways the land card.Tapped cards can not be used.

Below is a picture of the bottom of a creature card in Magic the Gathering. On the bottom of a creature card there is the creature’s power and toughness. Power is the amount of damage a creature can do in combat. Toughness is the amount of damage a creature can absorb. Right now I am going to teach you how to battle. Creatures cannot attack on the turn they are cast unless they have haste. At the beginning of your battle phase if it is your turn you will choose if you want to attack or not if you want to choose which creatures you want to attack with. After you have told your opponent which creatures you are attacking with your opponent will choose what he want to block what. In battle creatures both deal their power to each others toughness. Example:A 1/1 fought a 2/2 the 2/2 would win because 2 power beats 1 toughness and 1 power does not beat 2 toughness. If a creature attacked it becomes tapped if it does not have vigilance. Tapped creatures can not block. Blocking does not cause creatures to tap.

Here is the middle and bottom of a instant. Instants can empower your creatures,weaken your enemies creatures,and can do almost anything you can think of. Instants can be played during your turn or your opponents turn. Instants are considered spells.

Below is a picture of the lower portion of a sorcery card in Magic. A sorcery is the same as a instant except you can only cast them during your turn.


Above are two different types of enchantments. The first enchantment is a enchantment that affects something on the field. The second type which is called a aura affects one creature. Enchantments can only be cast on your turn.

Below is a artifact. There are two types of artifacts one type is not shown. Like enchantments the first one affects the field and the second type is called a equipment and affects one creature. Artifacts can only be cast during your turn.

Below it shows a card called a planeswalker. Like all other cards in Magic they have a mana cost. At the bottom are it’s loyalty counters. In the middle section are some actions it can do +1 means you add 1 to it’s loyalty. If you do not want to take damage a planeswalker on your side can take the damage for you by removing loyalty counters equivalent to the damage. If a planeswalker’s loyalty falls to 0 or less put it into the discard pile. SETUP

Each player starts with 20 life, a 40-60 card deck, and a 6 card hand.

TURN SEQUENCE

Untap Phase: Untap all of your cards.

Draw Phase: Draw 1 card

Upkeep Phase: Activate any cards that say during the upkeep

Main Phase 1: Play lands, sorceries, instants, and cast creatures

Battle Phase: Attack and block( Instants may be played during battle phase)

Main Phase 2: Do anything you could do in main phase 1 except play a land card

End Phase: Activate cards that say during your end phase

SPECIAL POWERS

Trample: Battle damage done by a creature with trample not absorbed by a blocker’s toughness is dealt to the defending player.

Vigilance: Creatures with vigilance do not tap after attacking.

Flying: Creatures with flying can only be blocked by creatures with flying and creatures with reach.

Reach: Creatures with reach can block creatures flying.

Morbid: Creatures and spells with morbid get stronger if a creature died the turn it was cast.

Exalted: Creatures that attack alone get +1/+1 until end of turn

War Cry: If a creature with war cry attack and then creatures attack after them the creatures that attacked after the creature with war cry get a bonus.