“If These Walls Could Talk” Gallery Wall – Week Two – Spring 2025 One Room Challenge

I seriously love the One Room Challenge. It’s just the motivation I need to finish off projects. I’ve been puttering away preparing the gallery wall in our new bedroom, and with this week’s progress update launching, I got the energy to finish hanging everything after work today!

As a reminder, this room is bedroom addition we built last year. It’s going to be a room for our oldest, when he’s home, and also serve as a guest room or lounge! It’s a petite space, but I had big plans for this wall, and I really feel like it opens up the room!

If you are looking for tips for your own gallery wall, here are some ideas to consider:

  • let an overall impression guide you – my inspiration spaces contained art that felt light, with large white mats or lots of negative space.
  • Consider a theme – I chose items that represent the outdoors, wanting to make this narrow space feel more open
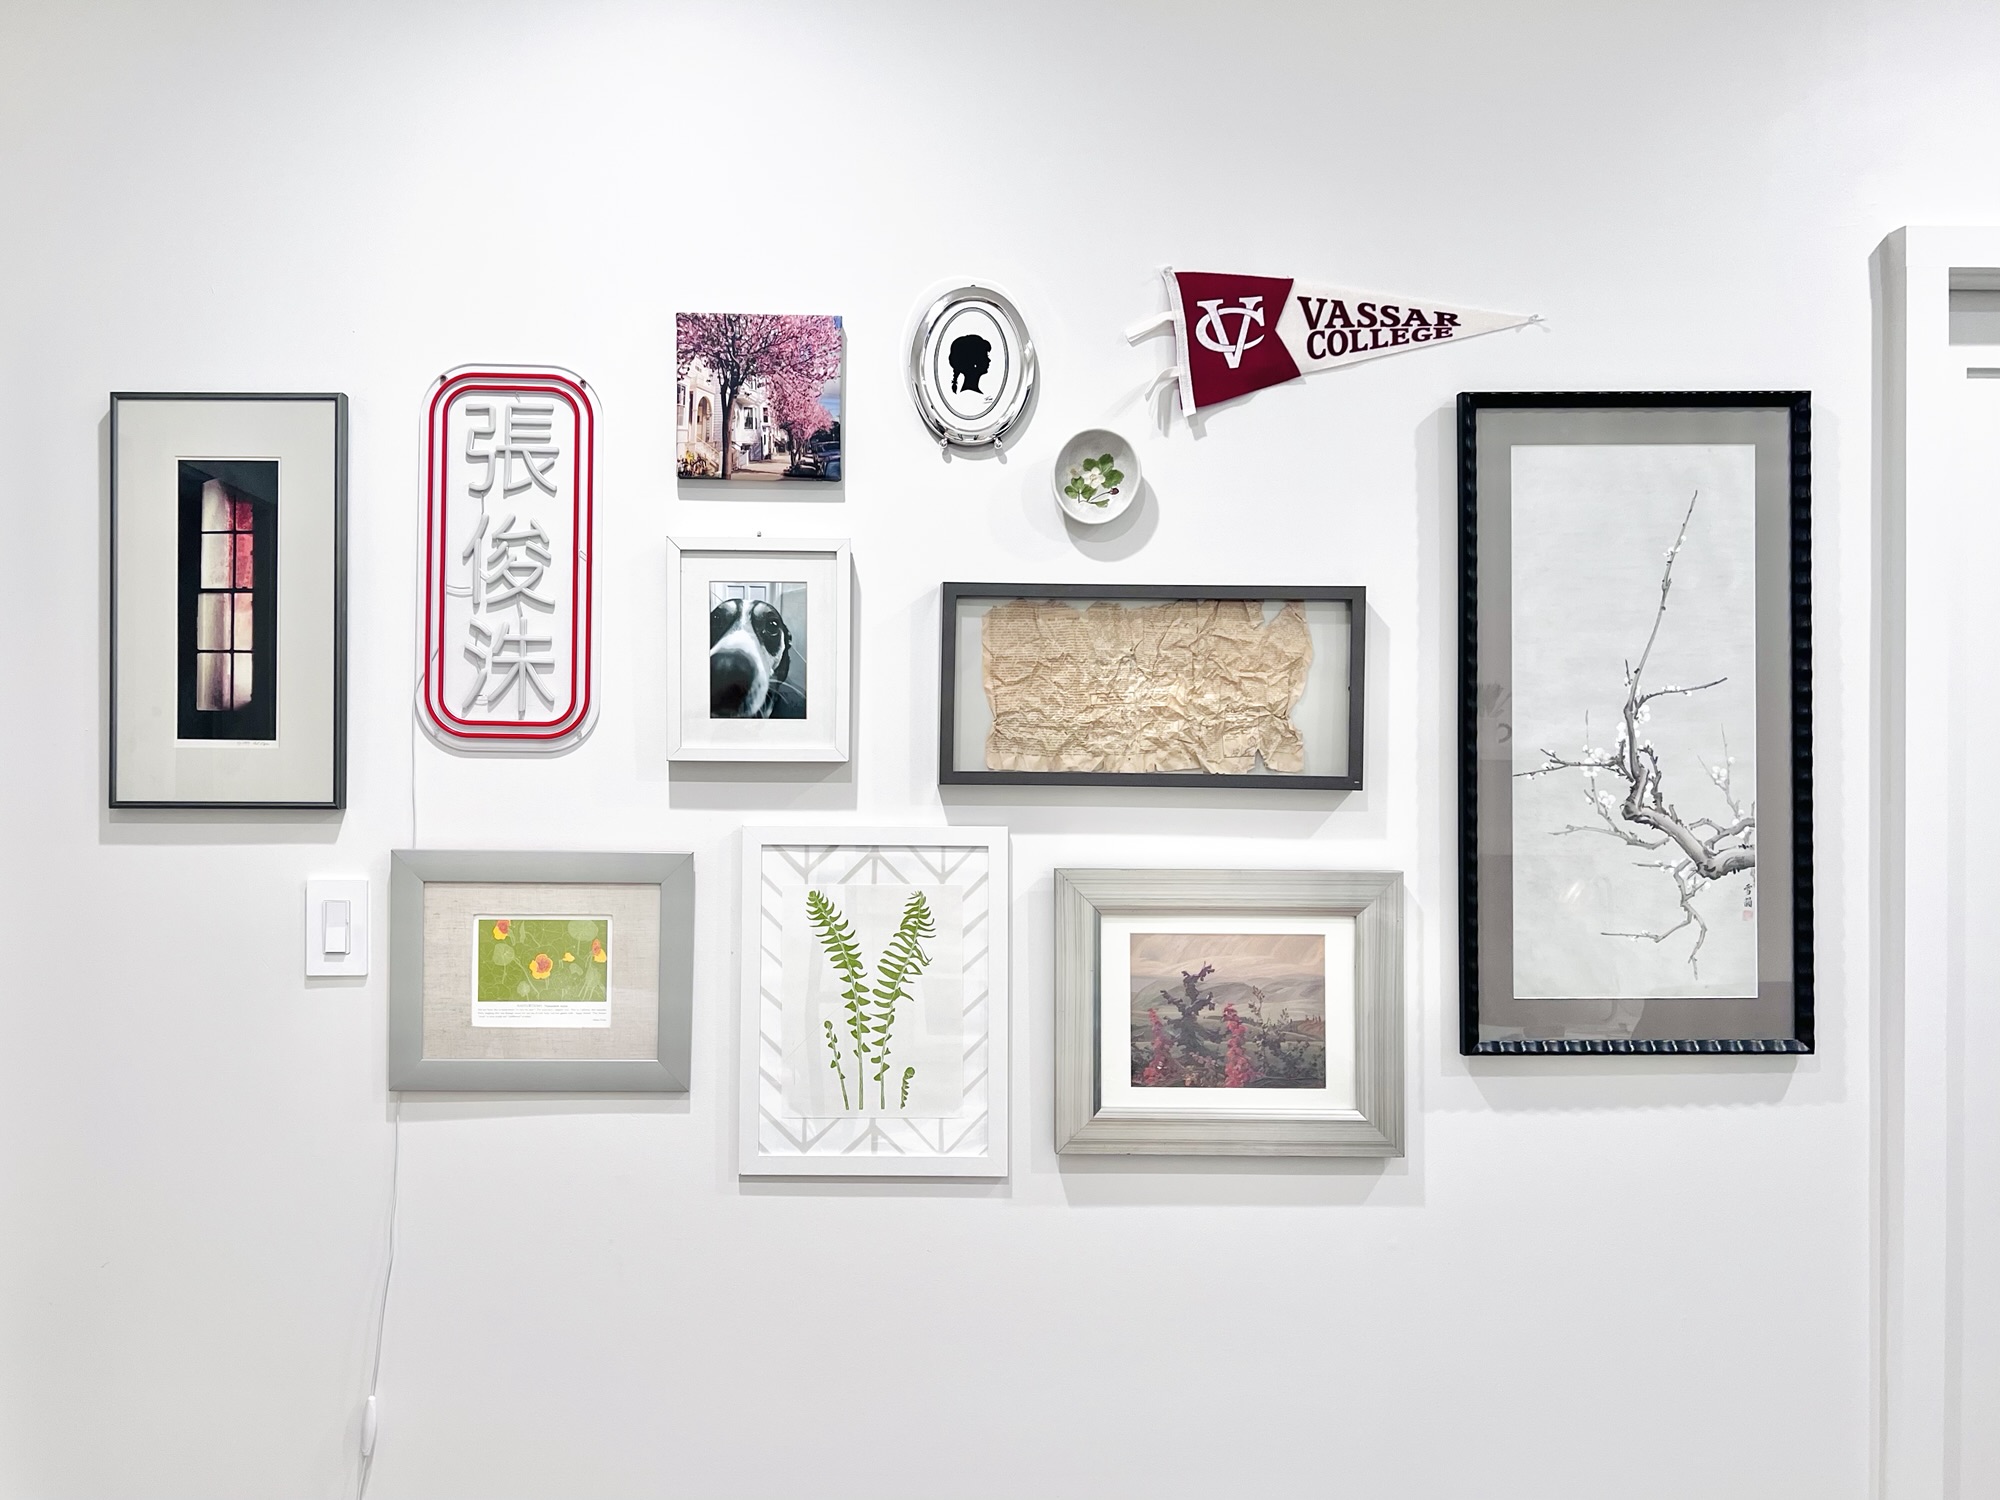
  • choose items with meaning -these walls can talk, because every item here has a story behind it!
  • for a collected look, mix multiple types of art, such as paintings, photographs, prints, and three-dimensional objects
  • DIY items, such as a fabric-covered picture mat or your own photographs
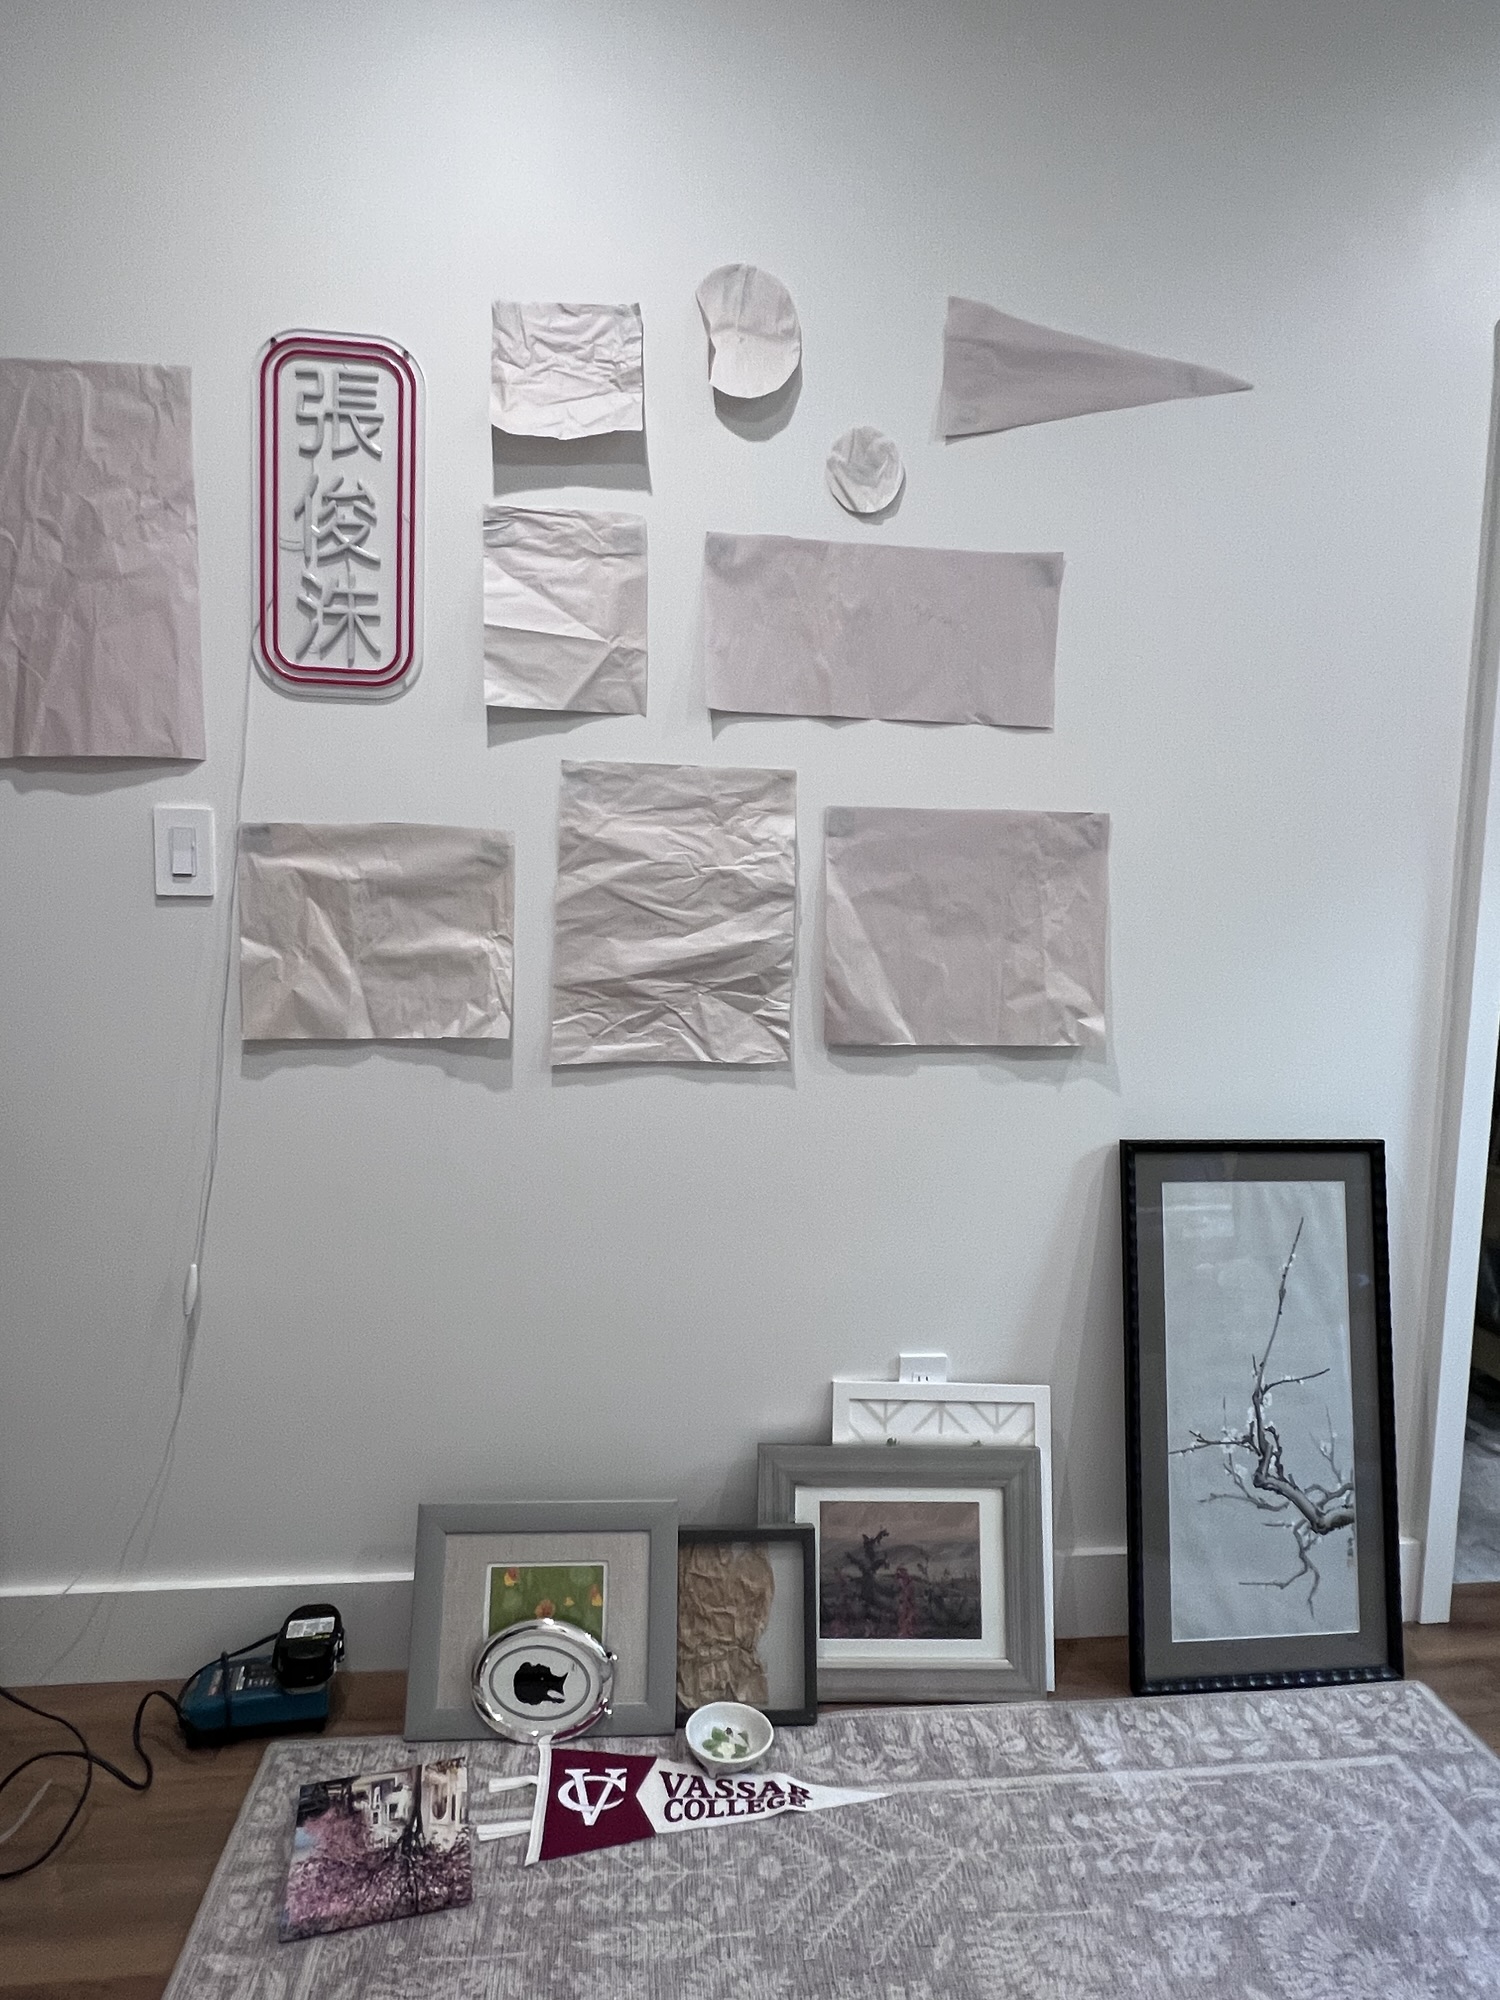
  • Use paper cutouts of your items to help you design the layout

Here’s a before-and-after look at the space:

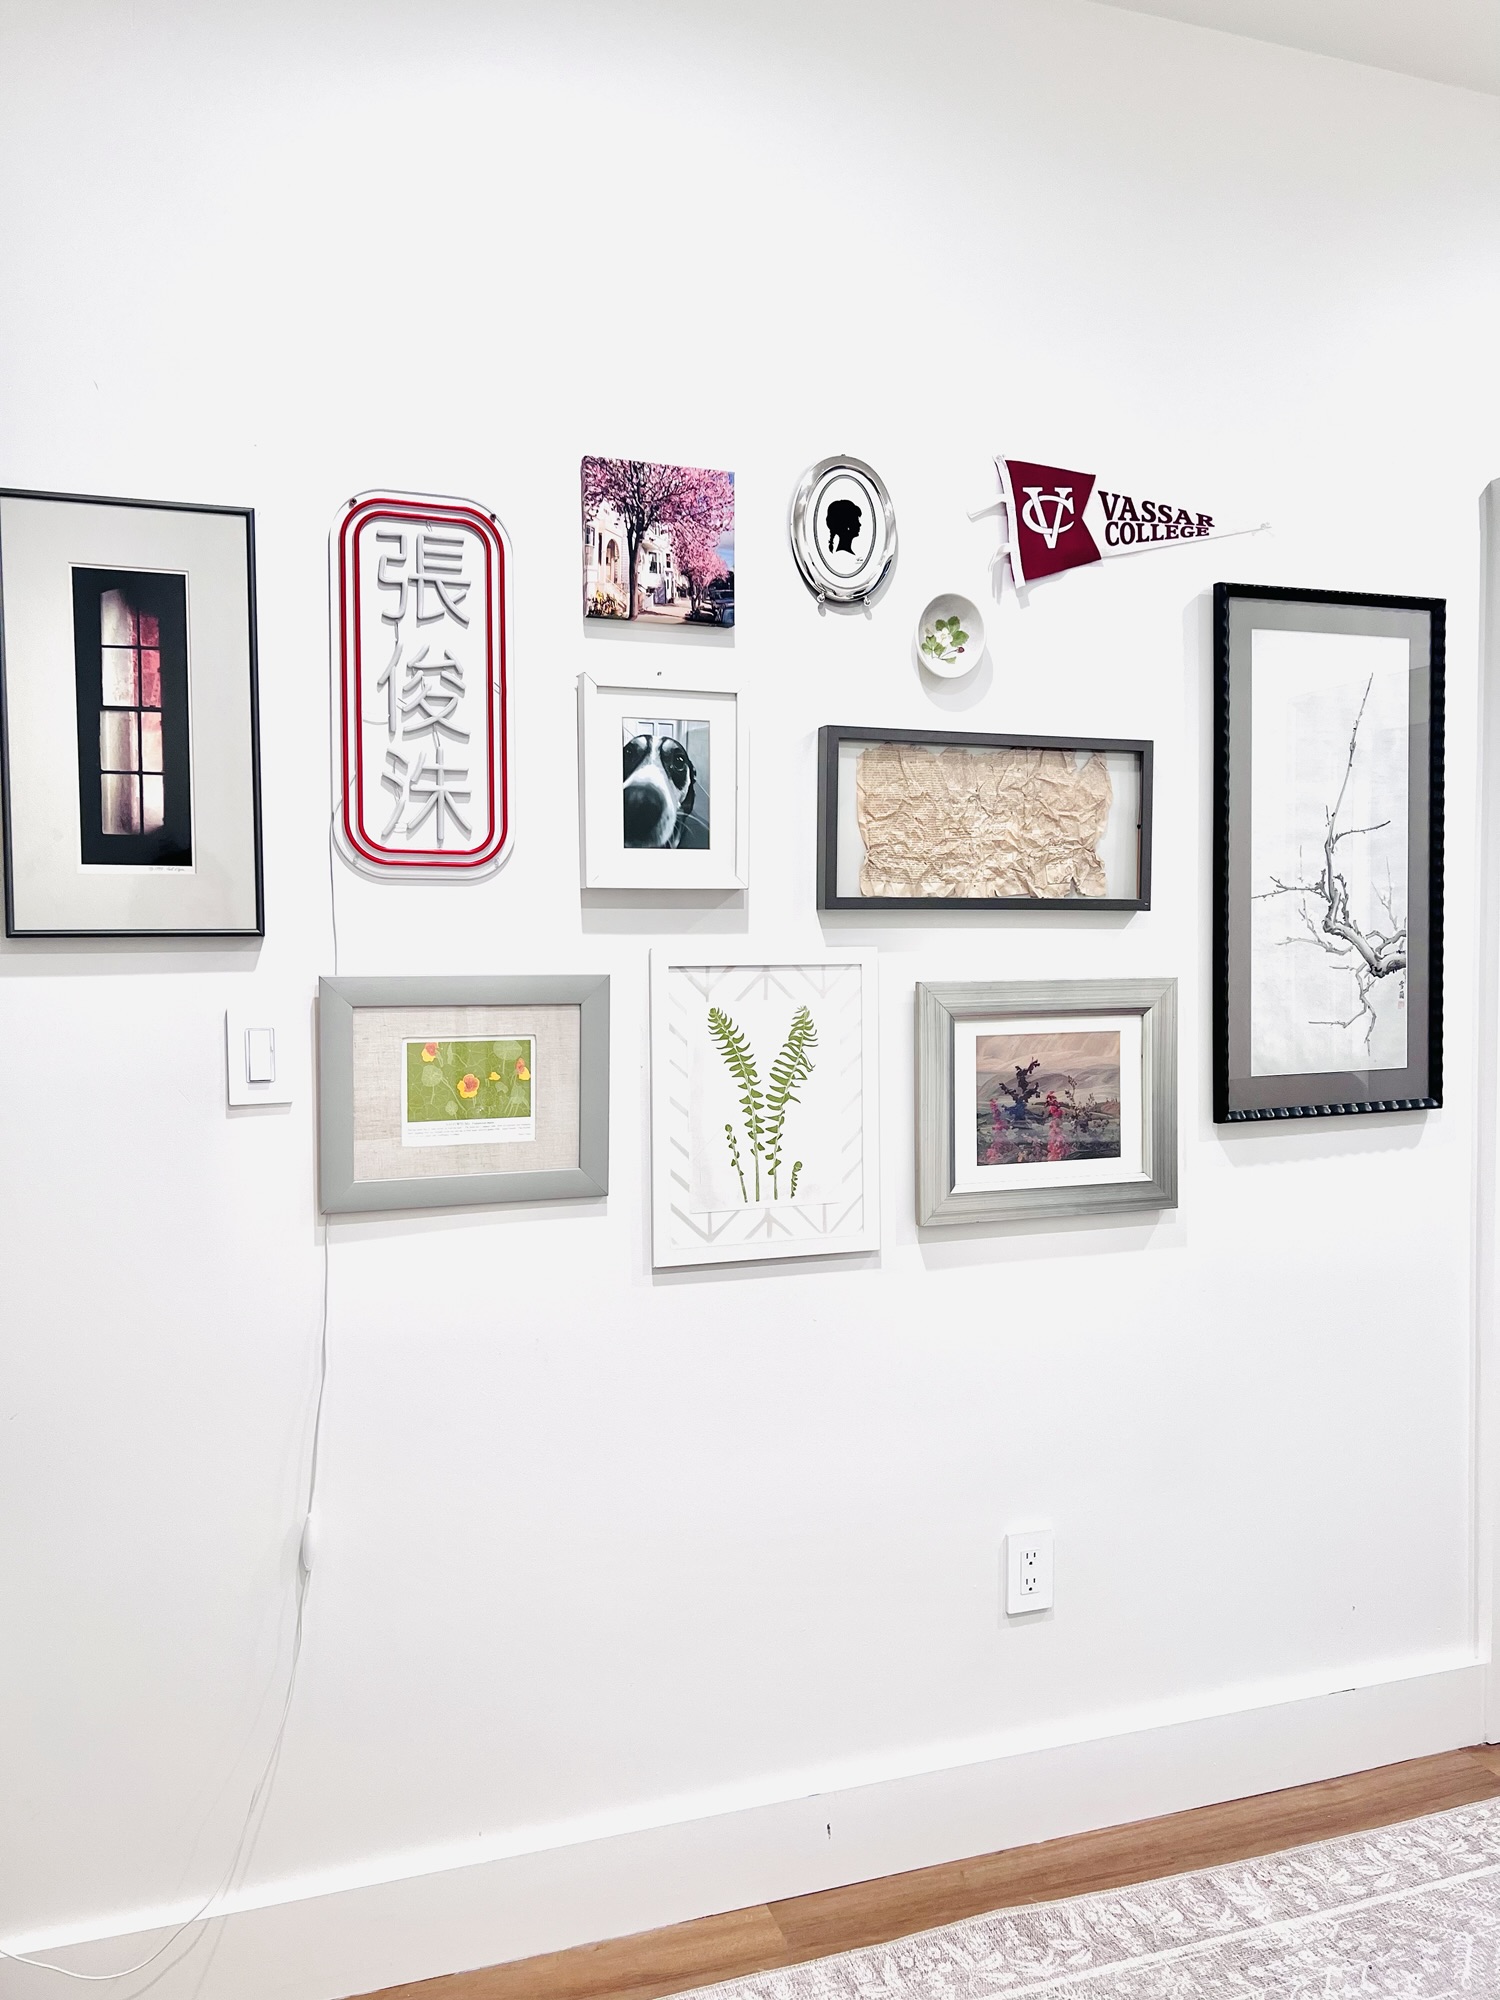
This collection includes a DIY fabric-covered picture mat and a photo I took of Finn and printed at the local drugstore.

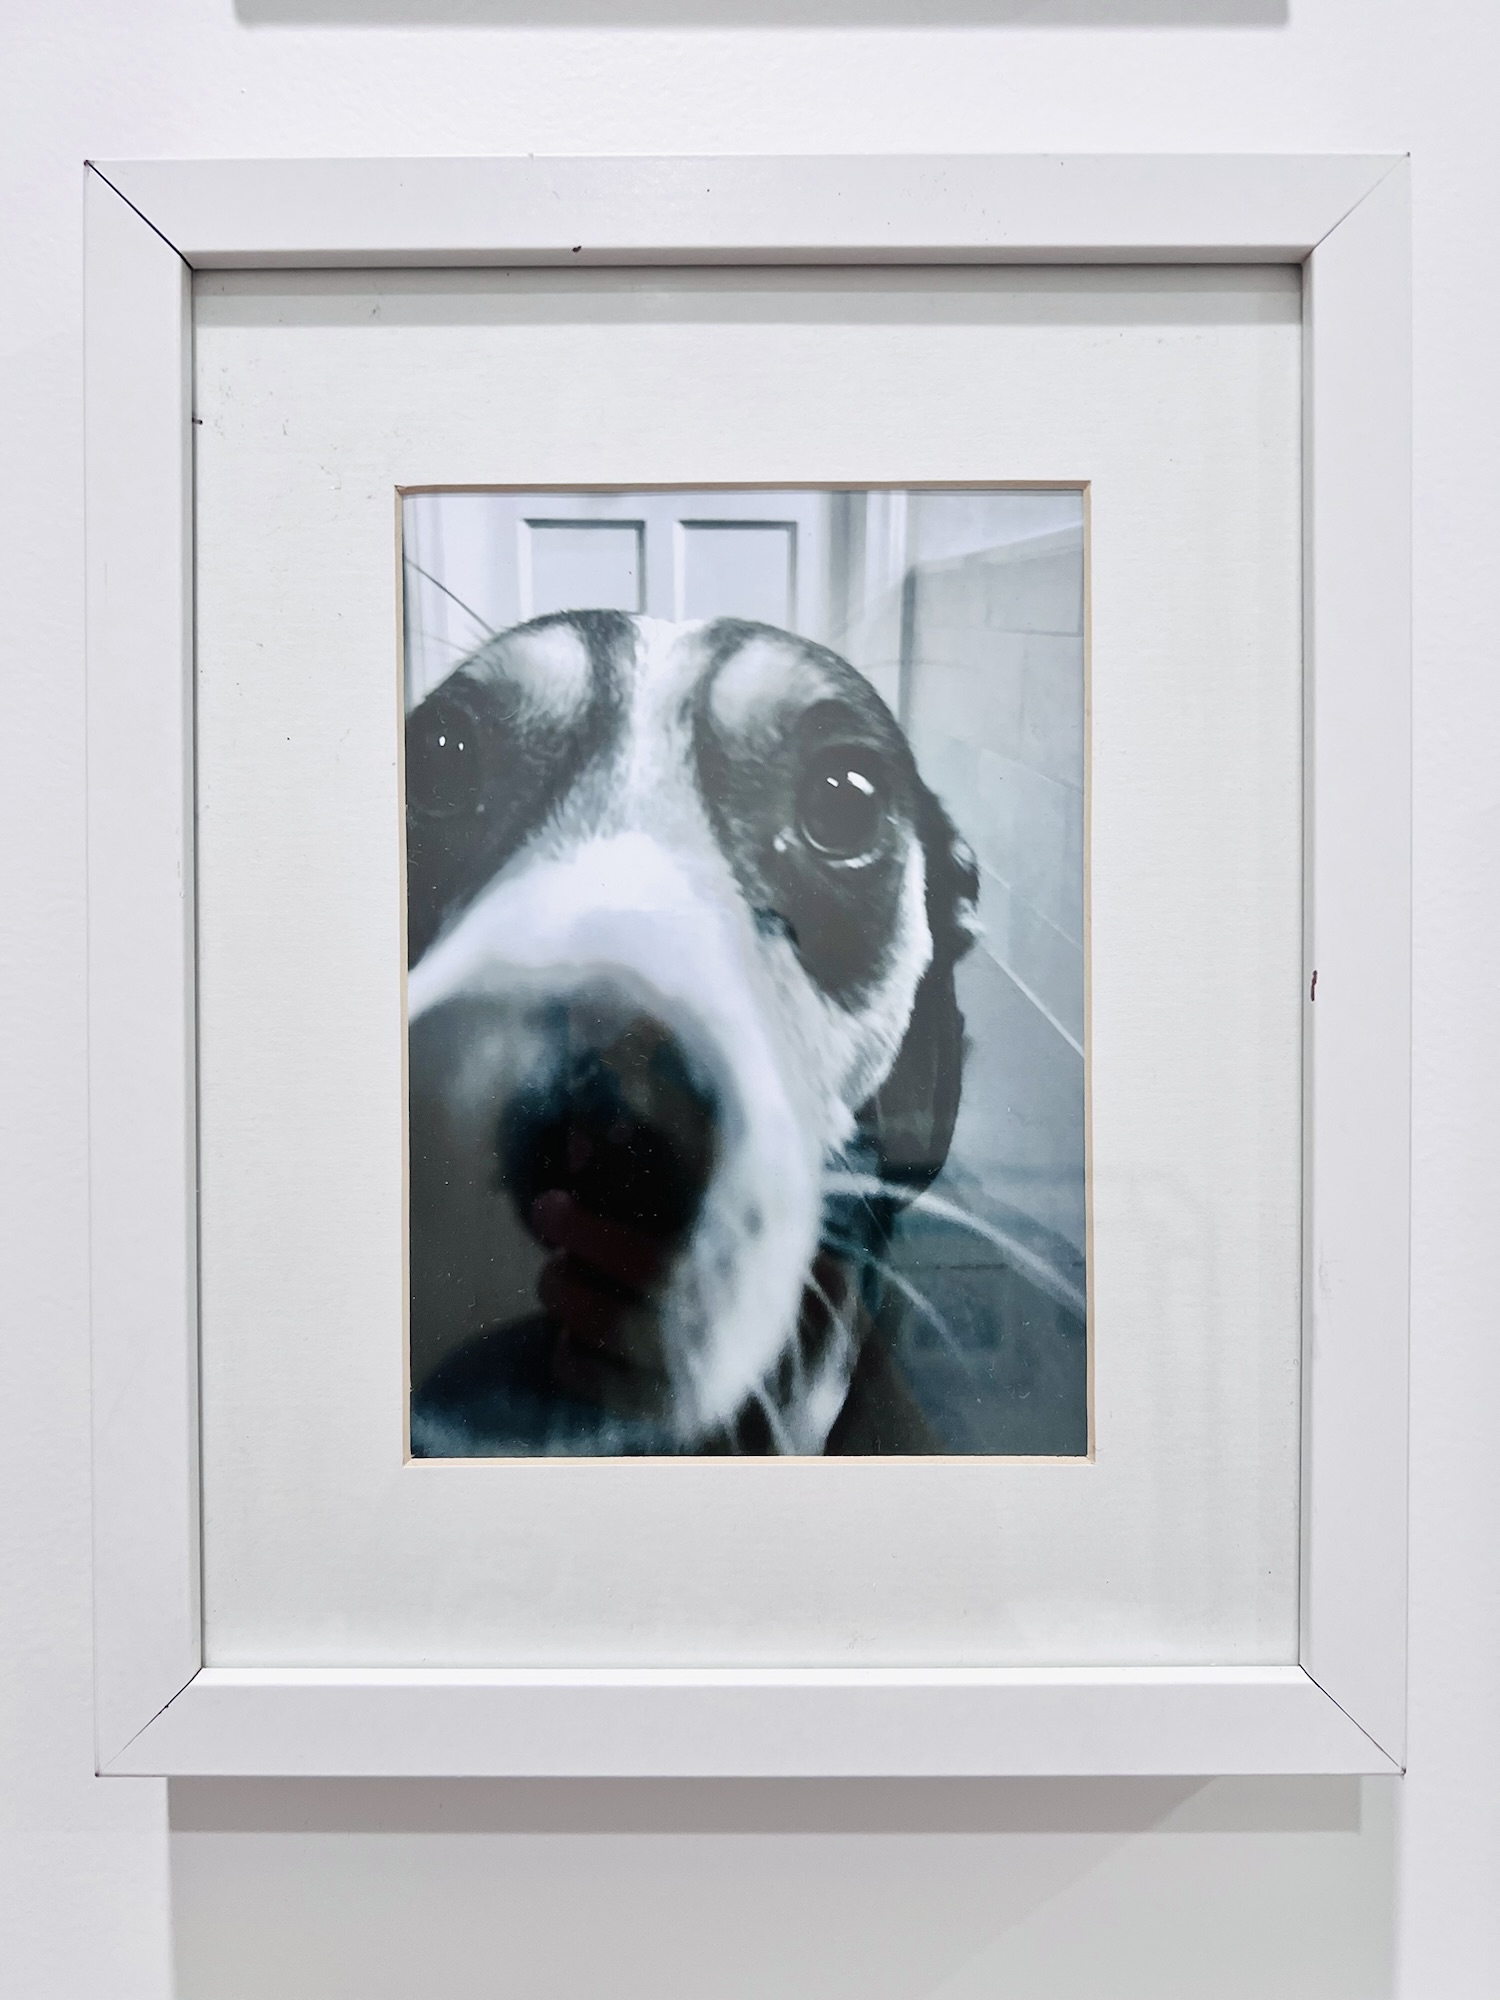
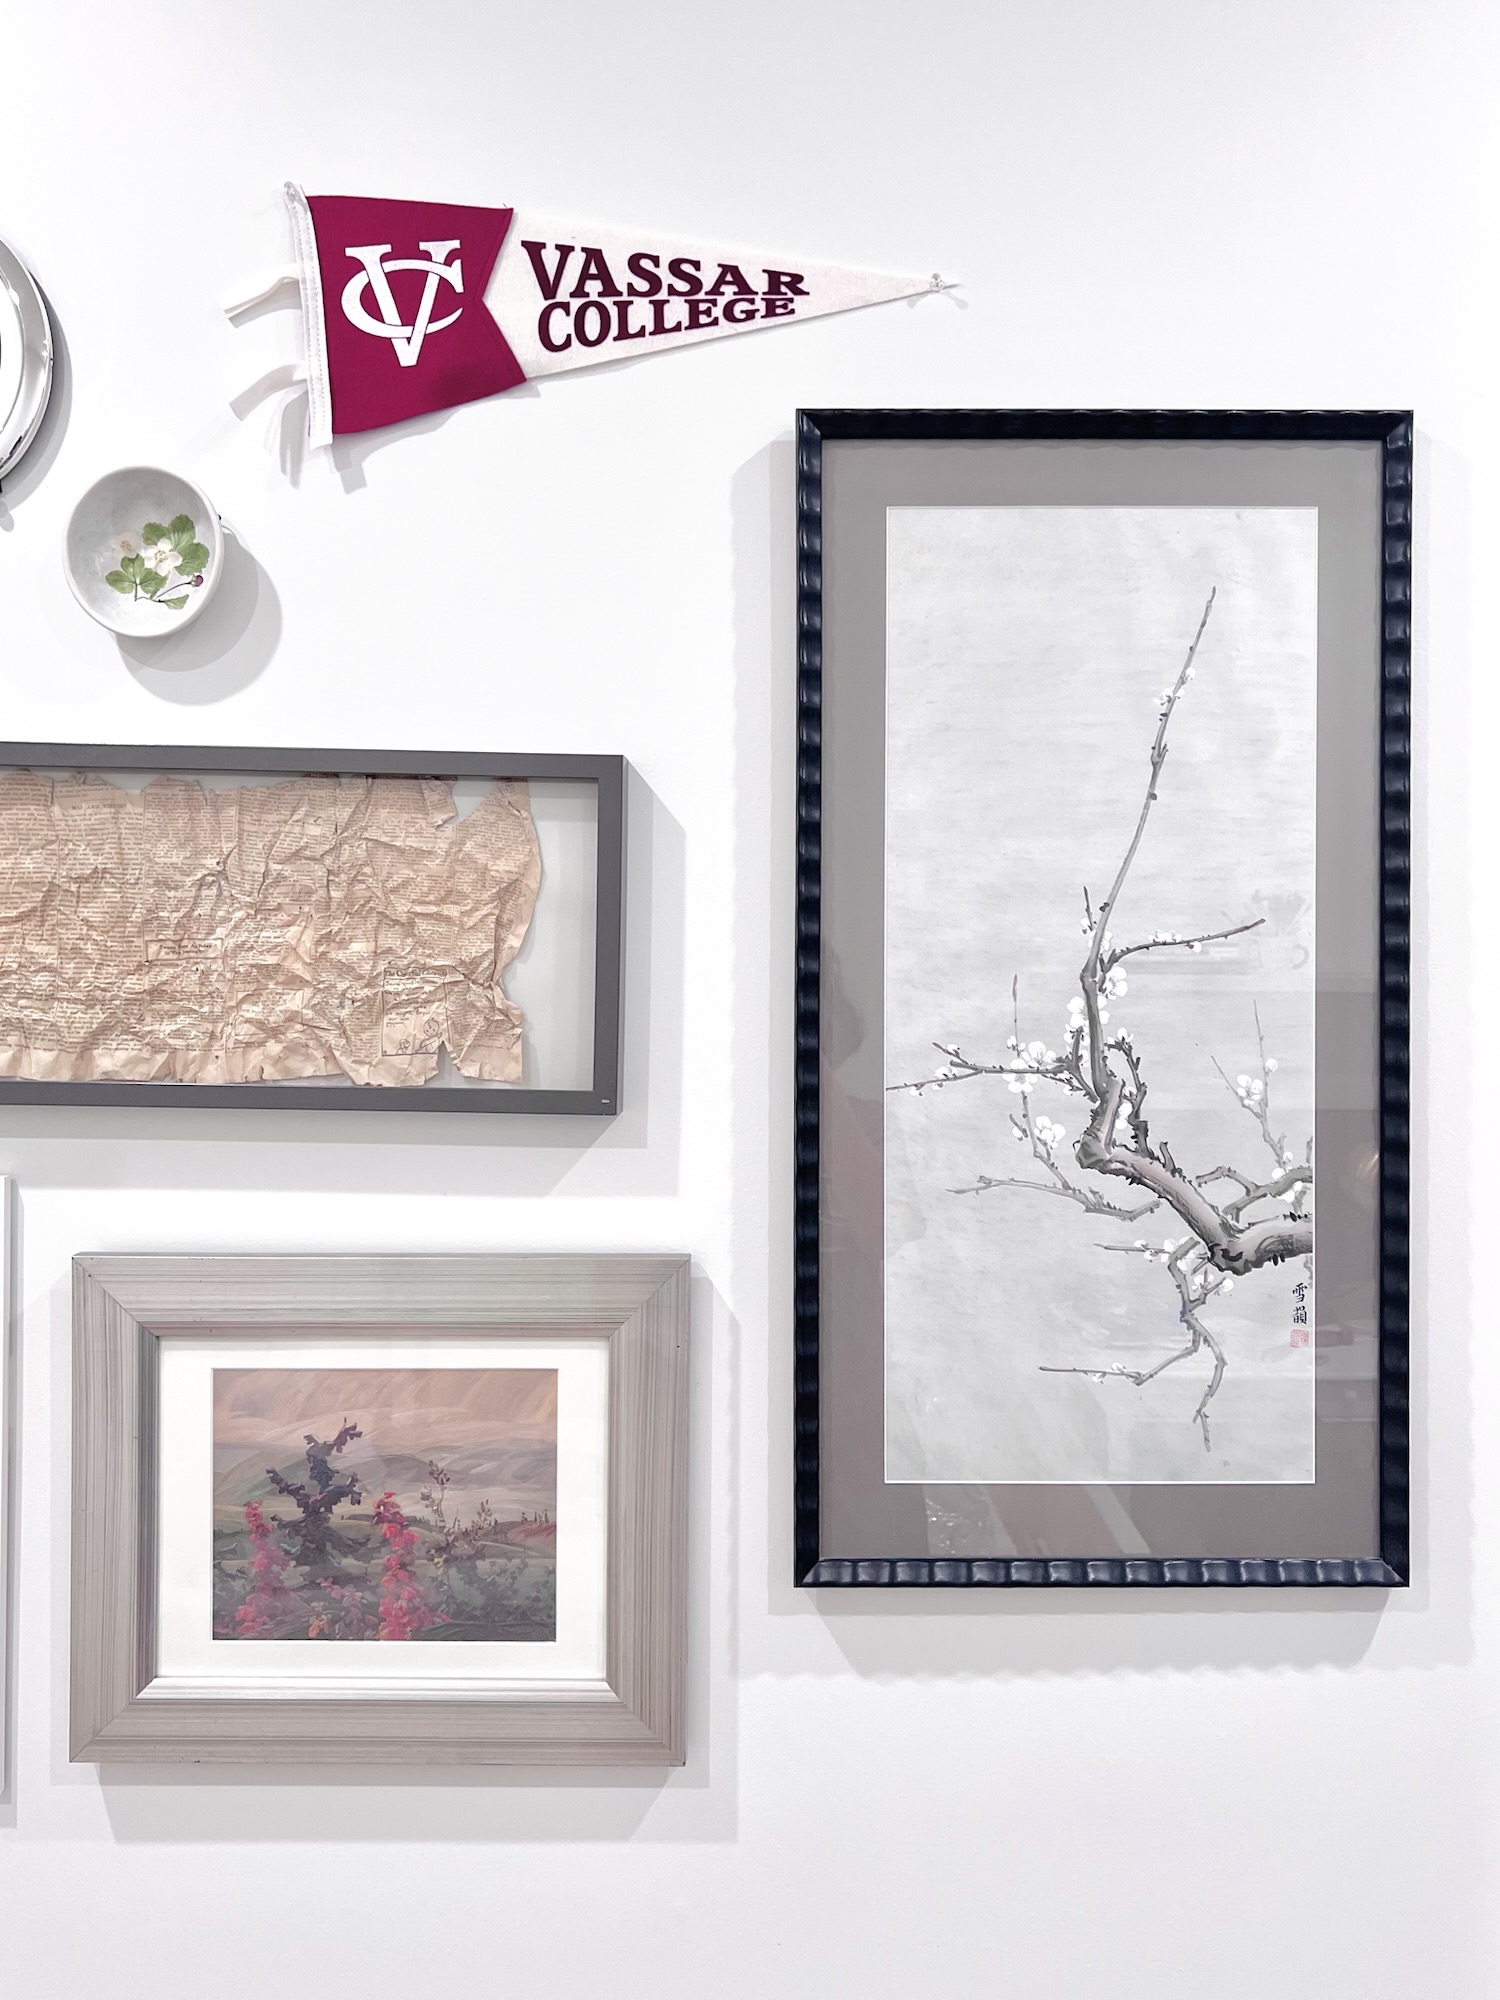
As I said, these walls can talk! Clockwise from left, a photograph taken from Fort Point, under the Golden Gate Bridge, that Steve and I bought at an art fair ~25+ years ago; an LED sign with my son’s name that my sister sent from Hong Kong; a small canvas print of a photo I took, featuring spring blossoms and Victorian houses; photo of Finn I took and printed; nasturtium print by Henry Evans calendar under a DIY fabric mat. My friend Penny gifts me a Henry Evans calendar every Christmas!

More treasures: paper silhouette cut-out from the Canadian National Exhibition when I was a child; strawberry ceramic bowl I bought at an art fair with a friend ~25 years ago; Vassar College pennant for my oldest; 1924 newspaper found in the walls of our last house; replica Group of Seven Canadian landscape painting my parents got on an Air Canada flight ~30 years ago; fern print from another Henry Evans calendar.

Last of the treasures: a beautiful branch painting by my mom ❤

I’m working away on some other projects that I hope to share with you soon! In the meantime, you can see all the other fun room transformations on the One Room Challenge website!

Julie AKA “Jewels”

Gallery of Plates for the Dining Room

UPDATE 4/20/2011:

I wasn’t completely happy about the first iteration of our plate display, but that’s okay!  I popped into the Goodwill store on my way back from the hardware store today (buying spray paint – what else?!) and found two little plates that complement the collection nicely.  They were just $2.49 each, so a good deal, too!  I think flea markets and thrift stores are great places to find items for decor and styling.  A lot of the items would not seem special on their own but work well together.  It also gives your room a lot more personality to have a mix of old and new items.

I hung the new plates with the same 3M Command Picture Hanging Strips
that I used for the oversize initials project – I was paranoid and used way more strips than specified for their weight – and I think the display looks much more complete.  The other thing I did was to swap one of the blue and white plates with one of the green ones.  I was staring at it during dinner and just jumped up to try it!  Sometimes, staring at things helps.  It breaks up the line of blue and white plates while creating a small grouping with the two green ones.  Getting a balanced design can take a few tries, but it’s so pleasing to look at when it’s done. Here is the new dining room display.  I might still keep an eye out for something special at the flea market this weekend, but I no longer feel like something is missing.

wall gallery take 2

Take Two: The collection of plates feels more complete and balanced after the addition of two more plates and changing the positions a bit.

plates close-up

Close-up of the plates. Finding the right balance can take a few tries. I needed to separate the blue and white plates, because they are so strong and formed a line in the original placement. It works to group some like items together, like the octagonal green plates, while separating others, like the two small plates.

ORIGINAL POST:

Remember the collection of plates I found for $11 at our local rummage sale (The Pleasure of the Hunt)?  I put them up in the dining room today, and it was an easy project to dress up the space!

Gallery of plates

Wall display with plates from a rummage sale. $11 worth of plates and another $11 of hanging materials.  I think I need a few more plates!

I got the idea for this plate gallery from Sabrina Soto’s High Low Project on HGTV.  I like Sabrina’s style – it’s classic and comfortable with a fresh contemporary touch.  If you haven’t seen the show (and I recommend you do!), she starts by designing a dream room for her clients that is full of high-end pieces and then recreates it for a fraction of the cost.  There is an element of the show that is a bit silly – some of the elements in the first room are always exceedingly expensive – like original artwork or rare antiques – and she also saves a lot of money on the second version by having her assistant build things, but overall, I love the concept.  Because she tries to recreate the original room, you get to see the project broken down into components, and she good tips for deals and DIY projects, which are right up my alley, in case you couldn’t tell!

Anyway, in one of the episodes (I think it’s the first one), she does a dining room makeover and hangs a collection of plates on the wall.  She used these Invisible Disc Hangers which are a great way to hang plates securely without any visible hardware!  They are made in England and available from a lot of vendors.  I found a good price for mine on eBay.  They are easy to use – just wet the disc and press it onto the back of a clean plate.  I used blue painter’s tape to mark the top center of the pattern, so I could line up the hanging ring.

disc hanger on plate

Just wet the disc hanger and press onto a clean plate.

I like how it looks, and I’ll see if I can find any more great deals on plates to add, when I go to the flea market next weekend.

“Jewels”