I want to be very clear that I’m no minimalist, but I’ve definitely been working hard on taming the clutter in our house. In the process, I’ve really noticed how calming it is to see a formerly-cluttered space all cleared … Continue reading
I want to be very clear that I’m no minimalist, but I’ve definitely been working hard on taming the clutter in our house. In the process, I’ve really noticed how calming it is to see a formerly-cluttered space all cleared … Continue reading
I know I’m not alone in starting this year with a real fire lit under me to start cleaning and de-cluttering our house. I first read Marie Kondo’s book a few years ago, but with her new show, she’s somehow getting even more popular, and I am on the wagon!
After doing a major closet cleaning, my friends and I decided that we would have a little clothing swap party to see if we could find some new items that “spark joy,” all without spending a penny! It was SO MUCH FUN!

I ended having a small get-together, which was just as much for the company as for anything else. A couple of my close friends from work and I are always admiring each other’s style and wear similar sizes, so this was an easy guest list to put together.
Admittedly, I would have fun doing just about anything with these girls, but the clothing swap was truly a blast! Of course, there was the excitement of getting something new for free! But on top of that, it was a great feeling to see things that I really liked but just didn’t work on me fit perfectly on my friends. Not to mention, there were some good stories behind some of these items!
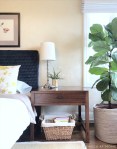
A couple of my favorite “new” items are this leather tote bag and the little pendant necklace on the dresser.

Even though our party was small, I take party planning seriously, so I’ve gathered some of my best tips for a clothing swap of any size!
Before the party
At the party
I’m a little sad it will take us years to accumulate enough stuff for another swap, but we’ll definitely find another excuse to get together and have fun soon!
Julie aka “Jewels”
With our recent renovation, we finished the basement and garage – yay! The garage entry gets used quite a bit when the boys are playing out back or running in after school, so I wanted to create a little mudroom area to corral their jackets and shoes. I especially love this project, because it’s made entirely with things we had in the house already!

I got the idea for turning a bookcase into a mudroom locker from Melissa at Polka Dot Chair, who did this great project using IKEA Billy bookcases. I was going to do the same thing, when I realized we had all the parts I needed at home.
I started with this big heavy bookcase I bought off Craigslist ages ago. I never want to move it again! I shifted the shelves towards the top and bottom – which was perfect, since the bookcase was already missing a shelf, and added hooks for coats and the dog leash. The hooks were from two over-the-door racks we were no longer using. I cut off the hangers and just screwed them in place.
The two baskets on top were also repurposed and fit perfectly, holding all the extra soccer cleats and other shoes waiting to be passed down from one brother to another. Finally, we’re lucky to have pretty mild weather here, so I don’t need my boots too often, and the space on top is the perfect place to store them for a rainy day – haha!
A bamboo doormat finishes off our garage entry!

I’d love to spruce up this area even more by painting the back of the bookcase and the door, but if you could see all the boxes that are half unpacked upstairs, you’d believe me that I’ve got bigger fish to fry!
“Jewels”
I recently picked up some beautiful wrapping paper at Lavish in Hayes Valley. This is the same store where I found the perfect red and white graphic paper for lining our nursery bookcase. The new paper I found is for my craft room. It’s called Hydrangeas by Kate & Birdie. This company has lots of very sweet original prints – my six year old bought himself a sheet of pirate ship paper while we were in the store. They started in Winnipeg, Canada, so even dearer to my Canadian ex-pat heart.

Hydrangeas (WP02) wrapping paper by Kate & Birdie. Click the picture to see their site.
The blue, green, and grey color scheme of this paper fits my craft studio perfectly! The blue is just the same as the great print on my newly upholstered Queen Anne chairs, and all the colors are found in the stenciled lampshade I made for that room.
I’m amazed what a long way this one sheet can go. For $4, I have enough paper to create several great accessories and accents for my room. I started a clothespin wreath and moved on to these pencil tins – and I still have more projects planned!
I love reusing old items, though it’s always a fine line between clever frugality and looking like a preschool art project. I’ve definitely seen more “primitive” versions of these pencil tins, but I like to think that mine fit into the feminine, elegant, slightly funky studio I am creating.

Turn used cans into beautiful pencil tins for your office.
This is a very simple and quick project that needs very little explanation. I started by using pliers to flatten any sharp edges along the inside of the can. To cut the paper neatly, I used the quilting ruler and mat I showed in the fabric growth chart tutorial.

Flatten the sharp edged on your can. Cut out paper and glue with a glue stick.
I used a glue stick to affix the paper to the tin. For my kids’ tins, I also added a layer of clear contact paper to make the tins more durable. Finally, I use tacky glue to attach bias ribbon to the top of the tin, for a polished look. (I tried hot glue, but it cools very fast on the metal and gets lumpy.)

Beautiful pencil tins made from old cans, decorative paper, and bias tape.

Craft room desk set: DIY pencil tins fit in with ceramics on a vintage tray.

DIY pencil tins.
While I was making these tins, I added some for the boys’ homework area. These have a layer of clear contact paper over the scrapbook paper, since I know they will get more (ab)use.

Pencil tins for the boys’ homework area.
What else do I want to decorate with my beautiful Hydrangeas paper? A pennant banner, some magnets, magazine files, and some storage boxes for the craft studio. Hope to share those projects soon. Meanwhile, go raid your recycling bin and make some new accessories for your own office!
“Jewels”
