
A few years ago, I made an accordion album to hold photos for my dad. Now, here’s a more dressed-up version that I made as wedding cards from our work for two coworkers who are both getting married this summer. … Continue reading
A few years ago, I made an accordion album to hold photos for my dad. Now, here’s a more dressed-up version that I made as wedding cards from our work for two coworkers who are both getting married this summer. … Continue reading

Making these decorative paper storage boxes makes me so happy! Like many of my other creations, it started by seeing something beautiful and wondering “how could I make that?!” In this case, it started by seeing these gorgeous Antoinette Poisson … Continue reading

A couple of years ago, shortly after everything shut down at the beginning of the pandemic, I got back into sewing. A lot. It kept me busy and feeling productive and was a great outlet, while making pretty things for … Continue reading
I have a lot of craft projects “incubating” – I get excited, I buy supplies, and then… I wait for the perfect moment to create them! We could also call this hoarding of craft supplies, but that’s not in the spirit of the season!
We’ve got an enthusiastic new social committee at work, and they organized a “Secret Snowflake” exchange for the holidays. “Handmade is encouraged,” they instructed. Now that’s my kind of challenge. My gift recipient loves to host dinner parties, so I found her a cute serving bowl, some holiday dish towels, and I am finishing off the package with these DIY coasters!

Here’s what you’ll need:

Here’s how to do it:
Here they are in my home and getting ready to go spread cheer in my friend’s home!
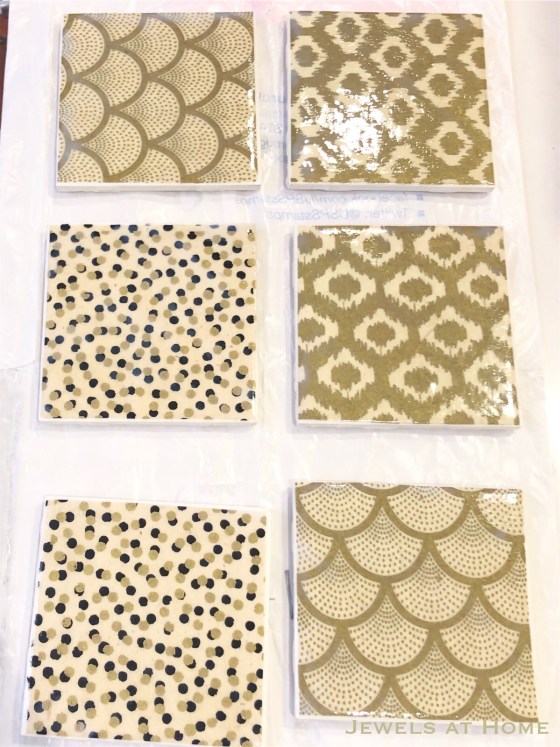


Next time, I’d like to try making these coasters, with the paper sandwiched between glass, because I think they’ll hold up even better. Next year’s teacher and coworker gift? Maybe!
Hope you are having fun sharing treats and gifts this season!
Julie aka “Jewels”
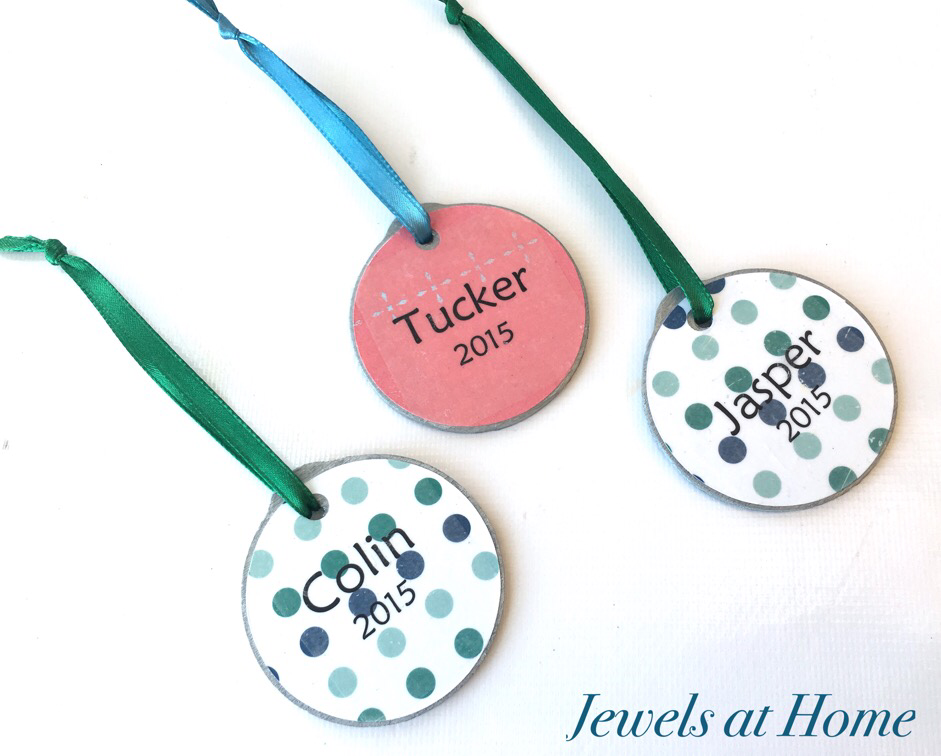
Every year, I make personalized Christmas ornaments for our family and friends. This is usually a simple project with store-bought ornaments. This year, I’m doing a little DIY, because I didn’t find anything quite right for our retro mid-century Christmas.
I’m making some clear globe ornaments to give to our local friends. For those that live further away, I wanted something easy to mail, so I was excited to find this inspiration for ornaments covered in scrapbook paper. Besides being pretty, these ornaments are lightweight, flat, and sturdy, so they’re perfect for sending to friends!

Here’s how to do this cute project:
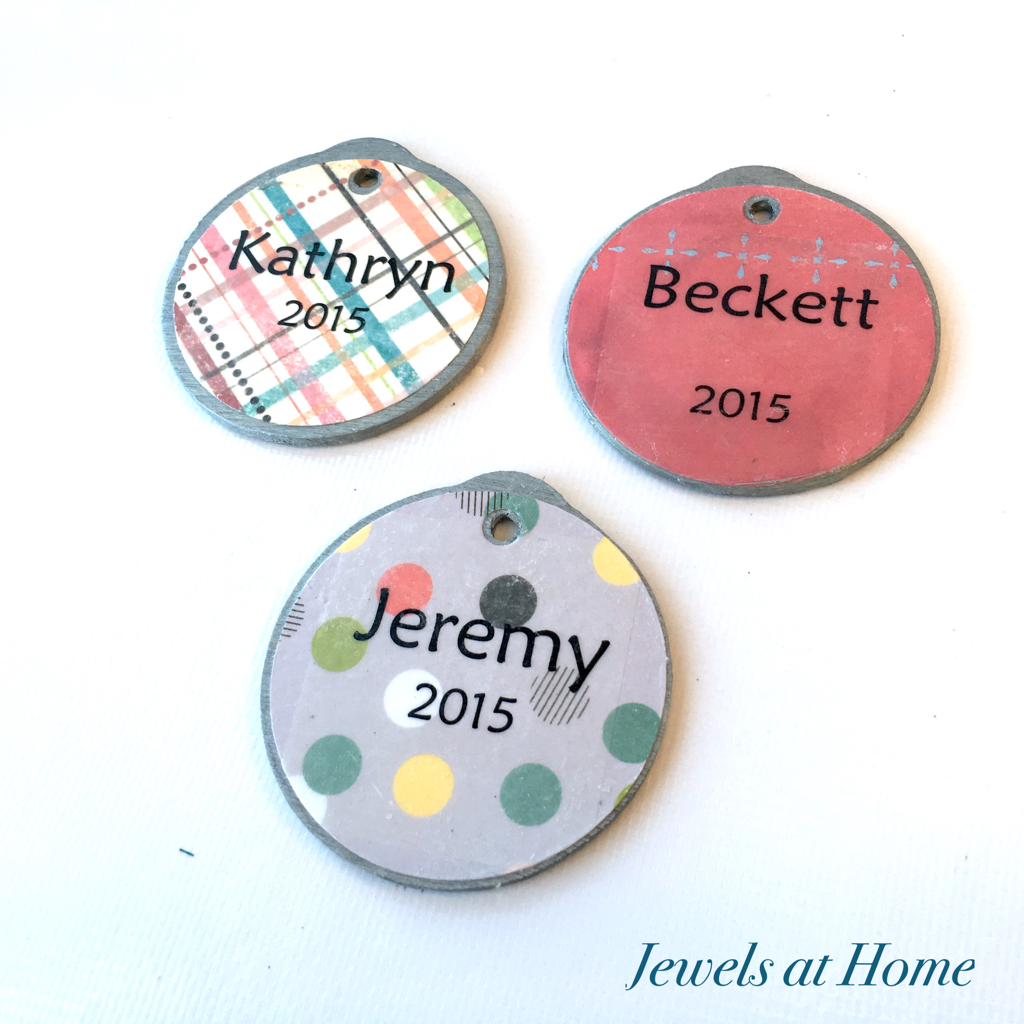
 To finish off, I added ribbons for hanging.


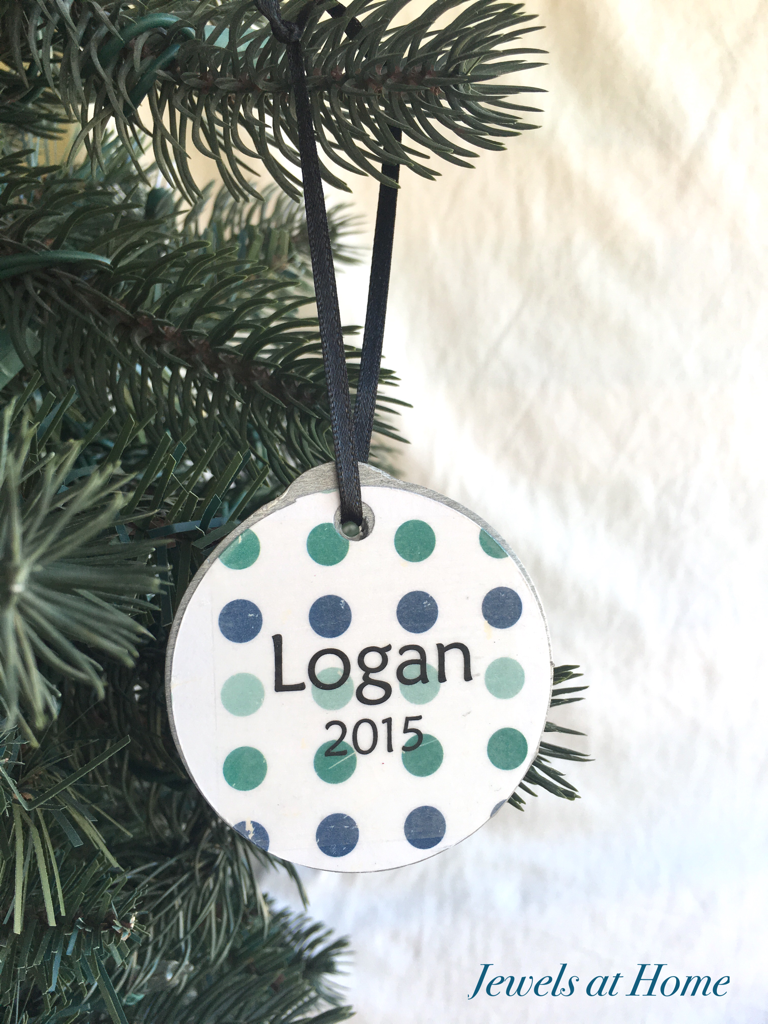
What fun to be able to send a bit of holiday cheer!
“Jewels”
These wide-frame mirrors from Ikea have so many possibilities! You could hang them as they are, of course, but what fun to decorate them with a tile mosaic, paint, or paper!
In setting a theme for our tween boy’s new room, I found this fun and colorful Heroes and Villains wrapping paper. I’m using it for some DIY pencil tins and also covered some Ikea Malma mirror frames for his wall.
This is an easy project. You’ll need a mirror, wrapping paper, Mod Podge, and a brush. I started by using painter’s tape (okay, I guess you’ll need that, too) to cover up the mirror in the center, so it wouldn’t get glue on it. (pictured below, left). I then spread a layer of Mod Podge over the mirror frame and carefully lay the paper on top, lining it up and smoothing out the wrinkles. (pictured below, right)

Cover the mirror with painter’s tape (left). Spread Mod Podge over the frame and lay the wrapping paper on top (right).
To fit the paper around the mirror, I cut an “X” shape and then trimmed the paper with a craft knife (oh yes, you need that, too!). (pictured below, left) To wrap the paper around the edge of the frame, I cut squares out from the corners and then applied more Mod Podge and wrapped the paper around, smoothing out the wrinkles and bubbles. (pictured below, right)

Cut an “X” in the center and trim the paper with a craft knife (left). Cut squares out of the corners and apply the paper around the frame with the Mod Podge (right).
I finished off the mirror with a few coats of Mod Podge to seal the paper and give it a glossy finish. I hung the mirrors with my favorite Command Picture-Hanging Strips
.
Here’s how the finished mirror looks:

And below are some pictures of the entire wall. Also featured on this wall are


This sweet tween’s room is almost ready. His desk is on order, and I look forward to showing you the completed space, soon!
“Jewels”
Little details like art pieces are what bring personalty to a room and make it feel complete. Sometimes, it seems like I’m so busy battling piles of laundry and other basic necessities, that I will never get around to all these little details, but I’m always rewarded when I do! I finally put up the travel art for the boys’ room.
I decided to try making my own picture mattes by wrapping cardboard with fabric. You could do it with a large sheet of art or wrapping paper, too. One caveat is that cardboard can be acidic and could damage valuable art or photos, so this is not a project for your heirlooms. I turned the coated side of my cardboard towards the back, hoping that would protect the art a bit. This project turned out to be pretty easy, and I like how it looks. I’m also glad, because I have some other plans for this fabric in the room, and now it will all coordinate!

Materials:
Instructions:

Step-by-step tutorial for fabric-covered picture mattes.
Here are the art posters up on the wall in the big boys’ room.


And here are the newly framed pictures next to the DIY cardboard initials I made. This display wall is slowly coming together – I’ve got one more project planned!
Now, hopefully this motivation will carry over to my own bedroom gallery wall!
“Jewels”
I recently picked up some beautiful wrapping paper at Lavish in Hayes Valley. This is the same store where I found the perfect red and white graphic paper for lining our nursery bookcase. The new paper I found is for my craft room. It’s called Hydrangeas by Kate & Birdie. This company has lots of very sweet original prints – my six year old bought himself a sheet of pirate ship paper while we were in the store. They started in Winnipeg, Canada, so even dearer to my Canadian ex-pat heart.

Hydrangeas (WP02) wrapping paper by Kate & Birdie. Click the picture to see their site.
The blue, green, and grey color scheme of this paper fits my craft studio perfectly! The blue is just the same as the great print on my newly upholstered Queen Anne chairs, and all the colors are found in the stenciled lampshade I made for that room.
I’m amazed what a long way this one sheet can go. For $4, I have enough paper to create several great accessories and accents for my room. I started a clothespin wreath and moved on to these pencil tins – and I still have more projects planned!
I love reusing old items, though it’s always a fine line between clever frugality and looking like a preschool art project. I’ve definitely seen more “primitive” versions of these pencil tins, but I like to think that mine fit into the feminine, elegant, slightly funky studio I am creating.

Turn used cans into beautiful pencil tins for your office.
This is a very simple and quick project that needs very little explanation. I started by using pliers to flatten any sharp edges along the inside of the can. To cut the paper neatly, I used the quilting ruler and mat I showed in the fabric growth chart tutorial.

Flatten the sharp edged on your can. Cut out paper and glue with a glue stick.
I used a glue stick to affix the paper to the tin. For my kids’ tins, I also added a layer of clear contact paper to make the tins more durable. Finally, I use tacky glue to attach bias ribbon to the top of the tin, for a polished look. (I tried hot glue, but it cools very fast on the metal and gets lumpy.)

Beautiful pencil tins made from old cans, decorative paper, and bias tape.

Craft room desk set: DIY pencil tins fit in with ceramics on a vintage tray.

DIY pencil tins.
While I was making these tins, I added some for the boys’ homework area. These have a layer of clear contact paper over the scrapbook paper, since I know they will get more (ab)use.

Pencil tins for the boys’ homework area.
What else do I want to decorate with my beautiful Hydrangeas paper? A pennant banner, some magnets, magazine files, and some storage boxes for the craft studio. Hope to share those projects soon. Meanwhile, go raid your recycling bin and make some new accessories for your own office!
“Jewels”
Remember these wall initials I made for my kids? I put one up in the nursery already, using 3M Command Picture Hanging Strips. Besides hanging them on a wall, you could make these letters part of an artful arrangement on a shelf or stick them to the door. I made mine as big as a 12×12 inch sheet of scrapbook paper would allow, but I would love to make a really large one some time with wrapping paper or fabric.

DIY paper-wrapped wall initials by Jewels at Home
These oversize letters were also the May Giveaway, and Jenny won them for her two girls. While I was working on Jenny’s letters, I made two more for my twin nieces, who are turning one next month! It’s often easier to do several of any project at once, while you have the motivation and all the supplies out. You definitely learn a lot as you repeat projects, too. Don’t you wish you could always start with the second one, after all the mistakes have been made?
I already posted the instructions for making these letters, so I’ll jump straight to the final result!

DIY paper-wrapped wall initials

With this combination of letters, I just couldn’t resist!!

Close-up of this pretty paper on the “C”

Close-up of some more beautiful paper on the “m.”
As you can see, I used lower case letters this time and a different font: American Typewriter Bold.

And I’ll add one tip if you have to wrap around a small opening. I cut the tabs in a zig-zag pattern, so that they don’t get too short.

Cutting tabs to wrap letters in paper
Beside the fact that I nearly glued all my fingers to each other in the process, it was so fun for me to make something for little girls, since we have a house full of (wonderful!) boys. I’m also really glad to give Jenny’s girls a piece of home that they can take as they move overseas and just as thrilled to have something unique to celebrate the big one year birthday with my nieces!
Looking forward to another fun giveaway starting next month!
“Jewels”
The idea for these brilliant clothespin wreaths came from Kirstin at Kojo Designs, who made it as a tea wreath, and it is one of my favorite projects.
O Tea Wreath, how do I love thee? Let me count the ways. You are

I think Kirstin’s tutorial pretty much covers it all. I had only a few variations for making mine. I also loved thinking up new ways to use these wreaths!
Here are the simple steps with my tips.
Creating the wreath base:

Wrapping the wreath base. After glueing the circle in place, cut tabs around the outside.

I used a craft knife to cut the tabs in the center and held the wreath up to the light to see where to cut.

I liked the glue stick for glueing down the tabs. It sticks quickly and doesn’t wrinkle the paper.
Creating the clothespins:

I used a quilting ruler and mat to cut precise strips of paper for the clothespins.

I used white glue for covering the pins with paper. By pressing two pins together, you get a thin even layer of glue.

Wow! These clothespins are so beautiful!
Finishing the wreath:

Finish the wreath by glueing the pins in place with a hot glue gun and adding a ribbon to hang it.
Endless ideas!
I made several of these wreaths for Christmas and birthdays recently, including teacher gifts, and they were always a big hit. I made them in a variety of colors for many different looks
While I gave the wreaths away with tea bags, my friends and I have found new uses for these beautiful wreaths. Here are some of our ideas. I’d love to hear yours, too!

I’m using my wreath to organize ideas for projects. I might need some more pins!
I think there are lots of great uses for the decorated clothespins themselves, too. You could
Thanks again to Kirstin at Kojo Designs for this wonderful project idea. It has become a standby for me, and I hope you will let me know if you come up with new ideas for these beautiful wreaths and pins!
“Jewels”
