
My collection of plates and tea cups started when I threw a tea party baby shower for my friend, Nicola, a whole decade ago! Over the years, I have added more treasures to my collection, and I love the stories … Continue reading
My collection of plates and tea cups started when I threw a tea party baby shower for my friend, Nicola, a whole decade ago! Over the years, I have added more treasures to my collection, and I love the stories … Continue reading

My motto about cooking is that I don’t do it much, but when I do, it’s something I saw on Pinterest. We throw a big holiday party every year. Last year, I introduced these puff pastry Christmas trees, and they’ve … Continue reading
Mother’s Day is coming up tomorrow, which is probably not news to anyone, except my family, who realized yesterday… Anyway, I have very mixed feelings about this holiday. It’s the day that makes me think of my mom the most, and those memories are very sweet, but it’s hard for me to push past missing her to actually feel happy and excited.
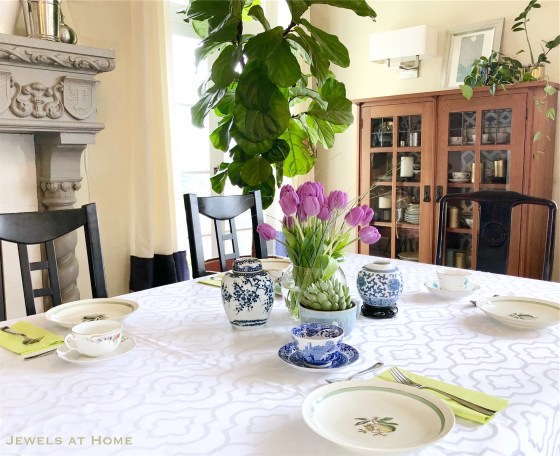
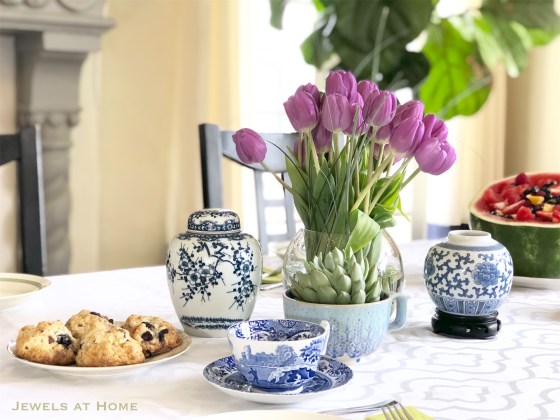
Life conspired perfectly this year, as one of my good friends celebrated her birthday the day before Mother’s Day, and I hosted a small brunch for her. It felt very meaningful to put together this event, using treasures that are full of stories for me. Sipping tea, laughing, and pouring our hearts out with my dear mom friends was something I could wholeheartedly feel good about, so I’m calling today my own version of Mother’s Day.
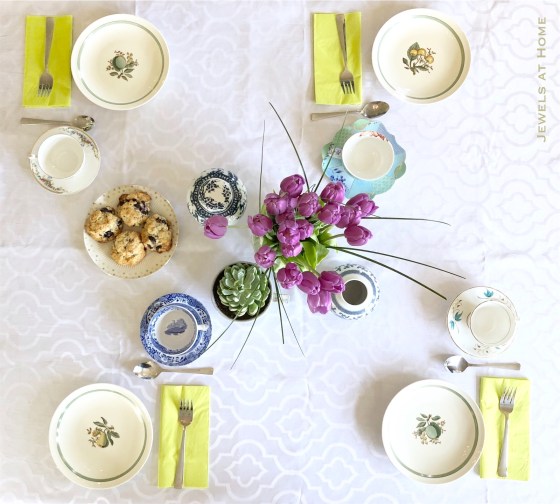
Lots of special stories behind our brunch table, which I hope you will enjoy as much as we did!

Tulips! These are among my favorite flowers and remind me of springtime growing up. We don’t see many in San Francisco, but I’m hoping to go visit a tulip festival some day.
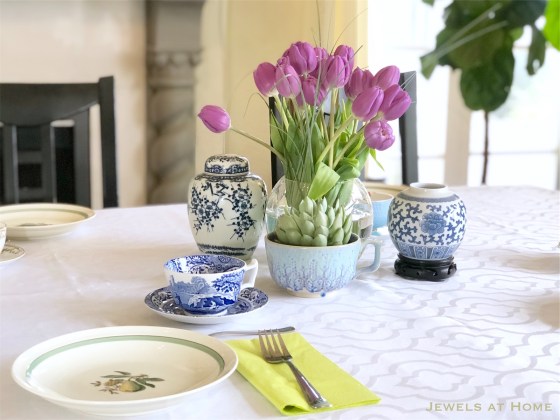
The little succulent was rescued from a work dinner I attended, and it’s growing in a pretty Anthropologie mug I was given by my dear coworker. The small blue and white vase on the stand was my grandmother’s.
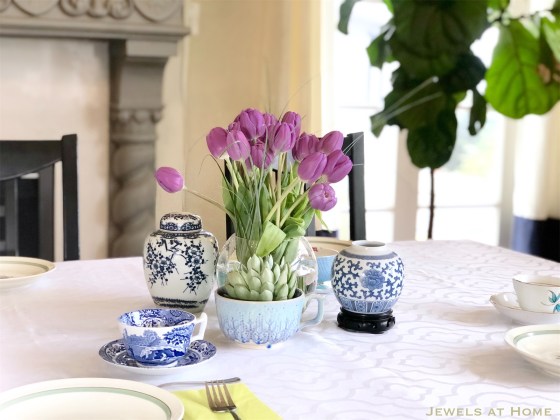
I started collecting tea cups when I was planning Nicola’s baby shower, and I love the stories behind each one – the one on the right was actually a gift from Nicola!

These plates were given to me by one of my mom’s closest friends, about eight years after my mom died. She told me that she had seen them in an antique shop while shopping with my mom, and my mom went back to buy them for her. I remember both of these kind, generous, and loving women, when I use them.

The ginger jar on the left and the Blue Willow tea cup are thrift store finds!

I am running low on stories, so just enjoy this picture!

Happy Mother’s Day to those of you who enjoy this holiday. And if you, like me, find it difficult or complicated, I hope you find something meaningful to celebrate… like a giant fiddle leaf fig that is “mother” to many cuttings I have propagated and shared!
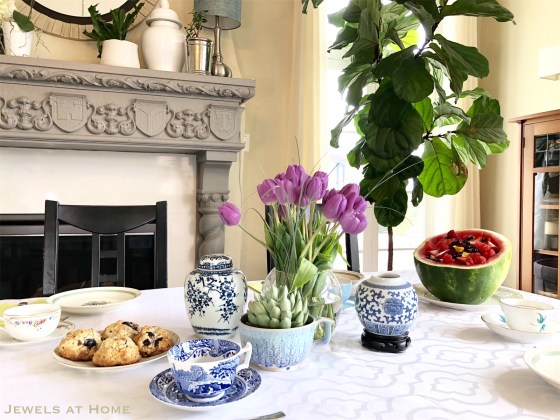
Hmmm, some pictures of our food!

Sending love to all who need it,
Julie, aka “Jewels”
I know I’m not alone in starting this year with a real fire lit under me to start cleaning and de-cluttering our house. I first read Marie Kondo’s book a few years ago, but with her new show, she’s somehow getting even more popular, and I am on the wagon!
After doing a major closet cleaning, my friends and I decided that we would have a little clothing swap party to see if we could find some new items that “spark joy,” all without spending a penny! It was SO MUCH FUN!

I ended having a small get-together, which was just as much for the company as for anything else. A couple of my close friends from work and I are always admiring each other’s style and wear similar sizes, so this was an easy guest list to put together.
Admittedly, I would have fun doing just about anything with these girls, but the clothing swap was truly a blast! Of course, there was the excitement of getting something new for free! But on top of that, it was a great feeling to see things that I really liked but just didn’t work on me fit perfectly on my friends. Not to mention, there were some good stories behind some of these items!
A couple of my favorite “new” items are this leather tote bag and the little pendant necklace on the dresser.

Even though our party was small, I take party planning seriously, so I’ve gathered some of my best tips for a clothing swap of any size!
Before the party
At the party
I’m a little sad it will take us years to accumulate enough stuff for another swap, but we’ll definitely find another excuse to get together and have fun soon!
Julie aka “Jewels”
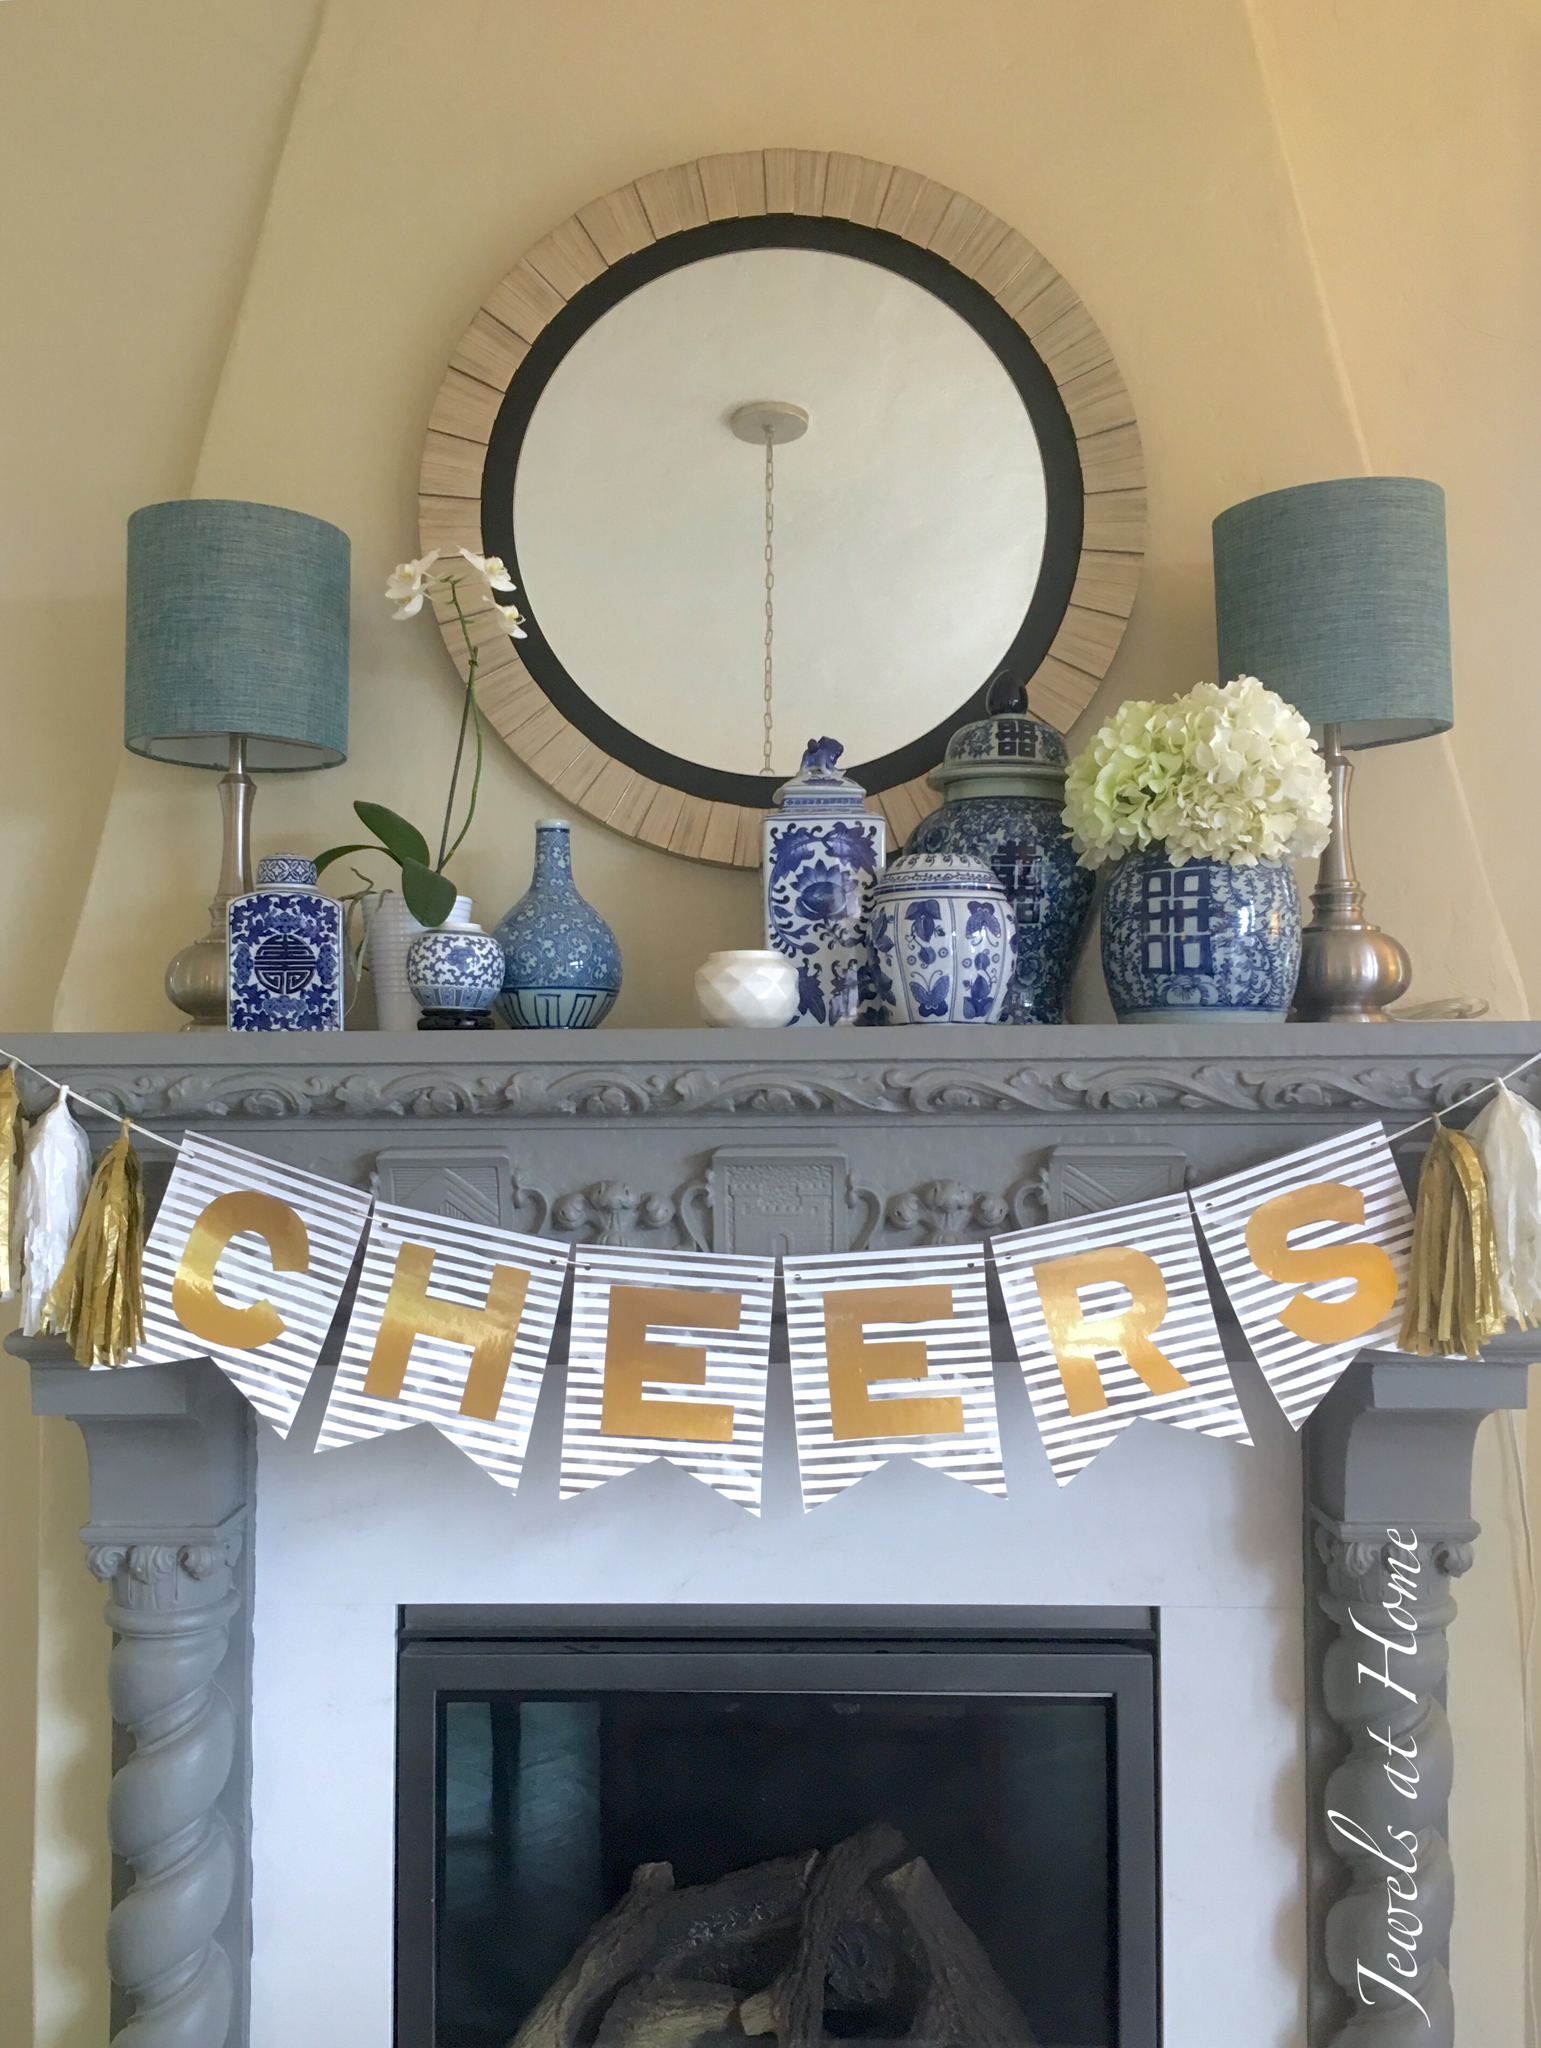
I love hosting parties because of the great food and company. And, to be honest, entertaining is also exactly the kick in the behind I need to work on fun projects around the house. We’re hosting a parent social in a few weeks, and I’m working on some decorations that will be festive and a touch glamorous, to help us all escape for a few hours from the daily routine.
One project I was excited to do was this “CHEERS” party banner. You could use this idea with any saying for all kinds of occasions, like weddings or birthdays. If you want to make one for your next shindig, here’s how I did it.

Materials:
Instructions:
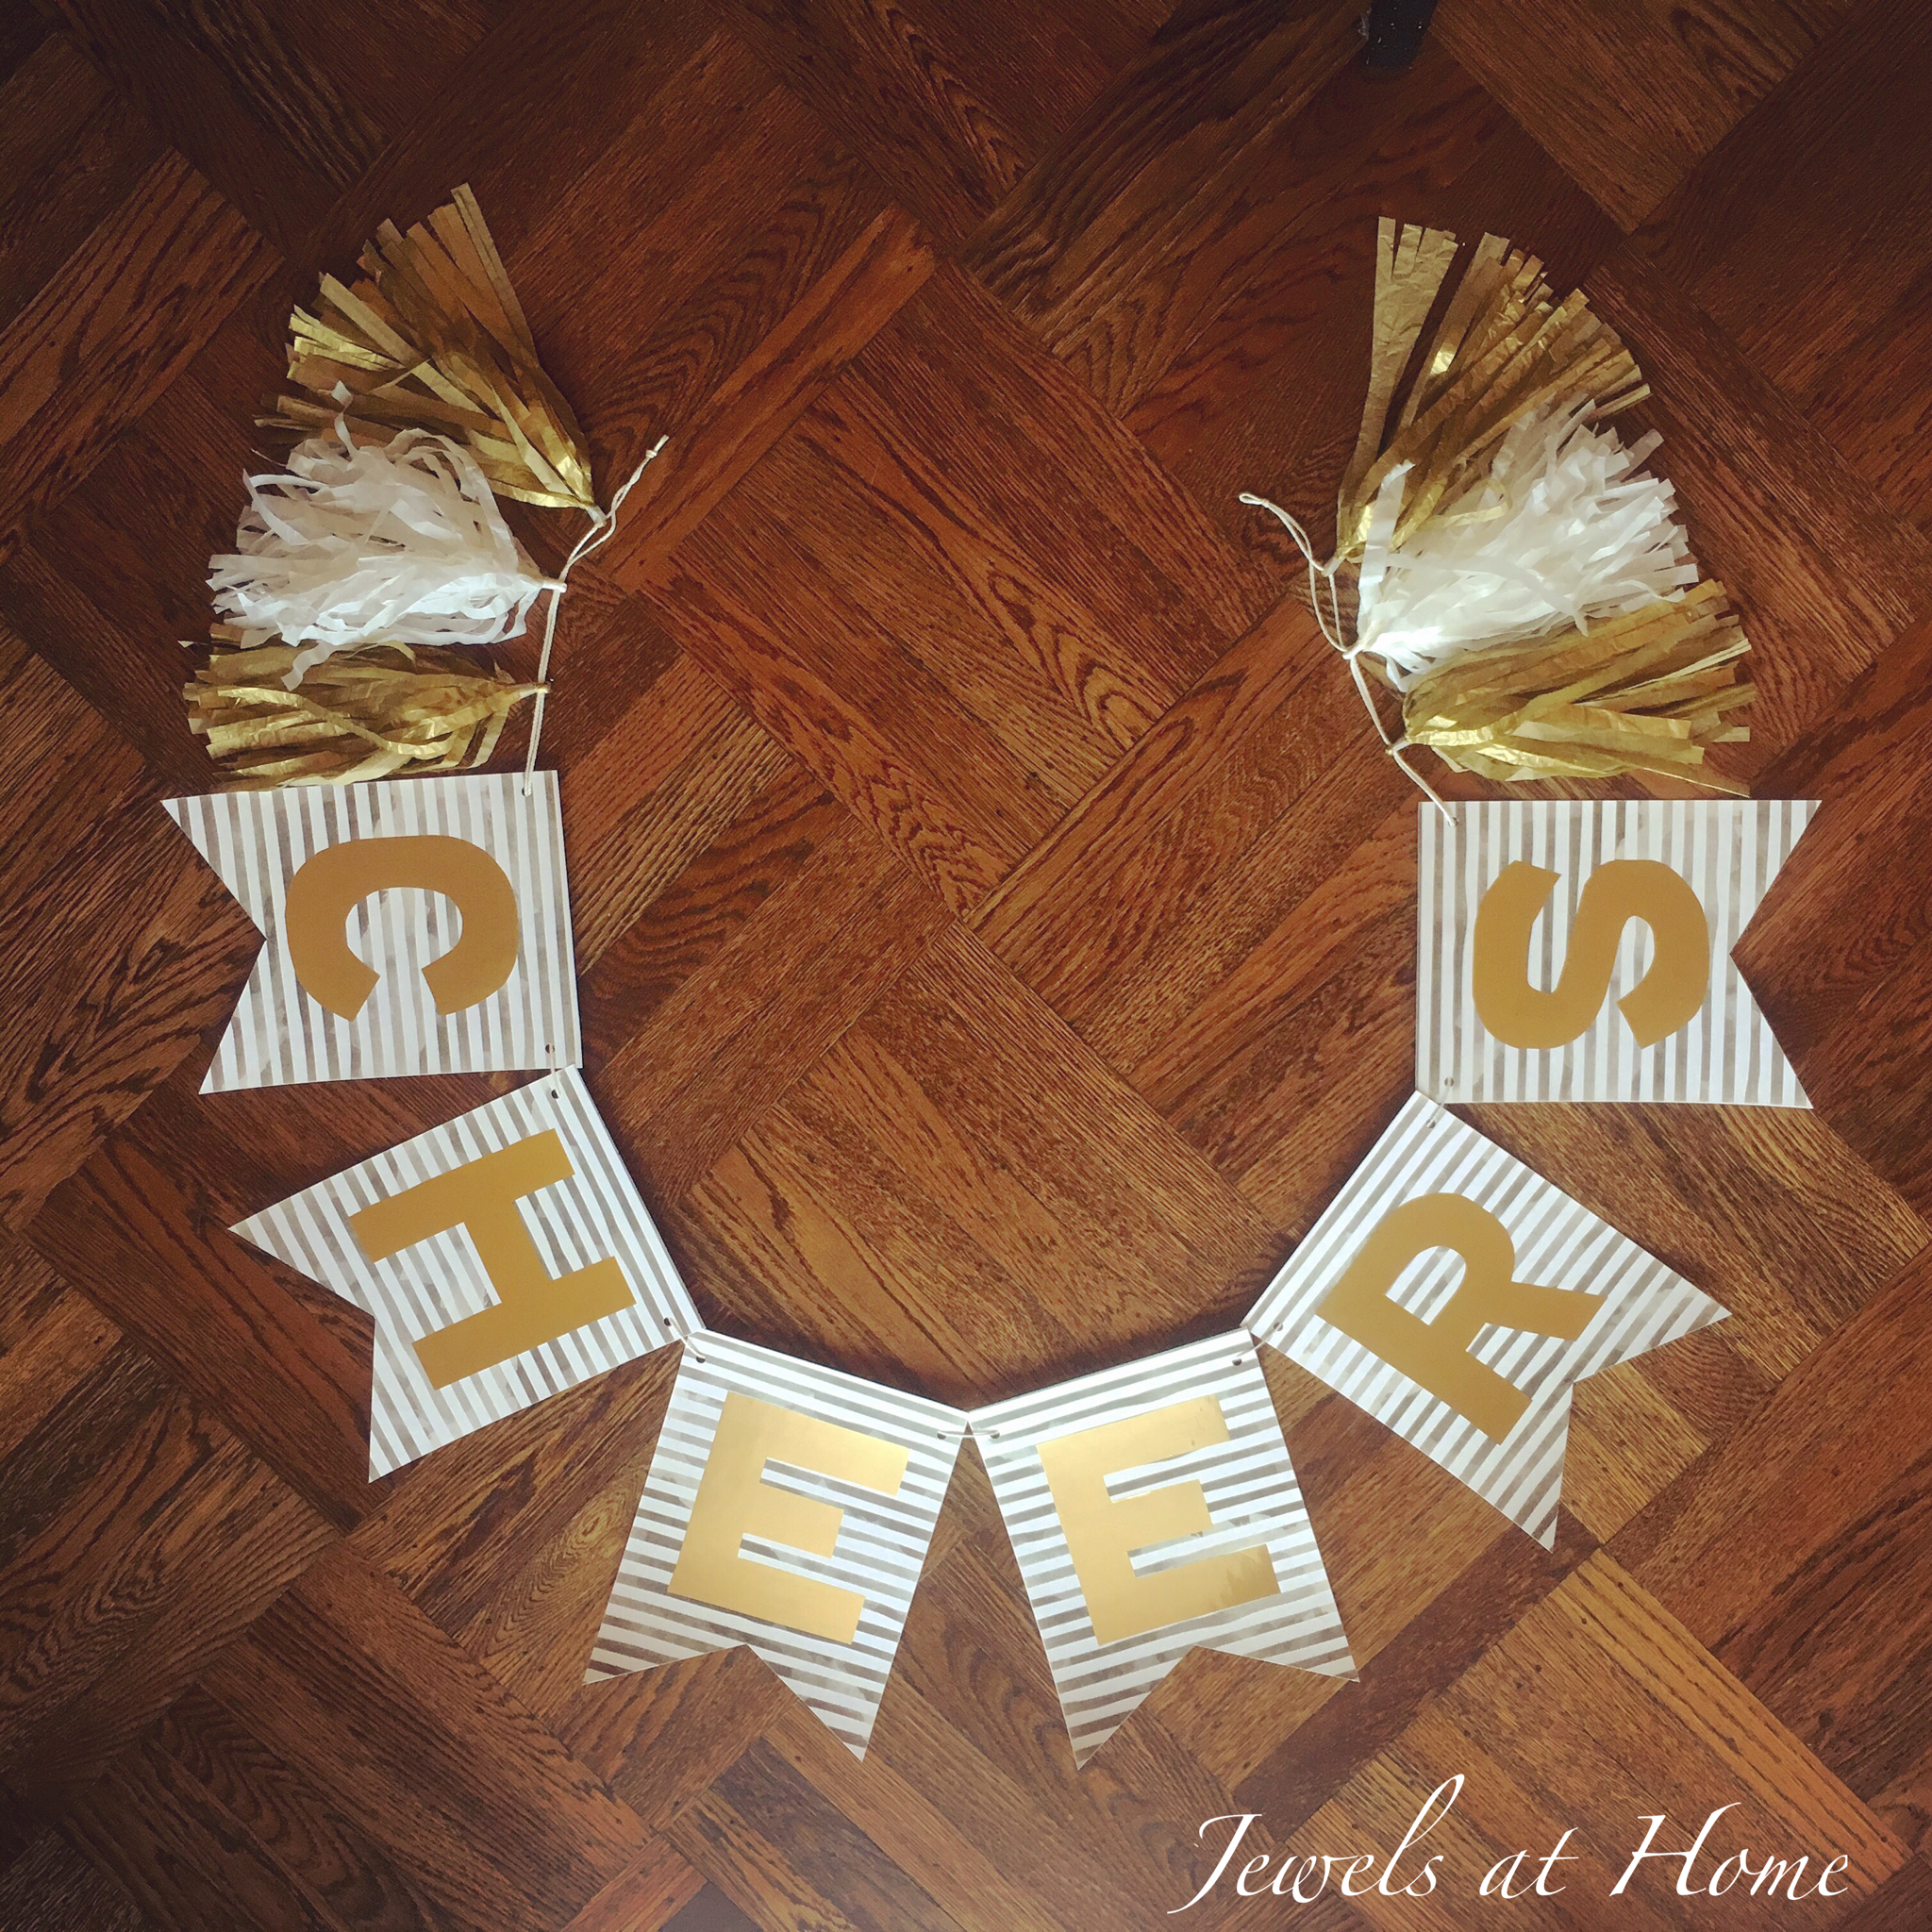
Here are a couple more pictures of our fun party banner!
Can’t think of a better way to sign off than saying “Cheers!”
“Jewels”
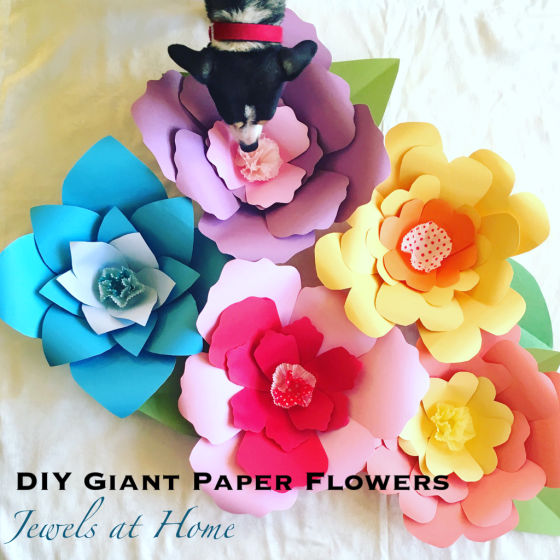
Oh, I honestly love any project that involves paper!
For a friend’s bridal shower, I offered to set up a photo booth and make some other decorations, which was the perfect excuse to try making these giant paper flowers.
Materials:
Instructions:
Here are some close-ups of the flowers:
They look really impressive grouped together:
And while I was taking pictures, it was so cute that Finn came over to smell the flowers!
Here’s how the flowers looked in our photo booth. The backdrop is a striped shower curtain.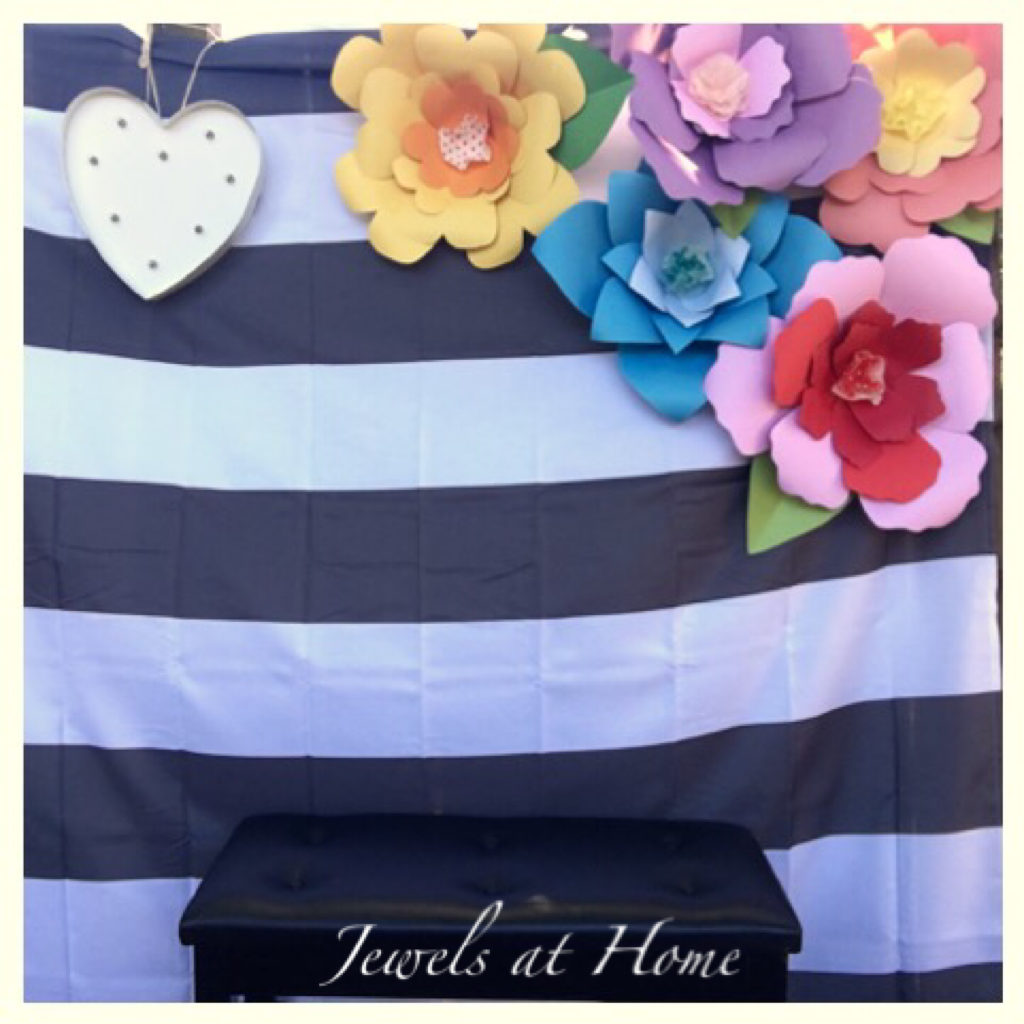
Any ideas of where to put the flowers until our next event?
“Jewels”
Canada Day is coming up this Friday, July 1. My ex-pat friends and I had the pleasure of celebrating a little early today. “What is a Canada Day party?” some of our American friends asked. Well, a regular Canada Day party is a nice summer picnic or barbecue, but when you are an ex-pat, you have to go over-the-top to assert your Canadian-ness, and today was a good example.
Setting the scene:
Red-and-white everywhere!


And some more subtle elements like these Hudson Bay striped pillows:

Music:
So much good music comes out of Canada. You will have no problem putting together a playlist with artists like Bare Naked Ladies, Sarah Mclachlan, Bryan Adams, Tragically Hip, Avril Lavigne, Alanis Morisette, and so many more!
Food and drink:
You can find Canadian beers, wines, and soft drinks at specialty stores like BevMo. We also enjoyed Nanaimo bars, smoked salmon, “Timbits” (donut holes), and other treats.
Be sure to add these adorable igloo ice cubes!

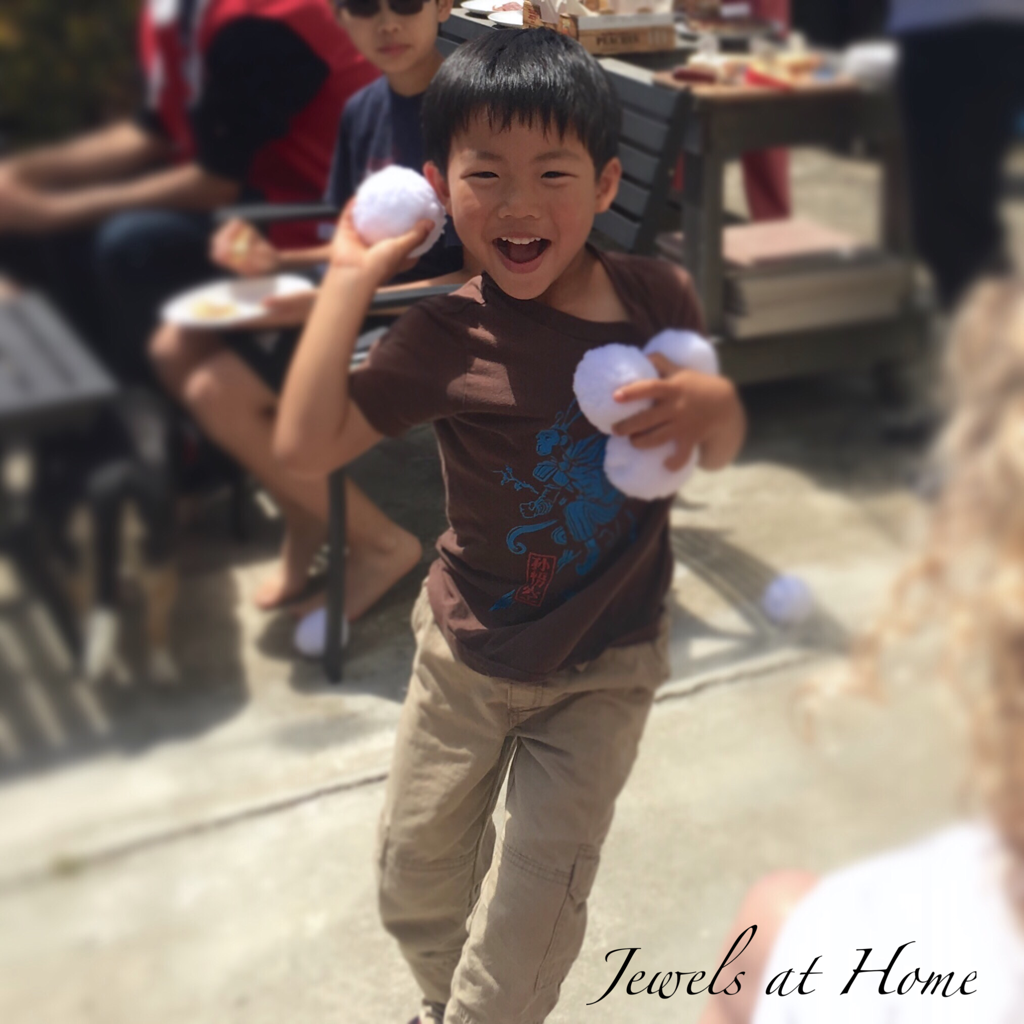
Games:
Falling in July, Canada Day is not typically celebrated with snowball fights, but that didn’t stop us from having a ball with Snowtime Anytime.
Happy Canada Day to my friends at home and all over the world!
“Jewels”

Yes, yes, our third of three (do we get a special trophy?) Pokemon birthday parties is in the planning stages. I try to give our guests one special party favor that has more lasting power than a bunch of smaller … Continue reading

As the youngest of three boys, I’m disappointed to confess that JJ has a lot interests that are not particularly age-appropriate for a four-year-old. So, I’m always happy to encourage him when he gets excited by something more wholesome than Power … Continue reading
This year, L is turning 9, and since his birthday falls at the start of his youth baseball season, I thought it would be fun to celebrate with a retro baseball theme.
He wanted to hold the party at a trampoline place, which took care of the activities for the kids. This allowed me to have some fun putting together decorations, favors, and a ballpark menu.
Decorations:
Since we had a table in the middle of the trampoline space, I couldn’t make use of the walls for decorations.
I did find a little spot to hang our reusable birthday banner, customized for the baseball theme.


I also bought a set of these 12″ table number holders to display posters and signs. I found various retro-looking baseball posters and printed them with birthday messages and signs for the food and displayed them around the table.
Here are the sources for these great retro posters:Baseball player batting and Pitcher poster.


Menu:
We had a ballpark-inspired menu including:


Party favors:
I decorated blank youth baseball jerseys for the boys with iron-on letters and numbers.


Each boy also got Cracker Jack in old-fashioned packaging.

I created these charming gift tags to go with the party favors.

What a fun time we had celebrating!
“Jewels”
