Milestones: A Korean First Birthday

When you welcome a baby into your life, you can’t help but think a lot about his roots and his future.  One special tradition that Steve’s parents introduced us to was the Korean first birthday celebration – the Tol (also called Dol).

Even before our oldest son was born, his Harabuje and Halmoni (Korean grandfather and grandmother) were planning K’s Tol.  This is a special celebration that originated in a time when infant mortality was high, and a baby reaching his first birthday was an important milestone.

I didn’t know much about the Tol at first, but it became a sweet tradition that we continued for all three of our boys. With a few simple and meaningful elements, you can add this special event to your family’s memories, too!

Hanbok:

Steve happened to have gone on a business trip to Korea while I had been pregnant and he had brought home a traditional outfit (hanbok) for baby. Steve’s parents searched high and low and found the special socks and shoes to match. You can buy these in the US, too.  Here is a link to a baby boy Hanbok and a baby girl Hanbok.

Milestones: A Modern Korean Tol | Jewels at Home

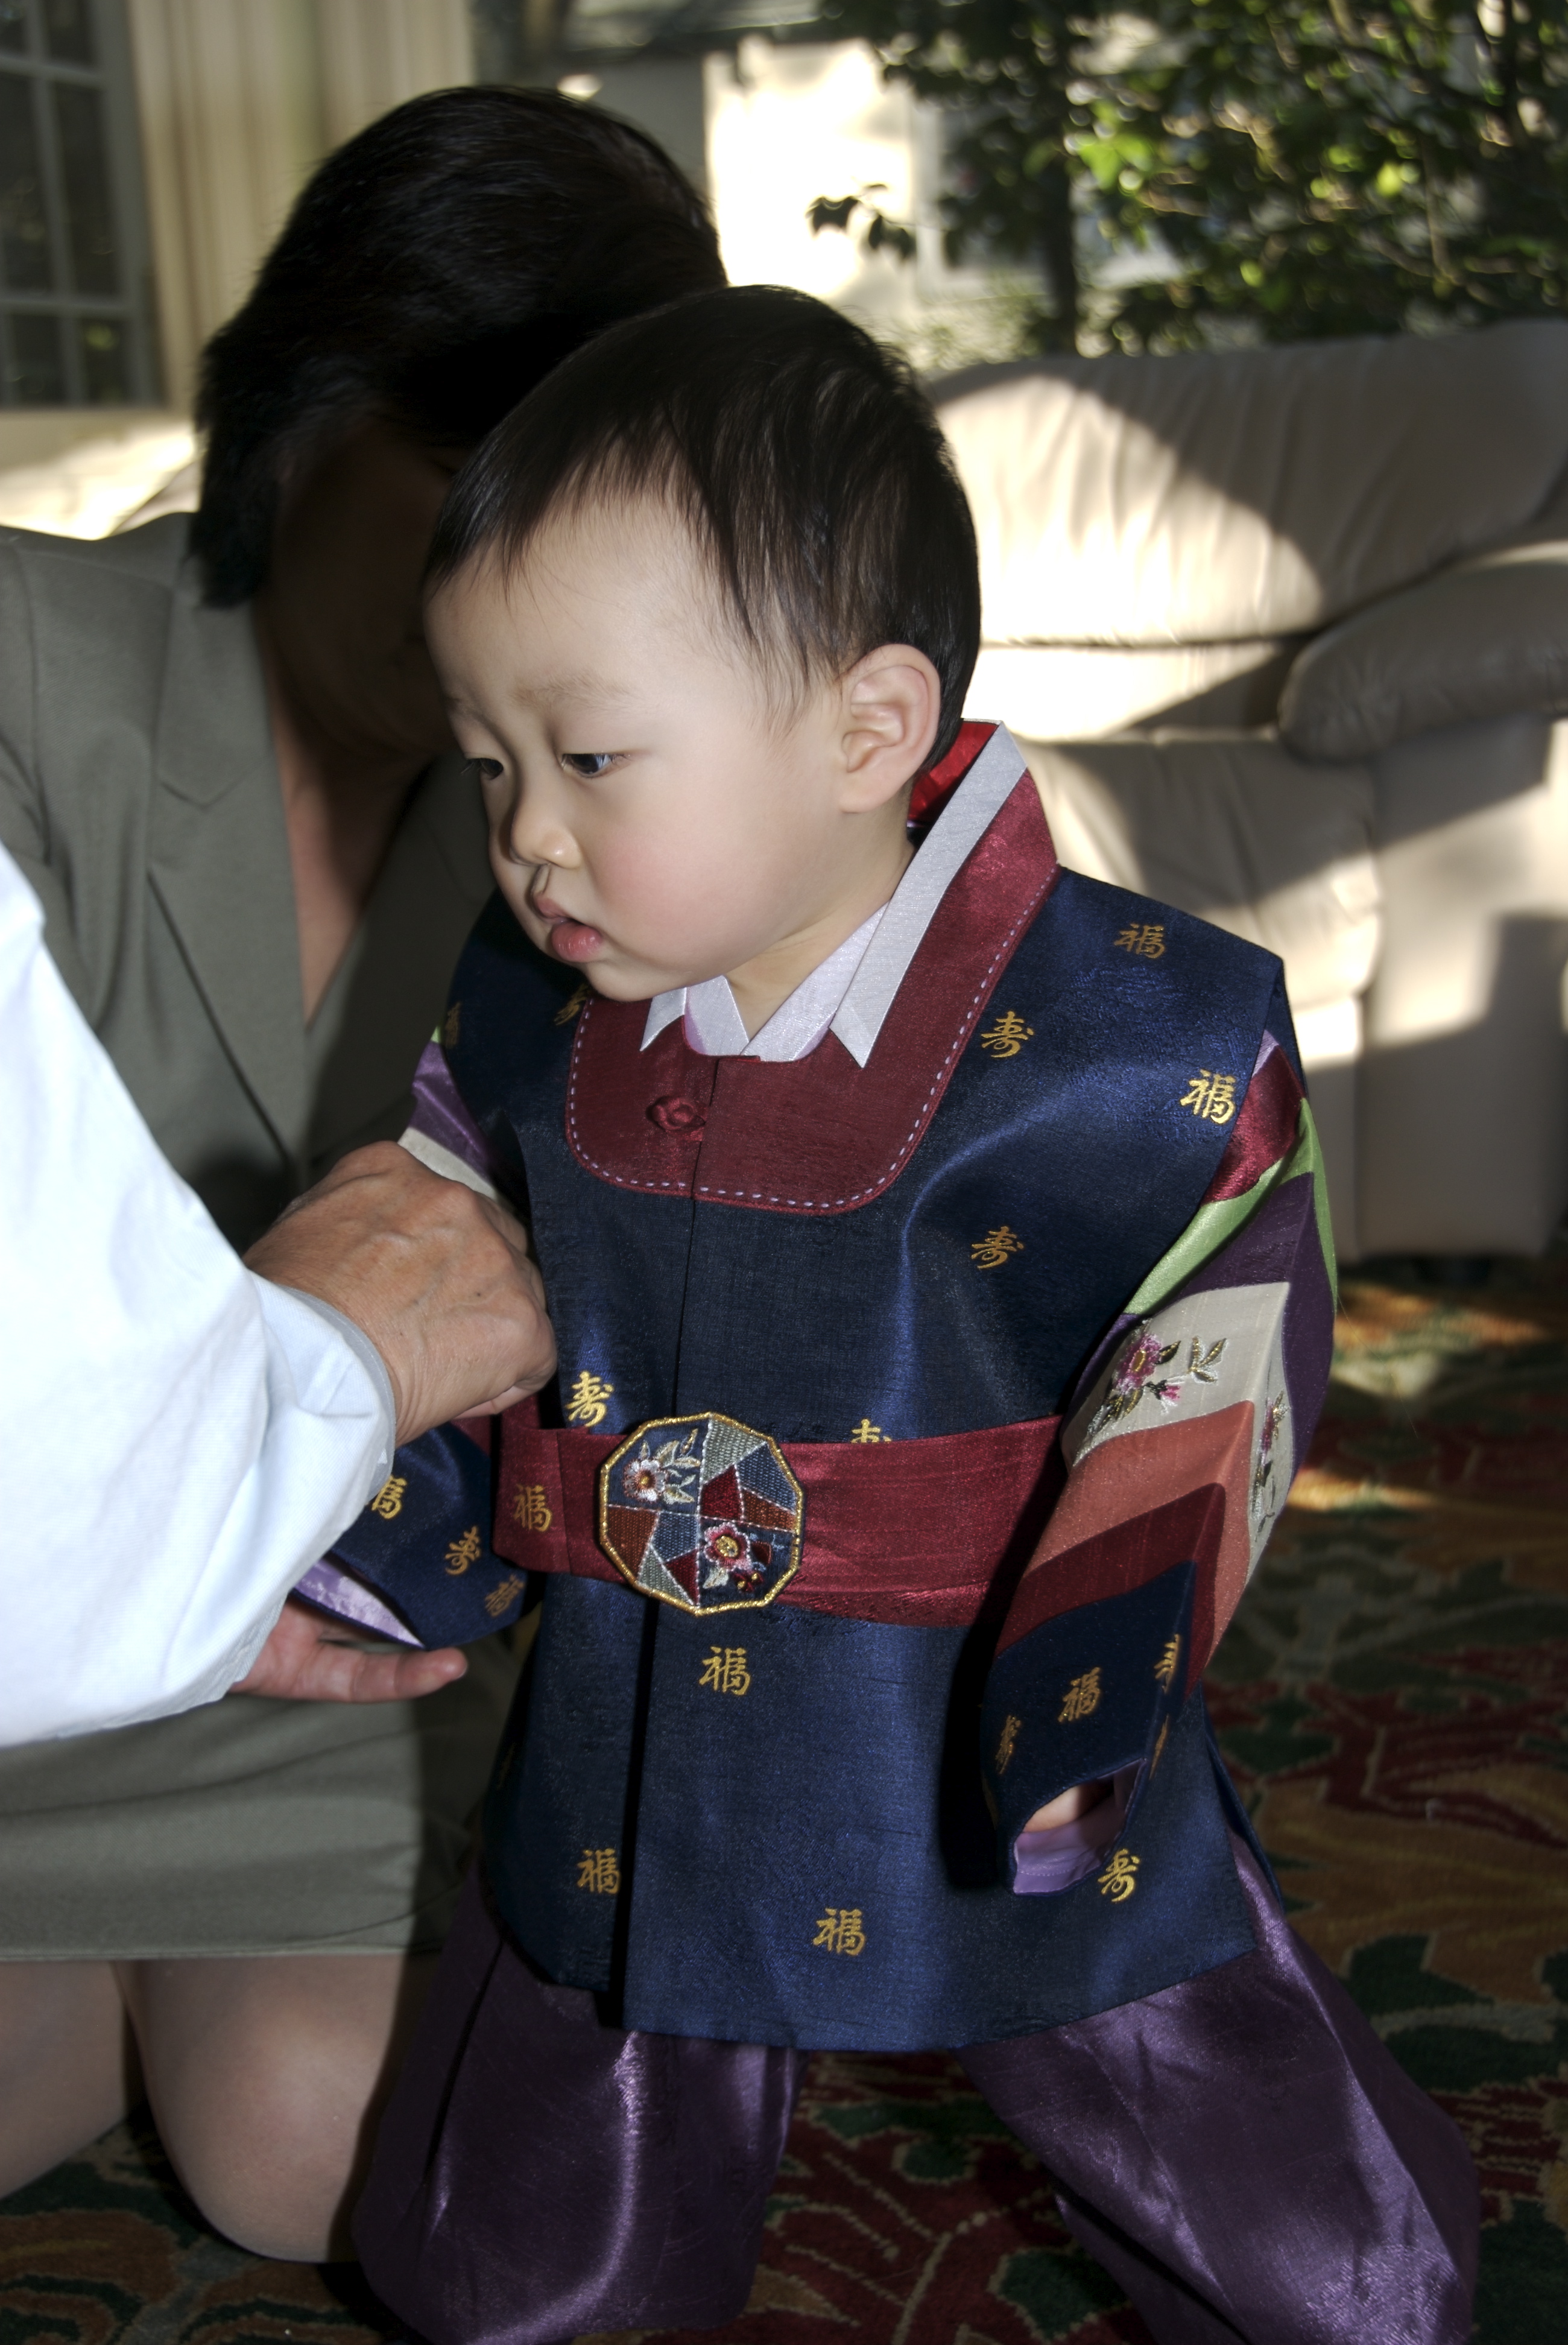
Harabuje (grandpa) helps birthday boy L adjust his Hanbok.

Milestones: A Modern Korean Tol | Jewels at Home

Baby J wore a mix of his older brother’s outfits.

Milestones: A Modern Korean Tol | Jewels at Home

There are even special socks and shoes!


Tol table:

Harabuje and Halmoni hosted our first Tol in a private room at a Korean restaurant. It was a small event with family and a few close friends. The ritual of welcoming and honoring our young baby and his family seemed more important than putting on a display for others.

The main features at a Tol are the table set with an abundance of fruit and special rice cakes (called “duk”) and the Toljabee.

After the restaurant party for K, we hosted L and J’s Tol celebrations at home. While the restaurant had a set of fake fruits and accessories, I opted for something more simple, setting the table with red and blue decorations and fresh fruit and rice cakes. Simple, familiar flavors always go over really well with a crowd (especially if there are some picky eaters among you).

Milestones: A Modern Korean Tol | Jewels at Home

The Korean restaurant’s elaborate Tol table. Half those cakes and fruits are plastic – haha!

Milestones: A Modern Korean Tol | Jewels at Home

Our home Tol table was more modest – but everything was real!


Toljabee:

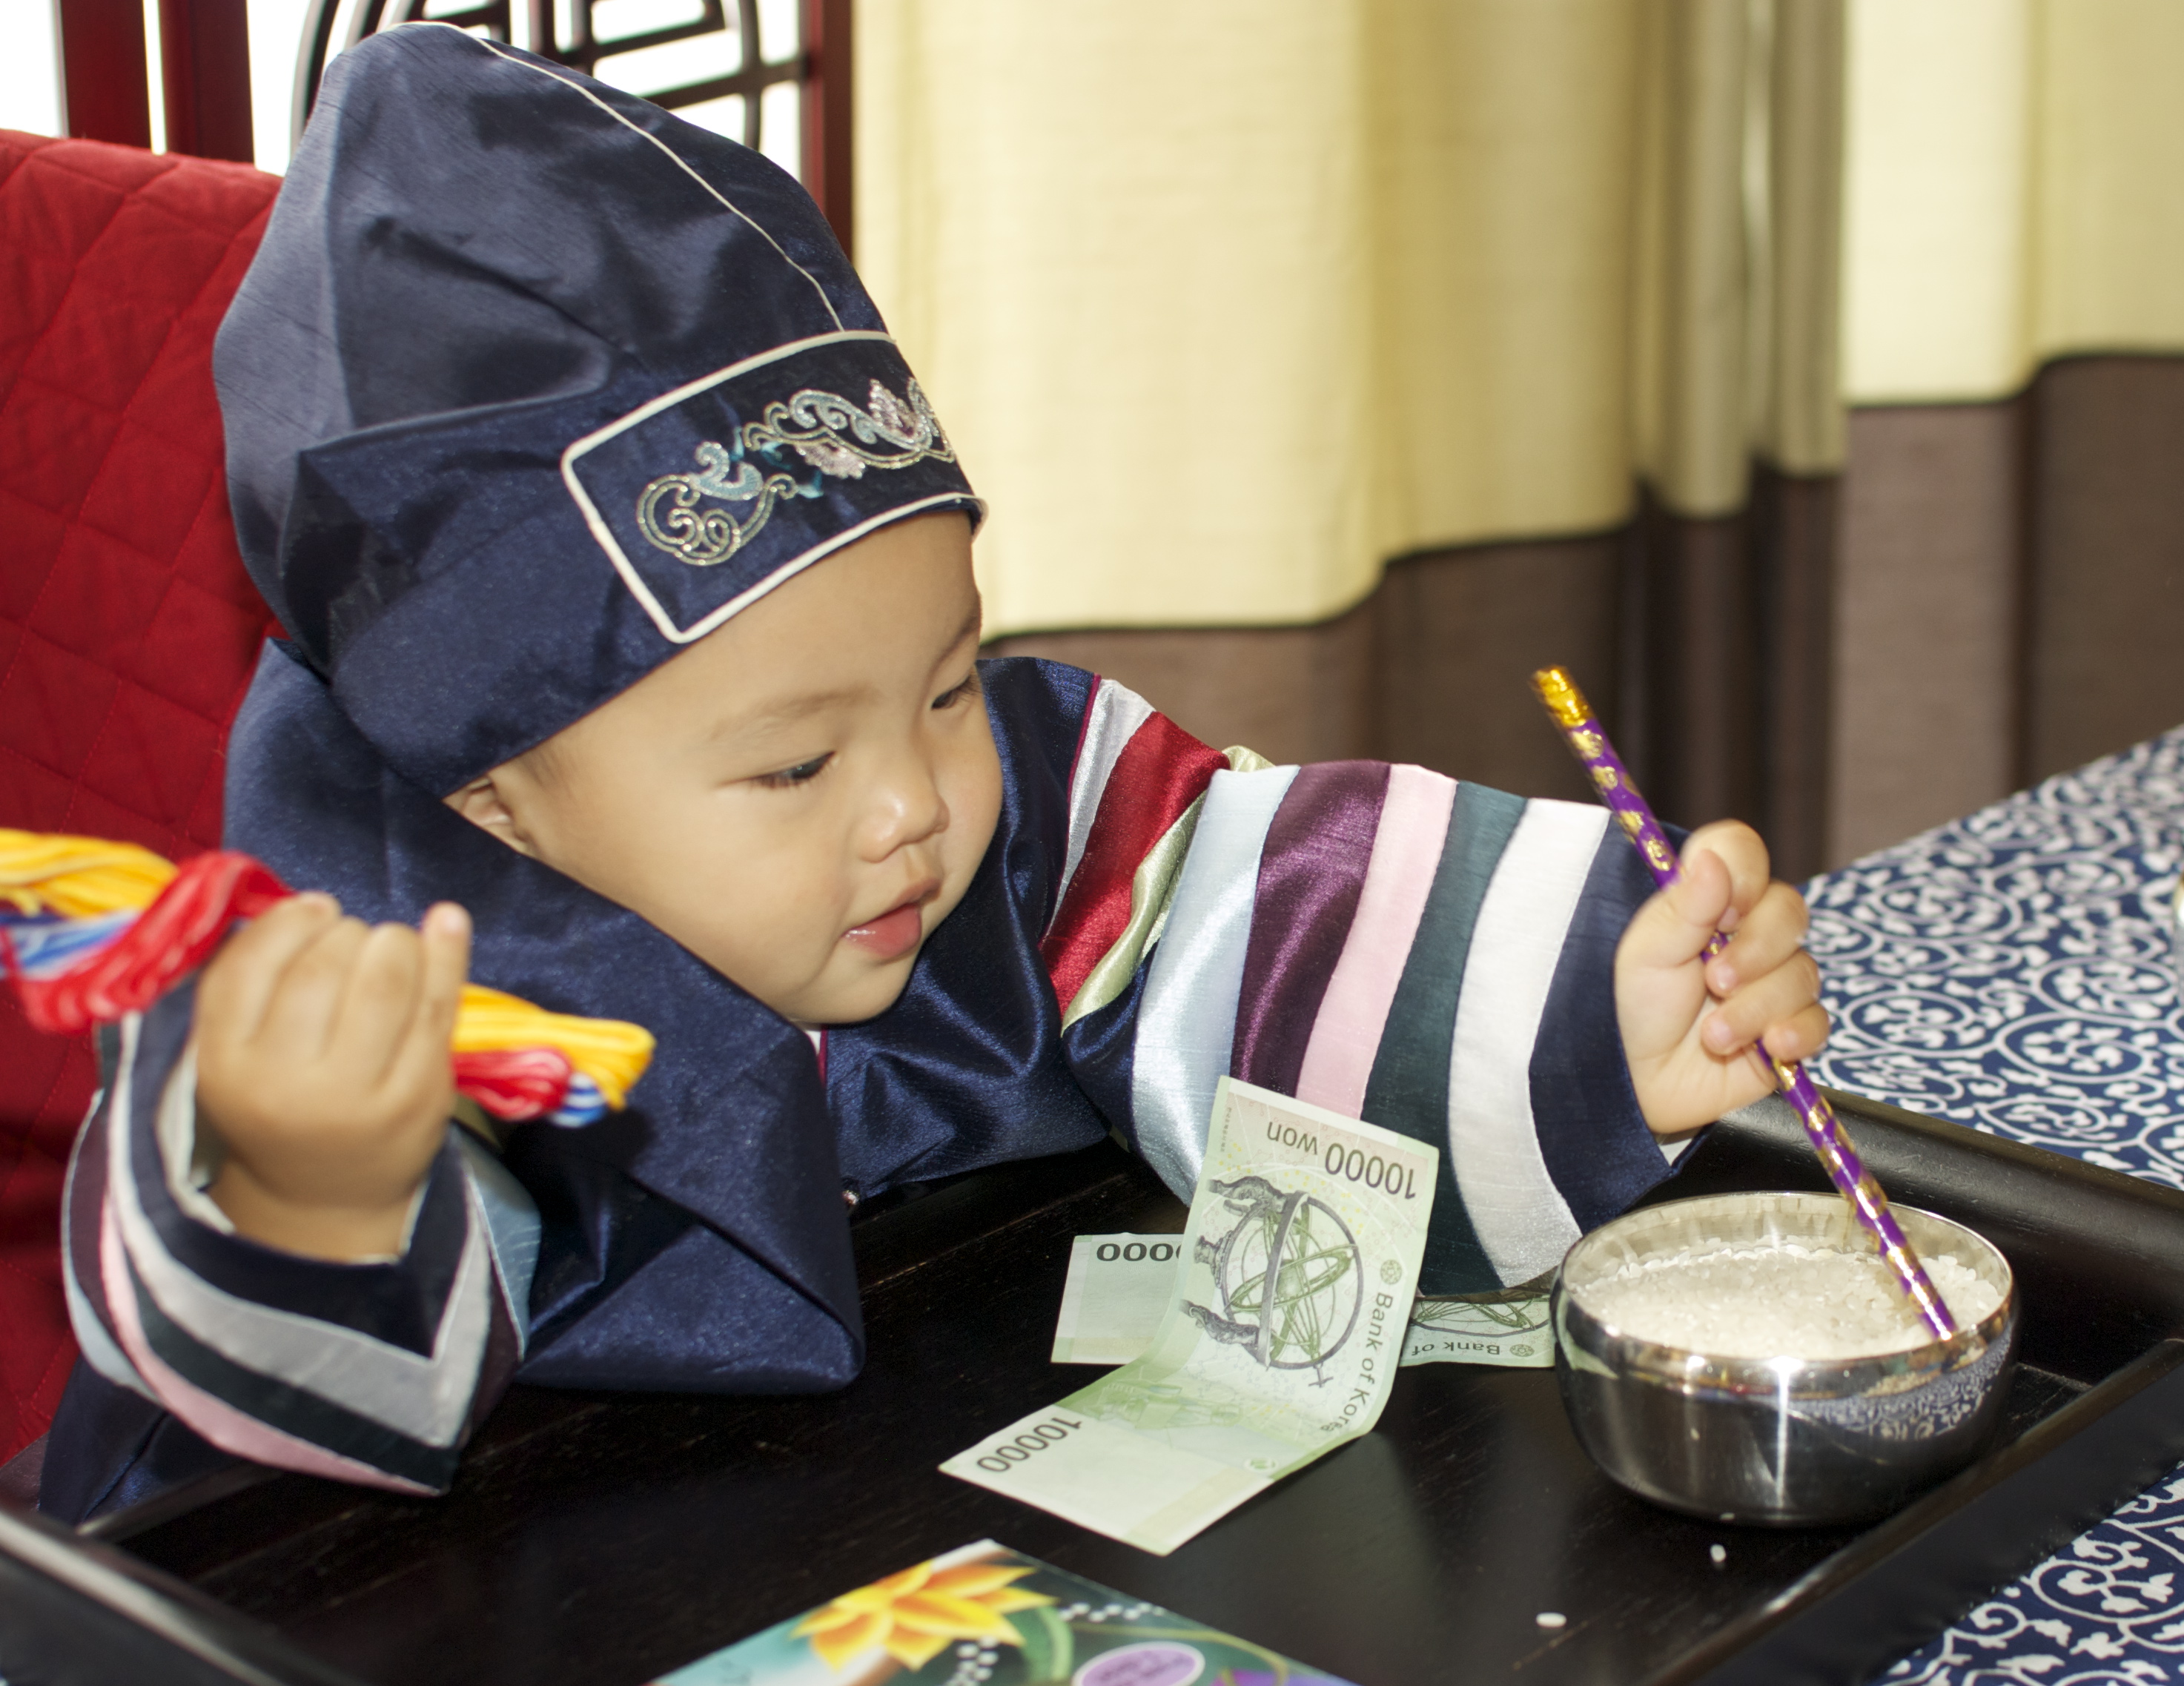
In the Toljabee, the baby is presented several items that each symbolize some characteristic, and the items that the baby chooses are a prediction about his future.

That’s a lot of pressure for a one-year-old! Luckily, the Toljabee is definitely rigged for success. Some examples of things a baby could choose are:

  • A book, showing he will be intelligent
  • A pen, showing he will be well-educated
  • A bundle of string, symbolizing long life
  • A Korean metal bowl of rice, meaning he will have enough to eat
  • Grapes, predicting many offspring
  • Money, representing wealth

Milestones: A Modern Korean Tol | Jewels at Home

Milestones: A Modern Korean Tol | Jewels at Home

L was kind of hungry, and kept trying to eat the grapes. I wonder if that really means I have a lot of grandchildren to loo forward to!

Milestones: A Modern Korean Tol | Jewels at Home

Milestones: A Modern Korean Tol | Jewels at Home


For our Toljabee at home, I assembled some symbolic items on a decorative tray. Embroidery floss or ribbon makes a pretty string!

Milestones: A Modern Korean Tol | Jewels at Home


Sharing the tradition:

All of our Tol celebrations were small. We kept to a small group of family and close friends. A big party can be overwhelming for a little baby, and there will be plenty of bigger parties to come. If you are having trouble tailoring a guest list, try writing everyone’s names down. This can help you to see who really needs to be there.

When L had his Tol, I mentioned it to his older brother’s preschool teachers, and they asked if I could teach his class of three-year-olds about this tradition. L became a living show-and-tell presentation, and we let each of the kids pick an item as part of the Toljabee.

I also made a picture book for the class to teach them about the Tol tradition. This was easy to do with a photo book and some simple text. Shutterfly has lots of options for customizing a book to make almost anything you can imagine. I made an extra copy for our family, which I put out during J’s Tol, and it was very cute to see L request a reading from every adult in the family.

Milestones: A Modern Korean Tol | Jewels at Home

I made a photo book to teach our kids and their friends about the tradition of the Tol.

Milestones: A Modern Korean Tol | Jewels at Home

The first page of our photo book about the Tol.


Milestones: A Modern Korean Tol | Jewels at Home


Looking back, we have a lot of special memories from these parties. Our kids tend to be more involved with their Chinese heritage, since they’re in a Chinese immersion school, and above all, their lives revolve around North American culture and interests, so I’m particularly glad to have included this Korean tradition in our family. While it was very important to Steve’s parents, it seems like a lot of other families didn’t know about the Tol, so it was also fun to share this tradition with our friends, and now, I’m excited to share it with you!

Milestones: A Modern Korean Tol | Jewels at Home

Do you have a baby with some Korean roots? This would be a beautiful event to hold for him or her. A lot of Korean restaurants are equipped to host a Tol, or it’s easy to do something simple at home. When I get a chance, I also want to tell you about our Chinese Red Egg and Ginger parties, and I’d love to hear about your traditional celebrations from other cultures, too!

“Jewels”

“A” – You’re Adorable – Baby Shower Alphabet Crafts

A bit of Canadiana for you – Sharon, Lois, and Bram have the greatest kids’ albums – stuff you can totally get into as a parent, and if not, we’ll you didn’t hear it here. But really, please check them out. One of my favo(u)rites is actually a popular song from the 1940s, “A – You’re Adorable.”

You can listen, while you check out this sweet project we did for a baby shower last month. Since this was my friend Nicola’s second baby, we wanted a simple event, but of course, there had to be a craft project!

For baby E’s sister’s shower, we decorated onesies. For baby E, I gathered letter shapes, and we created an eclectic alphabet to decorate the room the sisters will share.

I loved seeing all the creative ideas, including some creations by the under-three set.

Here are some of the techniques we used:

  • Paint – we discovered some of our friends had a lot of talent!
  • Yarn – wrapping a letter took a little patience but turned out charming. I had fun with the multicolor yarn.
  • Scrapbook paper – you can paint the sides first; then add a coordinating paper. So many possible variations with this!
  • Craft tape – I couldn’t resist this cute tape with bicycles, since our friends are avid cyclists.

Here are some close-ups of the same letters I made before the party:

Baby shower idea: decorate letters to create a one-of-a-kind alphabet for baby's nursery! Jewels at Home

Creative baby shower idea: guests decorate letters of the alphabet to create a beautiful project for baby's nursery | Jewels at Home
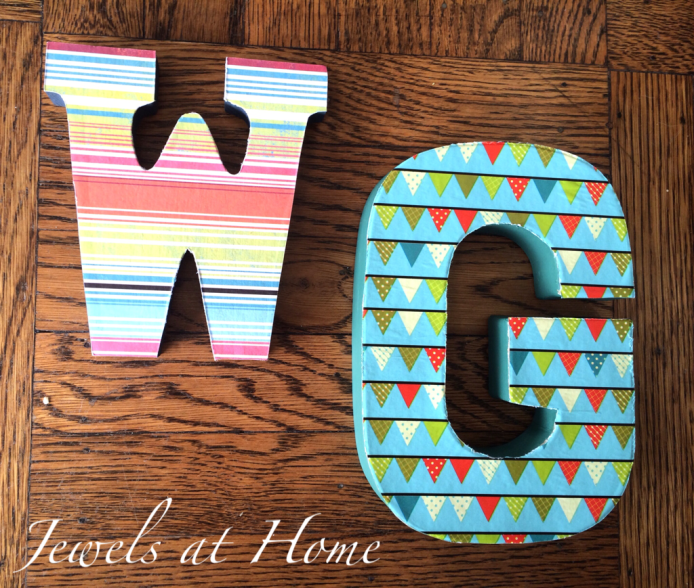
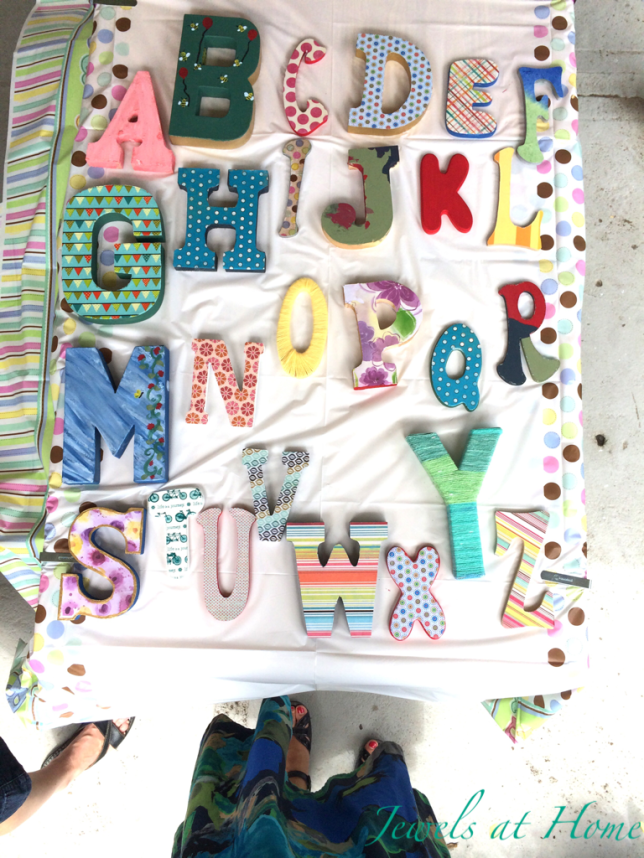
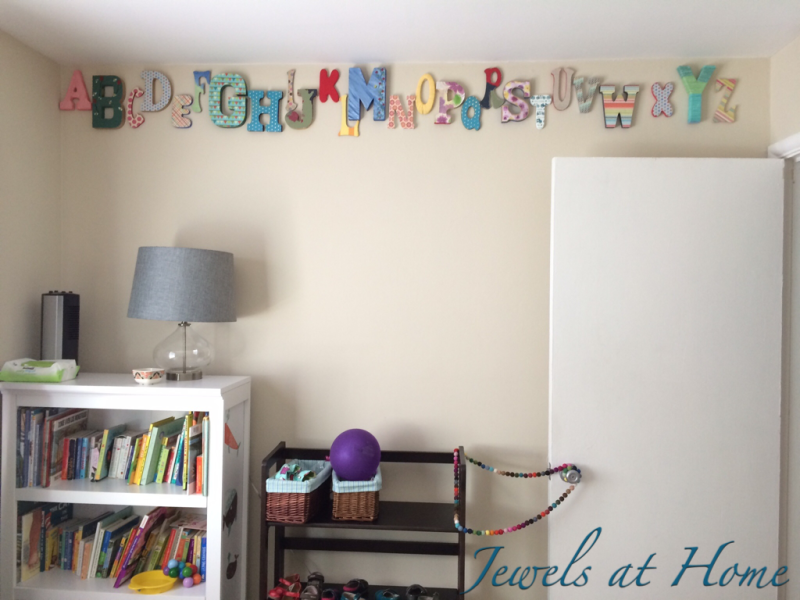
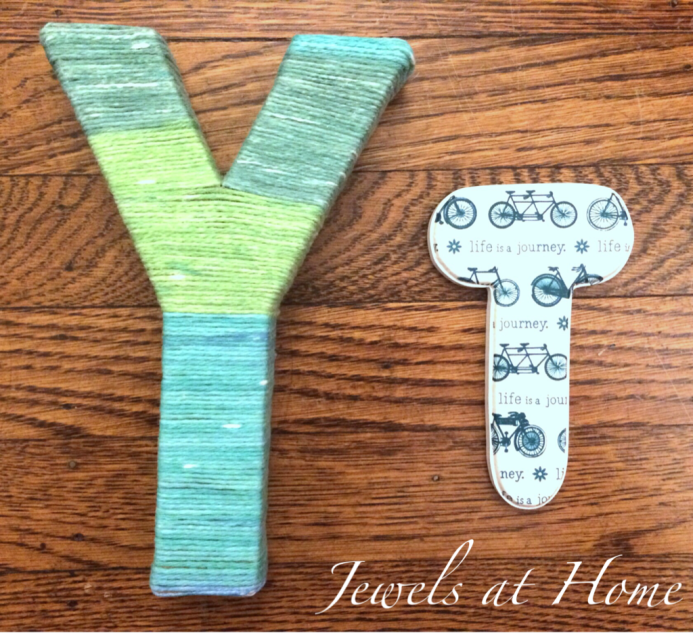
And here is our finished alphabet!

Creative baby shower idea: guests decorate letters of the alphabet to create a beautiful project for baby's nursery | Jewels at Home

Creating the art made for a fun and relaxing afternoon!

Creative baby shower idea: guests decorate letters of the alphabet to create a beautiful project for baby's nursery | Jewels at Home

Baby shower ideas: decorate the letters of the alphabet to decorate baby's nursery! Jewels at Home
And, I got to come visit when the letters were mounted on the wall. I love how it looks!

Baby shower idea: decorate letters to create a one-of-a-kind alphabet for baby's nursery! Jewels at Home

I love watching my boys grow up, but you can never get enough of a new baby.  One of my favorite places to find special gifts for everyone from babies to big kids is the amazing sales at Zulily.com!


Congratulations to the beautiful family on sweet baby E’s arrival!

“Jewels”

Christmas Mantel in Wintery White

The mantel is a natural focal point for Christmas decorating.  After all, that’s where the man in the red suit makes his entrance!

This year’s mantel matches the rest of our house, with white decorations setting a wintery scene.

Christmas mantel that lasts all season long with a wintery white theme | Jewels at Home

Stockings

These felt stockings in a lovely natural cream felt on sale at West Elm. I added felt circles with our initials to personalize them.

Simple felt stockings with initials.  Christmas mantel in wintery white | Jewels at Home

I set up some of my feather boa Christmas tree and felt Christmas trees I made last year.Winter wonderland.  Christmas mantel in white | Jewels at Home

Winter wonderland.  Christmas mantel in white | Jewels at Home

These little wooden houses are actually a work in progress. I’ve always wanted to have a Christmas village display, but I wanted to do something a little out of the ordinary. When my manager at work found these little bird houses at our local craft store, I knew they would be the foundation for my village. So far, I’ve painted them white. I want to add some wood embellishments, but we had some company this weekend, so I put up them up as-is. I’ll show you the finished village when I’m done!

Winter wonderland.  Christmas mantel in white | Jewels at Home

Winter wonderland.  Christmas mantel in white | Jewels at Home

By night, the candles light up our little winter village!

Winter wonderland.  Christmas mantel in white | Jewels at Home

Winter wonderland.  Christmas mantel in white | Jewels at Home

Winter wonderland.  Christmas mantel in white | Jewels at HomeWinter wonderland.  Christmas mantel in white | Jewels at Home

Winter wonderland.  Christmas mantel in white | Jewels at Home

Wishing you happy holidays!

“Jewels”

White Chocolate Cranberry Cake – A Modern Fruitcake

When I got married, my mom gave me a little notebook with favorite baking recipes from our home.  Last year, I shared our childhood banana bread recipe from this book.

Another favorite is this recipe for a cranberry white chocolate cake.  It has the perfect blend of moistness with sweet and tart flavors, and it’s always a hit at the holidays.  It originally came from a Baker’s chocolate ad in an magazine, though we’ve tweaked it a bit over the years.

Ingredients:

  • 7/8 c butter
  • 1/2 cup brown sugar, lightly packed
  • 1/2 cup granulated sugar
  • 4 eggs
  • 3 Tbsp orange juice
  • 1 Tbsp grated orange rind
  • 2 c all-purpose flour
  • 2 tsp baking powder
  • 1 1/2 cups cranberries
  • 6 oz white chocolate chips

Directions:

  • Preheat the oven to 350 degrees
  • Grease and flour a 9″ tube or  bundt pan
  • Beat butter and sugars with electric mixer
  • Beat in eggs, orange juice, and rind
  • Beat in flour and baking powder
  • Stir in cranberries and chocolate chips
  • Bake 1 hour
  • Cool in pan for 10 minutes.  Turn onto a cooling rack to cool completely.

A book of family recipes makes a gift that will become a family treasure | Jewels at Home

I make this cake every year for our holiday party, and it has become a popular tradition!

Modern fruitcake recipe: Cranberry white chocolate cake | Jewels at Home

Modern fruitcake recipe: Cranberry white chocolate cake | Jewels at Home

What are some of your childhood holiday favorites?

“Jewels”

Faux Birch Branches

They say, there’s a fine line between genius and insanity… I think I got a deeper understanding of this when I took on this faux birch branch project.

I saw these a year or two ago in a department store, and I’m not sure what possessed me, but I decided to make them for our house. It’s the kind of fantastic paper creation you might see at Anthropologie, which always has the best art in their store displays… It makes me want to buy a cute sweater… Now! But I digress.

I’m working on creating outdoorsy and white-themed Christmas decorations this year, like these felt poinsettia ornaments and homemade clay ornaments.  I had several large cardboard tubes left over from buying fabric, and I got inspired to transform them into a little homemade forest.  I have to say that I was super-excited when I started, and by the end, I was going blind from visions of decoupaged tissue paper, but I think it was worth it in the end.

So cool!  Transform cardboard and paper into faux birch branches for a beautiful display | Jewels at Home

Materials:

  • Cardboard tubes.  The “trunks” are made from large tubes for rolling fabric.  The “branches” are smaller tubes, including toilet paper and paper towel rolls.
  • Brown paper
  • White tissue paper
  • Mod Podge or glue for decoupage
  • Embroidery floss in black and gray
  • Patience

To get started, created the shapes of the trees.  I used brown paper and Mod Podge to join some long tubes together, so that the lengths would vary.  I also used the same technique to add branches to some of the trunks (pictured below).

So cool!  Transform cardboard and paper into faux birch branches for a beautiful display | Jewels at Home

Next, I started creating the look of birch bark, inspired by instructions on making fake birch bark over at Kitsch Designs.  The first step is to cut the tissue paper into strips – I made a variety ranging from about two to four inches wide.  Then, paint some Mod Podge on the cardboard and wrap strips of tissue paper around the tube (pictured below).  I overlapped the paper in places and left gaps in other places, to give a textured look to the branches.

So cool!  Transform cardboard and paper into faux birch branches for a beautiful display | Jewels at HomeIt looks cool when you tear the wet paper and get a rough edge like this!

So cool!  Transform cardboard and paper into faux birch branches for a beautiful display | Jewels at Home


Keep adding layers of paper, overlapping them, so the “bark” is textured and natural-looking (right two pictures below).  I estimate I used a total of about 4 layers.  On the top one or two layers, add some short strips of embroidery floss (left picture below).  I cut this into different lengths and also separated some into strands, so there was a lot of variety.  The floss stuck well to the paper using the Mod Podge.


So cool!  Transform cardboard and paper into faux birch branches for a beautiful display | Jewels at Home


I “planted” the finished birch branches in a pot wrapped in fabric in our font hall.  I think it would look great with the addition of some greenery and/or ornaments, so I’ll fiddle with that a bit more, but so far, I’m excited with these wintery additions to our foyer.

So cool!  Transform cardboard and paper into faux birch branches for a beautiful display | Jewels at Home

So cool!  Transform cardboard and paper into faux birch branches for a beautiful display | Jewels at Home

So cool!  Transform cardboard and paper into faux birch branches for a beautiful display | Jewels at Home

So cool!  Transform cardboard and paper into faux birch branches for a beautiful display | Jewels at Home

So cool!  Transform cardboard and paper into faux birch branches for a beautiful display | Jewels at Home

So cool!  Transform cardboard and paper into faux birch branches for a beautiful display | Jewels at Home

So cool!  Transform cardboard and paper into faux birch branches for a beautiful display | Jewels at Home

So cool!  Transform cardboard and paper into faux birch branches for a beautiful display | Jewels at Home

After the hours that went into this project, I’ll be keeping these faux birch branches around.  I haven’t decided if I’ll keep them long for next Christmas or maybe cut them short to display in the fireplace.  Let me know what you think!

“Jewels”

Felt Poinsettia Ornaments

I grew up in Canada, so Christmas was associated with cool temperatures, bare branches, and as often as not, snow on the ground. Even my kids, who grew up in California, ask for snow at Christmas. So, I decided to create a snowy Christmas for us at home.

I pared down my decorations to focus on the white and silver. I also made several new projects in a white and woodsy theme.  So far, I’ve finished a sleek new gray and white Christmas tree skirt, and I also made some new pillow covers in white and gray with outdoorsy appliques of reindeer, polar bears, and trees.

Since I kept our colorful ornaments packed up for this year, I needed to add some more decorations to our tree.  The kids helped me make these sweet clay ornaments, and I am adding these white felt poinsettia ornaments to fill in the branches.

DIY felt poinsettia Christmas decorations to use as ornaments, gift toppers, or around the house | Jewels at Home

I looked at lots of pictures of real and felt flowers, and I read a lot of tutorials, trying to find felt poinsettias that would have a natural look.  My final project was a combination of the felt poinsettia pin by Cheryl at her Tidy Mom blog, Kate’s felt poinsettia’s at her Centsational Girl blog, and my own innovation, as I wanted to make the flowers a bit more natural-looking and just right for my tree!

The thing I liked best about Cheryl’s flowers was how she cut the petals.  It’s much faster and easier than using a template, and it allows you to make each petal a little bit unique.  I used different dimensions, which I’ll list below, and I also cut my petals with a bit of a wave on the edge, to give them more dimension.

I washed and dried my felt before using it, to make it a bit thicker.  To cut the petals, first cut rectangles of felt in the specified dimensions, and then trim them to look like petals.  It’s very quick to cut the rectangles, if you cut the felt into strips first (left side of the picture below) and then cut the strips into rectangles (middle of the picture below).  I was also able to trim the petals three at a time, so it was all much easier than I expected!

DIY felt poinsettia Christmas decorations to use as ornaments, gift toppers, or around the house | Jewels at Home

Each flower is constructed the same way, and I’ll give the exact measurements for my two sizes below.

The basic parts of the felt poinsettia are

  • a round circle base (top left picture below)
  • a layer of large petals (top right and bottom left pictures below)
  • a layer of small petals (bottom right picture below)
DIY felt poinsettia Christmas decorations to use as ornaments, gift toppers, or around the house | Jewels at Home

Start with a round base, add a layer of large petals, and top with a layer of smaller petals.

To finish the flower, I sewed all the layers together while sewing on some pearl beads to decorate the center of the poinsettia.  I then used hot glue to attache the flower to a metal alligator clip.

DIY felt poinsettia Christmas decorations to use as ornaments, gift toppers, or around the house | Jewels at Home

Finish the flower by sewing the layers together while sewing on some beads for the center.

The pictures above are of the larger poinsettias.  The finished size is approximately 6.5″ in diameter.  The large flower uses:

  • 2″ diameter base circle
  • 8 large petals of 3.5″ x 2″
  • 5 small petals of 2.5″ x 1.5″
  • 7 beads
  • metal alligator clip

I also made smaller poinsettias, with a finished size of approximately 4.75″.  The small flower uses:

  • 1.5″ diameter base circle
  • 6 large petals of 2.5″x1.5″
  • 5 small petals of 1.75″ x 1″
  • 5 beads
  • metal alligator clip

Here are the large and small flowers side by side.

DIY felt poinsettia Christmas decorations to use as ornaments, gift toppers, or around the house | Jewels at Home

And here are the new poinsettias on our tree!

DIY felt poinsettia Christmas decorations to use as ornaments, gift toppers, or around the house | Jewels at Home

DIY felt poinsettia Christmas decorations to use as ornaments, gift toppers, or around the house | Jewels at Home

Christmas tree with all-white ornaments.  Link to DIY ornament ideas to trim your tree.  Jewels at Home

Hooray for a project that was even more easy and fun than I had expected!  If I get enough of these for the tree, they may start showing up elsewhere in our house!  Or that may be crazy-talk!

“Jewels”


Christmas Pillows in Simple White and Gray

I’m not even going to try to hide that I’m crazy about Christmas. I love the warm festive atmosphere, the carols, the time with family.

Over the years, I mostly had the same decorations up each year.  Last year, I tried a new color scheme of red, turquoise, and silver.  This year, I want to do as much as I can in simple gray and white.  I started with our new modern tree skirt, since that is a focal point.

Next, I wanted to make some cute Christmas throw pillows.  The idea behind the pillows is simple.  It’s all the different designs and fabrics that make them fun! The instructions for the basic pillow cover can be found in the post on our living room pillows.  The instructions for making the appliqués can be found in this post from the onesie-decorating baby shower.  Since I put some work into all these new pillows, I chose designs that would last beyond Christmas and through the winter.

Polar bear, snowy forest, and reindeer pillows in a simple white and gray color scheme for Christmas and the whole winter | Jewels at Home

Here are some of the decorations I put on my new winter pillow covers!

Reindeer pillows:

Reindeer pillows in a simple white and gray color scheme for Christmas and the whole winter | Jewels at Home

Polar bear pillows:

Polar Bear pillows in a simple white and gray color scheme for Christmas and the whole winter | Jewels at Home

A snowy forest of trees on this pillows:

Snowy forest pillows in a simple white and gray color scheme for Christmas and the whole winter | Jewels at Home

And here is our living room with the new pillows.  There’s more I’d love to do, but I like how it’s coming together so far.

Holiday decorating.  Living room with new polar bear, snowy forest, and reindeer pillows for Christmas and the whole winter | Jewels at Home

Holiday decorating.  Living room with new polar bear, snowy forest, and reindeer pillows for Christmas and the whole winter | Jewels at Home

Holiday decorating.  Living room with new polar bear, snowy forest, and reindeer pillows for Christmas and the whole winter | Jewels at Home

Holiday decorating.  Living room with new polar bear, snowy forest, and reindeer pillows for Christmas and the whole winter | Jewels at Home

Holiday decorating.  Living room with new polar bear, snowy forest, and reindeer pillows for Christmas and the whole winter | Jewels at Home

Holiday decorating.  Living room with new polar bear, snowy forest, and reindeer pillows for Christmas and the whole winter | Jewels at Home

Holiday decorating.  Living room with new polar bear, snowy forest, and reindeer pillows for Christmas and the whole winter | Jewels at Home

Holiday decorating.  Polar bear, snowy forest, and reindeer pillows for Christmas and the whole winter | Jewels at Home

I’m also planning to make a throw blanket and some pillows out of a sweater. It could be a fiasco or an amazing project. If it’s the latter, you’ll see it here!

Are you feeling our snowy white Christmas theme?!

“Jewels”

Homemade Clay Ornaments with the Kids

I love decorating for Christmas, and this year, I wanted to create a white and outdoorsy theme.  I love our collection of ornaments from over the years, but just for a change, I only put up the white ones this year, leaving our tree a little sparse.

Thanks to the kids for doing a quick and fun project with me to make some new decorations for our Christmas tree!

Christmas ornaments to make with the kids.  These are simple and beautiful!  Jewels at Home

I used this DAS Air Hardening Modeling Clay, and it worked fine, but the dried ornaments are quite fragile, so I’m going to try the next round with this AMACO Cloud Clay. The kids have used it at school, and it seems to be more durable, though it doesn’t look like the shapes come out as cleanly. We’ll let you know!

This project was quick and simple – all you need is some clay, a rolling pin and cookie cutters, and some beads and/or rubber stamps for embellishing the ornaments.  Oh yes, and some string for hanging the ornaments.  I used embroidery floss.

All the kids were able to do the project pretty much on their own.  I did help the younger ones with rolling the clay flat, but even little J did the cookie cutters and beads on his own!

Here are the boys at work:

Christmas ornaments to make with the kids.  These are simple and beautiful!  Jewels at Home

Christmas ornaments to make with the kids.  These are simple and beautiful!  Jewels at Home

And here are the ornaments we made:

Homemade clay Christmas ornaments to make with the kids.  These are simple and beautiful!  Jewels at Home

These are the ornaments I made. I used beads and rubber stamps to decorate the clay.

Homemade clay Christmas ornaments to make with the kids.  These are simple and beautiful!  Jewels at Home

L made the three wise men.. actually, I believe he called them an “army of snowmen”…

Homemade clay Christmas ornaments to make with the kids.  These are simple and beautiful!  Jewels at Home

Little J made these stars himself! I had to take them away from him as soon as they were done, as he wanted to roll them back into a ball like play dough.

Homemade clay Christmas ornaments to make with the kids.  These are simple and beautiful!  Jewels at Home

These are K’s ornaments. I like how he tried a lot of different designs.

The tree looks much better now, but I’m hoping to make a few more ornaments to fill it out.

Homemade clay Christmas ornaments to make with the kids.  These are simple and beautiful!  Jewels at Home

Homemade clay Christmas ornaments to make with the kids.  These are simple and beautiful!  Jewels at Home

Homemade clay Christmas ornaments to make with the kids.  These are simple and beautiful!  Jewels at Home

Homemade clay Christmas ornaments to make with the kids.  These are simple and beautiful!  Jewels at Home

Homemade clay Christmas ornaments to make with the kids.  These are simple and beautiful!  Jewels at Home

Homemade clay Christmas ornaments to make with the kids.  These are simple and beautiful!  Jewels at Home

Homemade clay Christmas ornaments to make with the kids.  These are simple and beautiful!  Jewels at Home

Homemade clay Christmas ornaments to make with the kids.  These are simple and beautiful!  Jewels at Home

“Jewels”

20131215-125612.jpg

20131215-125622.jpg

Modern Gray and White Christmas Tree Skirt

For many years, I decorated for the holidays with the same traditional red and green Christmas color scheme.  There’s nothing wrong with that, of course – traditions become traditions for good reason!  But after more than a decade of the same style, I decided it would be fun to change up our Christmas look.  Last year, I edited and updated our decorations for a red, turquoise, and silver Christmas.  And this year, I’m in love with a simple gray and white Christmas color scheme.  It makes me feel like I’m getting back to the tranquil snowy outdoors – even if I am in California!

Like last year, when I reinvented many of our decorations with silver paint and ribbons, I wanted to work with a lot of things I had, while adding a few new items.  I’ve also been trying to keep my fabric and craft stash in check, so I pulled out all the gray and white fabrics I could find around the house and started to sew!

First up was a new Christmas tree skirt.  I sewed our original tree skirt 18 years ago, when I was more fond of a cute and country look, and I took this year’s skirt in a complete different direction, making something very sleek and calming.  I started with a grey faux suede upholstery fabric sitting in a corner.  I had bought it to upholster our dining room chairs, and then I decided to make them more whimsical with a printed fabric.

Materials:

  • Grey faux suede fabric, 60″x60″
  • White cotton fabric to make a wide bias binding (I forgot to measure, but I estimate I used a little over a yard of 42″ wide cotton)
  • Narrower white bias binding

Instructions:

  • Cut a 60″ diameter circle from the main fabric
  • Cut a 6″ diameter hole from the center
  • Cut a straight line from the perimeter to the center
Tutorial for a simple gray and white Christmas tree skirt | Jewels at Home

The basic shape for the Christmas tree skirt.

  • Make 5″ wide bias binding from the trim fabric
  • Iron the binding in half to a make 2.5″ wide strip
  • Sew the binding to the two straight edges that makes the opening of the skirt, sewing on the back side of the main fabric with the raw edges lined up
  • Wrap the binding around to the front.  Pin and sew to the front of the skirt
  • Add the binding to the outer edge of the skirt the same way, stretching the edges of the bias binding as you go.
  • Use the narrower binding to finish the inside circle
Tutorial for a simple gray and white Christmas tree skirt | Jewels at Home

Sew the doubled bias binding to the underside of the skirt. Then, wrap the binding around to the front and sew in place.

That’s all! Here’s our new Christmas skirt!

Tutorial for a simple gray and white Christmas tree skirt | Jewels at Home

Modern gray and white Christmas tree skirt.

Tutorial for a simple gray and white Christmas tree skirt | Jewels at Home

Tutorial for a simple gray and white Christmas tree skirt | Jewels at Home


Tutorial for a simple gray and white Christmas tree skirt | Jewels at Home

I’ve got a few more white Christmas ideas coming up, and you can start your holiday shopping over at Zulily:

“Jewels”

Seeing Silver for the Holidays

I love decorating for Christmas and the winter holidays. There’s something about all that sparkle and warmth at the darkest time of the year that just lifts my spirits. I have a lot of traditional red and green decorations with a more natural feel, because our last house was an old Craftsman, and that theme fit it well, but in recent years, I decided to shift towards bright and silver! I set out to do this while reusing as much as possible. You can see how it turned out in last year’s 2012 Christmas house tour, and in this post, I’ll give details on how to add silver and shine to your holidays without breaking the bank.

I bought very few new decorations, but I used a few simple elements to transform things we already had:

  • Silver spray paint. Rustoleum metallic spray paint in “chrome,” and Krylon “bright silver” which I already had.
  • Silver craft paint. I used this to touch up some decorations and ornaments we had and add some sparkle.
  • Silver ribbon – Michael’s had an array of ribbons at 60% off when I was there, and I had some in my craft closet as well.
  • Silver bells – also on sale at Michael’s

Paint it!

I’ve had these “PEACE” and “JOY stocking holders for many years now. They were a lovely antique bronze finish that got refreshed with a spray primer and a few coats of Rustoleum chrome paint. It has a very bright and reflective finish that looks like real metal.

Tips on adding the glow of silver to Christmas decorations you already have. {Jewels at Home}

I painted these stocking hangers with metallic paint for a shiny new look.

Tips on adding the glow of silver to Christmas decorations you already have. {Jewels at Home}

I also painted these mercury glass look-alike ornaments in silver.

Tips on adding the glow of silver to Christmas decorations you already have. {Jewels at Home}

Two easy steps to get a faux mercury glass look on your old ornaments.

And finally, I painted some pine cones with the Krylon bright silver  paint and used the on their own, as vase filler, and on wreaths.

Spray some pinecones in silver paint to brighten up your holiday decor.  {Jewels at Home}

Spray some pinecones in silver paint to brighten up your holiday decor.

Spray some pinecones in silver paint to brighten up your holiday decor.  {Jewels at Home}

Wrap it in ribbon!

I had three wreaths in traditional greens and reds. This pomegranate and magnolia wreath from Restoration Hardware got a new look with some simple silver ribbon wound around it and used for hanging.

Transform a Christmas wreath with ribbon.  Plus lots more ideas to add silver sparkle to your holidays.  {Jewels at Home}

For my oversized wreath with pinecones and berries, some silver bells and ribbon gave a whole new look.

Transform a Christmas wreath with ribbon and silver bells.  Plus lots more ideas to add silver sparkle to your holidays.  {Jewels at Home}

My third wreath was this plain wreath that wore a burgundy velvet bow for more than a decade, and now it’s ready for the next decade with new ribbon and pinecones painted in silver.

Transform a Christmas wreath with ribbon and painted pinecones.  Plus lots more ideas to add silver sparkle to your holidays.  {Jewels at Home}

;

I did splurge (as much as one does at Target) on this silver beauty for our front door. It sets the silvery tone right when you enter our house!

Silver Christmas wreath.  Lots more ideas for a sliver-themed holiday.  {Jewels at Home}

And here’s what some more silver ribbon and bells did for this tabletop tree:

Decorate with silver ribbon and bells, plus lots more ideas for a sliver-themed holiday.  {Jewels at Home}

Wishing you a bright and merry holiday season!

“Jewels”