
I’m still looking for a good name for this year’s Christmas theme. Woodsy and Warm? I do know that sweaters are a big part of my decorations – like the sweater pillow covers and sweater ornaments I already made. The … Continue reading
I’m still looking for a good name for this year’s Christmas theme. Woodsy and Warm? I do know that sweaters are a big part of my decorations – like the sweater pillow covers and sweater ornaments I already made. The … Continue reading

It has been a busy few months here, but I’m sitting by the fire and finally have a minute to share our Christmas decorations – just under the wire this Christmas Eve. If there were a graph showing how many … Continue reading
So, I know I’m not the only one who loves the ficus lyrata, or fiddle leaf fig. My post on how to propagate fiddle leaf fig plants from cuttings is by far one of the most popular topics on the blog!
It’s my second year of growing these magnificent plants, and I thought I’d try my hand at shaping one into a tree. The two most common shapes for fiddle leaf fig plants are a column, often planted in groups of twos or threes, and a tree shape. Even though they look very different, these two shapes are the same plant, and you can actually make a tree by carefully pruning and shaping your plant!
The best time to prune is spring or summer, when your plant is growing most actively.
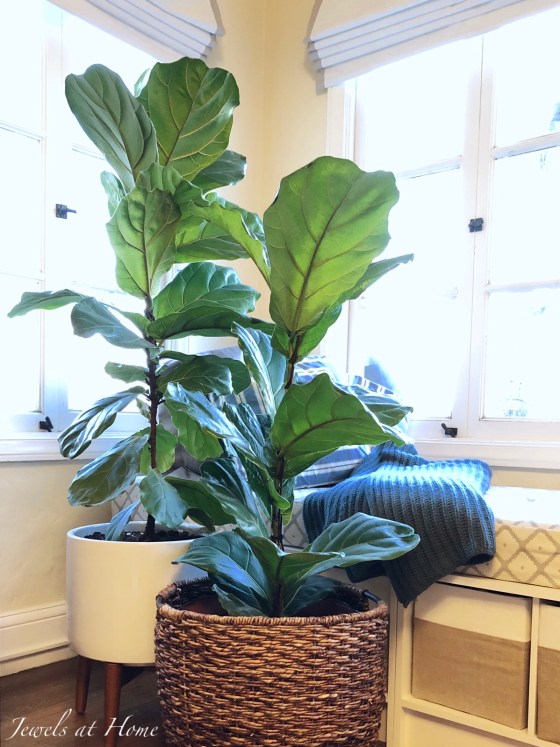
Here is a tree-shaped fiddle leaf fig I bought from Sloat Garden Center about a year ago. It has grown three-to-four times in size, and I’ve pruned it several times already. As it grows, I study the shape and look to see where it may be getting lopsided. Then, I cut the branch including two-to-three leaves off of that area, and this encourages the plant to branch out in new directions. The more you cut, the more side branches the plant will grow.
Why? The plant hormones – auxins – that promote upward growth also inhibit branch growth. The auxins flow from the tip down, so when you cut off the tip, you lower the level of auxins, which allows branching. The more you cut, the lower the concentration of auxins, and the more branching you’ll get.

These are examples of a traditional column shape, and the one in front is actually a plant I propagated off of the one in back! I was able to cut off the tip of the column-shaped plant with just one leaf, and it grew back just one bud, keeping its vertical form without branching. The benefit of doing this, besides getting a new plant from your cutting (!), is that it slows down the vertical growth and lets the trunk get stronger.
Of course, you don’t have to be traditional! I bought this plant from Flowercraft last Mother’s Day, when it was just the lower section. It grew two side branches, and I just let it continue that way. I pruned one of the side branches once, so you can see there is yet another small branch coming off of it. This plant now has a very unique shape which I’ve grown to love.
 Back to my latest fiddle leaf fig project! I had this smaller fiddle leaf fig plant that I actually purchased online, when I was eager to get my hands on one and was having trouble hunting one down at a nursery. It grew a bit slowly at first, but it did eventually take off, and now it is ready for an adventure!
How to shape your fiddle leaf fig plant into a tree:
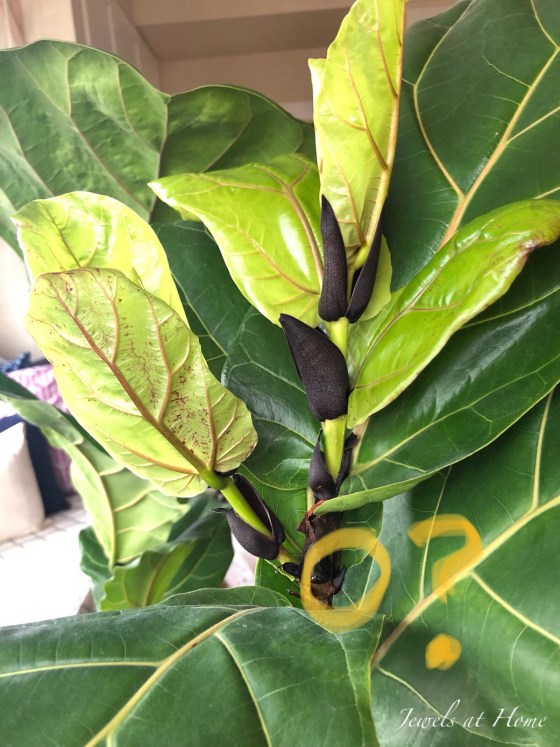
2. About a month later, I was rewarded with three new buds! Each of these will grow a new branch, and we’ll be on our way to a pretty new tree shape!

3. When it grows enough, I will start taking the leaves off the bottom section of the trunk. It is good to wait a while to do this, as each of those leaves is helping provide energy for the plant. I also have never been able to propagate a leaf without the stem section, though I think I might as well try when I cut those leaves. More to come!
I’ll keep updating this post with progress and tips, so come back and see how this beauty is doing!
Update at 1.5 months:
So, I have good news and bad news…. good news is that two of the buds have totally taken off into branches… bad news is the third bud hasn’t grown much. I’ll give it some more time, but I know that the plant hormones – auxins – that promote upward growth also inhibit branch growth, so I may try trimming the top of the new branches when they get mature, to try to allow that third little bud to grow.
“Jewels”
Remember when I made felt Christmas trees and yarn Christmas trees? Way back then I meant to make one with the pine cone scales, inspired by Shauna Mailloux.
Well, I finally made mine!

The new pine cone tree fits right in with his felt and feather cousins!
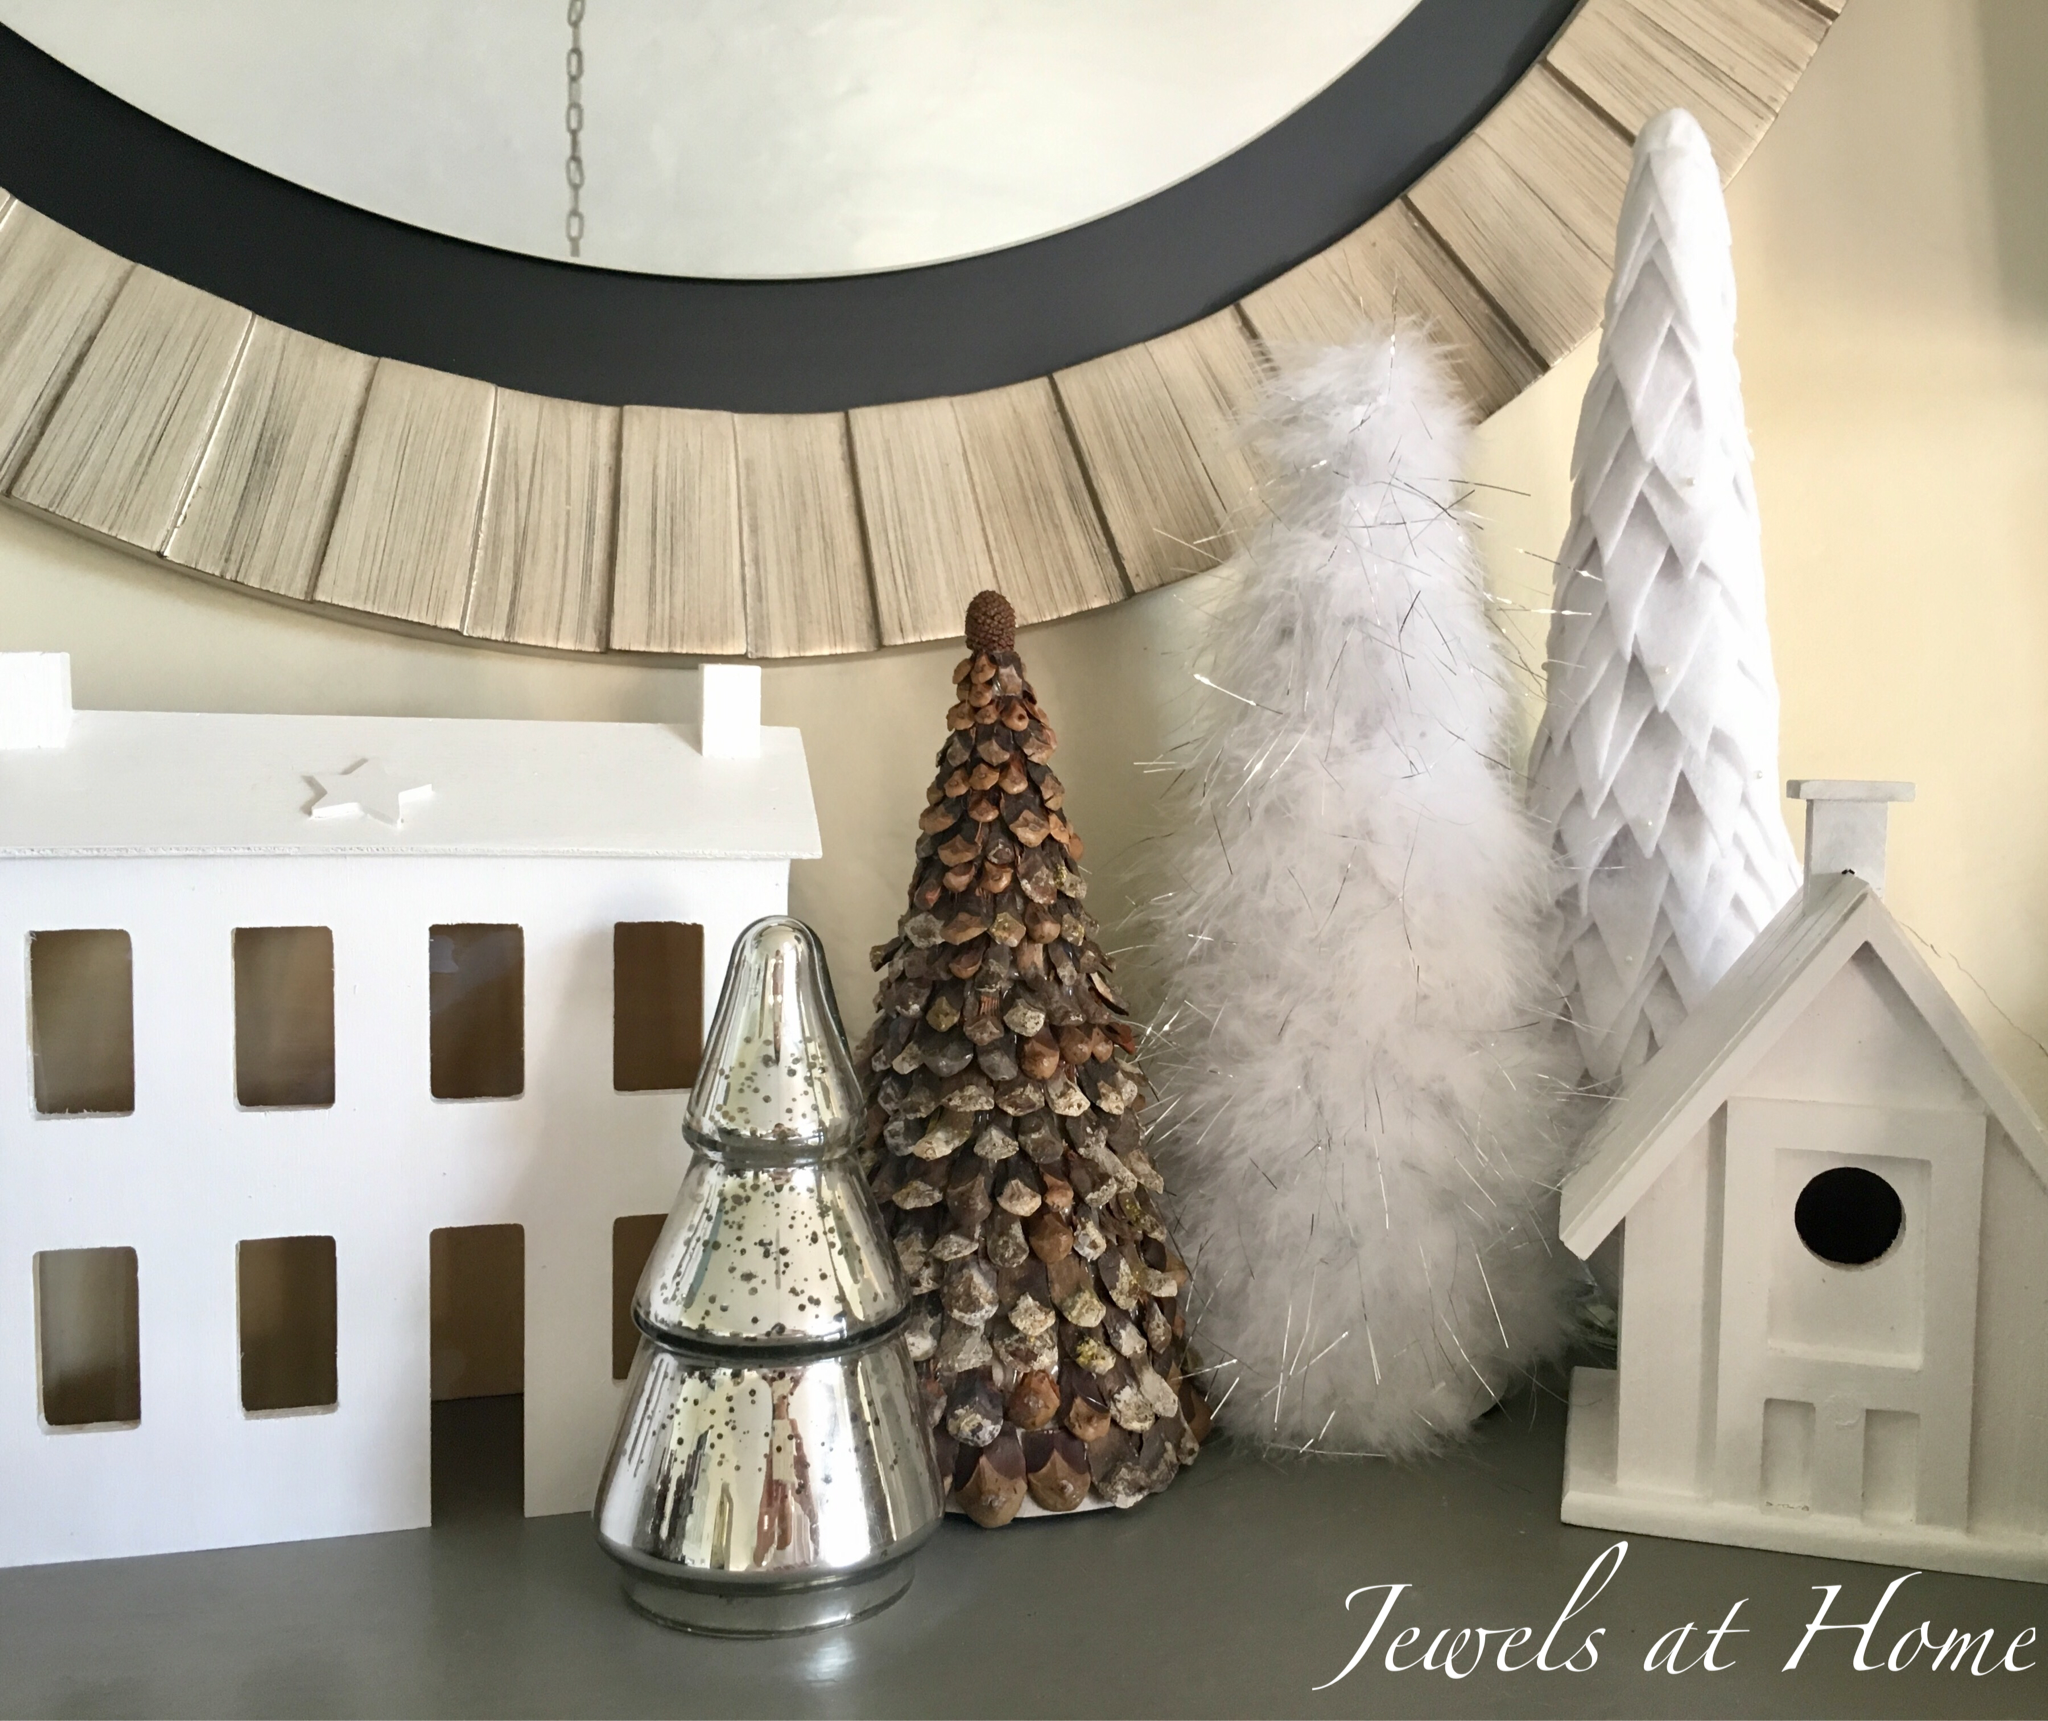
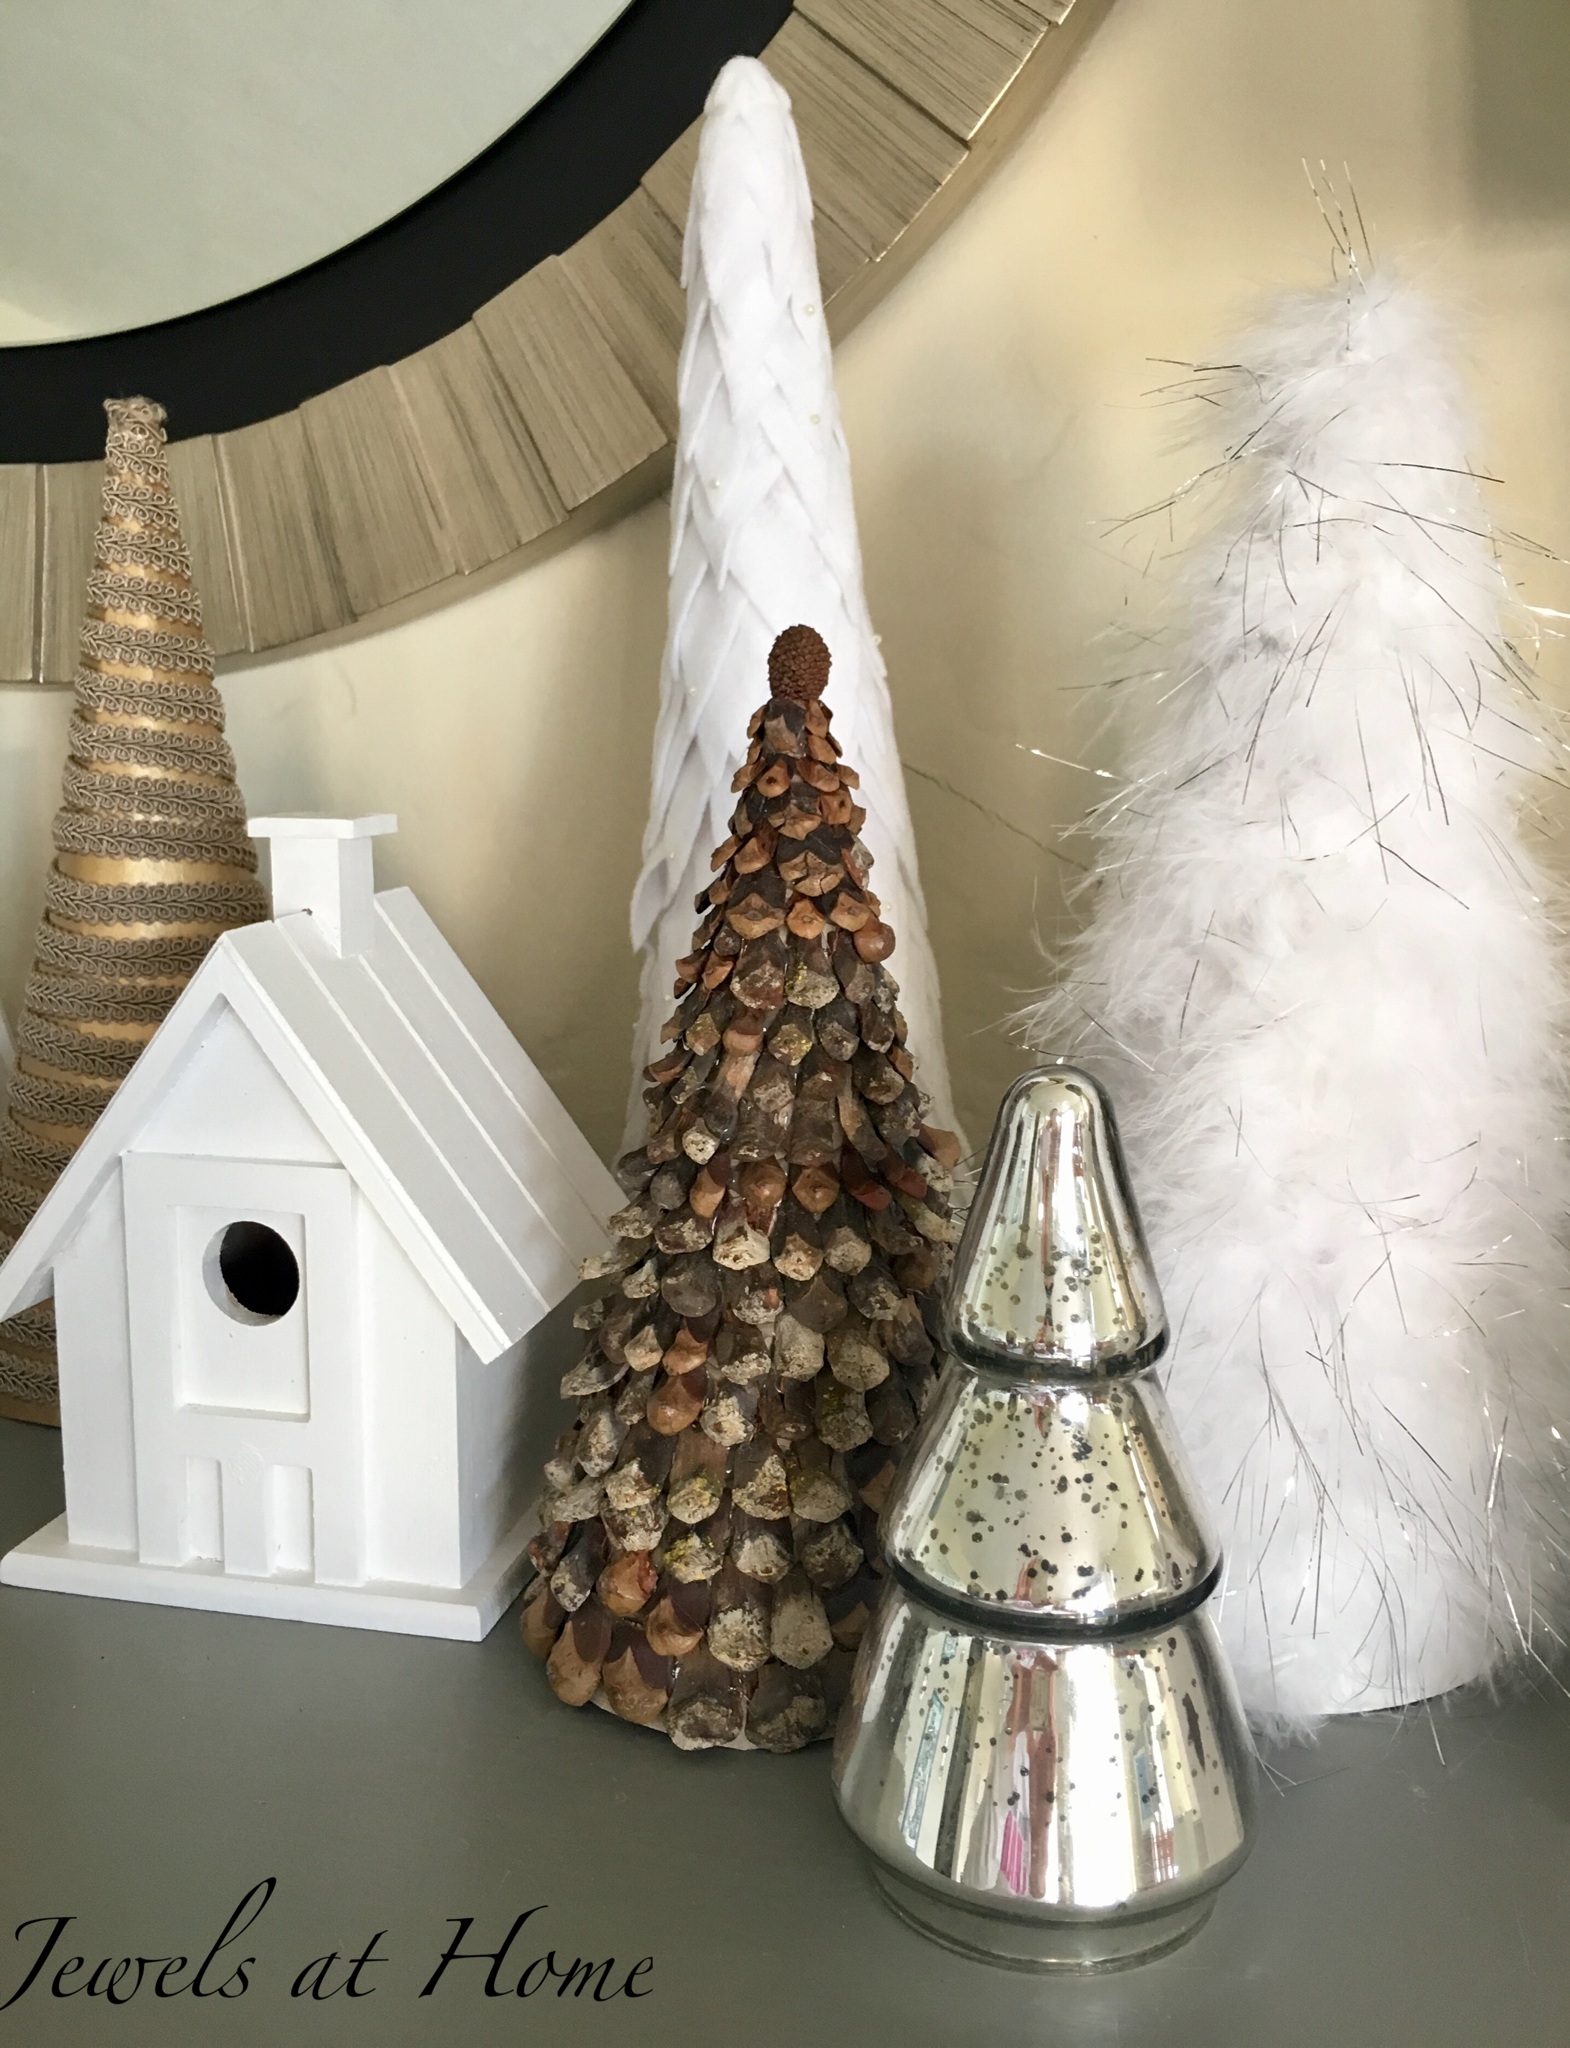
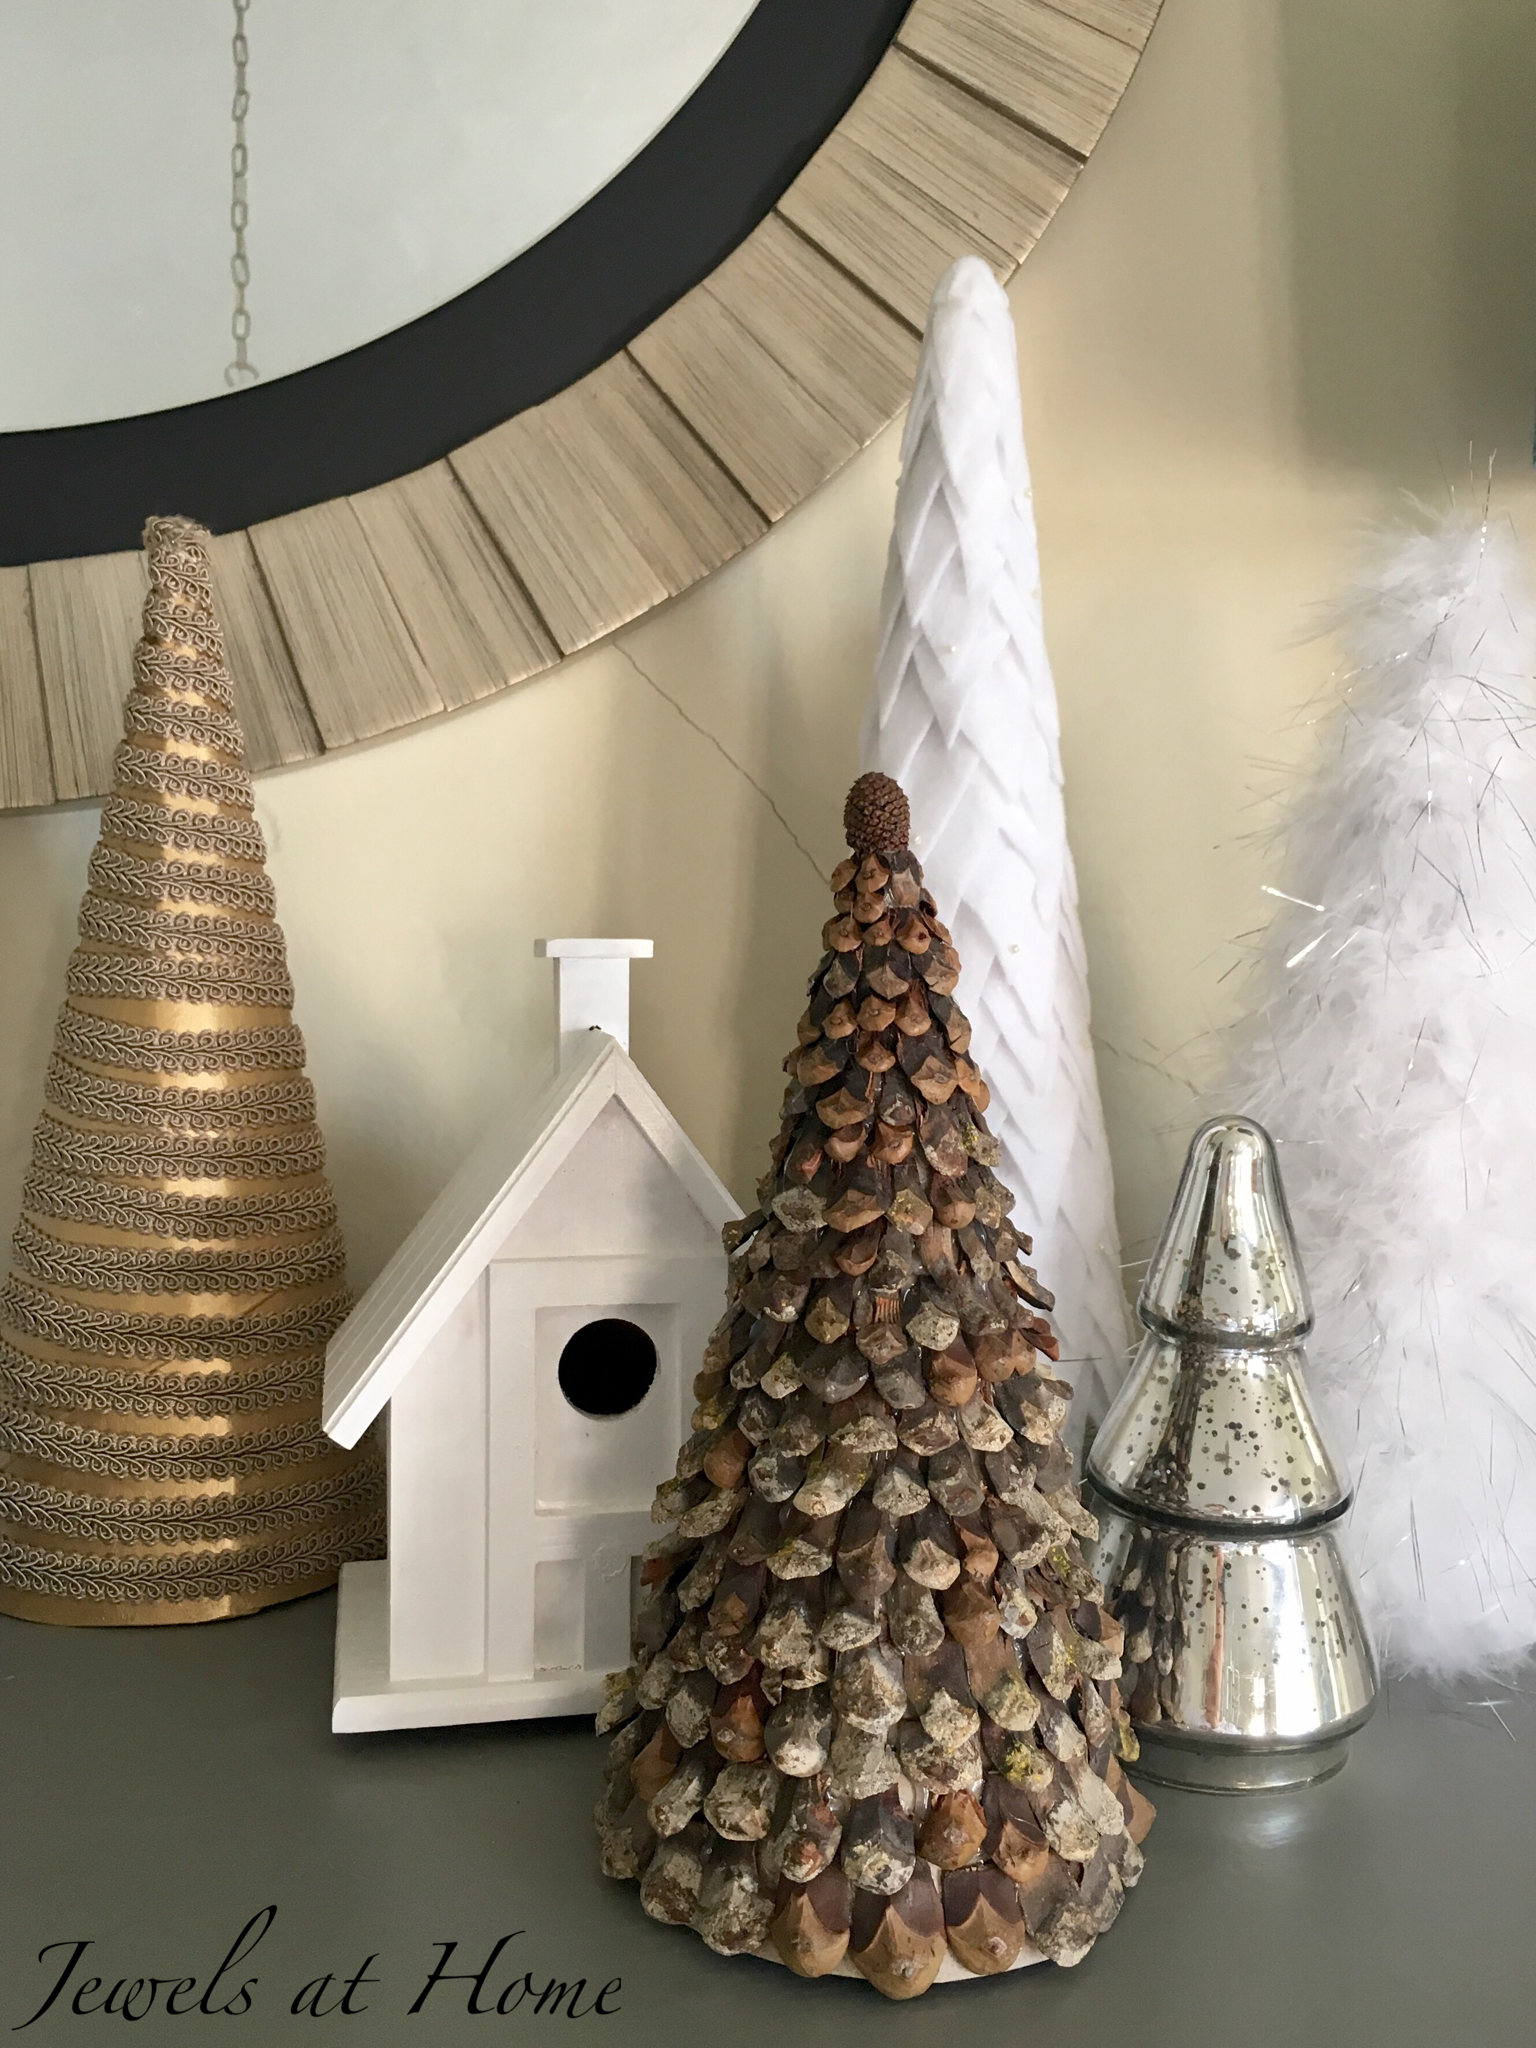
 I might paint it another time, but for this year’s Scandinavian-inspired theme, the natural finish seems perfect! It took a while to put together, and Steve took the opportunity to make about two zillion conifer-inspired puns, so I have multiple reasons to be glad that project is over:)… but I’m really happy with the results!
“Jewels”
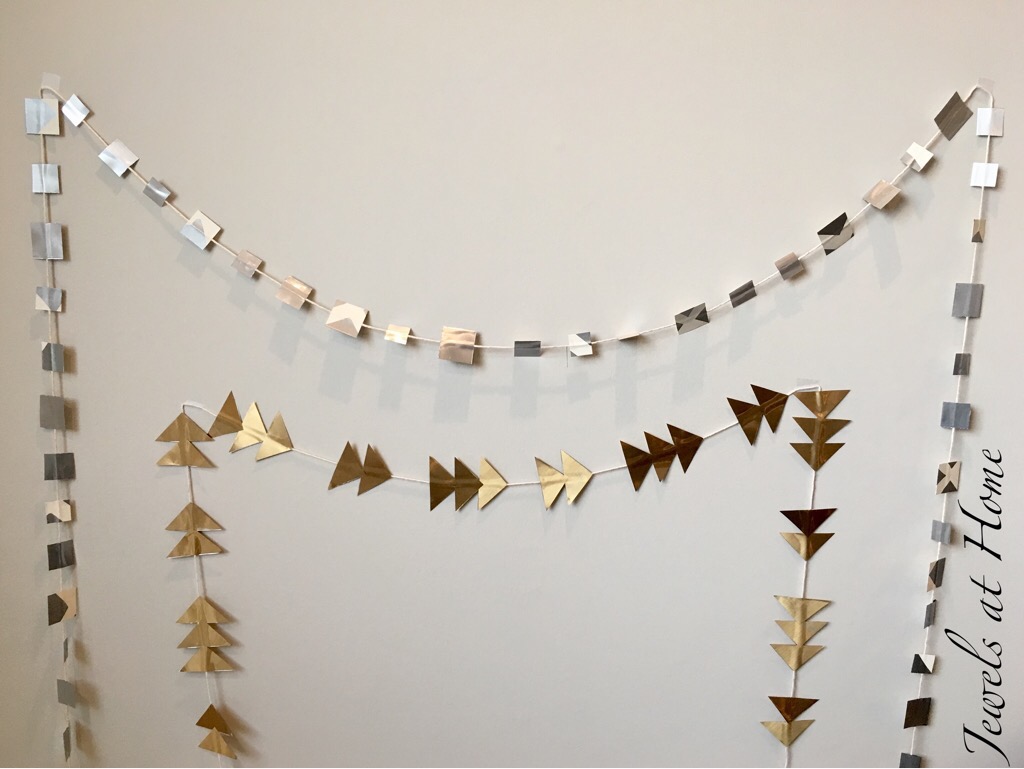
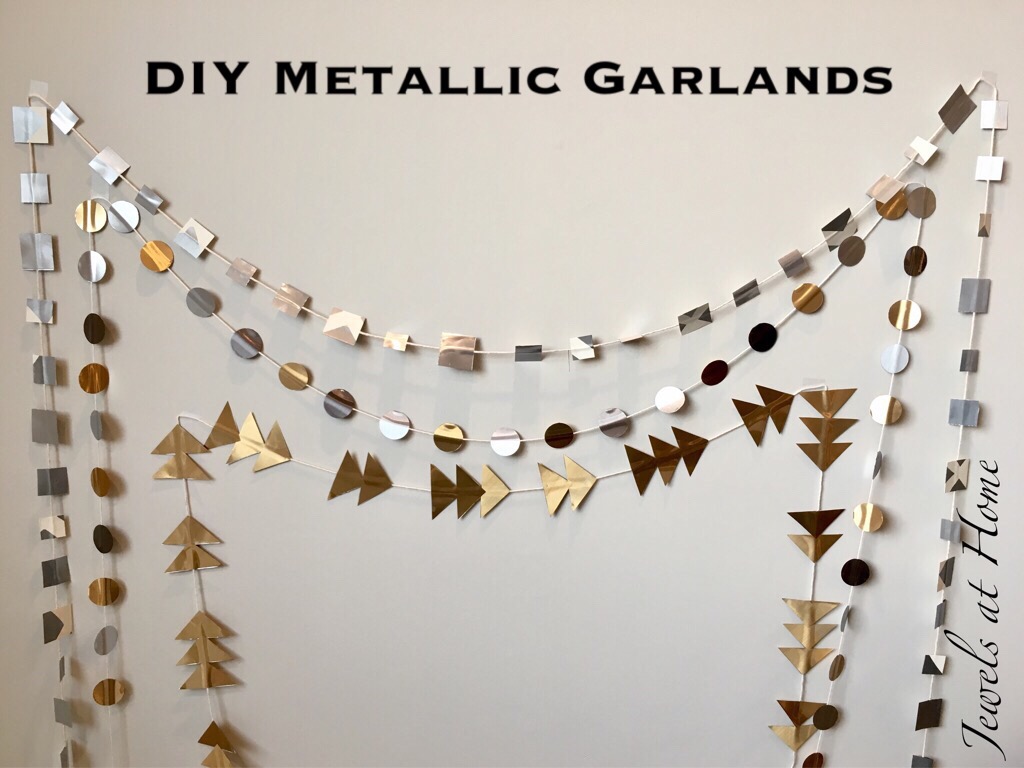
For our Mod Metallic Christmas, I wanted to make garlands for the tree and beyond. I love how these turned out, and I love that they are neutral enough to use for any occasion!

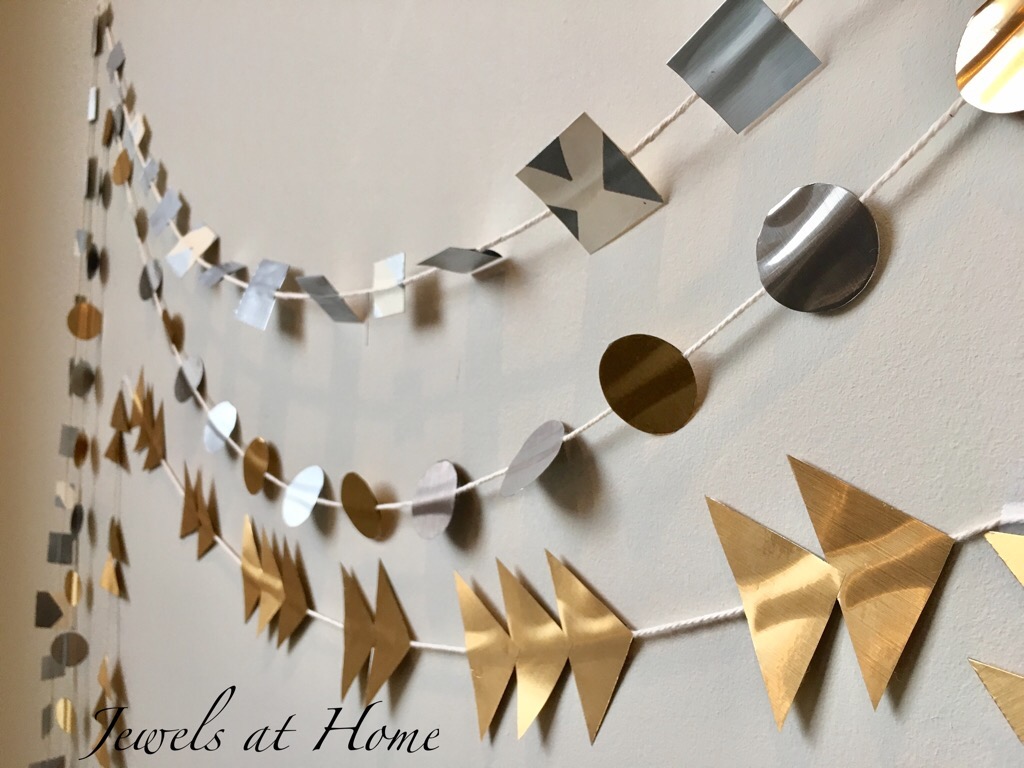
To make the garlands, I used beautiful metallic contact papers and simple twine to create a variety of garlands. You can find twine and white contact paper at a lot of local hardware stores, and here are the links buy the metallic contact paper:
I made three different garlands – squares, triangles, and circles – by cutting out shapes from the contact paper and sticking two sides together with twine sandwiched in between.
For the circle garland, you could also buy pre-cut circle stickers which would make the project even faster!
Here are the finished garlands, ready for when we put up our Christmas tree and for many celebrations to come!


Cheers,
“Jewels”
As you know, this Christmas, I’m decorating with a retro mid-century theme. Our tree is trimmed with globe ornaments in red, turquoise, and pink, including these scrapbook paper and washi tape globe ornaments.
I was looking for the perfect tree topper and saw this fabulous atomic topper from Over the Top Finials on Etsy. They have lots of fun products!!

Since I had all the supplies in the house already, I thought I’d try a DIY version, and I’m pretty excited with how it turned out!
Here’s what I rounded up to make the tree topper:
Here’s how to put it together
Ta-da!


And here’s how the tree has come together, including the retro Christmas Ornament tree skirt!

I think our Christmas tree looks far-out and groovy with its new topper!
“Jewels”
They say, there’s a fine line between genius and insanity… I think I got a deeper understanding of this when I took on this faux birch branch project.
I saw these a year or two ago in a department store, and I’m not sure what possessed me, but I decided to make them for our house. It’s the kind of fantastic paper creation you might see at Anthropologie, which always has the best art in their store displays… It makes me want to buy a cute sweater… Now! But I digress.
I’m working on creating outdoorsy and white-themed Christmas decorations this year, like these felt poinsettia ornaments and homemade clay ornaments. I had several large cardboard tubes left over from buying fabric, and I got inspired to transform them into a little homemade forest. I have to say that I was super-excited when I started, and by the end, I was going blind from visions of decoupaged tissue paper, but I think it was worth it in the end.

Materials:
To get started, created the shapes of the trees. I used brown paper and Mod Podge to join some long tubes together, so that the lengths would vary. I also used the same technique to add branches to some of the trunks (pictured below).

Next, I started creating the look of birch bark, inspired by instructions on making fake birch bark over at Kitsch Designs. The first step is to cut the tissue paper into strips – I made a variety ranging from about two to four inches wide. Then, paint some Mod Podge on the cardboard and wrap strips of tissue paper around the tube (pictured below). I overlapped the paper in places and left gaps in other places, to give a textured look to the branches.
 It looks cool when you tear the wet paper and get a rough edge like this!

Keep adding layers of paper, overlapping them, so the “bark” is textured and natural-looking (right two pictures below). I estimate I used a total of about 4 layers. On the top one or two layers, add some short strips of embroidery floss (left picture below). I cut this into different lengths and also separated some into strands, so there was a lot of variety. The floss stuck well to the paper using the Mod Podge.

I “planted” the finished birch branches in a pot wrapped in fabric in our font hall. I think it would look great with the addition of some greenery and/or ornaments, so I’ll fiddle with that a bit more, but so far, I’m excited with these wintery additions to our foyer.


After the hours that went into this project, I’ll be keeping these faux birch branches around. I haven’t decided if I’ll keep them long for next Christmas or maybe cut them short to display in the fireplace. Let me know what you think!
“Jewels”
