Easy Upgrades That Make Your House a Home

For various reasons, Steve and I have ended up living in quite few different places over the years. While I can’t exactly say that I enjoy moving, there is definitely something exciting about a fresh space. I love finding creative ways to upgrade and decorate a place to make it feel like home.

While we’ve been through several smaller and larger homes since then, I was prompted to look back to our very first house by the folks at Urban Compass, a NYC-based company helping people find apartments in the city.  My little sis recently moved to Manhattan to study at Parsons (I’m so proud!!), so I know that in a competitive housing market like New York or San Francisco, you definitely need every advantage you can to find a place to call home. And every space, however grand or humble, needs some finishing touches to make it your own. Our first townhouse was no exception. This little place was stuck in the 70s when we found it, but I’m glad we were able to see and bring out its charm. This is where I first started finding my style and developing DIY skills that can be used in any space!

Looking back, there were a lot of little projects that we did throughout the house, but most of the transformation came down to a few easy tools you could use in your new space:

  • paint – update your home with colors you love
  • fabric – dress your windows and furnishings; replace doors in tight spaces
  • add molding – I built a special board and batten wall that serves double-duty by providing soundproofing for a shared wall

Paint

Our house was brown, brown, brown, when we moved in.  As a special touch, our garage door didn’t match the attached unit to our left (top picture below)!  I found a pretty gray-blue paint, and we re-painted all the trim on the house, including our neighbor’s garage door – proof that a little paint can go a long way in updating your home!

/home/wpcom/public_html/wp-content/blogs.dir/41c/34939861/files/2015/01/img_3749.png

Here’s Steve up on the rooftop (like Old Saint Nick!) transforming our dreary brown house into a charming cottage!

Paint! Easy Upgrades That Make Your House a Home | Jewels at Home

Paint went a long way on the inside of our house, too.  The top picture below is of our bedroom when we first moved in.  The walls were boring beige, and the windows had functional, but unremarkable, blinds. In the second picture, you can see the tranquil space we created with some light blue paint. More about those window valances and the molding… keep reading!

Add paint, curtains, and a board-and-batten wall with soundproofing, Easy Upgrades to Make Your House a Home | Jewels at Home

 Fabric

Our house had functional, if uninteresting, mini-blinds on all the windows. Rather than spend money changing them, I sewed fabric valances for all the windows, which gave them a finished and warm look.

Add paint, curtains, and a board-and-batten wall with soundproofing, Easy Upgrades to Make Your House a Home | Jewels at Home

Add paint, curtains, and a board-and-batten wall with soundproofing, Easy Upgrades to Make Your House a Home | Jewels at Home

A lot of starter homes are full of tight spaces. The little bathroom off of our bedroom had a rickety bifold door that made the tiny space even more cramped, so I removed it and replaced it with a curtain that matched the valances in the bedroom. A curtain would be great solution for a small laundry area, too. Bonus: I trimmed the bathmat and shower door in the same fabric!

Short on space? Replace a door with a curtain to make your home feel less cramped. Easy Upgrades to Make Your House a Home | Jewels at Home


Board and Batten with Soundproofing!

DIYers are familiar with tricks like adding molding to give character to a plain space. The wall between our bedroom and our neighbor’s was paper-thin (and we had the detailed notes left by our curmudgeonly neighbor to prove it), so when I added trim to this wall, I put sound-insulating foam behind the boards to give us both more peace and privacy. The thicker trim also left a little ledge for display.

You've seen the DIY board-and-batten tutorials. This one looks great and has a hidden function with soundproofing panels! Easy Upgrades to Make Your House a Home | Jewels at Home


I had a lot of fun walking down memory lane to put together this post, and I love that many of the projects I did years ago would work just as well in any home today.

Look at this picture I found of moving day! Gone are the days of fitting a futon and a few boxes into a little rental van. It was a lot of work to move ourselves, but we had the help of friends, and I do feel nostalgic looking back.

/home/wpcom/public_html/wp-content/blogs.dir/41c/34939861/files/2015/01/img_3730.jpg

I still smile looking back on this first home sweet home.  I love the projects we did to make it beautiful, and I hope you are feeling inspired to make your mark on your own space!

Add paint, curtains, and a board-and-batten wall with soundproofing, Easy Upgrades to Make Your House a Home | Jewels at Home

Sentimentally yours,

“Jewels”

DIY Hand-Stamped Tea Towels – Teacher Holiday Gifts

“So….,” says Steve with studied casualness, “Um, I noticed a lot of new towels in our house…?”

My awesome hubby gets a lot of points for calmly observing many the craft obsession. Dozens of beaded snowflakes? Check! Table full of dip-painted utensils? Check! Washing machine filled with felting? Check! He rarely seems phased, so I know this must look particularly strange.

I’m stamping tea towels to give as holiday gifts for our teachers and coworkers this year. And there are a lot of them!

DIY Hand-Stamped Tea Towels | Jewels at Home

Supplies:

Instructions:

  • Prewash and iron the dish towels
  • For the stamps, spread some ink on a plate or flat surface, spread it with the brayer, and then roll onto your stamp and stamp the fabric
  • For the cookie cutters, you can dip the cookie cutter into the paint directly
DIY Hand-Stamped Tea Towels | Jewels at Home

Fun citrus print! I made this stamp by sticking adhesive foam to the wooden block from another stamp. I spread the paint onto a flat surface with a brayer and then rolled it on to the stamp.

DIY Hand-Stamped Tea Towels | Jewels at Home

  • Hang the towels to dry. This drying rack came in handy!

DIY Hand-Stamped Tea Towels | Jewels at Home

DIY Hand-Stamped Tea Towels | Jewels at Home

DIY Hand-Stamped Tea Towels | Jewels at Home

  • I read a lot of ideas about how to heat set the paints to make the colors last. I ended up letting them air dry for several days, running the towels on the hottest setting in my dryer for an hour and then ironing to finish them. I tried using the oven to heat set, because the ironing was so tedious, but a few towels got scorched, so I would try that with caution.

DIY Hand-Stamped Tea Towels | Jewels at Home

DIY Hand-Stamped Tea Towels | Jewels at Home

DIY Hand-Stamped Tea Towels | Jewels at Home

DIY Hand-Stamped Tea Towels | Jewels at Home

DIY Hand-Stamped Tea Towels | Jewels at Home

DIY Hand-Stamped Tea Towels | Jewels at Home

DIY Hand-Stamped Tea Towels | Jewels at Home

DIY Hand-Stamped Tea Towels | Jewels at Home

DIY Hand-Stamped Tea Towels | Jewels at Home

I love how our new towels look in our new kitchen!
DIY Hand-Stamped Tea Towels | Jewels at Home

Look who joined in the fun!
DIY Hand-Stamped Tea Towels | Jewels at Home

And off we went to play Santa!
DIY Hand-Stamped Tea Towels | Jewels at Home

I’d love to try some more designs soon. Check out these other cute stamps from Yellow Owl Workshop!

Yellow Owl Workshop Mushroom Snail Stamp Set
IMG_2963.PNG

Yellow Owl Workshop Apple Honeybee Stamp Set

IMG_2965.PNG

Yellow Owl Workshop Le Menu Stamp Kit
IMG_2964.PNG

Merry Christmas and Happy Holidays!

“Jewels”

“A” – You’re Adorable – Baby Shower Alphabet Crafts

A bit of Canadiana for you – Sharon, Lois, and Bram have the greatest kids’ albums – stuff you can totally get into as a parent, and if not, we’ll you didn’t hear it here. But really, please check them out. One of my favo(u)rites is actually a popular song from the 1940s, “A – You’re Adorable.”

You can listen, while you check out this sweet project we did for a baby shower last month. Since this was my friend Nicola’s second baby, we wanted a simple event, but of course, there had to be a craft project!

For baby E’s sister’s shower, we decorated onesies. For baby E, I gathered letter shapes, and we created an eclectic alphabet to decorate the room the sisters will share.

I loved seeing all the creative ideas, including some creations by the under-three set.

Here are some of the techniques we used:

  • Paint – we discovered some of our friends had a lot of talent!
  • Yarn – wrapping a letter took a little patience but turned out charming. I had fun with the multicolor yarn.
  • Scrapbook paper – you can paint the sides first; then add a coordinating paper. So many possible variations with this!
  • Craft tape – I couldn’t resist this cute tape with bicycles, since our friends are avid cyclists.

Here are some close-ups of the same letters I made before the party:

Baby shower idea: decorate letters to create a one-of-a-kind alphabet for baby's nursery! Jewels at Home

Creative baby shower idea: guests decorate letters of the alphabet to create a beautiful project for baby's nursery | Jewels at Home
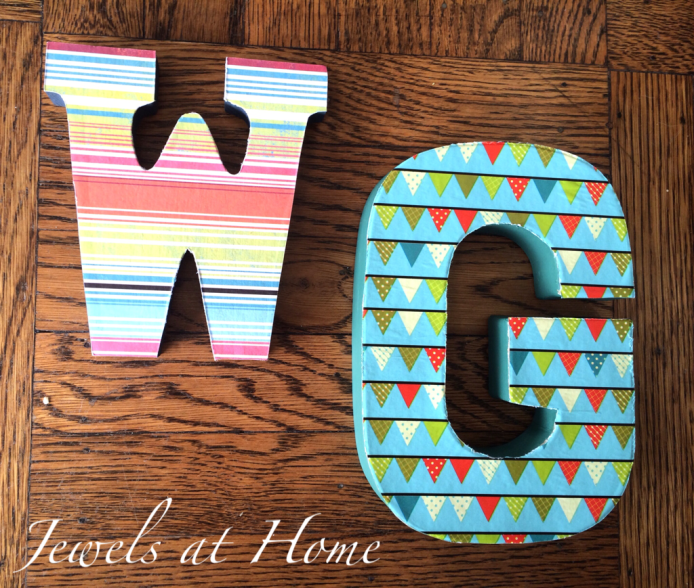
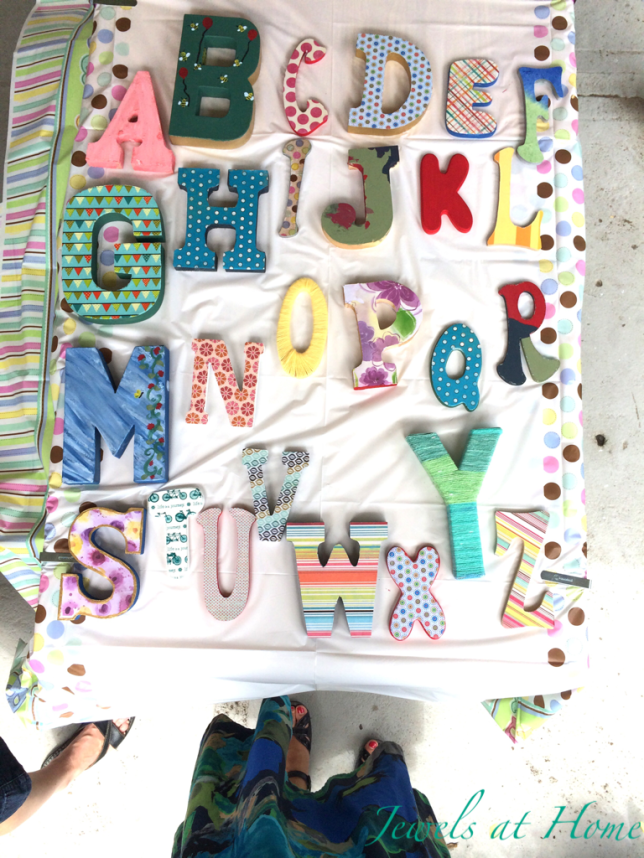
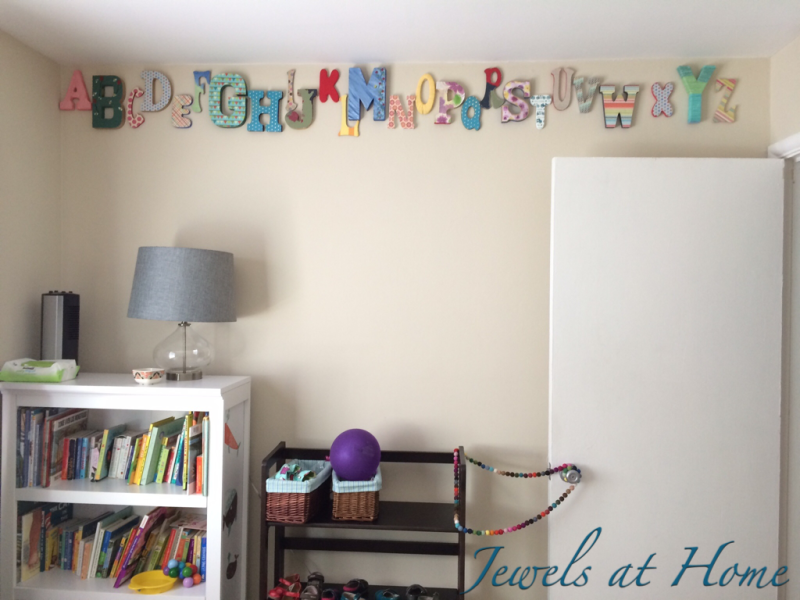
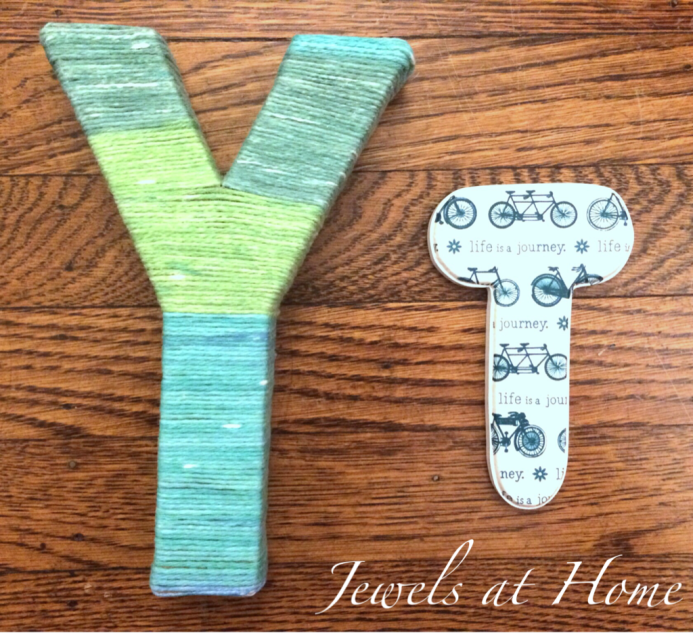
And here is our finished alphabet!

Creative baby shower idea: guests decorate letters of the alphabet to create a beautiful project for baby's nursery | Jewels at Home

Creating the art made for a fun and relaxing afternoon!

Creative baby shower idea: guests decorate letters of the alphabet to create a beautiful project for baby's nursery | Jewels at Home

Baby shower ideas: decorate the letters of the alphabet to decorate baby's nursery! Jewels at Home
And, I got to come visit when the letters were mounted on the wall. I love how it looks!

Baby shower idea: decorate letters to create a one-of-a-kind alphabet for baby's nursery! Jewels at Home

I love watching my boys grow up, but you can never get enough of a new baby.  One of my favorite places to find special gifts for everyone from babies to big kids is the amazing sales at Zulily.com!


Congratulations to the beautiful family on sweet baby E’s arrival!

“Jewels”

DIY Ribbon- Bordered Roman Shades

Roman shade upgrade: Give your plain shades a new look by adding a ribbon border.  DIY project by Jewels at Home.We’ve moved quite a few times over the years, and I’ve definitely learned a few things. One of those is that while it’s tempting to try to furnish and decorate your new home all at once, it’s better not to take your time. Besides the fact that you’ll make better decisions once you lived in your home for a while, I’ve also found that right after I move, I tend to look for the cheapest possible decor, since I’m still recovering mentally and financially from the move. When I space out the purchases, I usually end up picking better quality things.

That being said, some things just really need to be done quickly, and that includes window coverings. Black garbage bags hung with blue painter’s tape only look good for so long, you know. So, when I bought shades for our house three years ago, I went with the simplest option for the boys’ room. I had it in mind to spruce up the shades eventually, and I finally got to the project this summer.

I really like the look of fabric shades with a ribbon border. I had created a border on the curtains in our master bath, and I love how that turned out. For the boys, I wanted something very simple. I found some cotton twill tape and used tacky glue to attach it to the shades. It’s holding up very well so far. You’ll have to experiment with your own shades, but for reference, the twill tape I used is 1 1/4 inches wide, and I attached it to the shades 3 1/2 inches from the edge.

Roman shade upgrade: Give your plain shades a new look by adding a ribbon border.  DIY project by Jewels at Home.

Roman shade upgrade: Give your plain shades a new look by adding a ribbon border.  DIY project by Jewels at Home.


Roman shade upgrade: Give your plain shades a new look by adding a ribbon border.  DIY project by Jewels at Home.

 
I’m so impressed and happy with what a big difference this little change has made! It gives me hope that I might someday be “done” decorating the little boys’ room, a project which usually makes me think of the saying “Cleaning the house while children are growing is like shoveling snow while it is still snowing.”

Roman shade upgrade: Give your plain shades a new look by adding a ribbon border.  DIY project by Jewels at Home.

Hope to be back with more projects soon.  It has been a busy and fun summer.  We’re renovating our kitchen and basement, which is a big project.  I’m very excited and more than ready to be done with the dust and on to the decorating!

“Jewels”

Fleece-backed Baby Quilt

With two of my friends at work expecting babies, I realize I’ve crossed a strange line. Our family is complete, and while little J is just 3 years old, there is a part of me that feels a bit like a doting grandma, looking back on those long-gone days of pregnancy and first-time motherhood.

In any case, I wanted to make something special for my friend Kate’s baby boy, so I put together this patchwork of whimsical prints and backed it with warm fleece fabric.

Fleece-backed baby quilt with modern, whimsical design | Jewels at Home

Fleece-backed baby quilt with modern, whimsical design | Jewels at Home

Fleece-backed baby quilt with modern, whimsical design | Jewels at Home

Fleece-backed baby quilt with modern, whimsical design | Jewels at Home

Fleece-backed baby quilt with modern, whimsical design | Jewels at Home


Congrats, Kate and Rob.  You have a lot of fun ahead!  And try to get some sleep and date nights in…


“Jewels”

Chippendale Chair Makeover

I’m a little crazy for these chairs. As in, I told Steve that if I go before him, he should feel free to get rid of most of my stuff, but could he please consider keeping these chairs?

I have a faux bamboo fetish that includes these Chippendale chairs. They are a good match for the chinoiserie theme in our living room. I had been scanning craigslist for a while when I scored these great chairs. They weren’t exactly cheap, definitely not free like the Queen Anne chairs I found, but they were still a good deal for well-made pieces in this classic style.

I still have four side chairs waiting for their Cinderella moment, but the three armchairs in this set are ready for the ball:

Sharp-looking Chippendale chair makeover with glossy black paint and a geometric seat fabric | Jewels at Home

Sharp-looking Chippendale chair makeover with glossy black paint and a geometric seat fabric | Jewels at Home

https://jewelsathome.com/2013/03/26/living-room-tour/

https://jewelsathome.com/2013/03/26/living-room-tour/

Sharp-looking Chippendale chair makeover with glossy black paint and a geometric seat fabric | Jewels at Home

Are you looking for your own chairs to transform? I’m excited to share that my friend Ari launched a slick new furniture re-sale site over at www.revolvingdecor.com. Check it out to participate in a curated online marketplace for great furniture finds!

“Jewels”

Big Fleece Blankets for Little Superheroes

My little guy, L, just turned eight, and he’s been planning his first sleepover party for most of the past year! I like to make a special gift for our birthday boy and guests, and L requested a reprise of the fleece blankets I made for his big brother’s party a year and a half ago. He calls his “super,” and sleeps with it every night. I wanted to grant his birthday wish, but I didn’t want to make the exact same project, so here’s this year’s superhero version of our fleece blankets.

Superhero-themed monogrammed fleece blankets for a boys' sleepover party | Jewels at Home

Instead of fringed blankets, I trimmed the fleece in binding. L loves the superhero action words on his original blanket, and that’s no surprise, given he’s such a bundle of energy. I found the same print in a cotton fabric, so I used that for the binding. For each large blanket (60″x72″), you’ll need:

After prewashing the trim fabric, I ironed it and cut 8″ wide strips. I joined the strips and ironed it to make 2″ wide double-fold binding.  I then sewed this to the edges of the fleece blankets that were each 2 yards long.  L requested this longer blanket, since he sleeps with his, but you could use  1.5 yards of fleece for a throw blanket.

To add the monograms, I sketched each boy’s first initial and a large circle (I traced a plate) onto Heat’n Bond, ironed on to some other and bright and superhero-themed fabrics, cut them and appliqued onto the blankets (instructions in the post from our onesie decorating party).

Here are some more pictures of how they turned out.  The boys love them!

Superhero-themed monogrammed fleece blankets for a boys' sleepover party | Jewels at Home

Superhero-themed monogrammed fleece blankets for a boys' sleepover party | Jewels at Home

Superhero-themed monogrammed fleece blankets for a boys' sleepover party | Jewels at Home

Superhero-themed monogrammed fleece blankets for a boys' sleepover party | Jewels at Home

Superhero-themed monogrammed fleece blankets for a boys' sleepover party | Jewels at Home

Superhero-themed monogrammed fleece blankets for a boys' sleepover party | Jewels at Home

Hope you are staying warm as winter warms into spring!

“Jewels”

Striped Felted Bag

I may need to have a new series called “Felting Fanatic.” Since raiding my mom’s stash of yarn over the Christmas holidays, I’ve been so excited to try making some felted projects. The first was a felted basket to my knitting. Steve calls it “Knitting Inception,” because of the yarn within the yarn thing… he’s a bit quirky that way. The next project was this felted shoulder bag.

Knitted felted handbag with colorful stripes | Jewels at Home

I was having a lot of fun with the big needles and chunky yarn, because everything came together so quickly. I had learned a little bit about the proportions from making the basket, and so I adapted my plans for this bag a little bit. It’s a simple shoulder bag. The main color is dark blue, and I used a mix of many colors for the stripes in between. Like the basket, I was able to mix different types of yarn by doubling or tripling the ones that were thinner.

Like with the basket, I knit on my chunky needles with a gauge of 3 stitches per inch.  I cast on 90 stitches and knit in the round with stocking stitch until the bag was 22″ high, finishing with 4 rows of garter stitch at the top of the bag, so it wouldn’t roll over.  The shoulder strap is 8 stitches wide in garter stitch, and I sewed this onto the top outside edge of the bag and started as 47″ long.

To assemble the bag, I sewed the handle onto the sides of the bag, overlapping the pieces by about an inch.  I used a whip stitch to close the bottom of the bag from the inside.

Before felting, the bag was 21″ wide by 22″ long, and the handle was 47″ long. It was comically enormous, as the boys modeled. K said, I should go into business making bags for giants. If I ever meet a giant, I’ll think about it.

Knitted and felted handbag with colorful stripes | Jewels at Home

Knitted and felted handbag with colorful stripes | Jewels at Home

Knitted and felted handbag with colorful stripes | Jewels at Home

Thankfully, the finished bag is a much more comfortable 13.5″ wide by 11″ high, and the strap turned out about 30″ long.

Knitted and felted handbag with colorful stripes | Jewels at Home

As a finishing touch, I made a lining for the bag out of some vintage fabric, also from my mom’s stash.  I sewed a simple rectangular lining, with some pockets on one side.  I then folded down a hem along the top and hand-sewed it into the felted bag.Knitted and felted handbag with colorful stripes, lined in vintage fabric | Jewels at Home

Knitted and felted handbag with colorful stripes, lined in vintage fabric | Jewels at Home

I’m excited to use my new one-of-a-kind bag with all its fun colors!

“Jewels”

Felt Poinsettia Ornaments

I grew up in Canada, so Christmas was associated with cool temperatures, bare branches, and as often as not, snow on the ground. Even my kids, who grew up in California, ask for snow at Christmas. So, I decided to create a snowy Christmas for us at home.

I pared down my decorations to focus on the white and silver. I also made several new projects in a white and woodsy theme.  So far, I’ve finished a sleek new gray and white Christmas tree skirt, and I also made some new pillow covers in white and gray with outdoorsy appliques of reindeer, polar bears, and trees.

Since I kept our colorful ornaments packed up for this year, I needed to add some more decorations to our tree.  The kids helped me make these sweet clay ornaments, and I am adding these white felt poinsettia ornaments to fill in the branches.

DIY felt poinsettia Christmas decorations to use as ornaments, gift toppers, or around the house | Jewels at Home

I looked at lots of pictures of real and felt flowers, and I read a lot of tutorials, trying to find felt poinsettias that would have a natural look.  My final project was a combination of the felt poinsettia pin by Cheryl at her Tidy Mom blog, Kate’s felt poinsettia’s at her Centsational Girl blog, and my own innovation, as I wanted to make the flowers a bit more natural-looking and just right for my tree!

The thing I liked best about Cheryl’s flowers was how she cut the petals.  It’s much faster and easier than using a template, and it allows you to make each petal a little bit unique.  I used different dimensions, which I’ll list below, and I also cut my petals with a bit of a wave on the edge, to give them more dimension.

I washed and dried my felt before using it, to make it a bit thicker.  To cut the petals, first cut rectangles of felt in the specified dimensions, and then trim them to look like petals.  It’s very quick to cut the rectangles, if you cut the felt into strips first (left side of the picture below) and then cut the strips into rectangles (middle of the picture below).  I was also able to trim the petals three at a time, so it was all much easier than I expected!

DIY felt poinsettia Christmas decorations to use as ornaments, gift toppers, or around the house | Jewels at Home

Each flower is constructed the same way, and I’ll give the exact measurements for my two sizes below.

The basic parts of the felt poinsettia are

  • a round circle base (top left picture below)
  • a layer of large petals (top right and bottom left pictures below)
  • a layer of small petals (bottom right picture below)
DIY felt poinsettia Christmas decorations to use as ornaments, gift toppers, or around the house | Jewels at Home

Start with a round base, add a layer of large petals, and top with a layer of smaller petals.

To finish the flower, I sewed all the layers together while sewing on some pearl beads to decorate the center of the poinsettia.  I then used hot glue to attache the flower to a metal alligator clip.

DIY felt poinsettia Christmas decorations to use as ornaments, gift toppers, or around the house | Jewels at Home

Finish the flower by sewing the layers together while sewing on some beads for the center.

The pictures above are of the larger poinsettias.  The finished size is approximately 6.5″ in diameter.  The large flower uses:

  • 2″ diameter base circle
  • 8 large petals of 3.5″ x 2″
  • 5 small petals of 2.5″ x 1.5″
  • 7 beads
  • metal alligator clip

I also made smaller poinsettias, with a finished size of approximately 4.75″.  The small flower uses:

  • 1.5″ diameter base circle
  • 6 large petals of 2.5″x1.5″
  • 5 small petals of 1.75″ x 1″
  • 5 beads
  • metal alligator clip

Here are the large and small flowers side by side.

DIY felt poinsettia Christmas decorations to use as ornaments, gift toppers, or around the house | Jewels at Home

And here are the new poinsettias on our tree!

DIY felt poinsettia Christmas decorations to use as ornaments, gift toppers, or around the house | Jewels at Home

DIY felt poinsettia Christmas decorations to use as ornaments, gift toppers, or around the house | Jewels at Home

Christmas tree with all-white ornaments.  Link to DIY ornament ideas to trim your tree.  Jewels at Home

Hooray for a project that was even more easy and fun than I had expected!  If I get enough of these for the tree, they may start showing up elsewhere in our house!  Or that may be crazy-talk!

“Jewels”