
Welcome to the Fall 2023 One Room Challenge! This is such a hectic time but also such a fun one, with lots of projects to do and explore and a great supportive community! In the spring, I decorated our entryway, … Continue reading
Welcome to the Fall 2023 One Room Challenge! This is such a hectic time but also such a fun one, with lots of projects to do and explore and a great supportive community! In the spring, I decorated our entryway, … Continue reading

You know how much I love faux bamboo furniture! My collection includes these Chippendale chairs and this Thomasville dresser-turned-bar cabinet. When I recently acquired an older bookcase, which I chose for its solid wood construction and low price, I noticed … Continue reading
I can’t help drooling over pictures of gorgeous walk-in closets with romantic and glamorous touches. We gave up our walk-in closet when we created a fourth bedroom upstairs. I don’t regret this extra room, which was first a nursery and … Continue reading
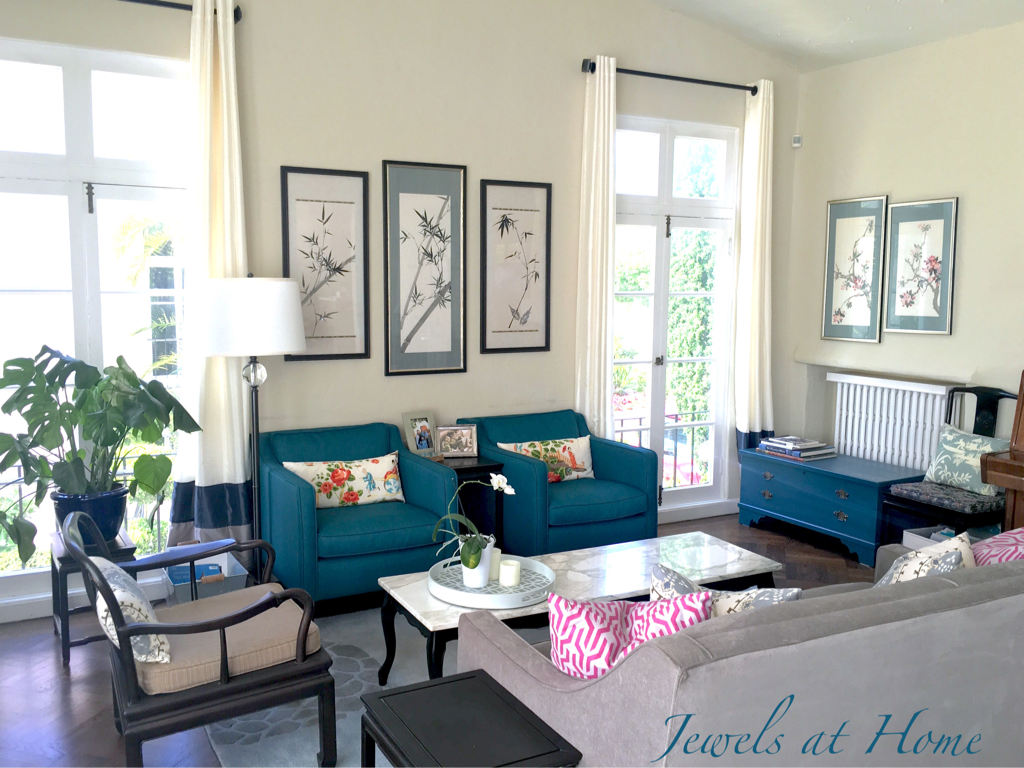
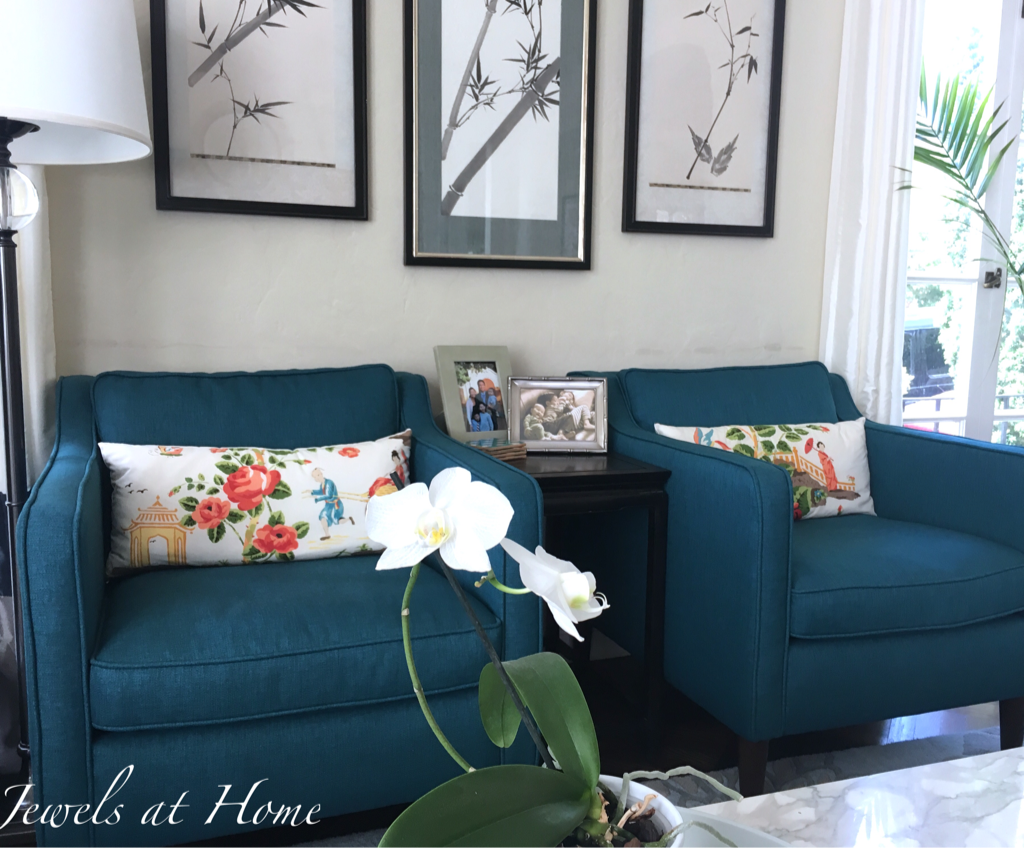
Our living room has evolved over the years. Here’s a look at some of our latest additions, including the color block drapes and these pretty turquoise chairs from Article (formerly Bryght). I have to admit I was pretty nervous when the intense color showed up in my living room, but I am so glad I took a risk!


Over on the other side of the room, I have a little bar set up next to the dining area:
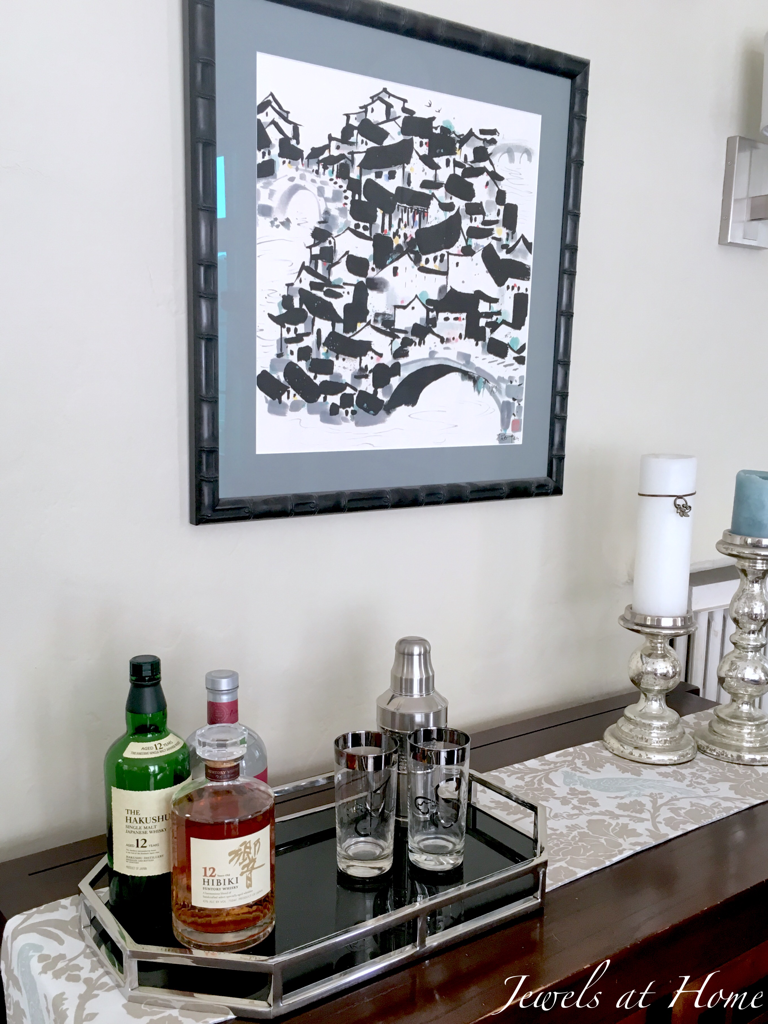
I recently moved this painted Chinese screen over the bar area when I was rearranging our art. I really like how it brings the eye up and emphasizes the tall ceilings.
And here are two paintings by my mom that I recently added to the living room. These remind me of De Gournay wallpapers and add an authentic bit of Chinoiserie to our home.

Hope you enjoyed the details in our living room!
“Jewels”
Did you just move into a new place? Or perhaps you are settled in your home but ready for a change of style. It can be challenging to plan a space from scratch, but it’s also a great opportunity.
For better or worse, Steve and I have moved a lot over the years, and on the “better” side, I’ve gotten a lot of experience designing spaces. Though I could have transferred our furniture and look directly from home to home, I used each move as an opportunity to refine our collection and re-consider our style. Of course, each home had its unique features of architecture, layout, and lighting, and adapting to each of these became an opportunity to try something new.
Here are some tips for creating your own dream room:
3. Make it personal
~~~~~
A fun room to demonstrate this process is our living-dining room.
The style I honed in on for this room was based on a Hollywood Regency mid-century look. The main colors are silver/grey and blue. One of my favorite inspiration rooms is this one, by designer Elizabeth Gordon. I love the clean-lined feminine upholstered pieces, with touches of metallic glamor.

Source: Houzz.com
While I am well on the way to creating our dream living room, my rooms are never really done. I’m always tweaking things and looking for ways to change things around. One piece I have an eye on is this Chinese cabinet from the online auction site invaluable.com. They have a variety of fine art for sale, including paintings and sculptures that would make a great jumping off point for your inspired space! The folks over at invaluable inspired me to write this post, and I have big ideas for a cabinet like this.
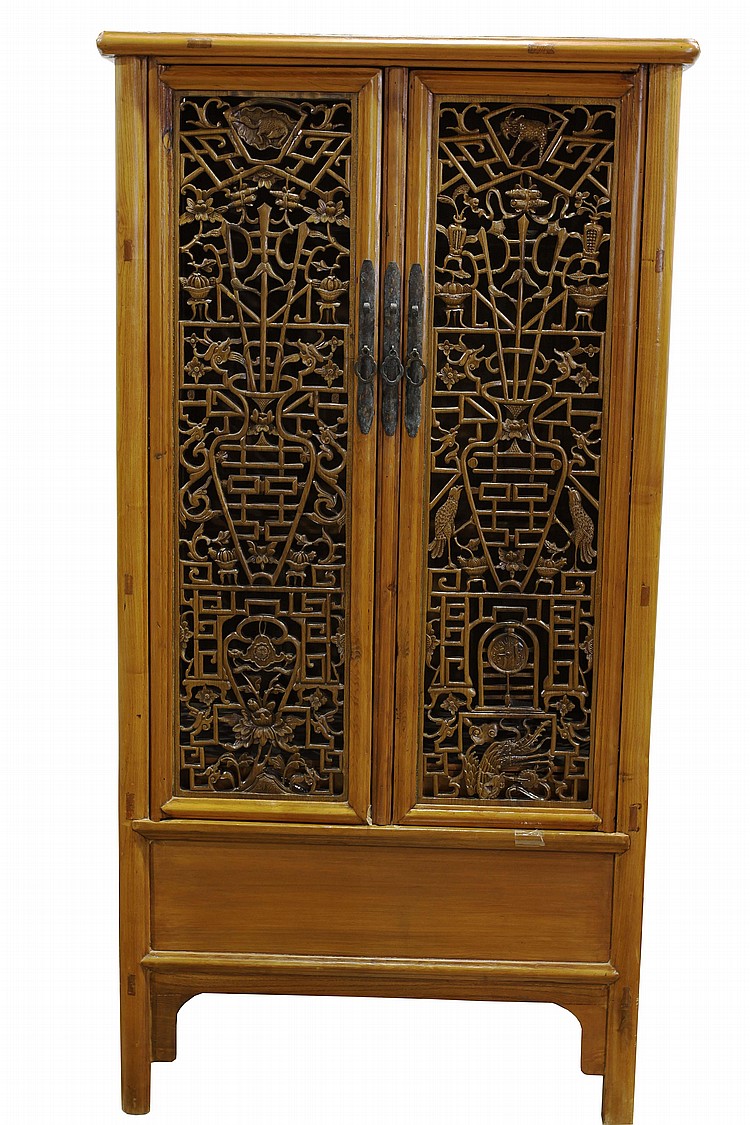
I would like to turn this into a bar cabinet, by adding mirrors to the inside and displaying glasses and bottles. The doors would keep clutter hidden, but the screens would allow glimpses of the glass and bottles on the inside. I think it would be a spectacular addition.
I’ve already been scouting out the accessories I would need:
I hope I will be able to do this project soon and show it to you!
“Jewels”
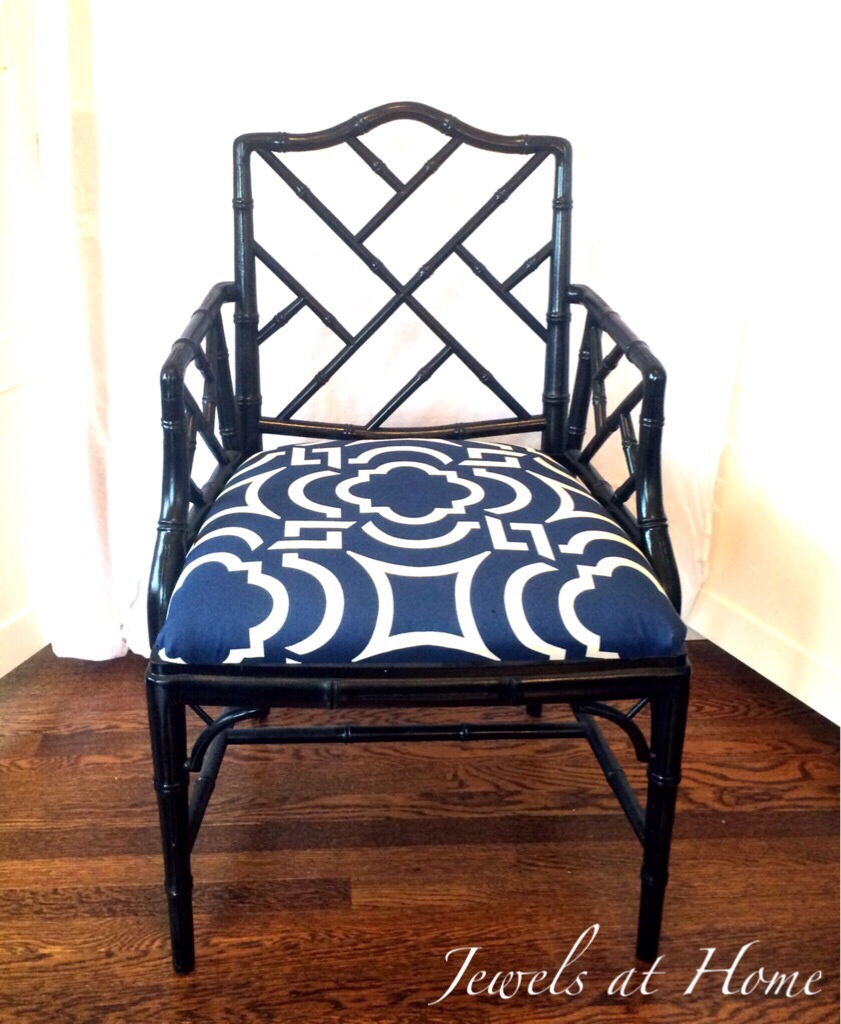
I’m a little crazy for these chairs. As in, I told Steve that if I go before him, he should feel free to get rid of most of my stuff, but could he please consider keeping these chairs?
I have a faux bamboo fetish that includes these Chippendale chairs. They are a good match for the chinoiserie theme in our living room. I had been scanning craigslist for a while when I scored these great chairs. They weren’t exactly cheap, definitely not free like the Queen Anne chairs I found, but they were still a good deal for well-made pieces in this classic style.
I still have four side chairs waiting for their Cinderella moment, but the three armchairs in this set are ready for the ball:


Are you looking for your own chairs to transform? I’m excited to share that my friend Ari launched a slick new furniture re-sale site over at www.revolvingdecor.com. Check it out to participate in a curated online marketplace for great furniture finds!
“Jewels”
After some peeks into the small spaces in our house – the powder room, the nursery, the laundry, the master bath – I’m glad I can show you our living room. It’s actually only one half of the original living room – we are using the other half of this enormous room as our dining room, and we turned the separate dining room into a family room.
I am not sure quite how to describe the style – it’s a little bit contemporary but classic. It has Chinese elements, but more of a Regency Chinoiserie feel than traditional Chinese. Is this the Asian fusion of the decorating world? Anyway, I love the cool soothing blues and grays warmed up with some green. It satisfies my desire for a grown-up space but is still a very comfortable spot to hang out.
Not much more explanation needed, so I’ll get to the pictures. I’ve included links to the many DIY projects in this room.

A view of the living room side of our living-dining room, from the foyer.

The bamboo brush paintings are by my mom. I sewed the living room pillows and repainted the vintage marble-top coffee table.


This picture was from the Holiday House Tour:

I love this elegant old Chinese chair that I picked up at the flea market. It’s sitting by the window, next to a craigslist-find chest that I painted in teal.

Here’s another sunny view of our living room. I love that it has so many windows.


To the left of the piano is an antique wooden window screen that I painted, and on top is a repurposed shoe box, decorated with paper.

These nesting tables are from a consignment store, and the silver box is a rummage sale find that I painted in silver.

This vignette on top of a bookshelf includes some art from a favorite calendar, an antique Korean vase given to us by Steve’s parents, and a little Japanese dish I picked up years ago while shopping with my mom and sister.

The bookshelf on the other side of the window has a similarly sentimental display – art from a calendar and from an old friend, a small blue and white Chinese vase from my grandmother’s house, and some candle sticks I found in thrift store.

Thanks for visiting!
“Jewels”
I recently became obsessed with the look of vintage faux bamboo dressers, like those made by Thomasville or Henry Link in the 60s and 70s. These dressers have come back into fashion, repainted for a gorgeous new look. I see them on eBay and Etsy regularly, but with the shipping costs from across the country, it doesn’t seem quite worth it. I’m also nervous about taking on such a big project. As Ibie, whose dresser is in the second picture below, chronicles on her blog, the painting process on such a large piece is not for the fainthearted.
Here are some of the beautiful makeovers that caught my eye:

Callie’s black dresser featured on Little Green Notebook. I love the glossy black finish, and the rest of this room is fantastic, too!
Go to Little Green Notebook

Ibie’s grey Henry Link dresser on One Story Building. This looks so sophisticated and elegant! I certainly believe her that it was a bear to paint, though.
Go to One Story Building
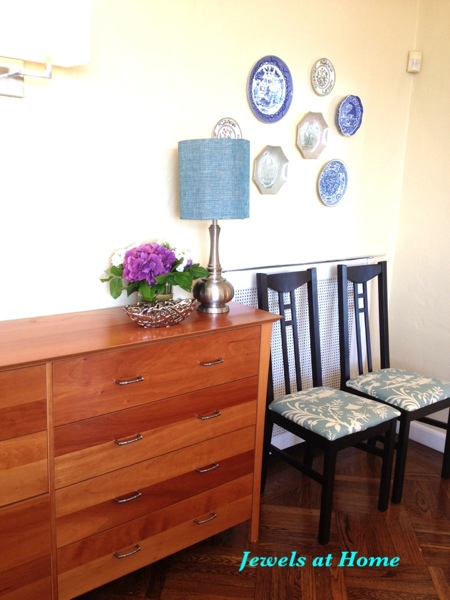
I still have this project in the back of my mind, and I occasionally look around on Craigslist, eBay, and Etsy for that perfect dresser to repaint, but for now, I’m happy with an easier update to our old dresser. This is actually an inexpensive piece that we bought a decade ago. We almost got rid of it a couple of years back, but no one on Craigslist even wanted it, so we decided to repair all the sagging drawer bottoms, and I’m so glad that it has a new life as the sideboard in our dining room.

BEFORE: Old dresser we are using as a sideboard.
The hardware we had on there is a little rustic for our space, so I decided to give those old knobs a new life down at my dad’s beach house and replace the hardware with – what else – faux bamboo pulls! I chose this Belwith Bamboo Collection black nickel cabinet pull
, and there were several others out there that also look great, and I put some of my favorites on Pinterest.

Belwith Bamboo Pull
Since the new pulls need two holes, I had to drill new ones. TIP: I used a piece of a piece of painter’s taped marked with the distance between the holes, so I could quickly measure and drill.

TIP: mark the distance between holes for cabinet hardware on a piece of painter’s tape.
And here’s the “new” old dresser. No, it’s not as stunning as an old Regency dresser painted in an elegant new color, but it was quick, easy, and inexpensive.

New faux bamboo hardware gives our old dresser new life.

I’m happy with the result of this little project, and will still keep my eye out for something perfect.
“Jewels”
