Favorite Blue Chinoiserie Wallpapers – Week Five Spring 2023 One Room Challenge

Since I chose a smaller project for this challenge, I have some time to show you all the details! Wallpaper is a really popular right now, and I’m loving this new-again trend! Ever since I wallpapered an accent wall in our bedroom, I’ve been looking for my next project. The choices are nearly endless, which made picking a pattern for our mini-mudroom both daunting and fun! Here are some of my favorites, including high vs. budget options.

My criteria were:

  • Blue or green, of course!
  • A bold print – a small space is the perfect spot to try something brave!
  • A modern twist on a traditional pattern, with a nod to chinoiserie

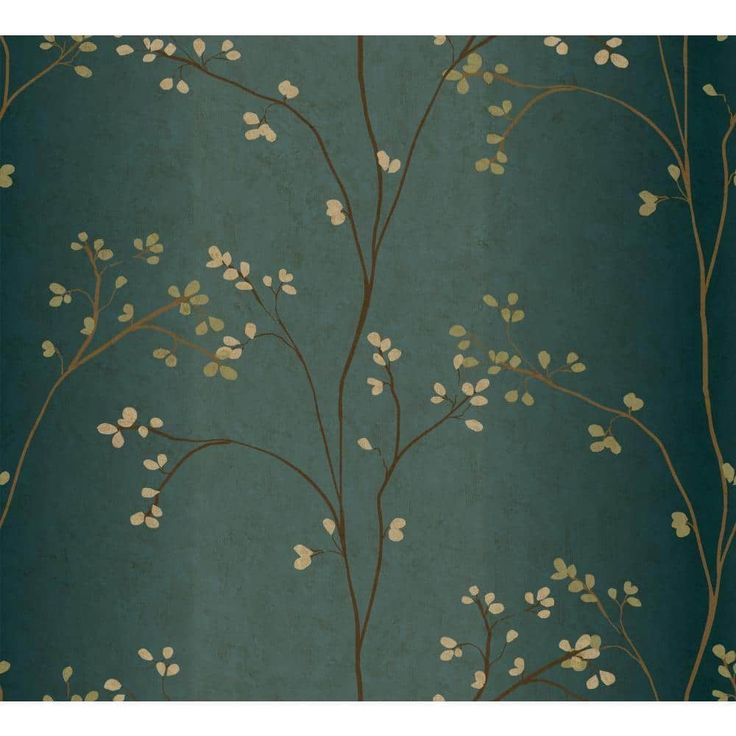
First, I was really drawn to these patterns with metallic branches on a dark background. The “high” option on the left is Nutcracker by Juliet Travers. It’s so elegant, and the little squirrel adds a whimsical touch! The “budget” version on the right is Colby Floral wallpaper. I think either of these would be beautiful, but I decided I wanted something a littler bolder for this project.

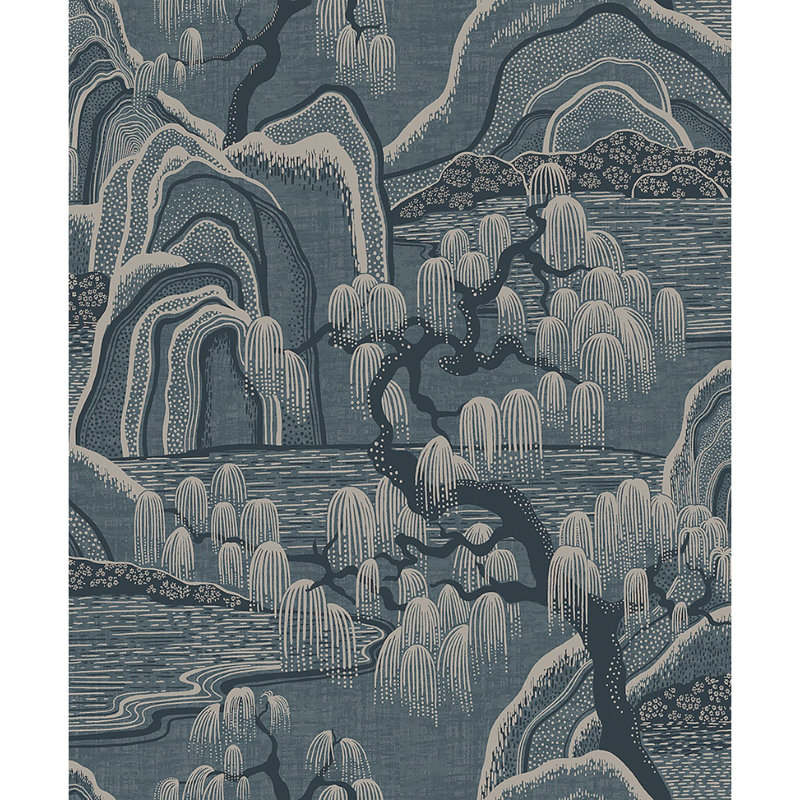
I was really considering these next two favorites: a “budget” version is Crown Sherwood Woodland in Dark Blue on the left, and the “high” version is Rifle Paper Co. Menagerie Toile in Navy and Metallic Silver. They have a bit of a chinoiserie feel to them, and I really like how the patterns are very elaborate, but they don’t feel too busy, because of being two-toned. I was definitely tempted by the metallic finish of the Rifle Paper one, also!

I was also very drawn to this Toile pattern by Borastapeter in green or blue. Ultimately, I think the scale would be better for a bigger space. I would love this in a dining room!

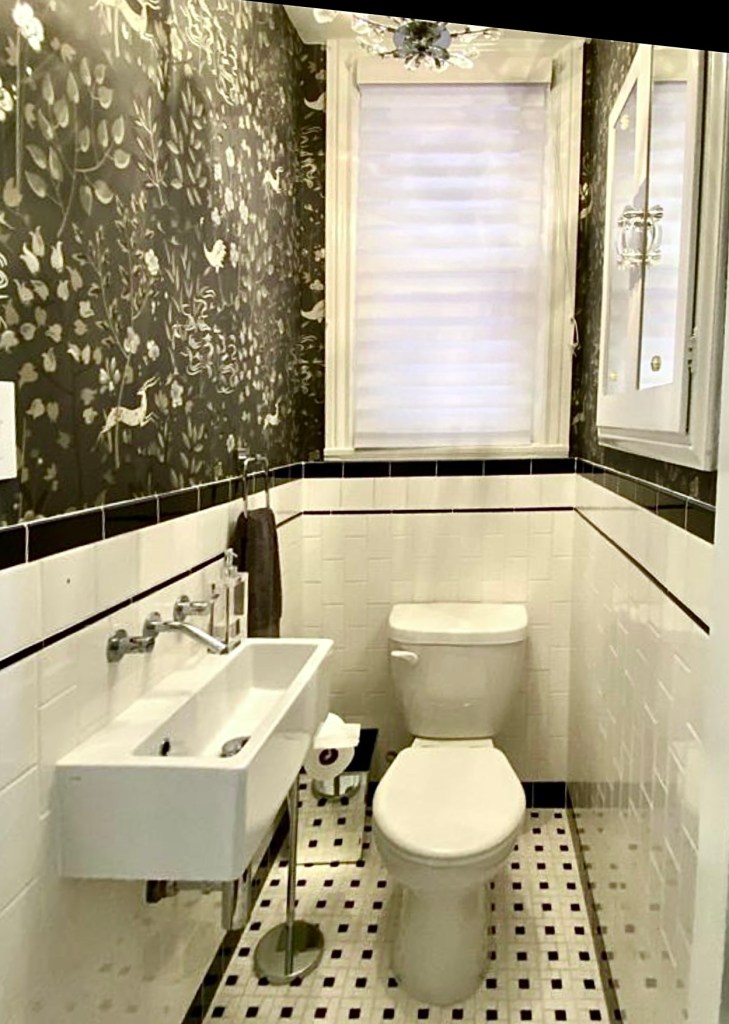
Finally, I decided to go with this beautiful print, the Ronald Redding Aspen wallpaper in dark blue. I love the mix of classic and whimsical and the dark teal blue color with light brown accents that will be brought out by the wood cabinet and the brass coat hooks. I knew it was meant to be when I realized that this is the same pattern that was in the powder room of our rental house. I always loved it, and I am very sentimental , so it makes me really happy to have that connection between the two homes.

Stay tuned to see the wallpaper installed in the mini mudroom next week! In the meantime, head on back to the One Room Challenge site to see some more room transformations!

Julie AKA “Jewels”

Making a Spring Floral Wreath

I don’t do that much seasonal decorating (except for my very over-the-top Christmas decorating, of course!). Maybe, it is because San Francisco does not have traditional seasons? Anyway, after our cool and wet winter, I really felt like celebrating Spring … Continue reading

Five Tricks for Making Realistic Silk Floral Arrangements

I love treating myself to real fresh flowers, but sometimes, we all need the low-maintenance burst of color that comes from “silk” flowers. I have a few favorite tips to create arrangements that look almost as good as the real … Continue reading

DIY Pencil Tins: Desk Set

I recently picked up some beautiful wrapping paper at Lavish in Hayes Valley. This is the same store where I found the perfect red and white graphic paper for lining our nursery bookcase. The new paper I found is for my craft room. It’s called Hydrangeas by Kate & Birdie. This company has lots of very sweet original prints – my six year old bought himself a sheet of pirate ship paper while we were in the store. They started in Winnipeg, Canada, so even dearer to my Canadian ex-pat heart.

Kate and Birdie Hydrangeas paper

Hydrangeas (WP02) wrapping paper by Kate & Birdie. Click the picture to see their site.

The blue, green, and grey color scheme of this paper fits my craft studio perfectly! The blue is just the same as the great print on my newly upholstered Queen Anne chairs, and all the colors are found in the stenciled lampshade I made for that room.

I’m amazed what a long way this one sheet can go. For $4, I have enough paper to create several great accessories and accents for my room.  I started a clothespin wreath and moved on to these pencil tins – and I still have more projects planned!

I love reusing old items, though it’s always a fine line between clever frugality and looking like a preschool art project. I’ve definitely seen more “primitive” versions of these pencil tins, but I like to think that mine fit into the feminine, elegant, slightly funky studio I am creating.

Turn used cans into beautiful pencil tins for your office.  From Jewels at Home.

Turn used cans into beautiful pencil tins for your office.

This is a very simple and quick project that needs very little explanation. I started by using pliers to flatten any sharp edges along the inside of the can.  To cut the paper neatly, I used the quilting ruler and mat I showed in the fabric growth chart tutorial.

DIY pencil tin tutorial from Jewels at Home.

Flatten the sharp edged on your can. Cut out paper and glue with a glue stick.

I used a glue stick to affix the paper to the tin. For my kids’ tins, I also added a layer of clear contact paper to make the tins more durable.  Finally, I use tacky glue to attach bias ribbon to the top of the tin, for a polished look.  (I tried hot glue, but it cools very fast on the metal and gets lumpy.)

Beautiful pencil tins made from old cans, decorative paper, and bias tape. Tutorial from Jewels at Home.

Beautiful pencil tins made from old cans, decorative paper, and bias tape.

Craft room desk set: DIY pencil tins fit in with ceramics on a vintage tray.  From Jewels at Home.

Craft room desk set: DIY pencil tins fit in with ceramics on a vintage tray.

Craft room desk set: DIY pencil tins fit in with ceramics on a vintage tray.  From Jewels at Home.

DIY pencil tins.

While I was making these tins, I added some for the boys’ homework area.  These have a layer of clear contact paper over the scrapbook paper, since I know they will get more (ab)use.

Turn old cans into pencil tins with paper and bias ribbon.  From Jewels at Home.

Pencil tins for the boys’ homework area.


What else do I want to decorate with my beautiful Hydrangeas paper?  A pennant banner, some magnets, magazine files, and some storage boxes for the craft studio.  Hope to share those projects soon.  Meanwhile, go raid your recycling bin and make some new accessories for your own office!

“Jewels”