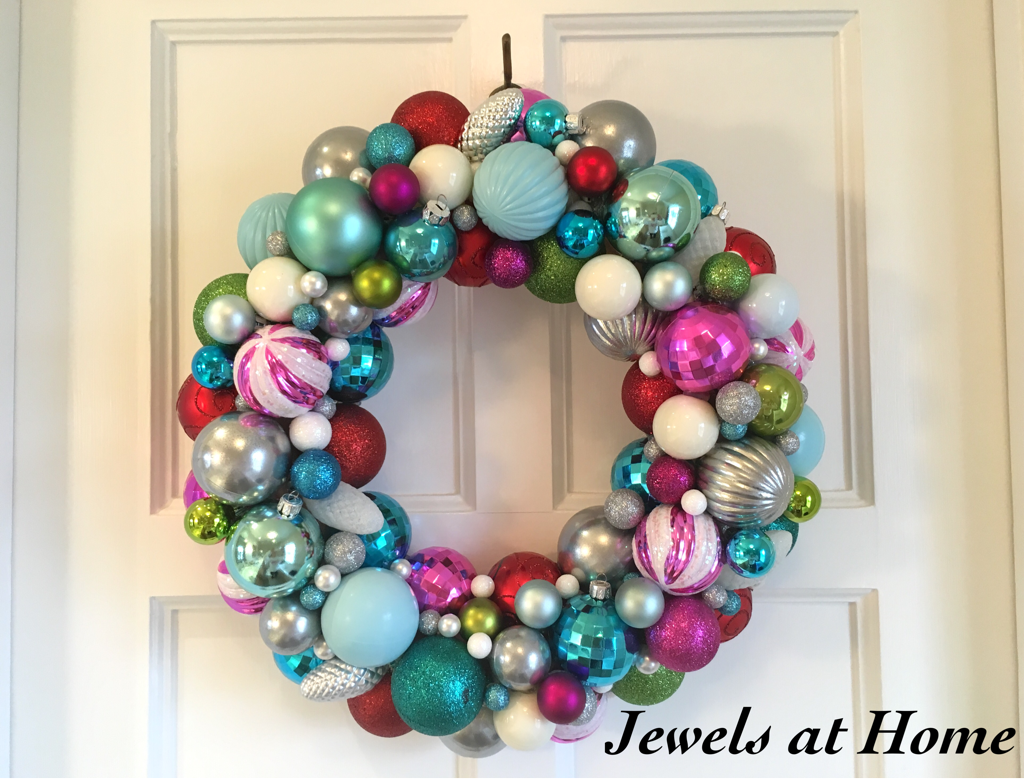
So, if you have been following along, you will know that I have a colorful Mid-Century Christmas planned for this year. So far, my preparations have included a new Christmas tree skirt, and next up was this pretty ornament wreath!
I found a lot of beautiful inspirations for this type of wreath, including some beautiful and whimsical examples from Georgia Peachez.
There are a lot of different methods out there for making ornament wreaths, and I read through several examples before starting my own.
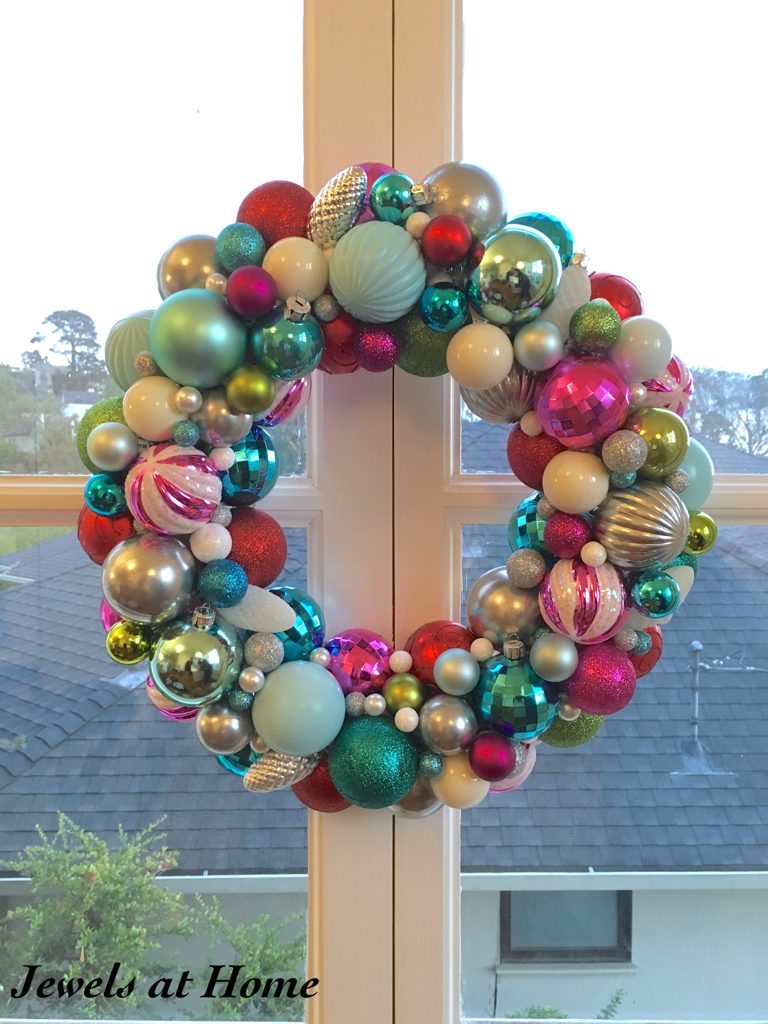
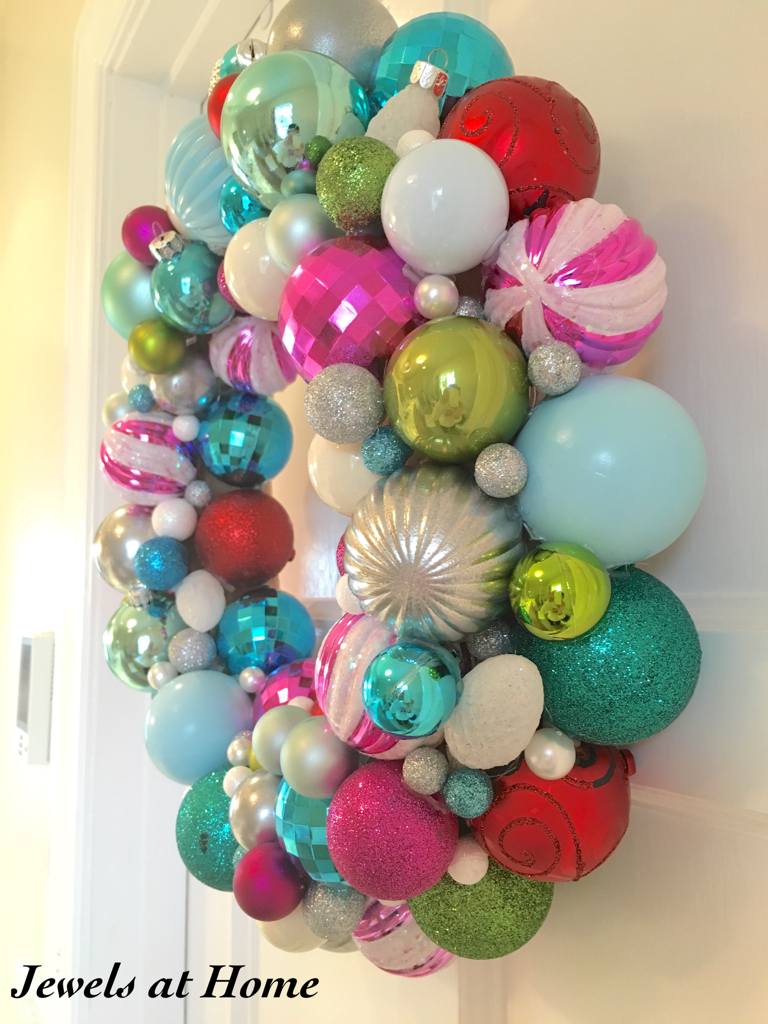
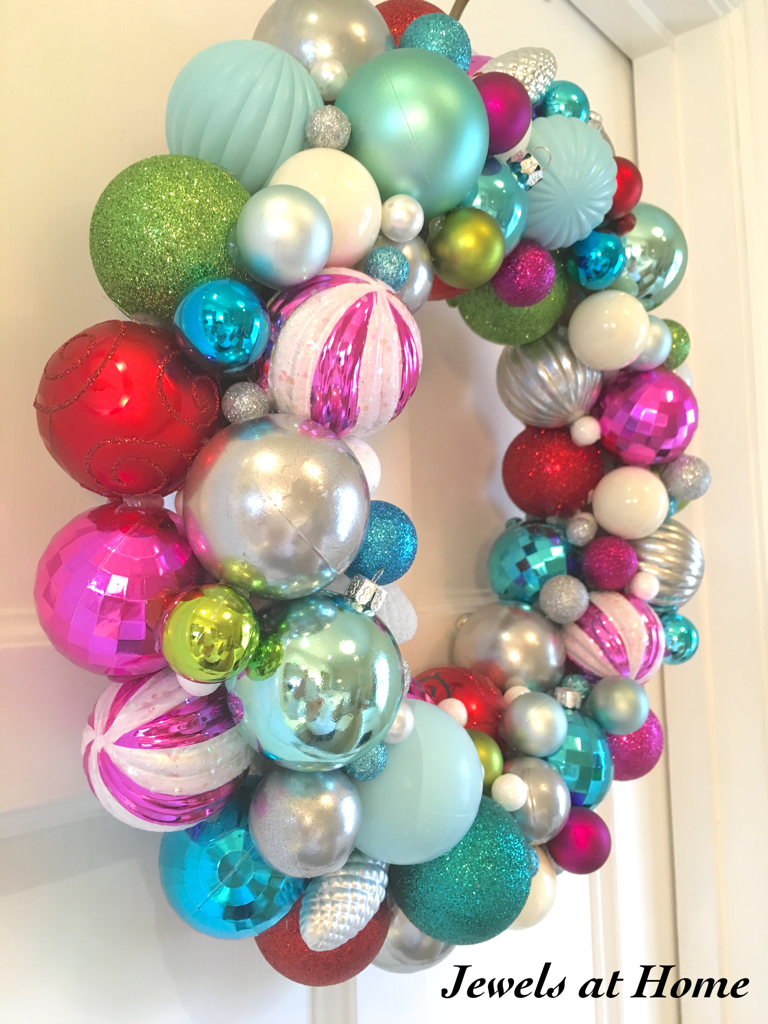
I used a piece of foam leftover from another project as my wreath base. It was flexible, but once the ornaments were glued in place, it held its shape. I used a piece of heavy beading wire to create a hanger on the back, before I started attaching the ornaments.
To attach the ornaments, I hot-glued a ring of the large balls in this year’s colors of pink, turquoise, and red around the entire outside and inside of the wreath base. I then added a few large ornaments to the top and filled in with medium and smaller ornaments. I included a few pine cone ornaments to change up the look. Also, I kept the hangers visible on a handful of the ornaments for more visual interest.
Some methods include tinsel on the base or painting the base. Since I didn’t do either, I needed to make sure I filled all the gaps, so I finished off the wreath with some vase filler and large beads. This is definitely one of those projects, like L’s birthday quilt, where it takes a long time and a lot of planning to make it look “random.” By the time I went to bed, I was seeing ornaments float before my eyes…
But it was all worth it! I am not decorating quite yet, so for now, the wreath is adding some cheer to my craft room window, and as Nicola said when she came over for our recent Creativity Circle, it looks pretty good there!


 With the new tree skirt and this wreath, I think I am well on my way to creating this year’s theme, but I do still have a few projects I’d like to add, if time allows! Looking forward to seeing it all come together!
“Jewels”