DIY Caned Cabinet Doors

I am seriously in love with all the caned cabinet doors and other furniture that’s popular these days. This look fits with all of my favorite styles – Chinoiserie, Hollywood Regency, Bohemian, Mid-Century Modern… and I am excited to find … Continue reading

Sunroom Funroom!

When we moved into our house, the small enclosed balcony became a place for LEGO, board games, and other toys. Now that the boys are older, I’m excited to reclaim this room as a more grown-up space for reading, lounging,… maybe even napping!

At 5’x15′, there is not much space in here, which made this a quick project! The key elements I wanted to include were:

  • Comfortable seating with plush cushions
  • Side table for books and drinks
  • Plants to bring the outside in
  • Throw blankets to snuggle in all seasons

The look I wanted to achieve included:

  • White paint
  • Light-colored fabrics
  • Natural materials, like rattan and bamboo
  • My signature blue-and-white decor

Here are some pictures of how it has all come together. I did buy this daybed quilt set, but otherwise, everything in the room we already had in our house!

I love this ceramic garden stool, but I have been looking for the right spot for it – what could be better than this indoor-outdoor room?!

This bookcase was my grandmother’s. I repainted it about 20 years ago and added the caning (post coming soon) for this space, to create a tropical feel.

We’ve had this round mirror for a while, and it’s a bit small for where it was hanging before, but it works perfectly here. The walls in this room are crazy hard to drill into (which makes sense, because they are actually exterior walls), so I braided some rope from my macrame days and hung it from a hook in one of the ceiling beams. I like how it adds to the outdoorsy, bohemiam vibe in here!

This room is a win-win with the plants – they love all the light, and they definitely help make me feel like I’m outside in nature!

This daybed is a magnet for people who love to snuggle!

Finn would also like to snuggle on the daybed. This is his mildly dissatisfied face, because he had to stay on the rug…

Last couple of close-ups of this vignette. I love how everything old feels new again, when you find just the right combination!

So excited to read, and snuggle, and knit, (and nap) in our new sunroom!

Julie aka “Jewels”

Macrame Cord Hanging Light

You might know that I caught the macrame bug last summer. There is just something so magical about transforming a simple piece of rope! Once I figured out the basics, I wanted to be able to create some more original designs as well. Here are my posts on macrame plant hangers:

Even with my love of plants and hanging planters, I was running low on things to make with rope, so I was very excited to see this I discovered macrame pendant lights. I first caught sight of Windy Chien’s Helix light in the Apartment 34’s One Room Challenge:

And then, I began spotting it everywhere, like in this beautiful bedroom from Katie Monkhouse:

Mandi Gruber (my idol!) also has a funky version of this simple and gorgeous idea, as does Holly Wade on Curbly.

I was looking for bedside lamps for our guest room and teen’s room, and I knew that I just had to try my own version of these lights!

Here’s what you’ll need:

  • Light bulb: looks great with an LED Edison bulb or G40 frosted LED bulb
  • For the hanger, I used my favorite Ikea Ekby Valter brackets (I’ve used them as plant hangers, as well as, as intended, shelf brackets). I stained the unfinished brackets with walnut stain. The 9mm rope light is hanging from the larger size bracket, and the 5mm rope light is hanging from the smaller bracket.

Here’s how to do it:

  • Test your light kit! It’s probably fine, but you’ll be spending several hours on it, so you want to make sure you didn’t get a lemon
  • find the midpoint of your rope and lay it behind your cord, next to the light fixture. With the two long ends of rope, start tying a wave knot
  • Tips: it can get unwieldy working with so much rope. I used a kitchen scale to help me divide the rope in half. I also used rubber bands to hold together the balls of rope, so they would not unravel.

  • Keep going
  • (Turn on a movie or podcast)
  • Keep going
  • When you get to the switch, neatly line the rope along the sides of the switch and then resume your wave knot
  • When you’ve almost reached the plug, use a gathering knot to finish off the ends

Here are some pictures of the hanging lights – the navy cord was made with 5mm cord and the denim cord with 9mm rope.

I don’t know about you, but I want to make another one (or ten) soon.

Happy knotting!

Julie aka “Jewels”

Festive Boho-ho-ho Christmas Stockings

Yup, I have become one of those people who does a themed Christmas each year. I am still not sure if this is a sign of greatness of madness! While I admit to having accumulated many boxes of decorations, I … Continue reading

Hanging Out & Hanging Up Plants

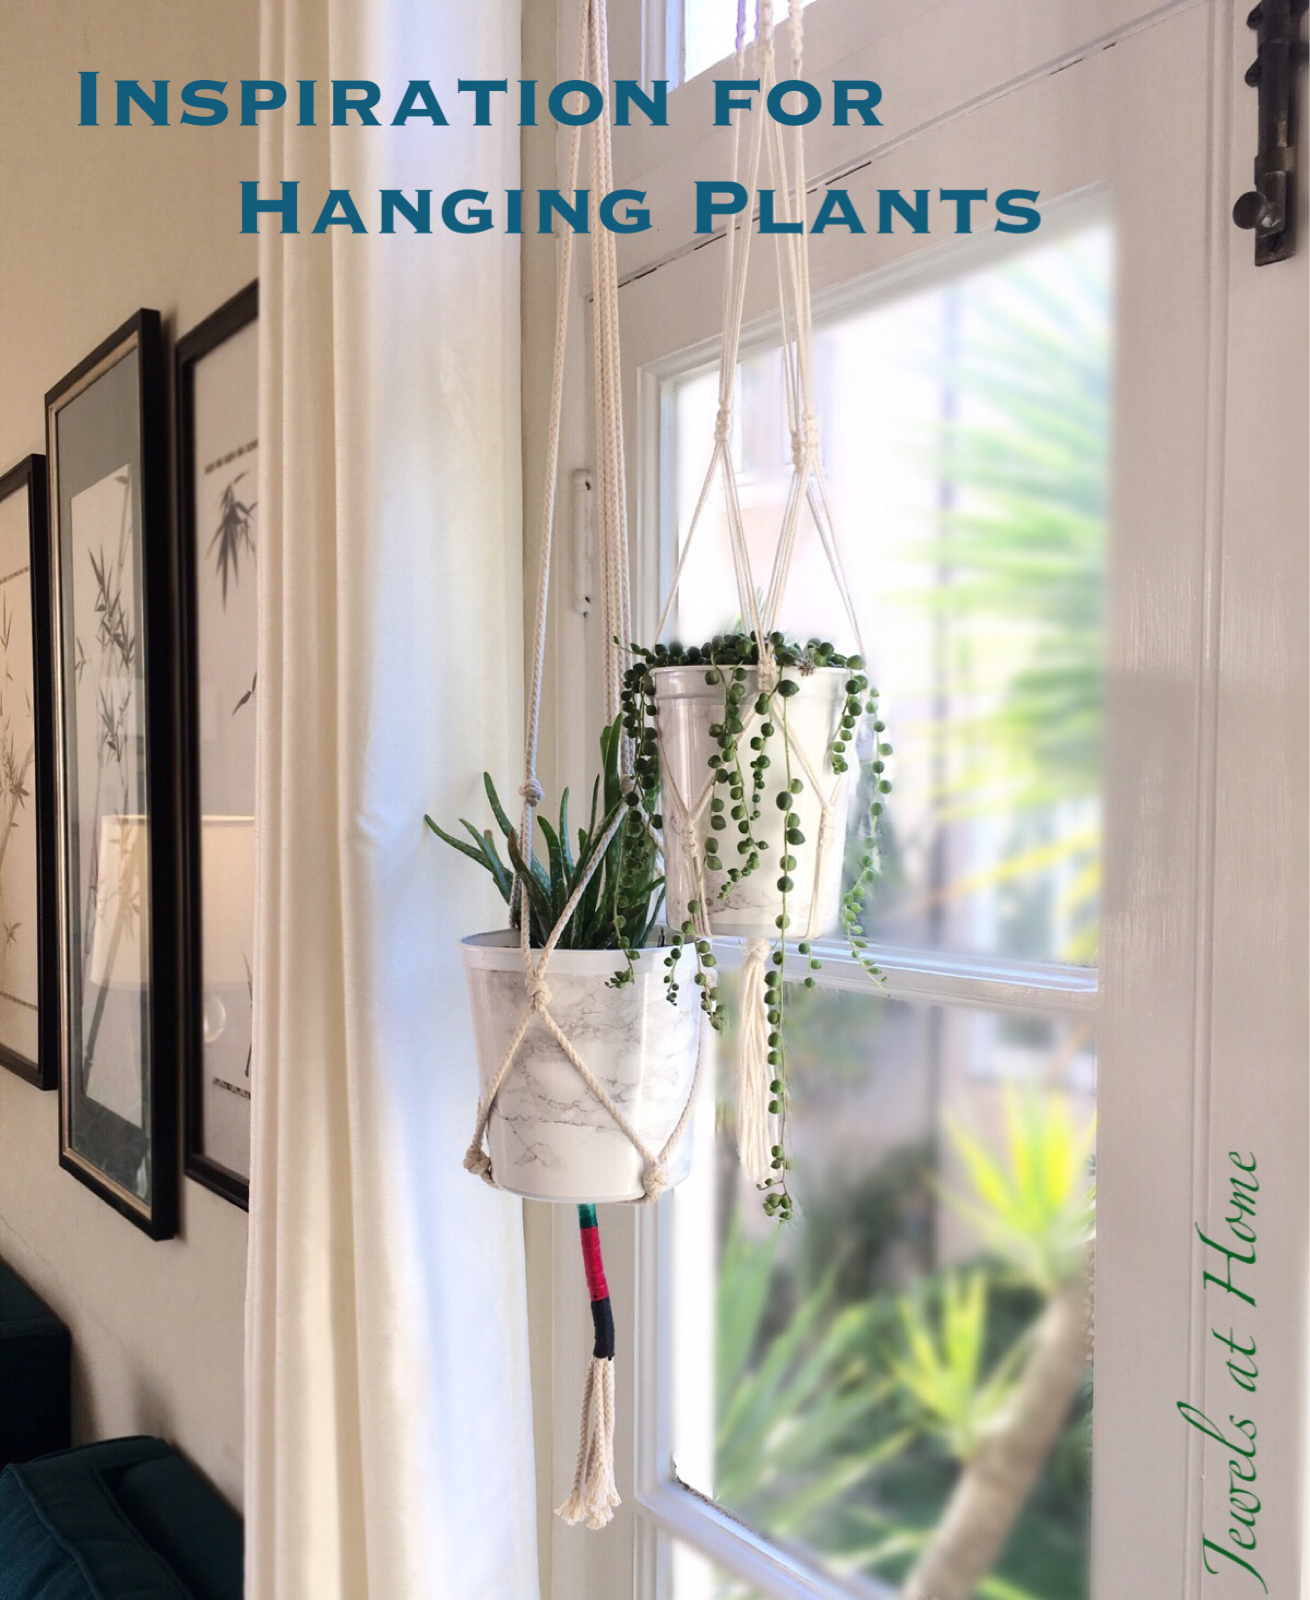
Hello, Crazy Plant Lady here today!

My good friend, Nicola, asked me to share more about how I’m installing my macrame plant hangers (see this post and this post for the details on the hangers).


There are lots of creative ideas for creating hanging plant displays. I’ve started with some easy methods, including hanging my plants from

  • Wooden beams
  • Curtain rods
  • Wall brackets

I’ll give you those details and also include some more ambitious ideas that I still fantasize about!

One general tip is that I chose lighter weight planters. Some of my plants are hanging in my made-over yogurt containers, and others are in glass jars or vases, some painted with metallic spray paint.
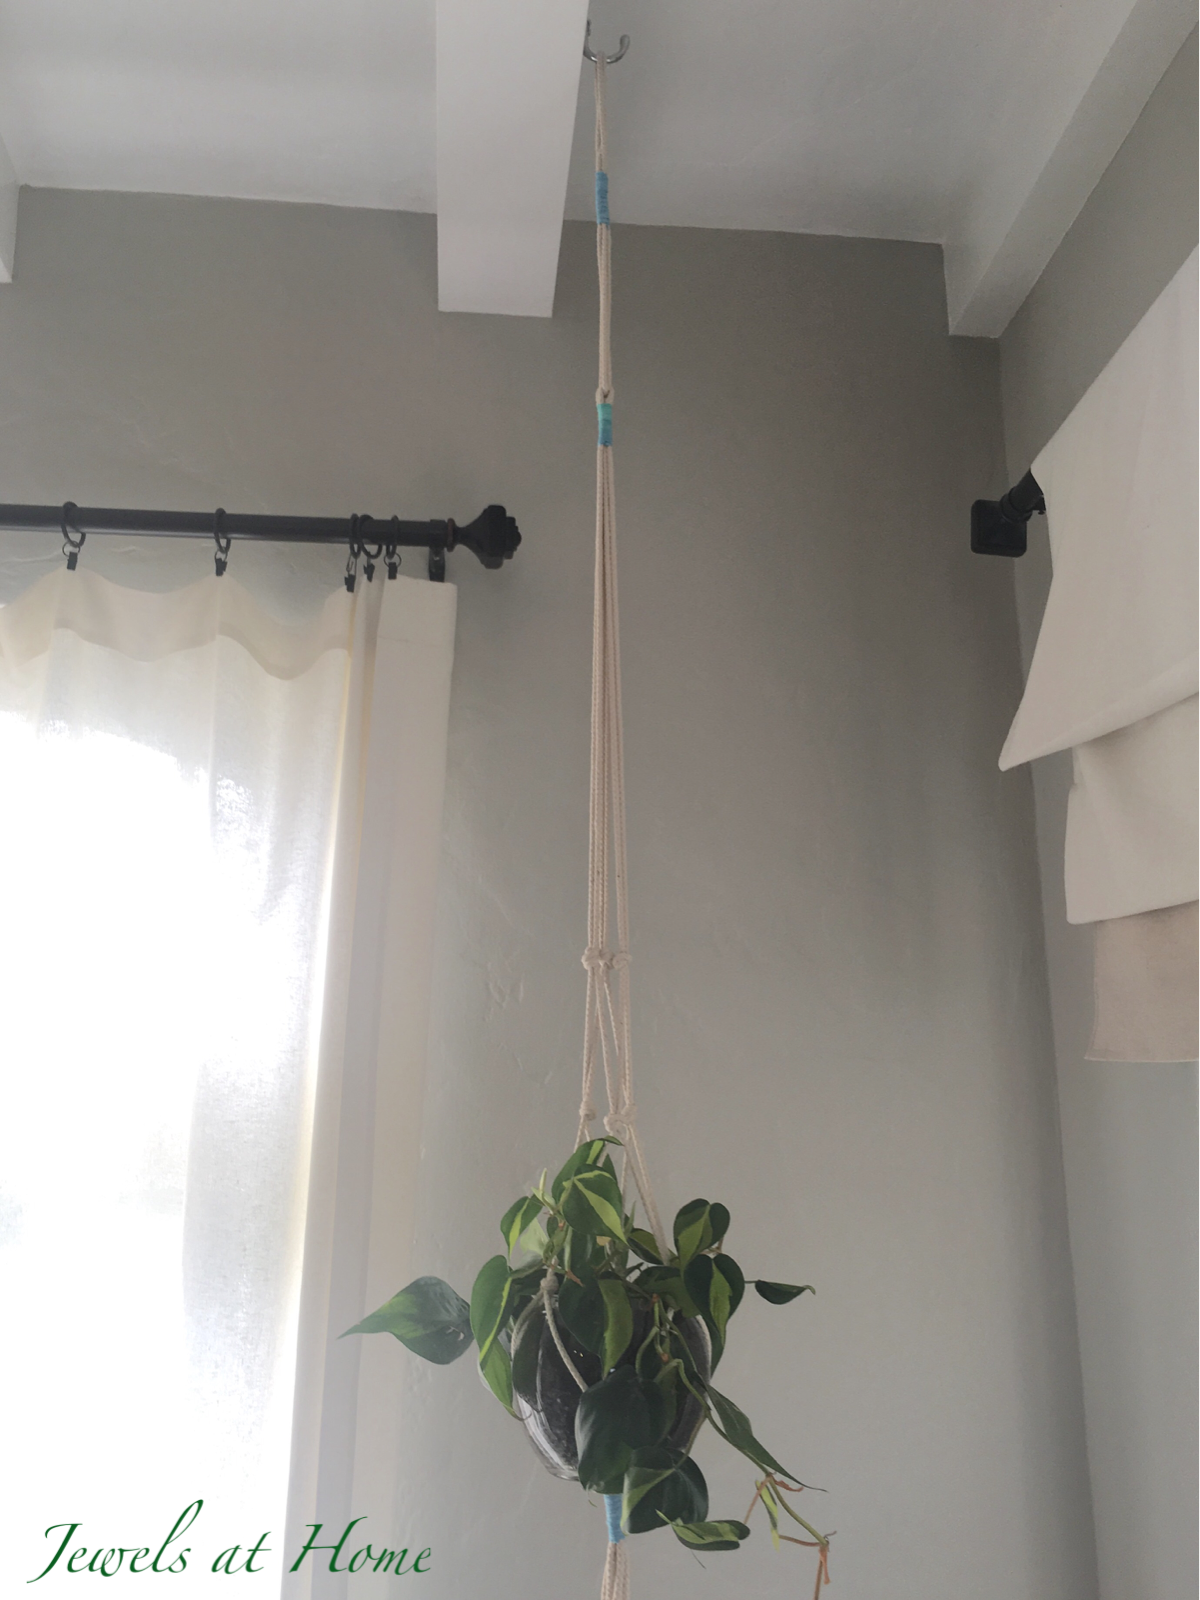
Wooden Beams

I lucked out to have these beams running in our family room, so I screwed in coat hooks for my plants. Obviously, not every house has wooden beams, but if you do, this is easy, and to display more, you can screw in two hooks and run a rod between them.
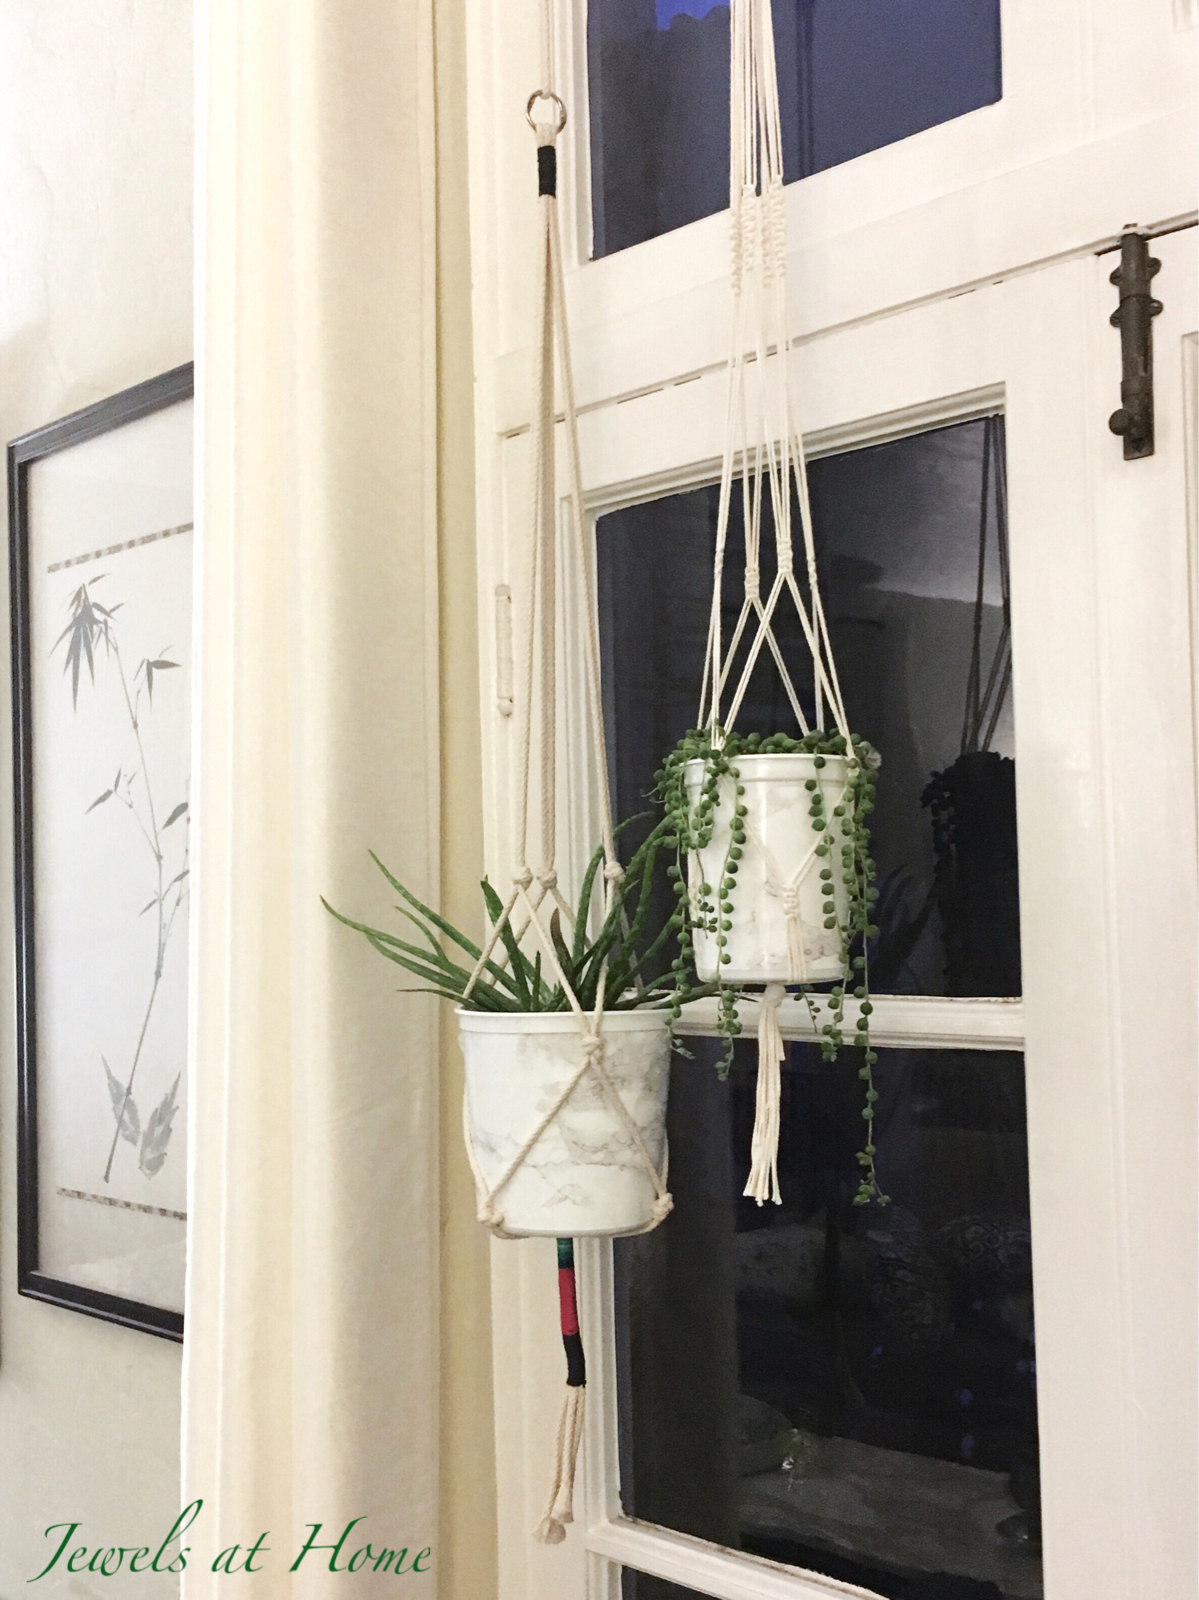

Curtain Rods

Plants need light, so it makes sense to hang them in front of a window! It wouldn’t be the most convenient idea for curtains that you open and close often, but it’s great for windows where the curtains can stay open most of the time. I used shower curtain hooks to hang several plants this way. The rollers on the curtain hooks make it easy to move the plants, if you want to close the curtains.
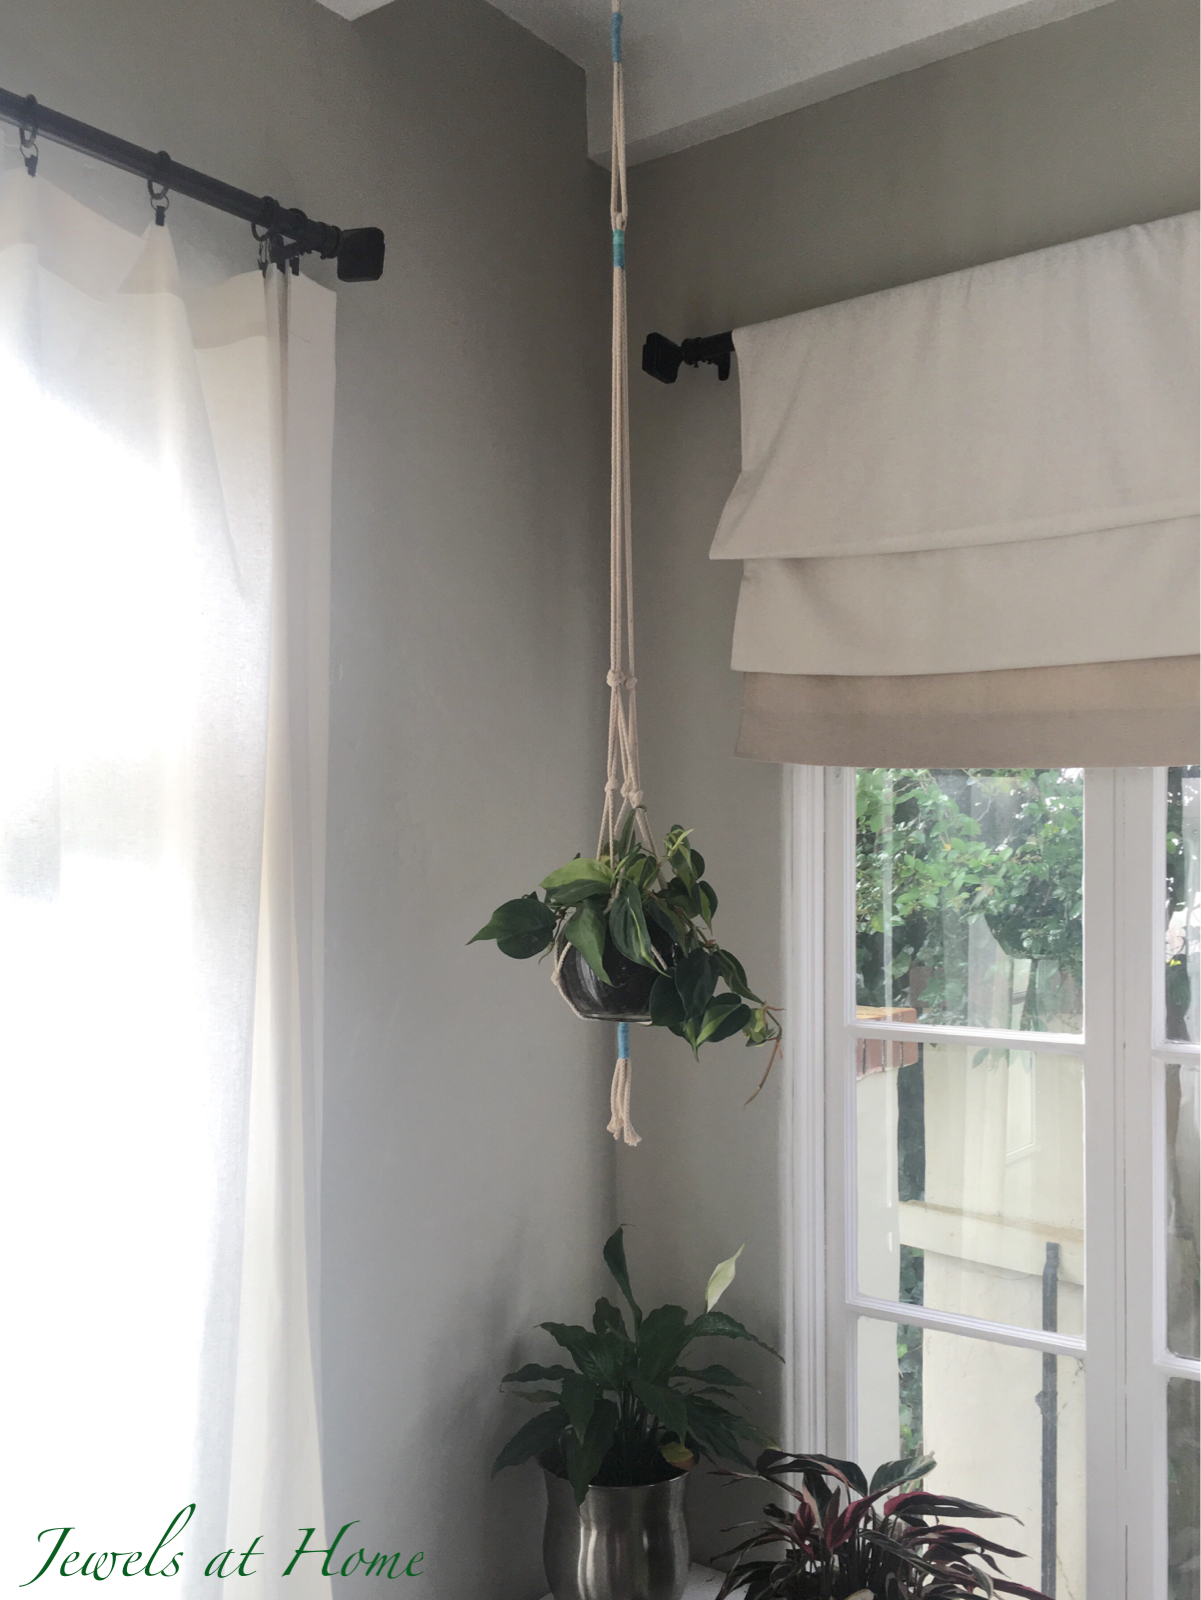
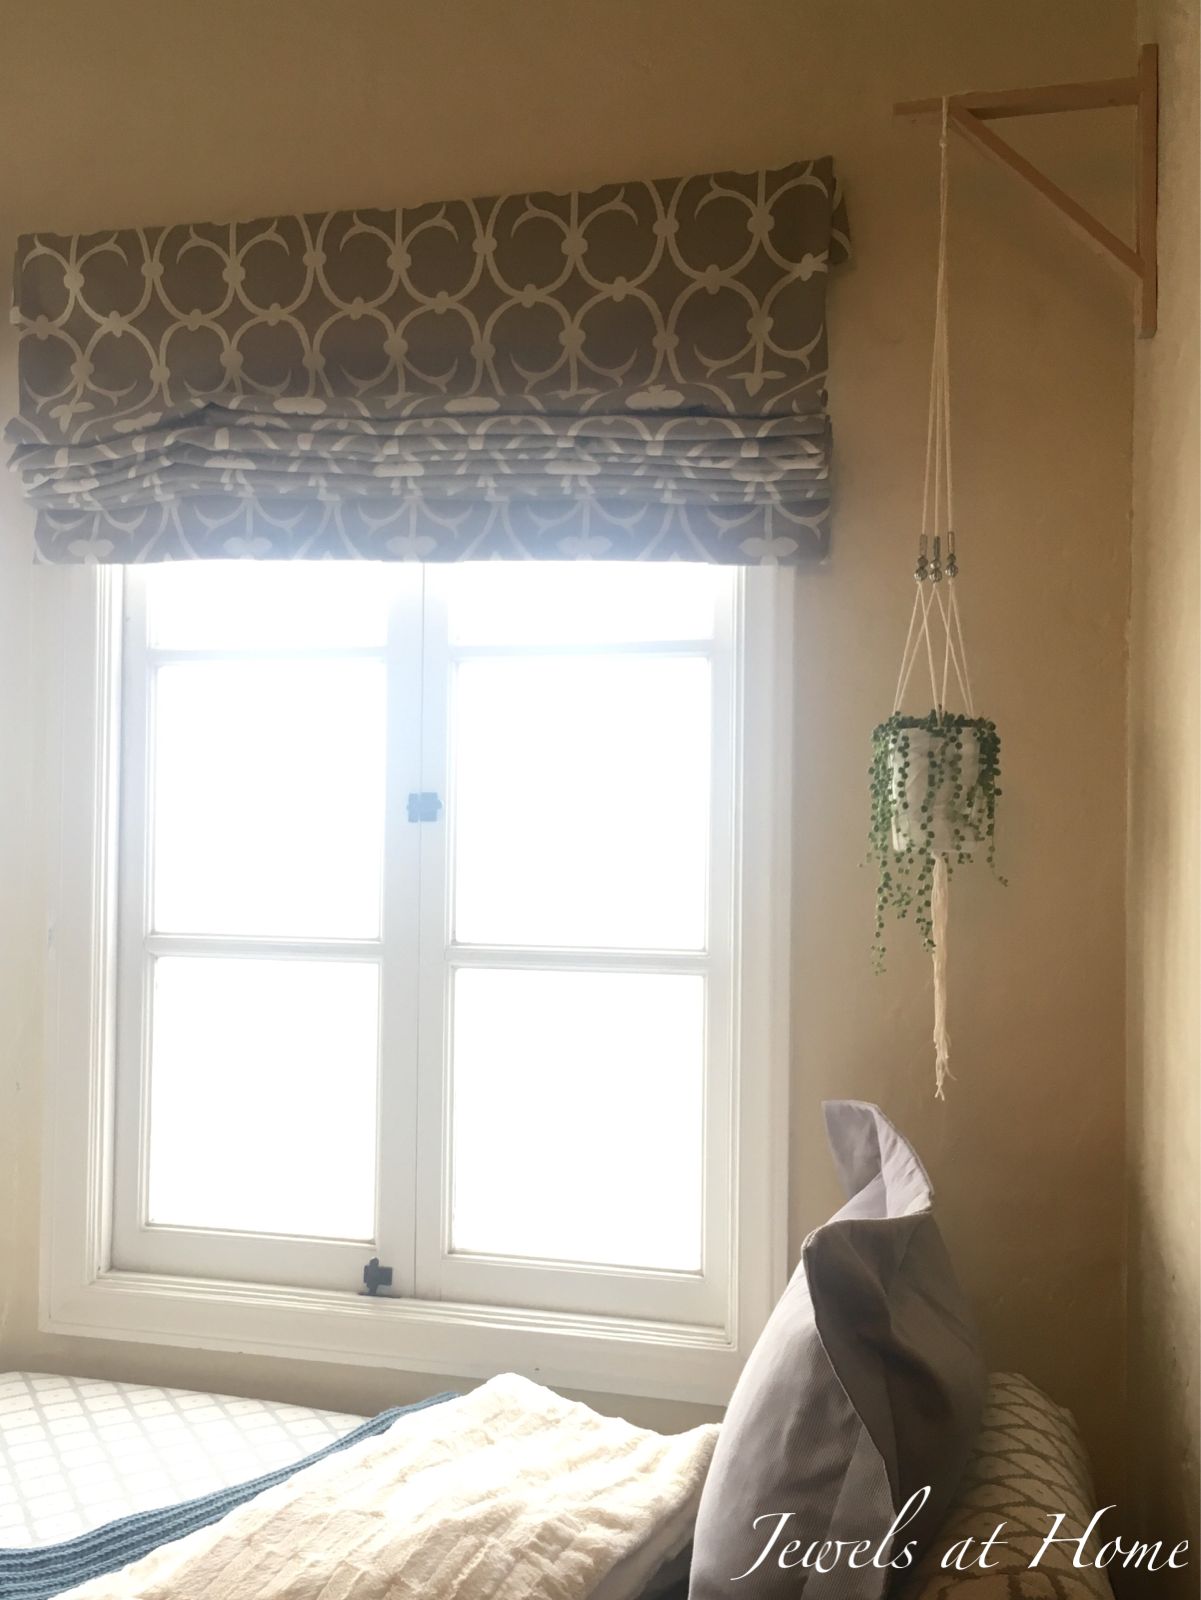
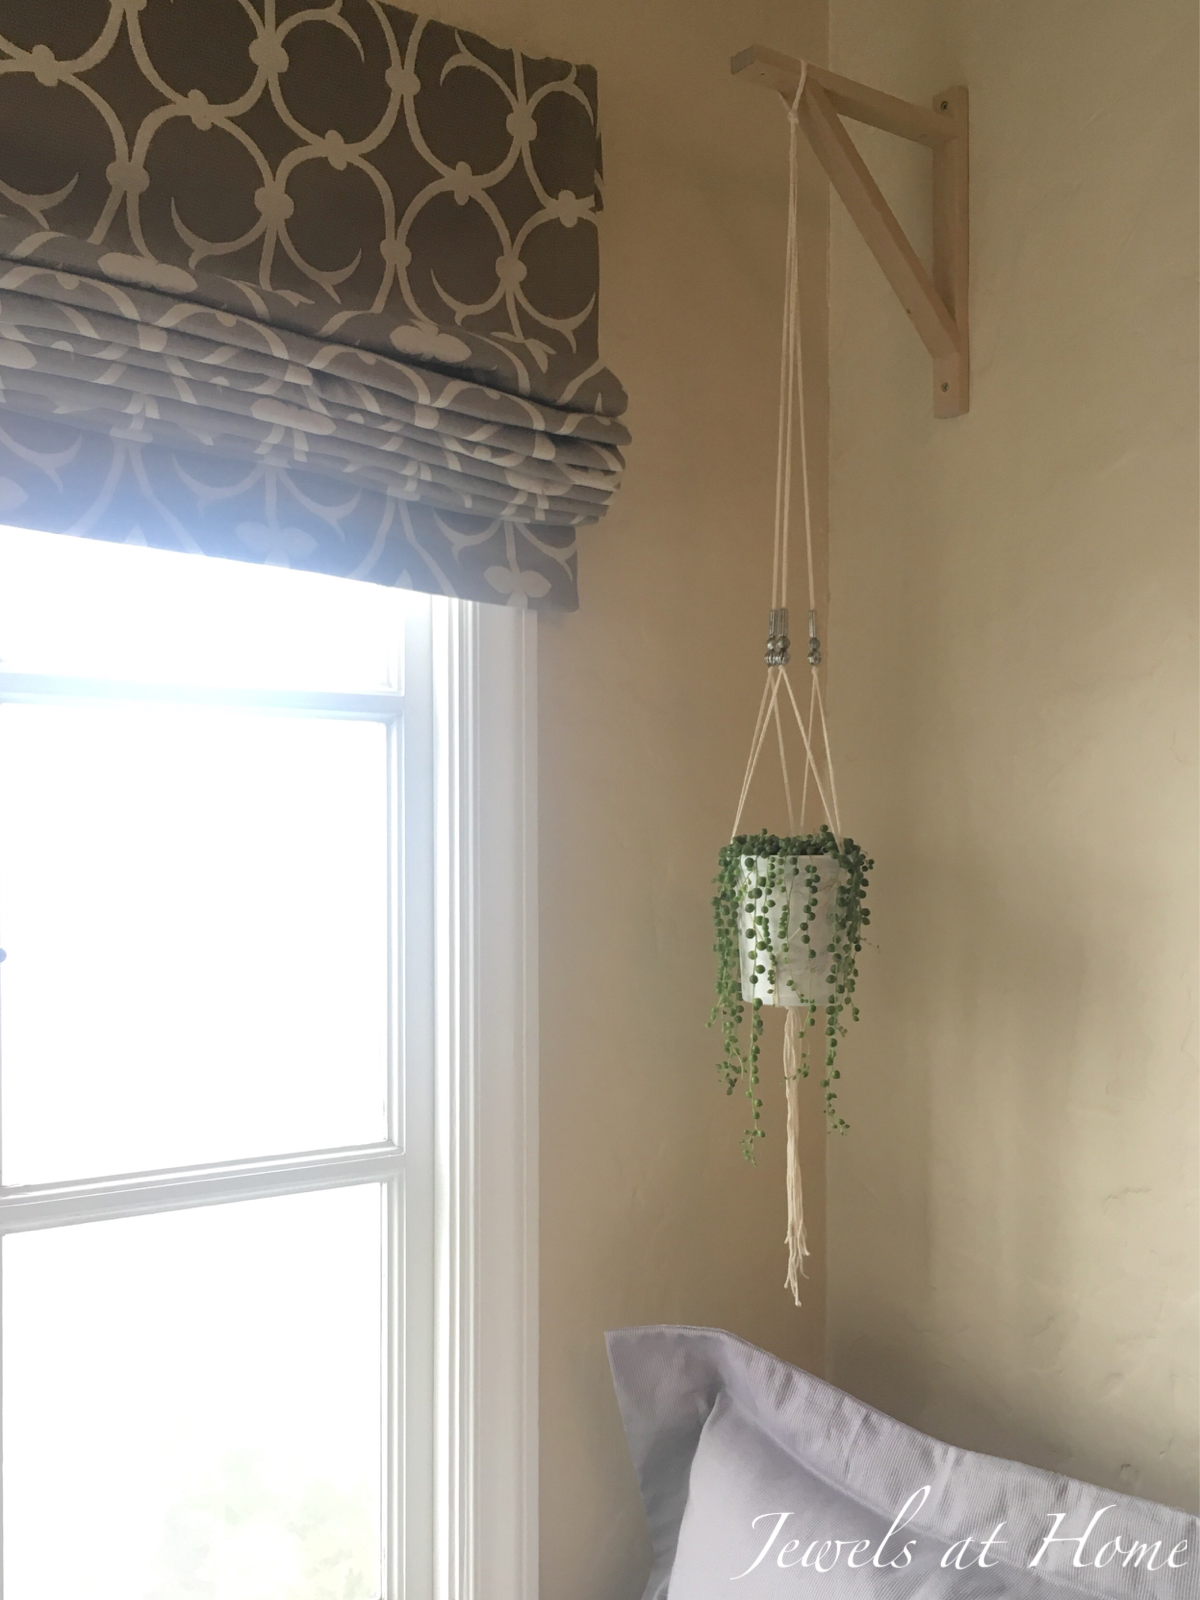
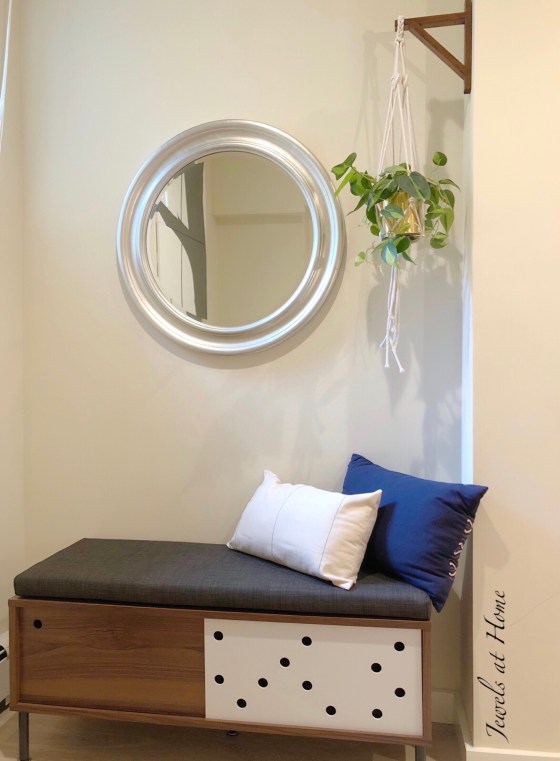

Wall Brackets

I was honestly too nervous to hang plants from our ceilings. The house is about 90 years old, and the walls and ceilings are plaster and lathe. I had visions of the giant patches of plaster crumbling down on me, so I decided to use wall brackets. This method also gives you more flexibility about hanging heights.


These are the brackets I used. (The link is to Amazon, but they’re cheaper at IKEA, if you can get to a store).


If you’re feeling more courageous, here are some more ideas I’d like to try!

Hanging a ladder from the ceiling. This is just so peaceful and gorgeous!


Photo: Jennifer Chong of See and Savour

A large branch displaying multiple hangers. I love all the colors and designs!


Photo: Emily Katz of Modern Macrame 

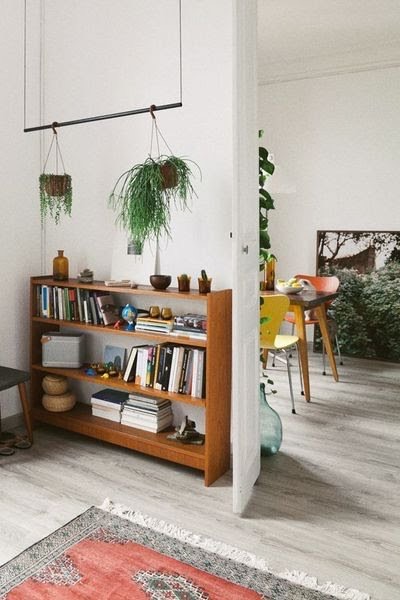
How about a cool metal pipe or rod to display your plants?! A sleek look, and you could do it from a wall, if your ceilings are unreliable, like mine.

Photo: Cote Maison

Thanks for coming with me into the world of macrame and plants. I am clearly a little obsessed. I’ve got more new ideas coming up to share with you soon(ish)!

“Jewels”