The Ultimate Craft Studio – Five Keys to the Perfect Creative Retreat

I have a lot to be grateful for with my job and family. They keep me busy, teach me, and make me happy every day. It’s equally wonderful, when I can steal a few minutes at the end of the day to do something that is just for me. And that something is usually something creative – sewing, cutting, gluing, or writing about my projects for Jewels at Home.

For those times when I need a little getaway, I love my creative retreat in the top corner of our house. A lot of really fun projects have been cooked up in this space. Did you stumble onto my blog through one of my DIY creations? Well, I’d love to show you where it all happens!

The Ultimate Craft Studio: Five Keys to the Perfect Creative Retreat | Jewels at Home

Whether you have a little corner or a roomy studio, here are my five keys for a perfect creative retreat:

  1. Storage
  2. Work surfaces
  3. Lighting
  4. Beautiful colors and patterns
  5. Artistic inspiration

1. Storage

So, I’m lucky enough to have this room to myself for the moment, until the little boys decide they don’t want to share a room anymore.  For many years, we had our guest room in my studio, and that worked quite well also. We used a twin-sized daybed that didn’t take up much space, and there was a pop-up trundle that could be used to create a king-sized bed, when we hosted a couple.

Whether you have a whole room or just a corner for your projects, efficient storage is a must.  If you only get a few minutes in a day to work on your favorite projects, you don’t want to spend the whole time looking for your supplies! Most of my supplies and projects are stored on these Liatorp bookcases from IKEA.  I lined the back with a roll of gray sketch paper for a cleaner look.

The Ultimate Craft Studio: Five Keys to the Perfect Creative Retreat | Jewels at Home

These IKEA Liatorp bookcases fit together neatly and hold lots and lots of supplies!

I have lots of small boxes and baskets to hold different materials, and they are all labeled, to make things easy to find. These Nickel Plated Card Holders are a big help!

Want more storage ideas? That’s a wicker laundry hamper in the right corner holding bolts of fabric.

The Ultimate Craft Studio: Five Keys to the Perfect Creative Retreat | Jewels at Home

There’s more storage hidden in the big IKEA Pax closets we built in to the room (more about those in this post).

The Ultimate Craft Studio: Five Keys to the Perfect Creative Retreat | Jewels at Home

The closets in this room, and all our bedrooms, are IKEA Pax units framed and built into the wall. There’s tons of efficient storage inside!


2. Work Surfaces

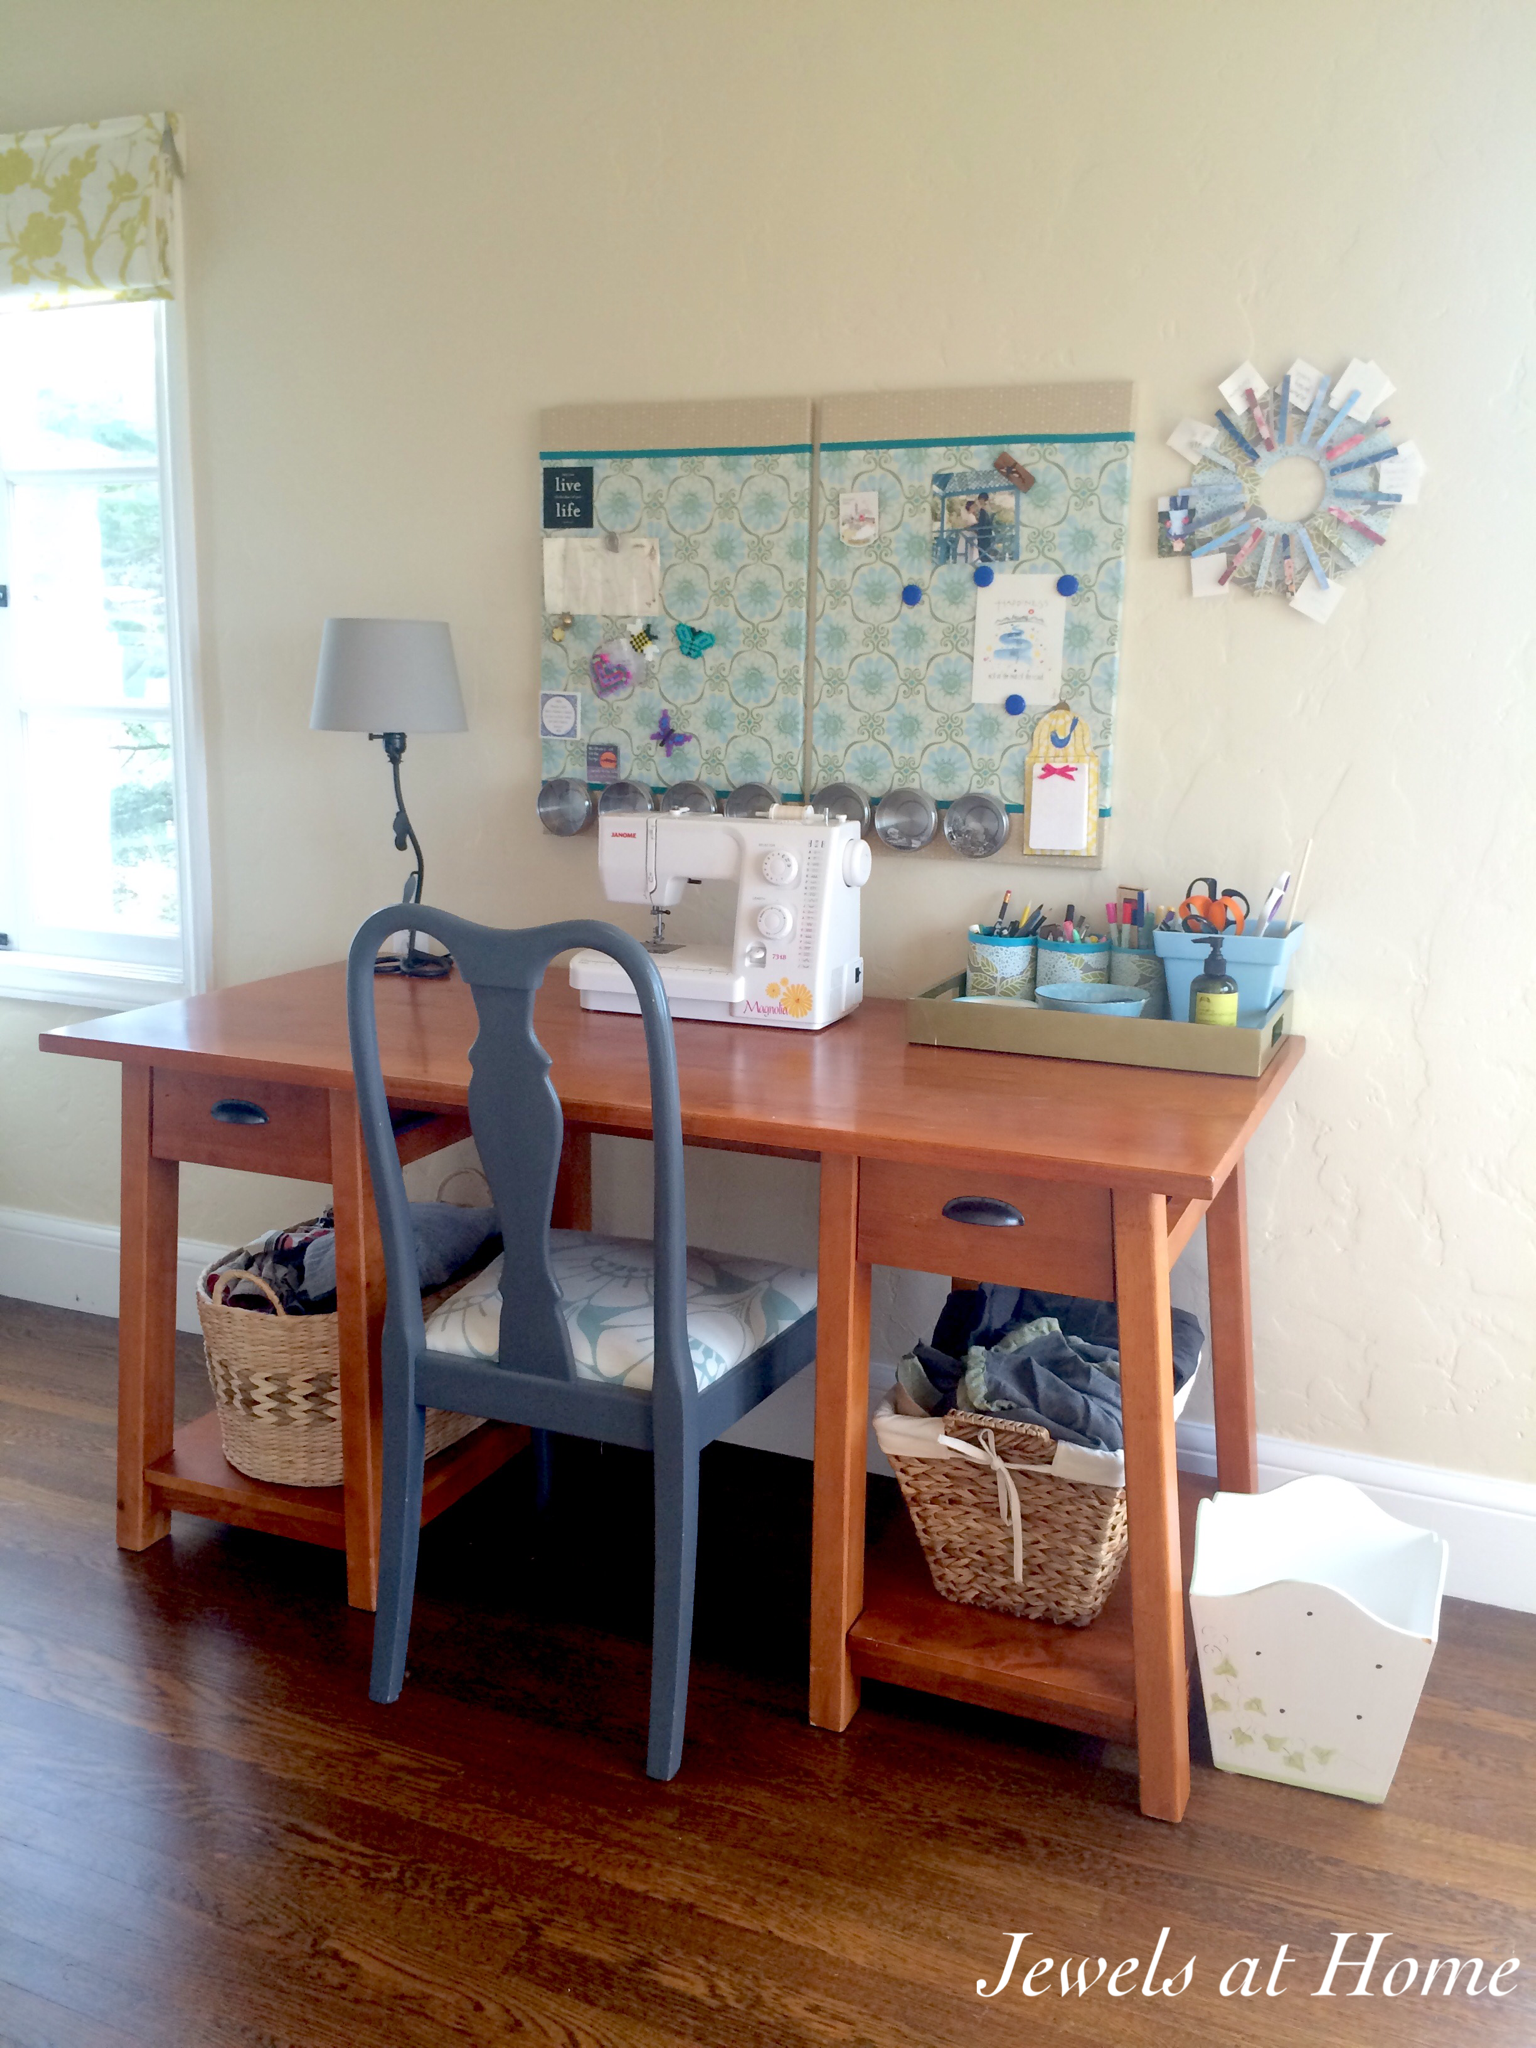
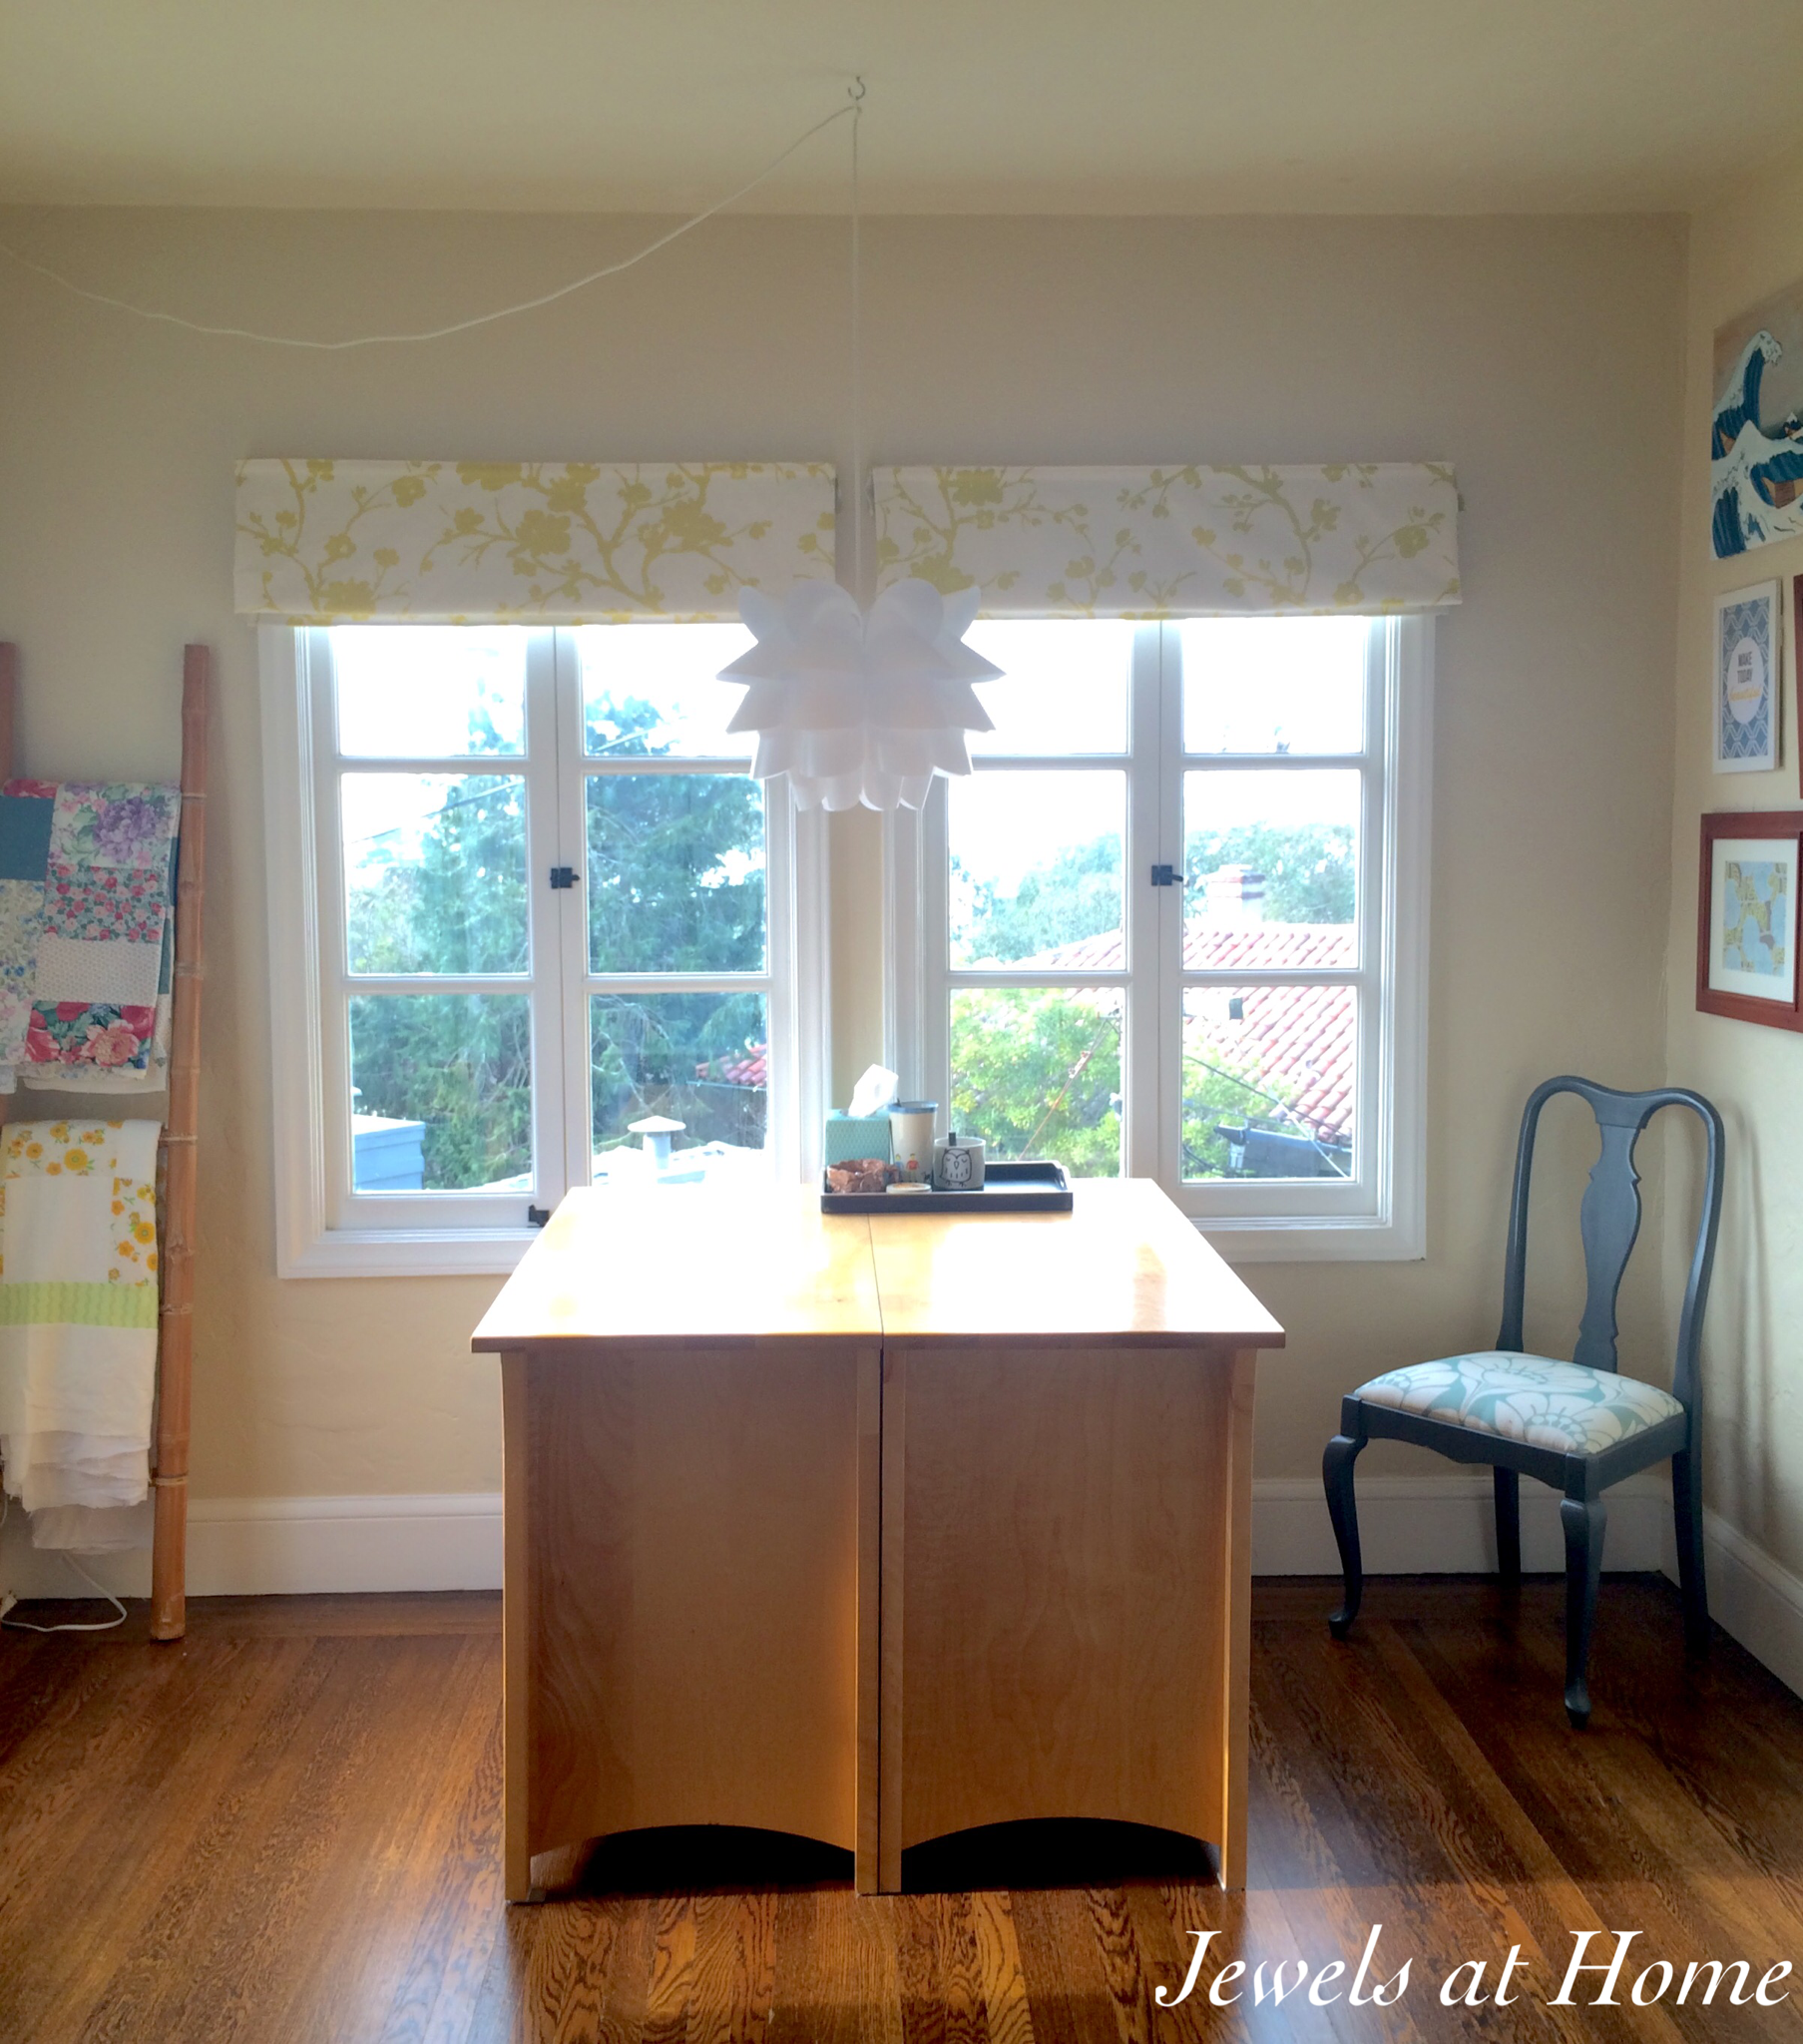
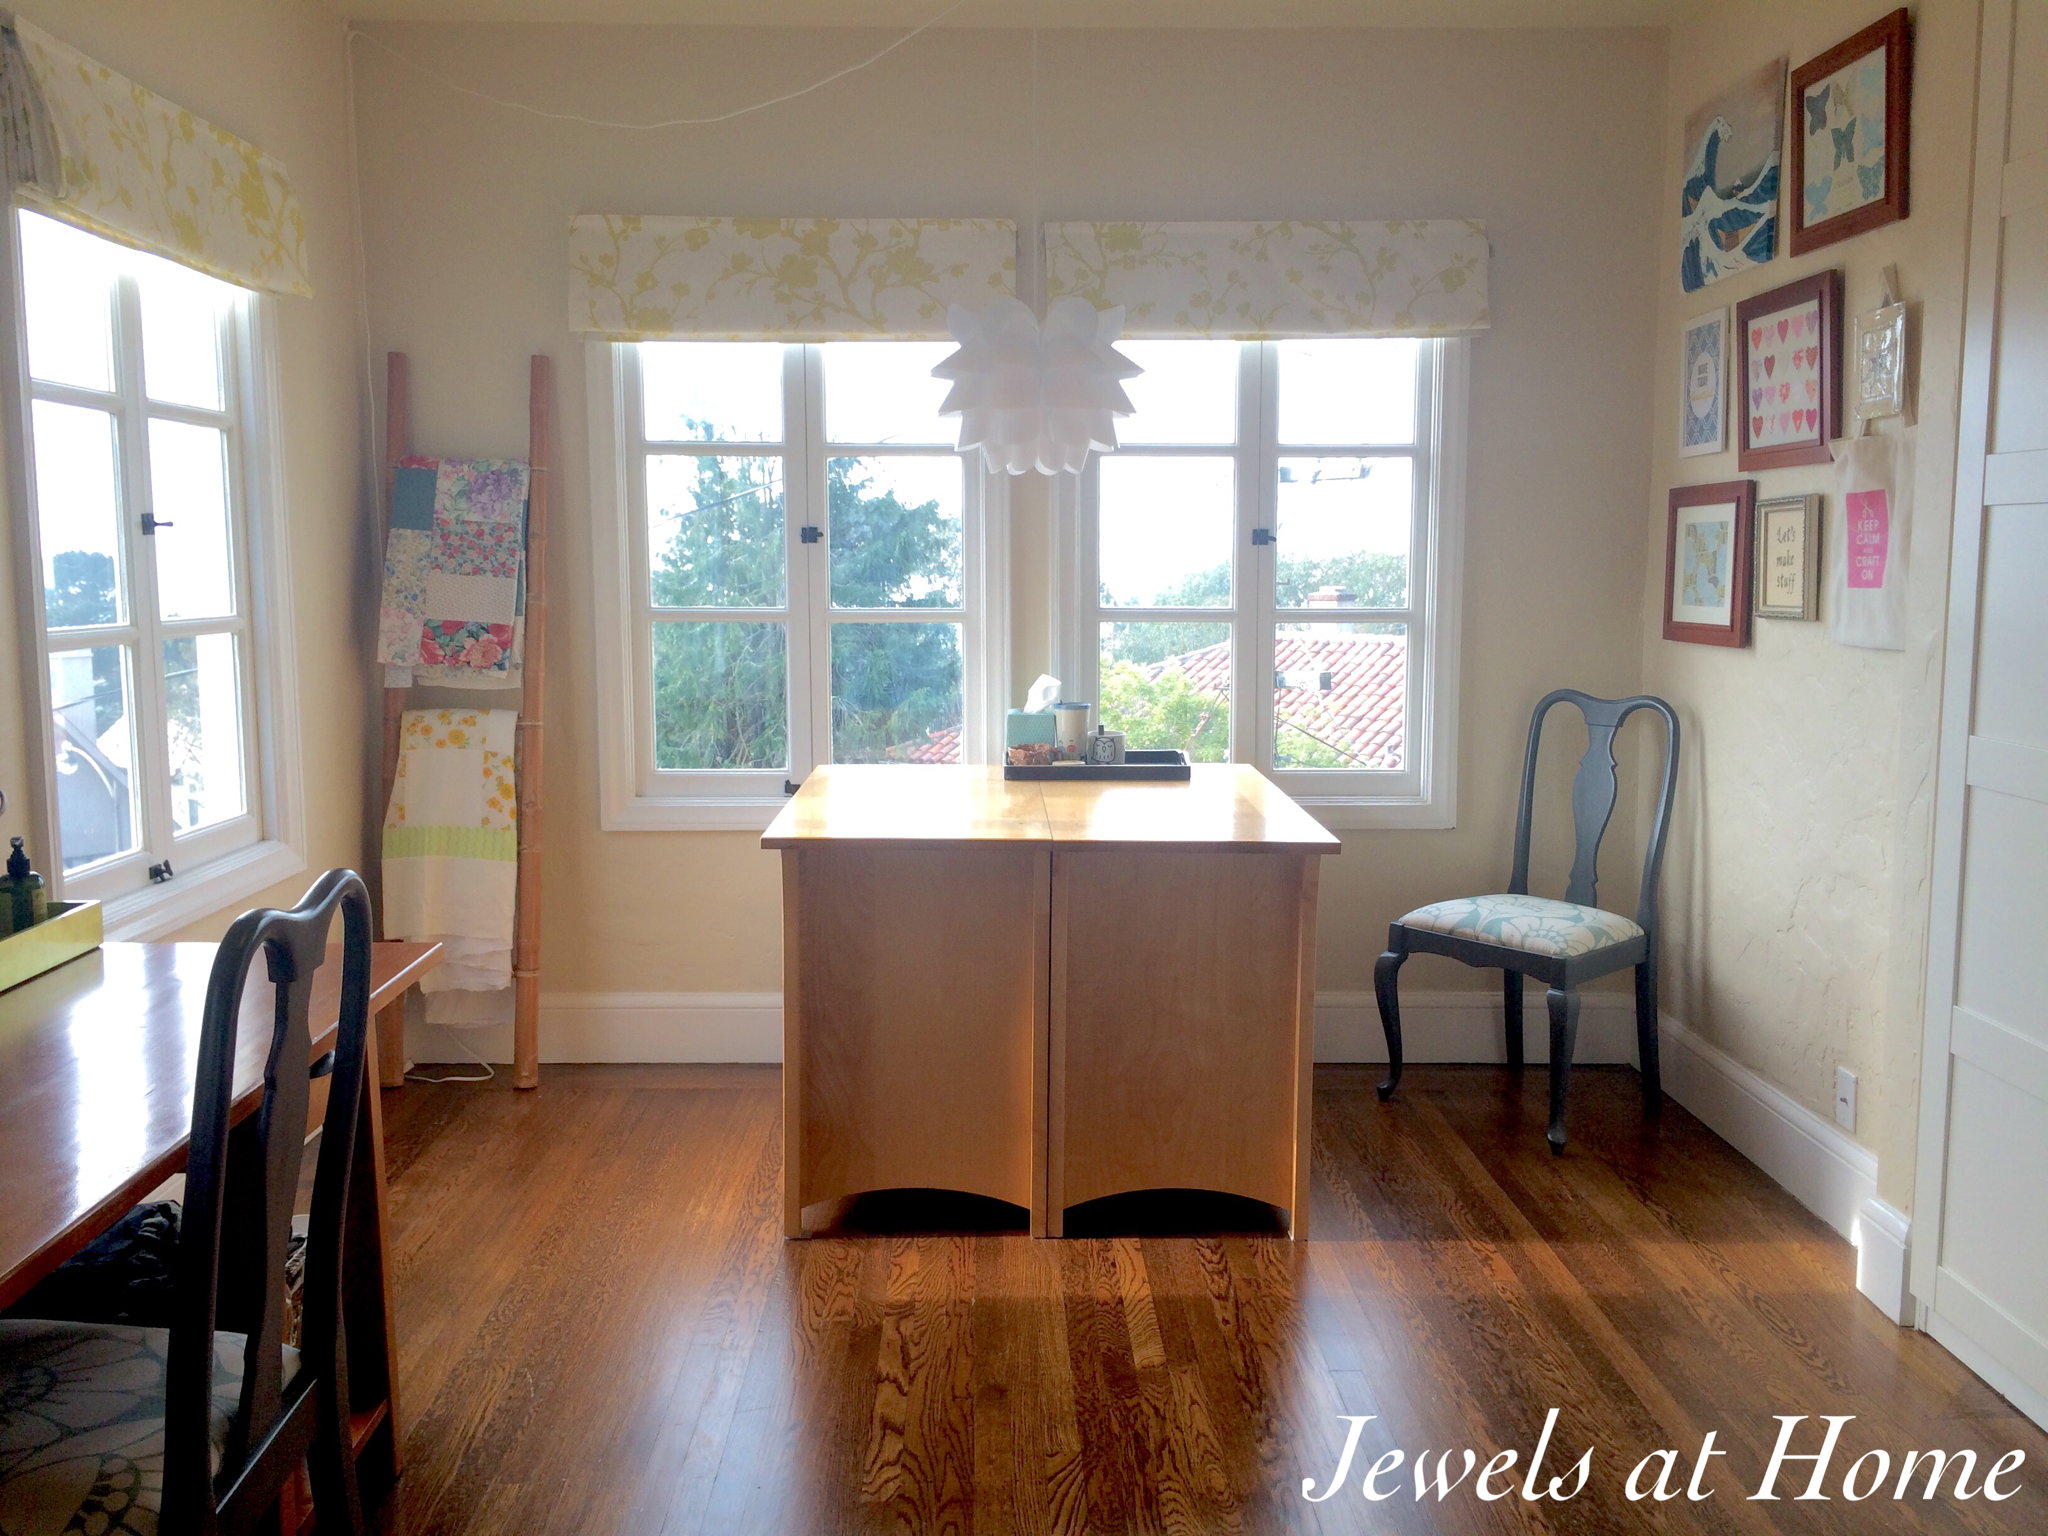
I have two work surfaces in the room – a desk for sewing or working on the computer and a big project table I created using the boys’ old dressers.

The Ultimate Craft Studio: Five Keys to the Perfect Creative Retreat | Jewels at Home

The Ultimate Craft Studio: Five Keys to the Perfect Creative Retreat | Jewels at Home

The Ultimate Craft Studio: Five Keys to the Perfect Creative Retreat | Jewels at Home

I should actually say I have three work surfaces, since a lot of big projects like quilts are done on the floor. When we moved in, I was looking for a rug for this room, and now I’m glad I don’t have one, since I work on the floor all the time.

3. Lighting

I needed a lot of light in this room to help me work and also take photographs of my projects. The windows on two walls are a great source of natural light.

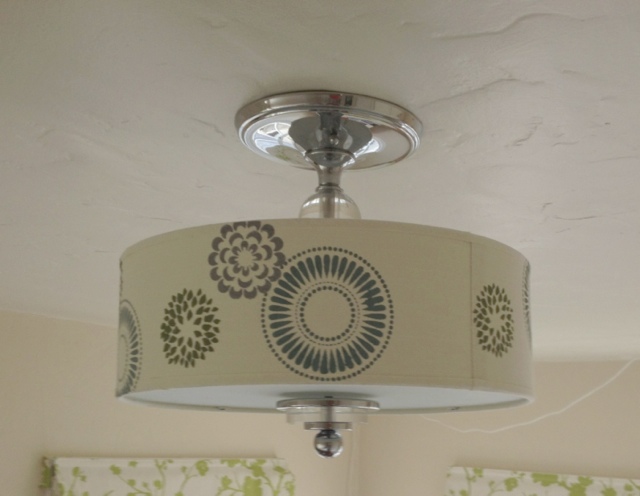
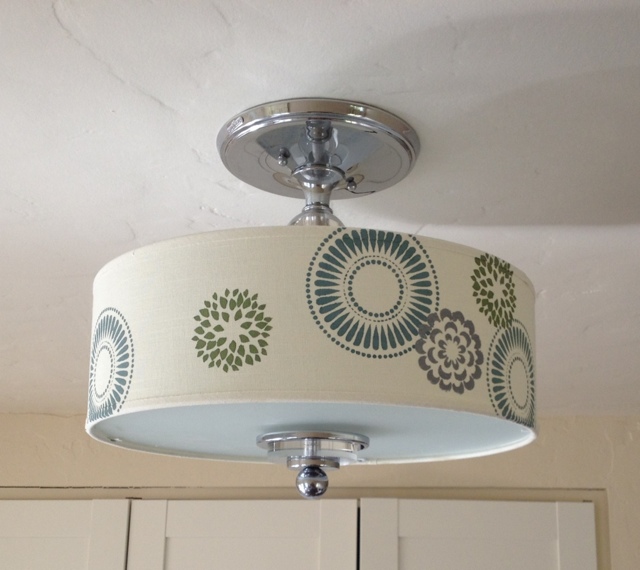
There is just one ceiling light fixture (you can see how I stenciled the shade in this post).

Stenciled lampshade | Jewels at Home

I added this plug-in Ikea Knappa Pendant Lamp over my big work table, and a little desk lamp also.

4. Beautiful colors and patterns

I live in a house of all boys, and I’m happy to keep our home’s decor pretty neutral. Since this is my room, though, I did allow myself to let go a bit more with the flowers and frills. The theme is shades of turquoise and green, and there are touches of color and pattern everywhere

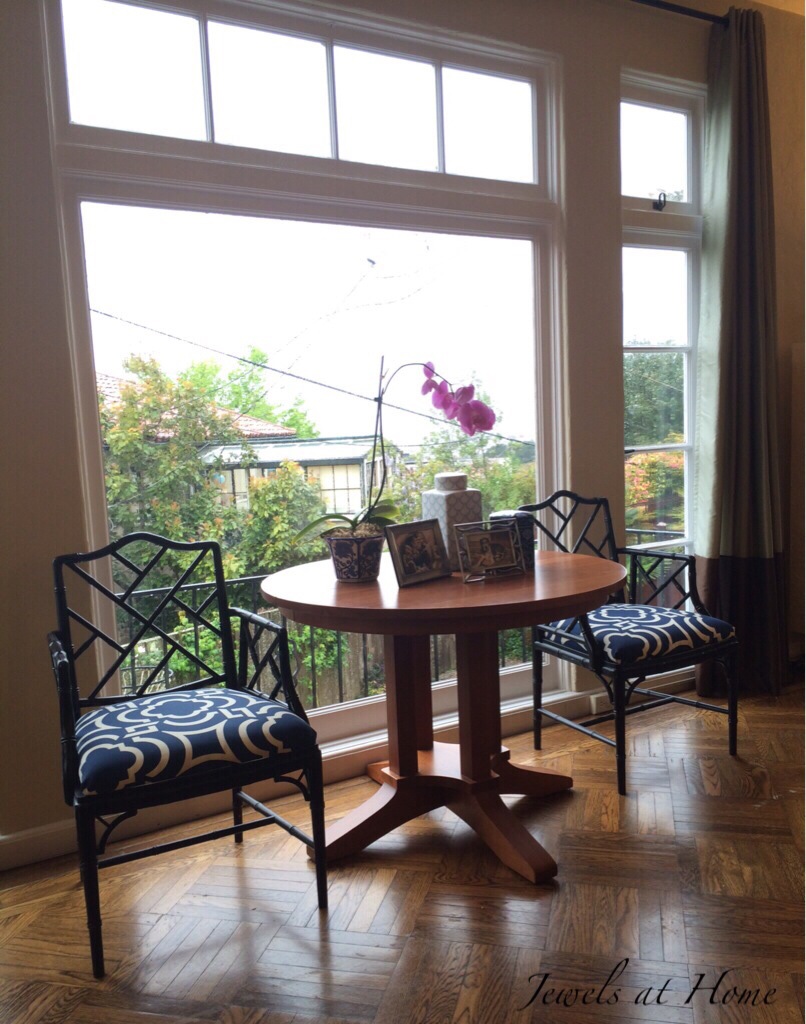
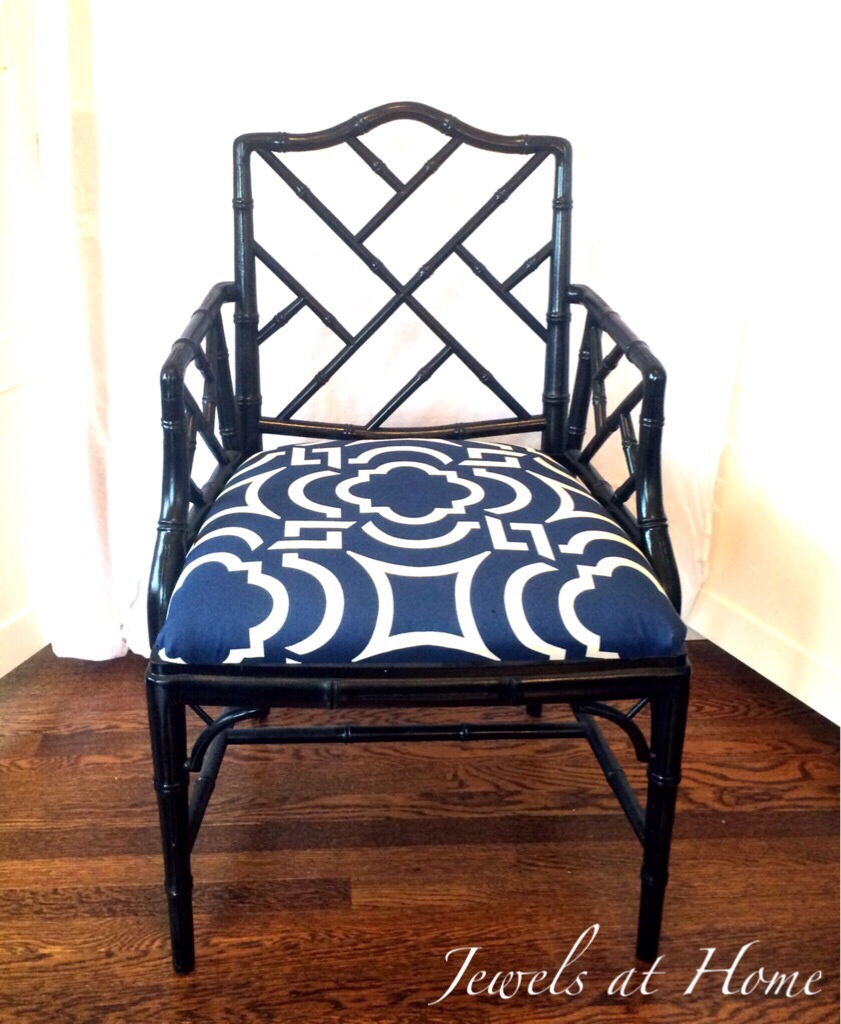
The old Queen Anne chairs I painted and upholstered have a fun retro floral print.

Queen Anne chair makeover by Jewels at Home

Free Queen Anne chairs found through Craigslist: from worn and boring to fresh and elegant!

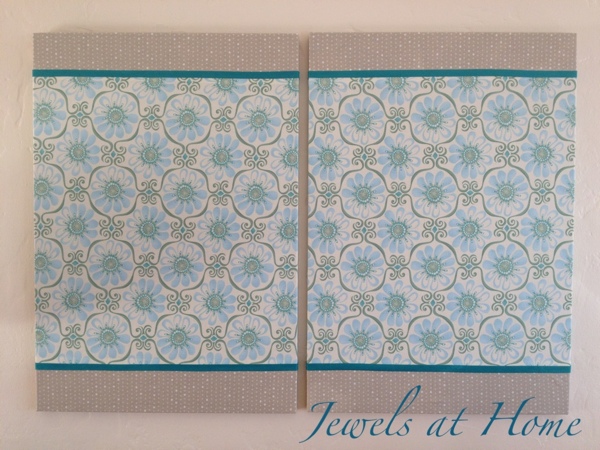
These fabric-covered magnet boards contain all the colors of the room.

Fabric-covered magnet boards | Jewels at Home

And the light shade I mentioned fits in with the rest of the room’s colors.

20120517-164139.jpg

The roman shades, with their green floral print, were sewn by Liz at SFSeamstress. She’s so talented and even managed to rescue a few pieces of this fabric that I had started cutting for another project. Magic!

5. Artistic inspiration

I love so many parts of this space. Since I’m in the southwest corner of our home, I even have great views to inspire me, including sunsets like this one!

The Ultimate Craft Studio: Five Keys to the Perfect Creative Retreat | Jewels at Home

I also like having the magnet boards to keep ideas easily visible. I use one of my clothespin wreaths to keep a list of to-dos.

20120518-203641.jpg

The bamboo ladder in the corner is a good place to display a quilt-in-progress.

The Ultimate Craft Studio: Five Keys to the Perfect Creative Retreat | Jewels at Home

I have a little inspiration wall in the corner, including paper art projects that I made and a cute printable from Isn’t That Sew.

The Ultimate Craft Studio: Five Keys to the Perfect Creative Retreat | Jewels at Home

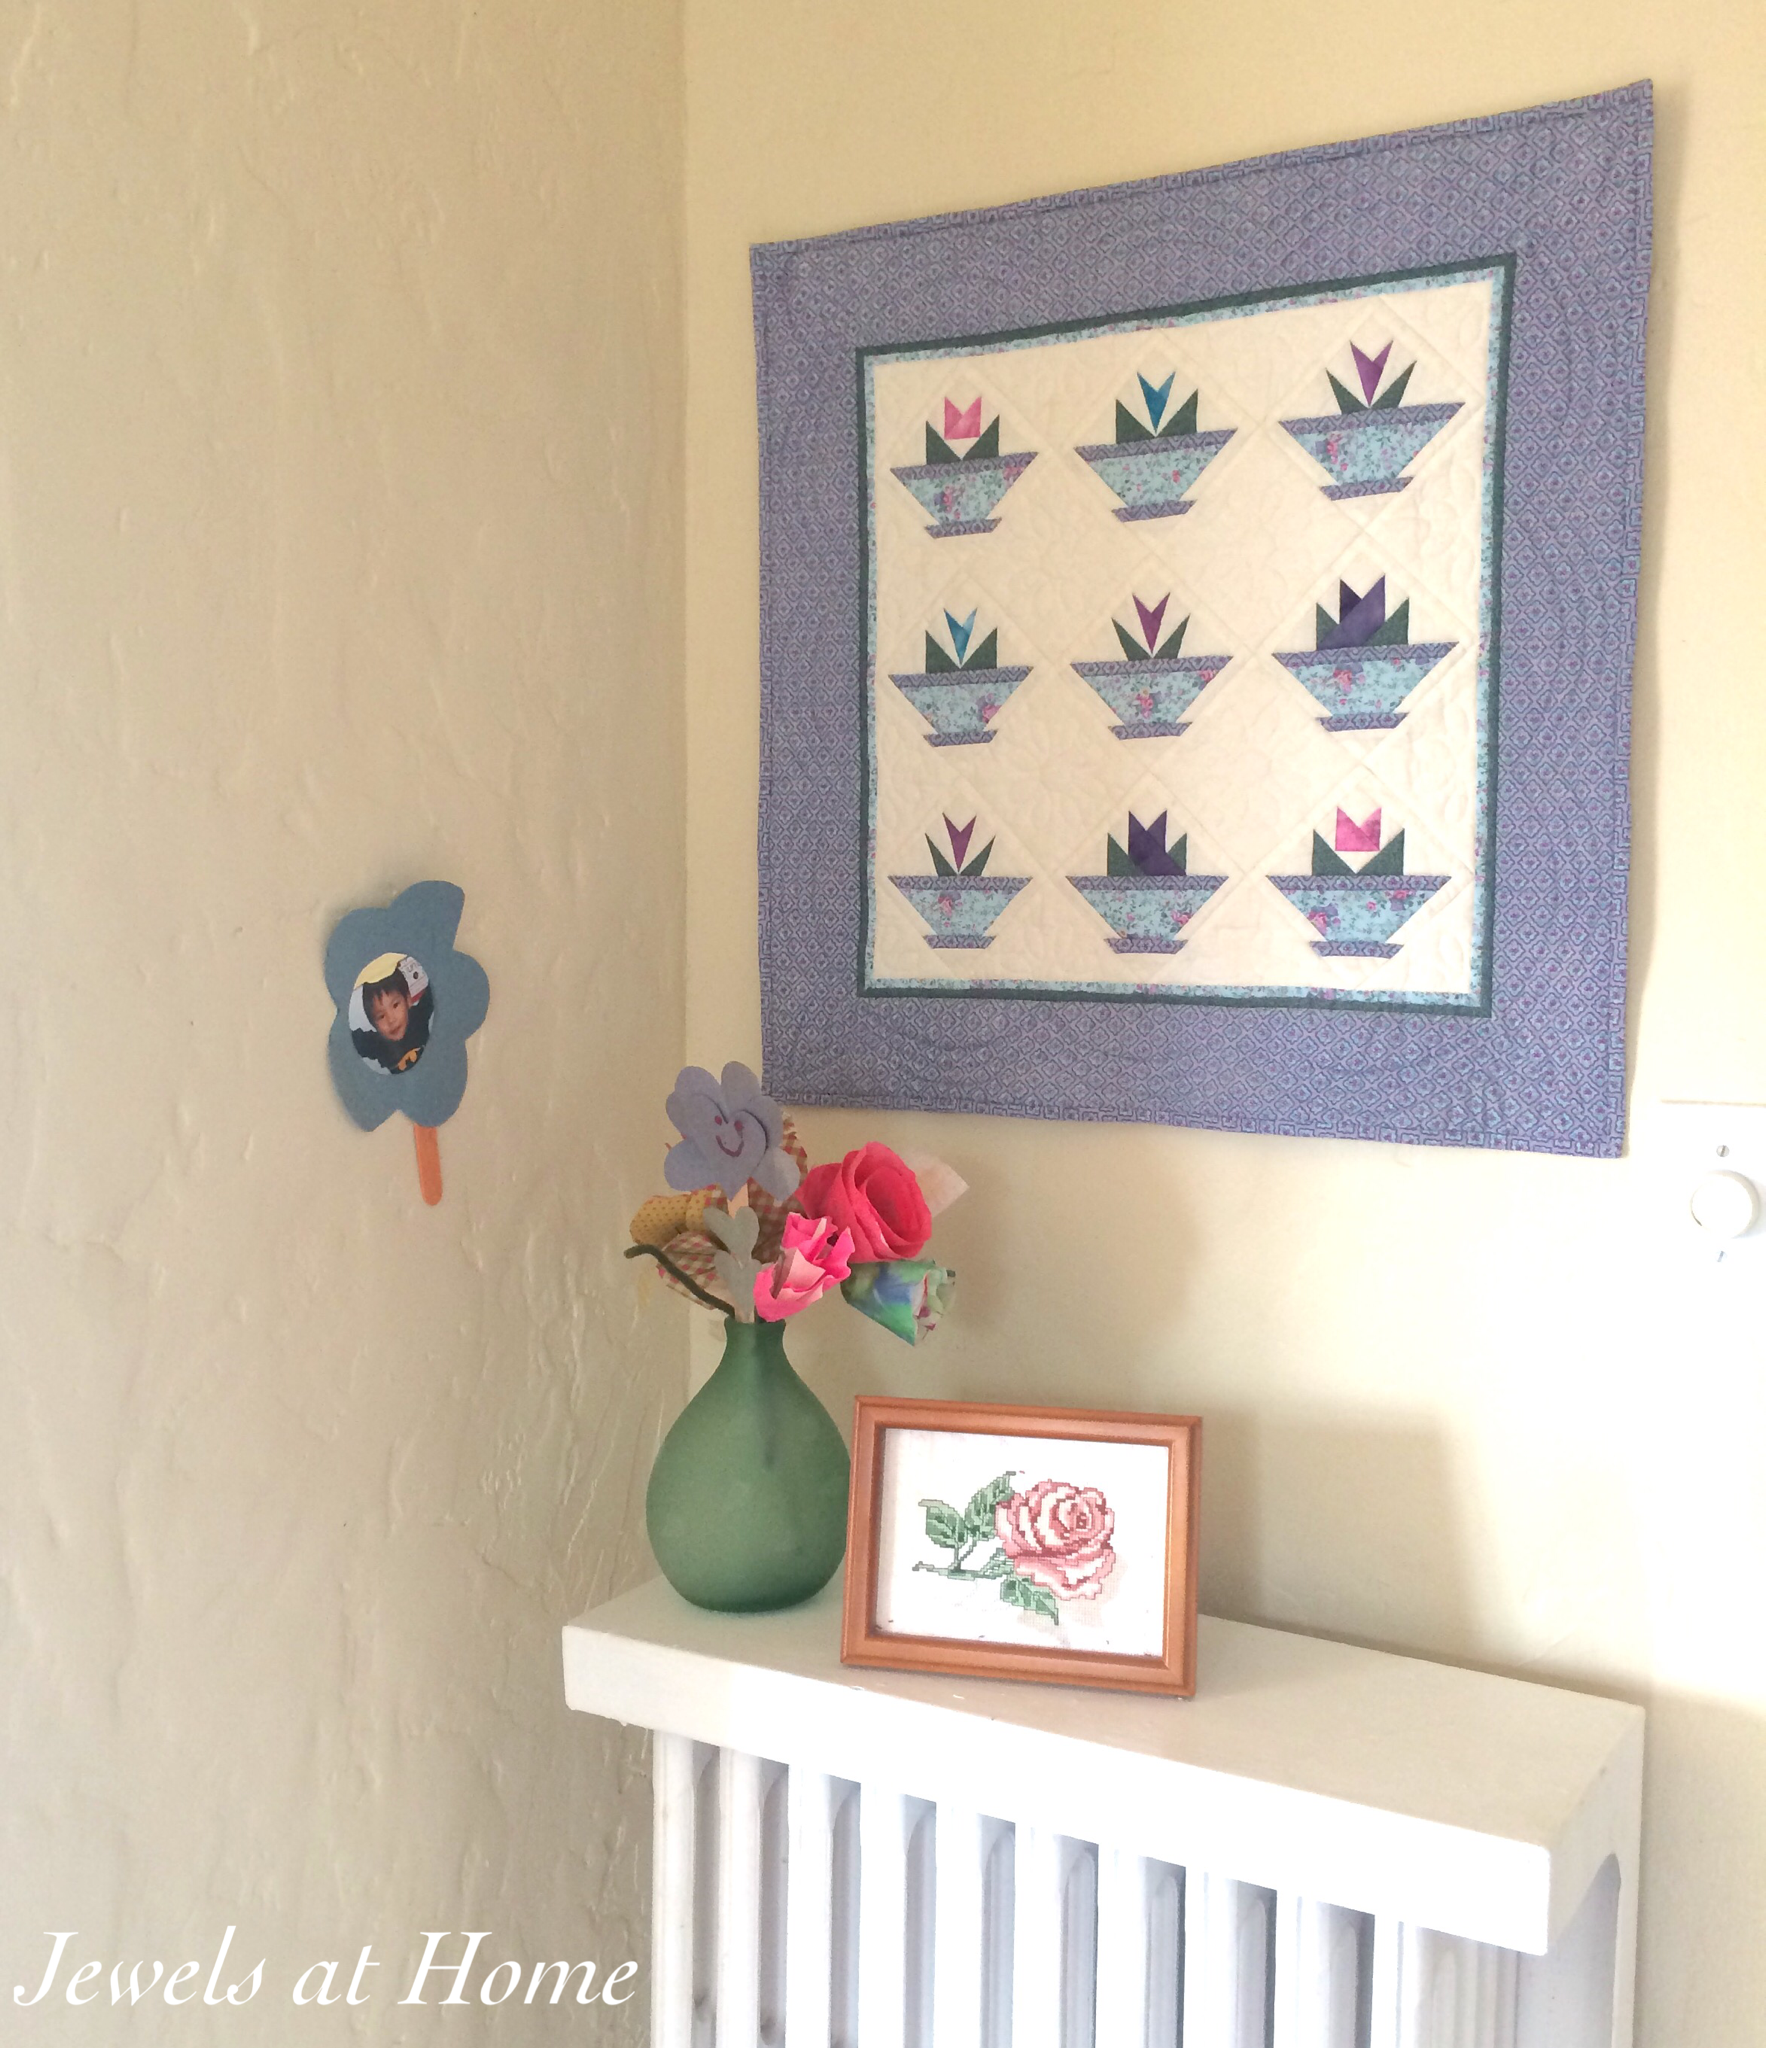
In another nook, I get inspiration from my wonderful family.  My mom made this quilt for my birthday one year.  The cross-stitch is from my sister-in-law, and the paper flowers are gifts collected over the years from my boys!

The Ultimate Craft Studio: Five Keys to the Perfect Creative Retreat | Jewels at Home


Ready for a final look around to see how all these elements come together?

The Ultimate Craft Studio: Five Keys to the Perfect Creative Retreat | Jewels at Home

The Ultimate Craft Studio: Five Keys to the Perfect Creative Retreat | Jewels at Home


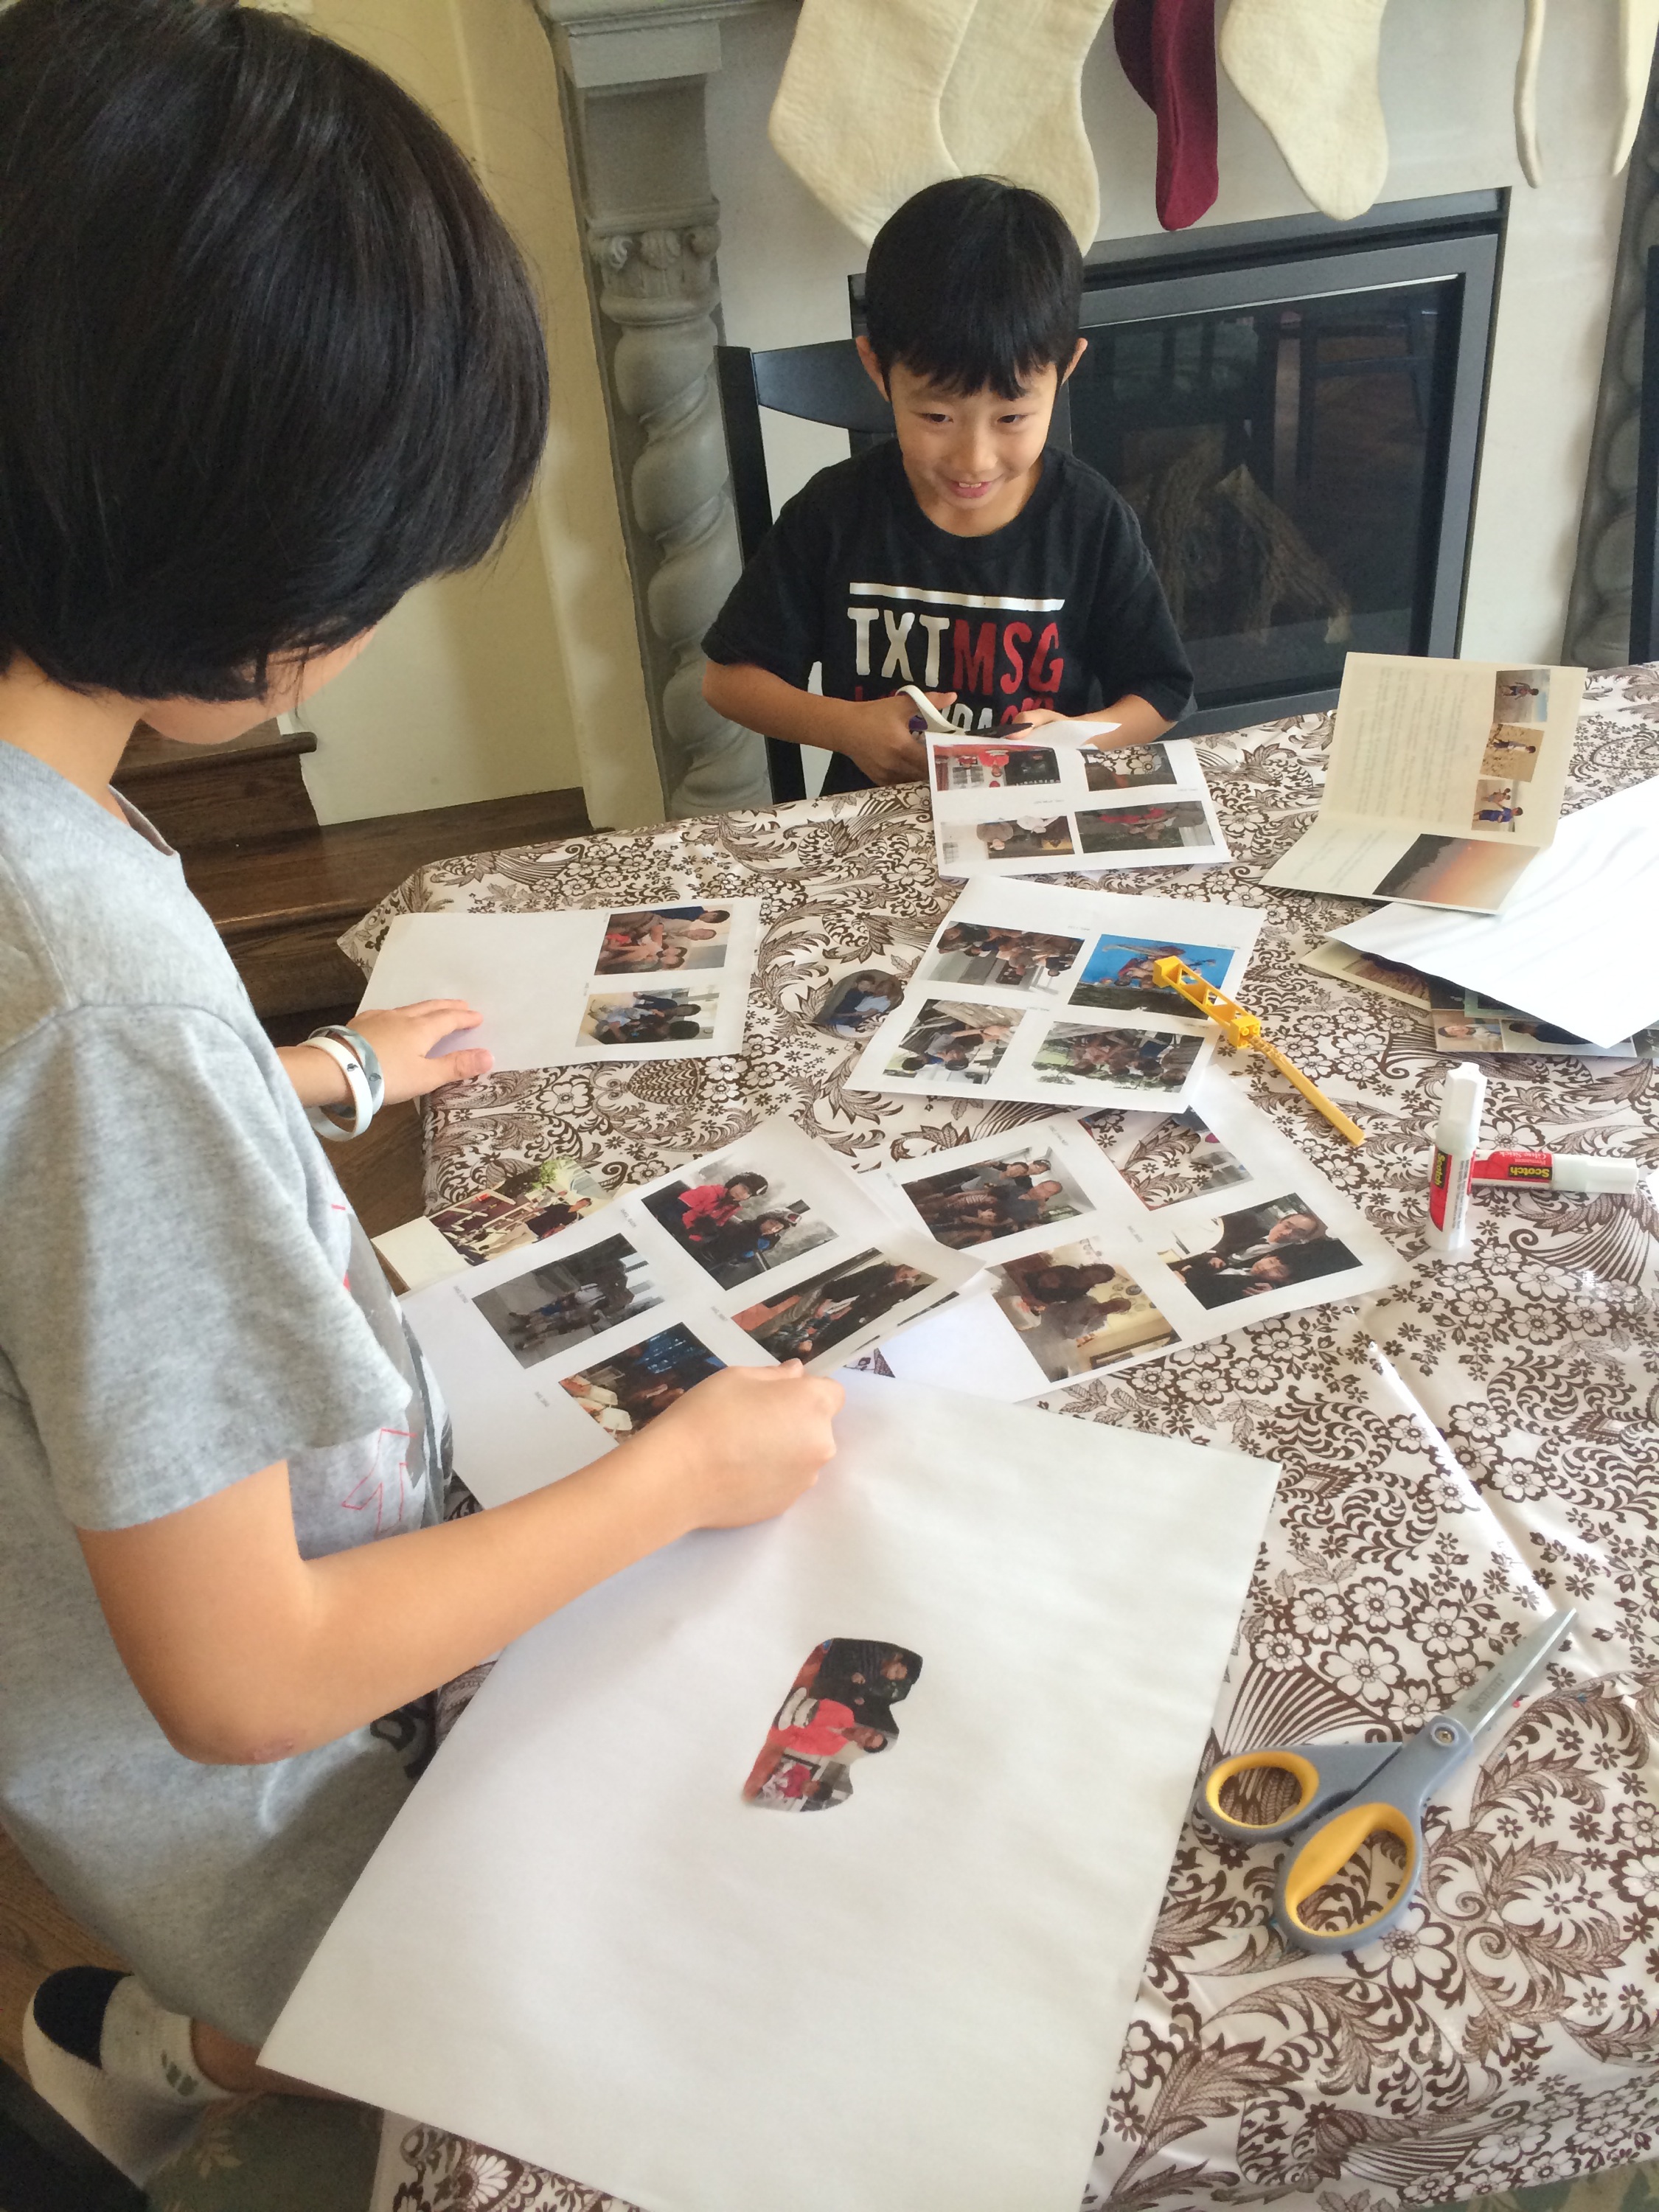
I am really, really in love with my workspace! Is there anything else I could ask for? Some more company! For Christmas, my oldest gave me a “coupon” for a day spent doing crafts together, and I am looking forward to that!

I’m also planning to start a “Creativity Circle” with some friends this year. I’m thinking we can have an activity each month – some girls’ nights in, some art shows, some classes. All of us are working professionals, moms, or both, and we could use some time to connect with our creative sides, and each other.

This is my studio, but I love curling up in other parts of the house, too.  Steve has an office in the basement, and for him, the quiet spot, sheltered from the hub-bub of the day, is just what he needs to get his work done.  If you don’t have the space in your home, or you need to separate home and work, there are lots of options for artists and entrepreneurs to join a shared work space like WeWork. Where do you like to work?

Wishing you a creative moment each day,

“Jewels”

Easy Upgrades That Make Your House a Home

For various reasons, Steve and I have ended up living in quite few different places over the years. While I can’t exactly say that I enjoy moving, there is definitely something exciting about a fresh space. I love finding creative ways to upgrade and decorate a place to make it feel like home.

While we’ve been through several smaller and larger homes since then, I was prompted to look back to our very first house by the folks at Urban Compass, a NYC-based company helping people find apartments in the city.  My little sis recently moved to Manhattan to study at Parsons (I’m so proud!!), so I know that in a competitive housing market like New York or San Francisco, you definitely need every advantage you can to find a place to call home. And every space, however grand or humble, needs some finishing touches to make it your own. Our first townhouse was no exception. This little place was stuck in the 70s when we found it, but I’m glad we were able to see and bring out its charm. This is where I first started finding my style and developing DIY skills that can be used in any space!

Looking back, there were a lot of little projects that we did throughout the house, but most of the transformation came down to a few easy tools you could use in your new space:

  • paint – update your home with colors you love
  • fabric – dress your windows and furnishings; replace doors in tight spaces
  • add molding – I built a special board and batten wall that serves double-duty by providing soundproofing for a shared wall

Paint

Our house was brown, brown, brown, when we moved in.  As a special touch, our garage door didn’t match the attached unit to our left (top picture below)!  I found a pretty gray-blue paint, and we re-painted all the trim on the house, including our neighbor’s garage door – proof that a little paint can go a long way in updating your home!

/home/wpcom/public_html/wp-content/blogs.dir/41c/34939861/files/2015/01/img_3749.png

Here’s Steve up on the rooftop (like Old Saint Nick!) transforming our dreary brown house into a charming cottage!

Paint! Easy Upgrades That Make Your House a Home | Jewels at Home

Paint went a long way on the inside of our house, too.  The top picture below is of our bedroom when we first moved in.  The walls were boring beige, and the windows had functional, but unremarkable, blinds. In the second picture, you can see the tranquil space we created with some light blue paint. More about those window valances and the molding… keep reading!

Add paint, curtains, and a board-and-batten wall with soundproofing, Easy Upgrades to Make Your House a Home | Jewels at Home

 Fabric

Our house had functional, if uninteresting, mini-blinds on all the windows. Rather than spend money changing them, I sewed fabric valances for all the windows, which gave them a finished and warm look.

Add paint, curtains, and a board-and-batten wall with soundproofing, Easy Upgrades to Make Your House a Home | Jewels at Home

Add paint, curtains, and a board-and-batten wall with soundproofing, Easy Upgrades to Make Your House a Home | Jewels at Home

A lot of starter homes are full of tight spaces. The little bathroom off of our bedroom had a rickety bifold door that made the tiny space even more cramped, so I removed it and replaced it with a curtain that matched the valances in the bedroom. A curtain would be great solution for a small laundry area, too. Bonus: I trimmed the bathmat and shower door in the same fabric!

Short on space? Replace a door with a curtain to make your home feel less cramped. Easy Upgrades to Make Your House a Home | Jewels at Home


Board and Batten with Soundproofing!

DIYers are familiar with tricks like adding molding to give character to a plain space. The wall between our bedroom and our neighbor’s was paper-thin (and we had the detailed notes left by our curmudgeonly neighbor to prove it), so when I added trim to this wall, I put sound-insulating foam behind the boards to give us both more peace and privacy. The thicker trim also left a little ledge for display.

You've seen the DIY board-and-batten tutorials. This one looks great and has a hidden function with soundproofing panels! Easy Upgrades to Make Your House a Home | Jewels at Home


I had a lot of fun walking down memory lane to put together this post, and I love that many of the projects I did years ago would work just as well in any home today.

Look at this picture I found of moving day! Gone are the days of fitting a futon and a few boxes into a little rental van. It was a lot of work to move ourselves, but we had the help of friends, and I do feel nostalgic looking back.

/home/wpcom/public_html/wp-content/blogs.dir/41c/34939861/files/2015/01/img_3730.jpg

I still smile looking back on this first home sweet home.  I love the projects we did to make it beautiful, and I hope you are feeling inspired to make your mark on your own space!

Add paint, curtains, and a board-and-batten wall with soundproofing, Easy Upgrades to Make Your House a Home | Jewels at Home

Sentimentally yours,

“Jewels”

Gifts Made by the Boys

The fact that I’m writing this when it is already Christmas morning in most parts of the world tells you what kind of crazy-busy December we had this year. I’m definitely looking forward to a few days of downtime with the family.

We don’t do a lot of shopping for Christmas. The adults in my family have generally agreed to not exchange gifts, and our kids get so much from their grandparents and aunts and uncles, that at most, we pick up one or two little things for them. However, on the night of December 23, I realized that I really wanted to have something to give to my dad and brother-in-law who are both celebrating Christmas with us this year. There was absolutely no way I was going to go near a mall on Christmas eve, so I wracked my brain and scoured my craft supplies to come up with a few meaningful projects that we could make at home.

We reprised the mugs that we made for Steve’s birthday and Father’s Day last year, and the boys also made these fun picture collages. We enjoyed going through old pictures to find our favorites, and I also added some extra copies of Christmas cards from the last few years. The boys did all the cutting and gluing themselves, as evidenced by the fact that there are duplicates right next to each other and other quirky touches. I think that our family is going to love these!

Gifts made by the kids: Hand-painted mugs | Jewels at Home

Gifts made by the kids: Family photo collages | Jewels at Home

Gifts made by the kids: Family photo collages using old Christmas cards | Jewels at Home

And for me, being able to stay in on December 24 was the best present of all.

Red and White Christmas | Jewels at Home
Merry Christmas!
“Jewels”

Modern White Christmas Village DIY

It’s no secret that I love decorating for Christmas. Even so, I’ve always held back a little from building a miniature Christmas village. Maybe it’s the expense, or the worry that my kids would break off the small parts, or the thought that if I took that step, there would be nothing left to distinguish my house from a Christmas museum. Well, here goes nothing!

I had already been playing around with my head with ways to DIY a village, possibly out of cardboard or paper, when my coworker and friend Beth found these adorable miniature wooden birdhouses. We used them for a group holiday project last year, and I turned mine into this pretty monochromatic village.

In addition to the birdhouses, I found a variety of unfinished wood and houses at the craft store. These were really inexpensive, ranging from about $1 to $10.

I did a few modifications, like removing the strings from the birdhouses and adding some embellishments with popsicle sticks and other wood pieces.

I painted the houses in all white for last year’s all-white Christmas, but I’m welcoming back some color for a red and white theme this year!

You can add tiny wreaths, doors, and as little or as much detail as you want.

Modern White Christmas Village DIY | Jewels at Home

Modern White Christmas Village DIY | Jewels at Home

Modern White Christmas Village DIY | Jewels at Home

Modern White Christmas Village DIY | Jewels at Home

Modern White Christmas Village DIY | Jewels at Home

Modern White Christmas Village DIY | Jewels at Home

Modern White Christmas Village DIY | Jewels at Home

Modern White Christmas Village DIY | Jewels at Home

Modern White Christmas Village DIY | Jewels at Home

Modern White Christmas Village DIY | Jewels at Home

Modern White Christmas Village DIY | Jewels at Home
Walking in a Winter Wonderland…

“Jewels”

DIY Hand-Stamped Tea Towels – Teacher Holiday Gifts

“So….,” says Steve with studied casualness, “Um, I noticed a lot of new towels in our house…?”

My awesome hubby gets a lot of points for calmly observing many the craft obsession. Dozens of beaded snowflakes? Check! Table full of dip-painted utensils? Check! Washing machine filled with felting? Check! He rarely seems phased, so I know this must look particularly strange.

I’m stamping tea towels to give as holiday gifts for our teachers and coworkers this year. And there are a lot of them!

DIY Hand-Stamped Tea Towels | Jewels at Home

Supplies:

Instructions:

  • Prewash and iron the dish towels
  • For the stamps, spread some ink on a plate or flat surface, spread it with the brayer, and then roll onto your stamp and stamp the fabric
  • For the cookie cutters, you can dip the cookie cutter into the paint directly
DIY Hand-Stamped Tea Towels | Jewels at Home

Fun citrus print! I made this stamp by sticking adhesive foam to the wooden block from another stamp. I spread the paint onto a flat surface with a brayer and then rolled it on to the stamp.

DIY Hand-Stamped Tea Towels | Jewels at Home

  • Hang the towels to dry. This drying rack came in handy!

DIY Hand-Stamped Tea Towels | Jewels at Home

DIY Hand-Stamped Tea Towels | Jewels at Home

DIY Hand-Stamped Tea Towels | Jewels at Home

  • I read a lot of ideas about how to heat set the paints to make the colors last. I ended up letting them air dry for several days, running the towels on the hottest setting in my dryer for an hour and then ironing to finish them. I tried using the oven to heat set, because the ironing was so tedious, but a few towels got scorched, so I would try that with caution.

DIY Hand-Stamped Tea Towels | Jewels at Home

DIY Hand-Stamped Tea Towels | Jewels at Home

DIY Hand-Stamped Tea Towels | Jewels at Home

DIY Hand-Stamped Tea Towels | Jewels at Home

DIY Hand-Stamped Tea Towels | Jewels at Home

DIY Hand-Stamped Tea Towels | Jewels at Home

DIY Hand-Stamped Tea Towels | Jewels at Home

DIY Hand-Stamped Tea Towels | Jewels at Home

DIY Hand-Stamped Tea Towels | Jewels at Home

I love how our new towels look in our new kitchen!
DIY Hand-Stamped Tea Towels | Jewels at Home

Look who joined in the fun!
DIY Hand-Stamped Tea Towels | Jewels at Home

And off we went to play Santa!
DIY Hand-Stamped Tea Towels | Jewels at Home

I’d love to try some more designs soon. Check out these other cute stamps from Yellow Owl Workshop!

Yellow Owl Workshop Mushroom Snail Stamp Set
IMG_2963.PNG

Yellow Owl Workshop Apple Honeybee Stamp Set

IMG_2965.PNG

Yellow Owl Workshop Le Menu Stamp Kit
IMG_2964.PNG

Merry Christmas and Happy Holidays!

“Jewels”

Overlapping Circles Tray in Blue and Silver

A while back, my friend Ari got the inspiration to paint decorative trays, and I caught the bug. She finished painting her tray some time ago, and it turned out beautifully with gold spray-painted stripes. I definitely took longer to finish my tray, but at last, it’s done!

Elegant overlapping circles painted tray in silver and blue | Jewels at Home

The inspiration for my latest project was actually a tray that Ari found after I wrote my earlier post on ideas for decorating trays. This gorgeous Circles Silver Round Mirror made by Beaux Maison and was my inspiration piece!

Circles Silver Tray

Circles Silver Round Mirror Tray. This is a beautiful inspiration!

I love the pattern and silver glow, which I thought would be perfect for an old round tray I had lying around. My original tray was from Target, and while I love the shape and the pattern of the bamboo, it had nicks and scratches in the finish, and the color doesn’t work with our current living room.

The tray had a very glossy finish, so I started by sanding it with a coarse (100 grit) sandpaper and using heavy-duty Zinsser Bulls Eye Primer.

I could have painted the tray in matte and glossy silver paint, to come closer to the Beaux Maison version, but I thought that might be a bit dressy for our living room, so I used a base of pale blue paint. The leftover can of Swept Away by Benjamin Moore has worked for several other projects already, like these painted screens.

Making a contact paper stencil:
To get the overlapping circles design, I found a simple graphic by searching the internet for images. This pattern actually came from a picture of a doormat!

I enlarged it and printed several copies to fit the large tray. After joining the pages together, I taped the whole template to a piece of contact paper. I then used a craft knife to cut out the design. This took a long time, but it made a good activity for a quiet evening, or should I say many quiet evenings!

When it was cut out, I used the stencil with some silver craft paint and created the design.

To finish the project, I applied several coats of a clear spray finish.

Elegant overlapping circles painted tray in silver and blue | Jewels at Home

Elegant overlapping circles painted tray in silver and blue | Jewels at Home

Elegant overlapping circles painted tray in silver and blue | Jewels at Home

Elegant overlapping circles painted tray in silver and blue | Jewels at Home

I’m still trying out ways to style this pretty addition to our living room. What arrangements do you like?

Elegant overlapping circles painted tray in silver and blue | Jewels at Home

Elegant overlapping circles painted tray in silver and blue | Jewels at Home

Elegant overlapping circles painted tray in silver and blue | Jewels at Home

Yay! Very happy to have this one off the project table and into the living room! Just in time for an icy winter holiday theme?

“Jewels”

“A” – You’re Adorable – Baby Shower Alphabet Crafts

A bit of Canadiana for you – Sharon, Lois, and Bram have the greatest kids’ albums – stuff you can totally get into as a parent, and if not, we’ll you didn’t hear it here. But really, please check them out. One of my favo(u)rites is actually a popular song from the 1940s, “A – You’re Adorable.”

You can listen, while you check out this sweet project we did for a baby shower last month. Since this was my friend Nicola’s second baby, we wanted a simple event, but of course, there had to be a craft project!

For baby E’s sister’s shower, we decorated onesies. For baby E, I gathered letter shapes, and we created an eclectic alphabet to decorate the room the sisters will share.

I loved seeing all the creative ideas, including some creations by the under-three set.

Here are some of the techniques we used:

  • Paint – we discovered some of our friends had a lot of talent!
  • Yarn – wrapping a letter took a little patience but turned out charming. I had fun with the multicolor yarn.
  • Scrapbook paper – you can paint the sides first; then add a coordinating paper. So many possible variations with this!
  • Craft tape – I couldn’t resist this cute tape with bicycles, since our friends are avid cyclists.

Here are some close-ups of the same letters I made before the party:

Baby shower idea: decorate letters to create a one-of-a-kind alphabet for baby's nursery! Jewels at Home

Creative baby shower idea: guests decorate letters of the alphabet to create a beautiful project for baby's nursery | Jewels at Home
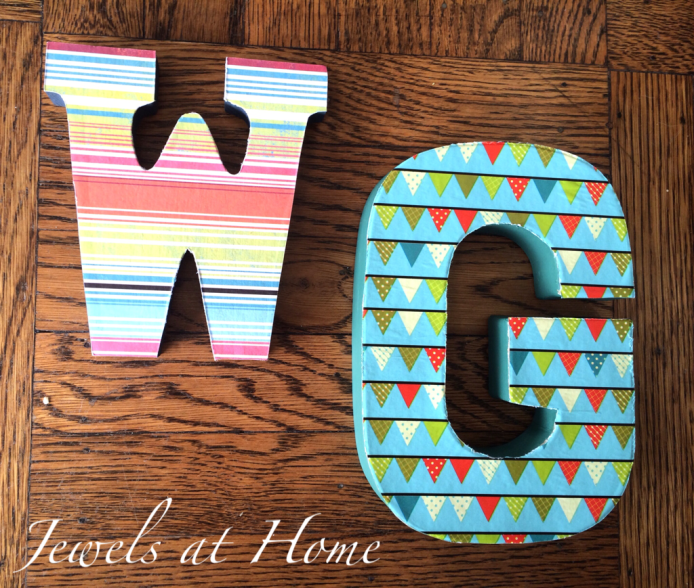
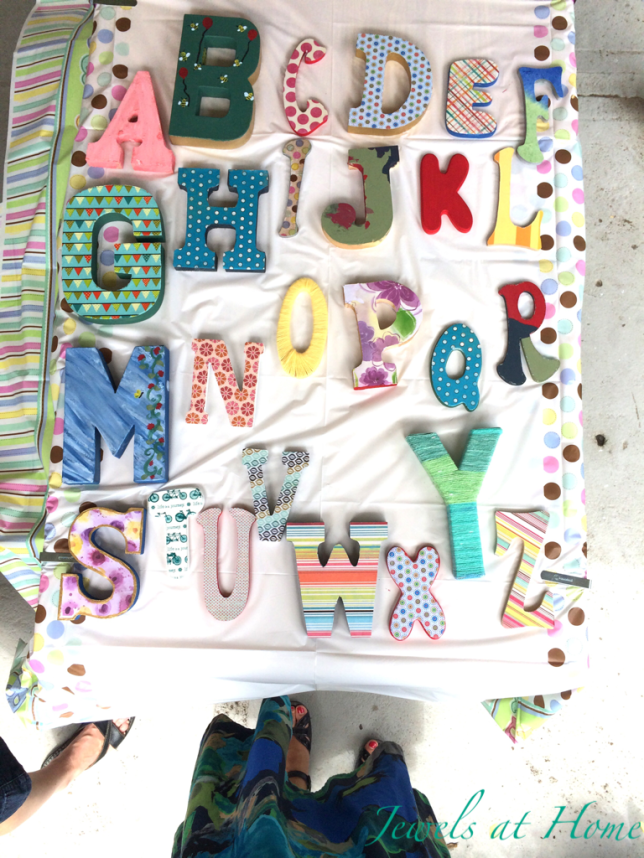
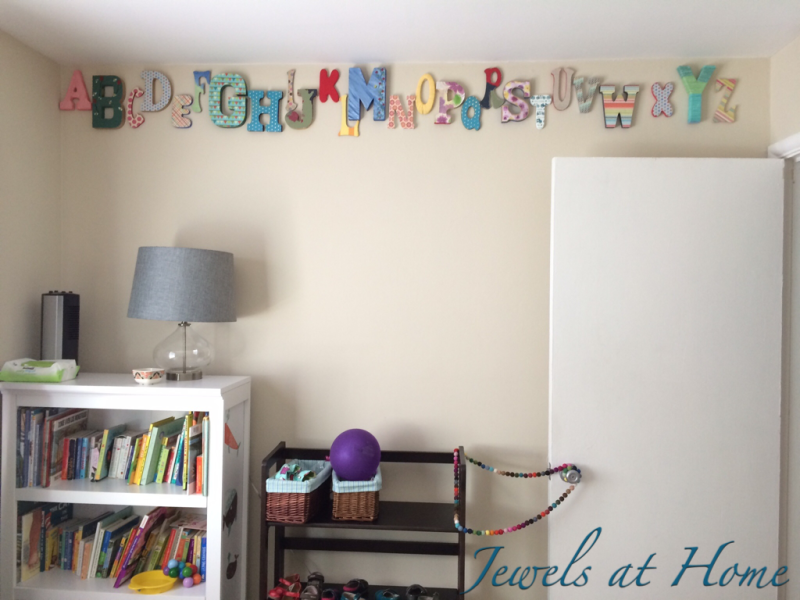
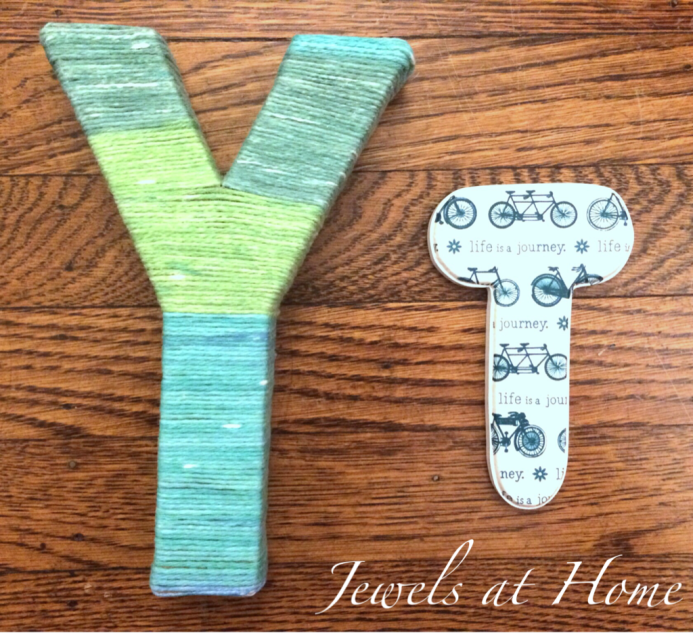
And here is our finished alphabet!

Creative baby shower idea: guests decorate letters of the alphabet to create a beautiful project for baby's nursery | Jewels at Home

Creating the art made for a fun and relaxing afternoon!

Creative baby shower idea: guests decorate letters of the alphabet to create a beautiful project for baby's nursery | Jewels at Home

Baby shower ideas: decorate the letters of the alphabet to decorate baby's nursery! Jewels at Home
And, I got to come visit when the letters were mounted on the wall. I love how it looks!

Baby shower idea: decorate letters to create a one-of-a-kind alphabet for baby's nursery! Jewels at Home

I love watching my boys grow up, but you can never get enough of a new baby.  One of my favorite places to find special gifts for everyone from babies to big kids is the amazing sales at Zulily.com!


Congratulations to the beautiful family on sweet baby E’s arrival!

“Jewels”

Foyer Table Design Solution

We’re in the early stages of planning a kitchen remodel, and we interviewed several architects. One, whom we didn’t end up hiring, became somewhat fixated with this large picture window in our living room. It’s the first thing you see when you walk into our house, and admittedly, the view is mixed. You can glimpse the western sky at the top, which is often stunning at sunset, but much of the view looks out on our neighbors and also on our own cracked concrete driveway, including parked cars and a basketball hoop. This particular architect couldn’t help himself from repeatedly bemoaning this “tragic” window. He coyly promised a solution, but I guess he’ll never get the chance to tell us about it.

Meanwhile, here’s my decorating solution. I love how this table makes a pretty focal point that screens and distracts from the less picturesque parts of this view.  I realize it’s not technically in our foyer, but the table serves a similar purpose of dressing up our entry.

A vignette with pretty table and chairs | Jewels at Home


The table is actually a small dining table we had.  Without the leaves, it works as a large display table in this space and doubles as a serving area for parties.  The Craftsman style pedestal looks pretty standing in front of the window.  The chairs are made over from a craigslist find and deserve their own post!

Pretty table and chairs vignette in a Chinoiserie style | Jewels at Home

I can’t say I’m not a little curious what our sassy visiting architect had in mind, but for now, I’m very happy with the way this little vignette dresses up our living room while screening the less attractive parts of our view.

Table and chairs vignette in a sunny window | Jewels at Home


More on those dreamy chairs soon!

“Jewels”


Chippendale Chair Makeover

I’m a little crazy for these chairs. As in, I told Steve that if I go before him, he should feel free to get rid of most of my stuff, but could he please consider keeping these chairs?

I have a faux bamboo fetish that includes these Chippendale chairs. They are a good match for the chinoiserie theme in our living room. I had been scanning craigslist for a while when I scored these great chairs. They weren’t exactly cheap, definitely not free like the Queen Anne chairs I found, but they were still a good deal for well-made pieces in this classic style.

I still have four side chairs waiting for their Cinderella moment, but the three armchairs in this set are ready for the ball:

Sharp-looking Chippendale chair makeover with glossy black paint and a geometric seat fabric | Jewels at Home

Sharp-looking Chippendale chair makeover with glossy black paint and a geometric seat fabric | Jewels at Home

https://jewelsathome.com/2013/03/26/living-room-tour/

https://jewelsathome.com/2013/03/26/living-room-tour/

Sharp-looking Chippendale chair makeover with glossy black paint and a geometric seat fabric | Jewels at Home

Are you looking for your own chairs to transform? I’m excited to share that my friend Ari launched a slick new furniture re-sale site over at www.revolvingdecor.com. Check it out to participate in a curated online marketplace for great furniture finds!

“Jewels”

Christmas Mantel in Wintery White

The mantel is a natural focal point for Christmas decorating.  After all, that’s where the man in the red suit makes his entrance!

This year’s mantel matches the rest of our house, with white decorations setting a wintery scene.

Christmas mantel that lasts all season long with a wintery white theme | Jewels at Home

Stockings

These felt stockings in a lovely natural cream felt on sale at West Elm. I added felt circles with our initials to personalize them.

Simple felt stockings with initials.  Christmas mantel in wintery white | Jewels at Home

I set up some of my feather boa Christmas tree and felt Christmas trees I made last year.Winter wonderland.  Christmas mantel in white | Jewels at Home

Winter wonderland.  Christmas mantel in white | Jewels at Home

These little wooden houses are actually a work in progress. I’ve always wanted to have a Christmas village display, but I wanted to do something a little out of the ordinary. When my manager at work found these little bird houses at our local craft store, I knew they would be the foundation for my village. So far, I’ve painted them white. I want to add some wood embellishments, but we had some company this weekend, so I put up them up as-is. I’ll show you the finished village when I’m done!

Winter wonderland.  Christmas mantel in white | Jewels at Home

Winter wonderland.  Christmas mantel in white | Jewels at Home

By night, the candles light up our little winter village!

Winter wonderland.  Christmas mantel in white | Jewels at Home

Winter wonderland.  Christmas mantel in white | Jewels at Home

Winter wonderland.  Christmas mantel in white | Jewels at HomeWinter wonderland.  Christmas mantel in white | Jewels at Home

Winter wonderland.  Christmas mantel in white | Jewels at Home

Wishing you happy holidays!

“Jewels”