
So, my weakness (talent?!) for finding home decor on the street is well-established. Remember when I made over this cute Chinese end table? Well, I was walking over to meet a friend for lunch today, and I saw this mirror … Continue reading
So, my weakness (talent?!) for finding home decor on the street is well-established. Remember when I made over this cute Chinese end table? Well, I was walking over to meet a friend for lunch today, and I saw this mirror … Continue reading
I fell in love with fiddle leaf fig trees a few years ago. I bought three plants that first year, and since then, I have propagated SO many. Most went to new homes with my friends, and a few were added to my collection. A few of my trees have gotten SO big, that I wanted to try propagating by air layering. I’m excited to share this technique with you, and I’ll also put links at the bottom of this post to all my other posts on pruning, propagating, caring for fiddle leaf fig trees!

When I have previously propagated new plants off my fig trees, it was by cutting off 2-3 leaves at a time and putting them in water until new roots formed (all the details in this other post). This works quite well, but you can only make plants from small cuttings, because they need to survive until the new roots form. Air layering is great for propagating larger branches, and while it takes a little patience up front, you end up getting a mature new plant much faster!
The principle behind air layering is that you set up conditions for your plant to form new roots, while it is still attached to the original plant.
Here’s what you’ll need:
Here’s how to do it:
Choose the section of the plant that you want to eventually cut off for a new plant. I tried this with approximately 2-foot section of my biggest plant – it was hitting the ceiling! It went really smoothly, and I’m now trying with a 3-foot section.
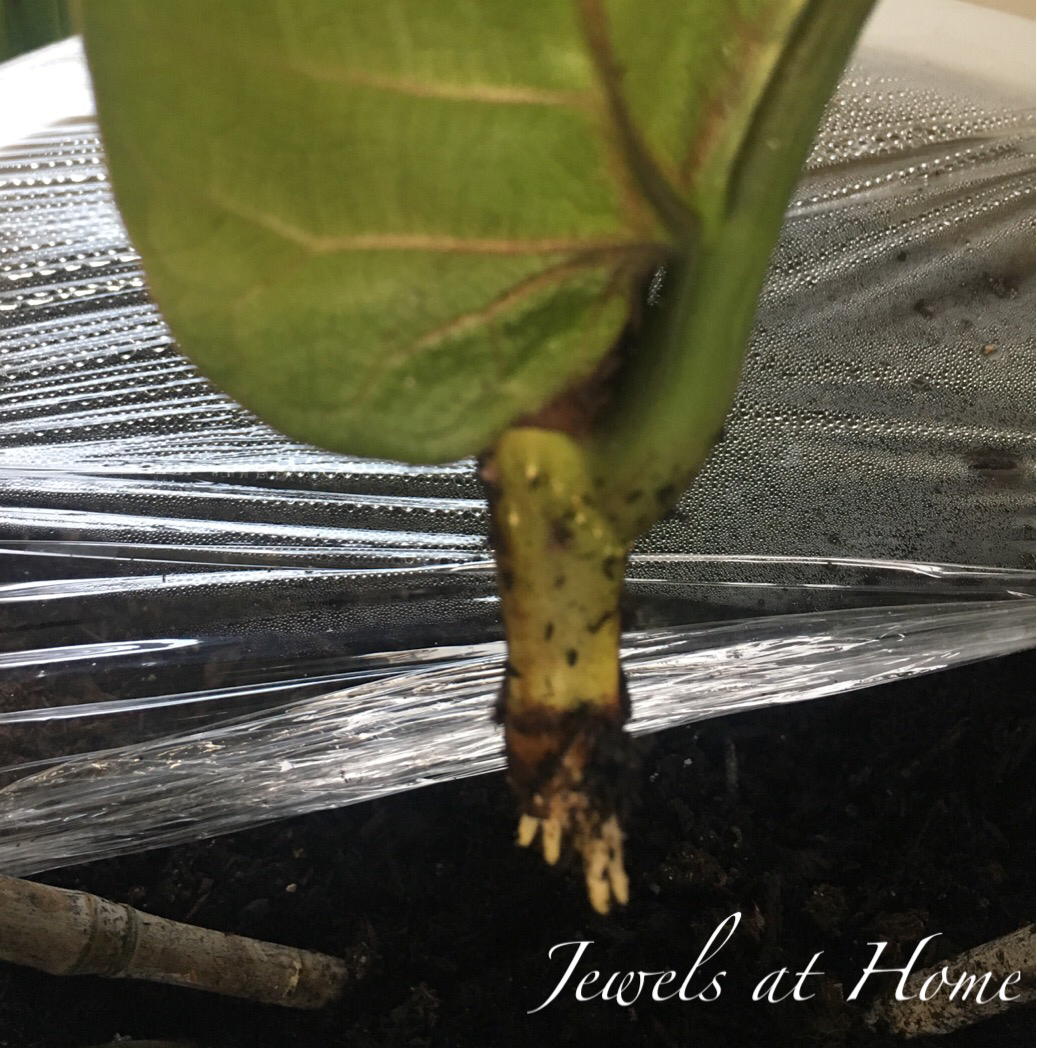
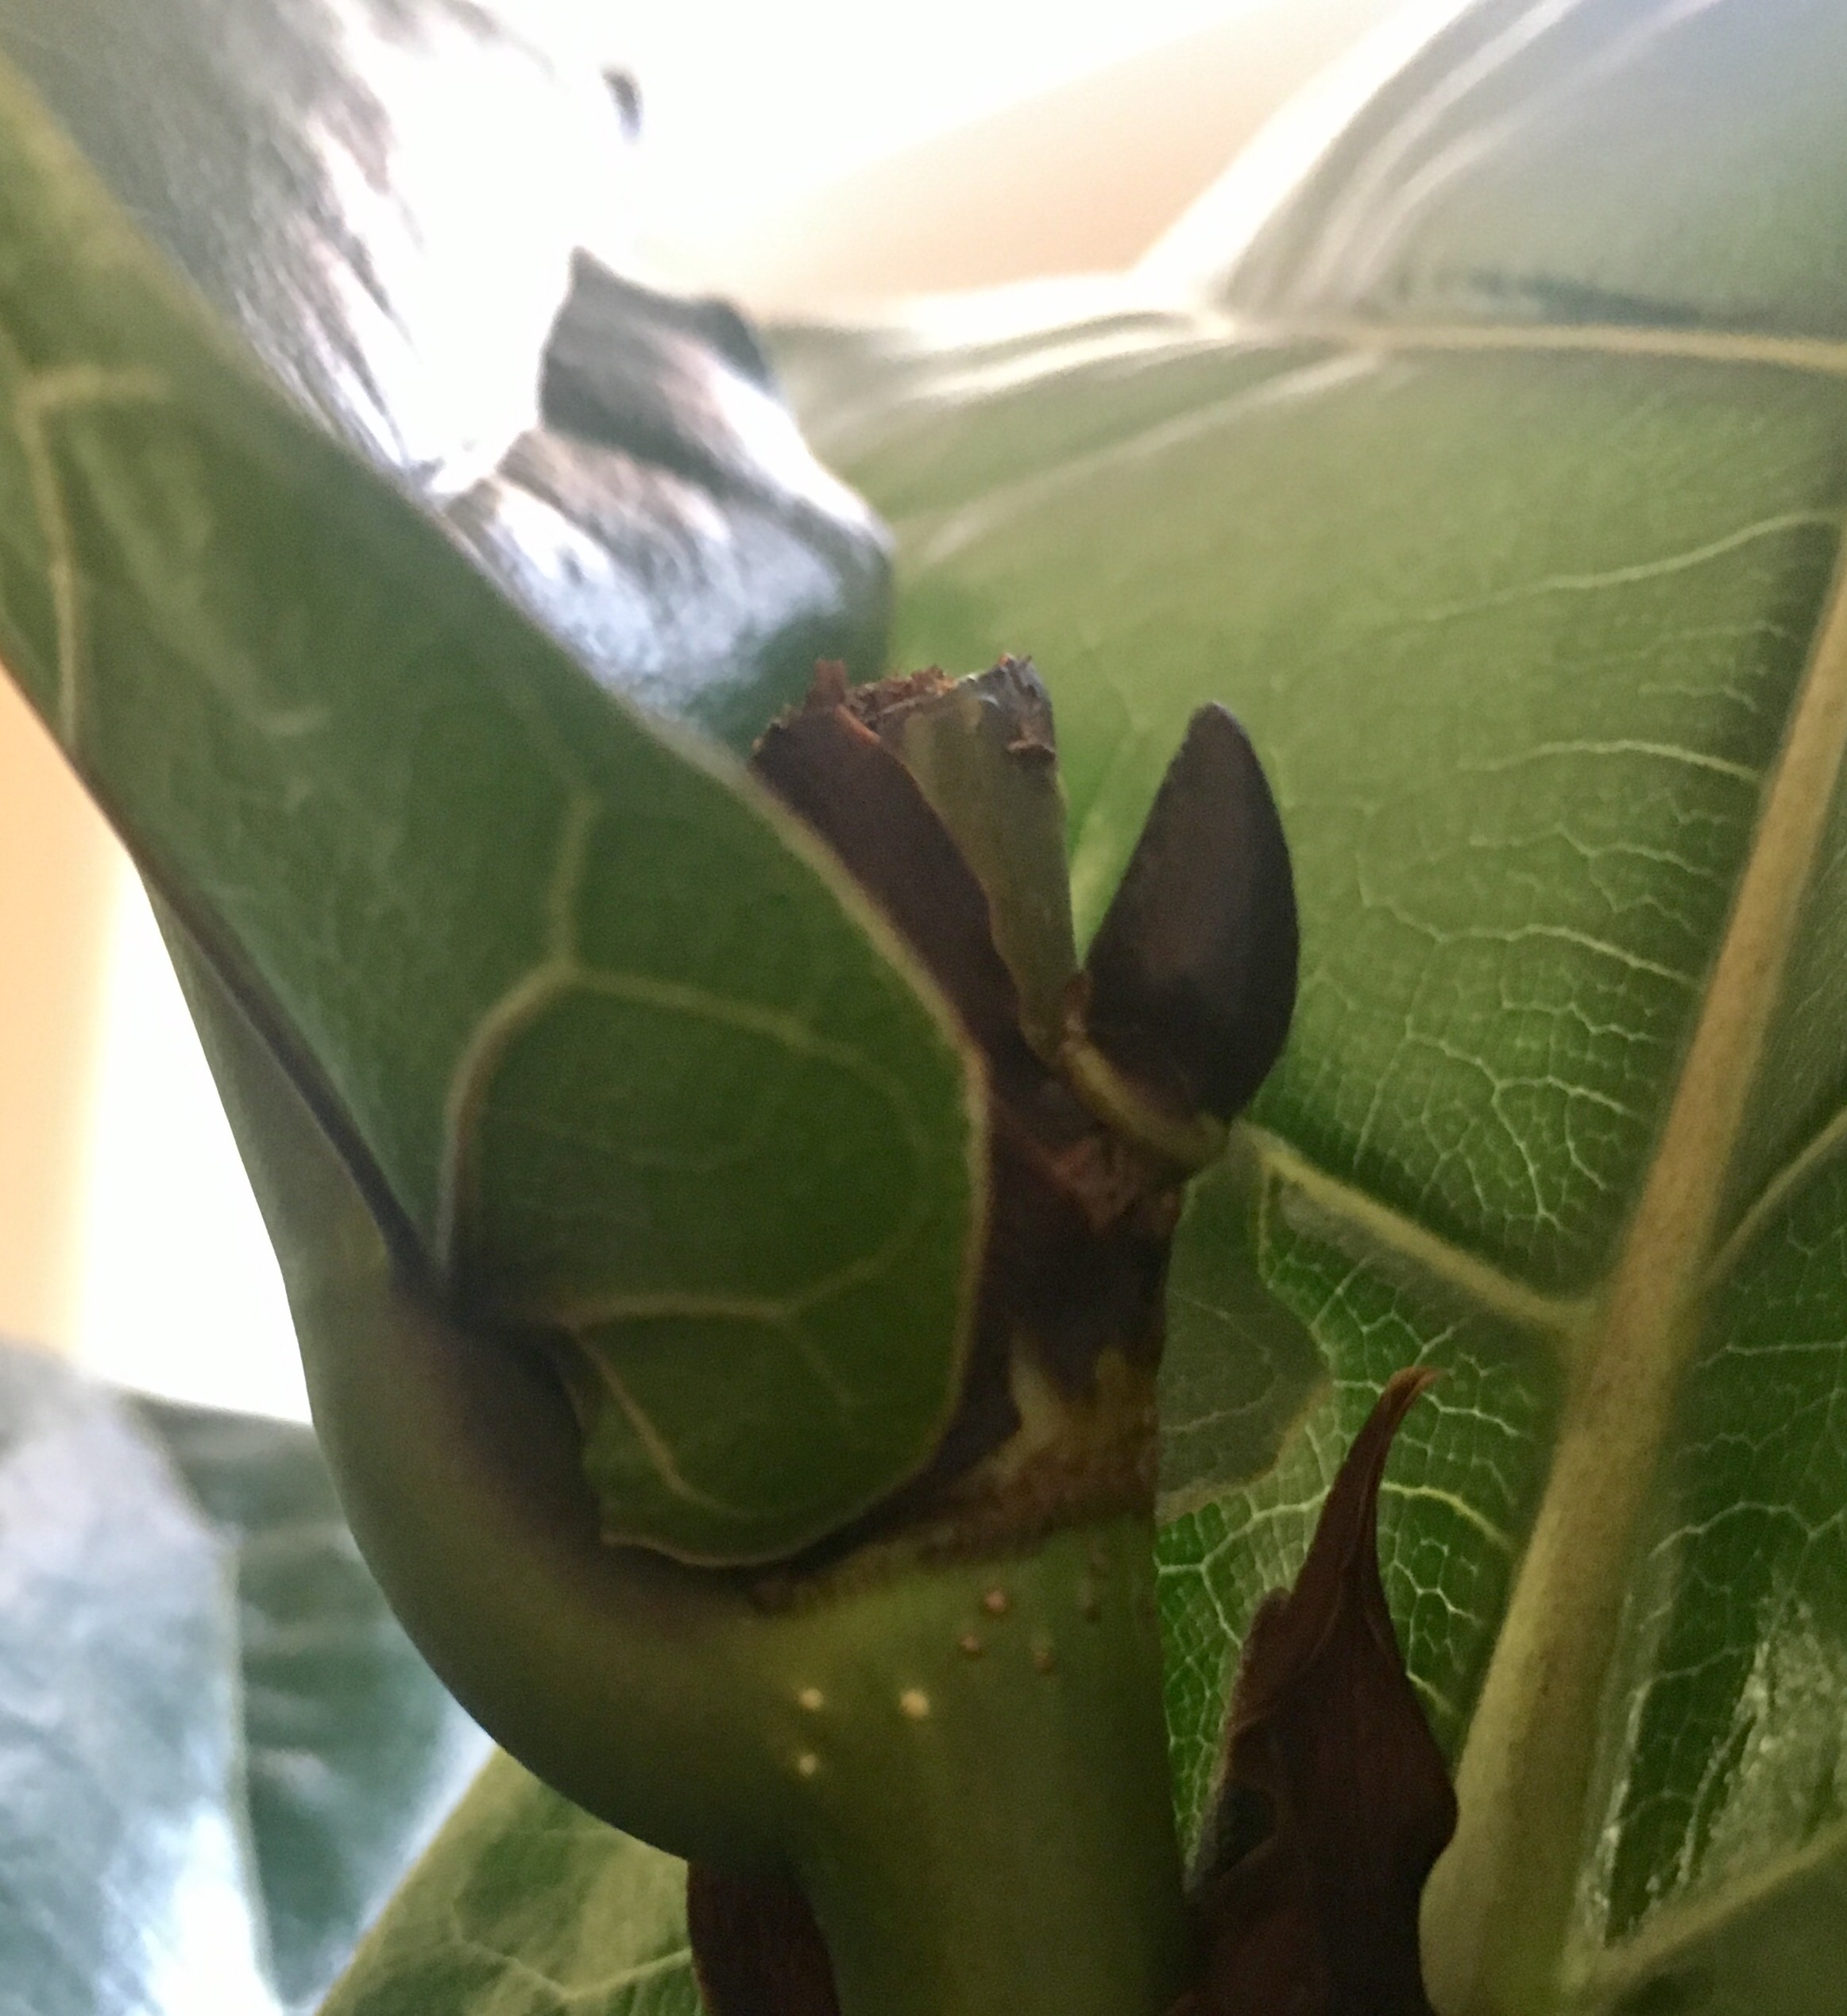
At the base of what will be your new tree, remove a leaf or two to create an open section of stem. Use a knife or vegetable peeler to remove the top layer of the stem – you want to remove the bark and the darkest green layer, but leave a little green and the white section of the stem. This will allow nutrients to continue to flow up into your plant, while it forms roots from the outside of the stem. See the picture on the left below:
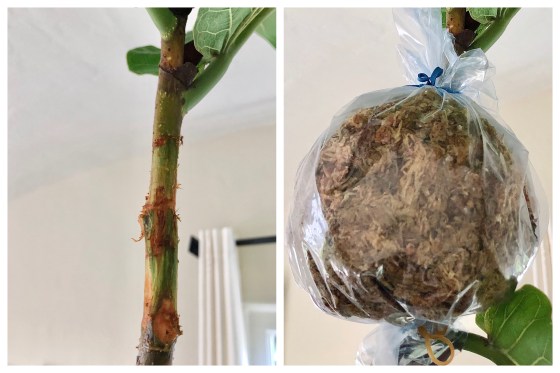
Next, spread some rooting hormone on the bare stem.
Wrap your plastic around the bottom of the bare stem and secure with string or elastic.
Pack wet sphagnum moss into the pouch you have formed and secure the top with string or elastic (see right picture above)
Right around two months, I saw the first roots inside my ball of moss. Within three more weeks, the moss ball was full of roots!

Once I started seeing roots, I did check the moisture level of the moss and add water every week or so.
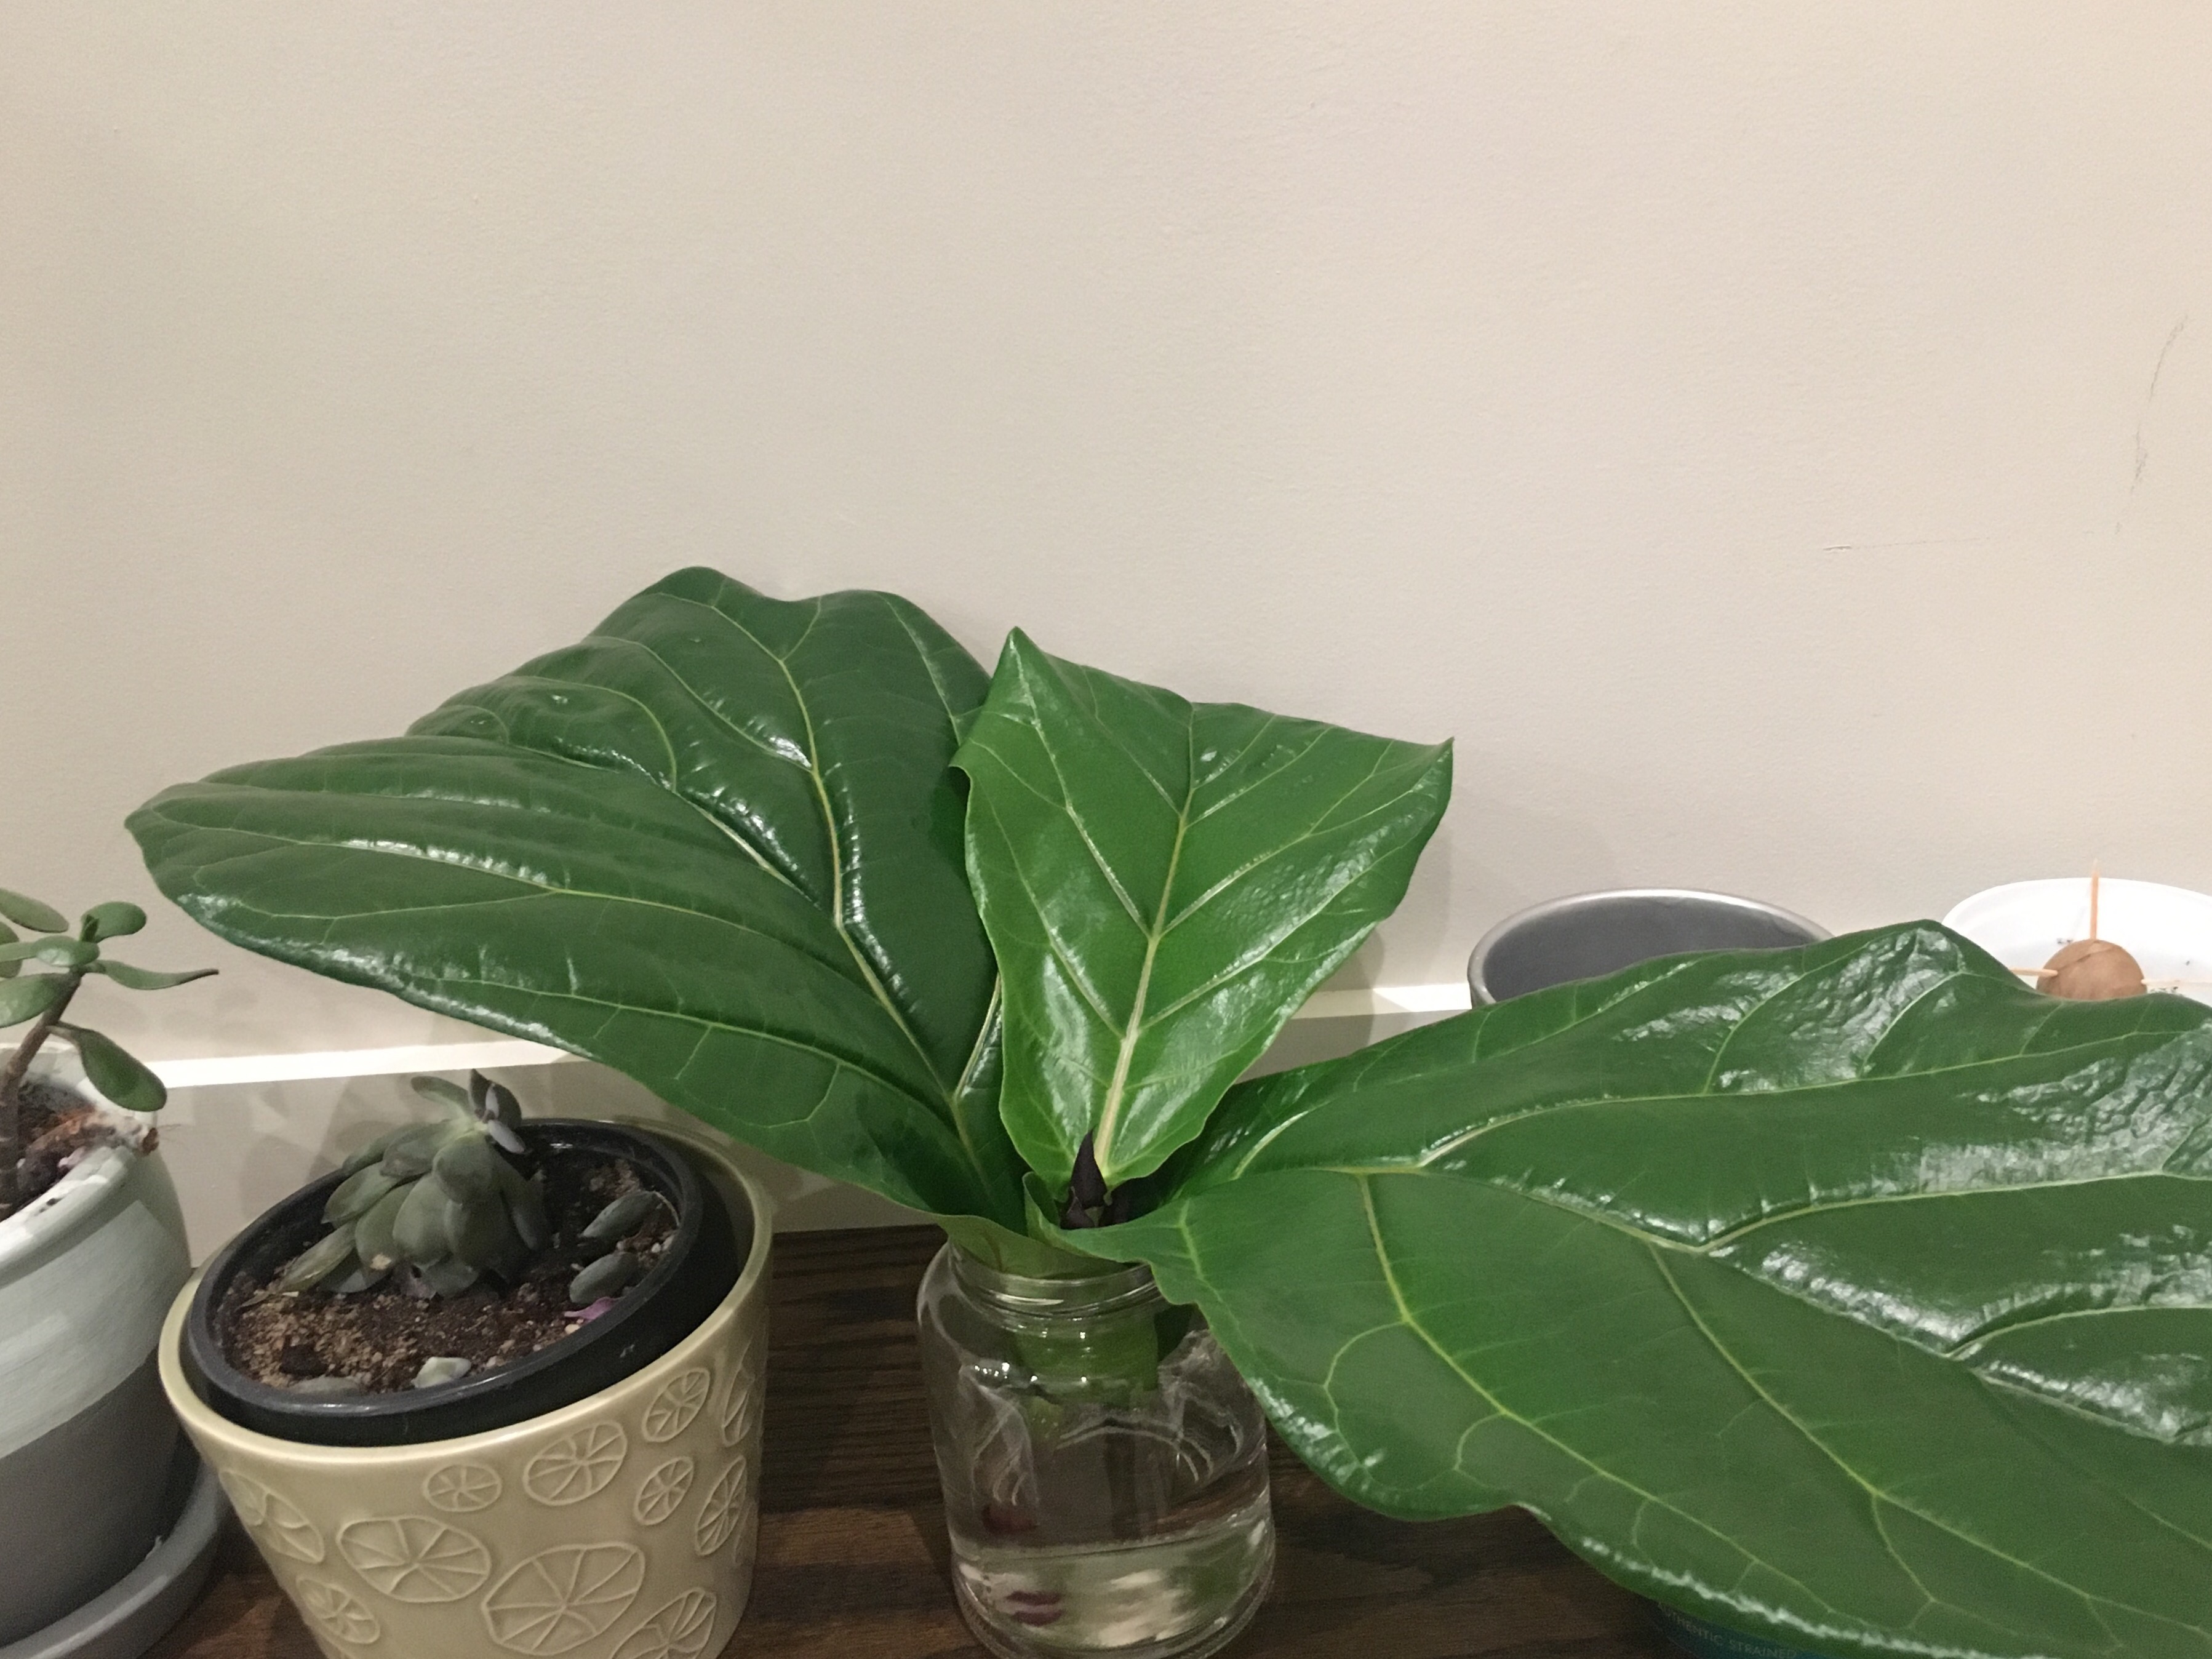
When the roots are filling up the bag of moss, as shown in the last picture above, it’s time to cut off the new plant and plant it in soil. It helps to stake the new plant, as it is top heavy. Here’s how my new plant looked, when I first planted it – much bigger and healthier than the new plants you can get by cutting and rooting in water!
A couple of months later, I passed this plant on to a friend as a housewarming present. As I was repotting, it I found that the roots had quickly grown to fill a large pot (see picture below)!

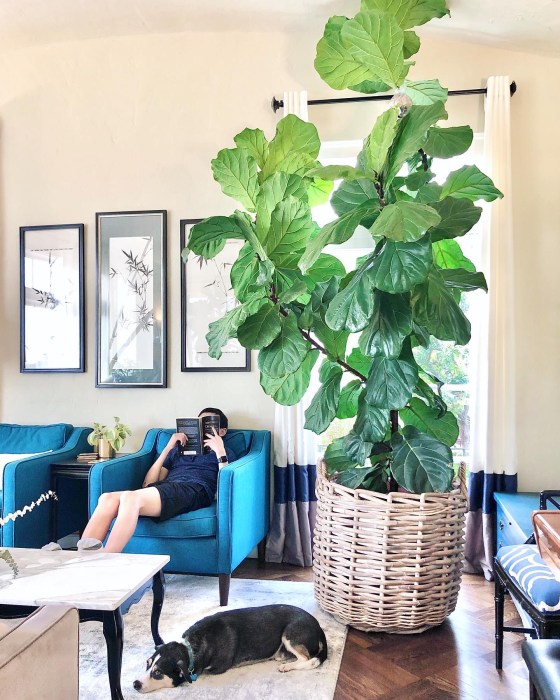
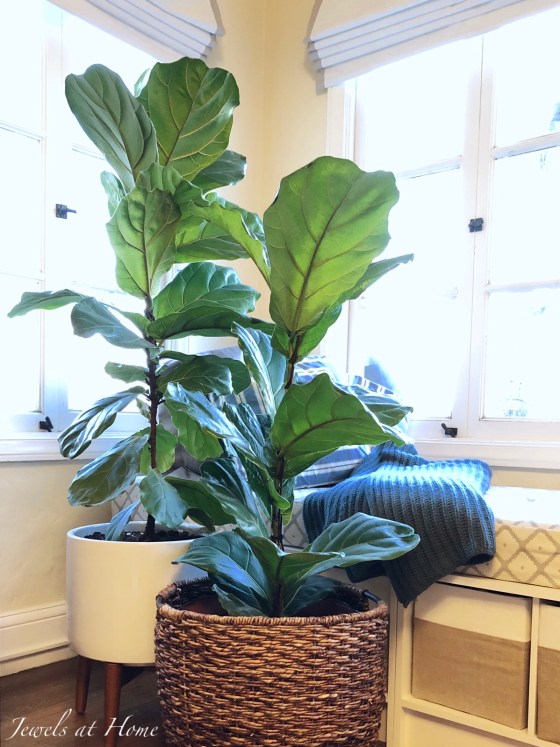
I’m so excited to keep trying this technique for creating healthy new plants while keeping my jungle in check. Here’s how my “mother” plant looked, hitting the ceiling, before I made a new plant from the top section.
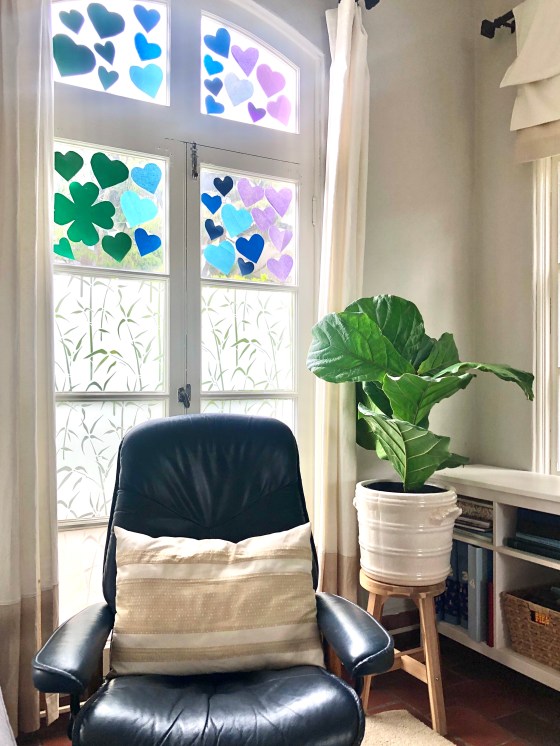
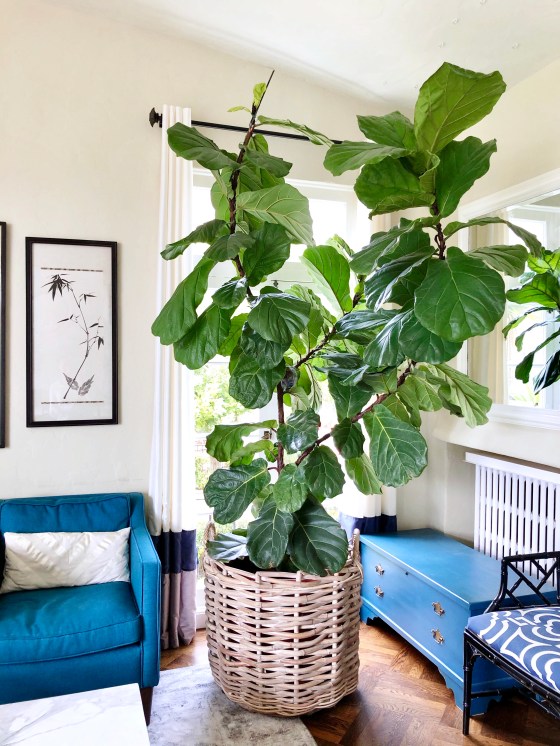
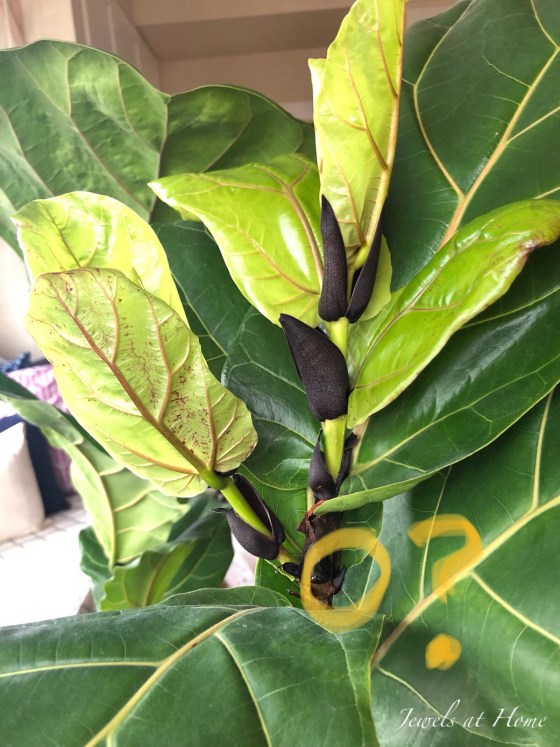
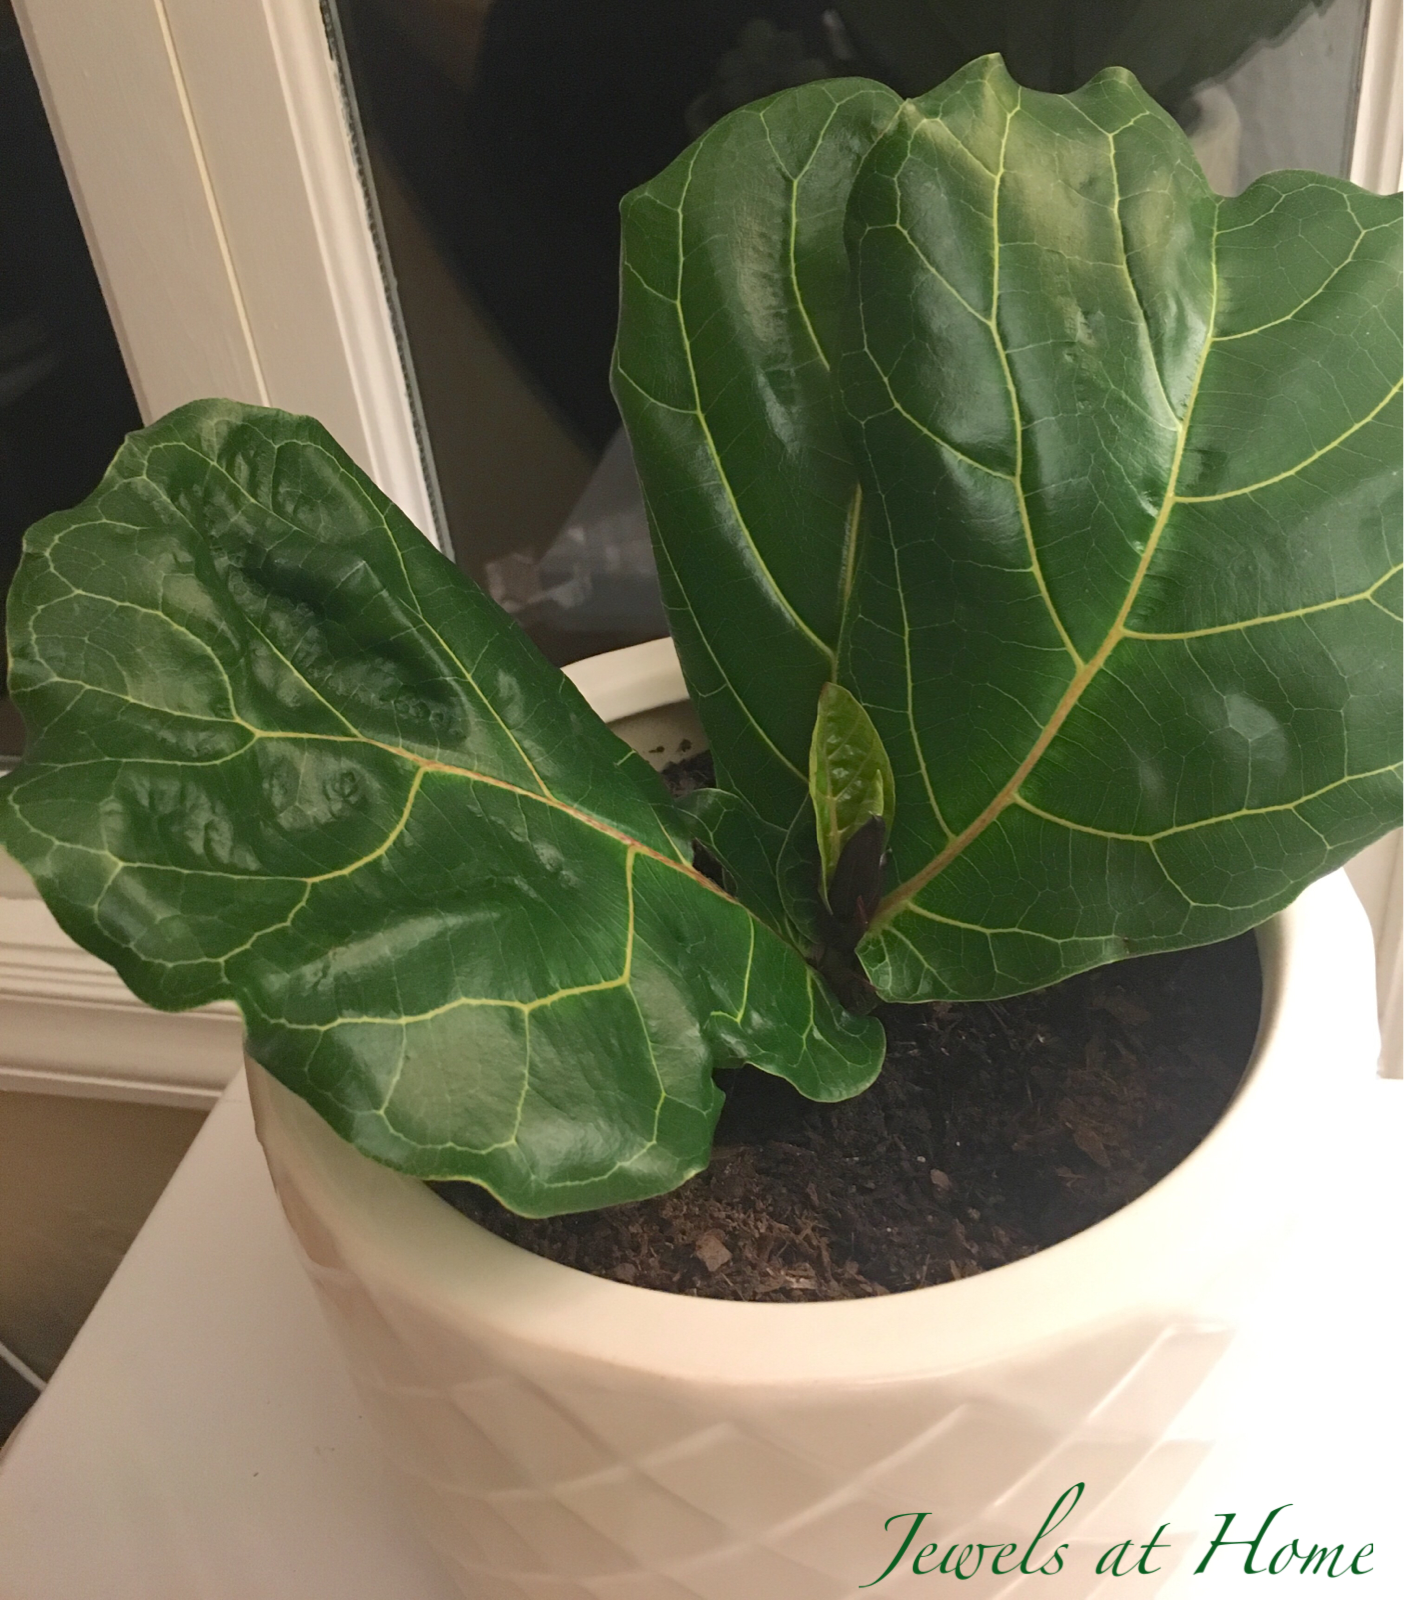
And here’s how it looks now, starting to come back into shape. You can see that a new bud formed where I cut off the new plant, and the branch is starting to grow back. I’m already working on air layering that back branch, so that will get trimmed off soon, too. My favorite stage of this plant was when the two big side branches arched together into a heart shape, so I am hoping to get back to that in a few weeks.
Looking for more information on fiddle leaf figs? Check out these other posts:
If you have a big plant, I definitely recommend trying the air laying. I’m sure I am not the only one who feels that time is moving slowly being at home during the pandemic, and watching these new plants grow has been a silver lining.
Happy plant vibes!
Julie aka “Jewels”

I threatened this punny post title last year, when I sewed a planter bag for one of my big fiddle leaf figs. That fig and another have outgrown their pots again, so I’m sewing new planter bags for them. I’ve … Continue reading
After years of professing to have a black thumb, I have been pleasantly surprised to discover over the past couple of years that fiddle leaf figs seem to love me as much as I love them.
Other posts in my fiddle leaf fig series are:
Today, I’m sharing tips on repotting your plants. I just repotted my two largest plants, which actually turned out to be a serious workout! (Or so I told myself when I had dessert later…)
What are some signs it’s time to repot your plant?
This plant had been in the same pot for about 20 months, and it was definitely time to repot it!

Tips for repotting your plant:
Ideally, try to repot in the spring or summer, when your plant is growing fastest, as this will help it recover more easily. Since we’re in California, where winters are shorter and milder, I’ve been able to repot in winter without issues – this was out of necessity, when I suddenly realized my plants were suffering from outgrowing their pots.
Pick a pot that’s a few inches bigger than the previous pot. Going up too far in size will leave too much empty soil and risk overwatering. Ideally, use a pot with good drainage, though I have do have several growing successfully in pots without drainage holes – I did put more rocks at the bottom of those, to create a space for water to drain within the pot.
If the roots are really matted and tight (left picture below), you can gently loosen and trim them (right picture below). If you can’t or don’t want to use a larger pot, you can also gently trim the roots, brush off as much of the soil as possible, and use the same pot, though this might limit your plant’s growth overall. I’ve just put my biggest two plants into 24″ diameter pots, which I think is as big as I’ll go, so I’ll need to try just trimming the roots next time. I had to look in a few places before finding this size at Flowercraft in San Francisco.

Line the bottom of your pot with small rocks to keep the soil from leaking out and add extra drainage. Add a layer of fresh potting soil on top of the rocks, and put your plant back in. Adjust the height by adding or removing soil until the top of the root ball sits a little below the rim of your pot, remembering that the soil will compact a bit over time.
Fill in soil around the root ball until about two inches from the top. Add some slow release fertilizer pellets – I use this one from Osmocote – and the continue filling in soil until it’s even with the top of your root ball.
Give your plant a good watering, and watch it grow!
Here’s a picture of the craziness while I was in the middle of repotting the two big trees – it’s a jungle in here!

My plants sure seem happy in their new pots! I have a plan to sew some giant planter bags for them, similar to this one, which is now going to be handed down to a younger FLF! UPDATE: Here are some pics of the plants in their new planter bags, and here’s a link to the tutorial for the new giant planter bags!


Let me know if you have any questions, and happy gardening!
Julie aka “Jewels”
It’s no secret that I have a serious love of the fiddle leaf fig plant – and quite unexpectedly for this life-long brown thumb, I have had a lot of success in growing them! This is a good sign for those of you who want a fiddle leaf fig of your own!
I started off with three plants that I bought. They have grown so much that I have been able to prune them (here are some tips on pruning), and I have propagated five new ones (here are some tips on propagation) off of those. I’m about to send one of the baby fiddle leaf figs off to a friend’s home, and I thought I would include a little card with some tips on caring for these special plants. I’m not having difficulty letting go, really…
Here’s the card I put together, and if you want this in a PDF format, this is the link: Caring for your Fiddle Leaf Fig.

Happy growing!
“Jewels”
So, I know I’m not the only one who loves the ficus lyrata, or fiddle leaf fig. My post on how to propagate fiddle leaf fig plants from cuttings is by far one of the most popular topics on the blog!
It’s my second year of growing these magnificent plants, and I thought I’d try my hand at shaping one into a tree. The two most common shapes for fiddle leaf fig plants are a column, often planted in groups of twos or threes, and a tree shape. Even though they look very different, these two shapes are the same plant, and you can actually make a tree by carefully pruning and shaping your plant!
The best time to prune is spring or summer, when your plant is growing most actively.
Here is a tree-shaped fiddle leaf fig I bought from Sloat Garden Center about a year ago. It has grown three-to-four times in size, and I’ve pruned it several times already. As it grows, I study the shape and look to see where it may be getting lopsided. Then, I cut the branch including two-to-three leaves off of that area, and this encourages the plant to branch out in new directions. The more you cut, the more side branches the plant will grow.
Why? The plant hormones – auxins – that promote upward growth also inhibit branch growth. The auxins flow from the tip down, so when you cut off the tip, you lower the level of auxins, which allows branching. The more you cut, the lower the concentration of auxins, and the more branching you’ll get.

These are examples of a traditional column shape, and the one in front is actually a plant I propagated off of the one in back! I was able to cut off the tip of the column-shaped plant with just one leaf, and it grew back just one bud, keeping its vertical form without branching. The benefit of doing this, besides getting a new plant from your cutting (!), is that it slows down the vertical growth and lets the trunk get stronger.
Of course, you don’t have to be traditional! I bought this plant from Flowercraft last Mother’s Day, when it was just the lower section. It grew two side branches, and I just let it continue that way. I pruned one of the side branches once, so you can see there is yet another small branch coming off of it. This plant now has a very unique shape which I’ve grown to love.
 Back to my latest fiddle leaf fig project! I had this smaller fiddle leaf fig plant that I actually purchased online, when I was eager to get my hands on one and was having trouble hunting one down at a nursery. It grew a bit slowly at first, but it did eventually take off, and now it is ready for an adventure!
How to shape your fiddle leaf fig plant into a tree:
2. About a month later, I was rewarded with three new buds! Each of these will grow a new branch, and we’ll be on our way to a pretty new tree shape!

3. When it grows enough, I will start taking the leaves off the bottom section of the trunk. It is good to wait a while to do this, as each of those leaves is helping provide energy for the plant. I also have never been able to propagate a leaf without the stem section, though I think I might as well try when I cut those leaves. More to come!
I’ll keep updating this post with progress and tips, so come back and see how this beauty is doing!
Update at 1.5 months:
So, I have good news and bad news…. good news is that two of the buds have totally taken off into branches… bad news is the third bud hasn’t grown much. I’ll give it some more time, but I know that the plant hormones – auxins – that promote upward growth also inhibit branch growth, so I may try trimming the top of the new branches when they get mature, to try to allow that third little bud to grow.
“Jewels”

Since I’ve become a crazy plant lady, I’m always looking for planters to hold my collection. Big plants like my fiddle leaf figs (see how to propagate them here) can get heavy, so I try to put them in plastic … Continue reading
Don’t say you can’t teach an old dog new tricks! After years of joking about my “brown thumb,” I’m getting really excited about gardening and plants. It’s so rewarding to watch things grow, not to mention how plants freshen up any space both visually and literally.
I’m growing all kinds of plants, but one of my greatest loves is the Ficus Lyrata, the fiddle leaf fig, and I’m so grateful that they seem to thrive in our conditions. I originally bought three plants, which have all at least tripled in size, and I’ve successfully started about 10 plants from cuttings. Here is a list of all my fiddle leaf fig-related posts:
I mentioned I originally bought three plants. I’ve heard that some people have found these at big box hardware stores, but I had no luck. I ended up buying one online (really!) but eventually acquired two more at local nurseries Sloat Garden Center and Flowercraft. The one I got online is fine, but the ones from the nursery are much bigger, so I’d definitely recommend looking around locally, if you can.
After just a few months, two of my trees needed trimming already, so I decided to try to propagate new plants from the cuttings. I have done this several times now, so I have updated this post with all the tips – get it? tips!
When and where to propagate?
What type of cutting can you propagate?

What supplies do you need?
Here are some pictures to show what you can expect over time:
0 weeks
 Three leaves rooting in water.
 Two leaves rooting in soil. I covered the pot in plastic wrap to keep a moist environment for new roots to form.
3 Weeks
You may see some new roots around this time!
And your original plant should be growing a new bud (or two, or three) where you took the cutting:

4 weeks
You can see more robust root growth taking off!

The original tree where I cut off the top three leaves also looks great. There’s a good-sized bud forming!
5 weeks
Exciting news! The single top leaf has grown so many roots that I transferred it to a pot today!

The tree where I cut off three leaves also grew a ton with three buds on it!

6 weeks
Crazy! This is where I cut off three leaves from the top of a plant. It went from buds to tons of new branches and leaves in just one week. So exciting!

2-2.5 months
I started to see new leaves growing out of the top of the stem cuttings. (Photo credit here goes to Nicola, who adopted one of the plants and kindly keeps me updated!)
3 months:
I came back from vacation to find that the stem cutting which started with a single leaf had two new leaves!

3.5 months:
This was the stem with a single leaf. It now has three new leaves and a promising looking bud pushing out the top. Yay!
If you take a cutting from the center section of a stem, with no bud attached, it may take even longer for a new bud to form, but it can definitely work!

9 months
For real! The plant in front was a section of stem with a single leaf off the top of the plant in back. It grew like gangbusters!

Thanks for reading and please share your questions and tips!
“Jewels”
