We moved twice in the last two years, and in the process, I gave away a lot of things. I feel like the universe has decided to reward me by sending me two great finds. First, I found this vintage Thomasville bedroom set on Craigslist that I used to make our home bar. More projects still to come from those pieces! Then, the woman who gave me that set contacted me when she was helping another client clean out an estate and shared these fabulous armchairs. The chairs needed new seats and I pushed myself to learn how to make cushion covers.

The chair frames are actually in very good condition – just the seats were broken. I removed the old seats and replaced them with plain plywood, since I planned to use a seat cushion anyway. The original cushions were a bit thin and worn, and I wasn’t able to find anything ready-made that would fit, so I took the leap to learn how to sew cushion covers! The tutorials I found online were for square cushions, and these are tapered/ trapezoid, so I had to adapt the pattern and will lay out the steps here.
Foam inserts: I bought mine from Foam Factory. I’ve ordered three sets of replacement cushions from them for various projects, and the price and quality are great. It’s actually cheaper and easier than cutting your own foam and wrapping it.
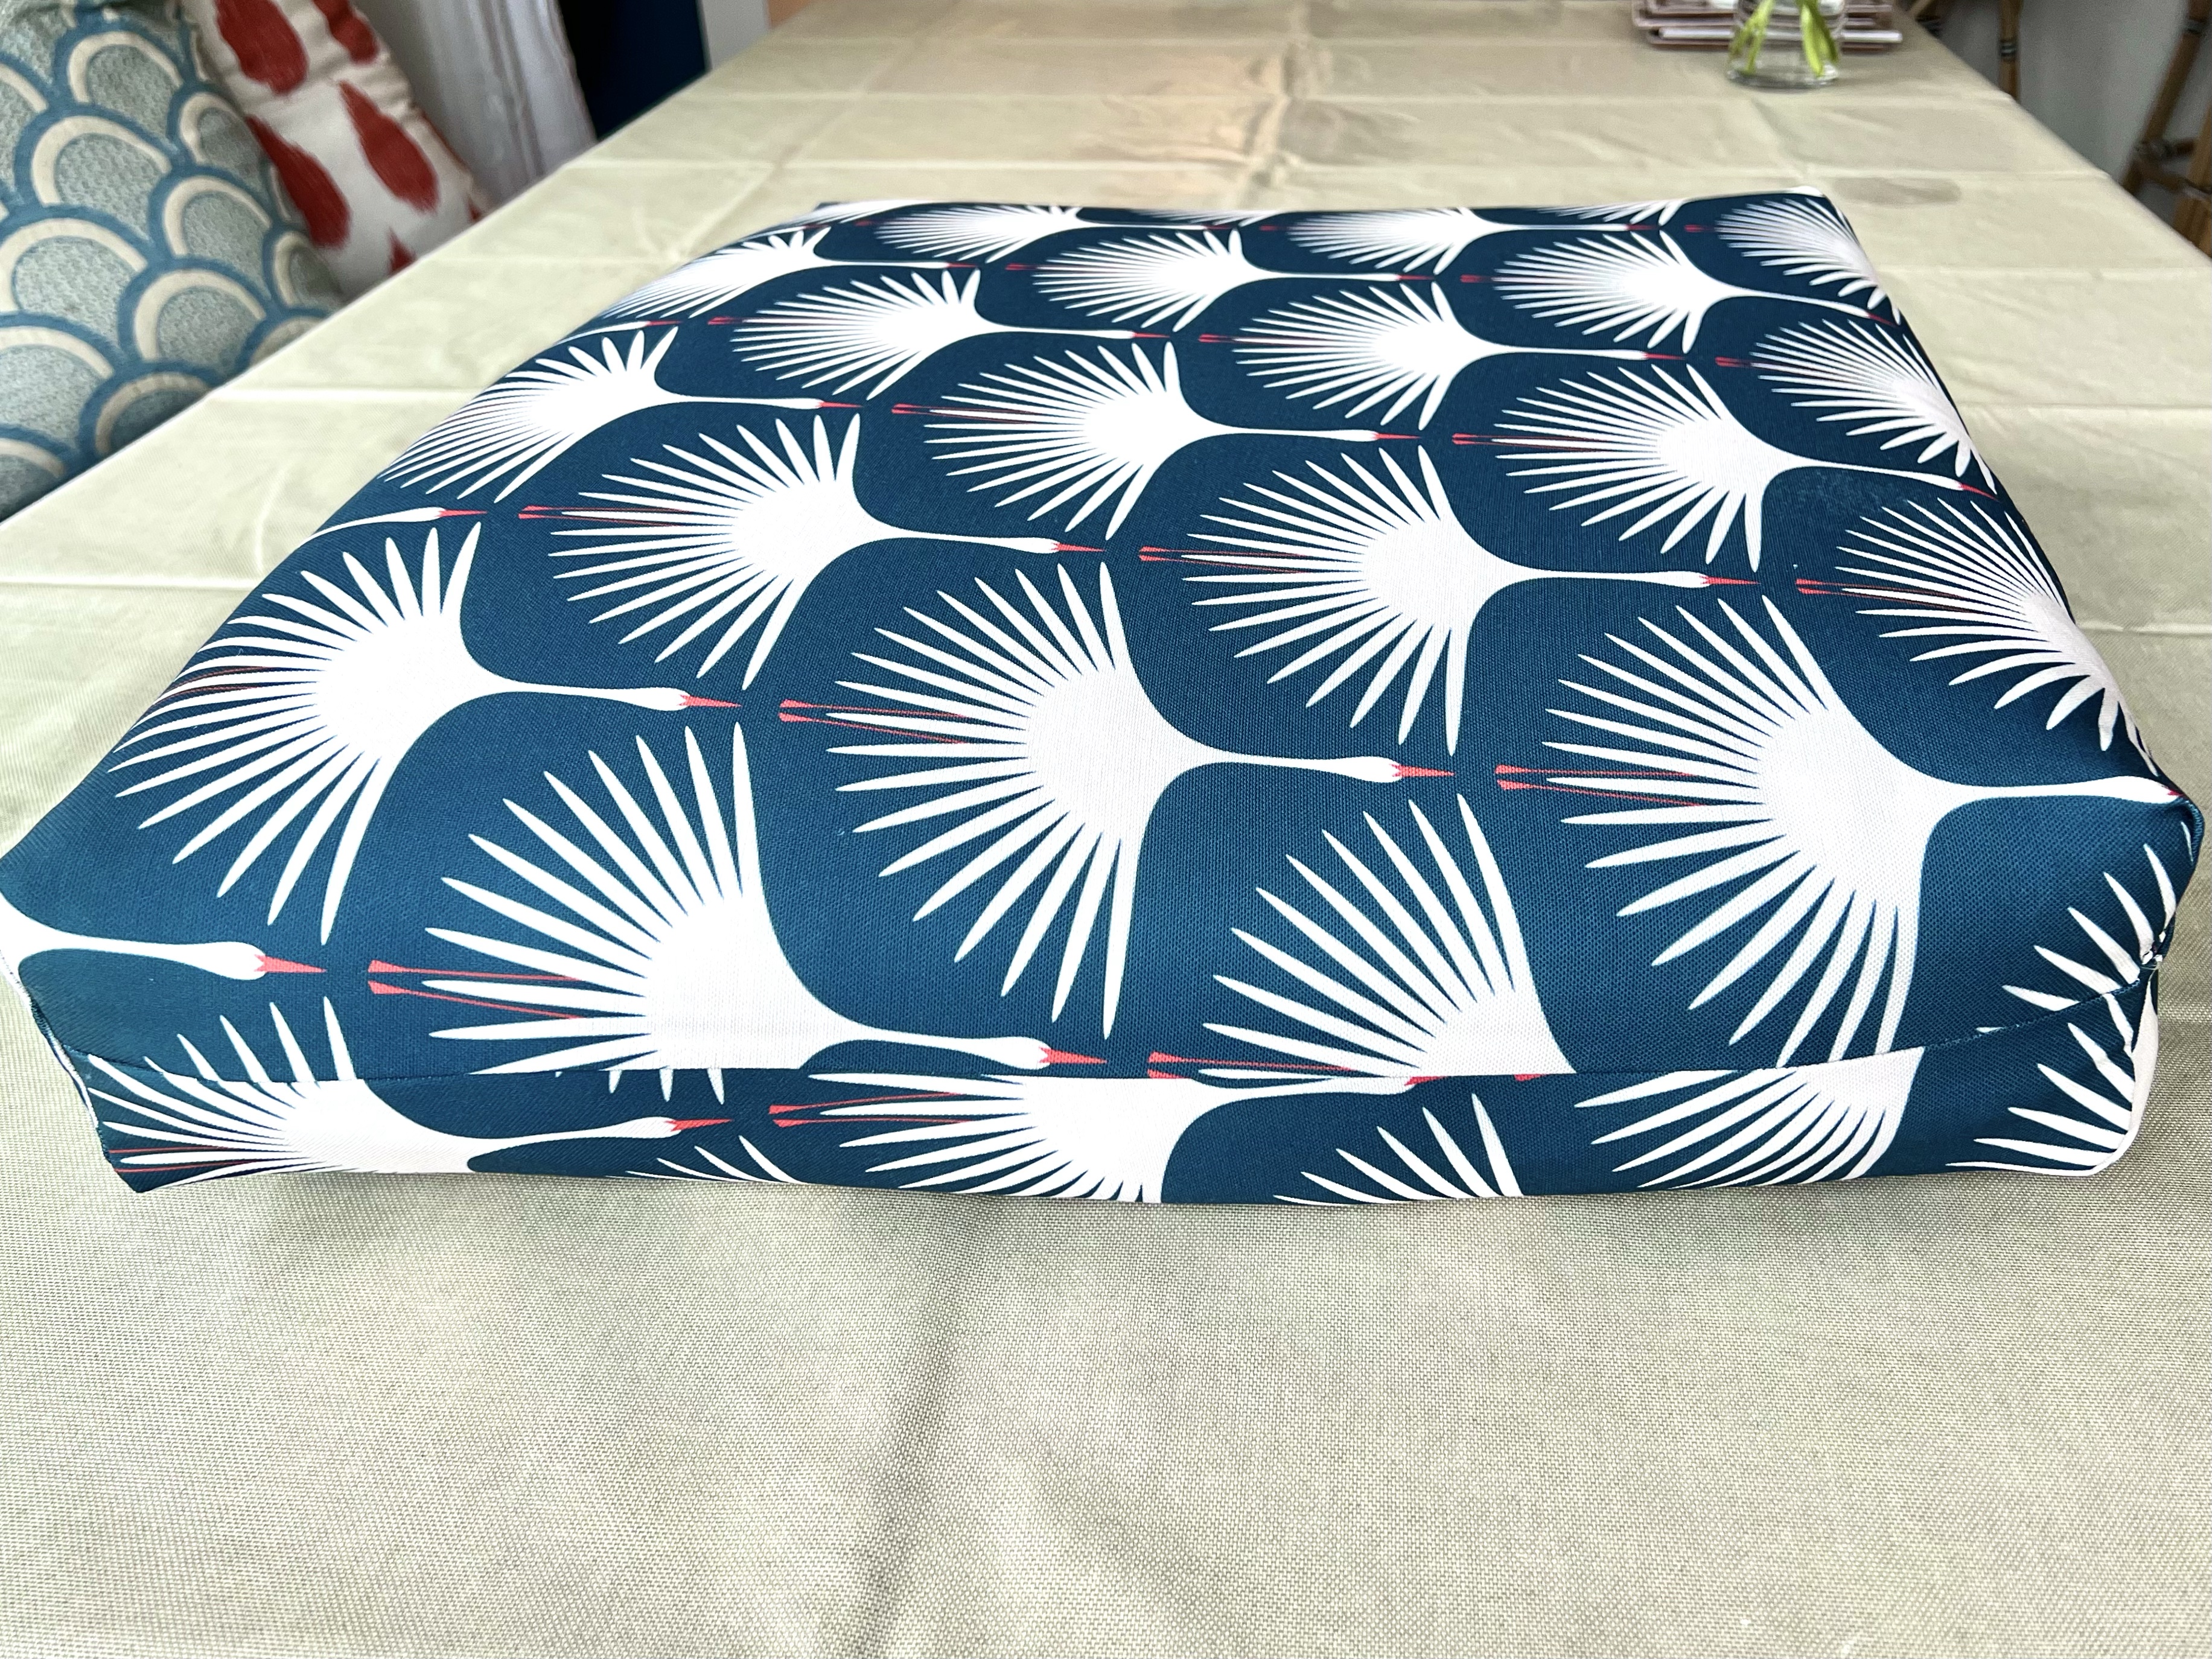
Choosing your fabric: I love the Art Deco Swans pattern by Kate Rhees that I found on Spoonflower. She has many gorgeous colors and sizes in this pattern. A directional pattern makes sewing this a bit more tricky, and the sides and back are not as pretty, but you can’t see them when the cushion is on the chair, so it worked out alright. I used the outdoor recycled canvas for durability.
Cutting out your fabric: I used this video tutorial for basic instructions but had to adapt the pattern for a tapered cushion. Here is the pattern I used to cut out my cushion covers. There is one piece that will form the top and front, and another piece that will form the bottom. You add allowances that will form the side and back of the cushion cover:

After you cut out the pieces for the top/front and bottom, join them along the front edge. Then cut out your gussets as shown:
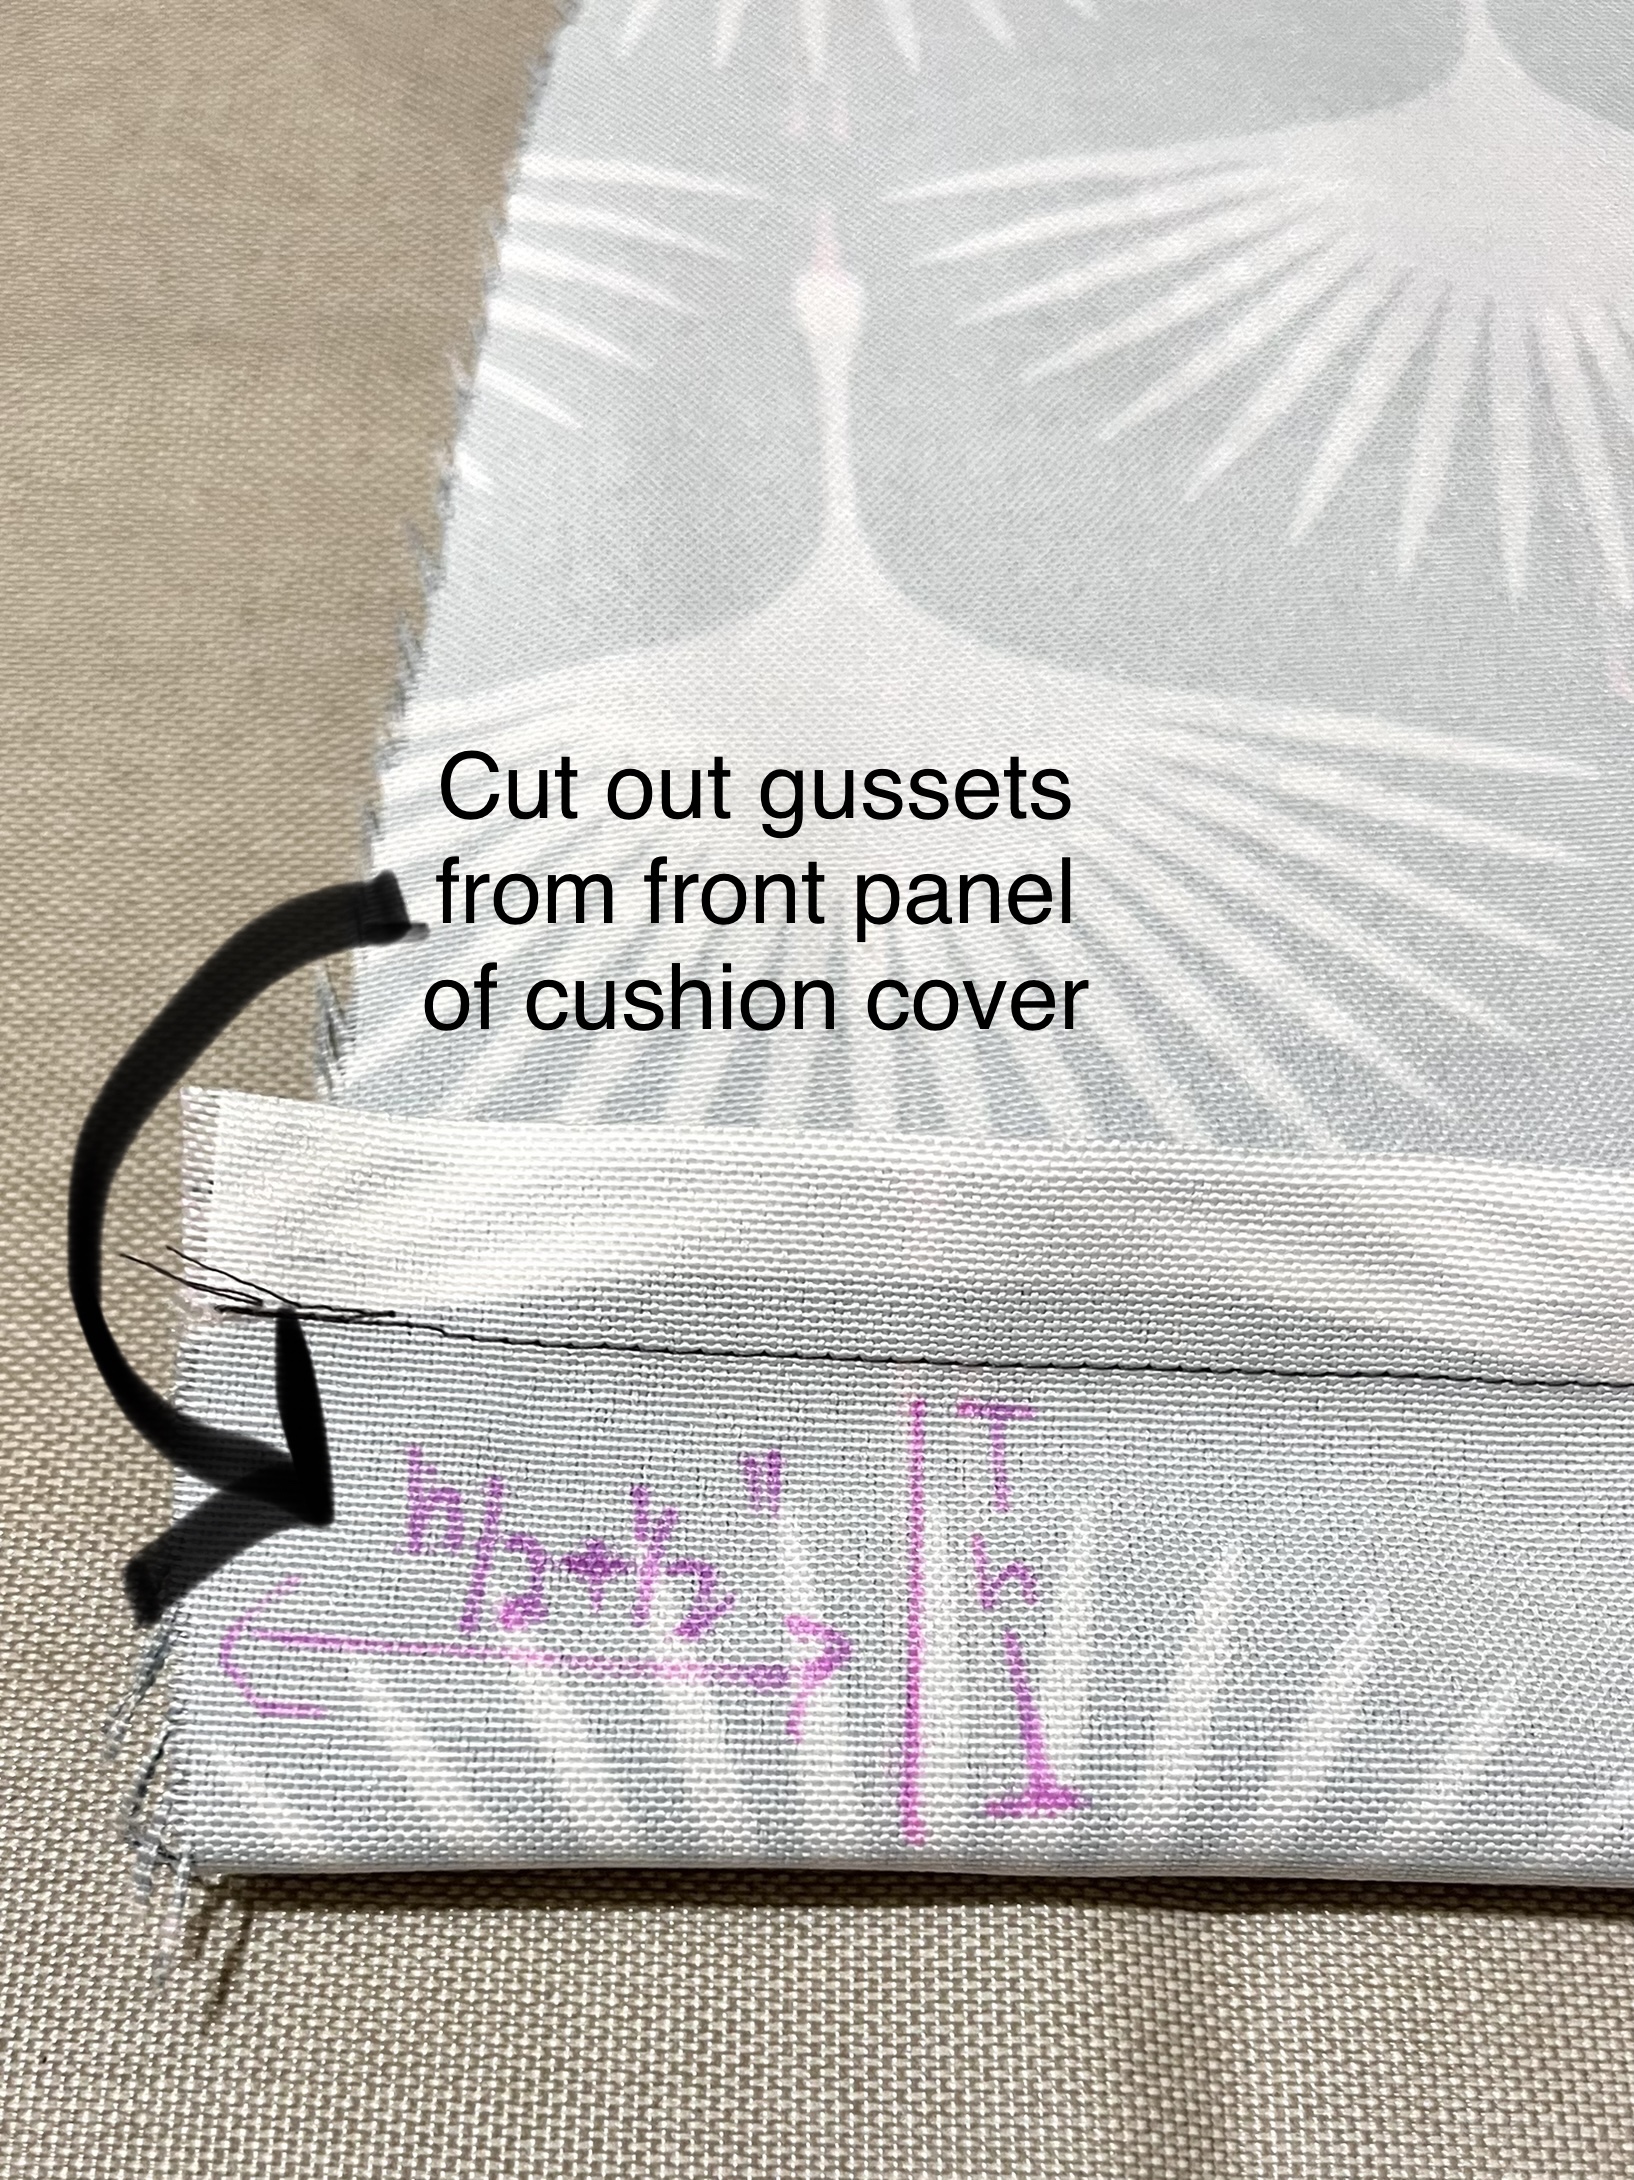


Assemble your cushion cover: Once you cut out the fabric according to this pattern, you can finish by following the instructions in the video: basting the back seam, installing the zipper, opening the back seam, sewing the side seams, and finally sewing the gussets. I zigzagged all the inside seams to prevent fraying.
I definitely was a bit intimidated by sewing a fitted cushion cover and by the zipper, but it turned out to be pretty easy, and I am excited with the results.


What’s next? I plan to reupholster the other dining chair seats in the same fabric to tie them together. I’m also still not sure about keeping the chairs red. I am thinking of a deep green or white or…?? What do you think? Never done with projects, and I don’t want to be 🙂
Julie AKA “Jewels”

Pingback: Cheery Warm Dining Room and Pattern Play with “Art Deco Swans” by Kate Rhees | Jewels at Home
Pingback: Your Home is Your Canvas – Inspirations for Custom Art | Jewels at Home
Pingback: The Cutest and Handiest Zipper Pouches | Jewels at Home
Pingback: (A Free) Ugly Duckling Cabinet Becomes a Swan! | Jewels at Home
Pingback: Elegant & Airy Dining Room Inspiration- Week One Fall 2023 One Room Challenge | Jewels at Home
Pingback: DIY Dining Banquette Cushions – Week Five – Fall 2023 One Room Challenge | Jewels at Home