Fall Inspirations from Daily Life

I love having a camera on my phone, so I can snap a picture of beautiful things that cross my path. Here ate some the sights and vignettes that caught my eye recently.

Ribbon-embellished throw pillow

Love this throw pillow.  It reminds me of the ribbon-bordered curtains I made for our bathroom.  I would love to try doing this on some pillows for the bedroom.

Ribbon-bordered throw pillow.  Spotted by Jewels at Home.

Ribbon-bordered throw pillow.

Beautifully accessorized bedroom

This is the window display at Plantation on Hayes St. in San Francisco.  It is lucky that I usually walk by early in the morning, when they are closed, or we would be bankrupt by now!  I love everything in this store, including the pillows and nightstand accessories on this bed.  This will be my inspiration, as I work on my bedroom.

Beautifully accessorized bedroom.  Spotted by Jewels at Home.

Beautifully accessorized bedroom.

Elegant grey loveseat

I’m also on the lookout for some seating for our bedroom – a loveseat or a nice armchair and ottoman.  On the list is this Chloe loveseat (also comes in a chair) from Macy’s.  I like the elegant classic look that is still comfortable.  That’s our baby J modeling for me on the chair.  Yes, he insisted on taking his shoes off in Macy’s.

Chloe loveseat from Macy's.  Spotted by Jewels at Home.

Chloe loveseat from Macy’s.

Urban garden patio

I frequently bemoan the lack of space and greenery in our back “yard.”  I was lucky enough to go to an event recently at a lovely home in Laurel Heights, and I was inspired by the back patio, which is although small and paved over, still feels lush and inviting.  I snapped some pictures for ideas when we get around to working on our patio!

Lush urban patio.  Spotted by Jewels at Home.

A little fountain makes the space so calming.

Lush urban patio.  Spotted by Jewels at Home.

Potted trees add greenery to the patio. The warm colors in the stone pavers brighten up the space, too.

Lush urban patio.  Spotted by Jewels at Home.

A little cut-out for plantings softens up the corner.

Lush urban patio.  Spotted by Jewels at Home.

The vines growing up the wall are so lush. Beautiful fountain, river rock, and bench.

Lush urban patio.  Spotted by Jewels at Home.

Small trees in the corners give a sense of greenery and softness.

“Jewels”

Racing Stripe Magnet Boards

Steve took our two older boys on a camping trip this weekend. I wanted to surprise them all with a few little projects when they got home, so this is what I did for the boys’ room. They have lots of pictures, cards, and art that collect in little piles, and I wanted to make a place for the boys to display and enjoy them.

The boys’ room has a huge wall of closets that made the perfect blank slate for this project. The closets, by the way, are amazing. This is a favorite trick of the design-build team that did our renovation – they take Ikea Pax closets and frame them with drywall, for inexpensive built-in closets. Since all the parts are pre-cut, the cost is a fraction of custom cabinetry, and Ikea has tons of options for customizing the insides to maximize storage. We were able to eliminate the boys’ dressers completely, since all their clothes fit inside the closets, with plenty of room to spare for other storage. I chose the Bergsbo closet doors, which match our paneled doors well (Steve commented the other day, “Hey, our closet doors go really well with our regular doors.” Yeah, honey, do you think that was an accident?). I added these 10″ square bar pulls for a clean, contemporary look.

Ikea Pax wardrobes used as built-in closets.  Jewels at Home.

Ikea Pax wardrobes used as built-in closets.

To make the magnet boards, I started with these 11.5″ square magnetic white boards. They cost half of most of the others I saw. You can’t pick the colors (I got three white and three different colors), but that was okay, since I wanted to paint them anyway. I sacrificed the dry erase function when I painted them, but I actually find dry erase stuff a bit creepy with all the black dust the markers make when you wipe it off. Finally, I will say that they are a bit lightweight (tin wrapped around cardboard), but mine arrived in overall very good condition, and again, it worked well for me, because I wanted to mount them on the doors, so the lighter weight was perfect.

Painting the racing stripes:

  • sand the boards lightly, including the sides, with a fine sandpaper
  • spray a coat of primer over the whole board, including the sides. I used white primer, which made the next step easier.
  • spray a band of white (or your choice of color) about 3 inches from the top. This may take a few coats for good coverage. Let it dry thoroughly, even overnight.
  • Using a ruler and painter’s tape – I used 1.5″ wide designed for delicate surfaces, tape over the white area. I placed the bottom of my tape 4″ from the top of the board. (top left picture below)
  • Spray a band of red (or a color of your choice) above the tape.  Again, this will take a few coats and should be thoroughly dry before moving to the next step. (top middle picture below)
  • Using the ruler, place painter’s tape 1.5″ from the top of the board, so that you are masking off a 1″ band of red. (top right picture below)
  • Spray the whole board with grey. (bottom left picture below)
  • Peel off the tape and spray your finished product with a couple of coats of clear paint.  (bottom right picture  below)
Tutorial: painting racing stripes on a magnet board.  Jewels at Home.

Tutorial: painting racing stripes on a magnet board.

Here’s a close-up view of the finished board:

Magnet board with racing stripes.  Tutorial from Jewels at Home.

Magnet board with racing stripes.

And here’s how the boards look in the boys’ room:

DIY racing stripe magnet boards.  Tutorial from Jewels at Home.

DIY racing stripe magnet boards.  Tutorial from Jewels at Home.

DIY racing stripe magnet boards.  Tutorial from Jewels at Home.

The boys were very excited to see their new magnet boards, when they got home.  Here’s how our 6 year-old personalized his board, with Pokemon cards and Ninjago Lego figures.

DIY racing stripe magnet boards.  Tutorial from Jewels at Home.

I was looking for pictures to put up on the boards this afternoon and found this photo from 2007 of our older boys with our old dog, Cooper.  He looks so big in the picture, but it’s only because they were so small!  We miss you, Coops.

20120916-223845.jpg

And what did I do for Steve (and myself)?  We were overdue for some new reading lamps for our nightstands.  Our toddler, who stayed home with me – we hope to make it camping next year! – didn’t mind going out to Marshall’s for the lamps, especially since we also found some new fruits for his play kitchen.  He was “feeding” them to me all weekend, and he cracked up every time I “ate” the lemon and made a sour face.

New bedside lamps on the nightstand.  Jewels at Home.

New bedside lamps on the nightstand. “His” side.

New bedside lamps on the nightstand.  Jewels at Home.

New bedside lamps on the nightstand. “Her” side.

Well, I’m very happy to have Steve and the older boys back home.  It was just a day and a half, but I missed them so much.  I guess, I’m used to a full house these days.

“Jewels”

Stairway Makeover – Step by Step

I give my hubby a lot of credit for seeing the potential in our current house. While I’m incredibly grateful to have a comfortable home to live in, it has been a long process for me to actually come to love the look of the place. There was a lot of pink, red, gold, and heavy ornate-ness that we’ve been slowly replacing. I think the recent work by our painters was the tipping point for me. I can now truly say that it is a pleasure to walk in the house and see these stairs.

Updating a stairway step by step from Jewels at Home.

As you can see, a lot has changed since the (blurry – sorry, I had to enlarge it to focus on the stairs) real estate picture was taken. We started by changing the light fixtures from crystal chandeliers and sconces to more architectural fixtures, and we replaced the red and grungy carpet with a brown textured wool with a sage green twill binding.

This fall, our painters Joe and Jose (yes, they know they have the same name), helped with a new wall color – Manchester Tan from Benjamin Moore – and painting the stair risers white to match the trim. After they were done, I also spray-painted the metal carpet rods, covering up the tarnished brass with satin black.

The easier thing would definitely have been to paint the risers before the carpet runner was installed, but sometimes inspiration does not come in an orderly way.. So Joe and Jose patiently taped off all the carpet, sanded the risers, primed and painted them.

20120823-213845.jpgTo paint stair risers after a runner is installed, you'll have to tape off the runner thoroughly.

To paint stair risers after a runner is installed, you’ll have to tape off the runner thoroughly, before sanding, priming, and painting the wood.

As for the carpet rods, I considered replacing them, but these innocent-looking pieces of metal are actually very expensive, at $40 plus a set, so a little but of work went a long way. I sanded, primed, and spray painted them a satin black finish to match the wrought iron balusters. I decided to leave the brackets on while painting, which held the rods off the cardboard surface. However, this did mean that I had to shift the brackets between coats, so no areas were missed, and it took a lot of coats. I would recommend lining the rods up very close to each other when painting, so each pass with the spray paint will cover multiple rods.

Update your carpet rods with a fresh coat of paint.  From Jewels at Home.

After I re-installed the carpet rods, the screws were still brass. Luckily, I had watched a wrought iron handrail get installed in our old house, and I saw that the installer painted the screws by spraying matching paint into a cup and then painting it on the screws. I used a cotton swab for this.

Tip for painting screws with spray paint.  Jewels at Home.

I did have a debate about whether to put the carpet rods back on at all. They’re decorative, not functional. I think they make the stairs look more formal and traditional, while they look a bit more contemporary without the rods. I put them back, at least for now, because they do a hide some staples and raw edges on the carpet. What do you think?

A bare runner looks more contemporary, while carpet rods give a more formal look.  Which do you prefer?

A bare runner looks more contemporary, while carpet rods give a more formal look. Which do you prefer?

Finally, we’re not really statue people, so I decided to fill the spaces on and around the stairs with orchids and houseplants instead. Here’s how our finished space looks. Ahhhh….

A classic stairway with a new look. Walls are Manchester Tan from Benjamin Moore. From Jewels at Home.

A classic stairway with a new look. Walls are Manchester Tan from Benjamin Moore. From Jewels at Home.

A classic stairway with a new look. Walls are Manchester Tan from Benjamin Moore. From Jewels at Home.

And one last before-and-after look, so we can put the memories of the old stairway behind us!A classic stairway with a new look. Walls are Manchester Tan from Benjamin Moore. From Jewels at Home.

“Jewels”

Bench Made From Chairs

So, I’ve been a bit crazy for chairs this year…

First, I picked up this beauty at the antiques fair on New Year’s Day.

Living room vignette with vintage chair, painted chest, and new cushions.  From Jewels at Home.

Living room vignette with vintage chair, painted chest, and new cushions.

Then, I refinished these free Queen Anne chairs found through Craigslist…

Queen Anne chair makeover by Jewels at Home

Free Queen Anne chairs found through Craigslist: from worn and boring to fresh and elegant!

And I went on to paint and reupholster our dining chairs

Ikea dining chair makeover by Jewels at Home

Another step in the evolution of our old Ikea chairs. This new fabric gives them an elegant yet whimsical feel that fits in with the Chinoiserie/ Regency look I am working on in our living-dining room.

Along the way, I could not resist these traditional Chinese chairs, also a deal on Craigslist.

Solid wood traditional Chinese chairs.

Solid wood traditional Chinese chairs.

Suddenly, I had too many chairs… and I still wanted a bench for our front hallway. Do you sense a solution here? I did!

While you could certainly get clever with carpentry and join chairs together in a number of creative ways (side by side in a row; on either end with a board in between; with two chair backs turned 90 degrees to make the ends of the bench, etc..), I didn’t want to permanently alter these chairs, since they are well-made and beautiful and might move on to a new purpose some day.

Instead, I chose to strap the chairs together and use cushions to give the feel of a single piece of furniture.

Strapping the chairs together

To make the chairs work together as a bench, I started by strapping them together. I used felt strips that were 2″ wide and long enough to wrap around two chair legs with 2″ overlap. I put straps at the back of the chairs, at the top and bottom of each leg. Measure the top and bottom of the legs separately, since they might not be the same width.

In the picture below,

  • Because my felt was thin, I started by sewing two layers of fabric together. (top left)
  • Then, I sewed velcro onto each end of the strip, as shown: the hook side on one end, and the loop side on the back side of the other end. You could use 2″ wide velcro, but I just used the narrower strips I already had and put two strips side by side. (top right)
  • This is how the finished straps look with the ends joined. (bottom left)
  • Here’s how they work on the chairs. These simple straps held the chairs in line pretty securely. (bottom right)
Sew straps to link chairs together into a bench.  Jewels at Home.

Sew straps to link chairs together into a bench.

Cushions

I took off the three separate chair cushions and added a single big one. After going around and around with all the options for fabric, I chose this textured fabric that has shades of blue, green, and grey in it. It ties together a lot of elements in the foyer and living room and doesn’t compete with the design of the chairs.

I added two bolster cushions in this really fun print: Barber in powder blue by Premier Prints. The technique for making the bolsters was detailed in the tutorial on sewing pillows. I used two, rather than three, to take attention away from the three separate chairs. I’m thinking of ways to use some more of this fabric on the living room that is right off the foyer.

Storage baskets
Finally, I tucked these faux leather storage crates under the chairs for the boys to keep their school bags and library books, so these things don’t get lost.

Finished “Bench”

Our new entry bench and storage system is working very well, and I like how it looks, too.

Ideas for joining chairs into a bench.  From Jewels at Home.

Ideas for joining chairs into a bench.  From Jewels at Home.

Ideas for joining chairs into a bench.  From Jewels at Home.

With a little bit of creativity, this “bench” has turned out to be a useful and attractive addition to our front hall.  Now back to some other chairs I picked up for free on the side of the road…

“Jewels”

Mid-Century Nightstand/ Dresser with Dipped Legs

To our delight, both our older boys love reading, and they recently requested a little nightstand to put their books on, so I poked around on Craigslist and found this cool-looking Mid-Century low dresser that was cosmetically-challenged but I thought would look great painted in grey.

Well, you know how Craigslist is – some people are completely friendly and professional and others can be a bit quirky or flaky. The guy selling this dresser was definitely friendly, but he did push back the time of our meeting several times, including once when we were already on the road, and he seemed to be struggling a bit to adjust to his move and letting go of some of his furniture. Anyway, we finally brought the dresser home.

A couple of days later, the seller of the dresser texted me to ask if he could buy the dresser back. That’s a first! But knowing that he was very attached to it, I didn’t want to be mean, so I agreed to sell it back to him. I was disappointed, but by that point, I was committed to the look, so I found the Sveio dresser at Ikea that has almost the same shape. I’m not crazy about the look in white, but since I was planning on painting ours anyway, I figured it would work out. Fast forward a few more hours, and the dresser’s former owner had changed his mind again and said he was not coming to pick it up.

Okay?! Whatever?! I got to work transforming this great vintage find into something cool and functional for the boys.

Mid-Century dresser found on Craigslist ready for a makeover!

BEFORE: Mid-Century dresser found on Craigslist ready for a makeover!  I forgot to take a picture before I started patching the damaged parts of the wood.

Sveio chest with drawers from Ikea

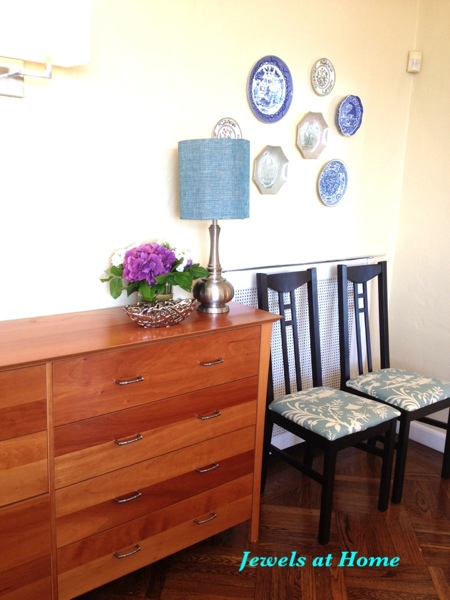
Sveio chest with drawers from Ikea has Mid-Century lines.

While part of me hated to paint over this classic piece of furniture, it really had seen better days. There were a lot of chips in the veneer and a dark stain on the top – so I felt I was better off painting it than trying to restore the wood finish.

I started with wiping it down and using some wood filler to patch up the most damaged parts of the veneer. When the wood filler was dry, I sanded the whole piece and wiped it down again.

I was inspired by this piece I saw at The Wits Blog, with the brass leg caps, so I taped off the bottom of the legs to leave the original wood.

Grey dresser makeover by The Wits.

Grey dresser makeover by The Wits.

Go to The Wits blog

For the rest of the dresser, I used a coat of primer followed by a couple of coats of Benjamin Moore Amherst Gray (HC-167).

I finished by rubbing the dresser with some furniture polish to give it a smooth protective finish.

Mid-Century dresser painted in Benjamin Moore Amherst Gray with reverse "dipped" legs. Get the same look with a Ikea Sveio hack.  From Jewels at Home.

Mid-Century dresser painted in Benjamin Moore Amherst Gray with reverse “dipped” legs.

Mid-Century nightstand painted with "dipped" legs.  Get the same look with a Ikea Sveio hack.  From Jewels at Home.

Close-up view of the legs of the painted Mid-Century nightstand, with a reverse “dipped” finish.

I’m happy with how the nightstand turned out, and it looks great in the boys’ room.  They love it and have already filled the drawers with their books and treasures.  Here’s how it looks in place.  Their room still needs a lot more decorating, but this is a good start!

Mid-Century nightstand makeover.  Get the same look with a Sveio Ikea hack.  From Jewels at Home.

Mid-Century nightstand with a new painted look.

Boys' room with a painted Mid-Century nightstand.  From Jewels at Home.

Boys’ room with a painted Mid-Century dresser.

Mid-Century nightstand painted in Benjamin Moore Amherst Gray with reverse "dipped" legs.  From Jewels at Home.

Mid-Century nightstand painted in Benjamin Moore Amherst Gray with reverse “dipped” legs. The cool baseball player lamp is a gift from the boys’ uncle. He brought it home from Korea.

And here’s the final before-and-after picture!

Mid-Century dresser painted in Benjamin Moore Amherst Gray with reverse "dipped" legs.  You could get this look with an Ikea Sveio hack, too.  From Jewels at Home.

So, this post turned out to be about making over a battered vintage dresser, but it almost became an Ikea Sveio hack, and that would have been okay, too.  If you try this with Sveio, you could leave the legs white or paint them another color first, before taping them off.  I hope this dresser’s former owner finds happiness, because our boys are very happy with their slick new nightstand.

Are you looking for your own diamond in the rough to transform? I’m excited to share that my friend Ari launched a slick new furniture re-sale site over at www.revolvingdecor.com. Check it out to participate in a curated online marketplace for great furniture finds!

“Jewels”

DIY Pencil Tins: Desk Set

I recently picked up some beautiful wrapping paper at Lavish in Hayes Valley. This is the same store where I found the perfect red and white graphic paper for lining our nursery bookcase. The new paper I found is for my craft room. It’s called Hydrangeas by Kate & Birdie. This company has lots of very sweet original prints – my six year old bought himself a sheet of pirate ship paper while we were in the store. They started in Winnipeg, Canada, so even dearer to my Canadian ex-pat heart.

Kate and Birdie Hydrangeas paper

Hydrangeas (WP02) wrapping paper by Kate & Birdie. Click the picture to see their site.

The blue, green, and grey color scheme of this paper fits my craft studio perfectly! The blue is just the same as the great print on my newly upholstered Queen Anne chairs, and all the colors are found in the stenciled lampshade I made for that room.

I’m amazed what a long way this one sheet can go. For $4, I have enough paper to create several great accessories and accents for my room.  I started a clothespin wreath and moved on to these pencil tins – and I still have more projects planned!

I love reusing old items, though it’s always a fine line between clever frugality and looking like a preschool art project. I’ve definitely seen more “primitive” versions of these pencil tins, but I like to think that mine fit into the feminine, elegant, slightly funky studio I am creating.

Turn used cans into beautiful pencil tins for your office.  From Jewels at Home.

Turn used cans into beautiful pencil tins for your office.

This is a very simple and quick project that needs very little explanation. I started by using pliers to flatten any sharp edges along the inside of the can.  To cut the paper neatly, I used the quilting ruler and mat I showed in the fabric growth chart tutorial.

DIY pencil tin tutorial from Jewels at Home.

Flatten the sharp edged on your can. Cut out paper and glue with a glue stick.

I used a glue stick to affix the paper to the tin. For my kids’ tins, I also added a layer of clear contact paper to make the tins more durable.  Finally, I use tacky glue to attach bias ribbon to the top of the tin, for a polished look.  (I tried hot glue, but it cools very fast on the metal and gets lumpy.)

Beautiful pencil tins made from old cans, decorative paper, and bias tape. Tutorial from Jewels at Home.

Beautiful pencil tins made from old cans, decorative paper, and bias tape.

Craft room desk set: DIY pencil tins fit in with ceramics on a vintage tray.  From Jewels at Home.

Craft room desk set: DIY pencil tins fit in with ceramics on a vintage tray.

Craft room desk set: DIY pencil tins fit in with ceramics on a vintage tray.  From Jewels at Home.

DIY pencil tins.

While I was making these tins, I added some for the boys’ homework area.  These have a layer of clear contact paper over the scrapbook paper, since I know they will get more (ab)use.

Turn old cans into pencil tins with paper and bias ribbon.  From Jewels at Home.

Pencil tins for the boys’ homework area.


What else do I want to decorate with my beautiful Hydrangeas paper?  A pennant banner, some magnets, magazine files, and some storage boxes for the craft studio.  Hope to share those projects soon.  Meanwhile, go raid your recycling bin and make some new accessories for your own office!

“Jewels”


Fabric-covered Decorative Boxes

It’s a bit silly that I avidly study “styled” displays of decorative items, because I have three boys who consider it their role to re-style any arrangement I make. Nonetheless, I keep my eye out for great objects and projects to bring beauty into our home. And for now, these are all placed well above the reach of little hands.

Some staples of a beautifully accessorized room are framed art, vases, books, trays, and boxes… I love the look of a stack of beautiful boxes!

I was pondering how to make a set of boxes when inspiration came from the most unexpected source! Remember those three little boys I was talking about? At the start of summer, I ordered three pairs of sandals for them. After they arrived and were unpacked, I found myself with a set of three perfectly matched boxes in small, medium, and large!

With the addition of some gorgeous fabric I found for just $2.99 a yard, those plain shoe boxes became a beautiful display!

Tutorial for DIY Fabric-covered decorative boxes from Jewels at Home.

DIY fabric-covered decorative boxes.

Here’s what you’ll need:

  • box(es)
  • fabric – I used only 2/3 yard for all three boxes. That’s a $2 project!
  • scissors
  • glue stick – I used this on the outside, for a smooth finish
  • tacky glue or white glue – I used this to glue the inside flaps, for extra security

Here’s the step-by-step:

Tutorial for DIY fabric-covered decorative boxes.  From Jewels at Home.

Above left: Fill in any holes in the box design with scrap cardboard.

Above right: Cut out fabric to fit wrap around box, including the sides and allowing about an inch extra to wrap to the inside.

Tutorial for DIY Fabric-covered decorative boxes.  From Jewels at Home.

Above top: Use the glue stick to lightly attach the bottom of the box to the fabric. At each front corner, cut diagonally to the bottom corner and trim, as shown. Apply glue stick lightly and fold up the fabric onto the front of the box. Fold flaps from the front towards the side of the box and glue them down securely with the glue stick.

Tutorial for DIY fabric-covered decorative boxes from Jewels at Home.

When cutting the flaps at the back of the box, make sure to leave some fabric to wrap the edge of the lid.

Above bottom: Apply glue stick lightly and fold fabric over the back of the box. At each back corner, cut diagonally to the bottom corner and trim, as shown. Again, fold a flap towards the side of the box and glue it down securely with the glue stick.

Tutorial for DIY fabric-covered decorative boxes. From Jewels at Home.

Above top: For the side flaps, fold in the excess, so that a finished edge lines up with the edge of the box.

Above bottom: Apply glue stick liberally, and fold up the side flaps.

Tutorial for DIY fabric-covered decorative boxes. From Jewels at Home.

Above top: Apply glue stick lightly and attach fabric to top of box.

Above bottom: At the top corners of the lid, cut the fabric diagonally to the corners and trim. Left: Apply glue lightly to the front of the lid and then glue a flap securely towards each side. Right: fold the side flaps, so a finished edge lines up with the edge of the lid. Glue securely with glue stick.

Tutorial for DIY fabric-covered decorative boxes. From Jewels at Home.

Above left: Trim excess fabric.

Above right: Use tacky glue to secure the loose fabric to the inside of the box and lid.

And you’re done!

Tutorial for DIY fabric-covered decorative boxes. From Jewels at Home.

Tutorial for DIY fabric-covered decorative boxes from Jewels at Home.

I’m so happy that these boxes are going to add a wonderful touch of color and style to our living room. So, while my newly-crafted accessories have to stay high out of reach for a few more years, I’m tickled to know that those rambunctious boys who usually mow down all my decorating projects can be credited with inspiring this one!

What ordinary objects will you turn into the extraordinary?

Love,
“Jewels”

New Entry – First Impressions Count!

When we bought our house last summer, the style did not suit us at all. I give a lot of credit to hubby for seeing past the pink and frills to appreciate that this could be our home.  Now we’re updating this place bit by bit, and I’m happy to say that it feels like home! We started inside with a renovation upstairs that gave us our new master bath, laundry area, and nursery. More about the upstairs, when I finally get the rest of it cleaned up. We decided to put off a downstairs renovation, due to cost and convenience, but I did spruce up our powder room with some wallpaper and a new chair rail and vanity.

Once our upstairs bedrooms were comfortable, the next priority was painting the exterior, where the paint on the trim was peeling, and equally importantly, the house was pink!

BEFORE:

BEFORE: Pink and stuffy entry did not reflect our personality.

BEFORE: Pink and stuffy entry did not reflect our personality.  The house number sign was white plastic!

Hooray for

  • new paint
  • a new house number sign (the old one was white plastic)
  • our whimsical doggy statue
  • and some old pots and flowers

Now, our entry is casual and pretty, which is much more our style.  The dog our light-hearted take on more serious front door statuary.  I found him in a flower shop in Toronto more than a decade ago, and he reminded me of our dog, Cooper, so I gave him to Steve for his birthday one year.  Now that Cooper is no longer with us, it’s sweet to have him as our guardian angel.

I tried to hang up the house number sign, but the stucco was defeating my masonry bit and my adhesive, so I just propped it up, and I actually like it there!  There’s lots more gardening that could be done to improve our curb appeal and functionality, but for now these little touches make it feel like home when you walk up to the door.

A new house color and some flowers at the front door make this place feel like home.

A new house color and some flowers at the front door make this place feel like home.

A new house color and some flowers at the front door make this place feel like home.

20120730-230807.jpgA new house color and some flowers at the front door make this place feel like home.

I usually putter around inside the house, so I can thank this little helper for bringing me outside. He had a lot of fun digging, and I had to work hard to channel his energies into the right areas!

Welcome Home!

“Jewels”

Faux Bamboo Fetish – Dining Room Sideboard

I recently became obsessed with the look of vintage faux bamboo dressers, like those made by Thomasville or Henry Link in the 60s and 70s. These dressers have come back into fashion, repainted for a gorgeous new look. I see them on eBay and Etsy regularly, but with the shipping costs from across the country, it doesn’t seem quite worth it. I’m also nervous about taking on such a big project. As Ibie, whose dresser is in the second picture below, chronicles on her blog, the painting process on such a large piece is not for the fainthearted.

Here are some of the beautiful makeovers that caught my eye:

Callie's black dresser featured on Little Green Notebook

Callie’s black dresser featured on Little Green Notebook. I love the glossy black finish, and the rest of this room is fantastic, too!

Go to Little Green Notebook

Ibie's grey Henry Link dresser on One Story Building

Ibie’s grey Henry Link dresser on One Story Building. This looks so sophisticated and elegant! I certainly believe her that it was a bear to paint, though.

Go to One Story Building

I still have this project in the back of my mind, and I occasionally look around on Craigslist, eBay, and Etsy for that perfect dresser to repaint, but for now, I’m happy with an easier update to our old dresser. This is actually an inexpensive piece that we bought a decade ago. We almost got rid of it a couple of years back, but no one on Craigslist even wanted it, so we decided to repair all the sagging drawer bottoms, and I’m so glad that it has a new life as the sideboard in our dining room.

BEFORE: Old dresser we are using as a sideboard.

BEFORE: Old dresser we are using as a sideboard.

The hardware we had on there is a little rustic for our space, so I decided to give those old knobs a new life down at my dad’s beach house and replace the hardware with – what else – faux bamboo pulls! I chose this Belwith Bamboo Collection black nickel cabinet pull
, and there were several others out there that also look great, and I put some of my favorites on Pinterest.

Belwith Bamboo Pull

Belwith Bamboo Pull

Since the new pulls need two holes, I had to drill new ones. TIP: I used a piece of a piece of painter’s taped marked with the distance between the holes, so I could quickly measure and drill.

TIP: mark the distance between holes for cabinet hardware on a piece of painter's tape.  From Jewels at Home.

TIP: mark the distance between holes for cabinet hardware on a piece of painter’s tape.

And here’s the “new” old dresser. No, it’s not as stunning as an old Regency dresser painted in an elegant new color, but it was quick, easy, and inexpensive.

New faux bamboo hardware gives an old dresser new life.

New faux bamboo hardware gives our old dresser new life.

New hardware gives an old dresser new life.

20120803-202021.jpg

I’m happy with the result of this little project, and will still keep my eye out for something perfect.

“Jewels”