From Thomasville Dresser to Dining Room Bar Cabinet

Remember when I told you that painting a vintage mid-century dresser was on my DIY bucket list? I love how that first project turned out. And then! When I was moving and definitely should not have been accumulating more stuff, I found something I couldn’t resist: a Thomasville faux bamboo bedroom set for free on Craigslist! This included a twin bed frame and a little desk and dresser. The desk had a bookcase hutch, which I put on top of the dresser to make a hutch/ bar for our dining room.

Here’s what you’ll need:

  • Rags
  • gloves
  • TSP or other deglossing solution
  • Sandpaper – fine grit
  • Bonding primer designed for slick surfaces
  • Amy Howard Spray Lacquer. I previously used this to lacquer a small entry cabinet, and I’m really impressed with how it looks and holds up
  • As needed, new hardware or metallic spray paint for your old hardware
  • If you need new holes for your hardware, some filler material for the old holes
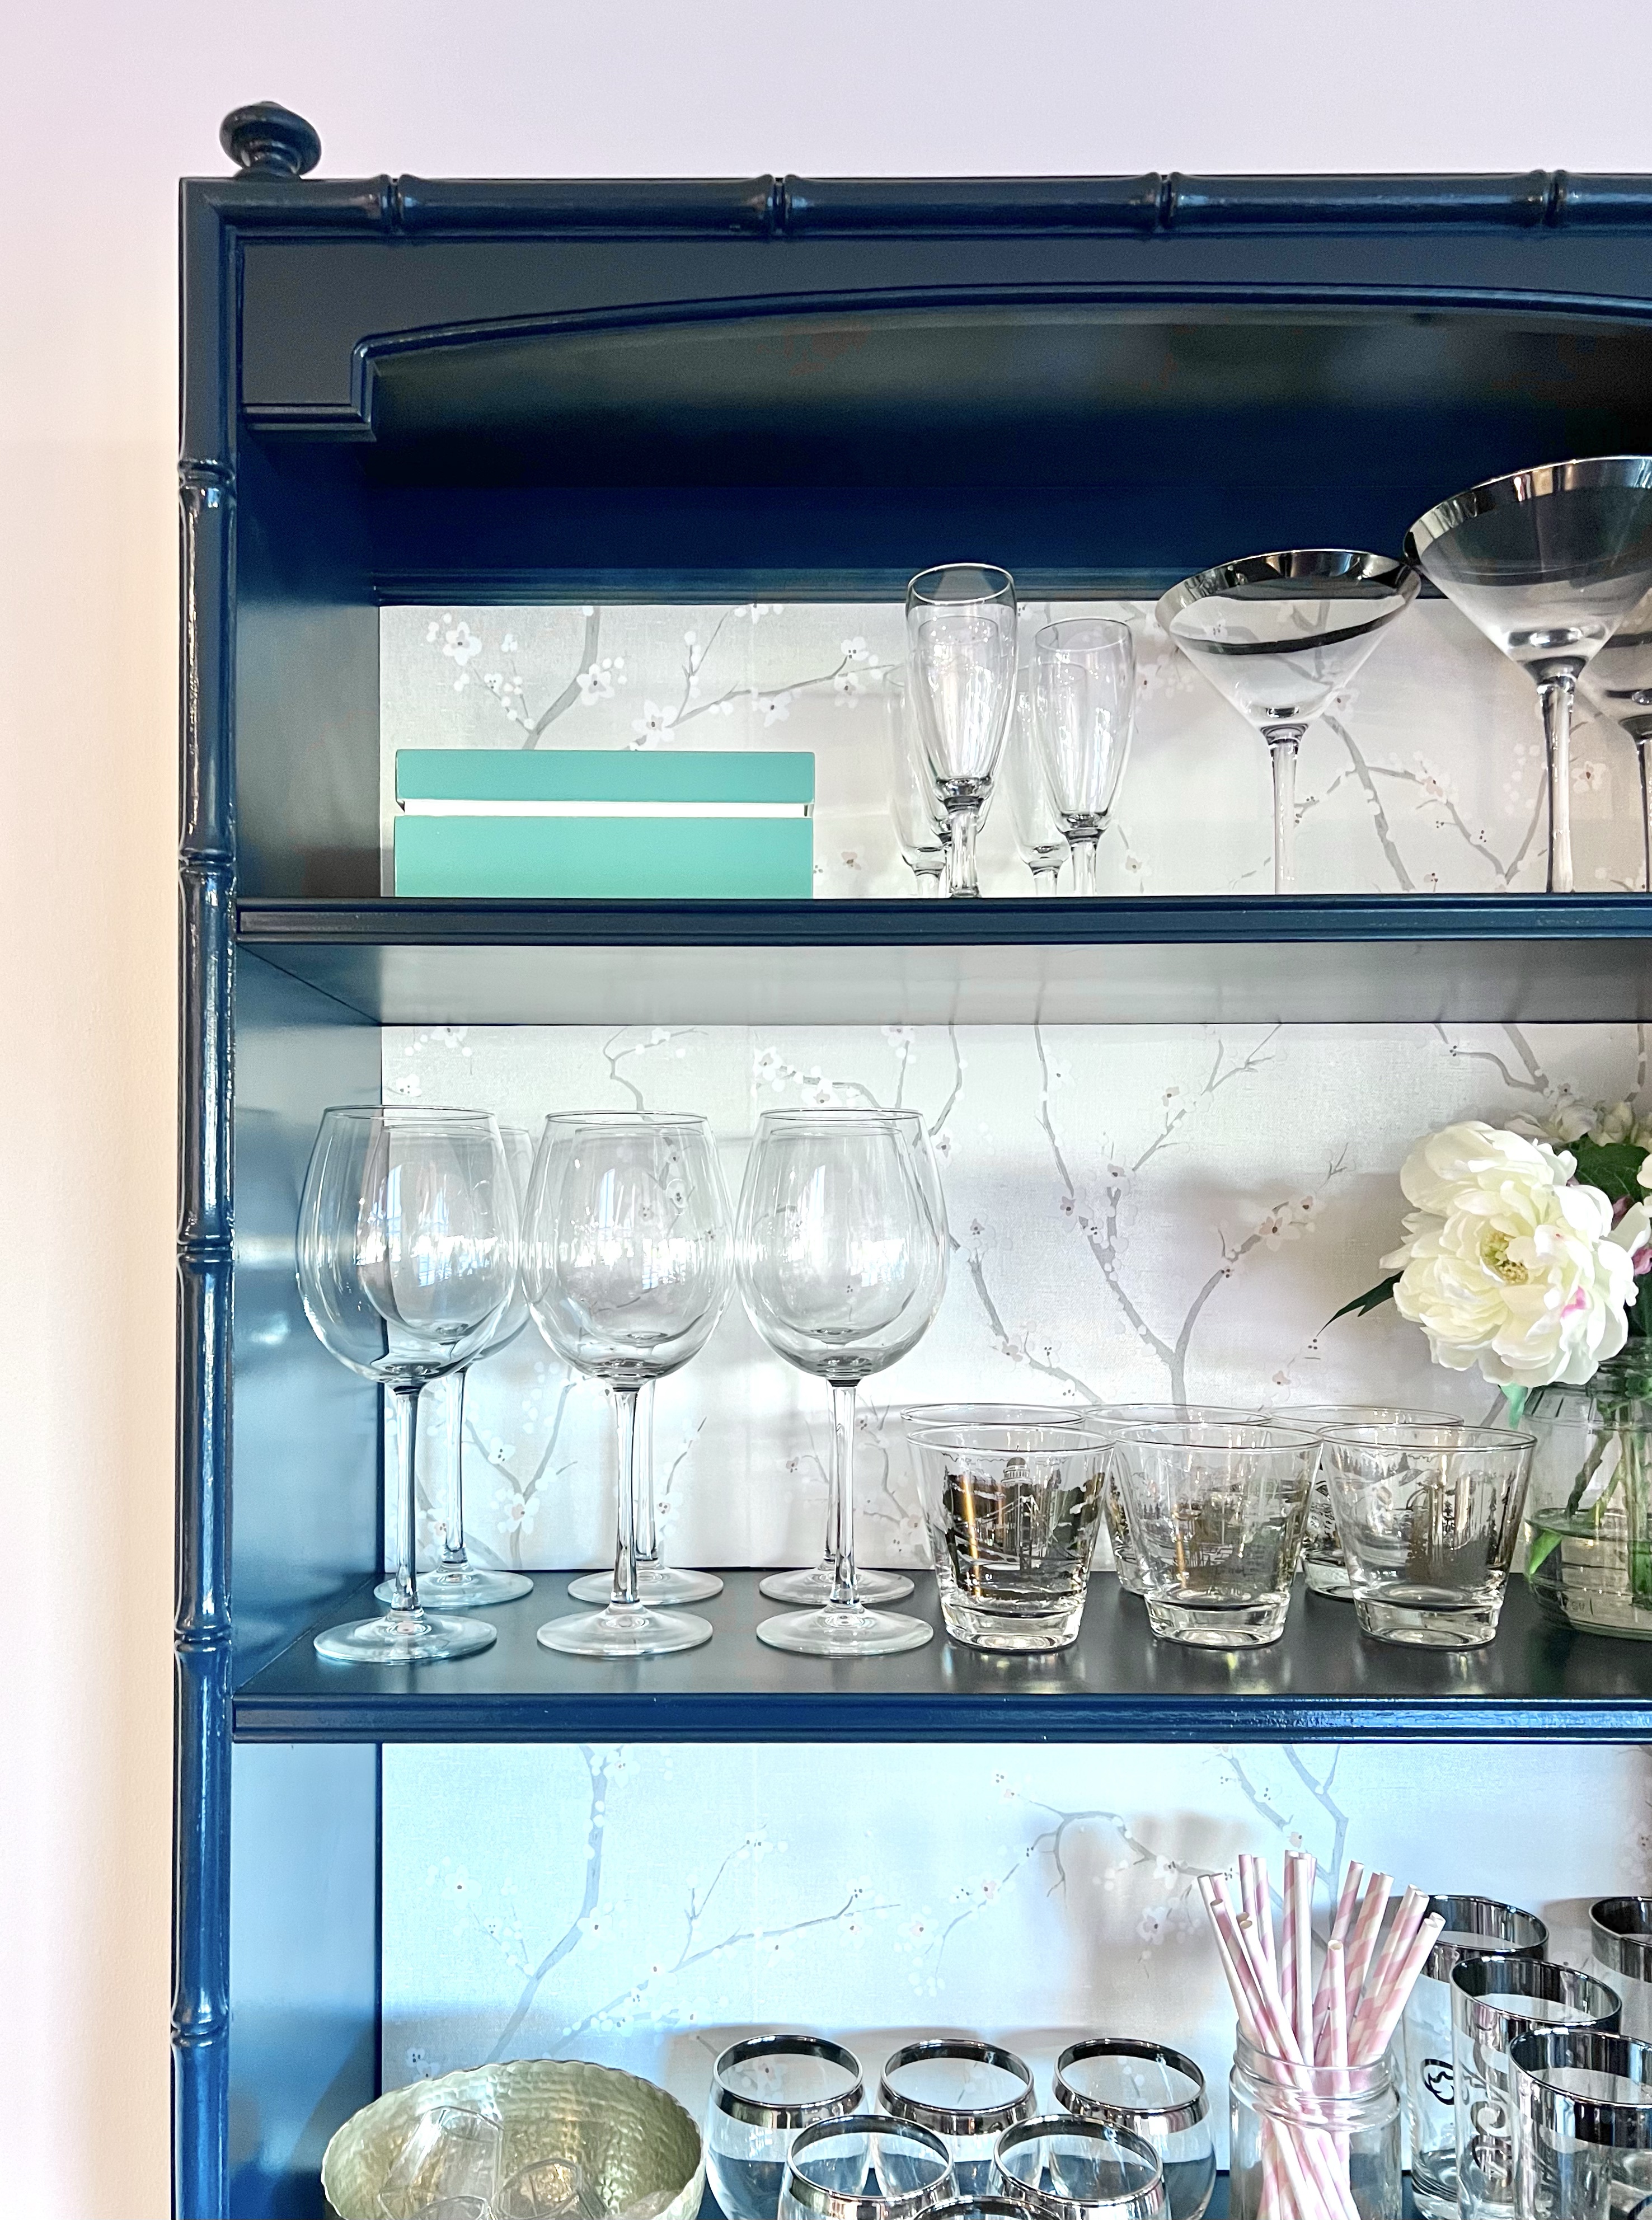
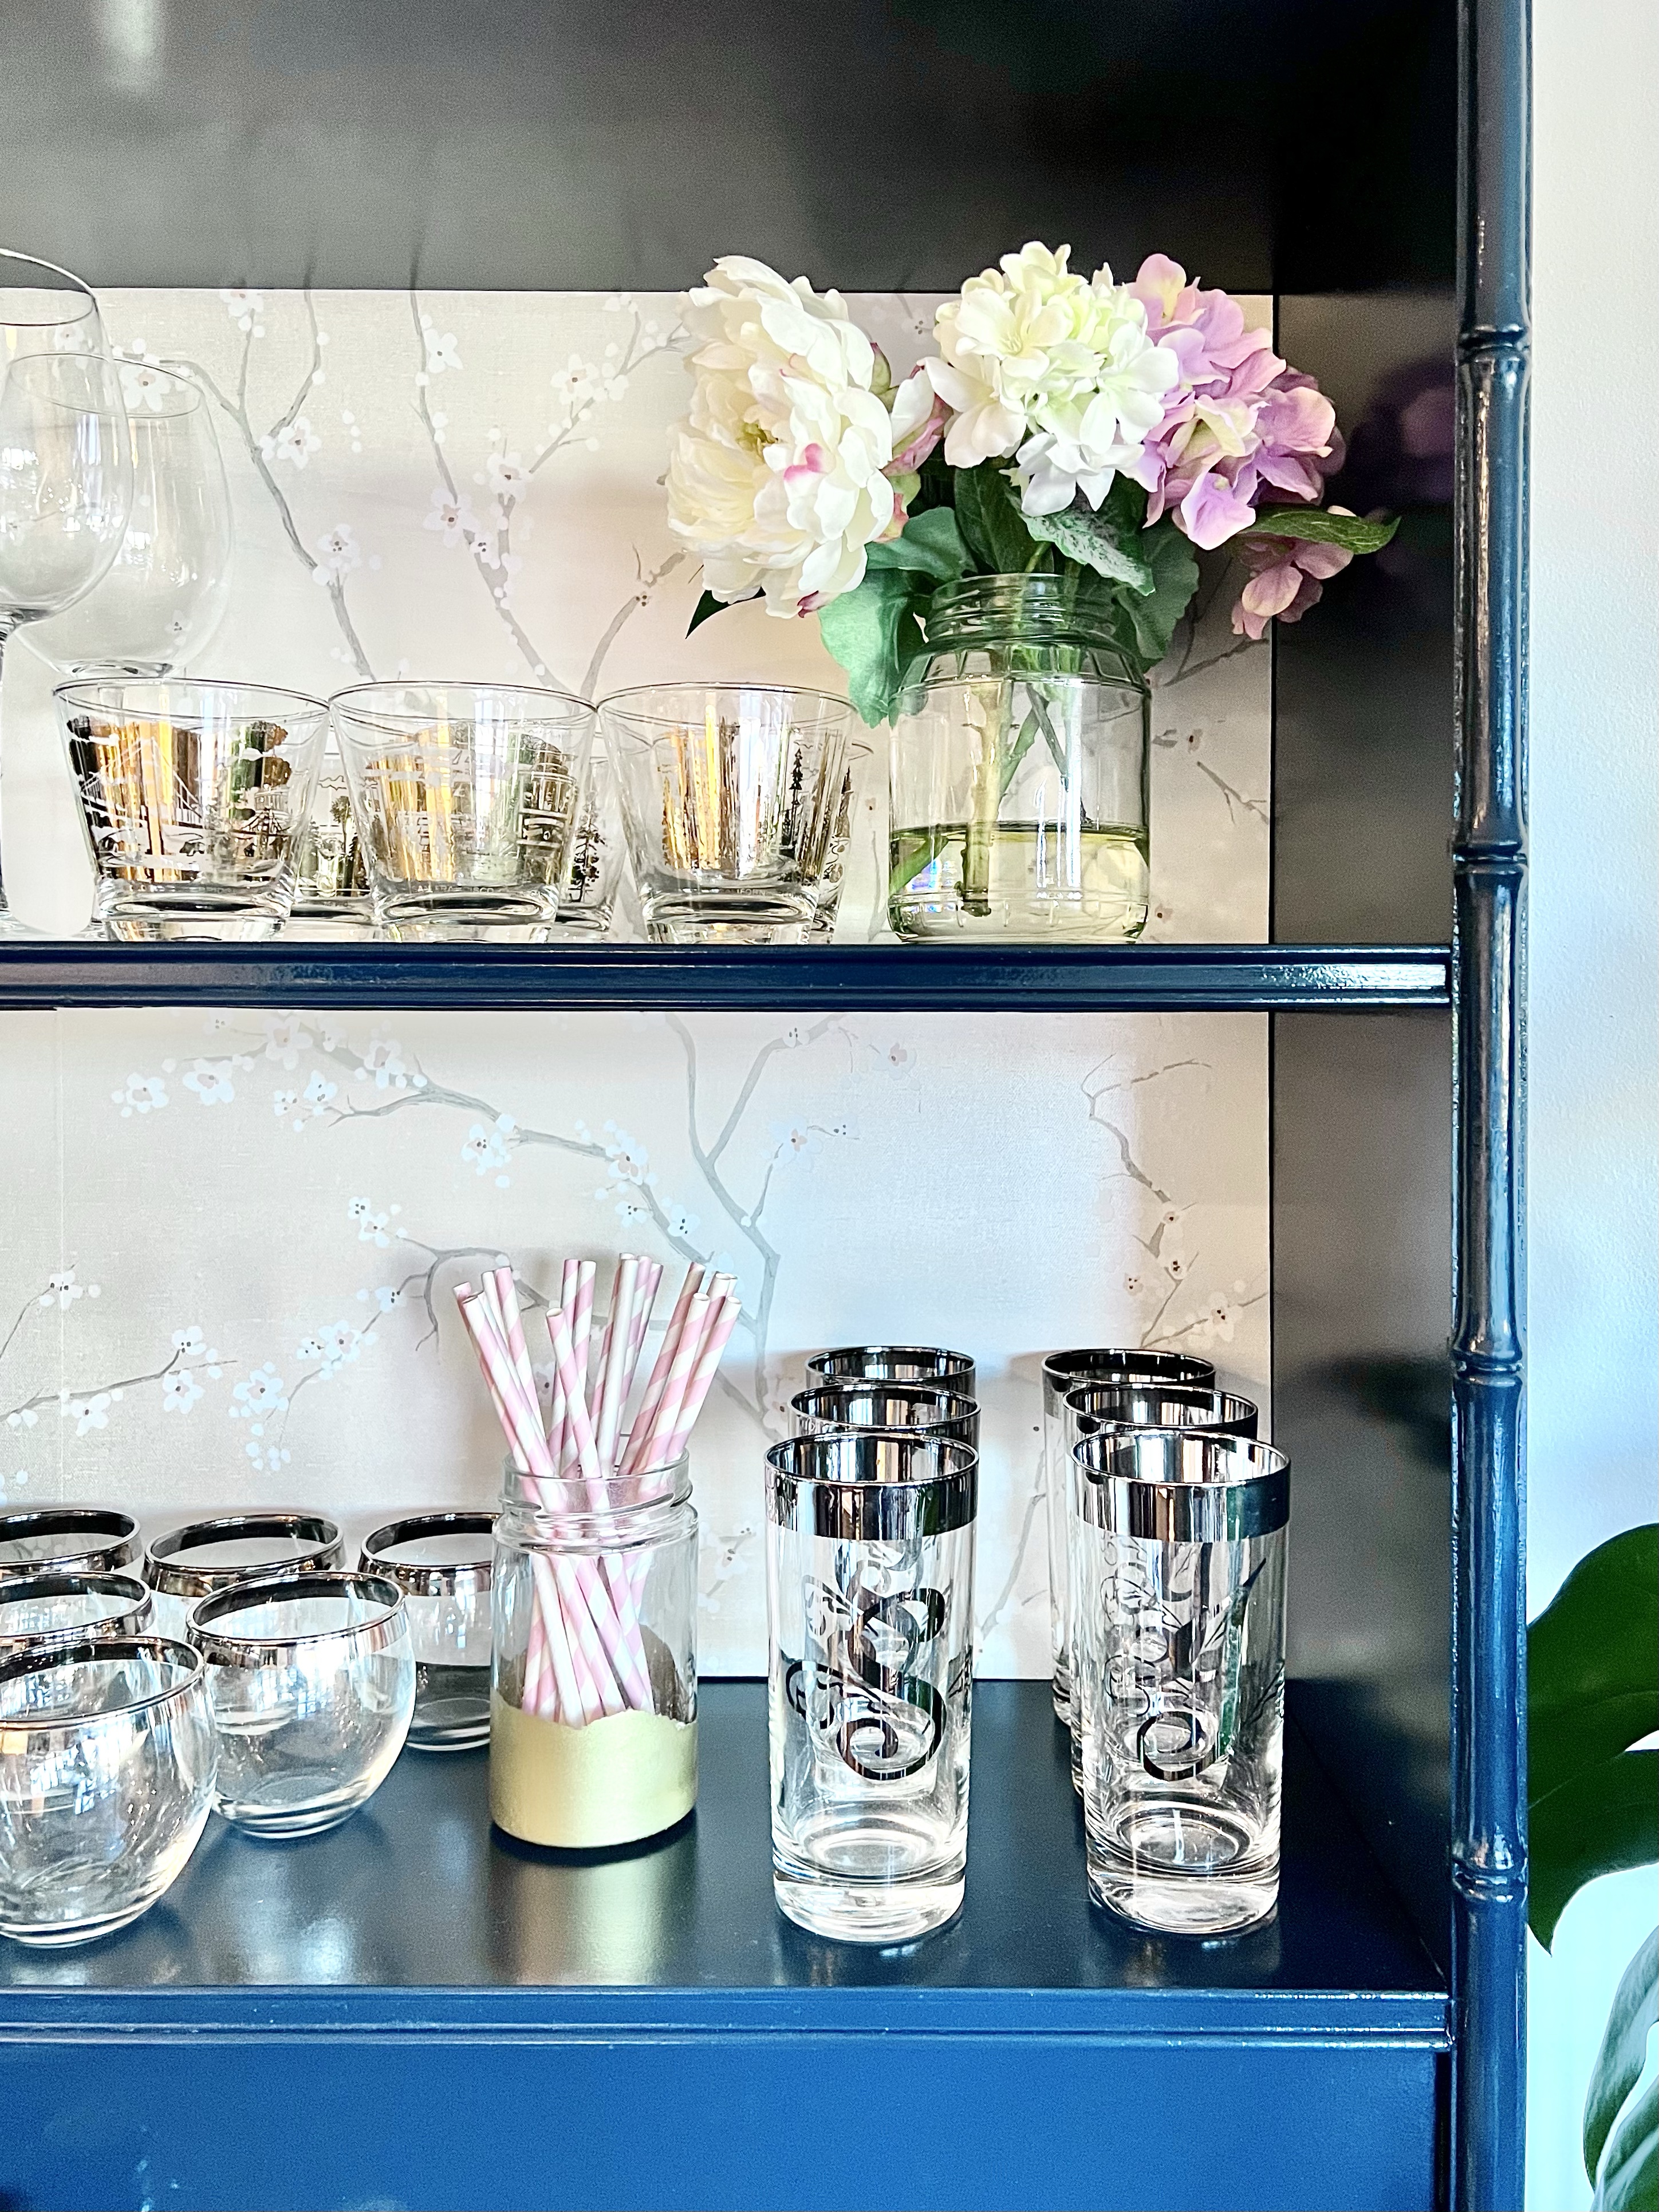
  • Wallpaper for the back of your hutch. This Cherry Blossom Peel and Stick wallpaper had everything I wanted – a pretty design that was subtle enough to not be too busy when the shelves were filled, and a little bit of sheen.
  • Hardware to attach the hutch and anti-tip hardware, especially if you live in earthquake country, like we do

Here’s how to do it:

  • Clean off dirt and dust
  • Remove hardware
  • If you are changing hardware, fill in the old holes and drill the new ones
  • Sand the surface lightly with fine grit sandpaper
  • Wipe with surface with deglosser such as Gloss-off or TSP
  • Apply the primer and let it dry thoroughly overnight
  • Sand lightly with 400 grit sandpaper and wipe off dust with a lint-free rag
  • Apply the spray lacquer – Amy Howard has some videos on YouTube with details on how to use this product. Overall, I really like it, but it is a bit finicky. Luckily, the little imperfections aren’t noticeable now that it is inside and decorated.
  • I let the lacquer cure for a week in the garage, and then I applied the wallpaper to the back of the bookcase
  • The last steps were to put the hardware back on, secure the hutch to the dresser and add anti-tip hardware to the top of the whole thing
Here are the cool details from the back of my dresser – it is 55 years young!
Before and after!

This new dining room bar is the perfect place to display our collection of vintage bar glasses. I collected them back when we threw a Mad Men party, and I still love them all!

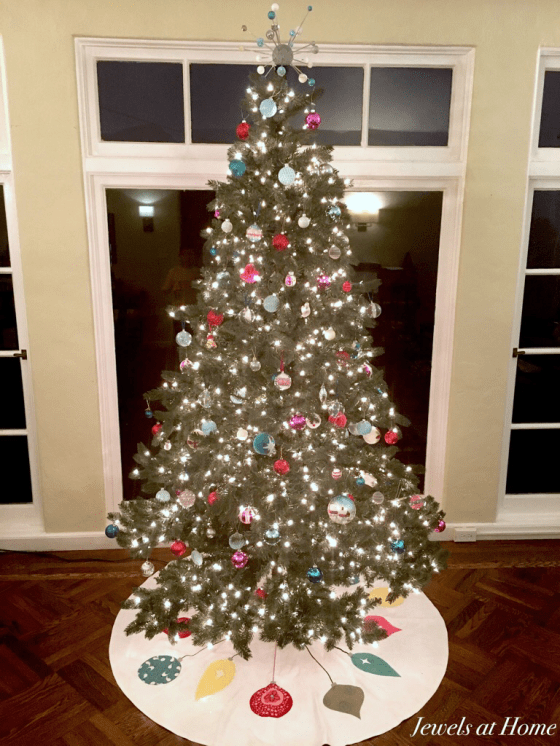
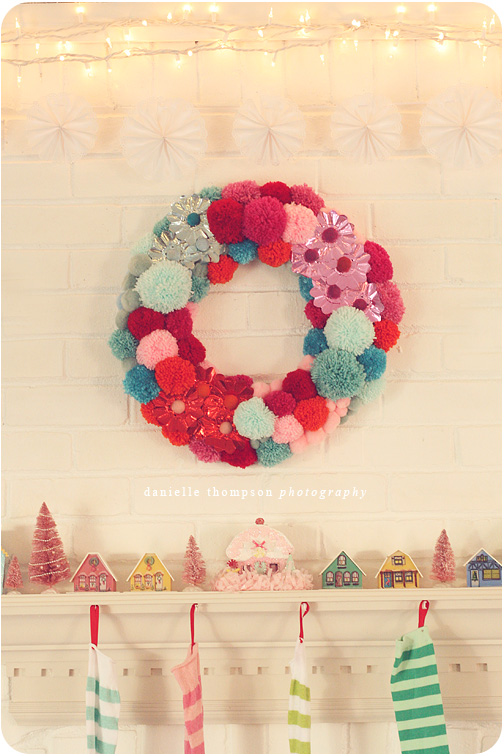
The days off for New Year’s allowed me to finish this project, so of course, I decorated for our at-home countdown to the New Year!

There is still the bed frame, a little corner desk, and some mirrors that came with the bedroom set. It was a silly indulgence to bring them all home, but I still hope to find a home for them some day somewhere!

Julie aka “Jewels”

DIY Mid-Century Atomic Christmas Tree Topper 

As you know, this Christmas, I’m decorating with a retro mid-century  theme. Our tree is trimmed with globe ornaments in red, turquoise, and pink, including these scrapbook paper and washi tape globe ornaments.

I was looking for the perfect tree topper and saw this fabulous atomic topper from Over the Top Finials on Etsy. They have lots of fun products!!

Since I had all the supplies in the house already, I thought I’d try a DIY version, and I’m pretty excited with how it turned out!

Here’s what I rounded up to make the tree topper:

  • 11 bamboo skewers – paint with silver spray paint
  • Medium styrofoam ball – paint with silver craft paint
  • Toilet paper roll
  • Green felt to cover roll
  • Assorted small balls and beads. I used some vase filler (which also came in handy when making my ornament wreath; I might have some trouble filling a vase in the future…)

Here’s how to put it together

  • Paint the skewers and styrofoam ball and let dry
  • Cut the toilet paper roll lengthwise and tape it into a narrower and tapered roll. Push the narrower end into the  styrofoam ball. Cover it with green felt to blend into the tree.
  • Cut the skewers into varying lengths, cutting on an angle to make sharp ends.
  • Stick the small balls and beads into the skewers.
  • Stick the skewers into the center ball, spacing them out in all directions and with varying lengths.

Ta-da!

DIY Mid-Century Atomic Christmas Tree Topper | Jewels at Home

And here’s how the tree has come together, including the retro Christmas Ornament tree skirt!

DIY Mid-Century Atomic Christmas Tree Topper | Jewels at Home
 I think our Christmas tree looks far-out and groovy with its new topper!

“Jewels”

I’m Dreaming of a Retro Christmas

I love Christmas! and I love Mad Men! The last few years, I have changed up our Christmas decor each year.

This year, I’m really loving the look of a colorful Mid-century Christmas. I’m gathering inspiration and have a few projects to show you soon. Here are some of my favorite ideas.

I love everything about Danielle Thompson’s Candy Colored Christmas. This pom-pom wreath is adorable, and the simple white background keeps the colorful theme from being over-the-top.

danielle Thompson xmas

Danielle Thompson

This little bottle brush forest seen at Apartment Therapy is so charming. I made Christmas trees with felt and yarn a few years ago, so I am am looking forward to adding to my collection!

bottle brush trees

And how about this beautiful Christmas tree skirt that was sold on Mod Cloth? It’s out of stock now, but I’m looking forward to making my own!

IMG_8029

One more project I have in the works is an ornament wreath inspired by the fantastic ones by Georgia Peachez.

georgiapeachezwreath

I’m looking forward to bringing all these fun retro Christmas ideas into reality in our house this year!

“Jewels”

Mad Men Party Wrap-Up

I did not want the night to end when we threw our Mad Men-themed birthday party a few weeks ago. There are more ideas in the first post about our Mad Men party and the retro menu can be found in another post as well. Here are some of the finishing details that pulled it all together – not the least of which were the fab costumes of our guests!

Lucky Strike cigarette boxes

Mad Men would simply not be Mad Men, without all the smoking, particularly the Lucky Strikes. At the same time, I’m not such a devoted fan of the show that I was about to start up a carcinogenic habit. As a compromise, I printed up some empty Lucky Strike cigarette boxes and filled them with Hershey’s Ovation Dark Chocolate Mint Sticks, which have that long thin cigarette shape.

There’s a great printable Lucky Strike box from Namida on Deviantart.com. It has a fun disclaimer on the side and otherwise looks quite authentic.

To save ink and paper, I printed two copies and then placed just the box images side by side, so I could make additional copies with two boxes per page. I printed mine on heavy Index Card Stock (110 lb paper) and then set them up in the front hall, under a vintage Lucky Strike ad, for guests to enjoy. I will say that this project was more time-consuming than I had anticipated, but they helped set the tone at the party and made a fun party favor, too!

Mad Men party.  Party favors: Lucky Strike boxes filled with mint chocolates and displayed under a vintage ad | Jewels at Home

Party favors: Lucky Strike boxes filled with mint chocolates and displayed under a vintage ad.

Mad Men Photo Booth

I love photo booths. I still have favorite strips from my school days and when Steve and I were young and goofy (now we’re not-so-young and still goofy). With today’s technology, it’s so easy to make your own photo booth, and that giddy sensation of not knowing exactly when the flash will go off, of trying to squeeze all your friends into the frame, is easy to recreate in your own home.

Mad Men party.  DIY photo booth with great accessories | Jewels at Home

DIY photo booth with great accessories.

To make the photo booth, I used

  • large cardboard boxes spruced up with fabric panels around the outside
  • a custom Mad Men photo booth sign
  • iPad with Picibooth app, attached to the inside of the box with Command Picture-Hanging Strips
  • three different backdrops

I hung all the curtains from our regular curtain rod, so it was easy to switch backdrops, just like the traditional photo booths!

Mad Men party.  DIY photo booth with iPad mounted inside | Jewels at Home

DIY photo booth with iPad mounted inside

Mad Men party.  DIY photo booth with three fun backgrounds hanging on a curtain rod | Jewels at Home

DIY photo booth with three fun backgrounds hanging on a curtain rod.

I provided some props, like costume jewelry, a fedora, fake cigarettes, and Lucky Strike boxes, all arranged under Peggy’s breakthrough Belle Jolie ad. Our guests had plenty of their own themed accessories, too!

Mad Men party.  Photo booth accessories | Jewels at Home

The photo booth got a lot of action that night. I loved going back later to see all the sassy poses, and I especially loved discovering that our seven-year-old had gone up several times to take pictures himself!

Mad Men party.  DIY photo booth with backdrops and accessories | Jewels at Home

Guys and Dolls – Fab Costumes

I cannot take any credit for the following photos, but I just had to share all the great looks that crossed our threshold that night. Honestly, it was like opening a birthday present every time I opened the door! It was enormous fun for us to see how much fun our friends had creating their costumes. From crinolines to bouffant hairdos, bow ties to patent pumps, every one looked perfect!

Mad Men party.  Costumes | Jewels at Home

Mad Men party.  Costumes | Jewels at Home

Mad Men party.  Costumes | Jewels at Home

More Mad Decor

I wanted to feel immersed in the Mad Men world everywhere I looked, starting with our front door, where I hung a large framed Sterling Cooper Draper Pryce logo:

Mad Men party.  Tons of ideas for decorating and entertaining! | Jewels at Home

Another logo was prominently displayed over the buffet table:

Mad Men party.  A complete guide to decorating and entertaining | Jewels at Home

This vintage typewriter sparked a lot of conversation!

Mad Men Party.  A complete guide to decorating and entertaining | Jewels at Home

Leading up to the party, I became obsessed with collecting vintage barware in thrift stores and on eBay.  I love the collection of Dorothy Thorpe silver-rimmed glasses displayed at our kitchen bar area and the classic California-themed tumblers gathered on a tray.

Mad Men Party.  A complete guide to decorating and entertaining | Jewels at Home

Mad Men Party.  A complete guide to decorating and entertaining | Jewels at Home

If you’re looking for some fabulous artwork to display, this book has fun illustrations Mad Men: The Illustrated World by Dyna Moe, including this one that I framed to put next to the dry bar area.

Mad Men Party.  A complete guide to decorating and entertaining | Jewels at Home

I said I didn’t want the evening to end, but it did end perfectly.  After most of the guests left, some of our college buddies hung out with us in the living room to catch up some more, and one of them snapped this pic of me and Steve at the end of the night.

Mad Men Party.  A complete guide to decorating and entertaining | Jewels at Home

Good night!

“Jewels”

Mad Men Party – Menu

It’s hard to pick a favorite thing about our recent Mad Men- themed party, but the food was a definite hit. Do check out the other posts on the pre-party brainstorming and the Mad Men party wrap-up for more ideas.

To Drink

True to the spirit (haha) of the show, I’ll start with the drinks! Steve played bartender for much of the evening, which I think satisfied his connection to the TV series – he mixes himself a drink in one of our roly poly glasses for each new episode.

Mad Men Party Bar Menu including both classic and whimsical items | Jewels at Home

Mad Men Party Bar Menu including both classic and whimsical items. No one went for the Mountain Dew…

Mad Men party bar set-up with menu and collection of vintage Dorothy Thorpe glasses | Jewels at Home

Mad Men party bar set-up with menu and collection of vintage Dorothy Thorpe glasses.

In the dining room, we had a dry bar including some fabulous California-themed vintage glasses from our local thrift store.  I love the whimsical art with Sally Draper serving drinks.  It’s from Dyna Moe’s book, Mad Men: The Illustrated World.

Mad Men Party dry bar set-up with vintage glasses and Mad Men-inspired art  | Jewels at Home

Mad Men Party dry bar set-up with vintage glasses and Mad Men-inspired art.

Fab vintage glasses for a Mad Men party | Jewels at Home

Fab vintage glasses for a Mad Men party.

To Eat

Besides an array of appetizers set out in “chip and dip” format, Steve and I each had our pet projects for the evening’s menu.  His was definitely more refined – a Beef Wellington.  Since we were eating buffet style (and serving 25), he made a “deconstructed” Beef Wellington, and it was perfection!  His have-to side dish was a wedge salad with blue cheese.  I confess to eating just the blue cheese and bacon, but the wedge did look good on the table…

Mad Men party menu.  Deconstructed Beef Wellington | Jewels at Home

Deconstructed Beef Wellington

Mad Men party menu.  Classic wedge salad | Jewels at Home

Classic wedge salad.

My retro dishes of choice were a Waldorf Salad – modernized with some dried cranberries – and a Jell-o mold.  I did look up some traditional Jell-o salads, but I couldn’t bring myself to put vegetables into gelatin, even for the sake of authenticity, so I made mine with canned Mandarin oranges and strawberries.  It was delicious and definitely a nostalgia item for many in the room.

Mad Men party menu.  Contemporary Waldorf salad with dried cranberries | Jewels at Home

Contemporary Waldorf salad with dried cranberries

Mad Men party menu.  Jell-o mold with strawberries and Mandarin orange slices | Jewels at Home

A mid-century housewife moment: Jell-o mold with strawberries and Mandarin orange slices.

20130512-224423.jpgMad Men party menu.  Jell-o mold with strawberries and Mandarin orange slices | Jewels at Home

A big thank you to our friends who came back in time with us for a fun evening!

Mad Men party menu: Jell-o mold, Waldorf salad, Beef Wellington, wedge salad, and more | Jewels at Home

“Jewels”

Mid-Century Nightstand/ Dresser with Dipped Legs

To our delight, both our older boys love reading, and they recently requested a little nightstand to put their books on, so I poked around on Craigslist and found this cool-looking Mid-Century low dresser that was cosmetically-challenged but I thought would look great painted in grey.

Well, you know how Craigslist is – some people are completely friendly and professional and others can be a bit quirky or flaky. The guy selling this dresser was definitely friendly, but he did push back the time of our meeting several times, including once when we were already on the road, and he seemed to be struggling a bit to adjust to his move and letting go of some of his furniture. Anyway, we finally brought the dresser home.

A couple of days later, the seller of the dresser texted me to ask if he could buy the dresser back. That’s a first! But knowing that he was very attached to it, I didn’t want to be mean, so I agreed to sell it back to him. I was disappointed, but by that point, I was committed to the look, so I found the Sveio dresser at Ikea that has almost the same shape. I’m not crazy about the look in white, but since I was planning on painting ours anyway, I figured it would work out. Fast forward a few more hours, and the dresser’s former owner had changed his mind again and said he was not coming to pick it up.

Okay?! Whatever?! I got to work transforming this great vintage find into something cool and functional for the boys.

Mid-Century dresser found on Craigslist ready for a makeover!

BEFORE: Mid-Century dresser found on Craigslist ready for a makeover!  I forgot to take a picture before I started patching the damaged parts of the wood.

Sveio chest with drawers from Ikea

Sveio chest with drawers from Ikea has Mid-Century lines.

While part of me hated to paint over this classic piece of furniture, it really had seen better days. There were a lot of chips in the veneer and a dark stain on the top – so I felt I was better off painting it than trying to restore the wood finish.

I started with wiping it down and using some wood filler to patch up the most damaged parts of the veneer. When the wood filler was dry, I sanded the whole piece and wiped it down again.

I was inspired by this piece I saw at The Wits Blog, with the brass leg caps, so I taped off the bottom of the legs to leave the original wood.

Grey dresser makeover by The Wits.

Grey dresser makeover by The Wits.

Go to The Wits blog

For the rest of the dresser, I used a coat of primer followed by a couple of coats of Benjamin Moore Amherst Gray (HC-167).

I finished by rubbing the dresser with some furniture polish to give it a smooth protective finish.

Mid-Century dresser painted in Benjamin Moore Amherst Gray with reverse "dipped" legs. Get the same look with a Ikea Sveio hack.  From Jewels at Home.

Mid-Century dresser painted in Benjamin Moore Amherst Gray with reverse “dipped” legs.

Mid-Century nightstand painted with "dipped" legs.  Get the same look with a Ikea Sveio hack.  From Jewels at Home.

Close-up view of the legs of the painted Mid-Century nightstand, with a reverse “dipped” finish.

I’m happy with how the nightstand turned out, and it looks great in the boys’ room.  They love it and have already filled the drawers with their books and treasures.  Here’s how it looks in place.  Their room still needs a lot more decorating, but this is a good start!

Mid-Century nightstand makeover.  Get the same look with a Sveio Ikea hack.  From Jewels at Home.

Mid-Century nightstand with a new painted look.

Boys' room with a painted Mid-Century nightstand.  From Jewels at Home.

Boys’ room with a painted Mid-Century dresser.

Mid-Century nightstand painted in Benjamin Moore Amherst Gray with reverse "dipped" legs.  From Jewels at Home.

Mid-Century nightstand painted in Benjamin Moore Amherst Gray with reverse “dipped” legs. The cool baseball player lamp is a gift from the boys’ uncle. He brought it home from Korea.

And here’s the final before-and-after picture!

Mid-Century dresser painted in Benjamin Moore Amherst Gray with reverse "dipped" legs.  You could get this look with an Ikea Sveio hack, too.  From Jewels at Home.

So, this post turned out to be about making over a battered vintage dresser, but it almost became an Ikea Sveio hack, and that would have been okay, too.  If you try this with Sveio, you could leave the legs white or paint them another color first, before taping them off.  I hope this dresser’s former owner finds happiness, because our boys are very happy with their slick new nightstand.

Are you looking for your own diamond in the rough to transform? I’m excited to share that my friend Ari launched a slick new furniture re-sale site over at www.revolvingdecor.com. Check it out to participate in a curated online marketplace for great furniture finds!

“Jewels”