Modern and classic. Elegant and streamlined. This is the balance I was looking for in a dining room chandelier. I also wanted an open design, so we could make the most of our views. This week, I will show you some of my favorite options, as well as what I ended up DIYing for ~$50! Along the way, I’ll show you my favorite gold spray paint and how to add a DIY cord cover to a chandelier.
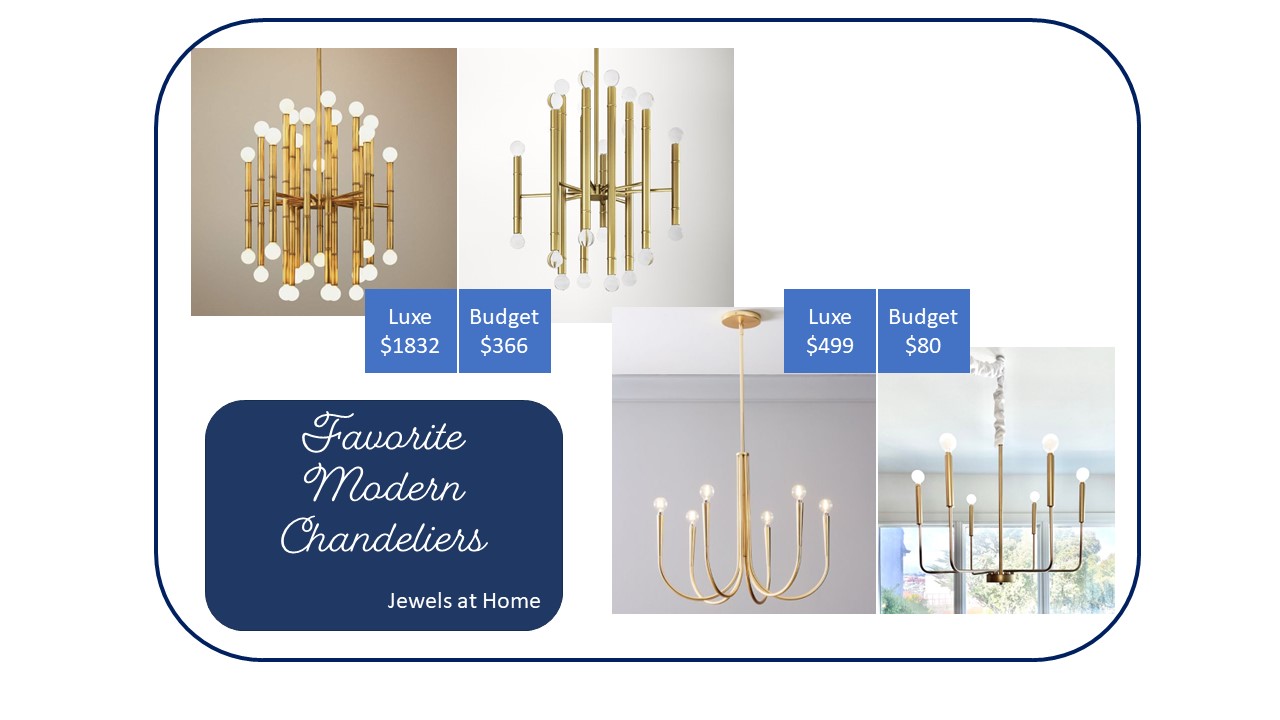
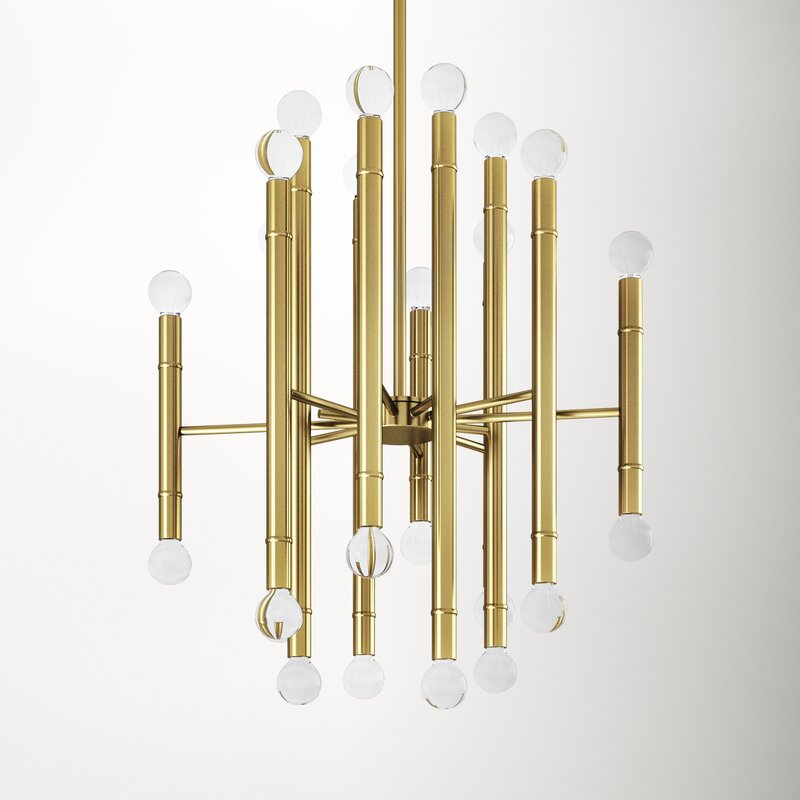
My top two choices were the West Elm Swoop Arm Chandelier (below left) and the Hammons Sputnik Modern Chandelier (below right) (a dupe for the Jonathan Adler Meurice chandelier):

I was getting ready to buy one of these beautiful lights when, at the last minute, I decided to take a quick peek on Craigslist, and I came across a chandelier with a similar shape for only $25! I’m pretty sure it is this Modern 6-Candle Chandelier shown below which is less than $100, even if you buy it new!

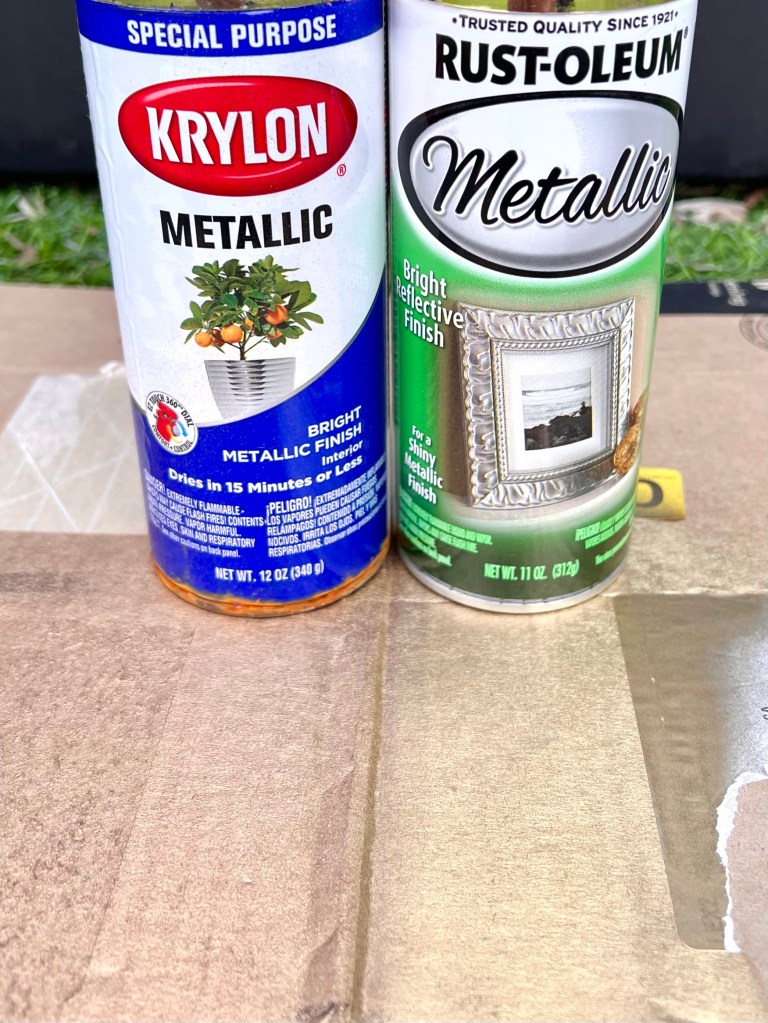
The light I found was a mix of black and gold, so I prepared to spray mine gold. Not all gold spray paints are the same. I happened to have the Krylon paint (left) in the garage, but it is a reddish color, more copper than gold, so I went to our neighborhood hardware store to pick up a can of my favorite gold paint, Rust-oleum, shown on the right, and it is perfect!

I added these frosted globe bulbs, which I think look more modern than the flame-shaped bulbs.

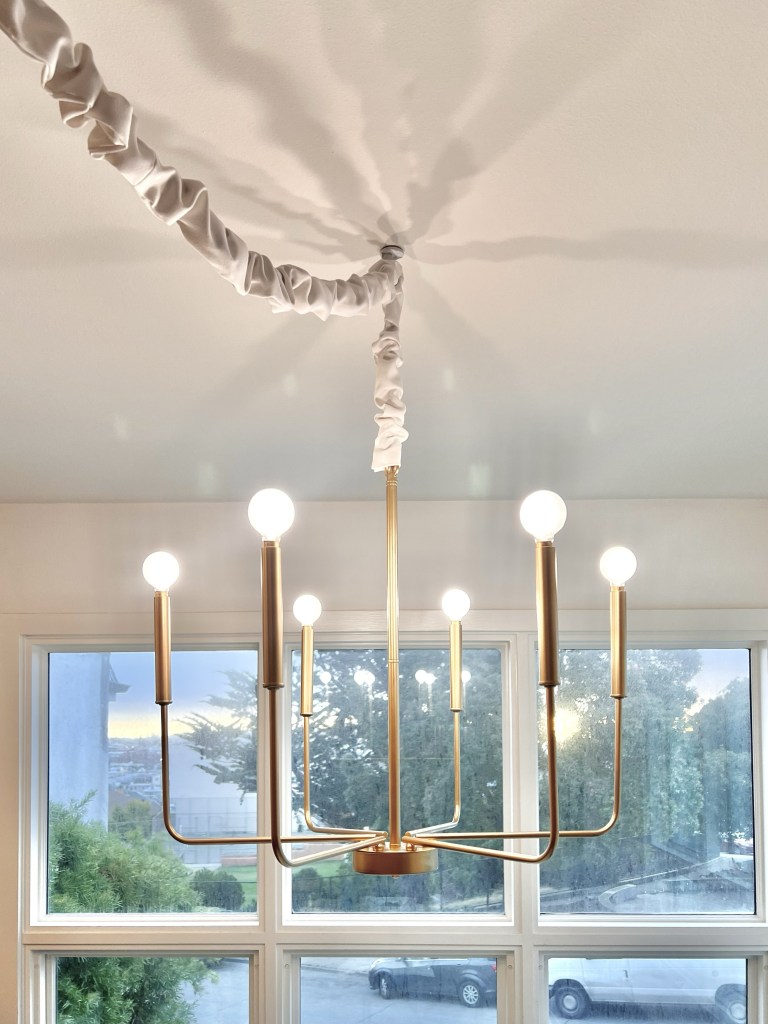
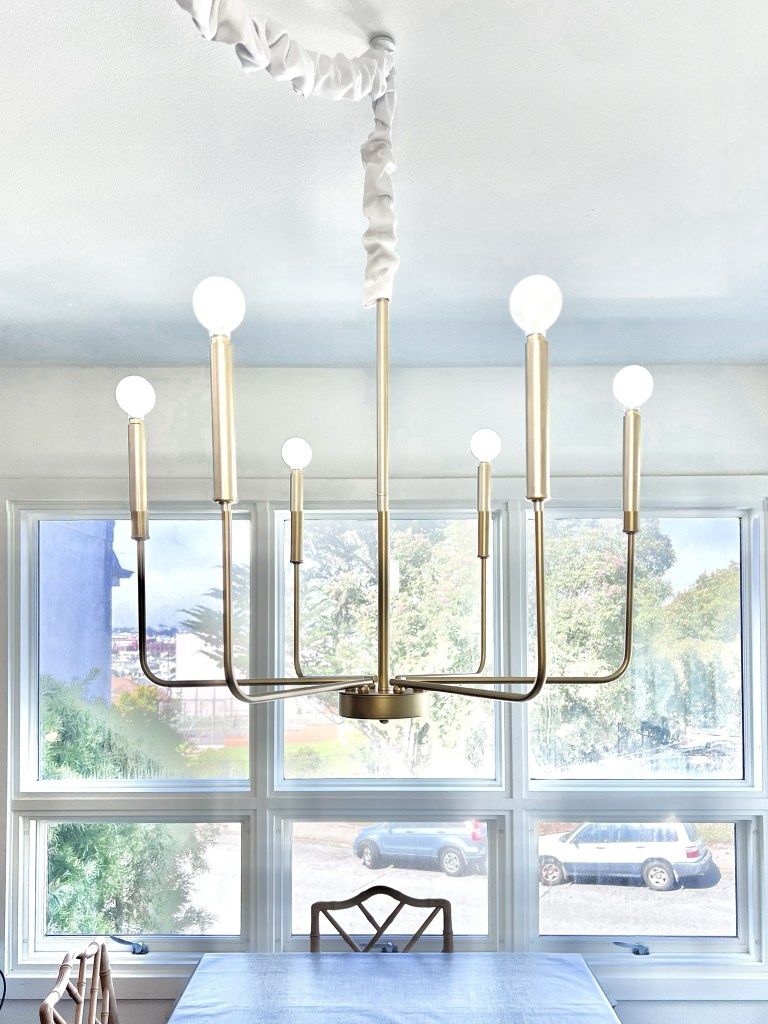
The last step was to was to add a cord cover. This is a 5″ wide strip of fabric about 1.5x the length of the cord. I ironed down a 3/8″ seam along the two long edges, and then I used hot glue to close the “seam” around the cord.


I’ll keep posting progress updates on Instagram and a weekly post here with more details! I’m looking forward to the next steps of this project, as well as enjoying the other participants’ posts. You can follow the whole event on the One Room Challenge website!
Julie AKA “Jewels”