Elegant Patio Chair Makeovers

I am so excited for our new patio space and have already enjoyed time out here eating lunch, reading, or catching up on some work. I started looking for some lounge chairs, but I couldn’t quite find what I wanted – or more accurately, what I wanted was way too $$$. But this story has an happy ending! I found these used chairs and made them over for $ to complete our patio space!

It’s no secret that I love anything with the look of cane or faux bamboo and also that I have a weakness for Craigslist finds! I spotted this set on Craigslist for $50, and when I showed up, the woman said I could have it for free. She also let me take the chairs without the table, so my karma of giving things away when we moved last year came back to me! I also picked up the chairs near my old neighborhood hardware store, so I stopped by to get some supplies and painting tips.

Here’s how to do it:

  • I started by cleaning off as much rust as possible. I used an old screwdriver, sandpaper, and steel wool
  • I prepped the chairs with deglosser and metal primer
  • I then finished them off with white gloss spray paint
  • The cushions were in decent condition, just faded, so I found these new slipcovers to freshen them up!

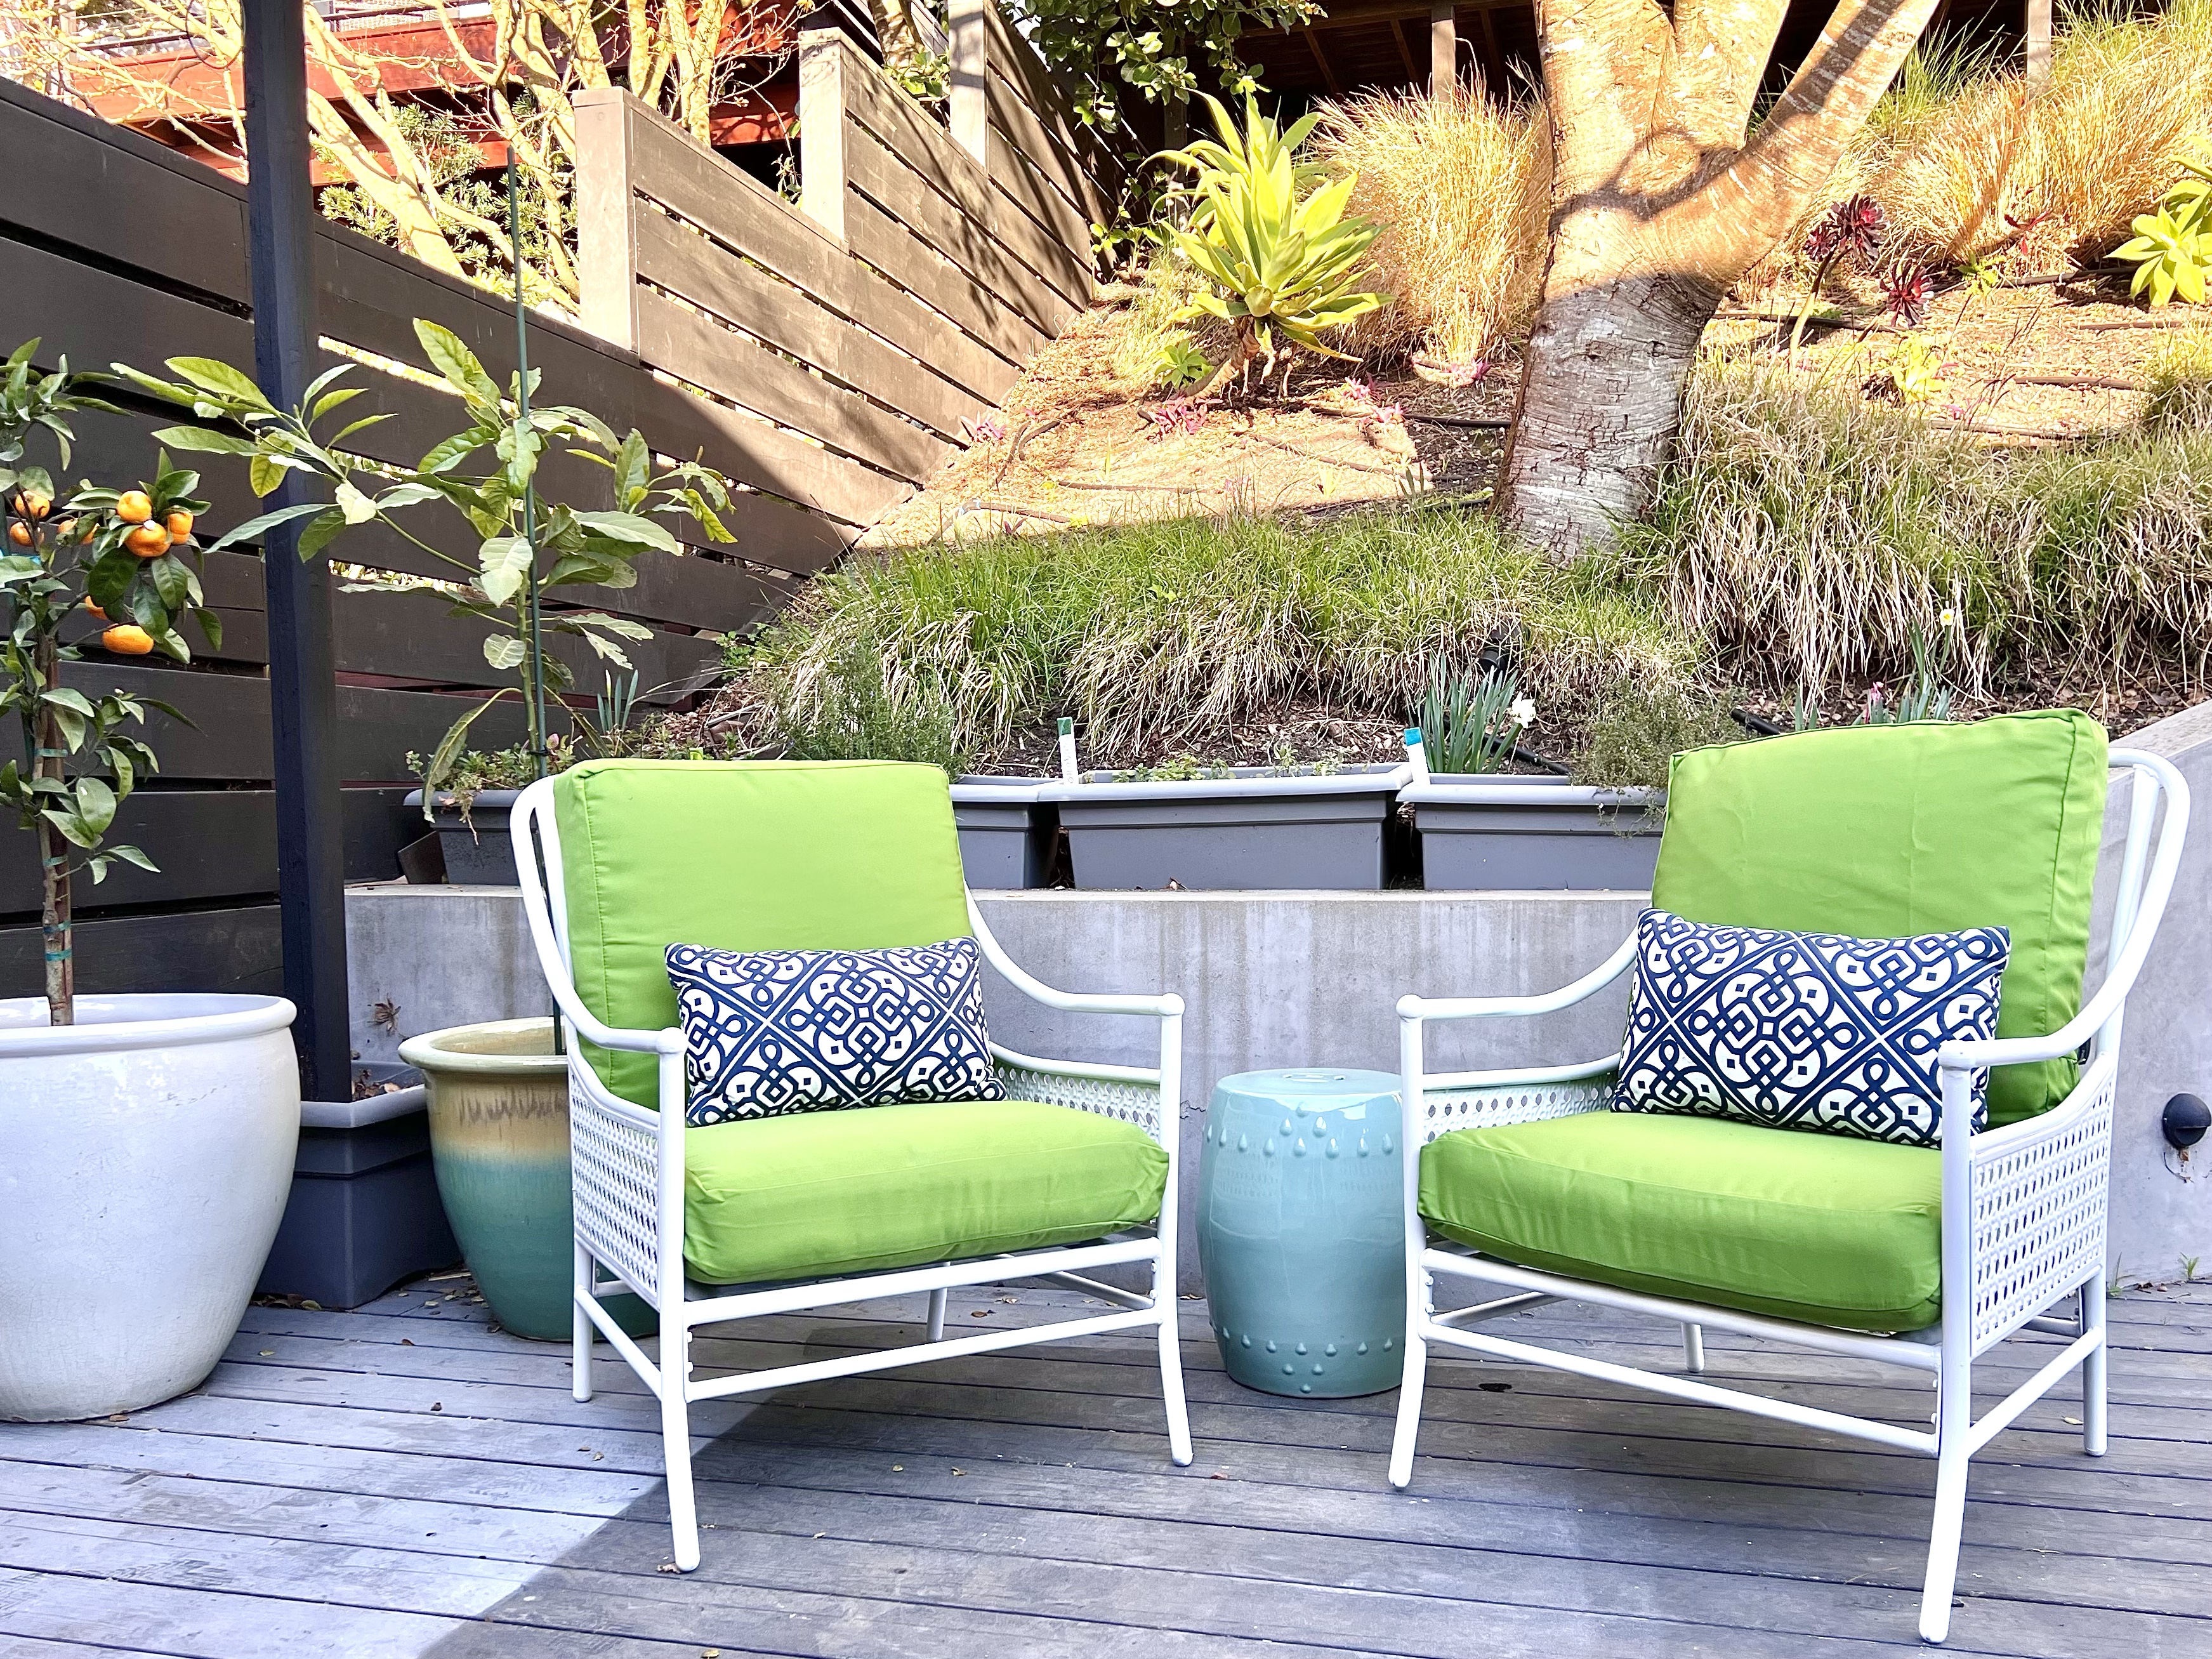
Here are some more pictures of our “new” chairs.

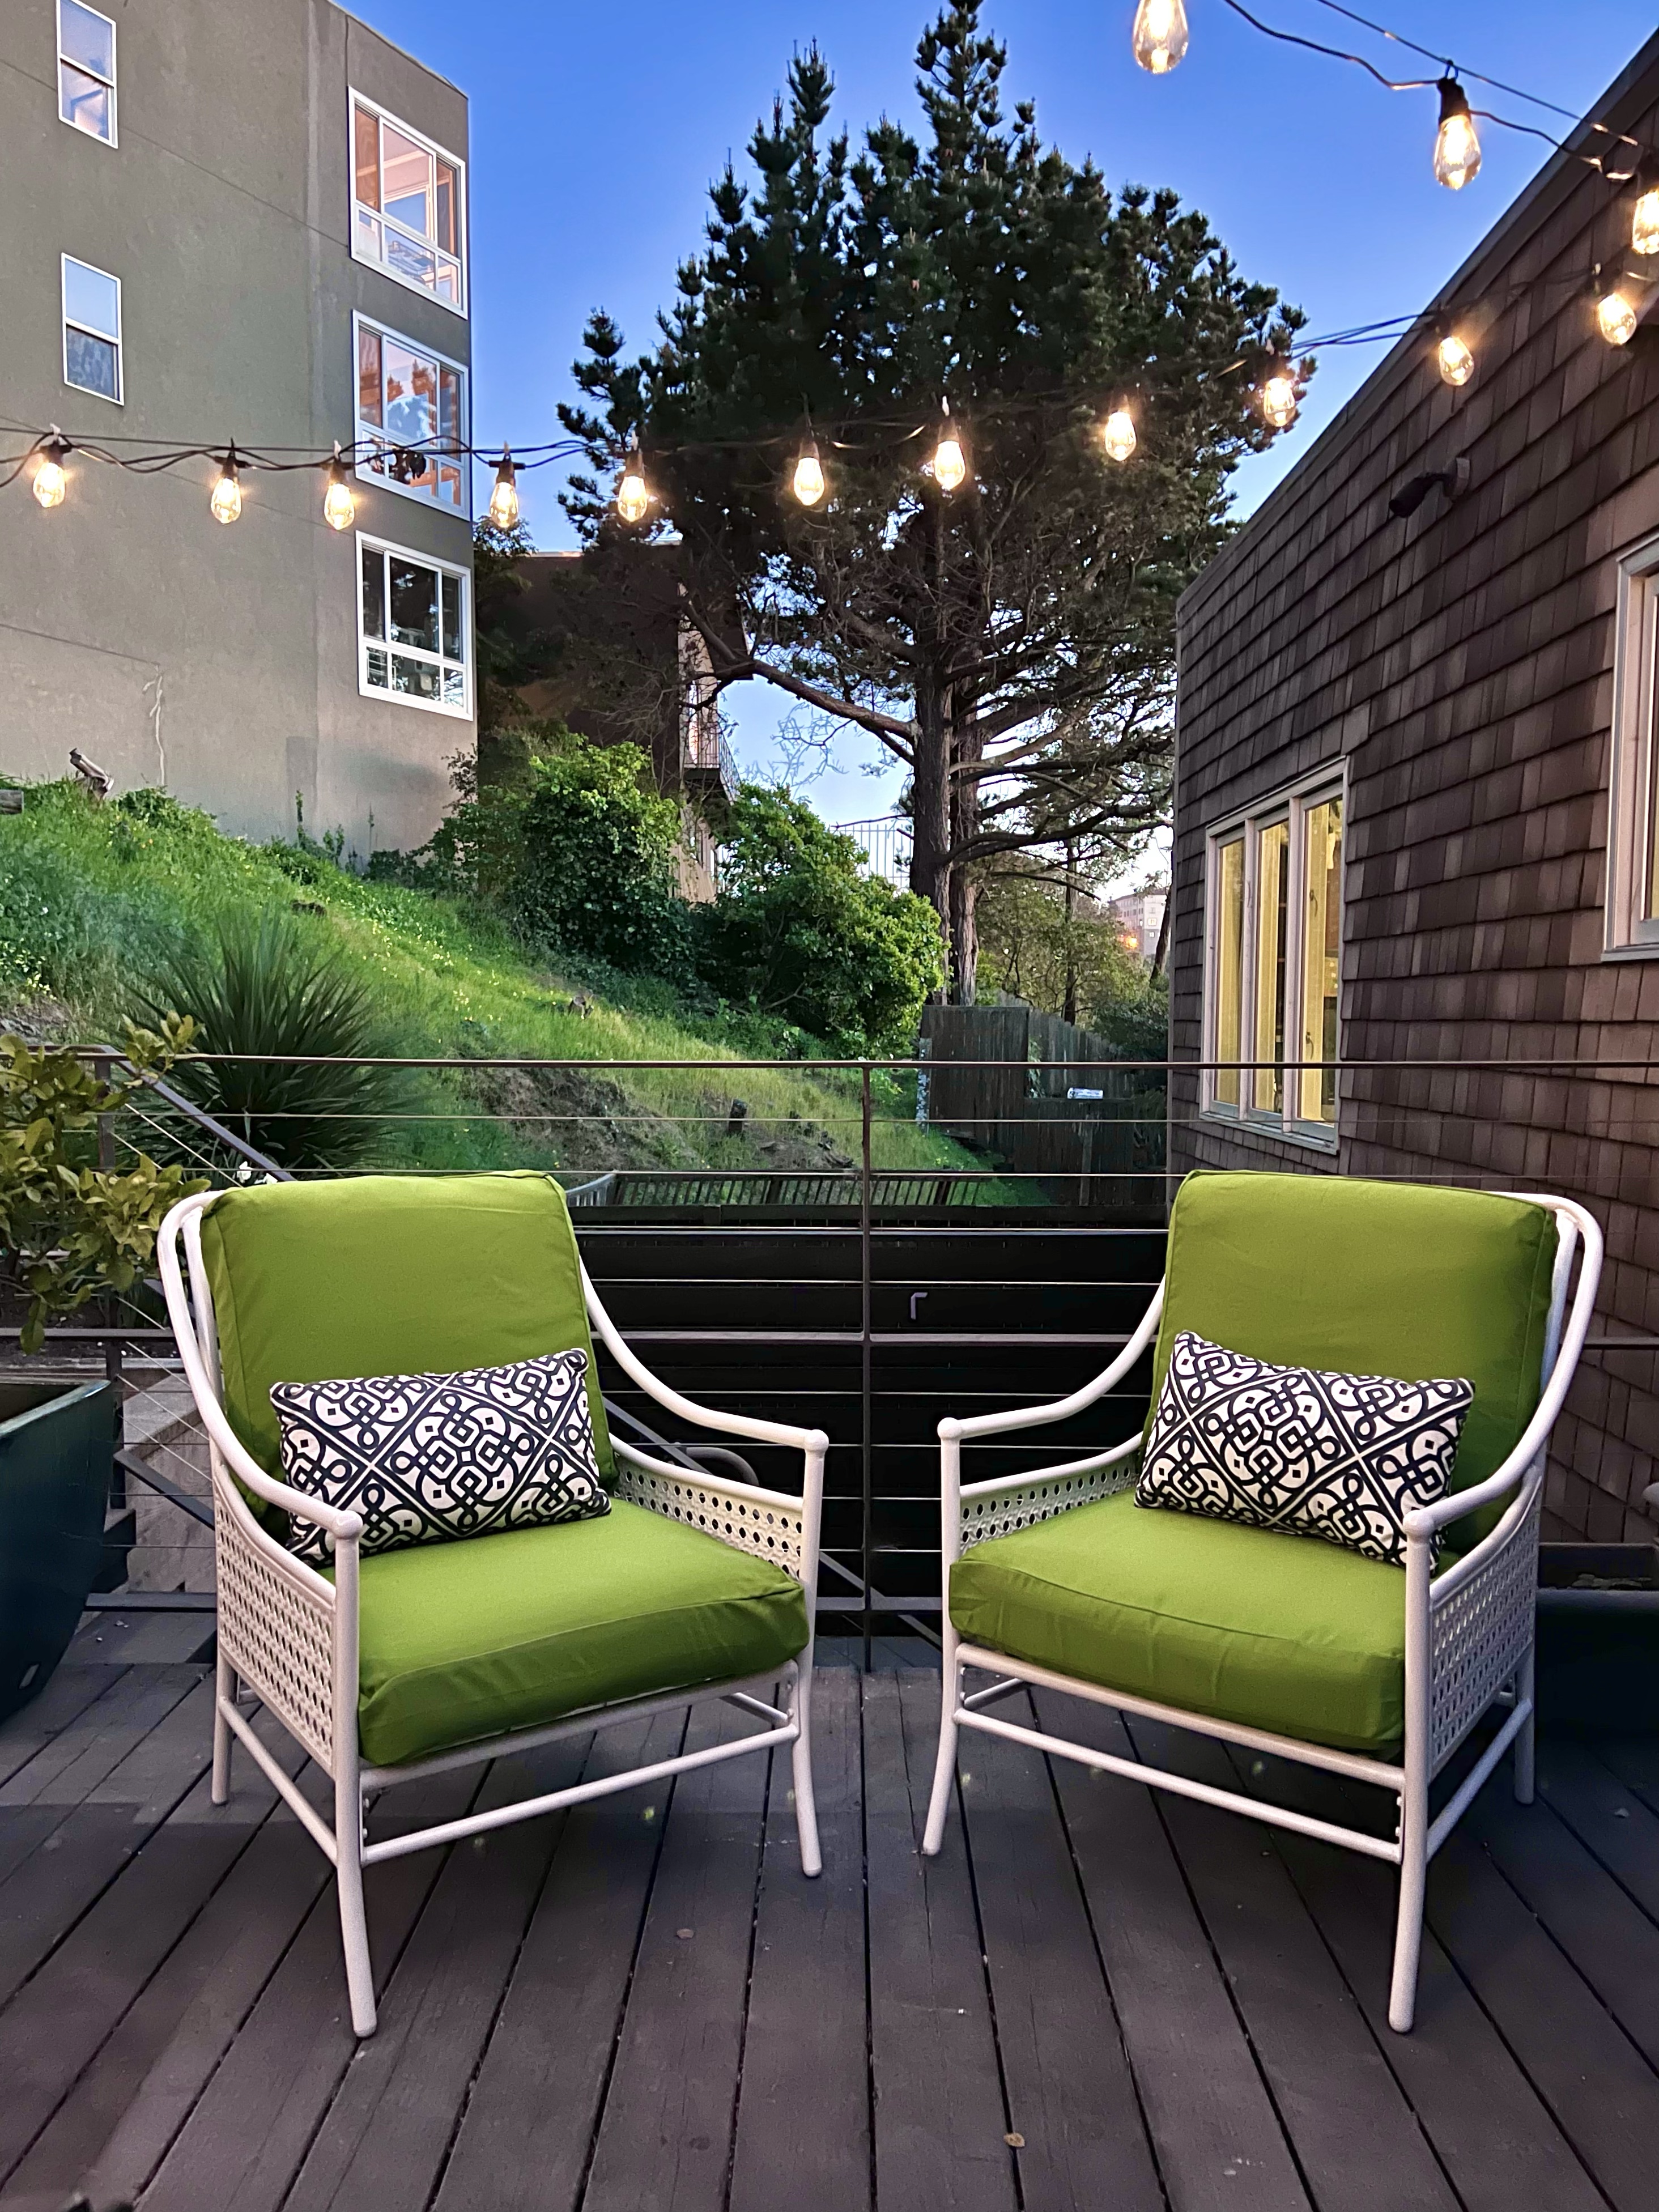
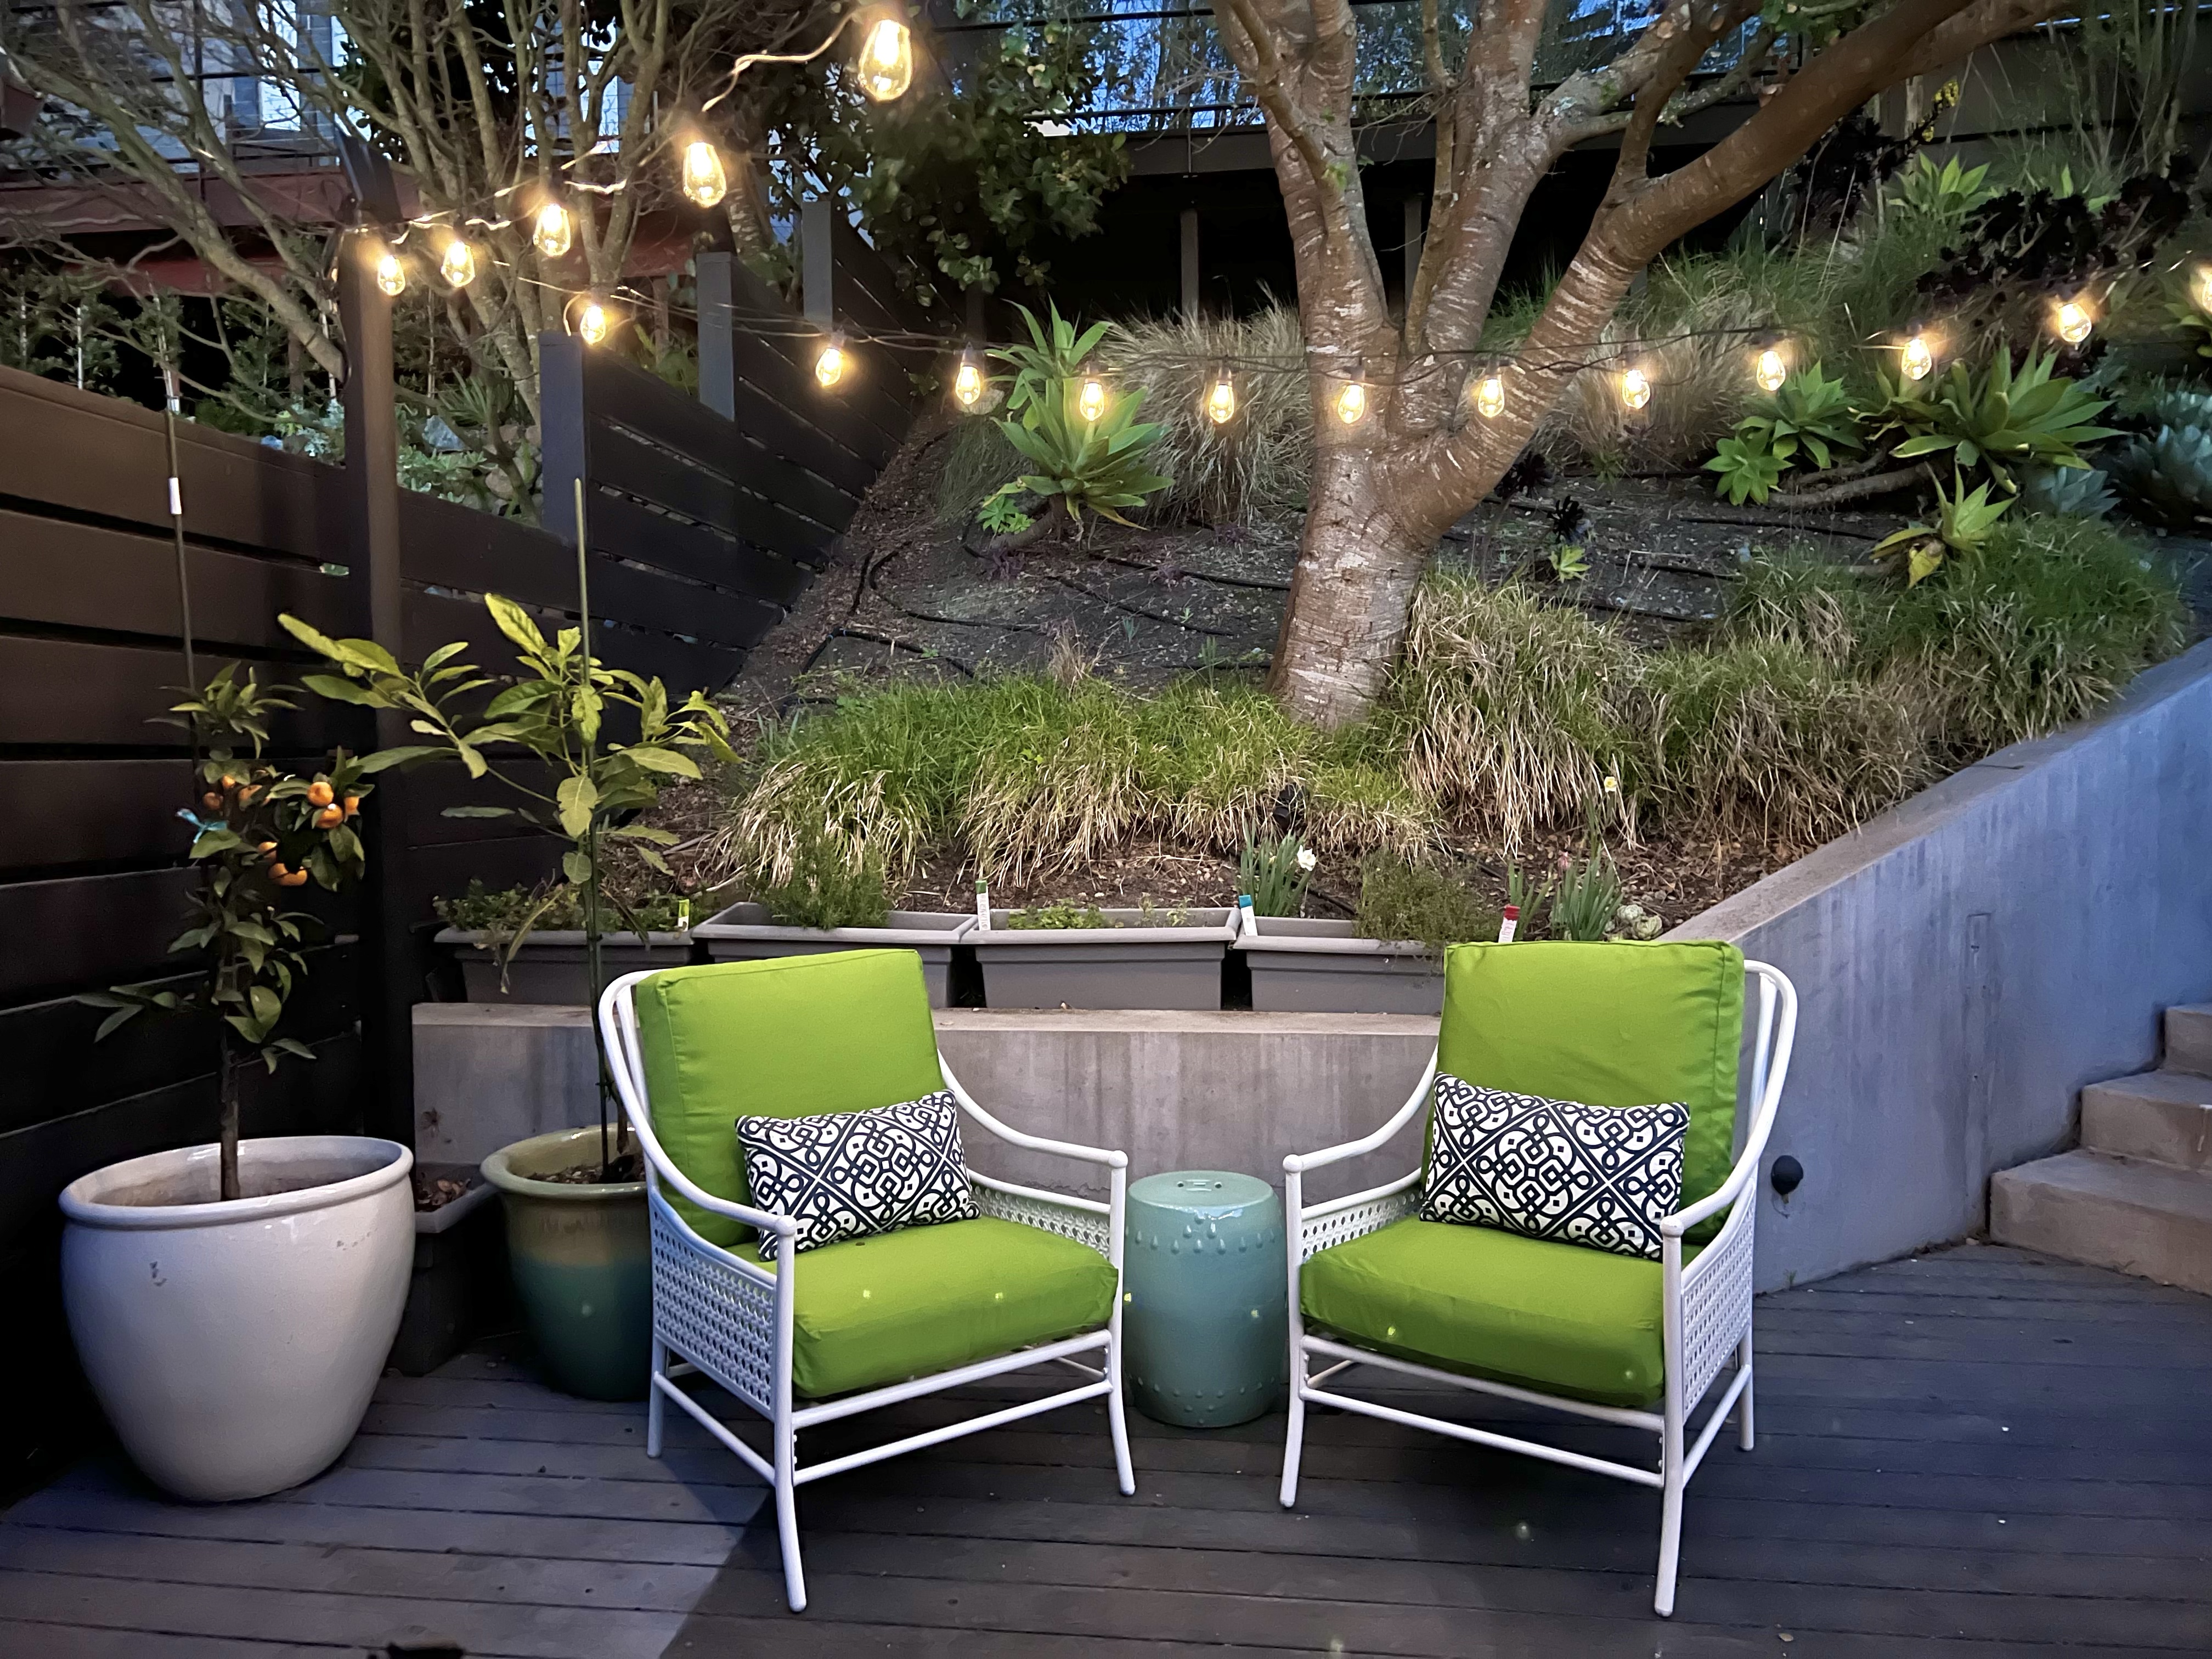
I feel they came pretty close to my inspiration pics, and all with the satisfaction with saving some money and a good DIY!

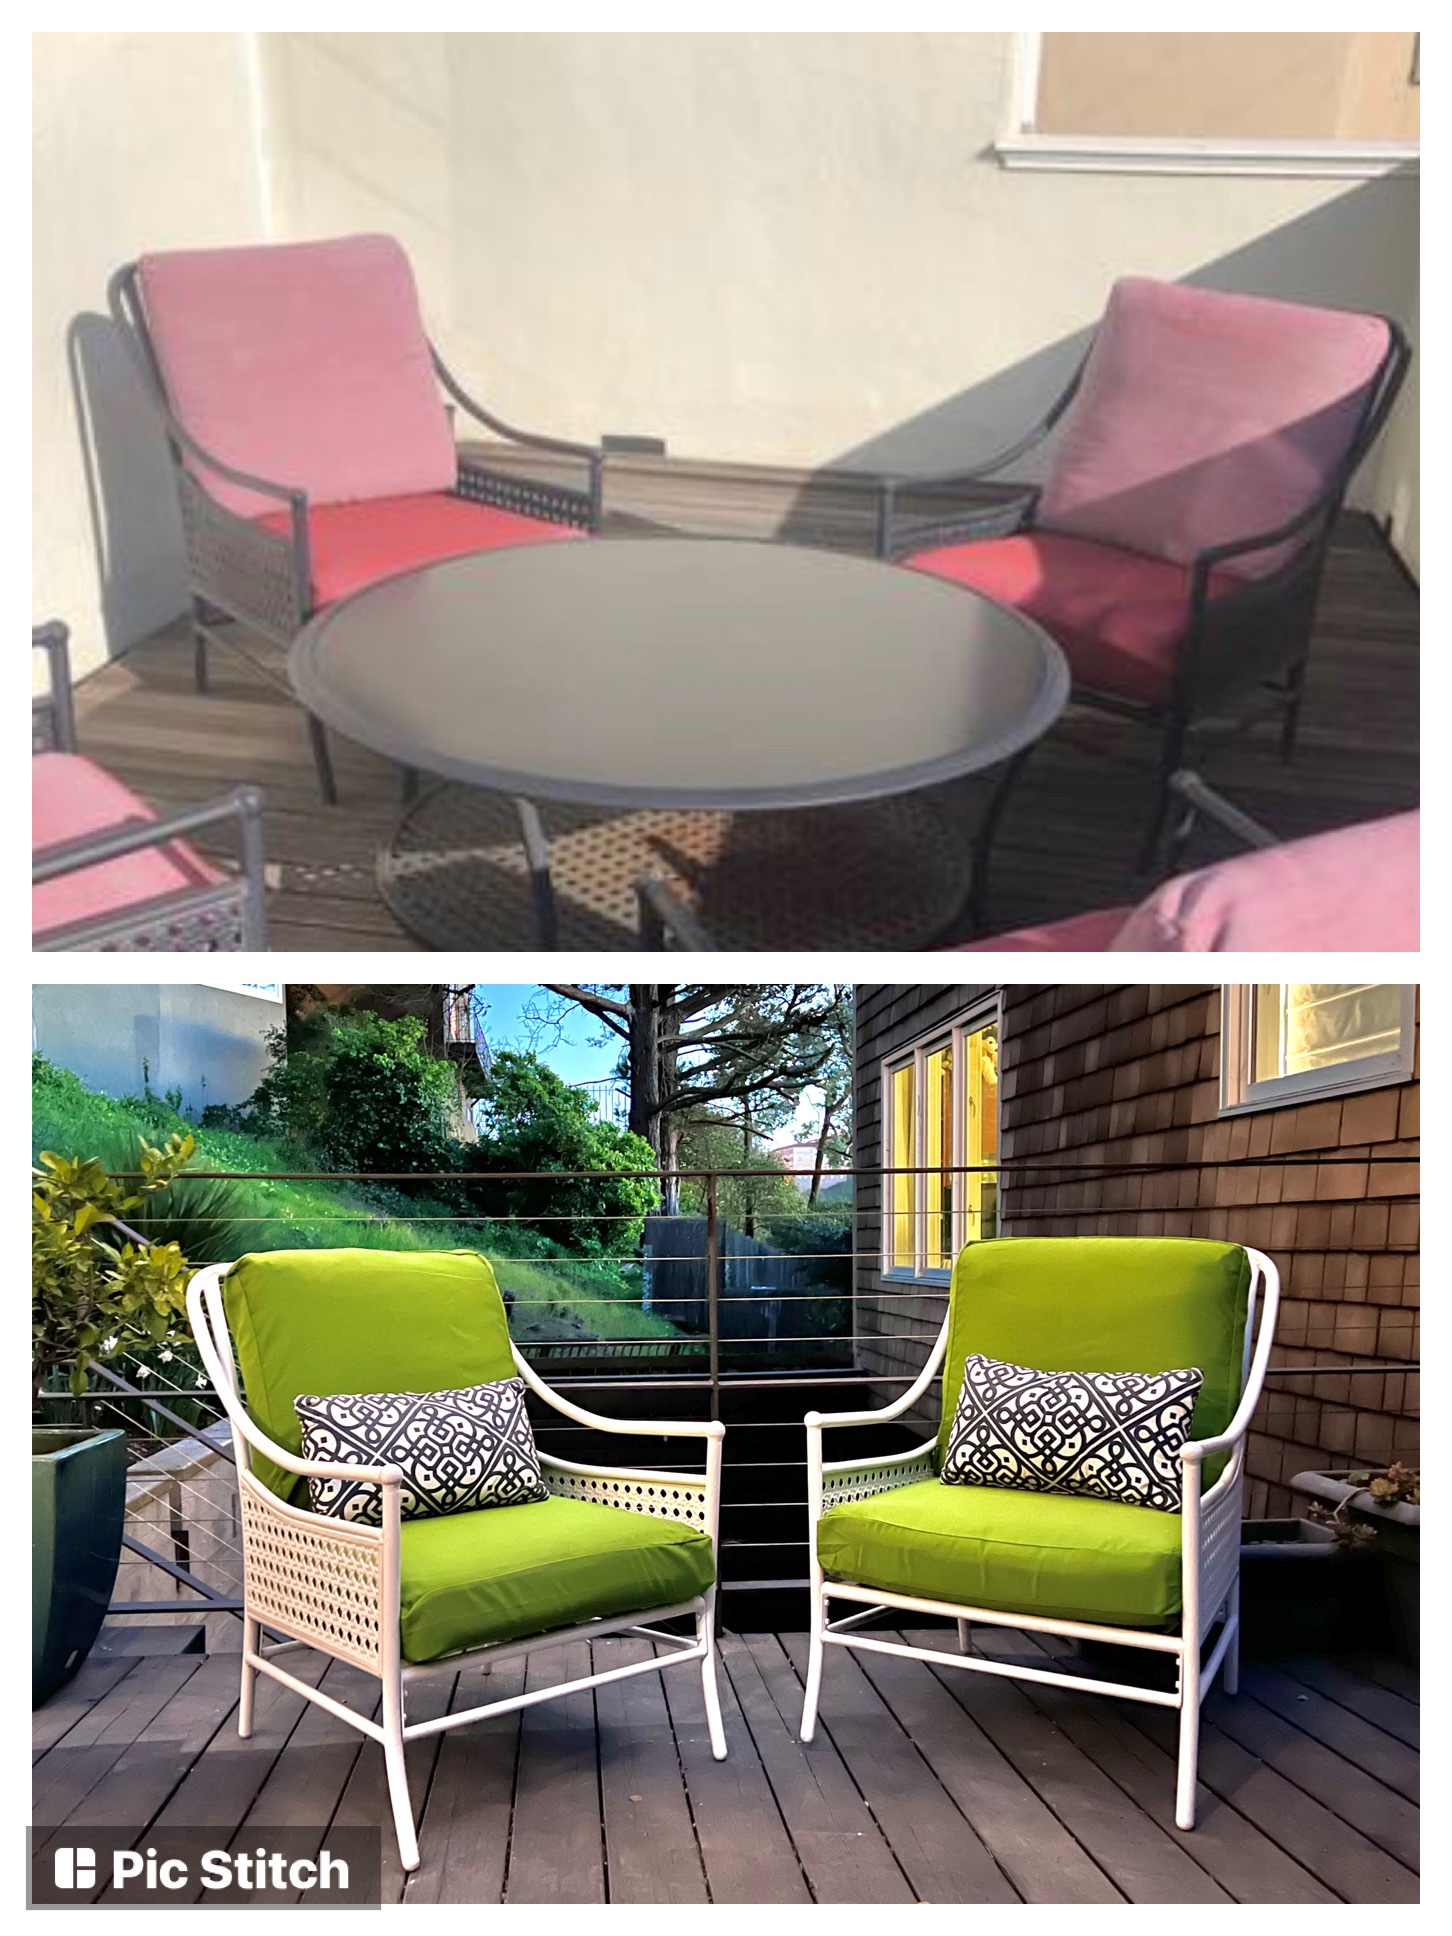
Everyone loves a good before and after pic:

I look forward to many more hours enjoyed out here with friends, family, or curled up with a good book!

Julie AKA “Jewels”

Anthropologie-Inspired Vintage Mirror Makeover

This project combines so many of my favorite things: vintage furniture (I have an extra weakness for chairs and mirrors), DIY, and Anthropologie! I’ll link to some of my other favorite mirror projects at the bottom of this post! I … Continue reading

DIY Faux Mercury Glass Vases

You’ve probably seen the popular mercury glass accessories out there as well as the DIY tutorials. I have been waiting to try this out, and it was really fun!

I made these for a party we have coming up, and – excitement!! – I am also helping a friend plan wedding decorations, so there will be more to come. Enjoy some tips and pictures:

I found quite a few different variations in instructions, which I will discuss a bit.

  • Types of paint: the most popular seems to be Krylon Looking Glass. It took several coats to get this finish, and I think I could actually have done even more, but I want to be able to put votive candles inside and still have some light shine through. I also added one coat of gold paint in the middle to warm up the color a bit.
  • Spraying water-vinegar mix before painting or after painting: I preferred to spray the water-vinegar mix on before spraying, which blocks the paint from sticking to the glass. I did still rub it off a little after, but I think you would have to rub a lot harder, if you sprayed the water on after the paint.
  • Spraying inside or outside: Looking Glass paint is intended to be sprayed on the inside, so the glass itself adds to the reflective finish. However, to make the vases more useful (ie able to hold things inside), I chose to paint on the outside.

img_8182img_8181

Here’s how one of my vases looks in front of some mercury glass candlesticks I bought from Pier 1. It makes me want to warm up my colors more next time by adding more layers of gold paint.

I’d also like to try again with some rose gold or copper paint!

“Jewels”