The Cutest and Handiest Zipper Pouches

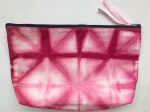
YEARS ago, I bought a cute zipper pouch ages ago at a Signatures craft fair in Toronto. The size is perfect for sunglasses, lip gloss, hair ties, ear buds, or other little items you want to corral in your purse. Since I recently conquered my fear of zippers when I made the box cushion covers for my new chairs, I decided to try making some of these little pouches myself. It’s such a fun project to use small scraps of fabric and combine colors and patterns.

I followed the instructions from icansewthis, which lays out the steps very clearly. The dimensions for this pouch use 4.5″x9″ rectangles to make a finished size of approximately 4″ x 8.5″

Here’s what you’ll need:

  • 2x Outside fabric pieces: 4.5″x9″ each
  • 2x Lining fabric pieces: 4.5″x9″ each
  • 2x zipper tab fabric: 1.5″x2″ each
  • zipper
  • Optional: fusible interfacing for outside pieces, if you are using a lighter weight fabric

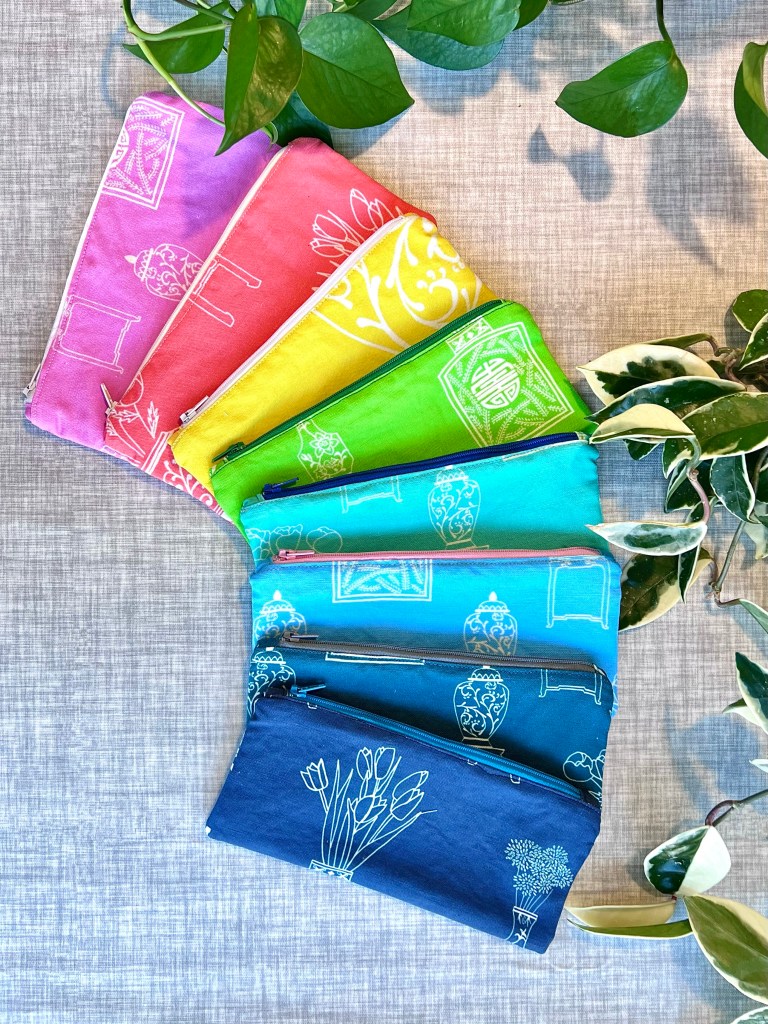
I made pouches from vintage kimonos, favorite scraps, and also some of fabrics I designed myself. If you want to check out my fabric collection, here’s my shop on Spoonflower. You can have have fun mixing and matching zipper colors and linings!

Happy sewing !

Julie AKA “Jewels”

More! Bigger! Shibori-Dyed Zipper Pouches

Are you looking for some DIY gift ideas? I had so much fun making the shibori-dyed zipper pouches for holiday gifts a few years ago that I decided to do this project again this time with larger pouches. The small size … Continue reading

DIY Botanical Print Ring Dishes

A couple of summers ago, when I was addicted to macrame, I started describing my crafting style as “serial crafting monogamy,” and that was definitely true with these little polymer clay ring dishes! My latest variation is botanical prints! If you want to look back at other versions, check out the stamped white and gold dishes and the marbled clay dishes. I am sharing this post in time for those of you looking for DIY holiday gift inspiration!

img_2797

Here’s what you’ll need:

  • Premo Sculpey in white (approximately 2oz per bowl)
  • Rolling pin or smooth glass jar
  • Plant cuttings. I used lavender, nasturtium, and crocosmia from our garden
  • Parchment paper or wax paper
  • Circle to trace (approximately 4″)
  • Bowl or other oven-safe mold
  • Optional: sandpaper
  • Paint brush
  • Gold paint
  • Paint to color plants
  • Clear glossy varnish

Here’s how to do it:

  • This white clay collects and shows dust and lint very easily, so try to keep your hands, tools, and work surface as clean as possible
  • Using a parchment or wax paper work surface, knead your clay and roll it flat – about 1/4″ thick
  • Place your plant cutting and roll over it to make an impression in the clay
  • Place your circle on your mold
  • Bake according to the instructions for the clay
  • Let it cool, and sand rough edges
  • Paint the leaf imprint green and lavender flowers purple
  • Paint rim with gold paint
  • Coat with clear varnish

This is what the bowls looked like out of the oven, before paint and varnish. I like the matte look, but I suspect they’d get dirty over time.

Next step: paint the flowers, add gold paint to the rim, and finish with clear gloss varnish!

I’ve got at least one more variation I want to try making!

Julie aka “Jewels”

DIY Personalized Felt Pennants

I recently made these vintage-style pennants to celebrate special places in our family. It was so fun that I went on to make personalized name pennants for my nephew and niece.

Here’s what you’ll need:

  • Felt for pennant, lettering, and trim
  • Iron
  • Scissors
  • Paper for templates
  • Sewing machine or needle and thread

Here’s how to do it:

  • Create a template for your pennant – mine is on two sheets of scrap printer paper. It is 7.5″ high x 21″ long.
  • Cut out the pennant from a large piece of felt
  • Choose your felt colors for the letters and images and fuse Heat ‘n Bond to one side
  • Cut out your letters and images
  • Arrange on the pennant and iron in place
  • Cut strips of felt for the binding (optional) and ties and sew in place

Here’s how the pennants turned out. I love all the color variations!

Julie aka “Jewels”

Recipe Tea Towels

If you’re already familiar with Spoonflower, then you know how amazing their site is. If you haven’t been introduced to them yet, be prepared to be completely addicted! They can custom print anything on fabric, and you can design your … Continue reading

Shibori-Dyed Zipper Pouches

Every year, I make a handmade holiday gift for my coworkers and our kids’ teachers. I love bringing them into school and the office and spreading joy! I’ll list all the past ones at the bottom, so you have more … Continue reading

DIY Decoupaged Tile Coasters

I have a lot of craft projects “incubating” – I get excited, I buy supplies, and then… I wait for the perfect moment to create them! We could also call this hoarding of craft supplies, but that’s not in the spirit of the season!

We’ve got an enthusiastic new social committee at work, and they organized a “Secret Snowflake” exchange for the holidays. “Handmade is encouraged,” they instructed. Now that’s my kind of challenge. My gift recipient loves to host dinner parties, so I found her a cute serving bowl, some holiday dish towels, and I am finishing off the package with these DIY coasters!

Here’s what you’ll need:

  • White 4″ square tiles – very inexpensive at the hardware store, or you can order online
  • Decorative paper – choose thinner paper that absorbs the adhesive and molds to the tile
  • Mod Podge
  • Water-based varnish
  • Paintbrush
  • Silicon bumpers

Here’s how to do it:

  • Cut paper to fit tiles
  • Paint a thin coat of Mod Podge on tile
  • Lay down paper and smooth out
  • Paint a thin coat of Mod Podge over paper
  • Letting dry between layers, add one or two more coats of Mod Podge
  • Add three or more coats of varnish, for a more durable finish
  • Add silicon bumpers to bottom

Here they are in my home and getting ready to go spread cheer in my friend’s home!

Next time, I’d like to try making these coasters, with the paper sandwiched between glass, because I think they’ll hold up even better. Next year’s teacher and coworker gift? Maybe!

Hope you are having fun sharing treats and gifts this season!

Julie aka “Jewels”

That Spells DNA – Nerdy and Beautiful Stacked Coins Baby Quilts

“DNA, you’re in my heart
DNA, in fact you’re in every part of my body
Each cell has a nucleus, each nucleus has chromosomes
And DNA, baby, that spells DNA”

-That Spells DNA by Jonathan Coulton

I can thank Steve, who is at the forefront of all things nerdy, for introducing me to Jonathan Coulton over a decade ago. Of course, as a genetic counselor, I have a particular soft spot for “That Spells DNA.” If you’re as nerdy as we are, and you don’t already know and love this song, you will want to check it out!

So, when we found out we were having a mini baby boom in our work family, with two babies due within two months, it wasn’t too hard for me to decide on DNA-themed baby quilts as gifts.

I found the DNA-themed fabric, Color DNA stripe by Melissa McCulloch, on Spoonflower. The fabric in the quilts is actually left over from a few Halloweens ago when our group dressed up as (if terrible puns cause you pain, skip this next part!) Gene-gnomes. The colors were a perfect jumping off point for this colorful gender-neutral patchwork of yellow, blues, greens and coral-red.

This pattern is called Stacked Coins and is easy to adapt to scraps of all kinds.

Here are some close-ups of the beautiful fabrics. I wanted to use every last scrap of the DNA fabric, so there is one patch in each of the quilts that I like to call “CRISPRed.” Can you spot one?

And here are a few more pictures of the quilts during their photo shoot, before they went off to their new homes!

All the colors and patterns together make me so happy! I am excited to meet the newest babies of our work family and give them their quilts, so they can start their genetics lessons early!

“Jewels”