My two older boys went to college on the opposite side of the country. I missed them, but a silver lining has been the connections they built with our extended family. When we were gathered for my oldest’s graduation, I … Continue reading
My two older boys went to college on the opposite side of the country. I missed them, but a silver lining has been the connections they built with our extended family. When we were gathered for my oldest’s graduation, I … Continue reading
YEARS ago, I bought a cute zipper pouch ages ago at a Signatures craft fair in Toronto. The size is perfect for sunglasses, lip gloss, hair ties, ear buds, or other little items you want to corral in your purse. Since I recently conquered my fear of zippers when I made the box cushion covers for my new chairs, I decided to try making some of these little pouches myself. It’s such a fun project to use small scraps of fabric and combine colors and patterns.
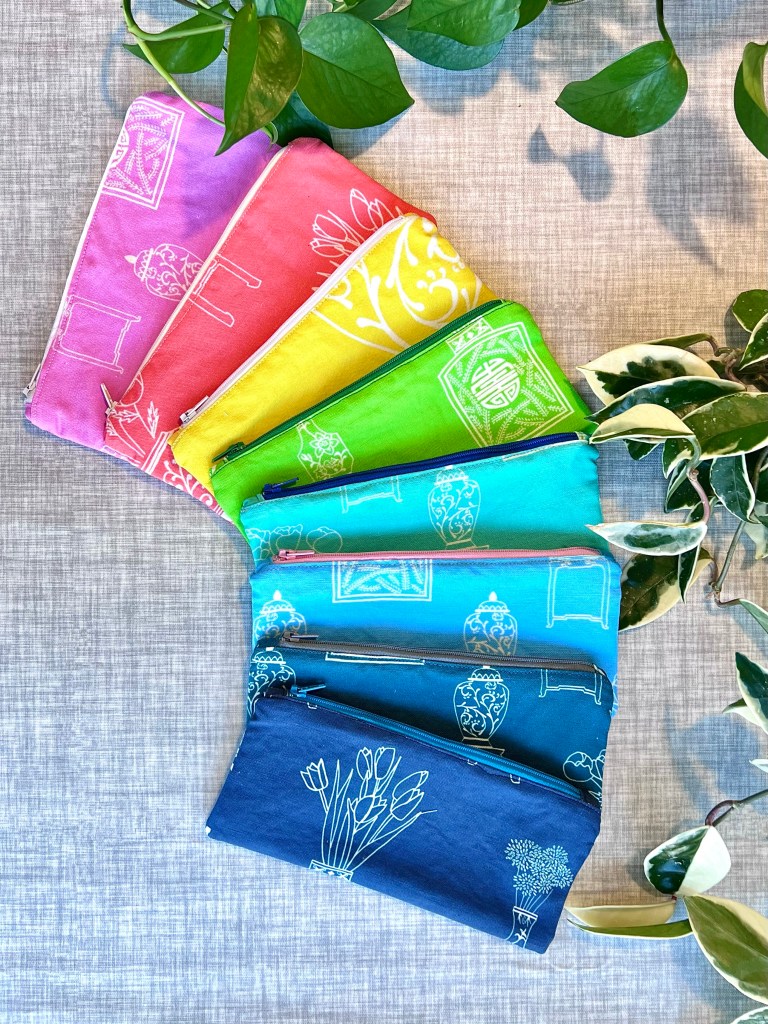
I followed the instructions from icansewthis, which lays out the steps very clearly. The dimensions for this pouch use 4.5″x9″ rectangles to make a finished size of approximately 4″ x 8.5″
Here’s what you’ll need:
I made pouches from vintage kimonos, favorite scraps, and also some of fabrics I designed myself. If you want to check out my fabric collection, here’s my shop on Spoonflower. You can have have fun mixing and matching zipper colors and linings!


Happy sewing !
Julie AKA “Jewels”

A couple of years ago, shortly after everything shut down at the beginning of the pandemic, I got back into sewing. A lot. It kept me busy and feeling productive and was a great outlet, while making pretty things for … Continue reading
About once a year, my friend Ariana (of Act 2 Decor) and I get up early go to the Alameda Point Antiques Fair to browse and look for treasures.
I’ve been working hard to clean out the house this year, so I kept my shopping restrained, but I was looking for a vintage felt pennant to finish up a new gallery wall in JJ’s room. I found the perfect piece, and it was definitely meant to be, because it was sold by the family of a former coworker!
When I got home, I was inspired to make some more pennants of my own. I made one for my home town, Toronto, and one for my sister-in-law’s family in New Jersey.

Here’s what you’ll need:
Here’s how to do it:
Create a template for your pennant – mine is on two sheets of scrap printer paper. It is 7.5″ high x 21″ long.
Cut out the pennant from a large piece of felt
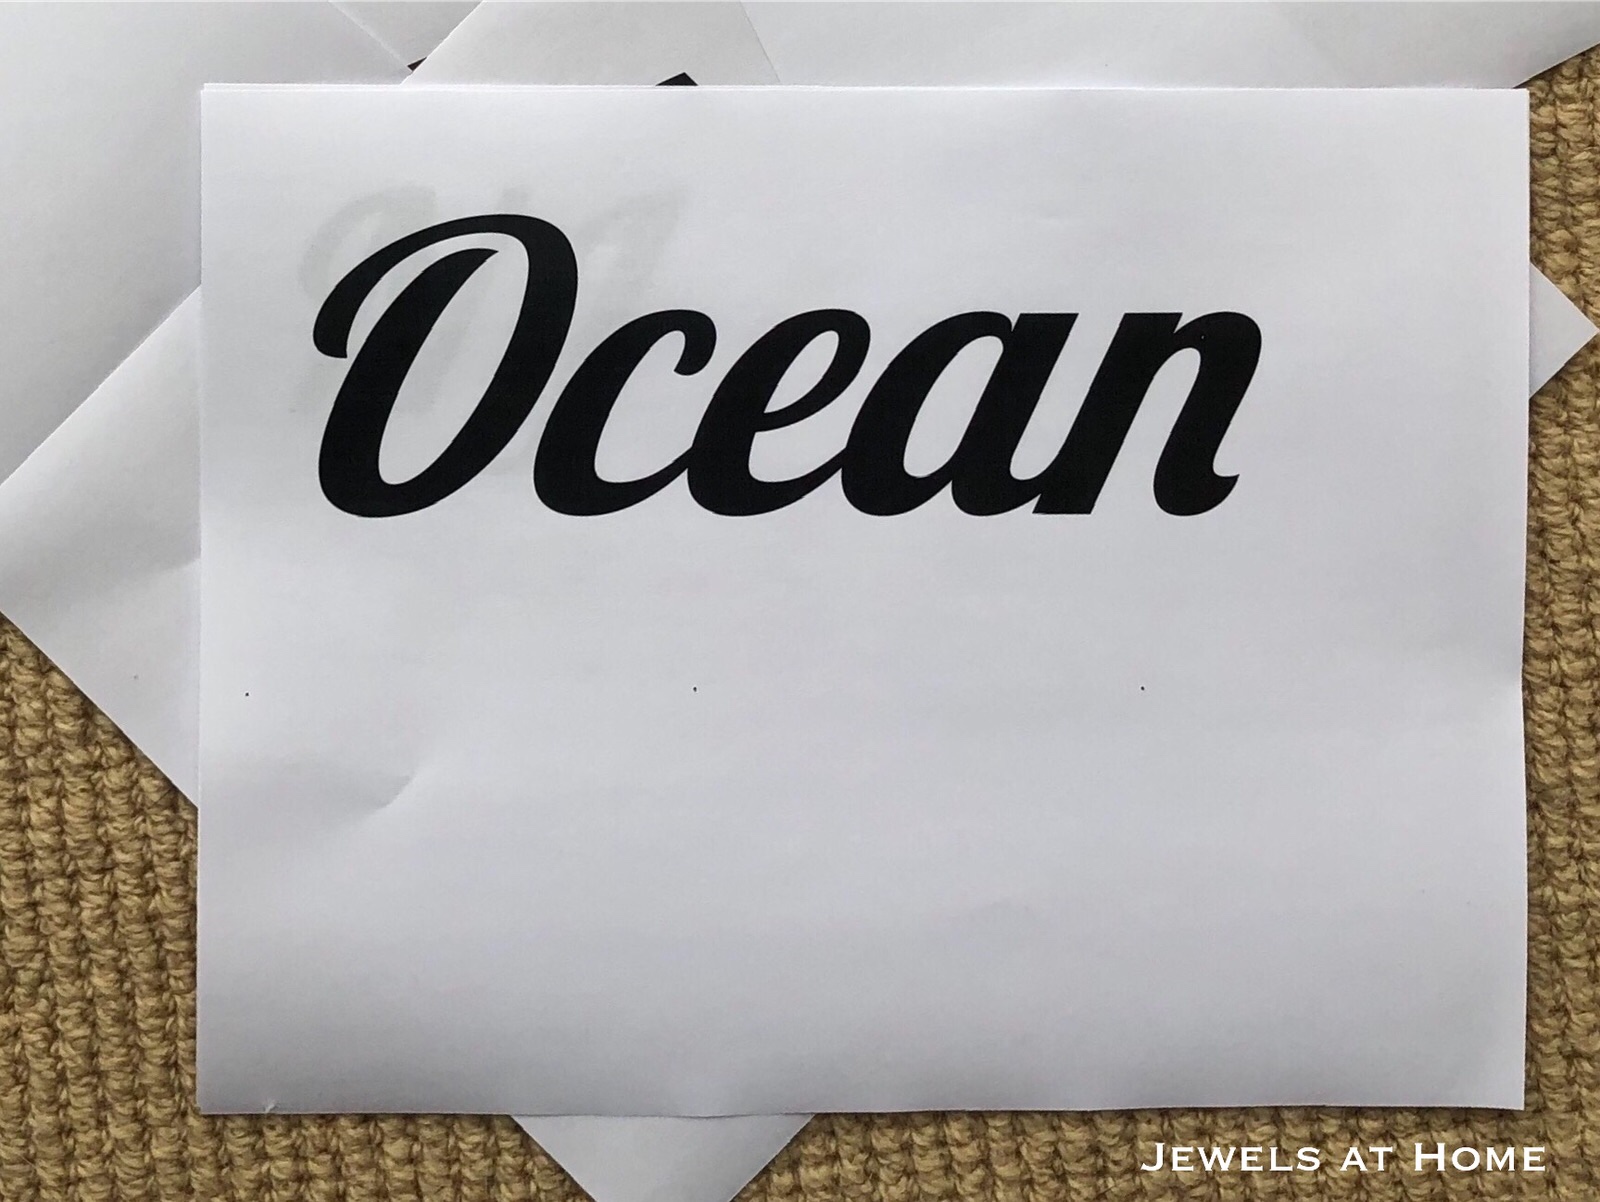
I sketched the images freehand in reverse on the paper side of the Heat ‘n Bond
For the script lettering, create a word processing document, print out the words, and trace them in reverse onto the paper side of the Heat ‘n Bond
Choose your felt colors for the letters and design and fuse Heat ‘n Bond to one side

Cut out your letters and designs
Arrange on the pennant and iron in place
Cut strips of felt for the binding (optional) and ties and sew in place
Here are my finished pennants. I should make one for San Francisco next!

Here’s a picture together with my vintage find:

And here’s how JJ’s new gallery wall came together!

I had so much fun! What city do you want to celebrate and what image would you use?
Julie aka “Jewels”
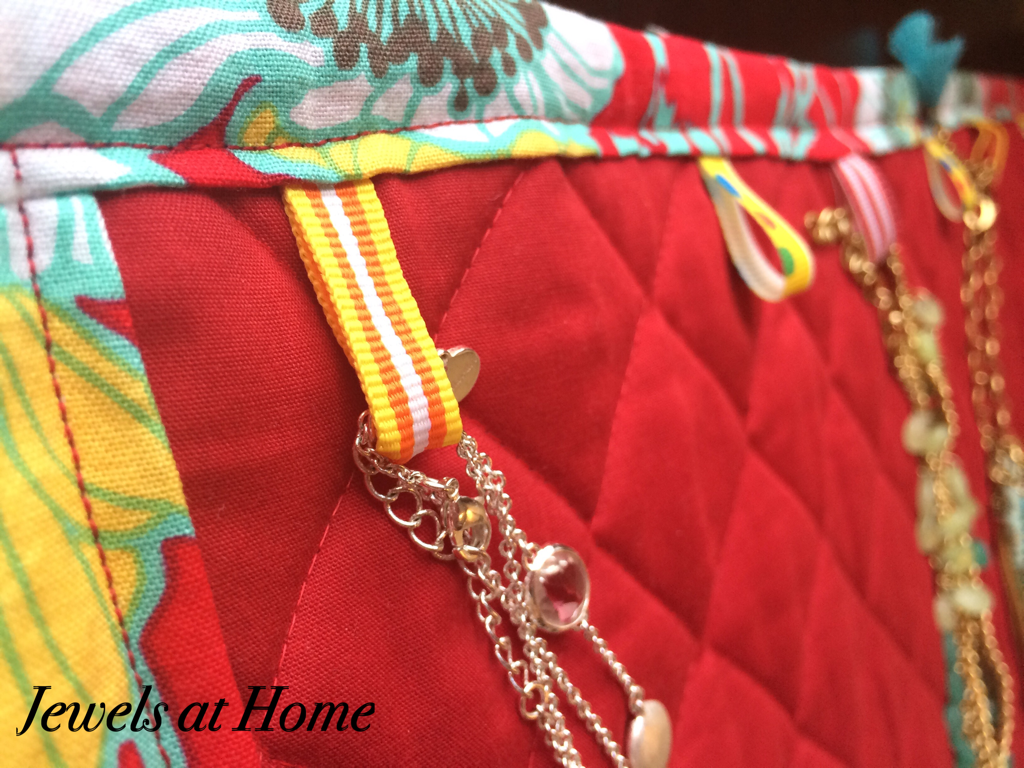
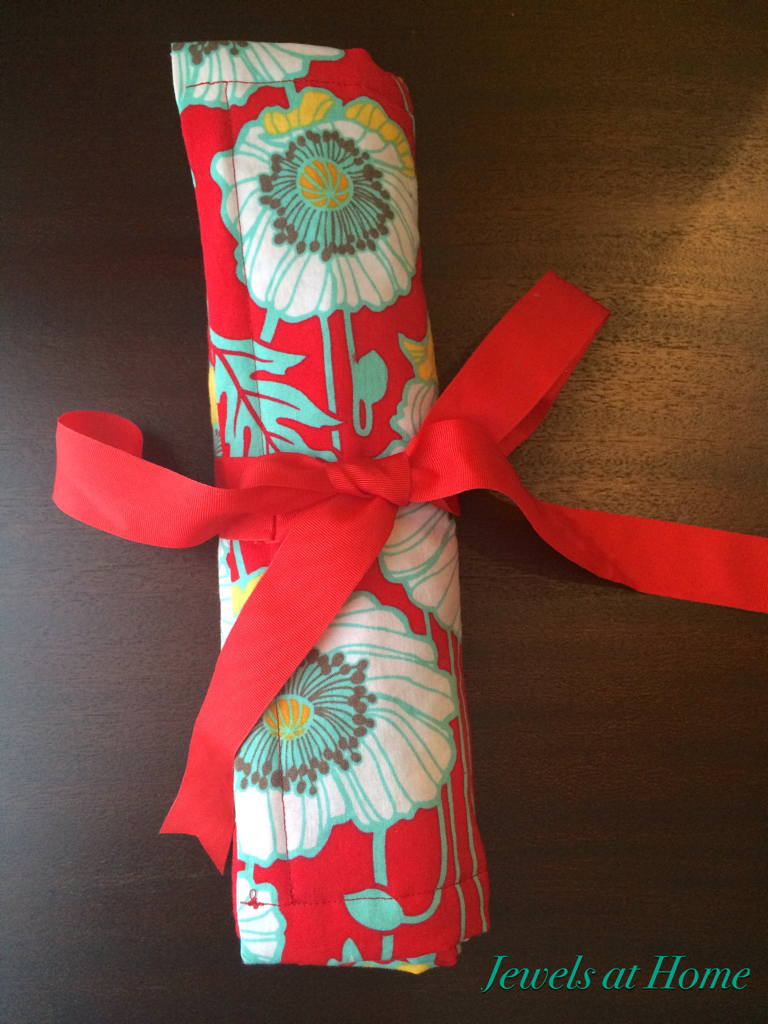
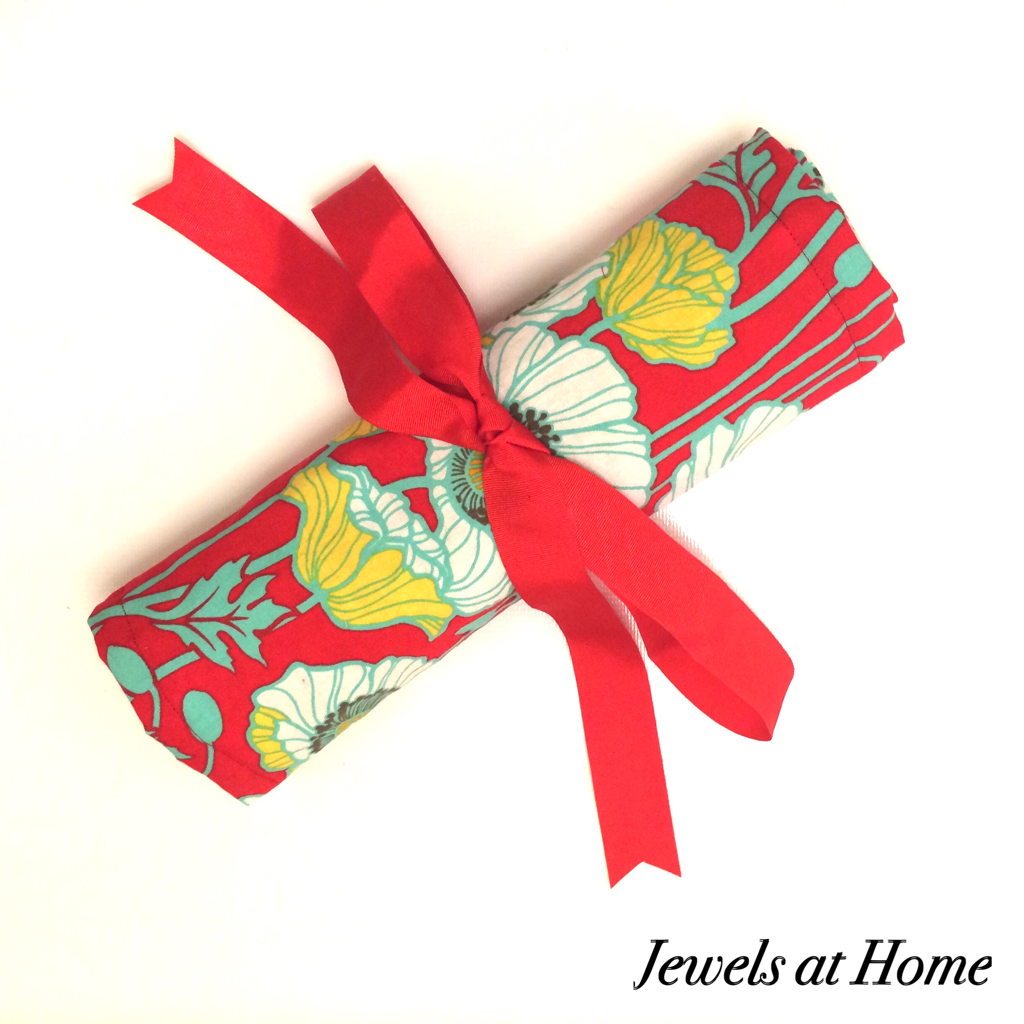
This travel roll for jewelry is a quick and easy project, proven by the fact I made it the night before we left for family vacation!
 My jewelry roll is perfect for packing necklaces and bracelets, which is what I usually wear.
To make your own, you’ll need
I cut the narrow grosgrain into four-inch sections to make the loops.
Next, I lay the small quilted material on the wrong side of the outer material. I folded over a border on all sides, and tucked the loops under the hem, pinning them in place.

I stitched down the border, which also secured the loops.

To make the outside tie, I folded the wide grosgrain in half and sewed it to one end of the roll, on the outside.

And that’s it!
Easy and pretty!

Happy travels!
Every time I walk into Lavish in Hayes Valley, I find a great piece of wrapping paper to use for a new project. At just $4 a sheet, these provide a lot of creative bang for the buck. First, there was the graphic red print I used to line J’s nursery bookcase. Next, I found a sweet hydrangea paper for my craft studio. Most recently, I was inspired by this retro air travel print from Cavallini & Co..

Retro air travel paper from Cavallini a& Co.
I didn’t originally plan a themed bedroom for our older boys, and I still want to keep it pretty neutral. The travel theme evolved first from these beautiful retro-style city posters by Karen Young of Loose Petals.

Retro-style city art prints by Karen Young of Loose Petals.
When I saw the wrapping paper, I knew it would tie in perfectly. I framed a section of paper as art – easy! – and then used more for DIY pencil tins and magnets for our DIY racing stripe magnet boards.

Upcycled DIY pencil tins with cool retro air travel paper.

Upcycle advertising magnets with some fun paper. Jewels at Home.
Here are those new items pictured in the boys’ room.


And here’s a summary of the fun projects I did with this new paper: pencil tins, magnets, and framed art:

There’s still plenty of paper leftover. I’m thinking it would be perfect for luggage tags!
Yay! I’m excited to see the boys’ room slowly coming together!
“Jewels”
