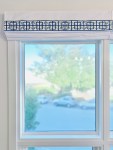
“Elegant and Airy” is my inspiration for our dining room. One of the projects was to switch out the Roman shades. I wanted something more formal-looking, and I also wanted to install my shades above the windows – a classic … Continue reading
“Elegant and Airy” is my inspiration for our dining room. One of the projects was to switch out the Roman shades. I wanted something more formal-looking, and I also wanted to install my shades above the windows – a classic … Continue reading
Modern and classic. Elegant and streamlined. This is the balance I was looking for in a dining room chandelier. I also wanted an open design, so we could make the most of our views. This week, I will show you some of my favorite options, as well as what I ended up DIYing for ~$50! Along the way, I’ll show you my favorite gold spray paint and how to add a DIY cord cover to a chandelier.
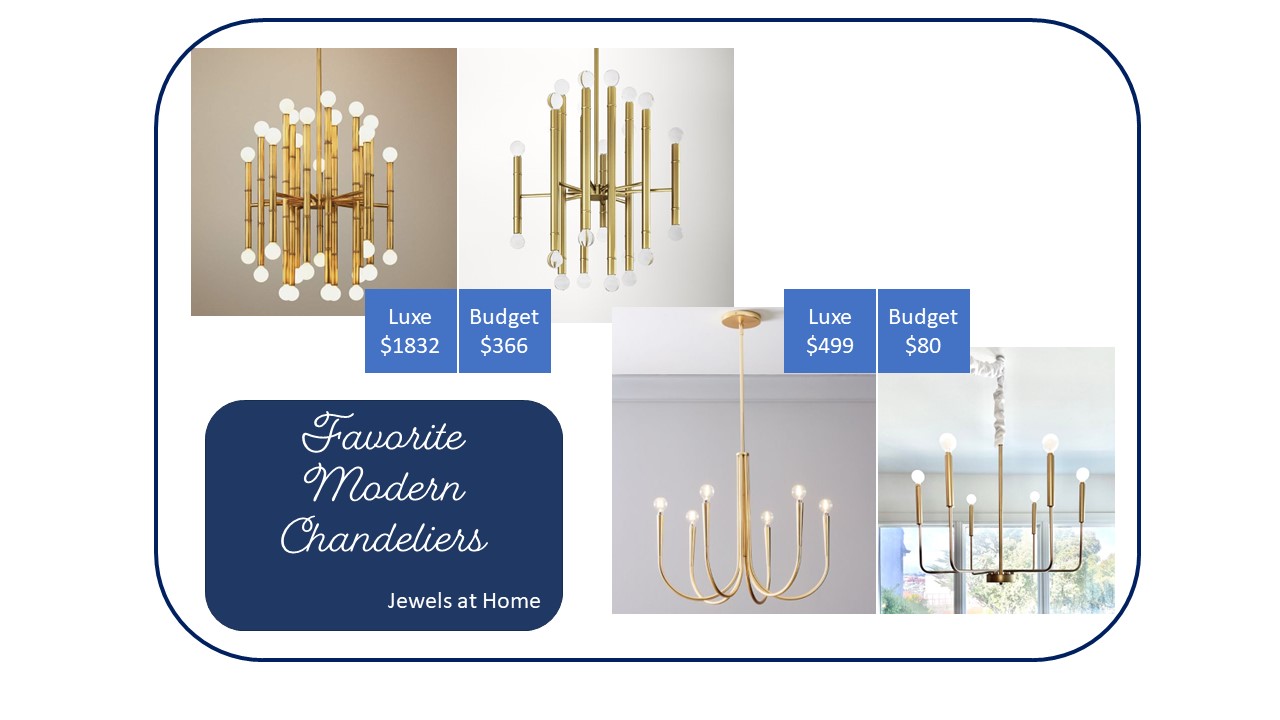
My top two choices were the West Elm Swoop Arm Chandelier (below left) and the Hammons Sputnik Modern Chandelier (below right) (a dupe for the Jonathan Adler Meurice chandelier):

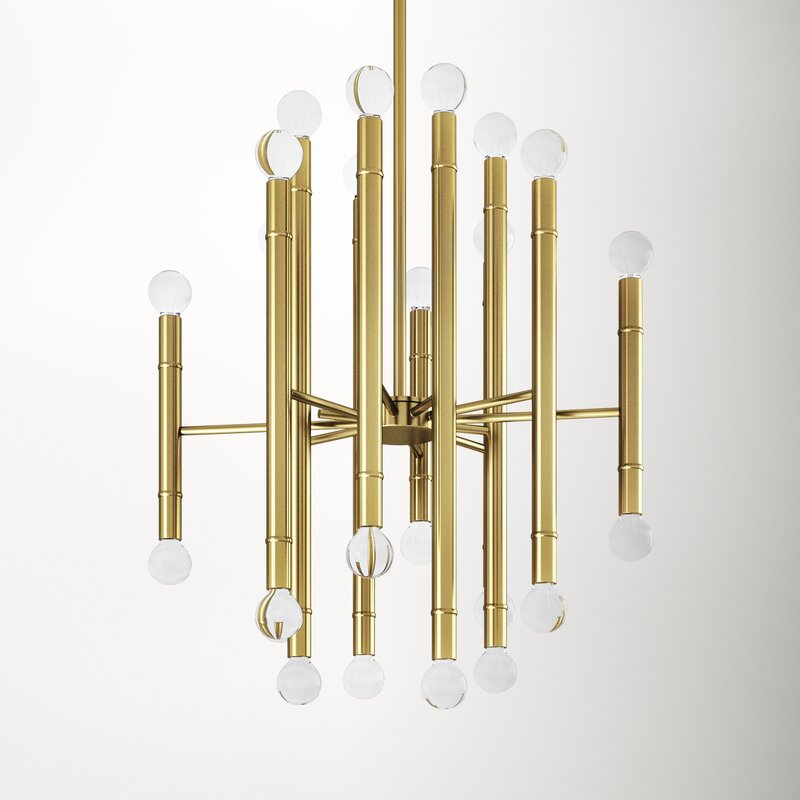
I was getting ready to buy one of these beautiful lights when, at the last minute, I decided to take a quick peek on Craigslist, and I came across a chandelier with a similar shape for only $25! I’m pretty sure it is this Modern 6-Candle Chandelier shown below which is less than $100, even if you buy it new!

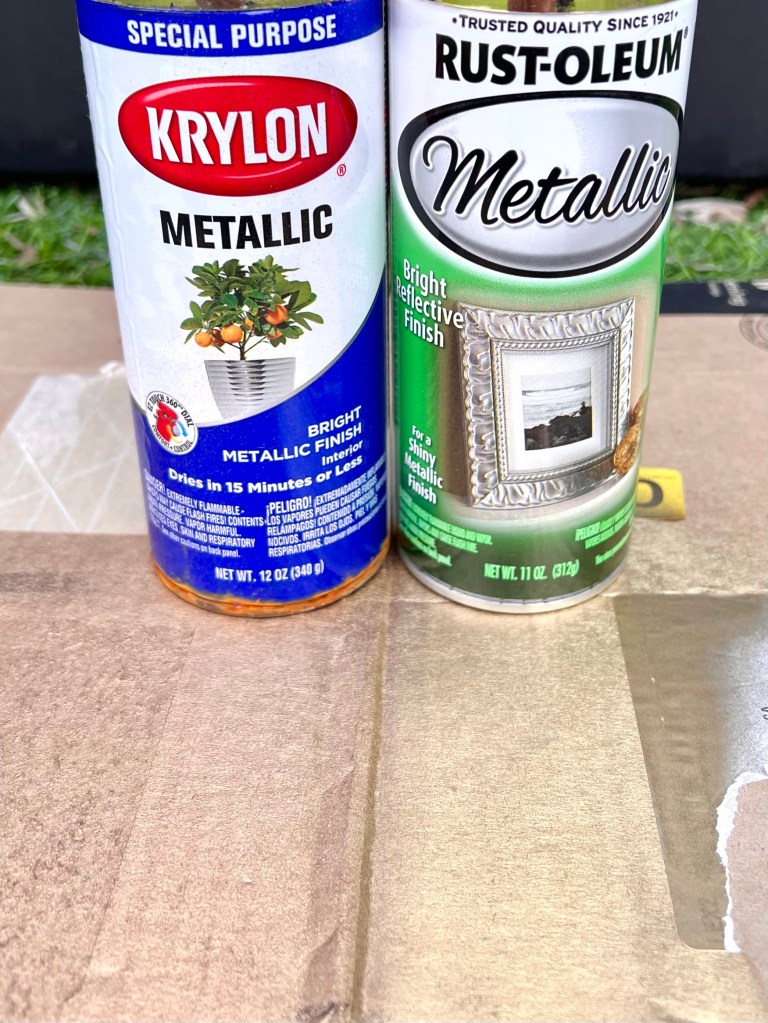
The light I found was a mix of black and gold, so I prepared to spray mine gold. Not all gold spray paints are the same. I happened to have the Krylon paint (left) in the garage, but it is a reddish color, more copper than gold, so I went to our neighborhood hardware store to pick up a can of my favorite gold paint, Rust-oleum, shown on the right, and it is perfect!

I added these frosted globe bulbs, which I think look more modern than the flame-shaped bulbs.

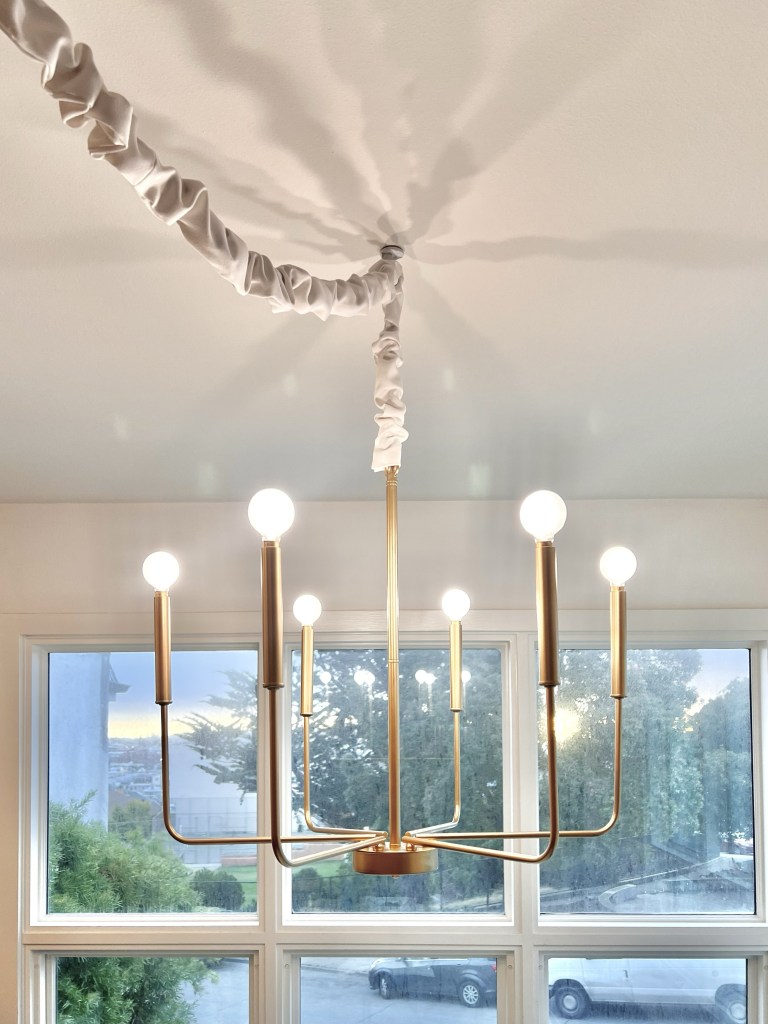
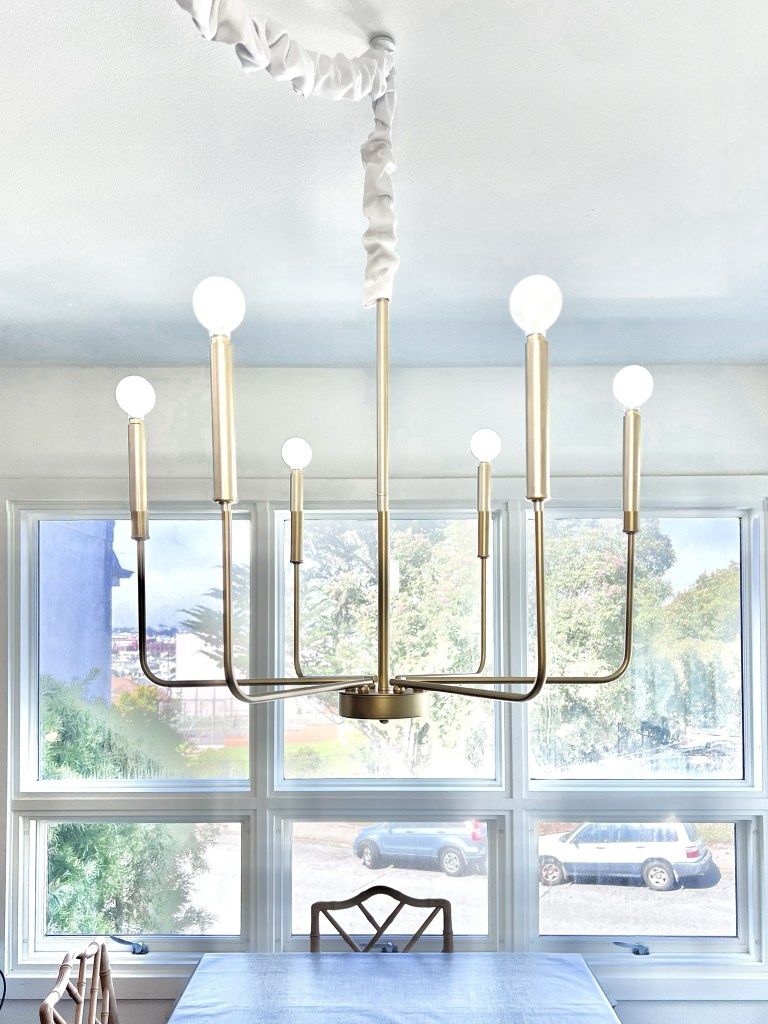
The last step was to was to add a cord cover. This is a 5″ wide strip of fabric about 1.5x the length of the cord. I ironed down a 3/8″ seam along the two long edges, and then I used hot glue to close the “seam” around the cord.


I’ll keep posting progress updates on Instagram and a weekly post here with more details! I’m looking forward to the next steps of this project, as well as enjoying the other participants’ posts. You can follow the whole event on the One Room Challenge website!
Julie AKA “Jewels”

Welcome to the Fall 2023 One Room Challenge! This is such a hectic time but also such a fun one, with lots of projects to do and explore and a great supportive community! In the spring, I decorated our entryway, … Continue reading

You know how much I love faux bamboo furniture! My collection includes these Chippendale chairs and this Thomasville dresser-turned-bar cabinet. When I recently acquired an older bookcase, which I chose for its solid wood construction and low price, I noticed … Continue reading

There are a few furniture painting projects that I’ve always wanted to do, like this mid-century dresser, or this faux bamboo bar cabinet. A big Chinese-style wedding armoire has been on my list, and my chance finally came! I found … Continue reading

I love the look of built-ins, and Ikea Hemnes furniture pieces make a great base for semi-DIY built-ins, because they are made of solid wood and have flush sides to line up neatly with each other. At our last house, … Continue reading
I’m excited to wrap up the One Room Challenge. It’s such a great way to motivate yourself to work on projects, and the community is already inspiring and positive. To remind you, I took this opportunity to turn our small, plain entry into a welcoming space that added function and style. I’m happy to say, mission accomplished!
You can see details on my choices and process in the posts from previous weeks. Here are some more pictures of the finished space!


Thank you so much to the One Room Challenge team and Apartment Therapy for a great event! It’s a great motivator and the most positive community. I’m already considering a project for the fall challenge…
You can head over to the One Room Challenge site to see some more room transformations!
Julie AKA “Jewels”

I dressed up this wooden desk organizer to create some pretty storage in my kitchen. You could use it for a bathroom, office or craft space also! I love tea – and throwing tea parties – so this is perfect … Continue reading
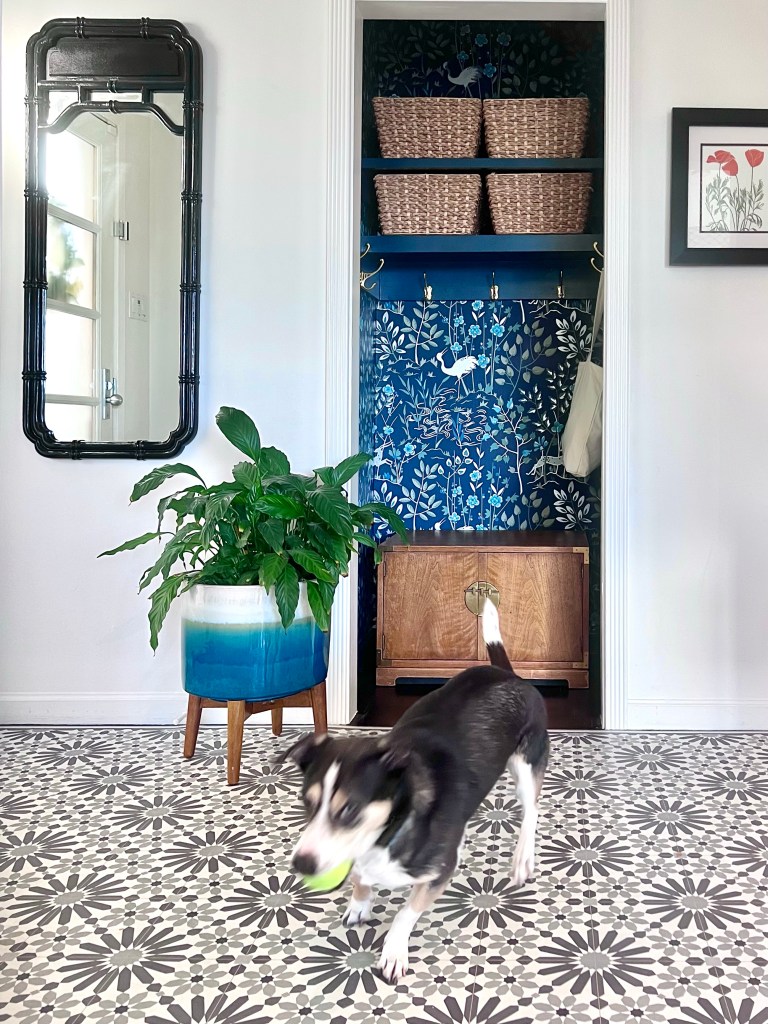
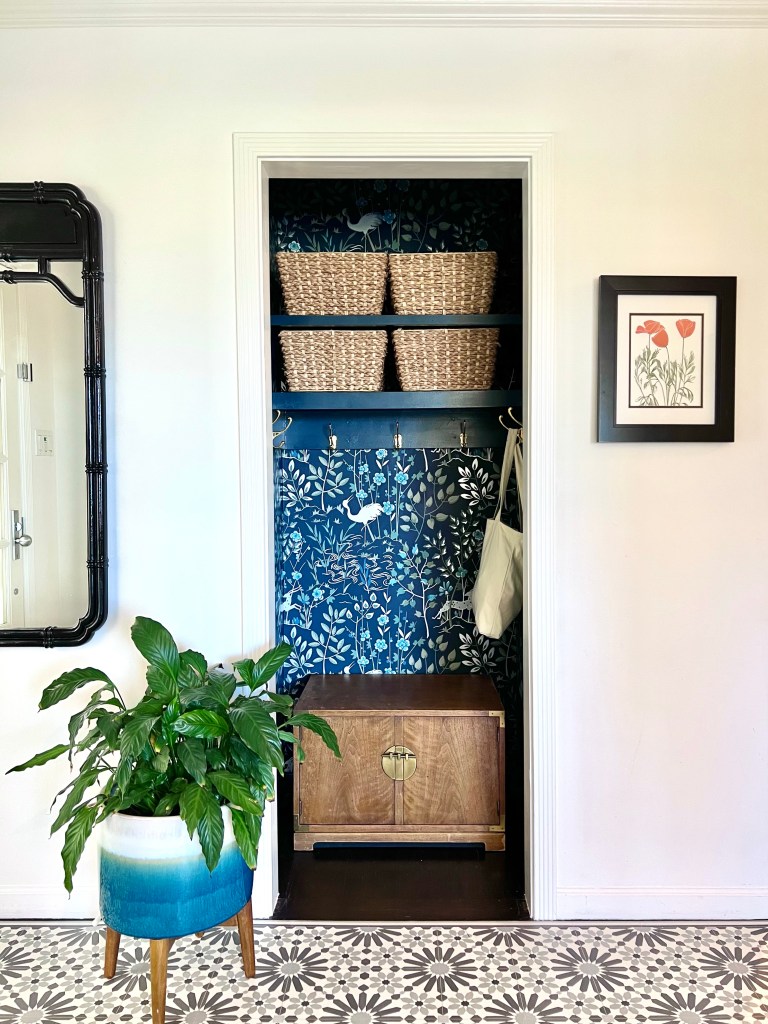
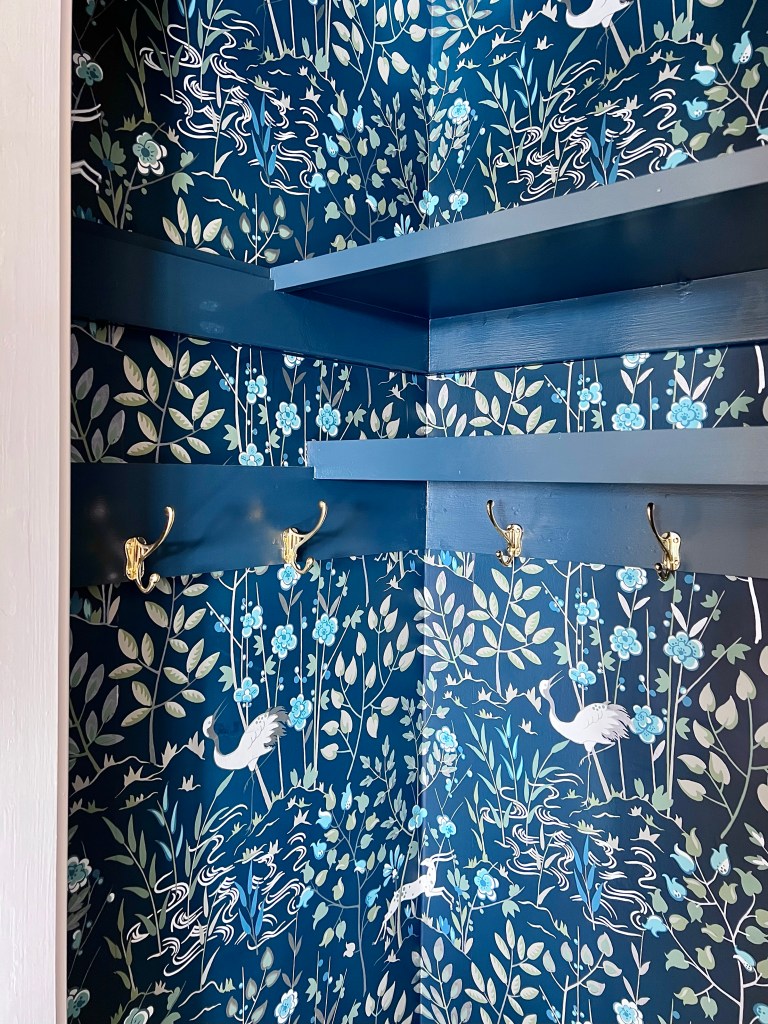
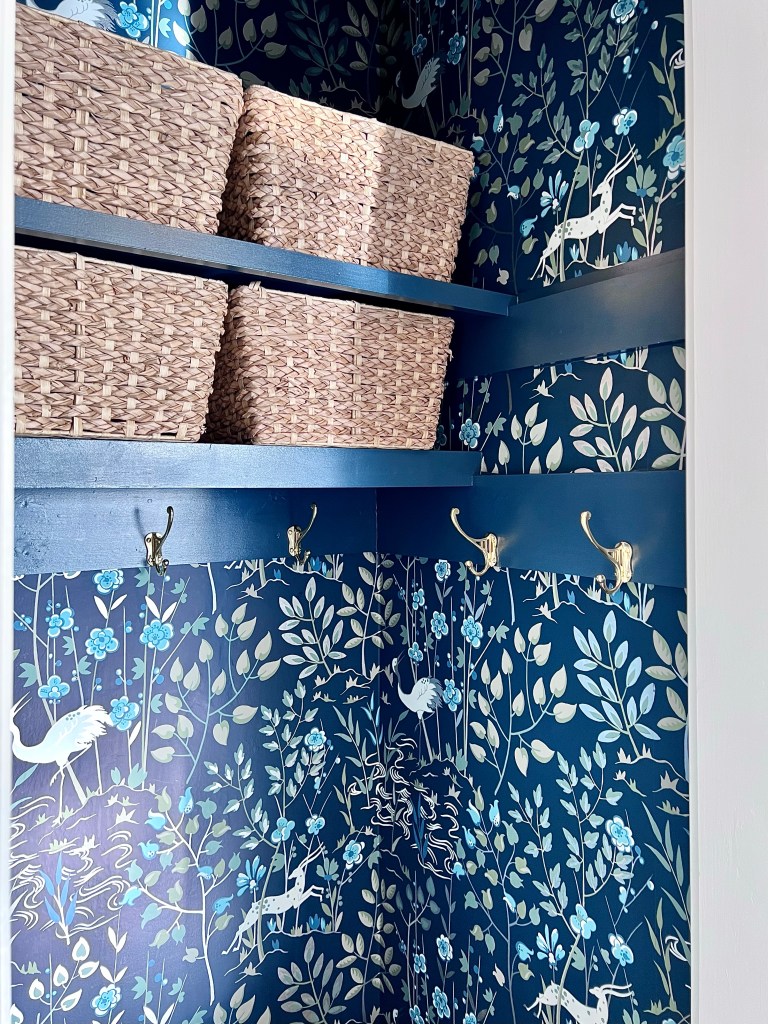
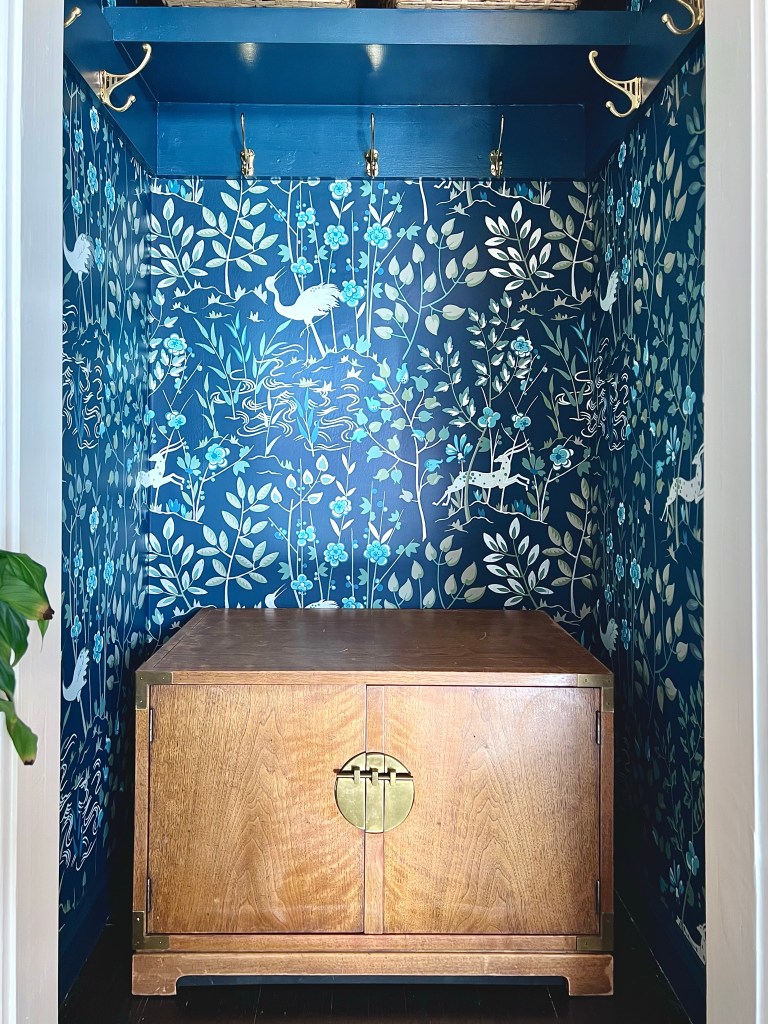
Since I chose a smaller project for this challenge, I have some time to show you all the details! Wallpaper is a really popular right now, and I’m loving this new-again trend! Ever since I wallpapered an accent wall in our bedroom, I’ve been looking for my next project. The choices are nearly endless, which made picking a pattern for our mini-mudroom both daunting and fun! Here are some of my favorites, including high vs. budget options.

My criteria were:
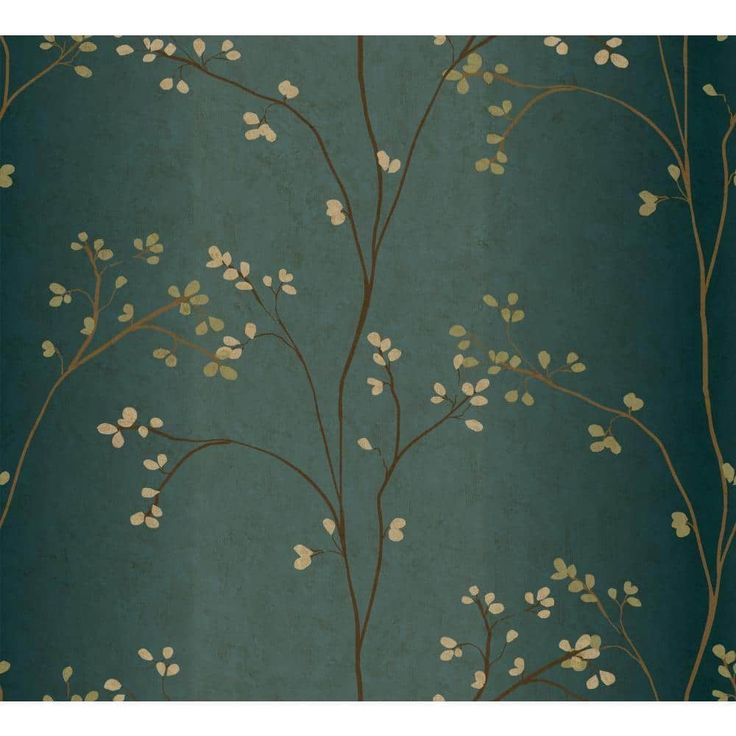
First, I was really drawn to these patterns with metallic branches on a dark background. The “high” option on the left is Nutcracker by Juliet Travers. It’s so elegant, and the little squirrel adds a whimsical touch! The “budget” version on the right is Colby Floral wallpaper. I think either of these would be beautiful, but I decided I wanted something a littler bolder for this project.

I was really considering these next two favorites: a “budget” version is Crown Sherwood Woodland in Dark Blue on the left, and the “high” version is Rifle Paper Co. Menagerie Toile in Navy and Metallic Silver. They have a bit of a chinoiserie feel to them, and I really like how the patterns are very elaborate, but they don’t feel too busy, because of being two-toned. I was definitely tempted by the metallic finish of the Rifle Paper one, also!


I was also very drawn to this Toile pattern by Borastapeter in green or blue. Ultimately, I think the scale would be better for a bigger space. I would love this in a dining room!

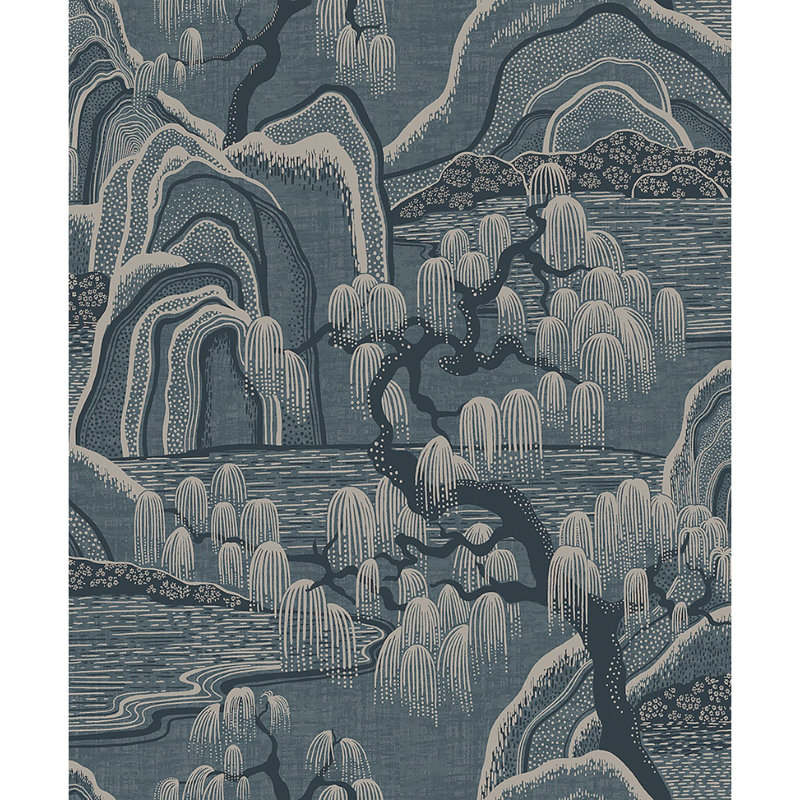
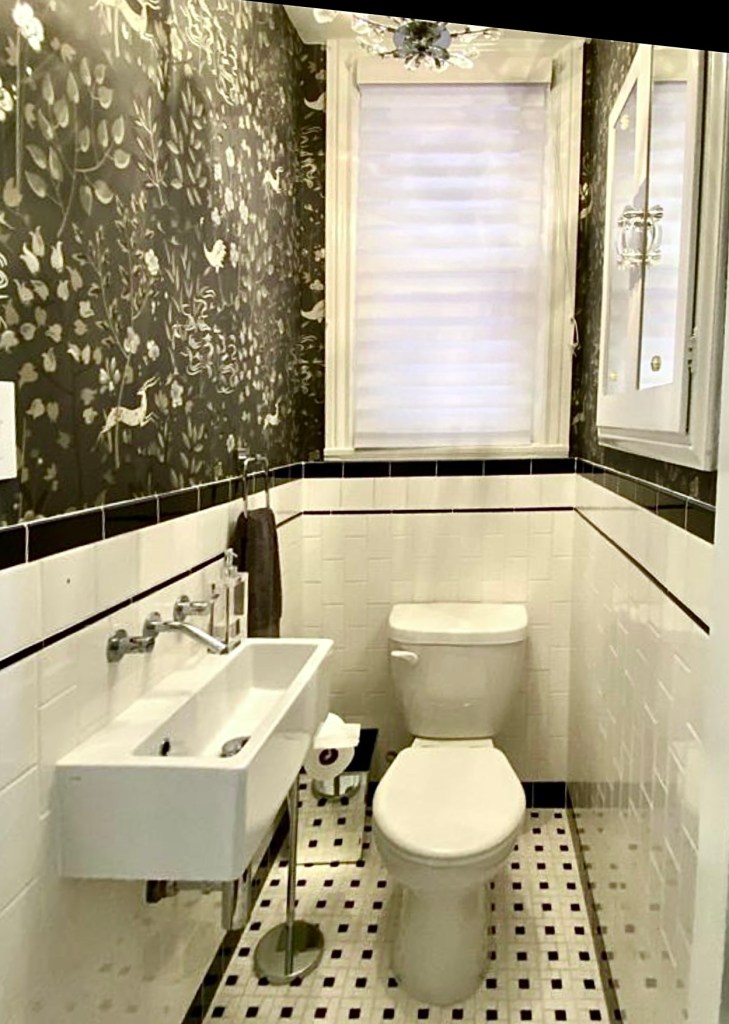
Finally, I decided to go with this beautiful print, the Ronald Redding Aspen wallpaper in dark blue. I love the mix of classic and whimsical and the dark teal blue color with light brown accents that will be brought out by the wood cabinet and the brass coat hooks. I knew it was meant to be when I realized that this is the same pattern that was in the powder room of our rental house. I always loved it, and I am very sentimental , so it makes me really happy to have that connection between the two homes.

Stay tuned to see the wallpaper installed in the mini mudroom next week! In the meantime, head on back to the One Room Challenge site to see some more room transformations!
Julie AKA “Jewels”
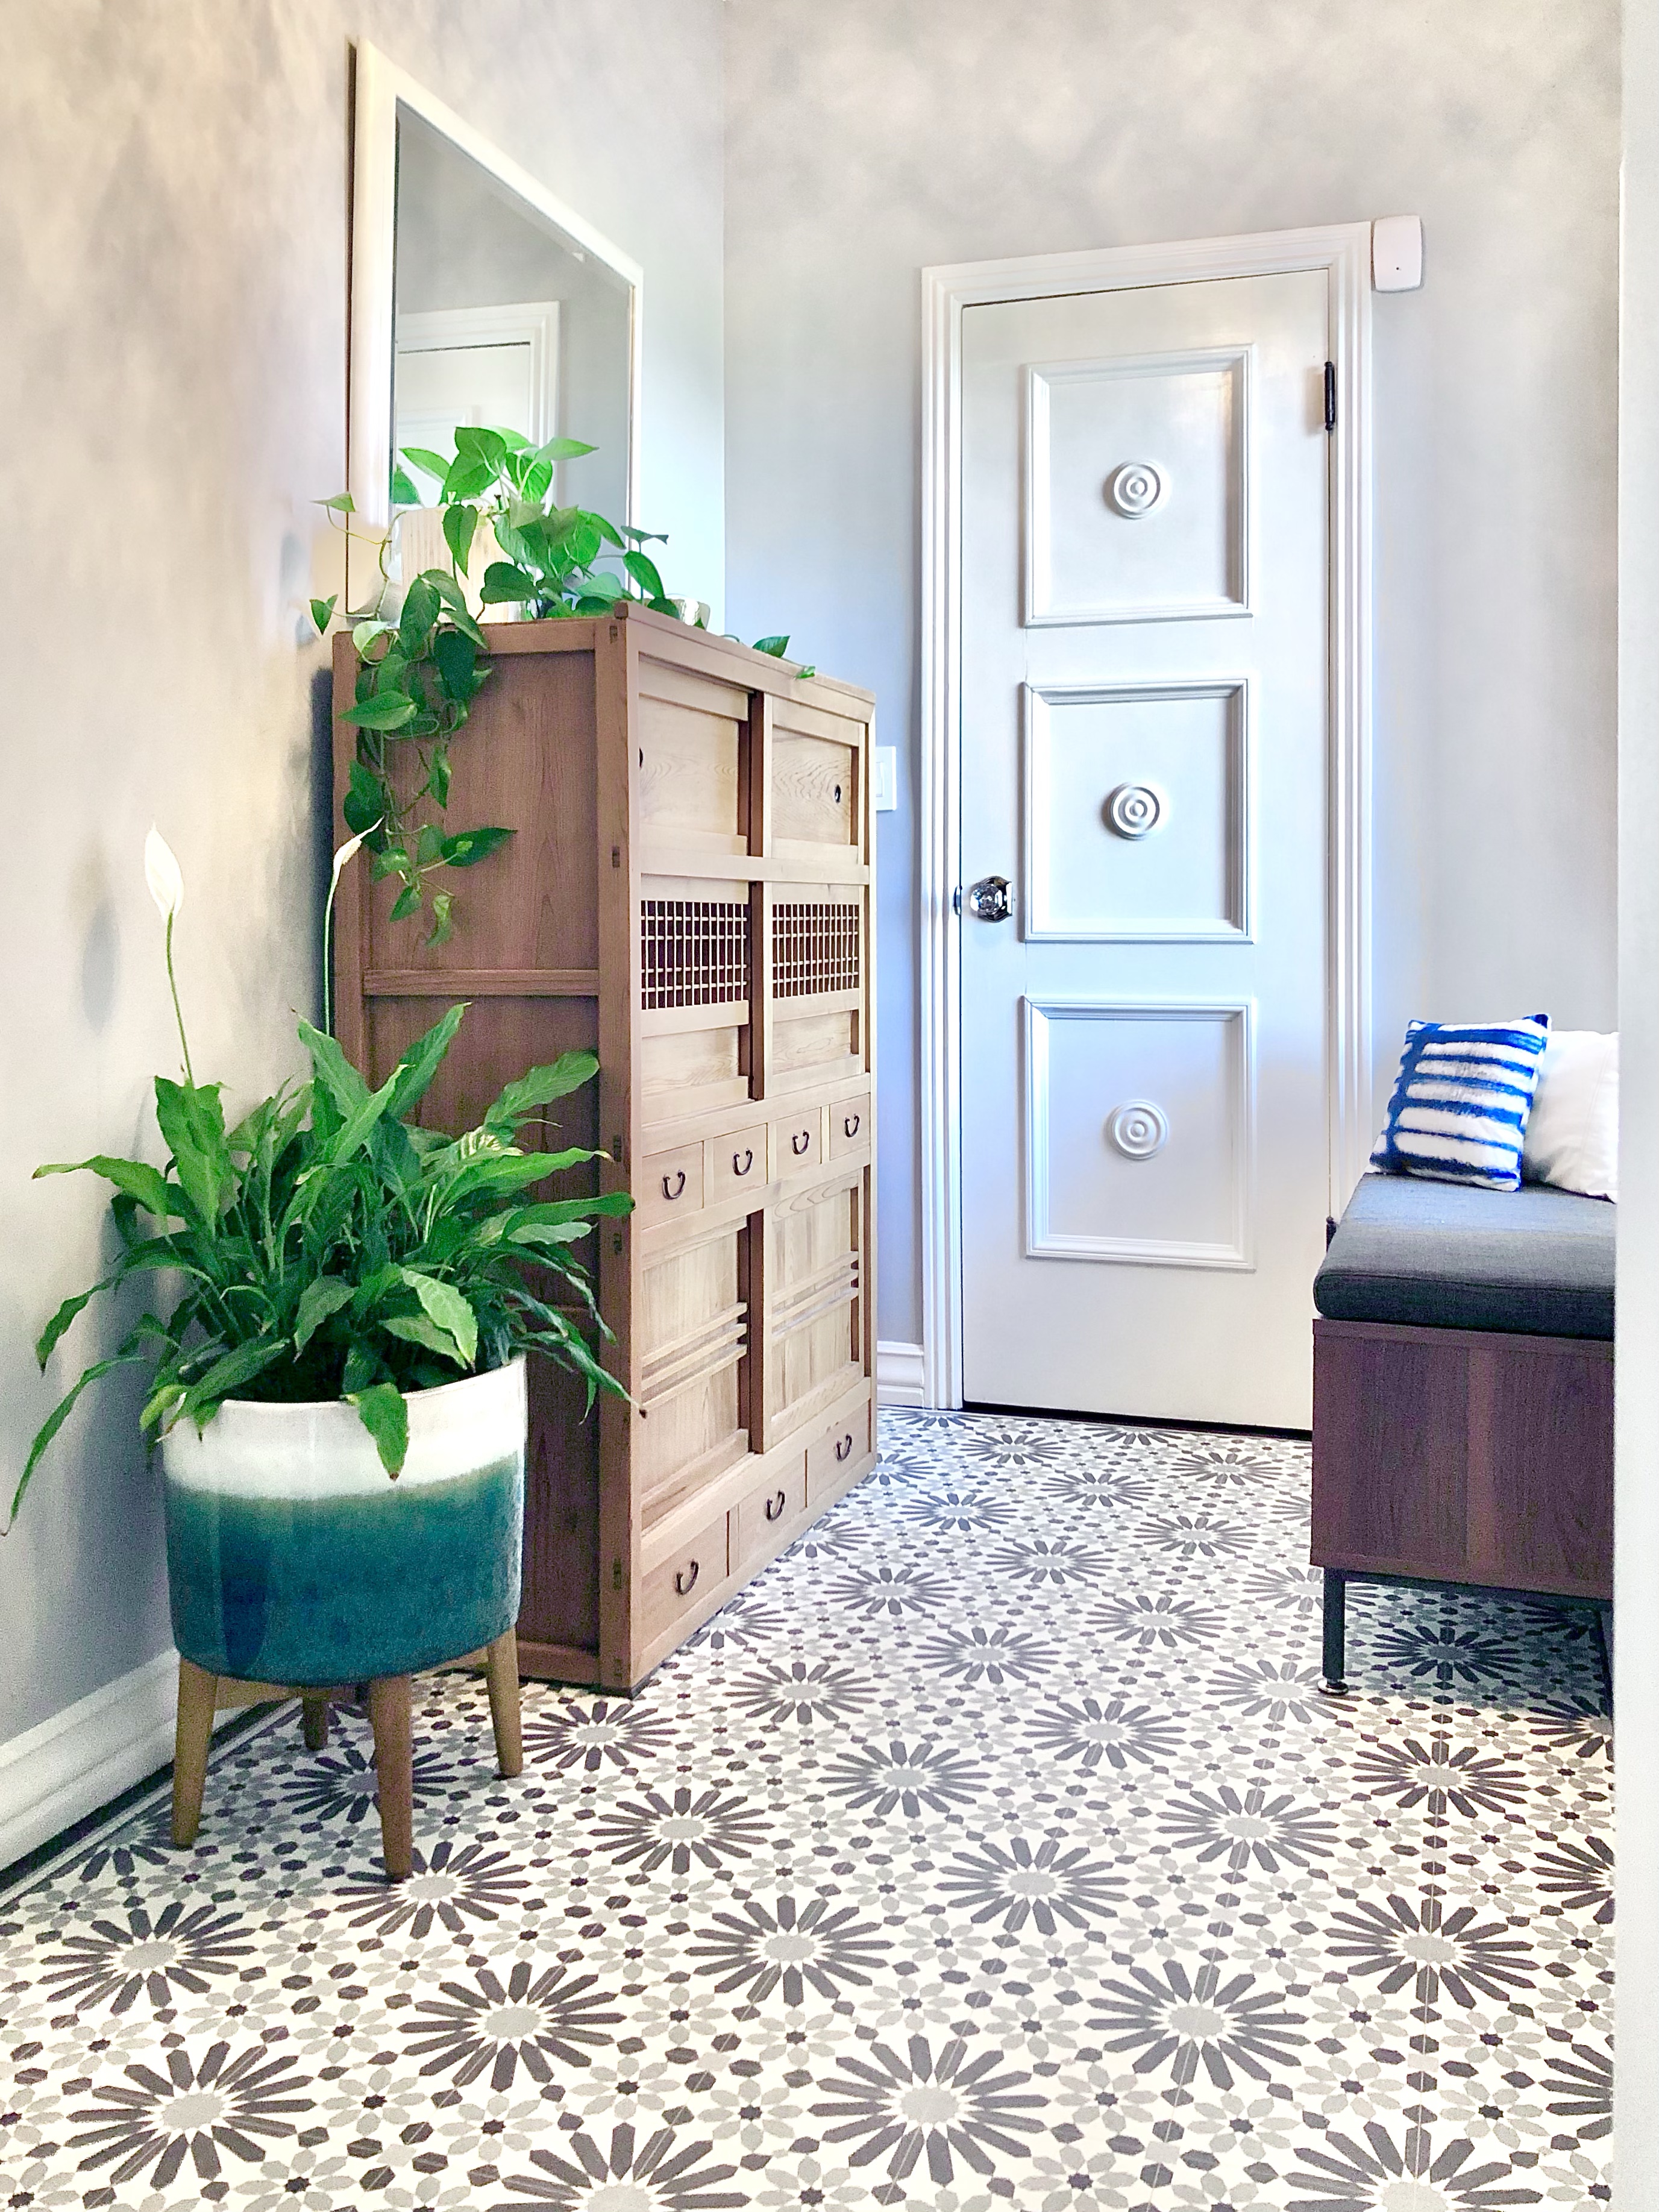
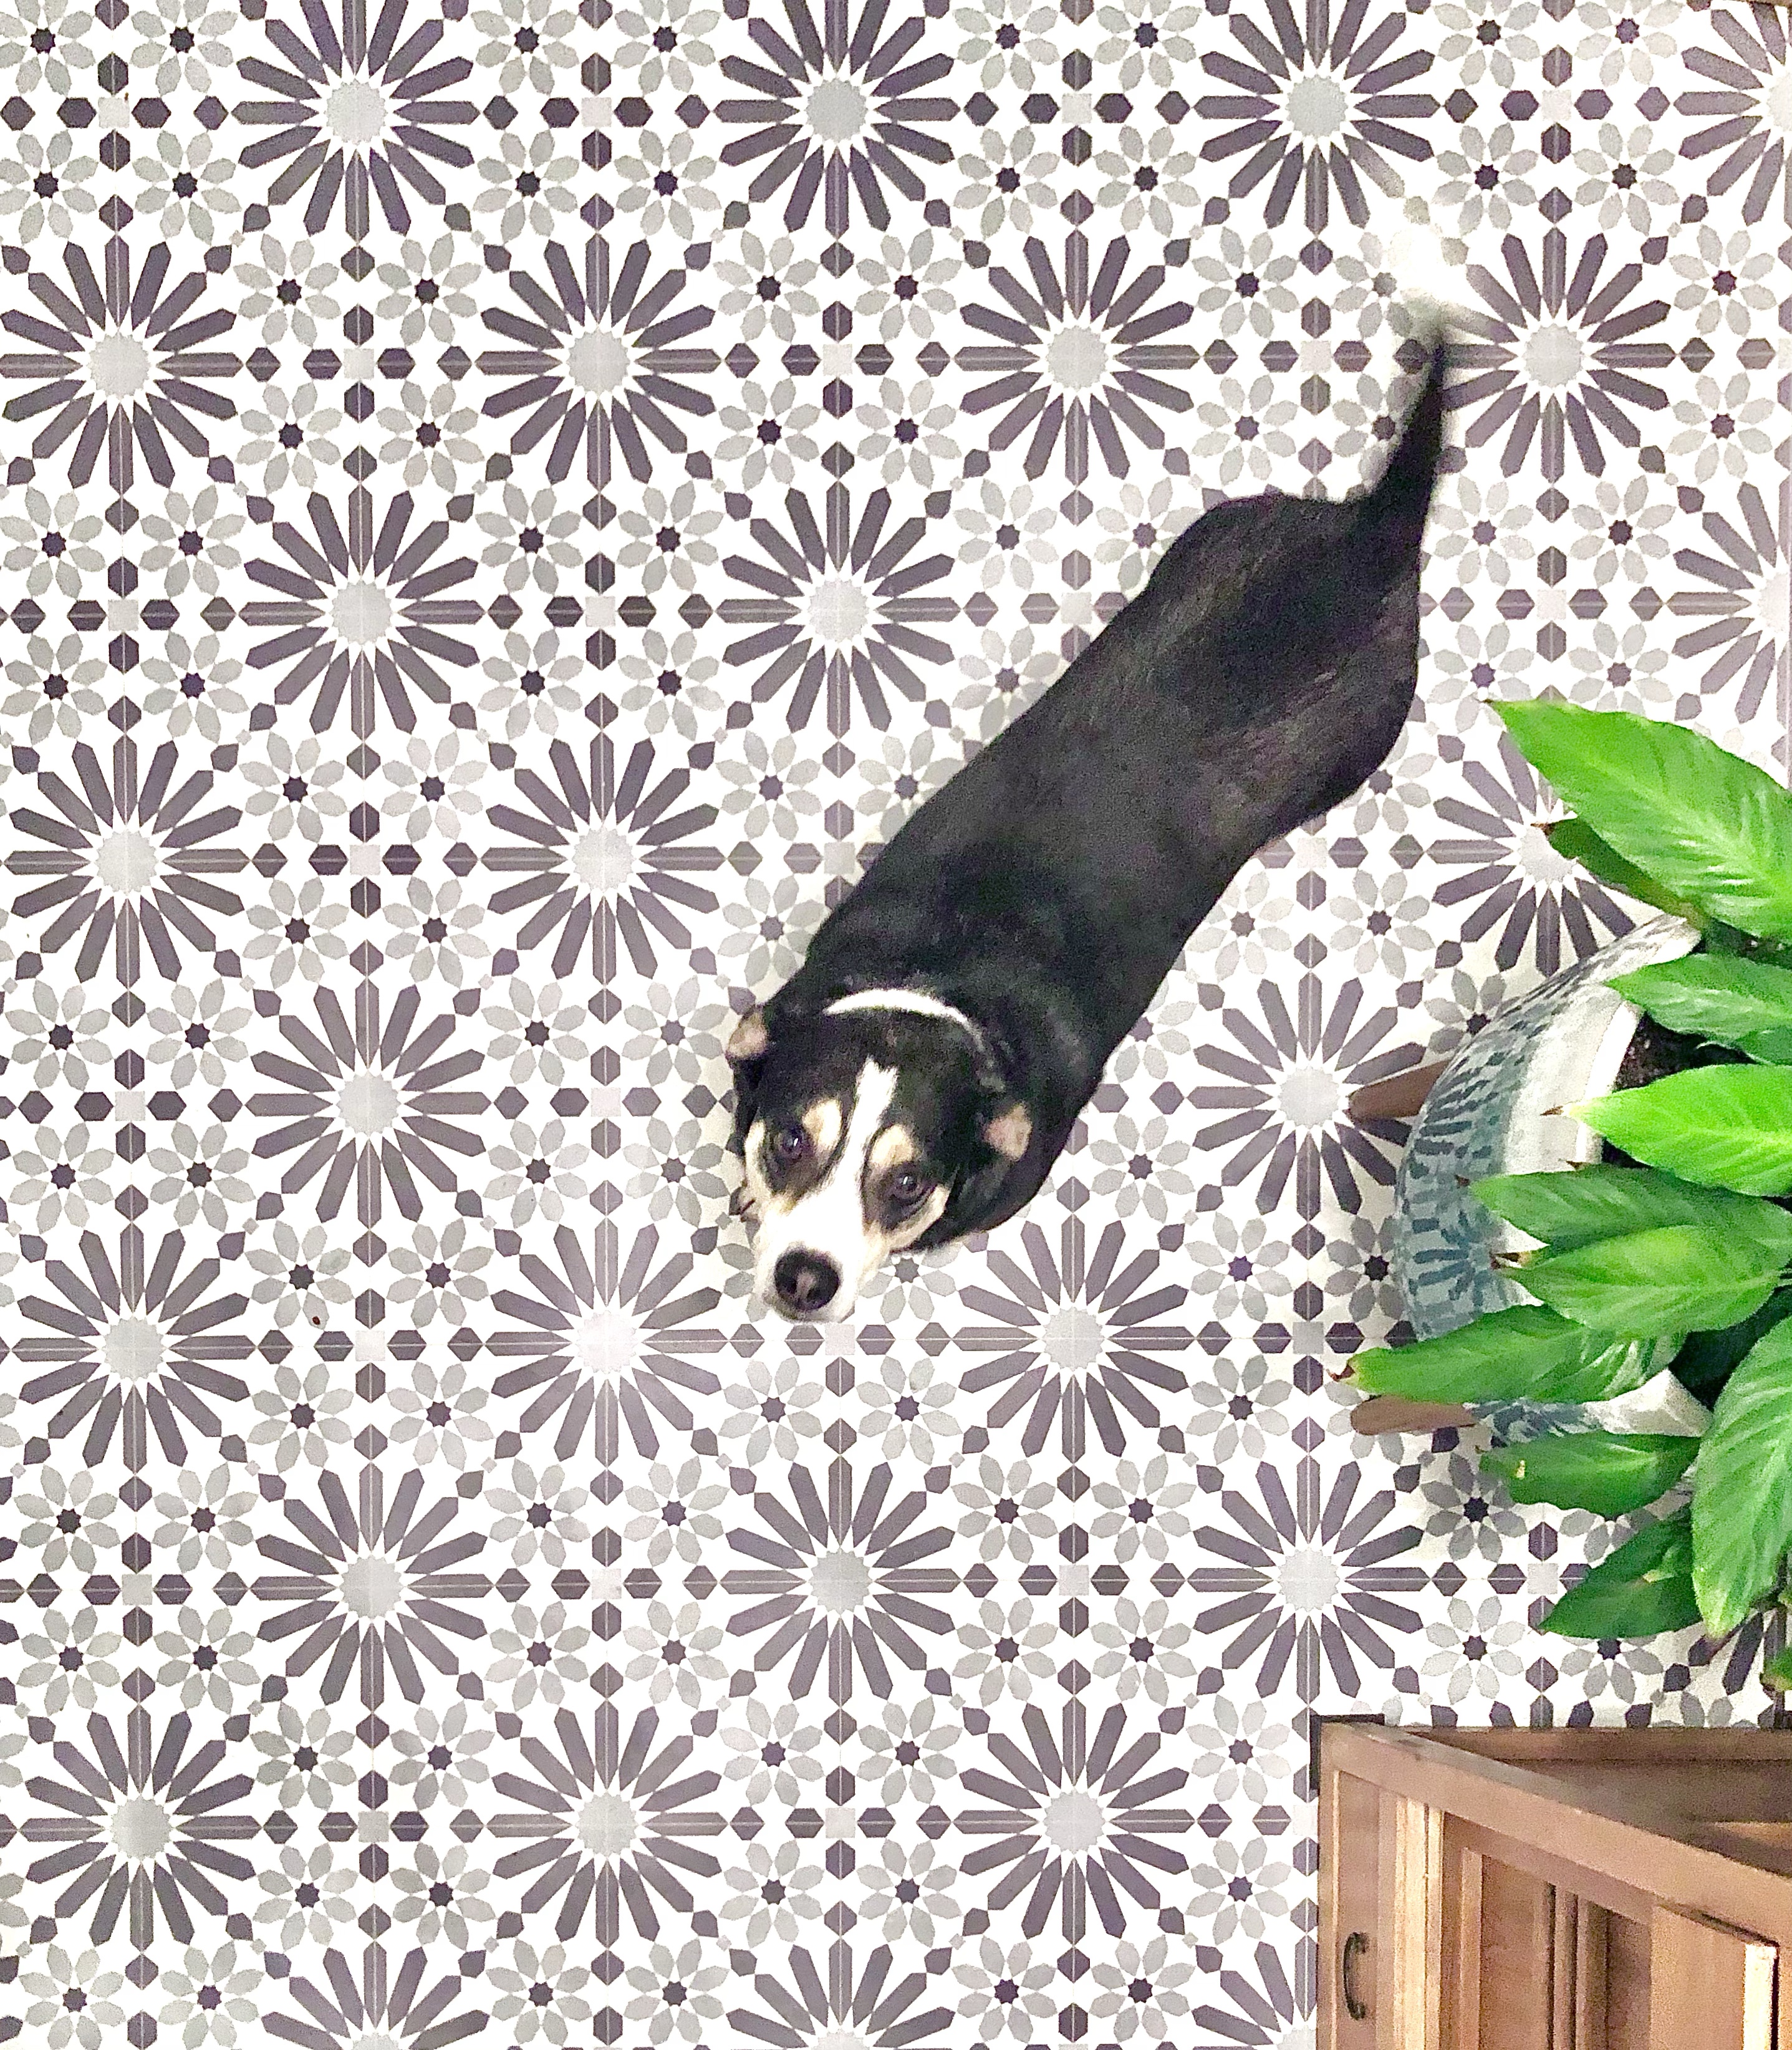
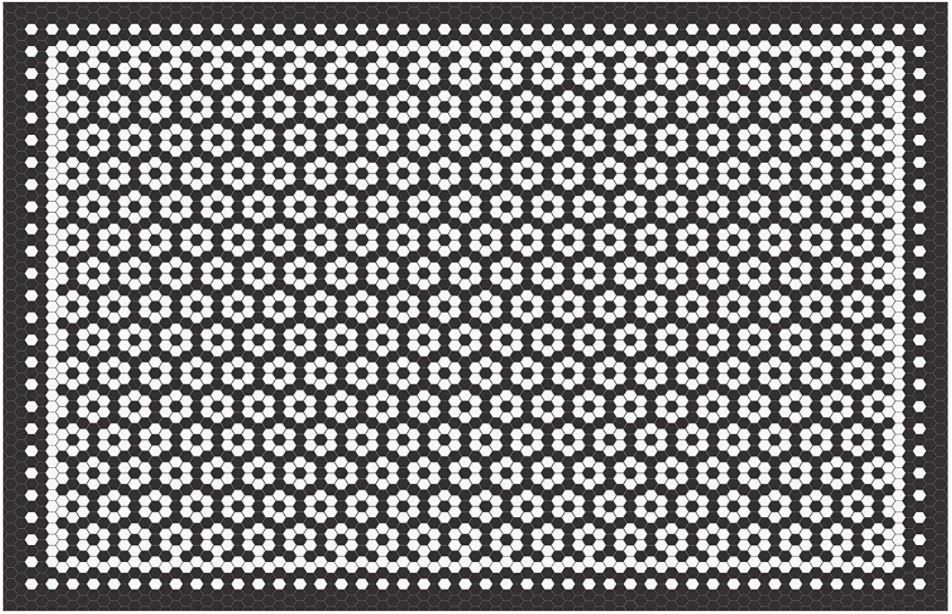
Ready, set, go! While I work away on projects for the space, I’ll share some of the other features of our foyer. One element that always gets comments and questions is the “tile” floor mat. I bought this mat for our rental house, because I didn’t want us to track water onto the wood floor, and luckily, it fits in our new home’s hallway also!
The flooring looks like tile or a carpet, but it’s actually a vinyl floor mat. I bought mine from ArtMatHome on Etsy, and I love their patterns and variety of sizes. This type of product is getting more and more popular, so there are many options available, and I’ll share some more of my favorite finds here!
Here are some photos of the floor mat in our rental house:
And here are some others that I’ve got my eye on!
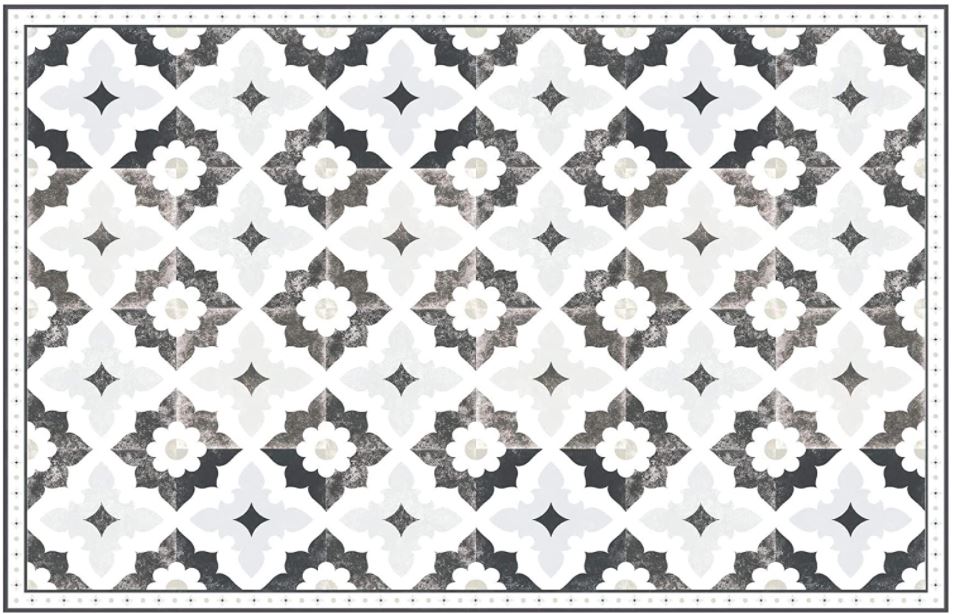

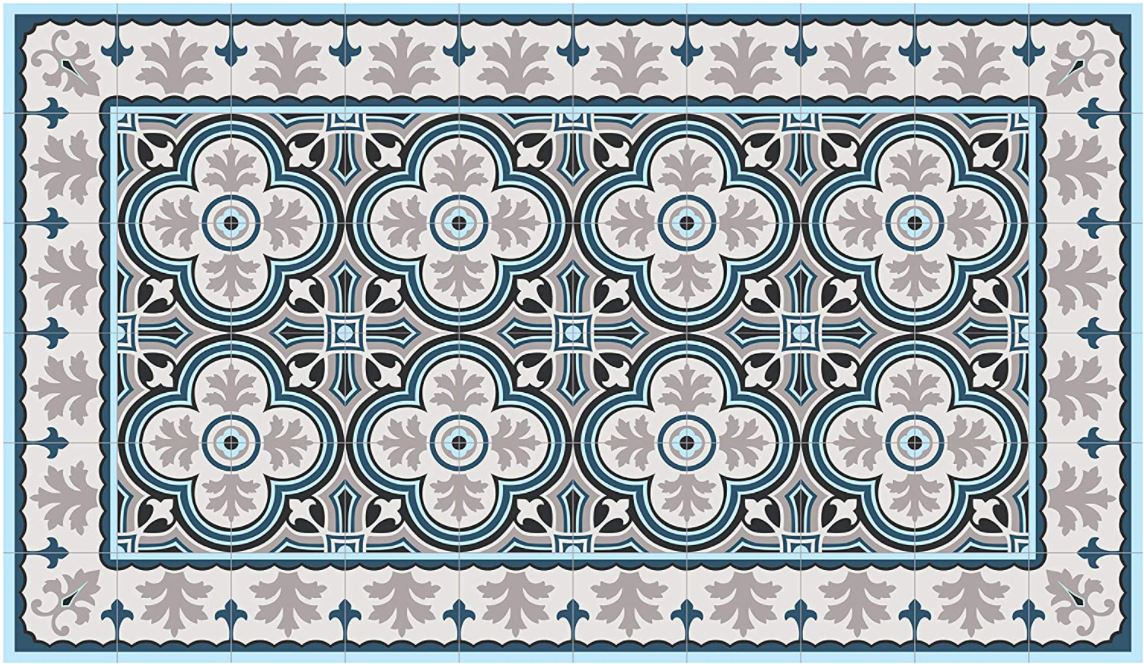

Clockwise from top left:
Check out more projects at the One Room Challenge site!
This post includes affiliate links.
Up next week, details on one of my favorite (I’m kidding – they’re all my favorite! – vintage furniture finds)!
Julie AKA “Jewels”
