I don’t do that much seasonal decorating (except for my very over-the-top Christmas decorating, of course!). Maybe, it is because San Francisco does not have traditional seasons? Anyway, after our cool and wet winter, I really felt like celebrating Spring … Continue reading →
I love treating myself to real fresh flowers, but sometimes, we all need the low-maintenance burst of color that comes from “silk” flowers. I have a few favorite tips to create arrangements that look almost as good as the real … Continue reading →
I wish I were a better sleeper. Trust me, I really do. I’m sensitive to light when sleeping, so room-darkening window coverings are a must! I’ve found some quick tricks that I’m excited to share for adding lining to existing … Continue reading →
So, my weakness (talent?!) for finding home decor on the street is well-established. Remember when I made over this cute Chinese end table? Well, I was walking over to meet a friend for lunch today, and I saw this mirror … Continue reading →
A lot of people groan when they think about moving, and while I plan to stay put for many years to come, I actually love the excitement and challenge of arranging a new space. I’ve had a lot of fun … Continue reading →
We moved twice in the last two years, and in the process, I gave away a lot of things. I feel like the universe has decided to reward me by sending me two great finds. First, I found this vintage … Continue reading →
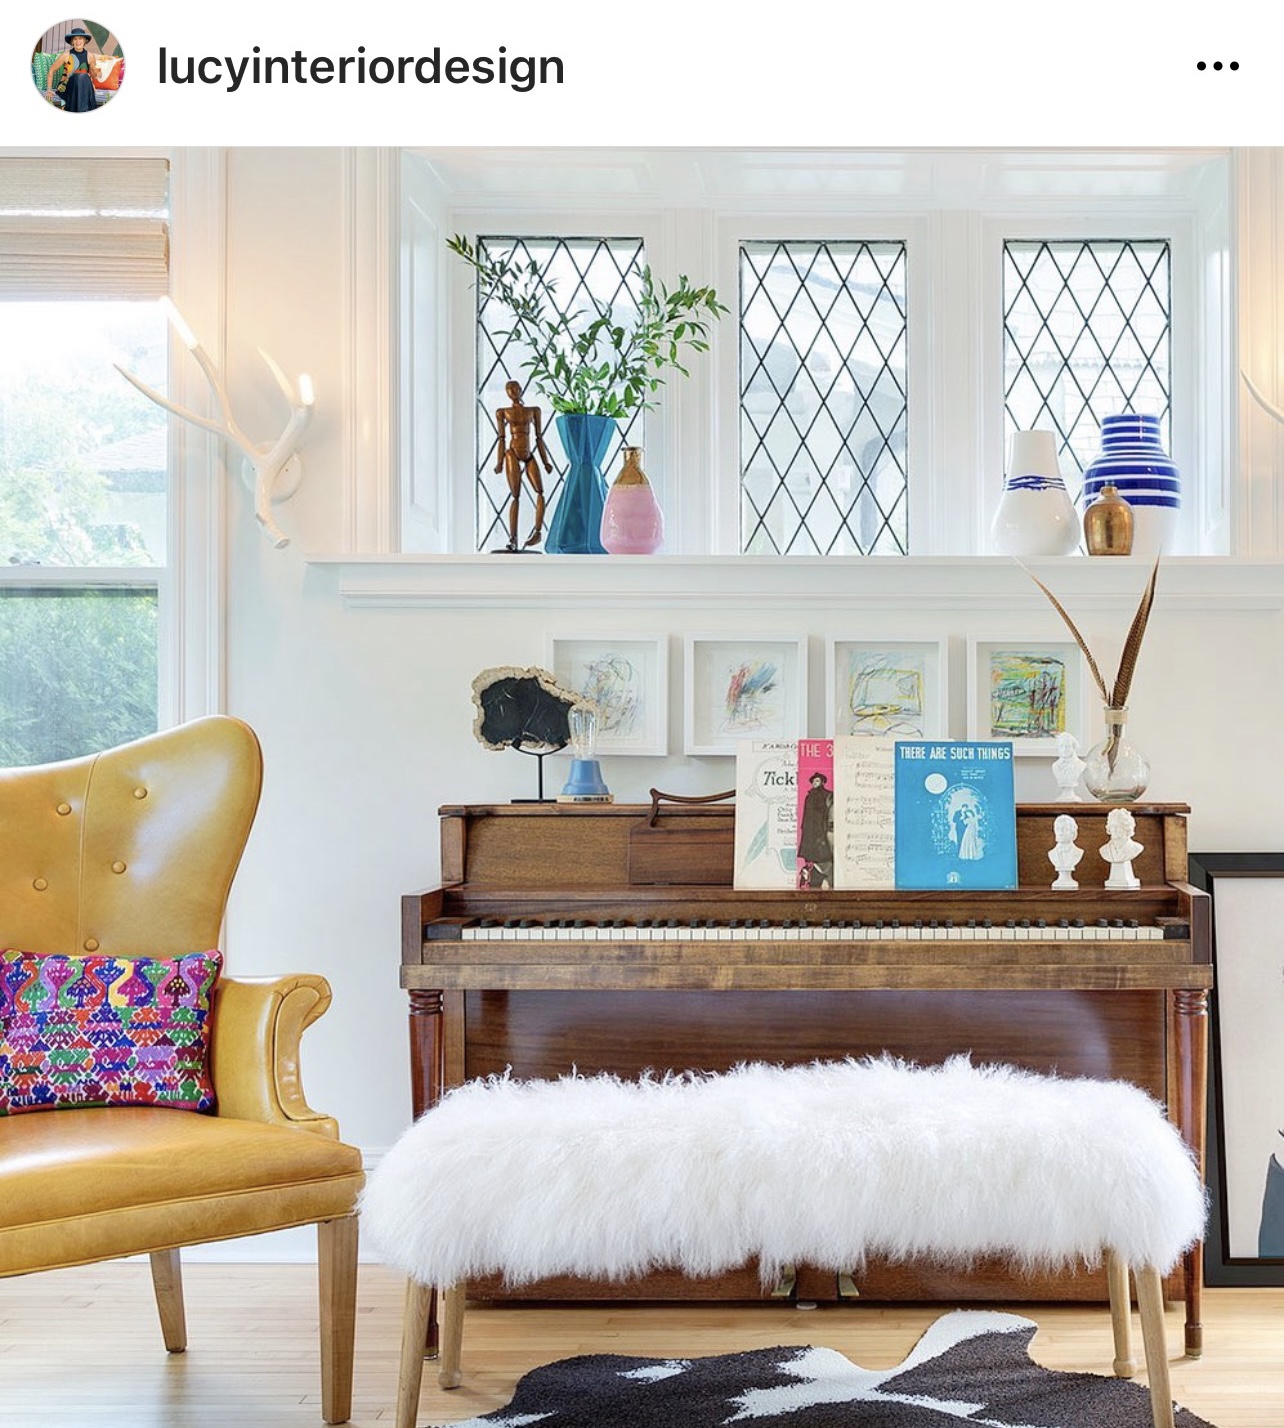
Oh wow, I am in love with the work of Lucy Penfield of Lucy Interior Design! She can execute a beautiful modern or bohemian room, but what I’m particularly smitten with is her ability to create space that has the perfect blend of classic and contemporary, casual and elegant, all full of whimsy and personality. This balance is what I am striving for in our home, and I am soaking up all the inspiration!
Here are my favorite elements of her designs:
A warm neutral base with walls, ceiling, and trim in a warm white, leaving lots of open space
Architectural details like beams and arches, and window seats
Black accents, such as hardware or black window and door frames
Natural mid-tone wood floors and other natural materials like rattan and bamboo
Bright jewel-tone accents in navy, teal, pinks, kelly green, yellow, and orange
Color is introduced through art, wallpaper, throw pillows, and patterned rugs
Vintage pieces from my favorite styles like mid-century modern and Hollywood glam
Fresh flowers and plants
This style is exemplified by her Highland Park Bungalow and Romantic Urban projects, as well as the Lake Cottage. I would happily move into any of these gorgeous spaces! Here are some of my favorite inspiration pics that capture that beautiful and unique blend of styles.
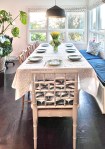
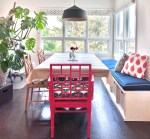
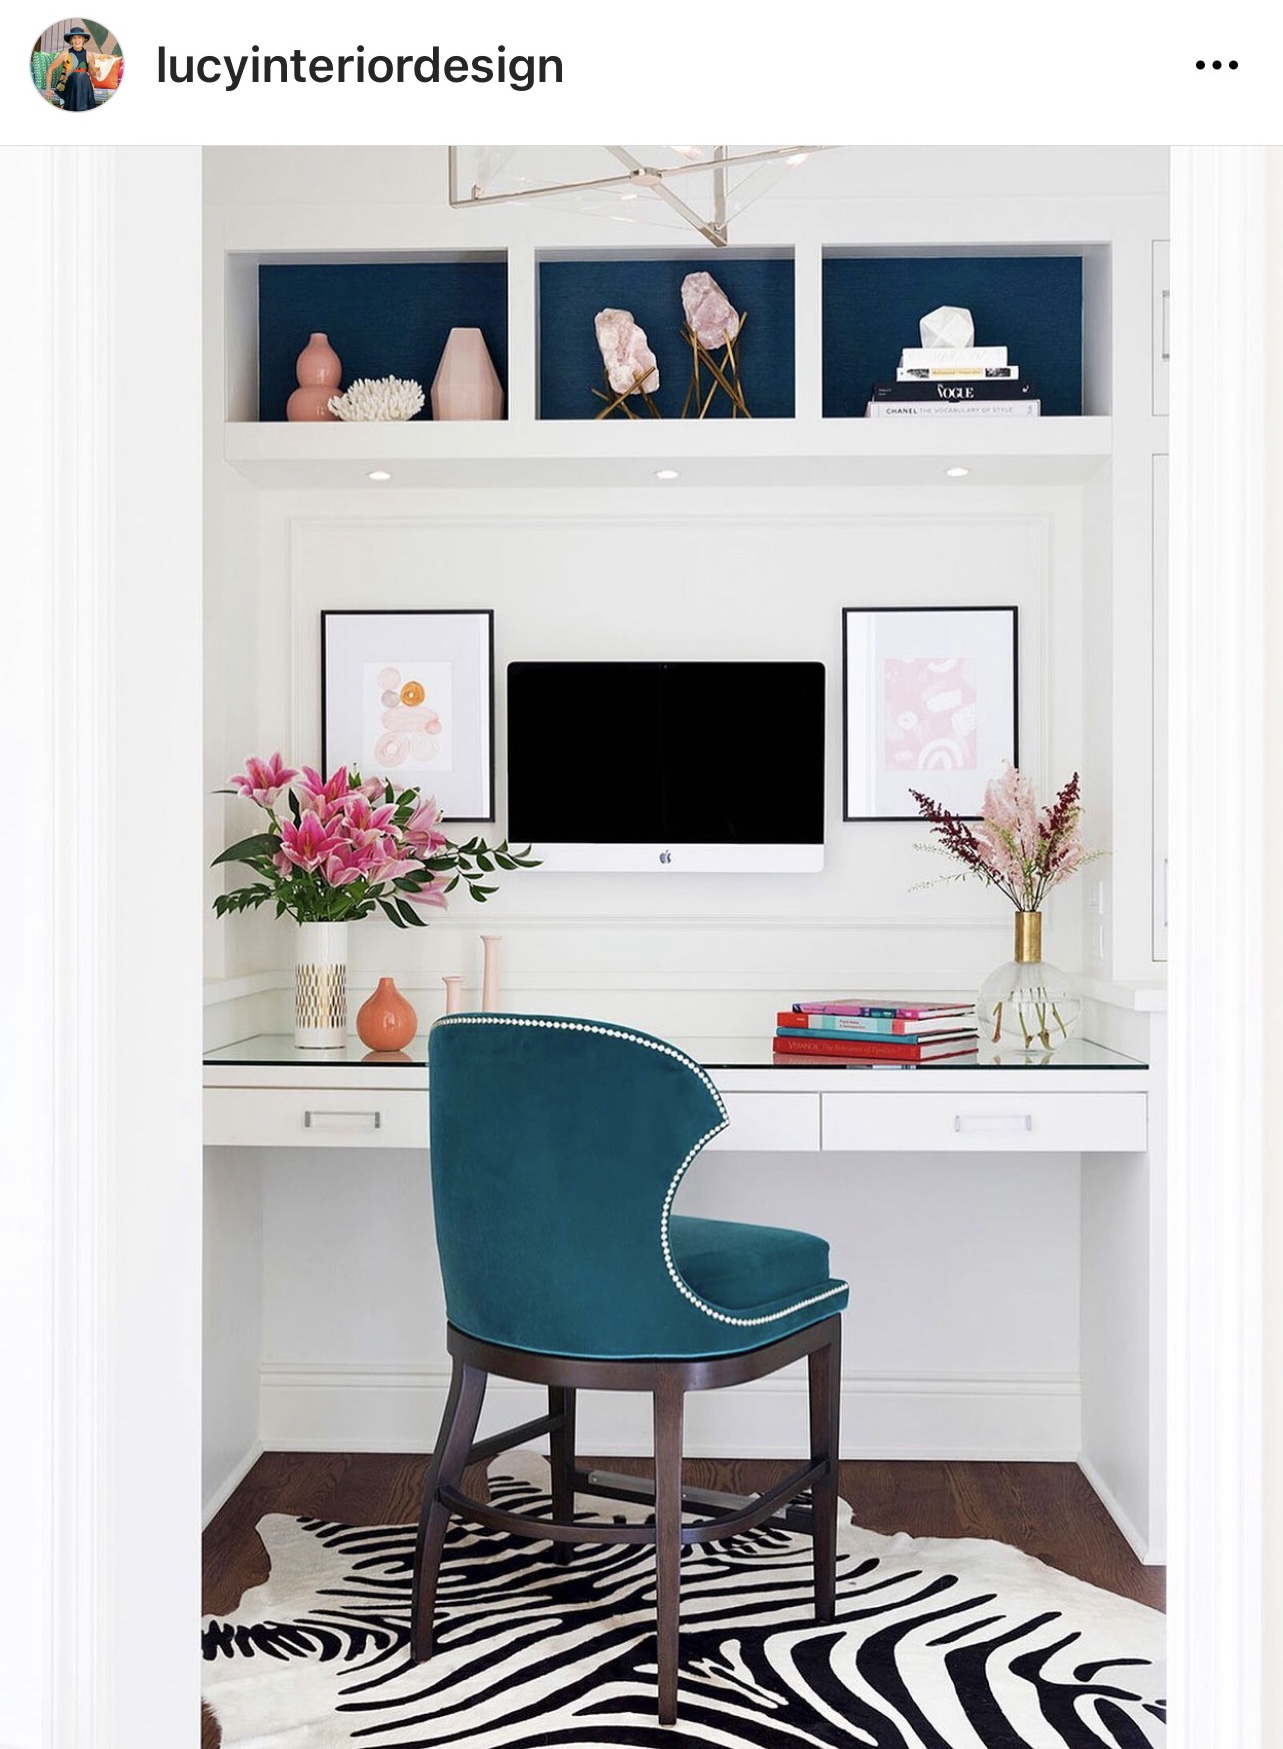
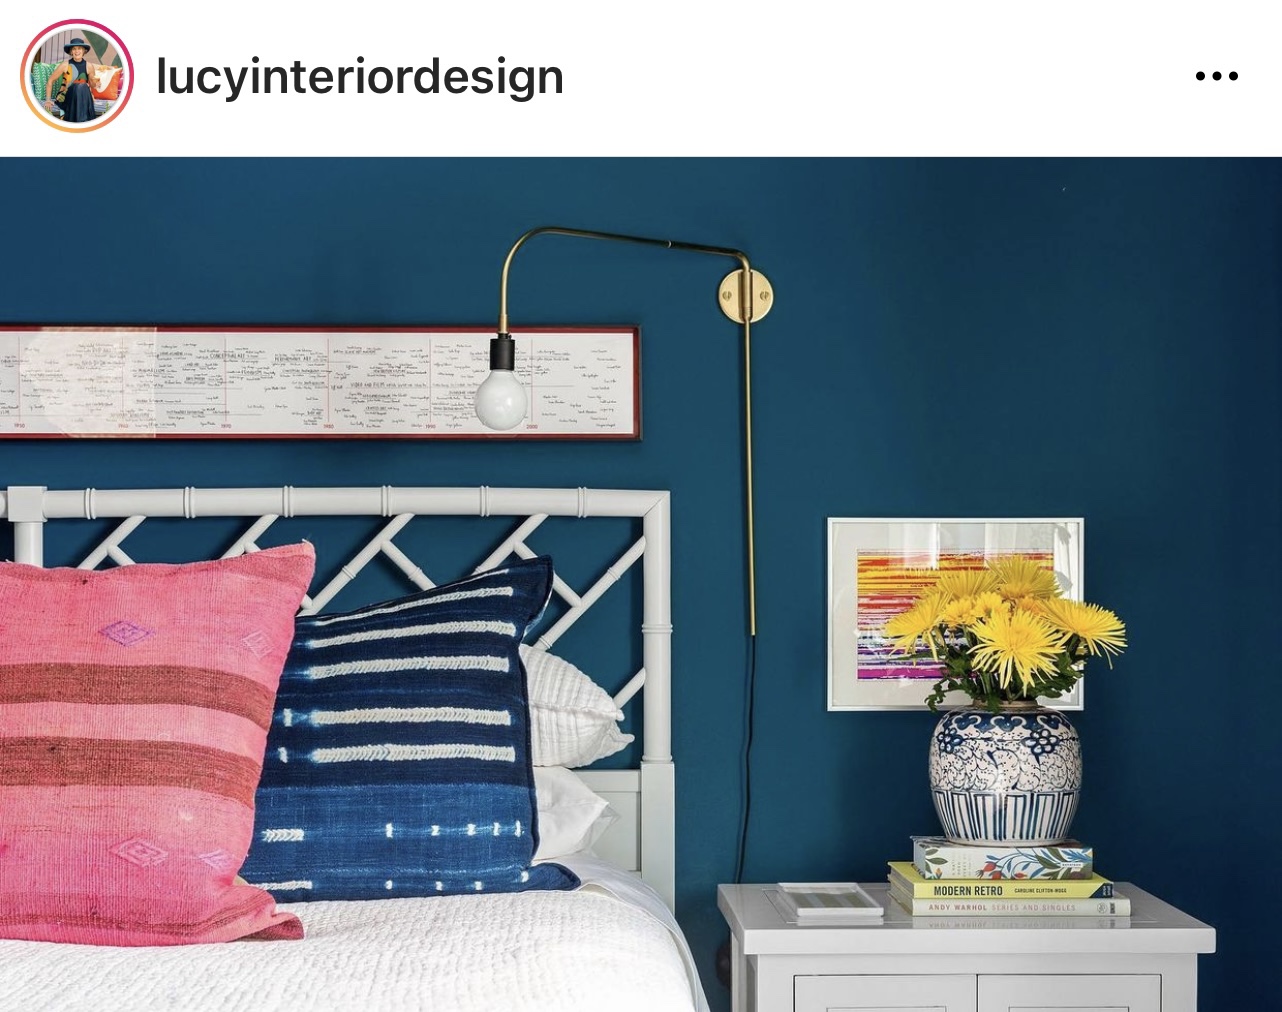
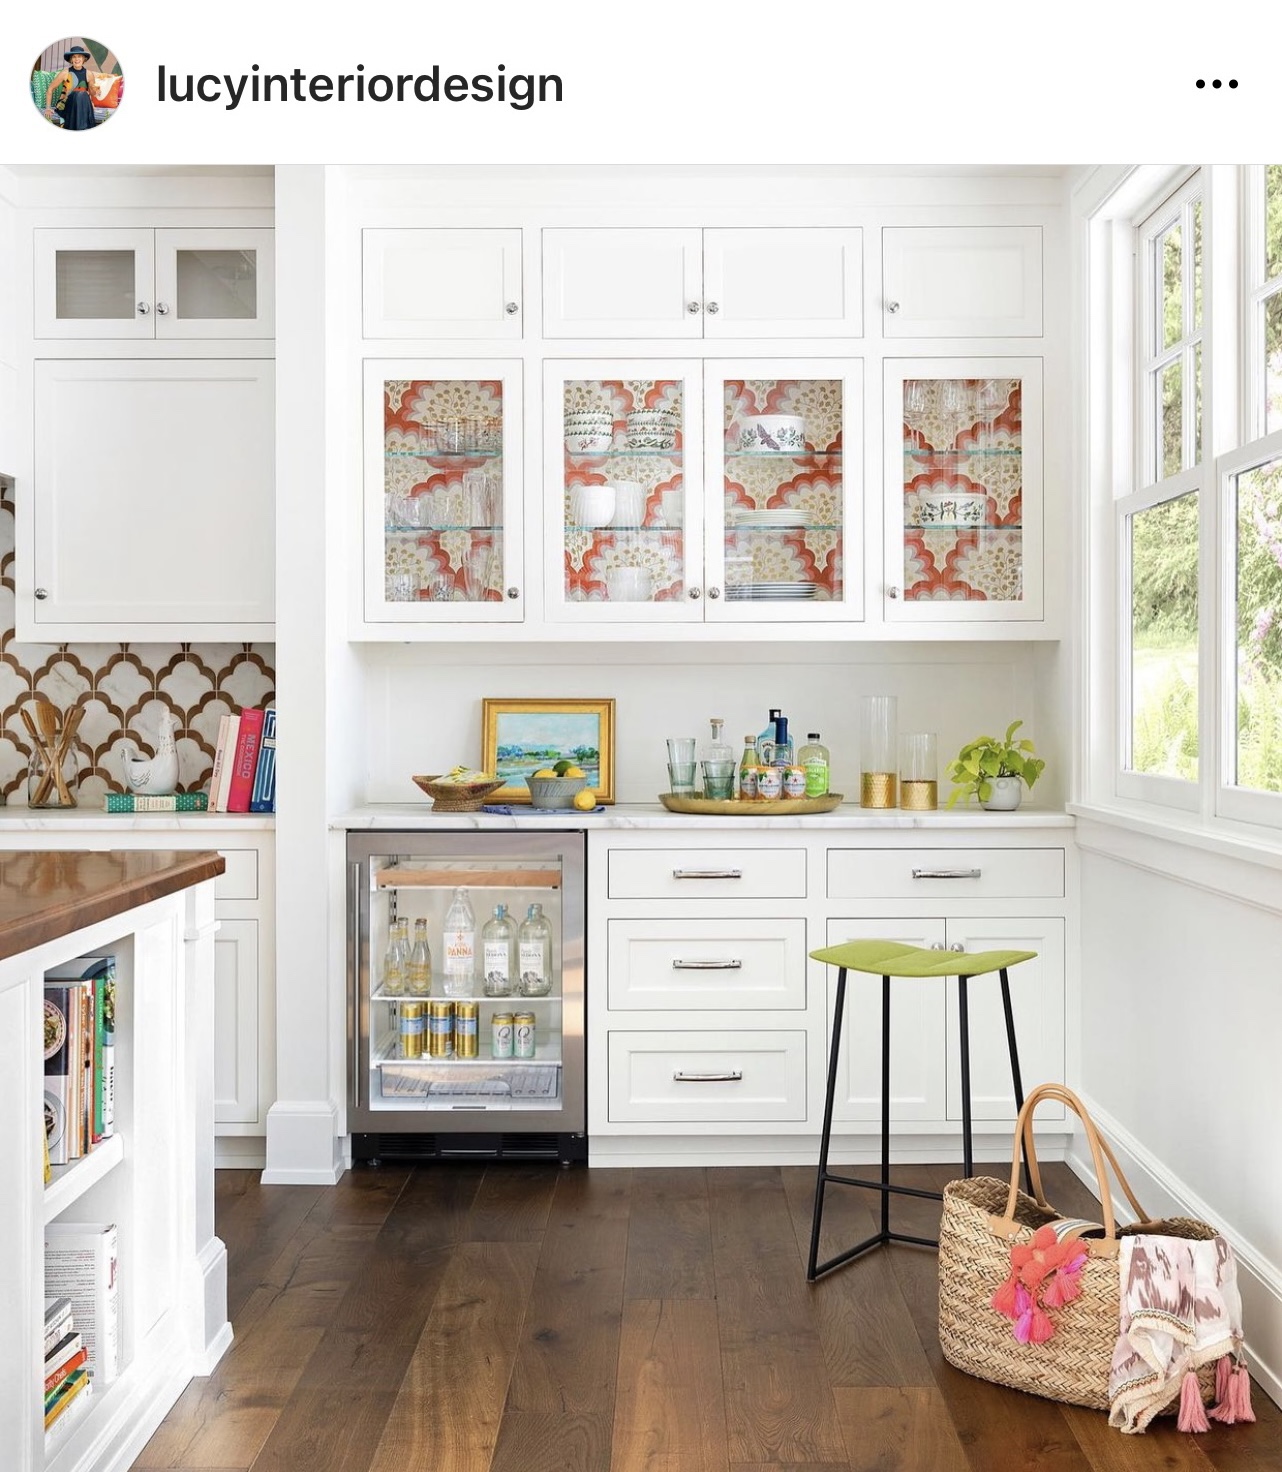
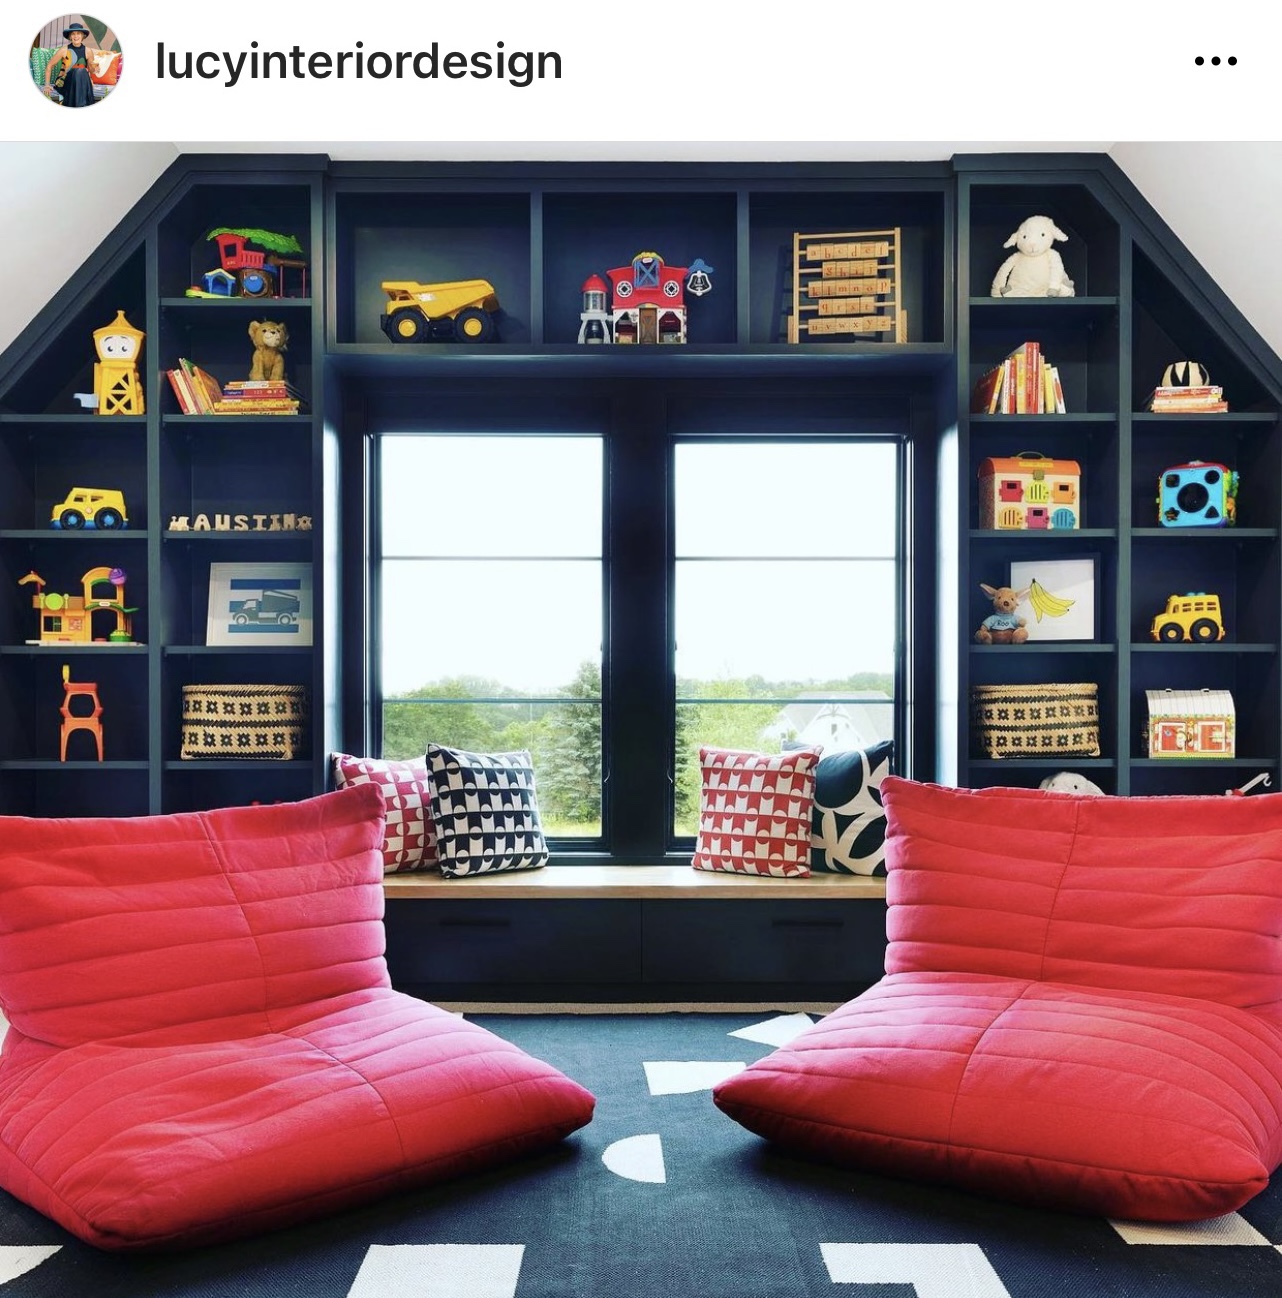
A simple classic foyer, with a fun patterned stair runner and brightly-colored accentsYou know my passion for faux bamboo and blue. The green accents are inspiration!The architectural details painted out in a warm white are making me swoon, all with just the right amount of pink and blue accents!Here’s a close-up of that same dining room ❤Lots of warm white, but the teal at the back of the cubbies, paired with the teal chair, with the touches of pink in the art and flowers… you can see why I am in love! Definitely office goals!Speaking of teal, this accent wall with the white bamboo headboard are perfect!I put a faux sheepskin on our piano bench, too – I am in good company!Kitchen inspo – classic white cabinets with that stunning wallpaper lining the cabinets and the complementary tile!More kitchen love – keeping the cabinets and island classic white, but the pink pantry door and the teal buffet, the natural chairs… swoon!Cutest laundry room ever. I would love to have a laundry room. Is that weird?I love these dark built-ins to ground all the color from the toys. Thinking of something like this for J’s room!
Isn’t this all fabulous?! I have always wondered if my blend of styles might be too scattered, but I love seeing how it is possible to bring together traditional and contemporary elements to create beautiful spaces. So inspired!
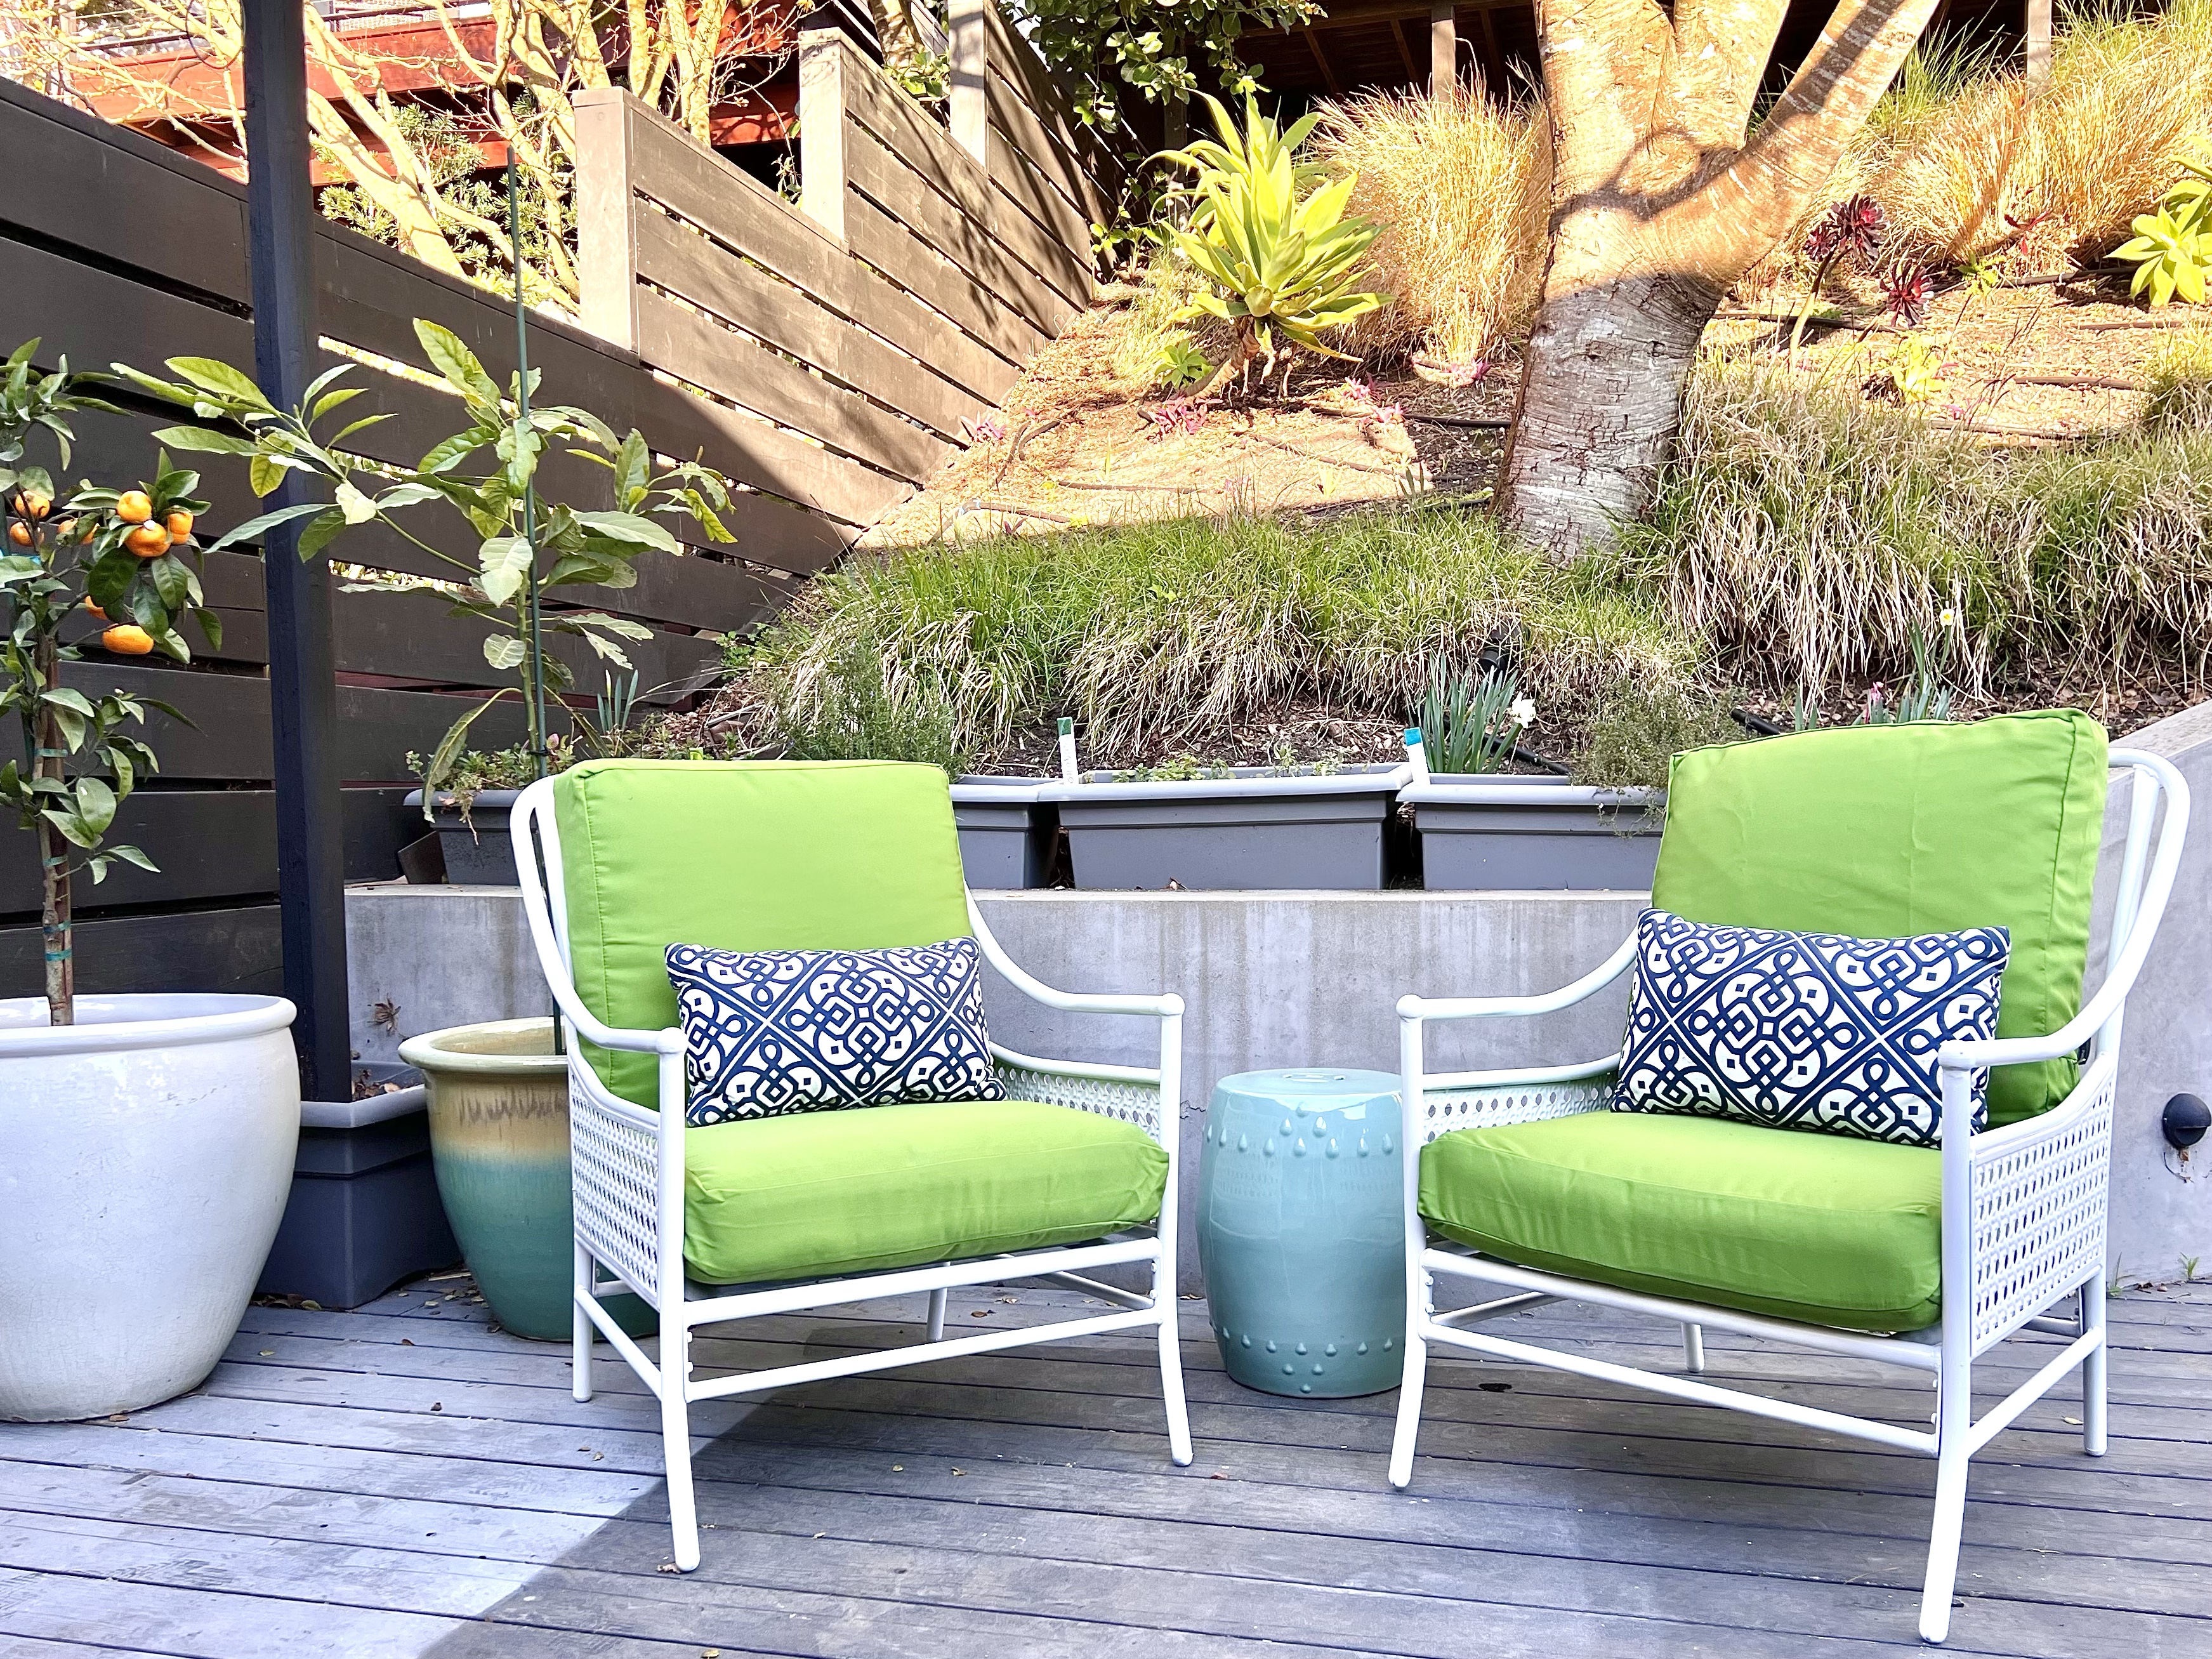
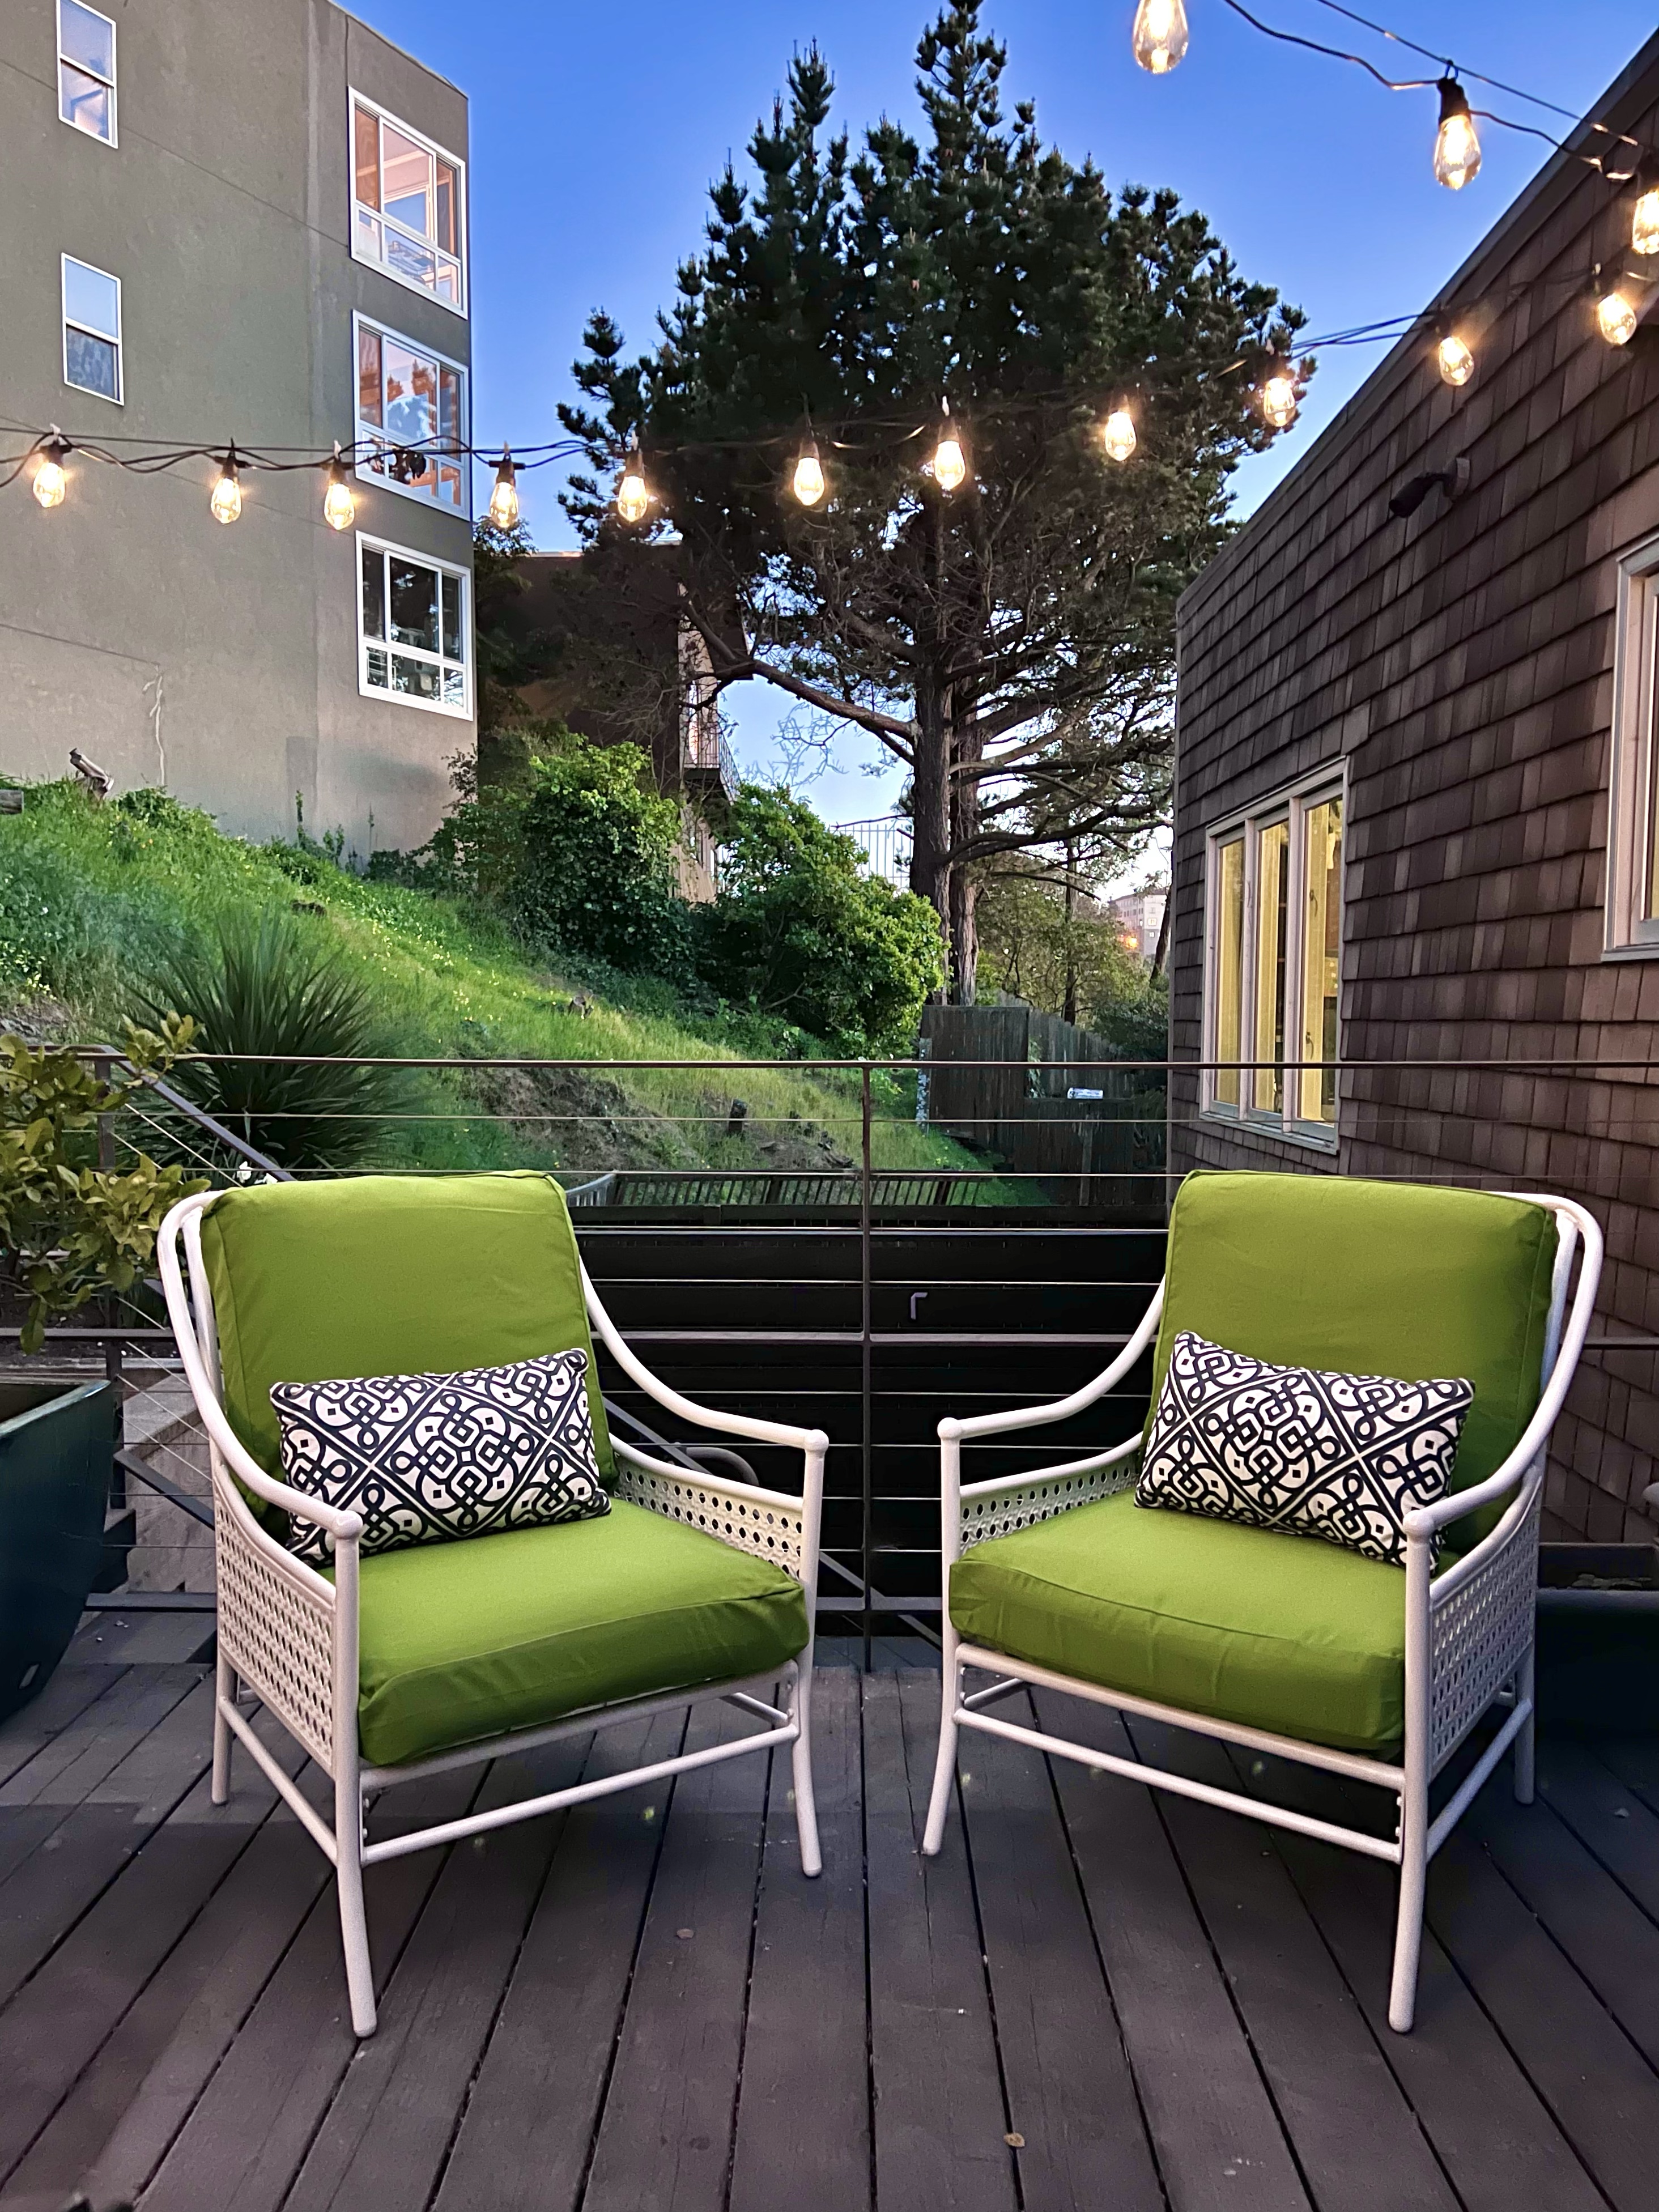
I am so excited for our new patio space and have already enjoyed time out here eating lunch, reading, or catching up on some work. I started looking for some lounge chairs, but I couldn’t quite find what I wanted – or more accurately, what I wanted was way too $$$. But this story has an happy ending! I found these used chairs and made them over for $ to complete our patio space!
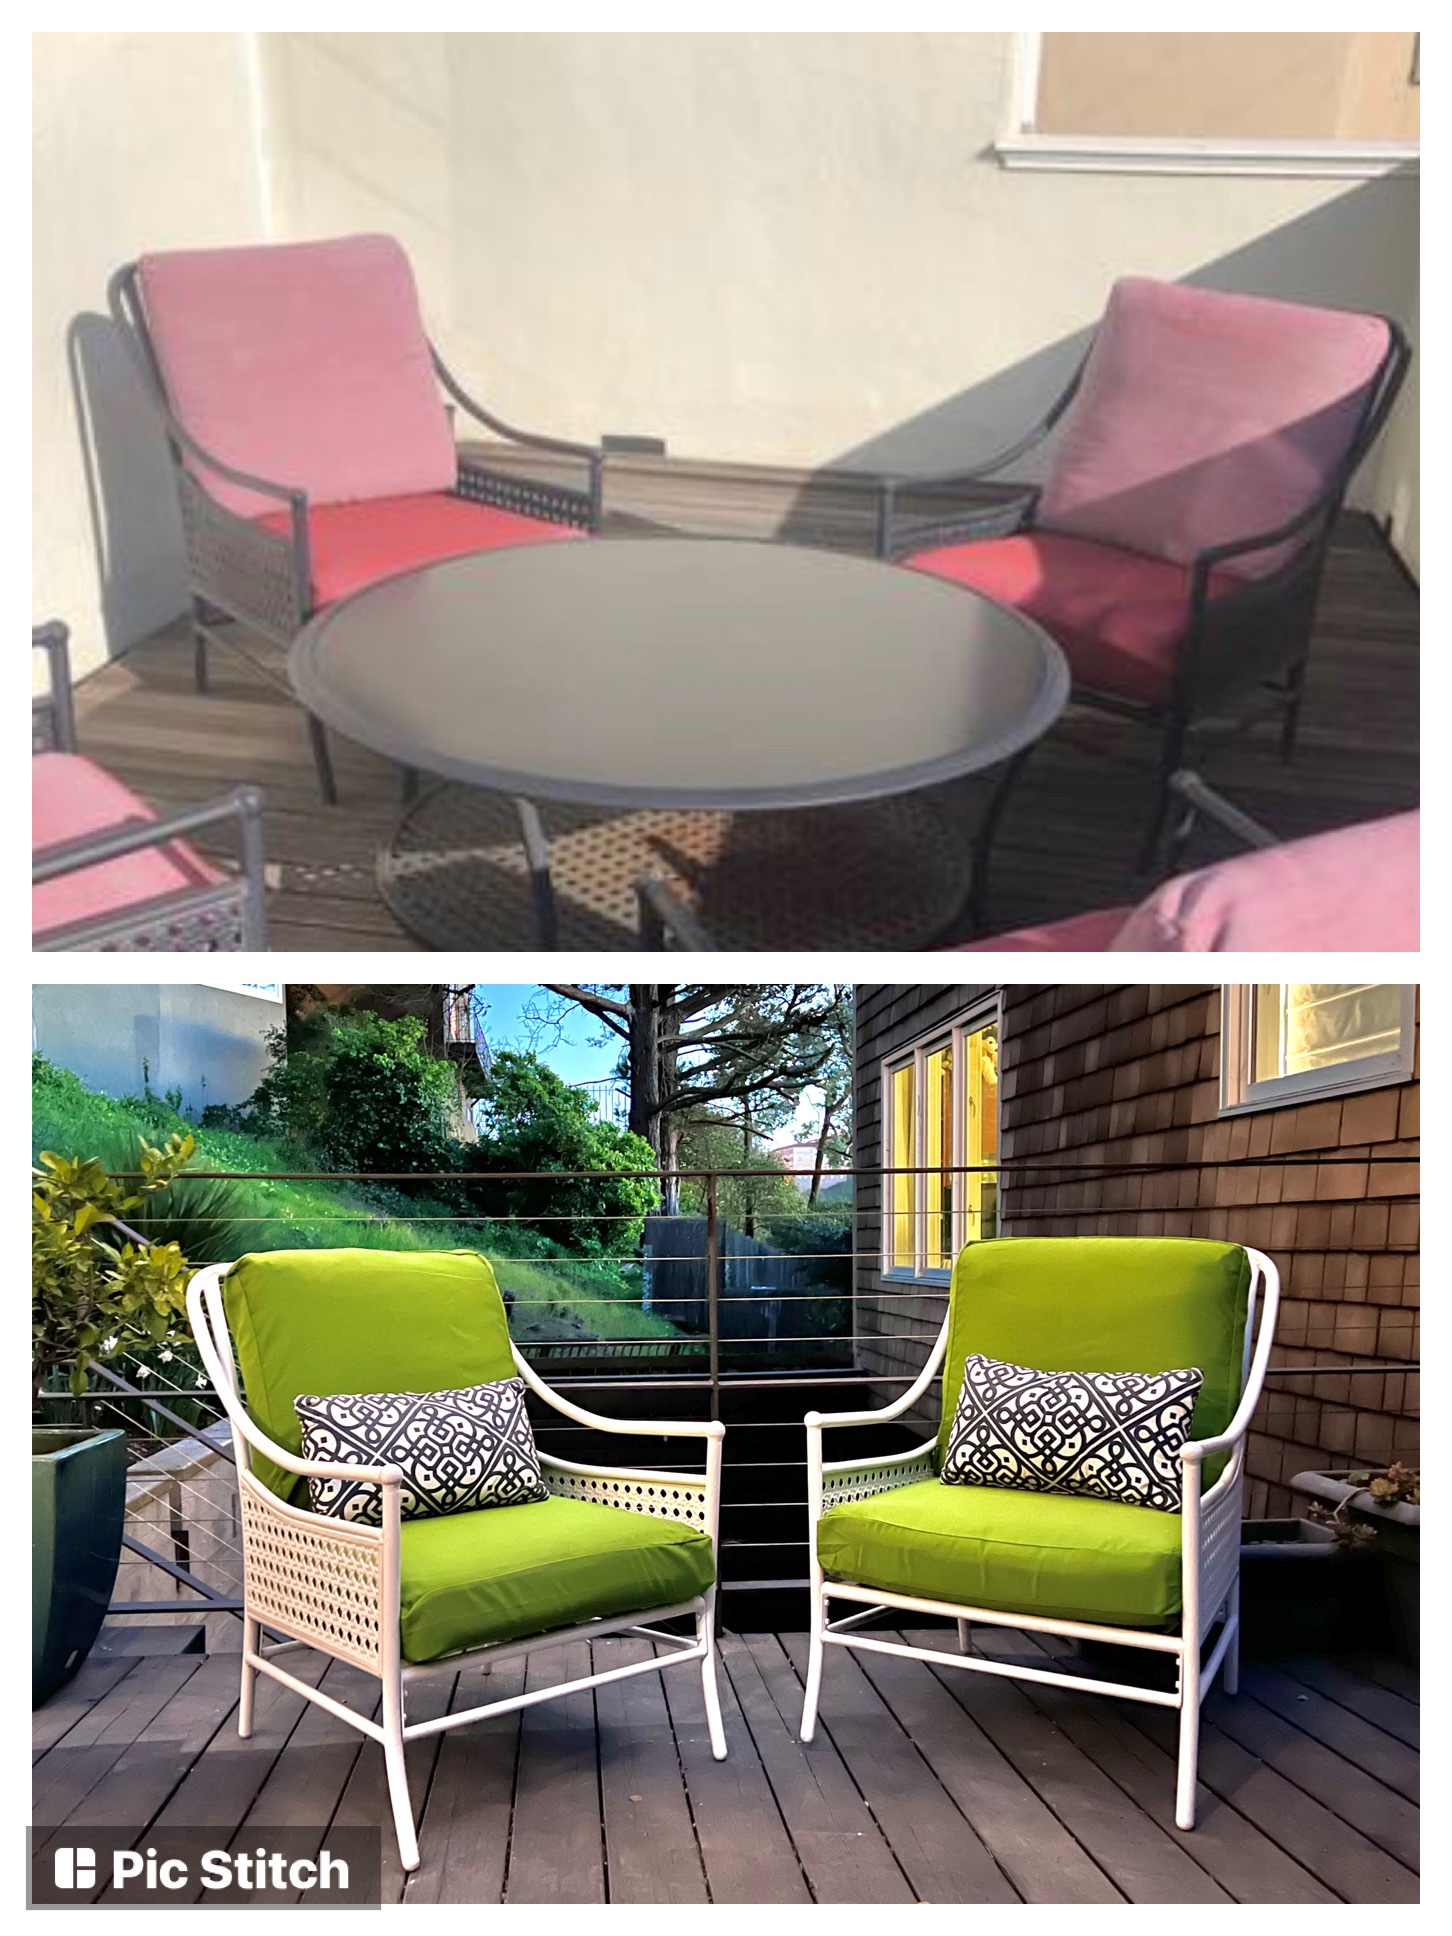
It’s no secret that I love anything with the look of cane or faux bamboo and also that I have a weakness for Craigslist finds! I spotted this set on Craigslist for $50, and when I showed up, the woman said I could have it for free. She also let me take the chairs without the table, so my karma of giving things away when we moved last year came back to me! I also picked up the chairs near my old neighborhood hardware store, so I stopped by to get some supplies and painting tips.
Here’s how to do it:
I started by cleaning off as much rust as possible. I used an old screwdriver, sandpaper, and steel wool
I prepped the chairs with deglosser and metal primer
I then finished them off with white gloss spray paint
The cushions were in decent condition, just faded, so I found these new slipcovers to freshen them up!
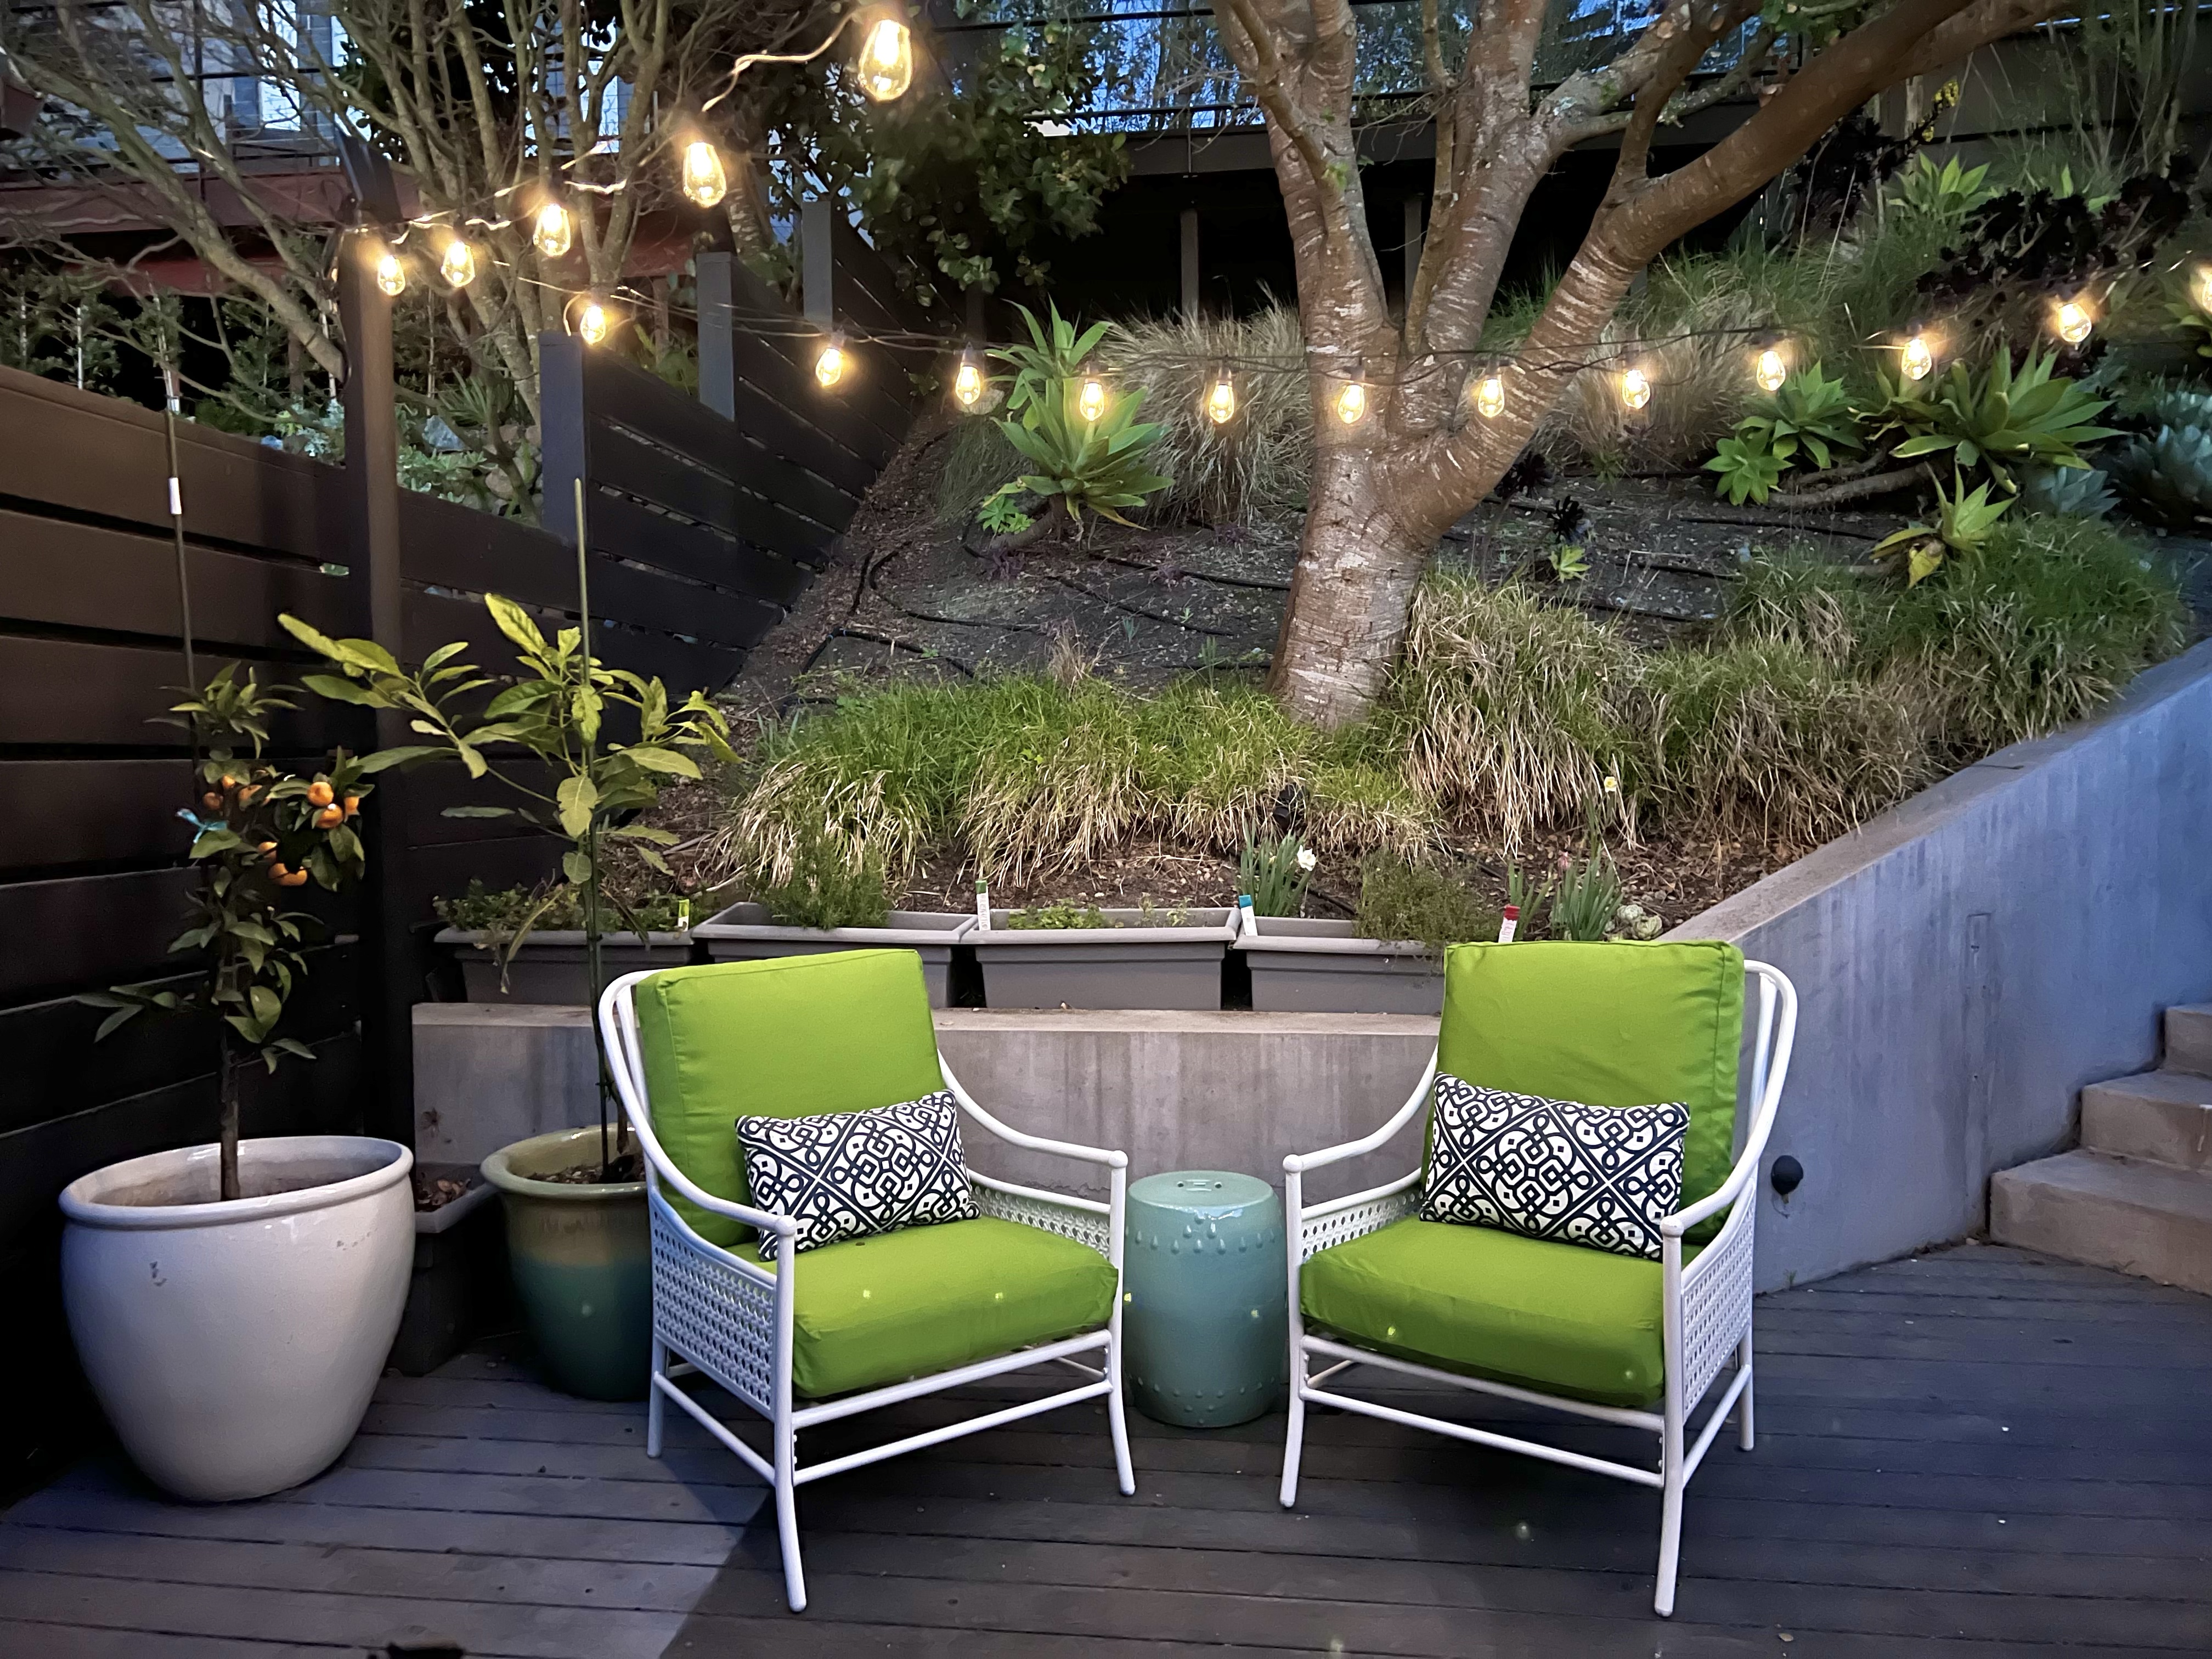
Here are some more pictures of our “new” chairs.
I feel they came pretty close to my inspiration pics, and all with the satisfaction with saving some money and a good DIY!
Everyone loves a good before and after pic:
I look forward to many more hours enjoyed out here with friends, family, or curled up with a good book!
Sometimes, milestones are measured in unusual ways. I know my kids are getting big, because it’s finally possible to take a picture of JJ’s room that is not a total disaster! We (I) were focused on finding a new house … Continue reading →
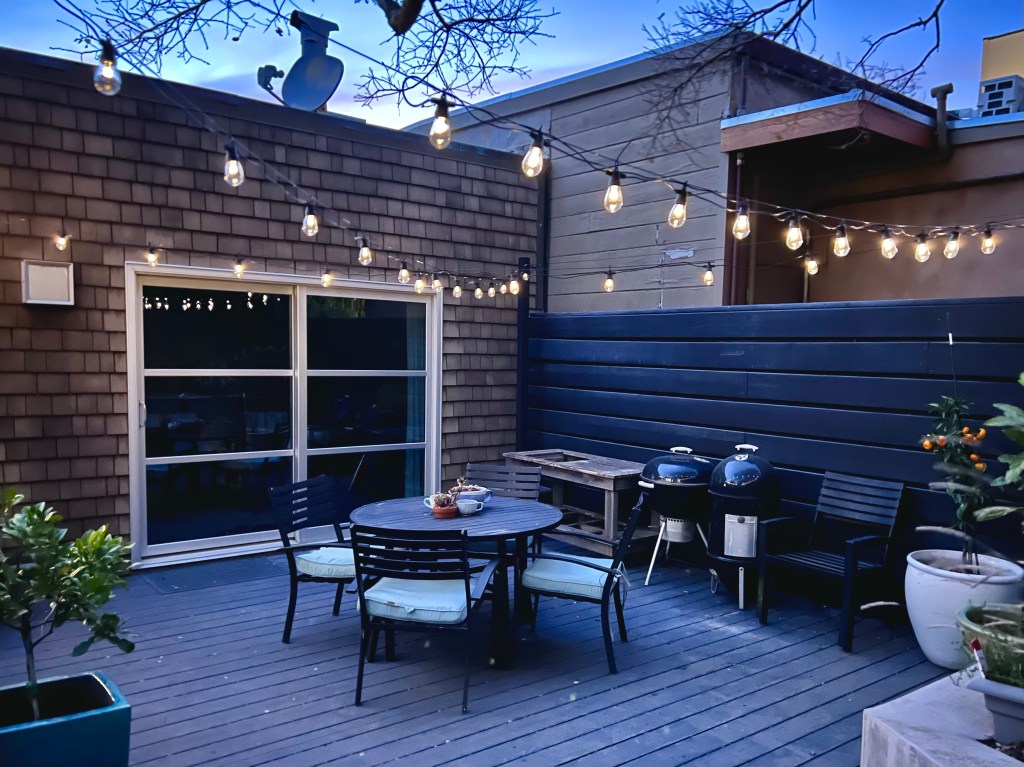
I have been in love with patio string lights for so long. Unfortunately, our last house didn’t really have a respectable outdoor entertaining space, but our rental house last year and our new house both have great patio spaces! I have been waiting to do this project creating posts to hang our lights, and I am so excited that we finally did it! It’s not hard (you do need some muscles!), and I am excited to share the how-to and our results!
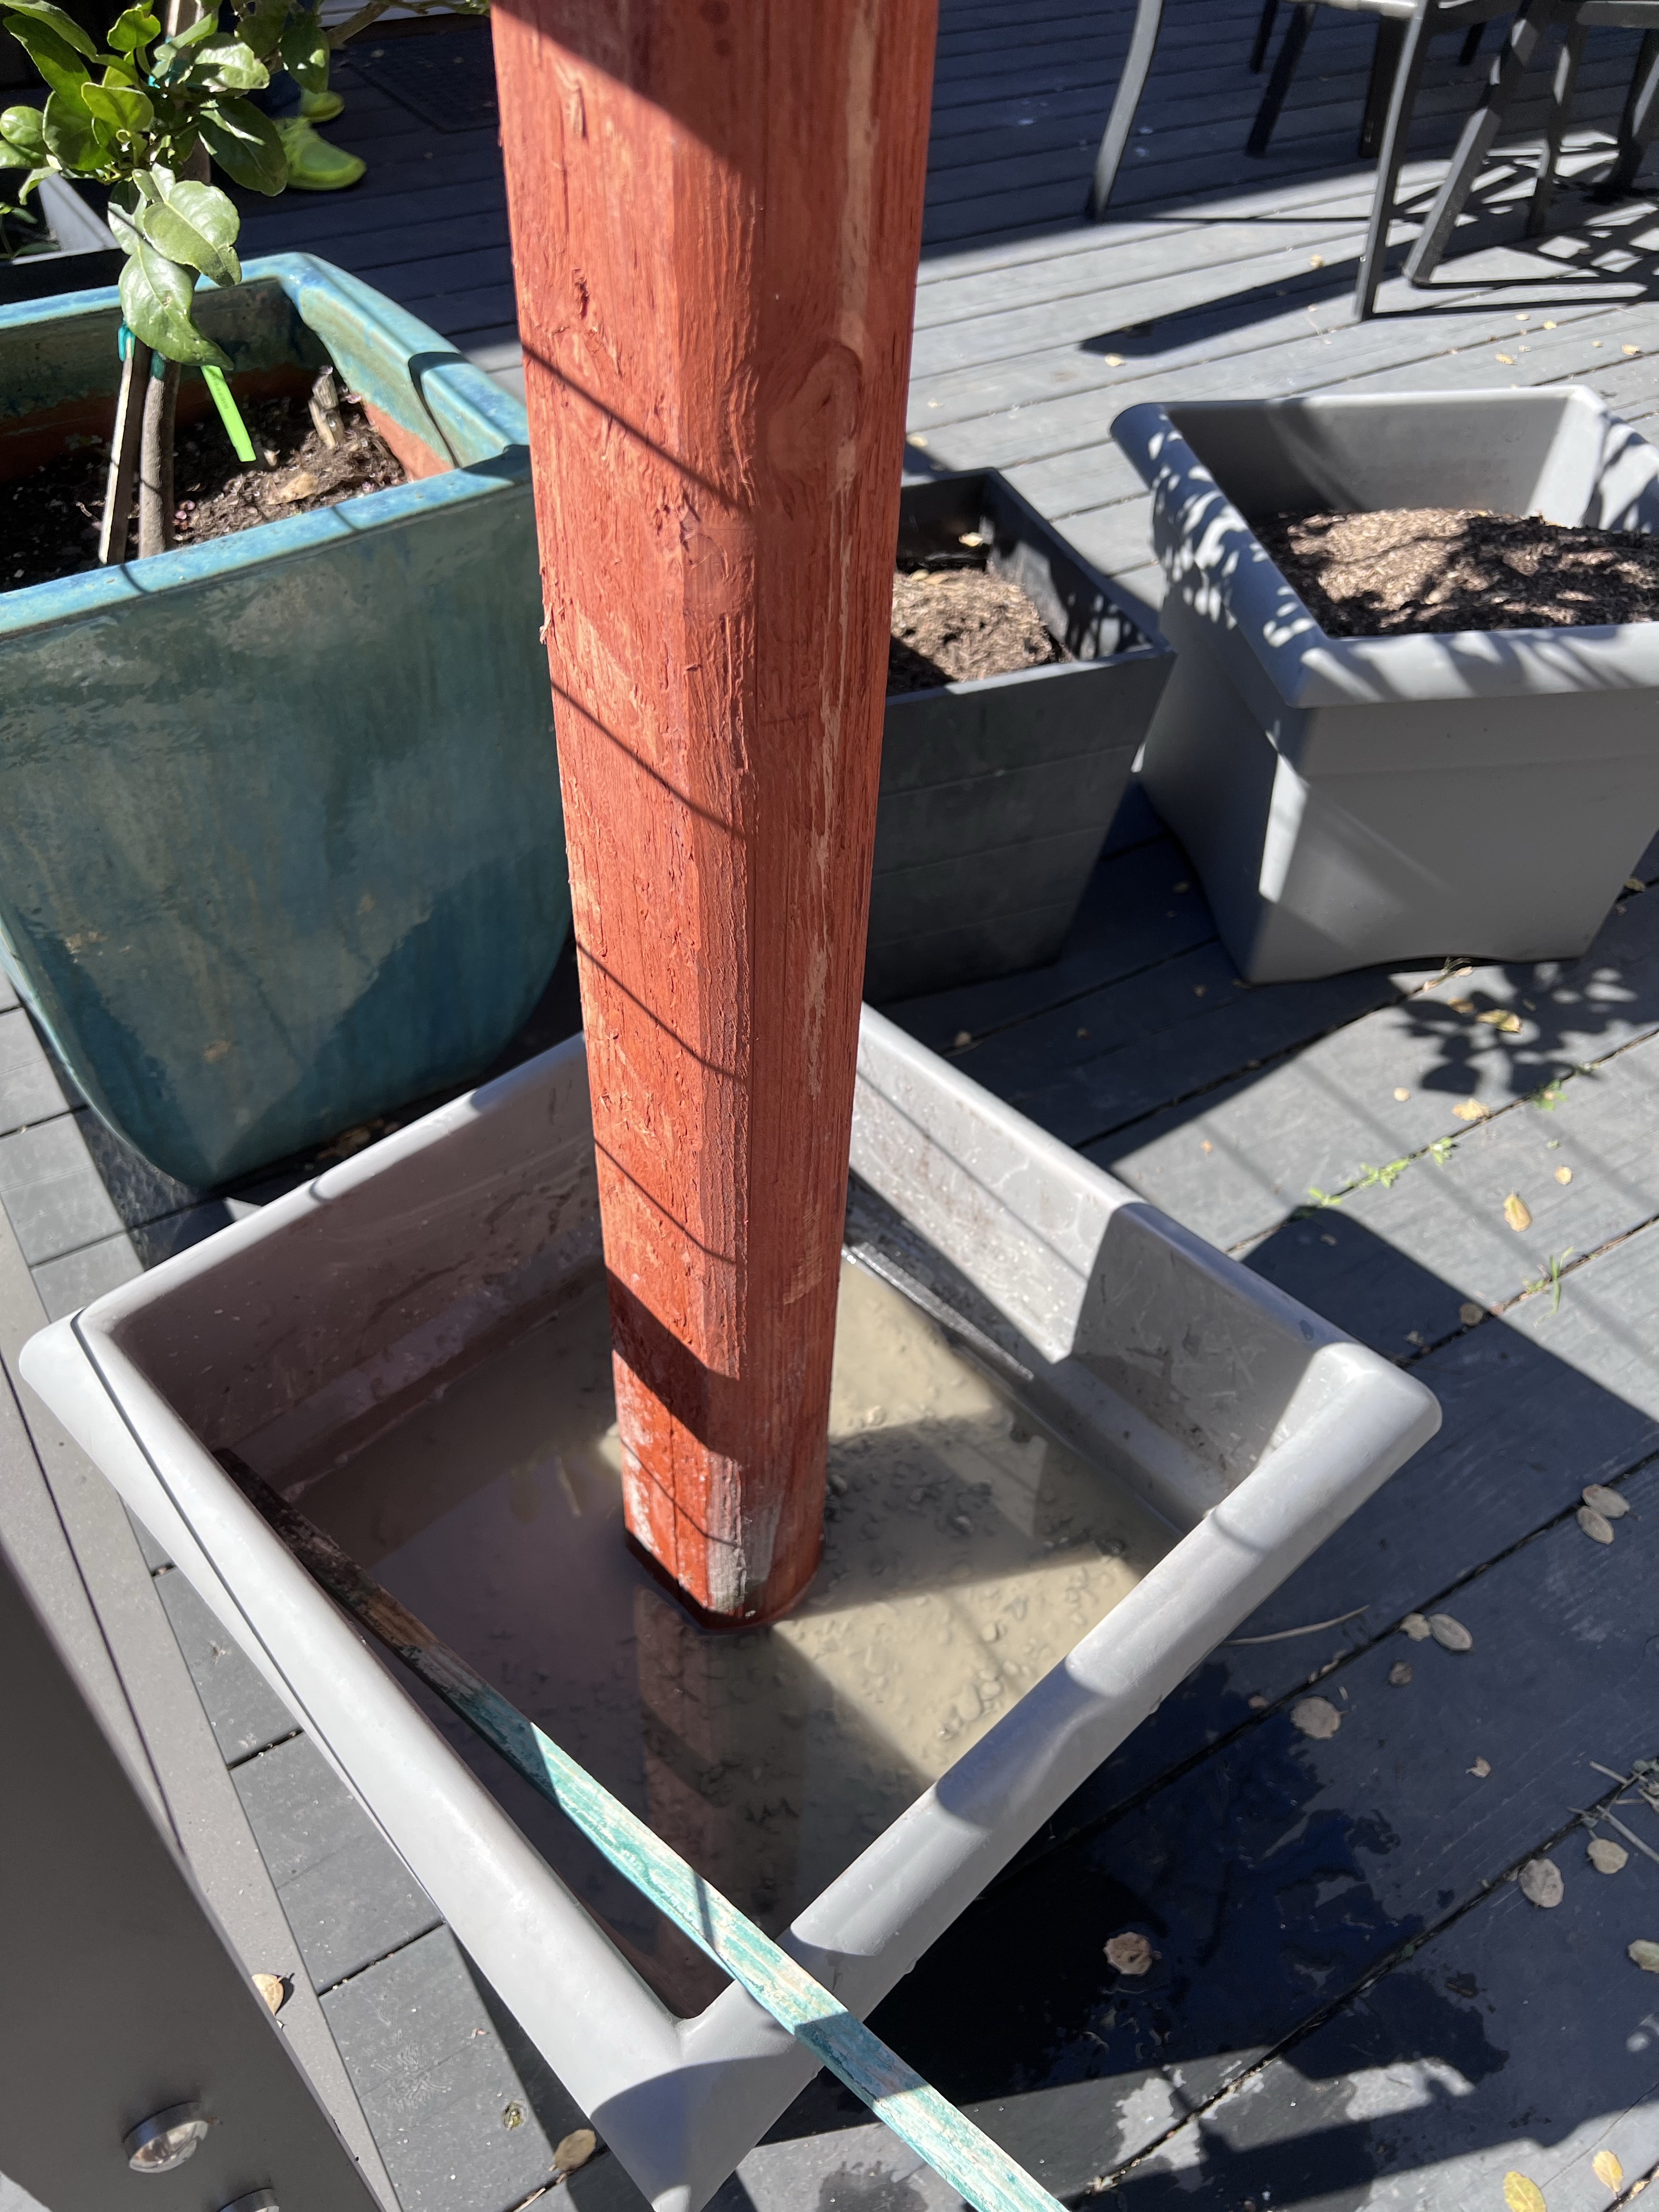
cement mix – I used Quickcrete, which is fast-setting and very easy to use. I used 1.5 bags per planter, but your quantity will depend on the planter that you use
Attach the hanging hardware to the top of your posts
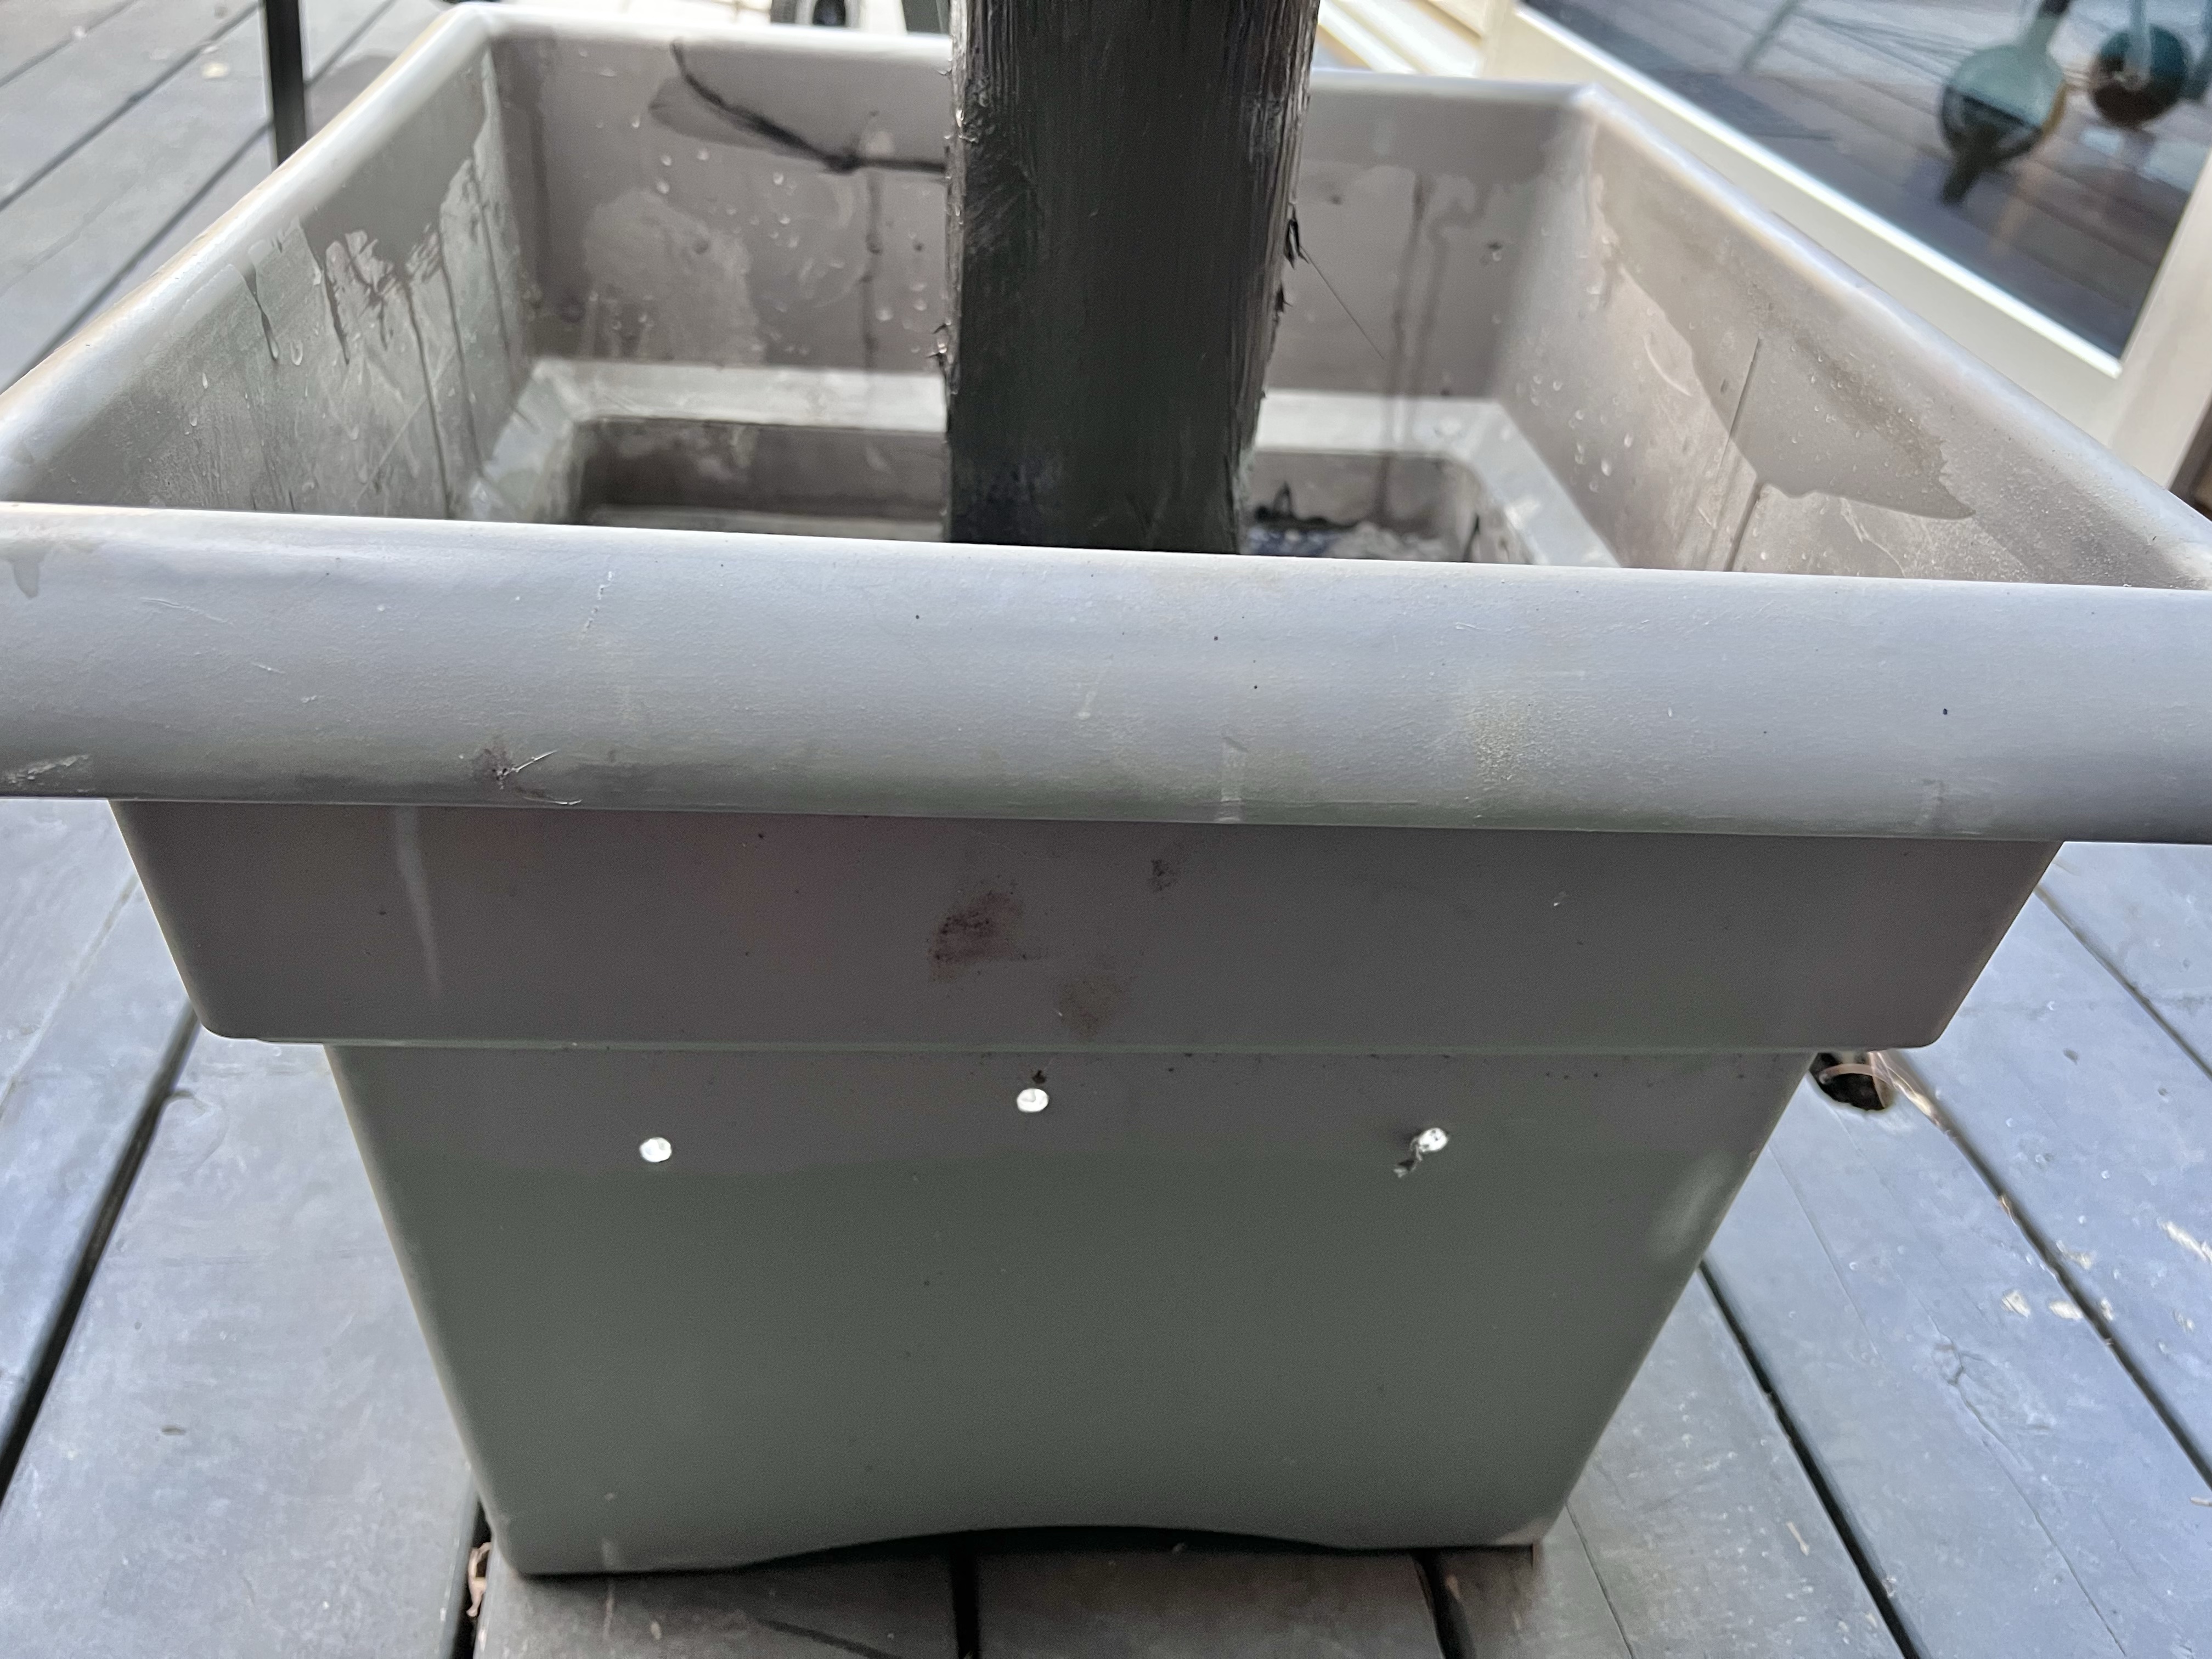
Place a post in the center of an empty planter
Pour in the concrete mix and add water according to the instructions
Use the spirit level to check your post is vertical
With the fast-setting Quickcrete, we didn’t have to use any extra supports for the post. We did check the level a few times as it set, but it pretty much held in place on its own
Repeat for the other posts
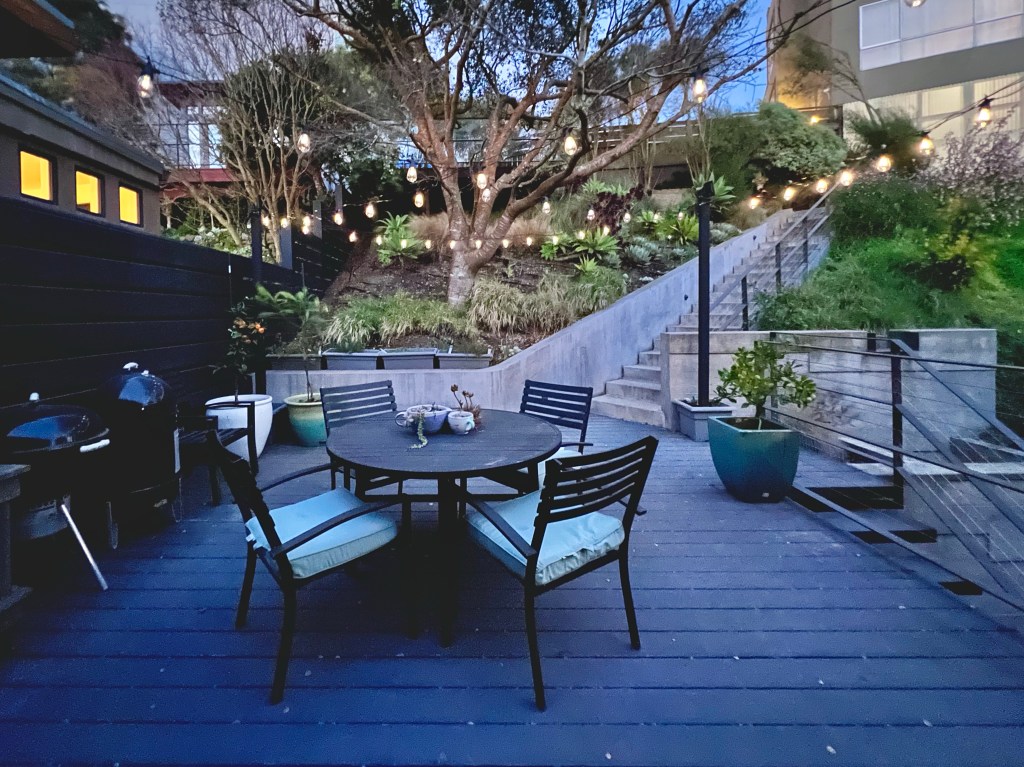
I painted my posts black to blend into our patio decor
Drill drainage holes in the planters just above the line of the concrete
Add gravel, soil, and plants
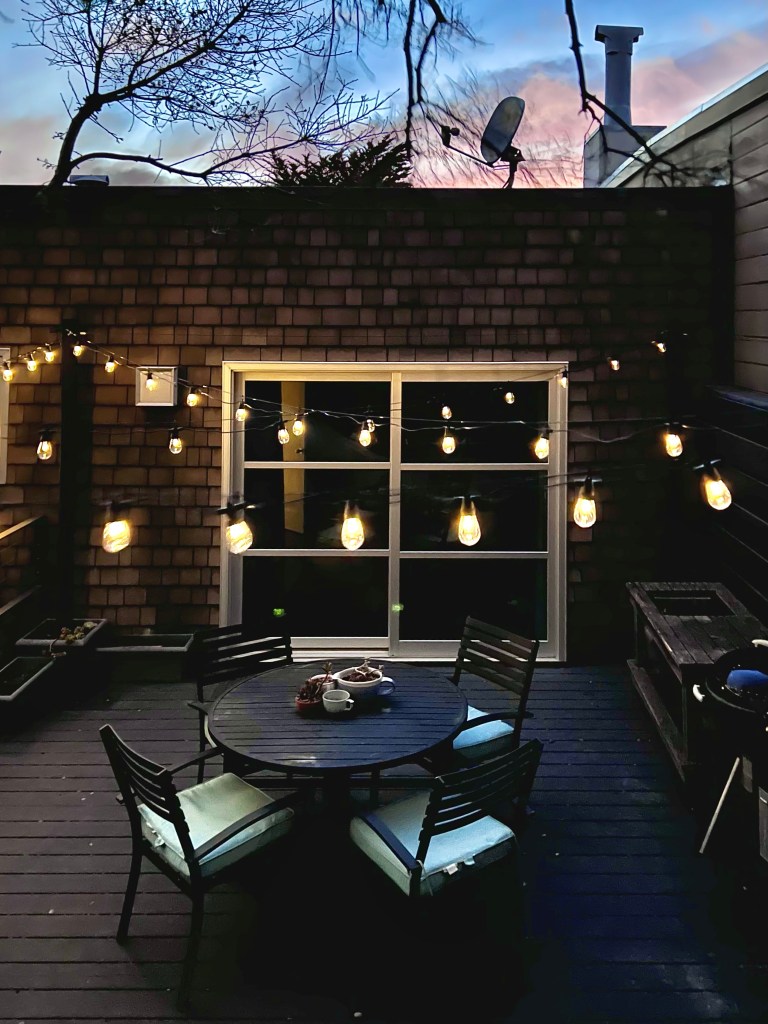
Install the patio lights according to the instructions with your hanging kit
Of course, we had a warm spell last week and it’s cooled off again, so we’ll have to wait a bit longer to hang out here!