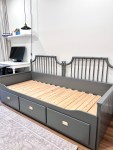
The Spring One Room Challenge has been just the motivation I need to decorate our bedroom addition! And the most important project is, of course, the bed! I love customizing furniture – remember my DIY built-in shelves or the DIY … Continue reading
The Spring One Room Challenge has been just the motivation I need to decorate our bedroom addition! And the most important project is, of course, the bed! I love customizing furniture – remember my DIY built-in shelves or the DIY … Continue reading
I seriously love the One Room Challenge. It’s just the motivation I need to finish off projects, and the community is always really positive. I love finding new accounts to follow for inspiration and encouragement! In the spring, I decorated … Continue reading
We’re waiting on permits to do a renovation adding a small guest bedroom and bathroom to our home. I’m getting excited and working on the design plans. I already shared the plan for the classic blue and white bathroom! Next up, here’s the design for the guest room. It’s going to be compact and on our lower level, so I wanted to keep the look airy and light. Of course, there’s plenty of my favorite blue and white, but I’m also really into the color green right now, so it’s fun to introduce that as well!
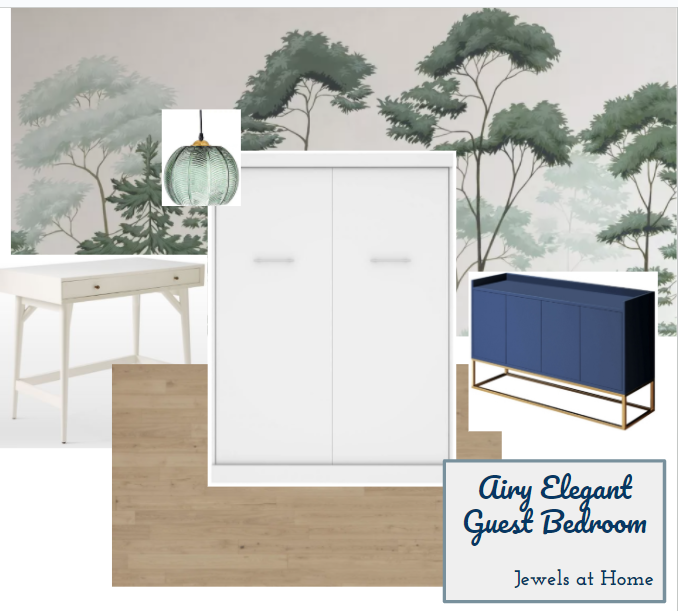
I think the look will coordinate well with the bathroom plan!

Some links are affiliate links. Let me know what you think, and keep your fingers crossed for our permits to be approved soon!
Julie AKA “Jewels”
So, the wheels of the planning department are turning, and we are hoping to be able to do a renovation to add a small guest bedroom and bathroom to our home. I’m getting excited and working on the design plan. The colors will be blue and white – of course! And the style will be classic, with a nod towards mid-century design.
I’m going to keep researching, but I like this direction! Let me know what you think, and keep your fingers crossed for our permits to be approved soon!
Julie AKA “Jewels”
This post includes some affiliate and paid links. There is no additional cost to you to shop through those links, but I may receive a small commission.
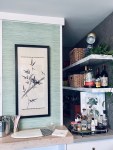
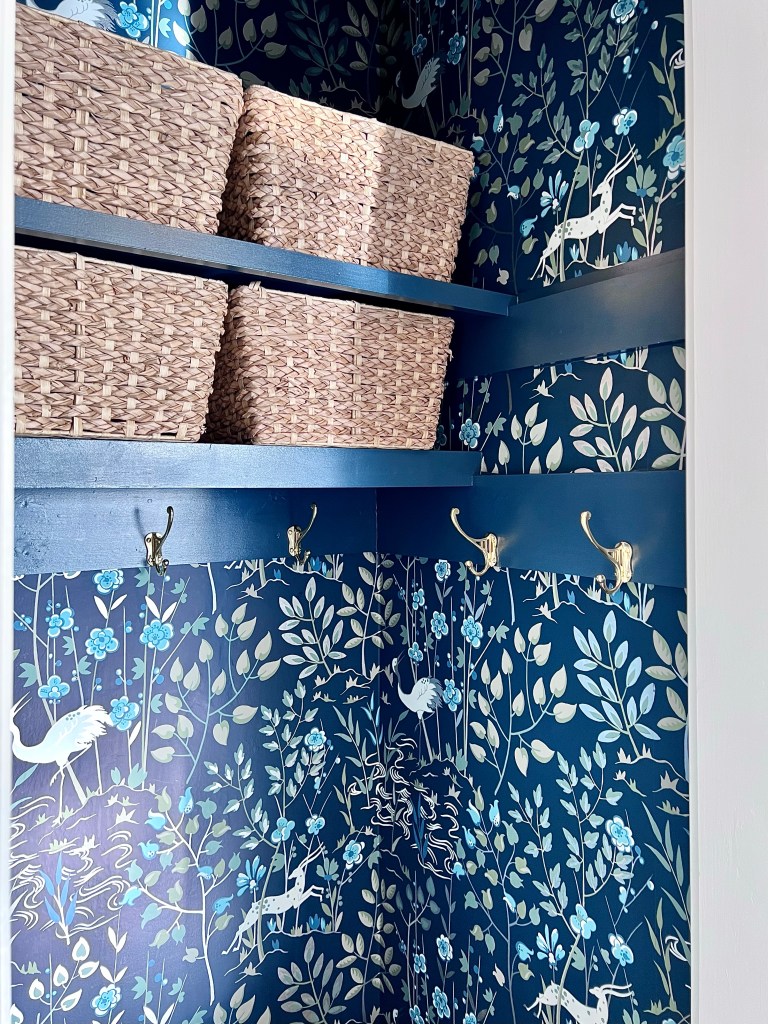
It’s so satisfying when a space comes together! I knew the hall closet was not working for our family, and now we have a mini mudroom that is functional and also beautiful – I am so happy with the result!

After building the space,
Enjoy these photos of all the details!
There’s something so luxurious about a glossy dark painted ceiling… even if it is in a closet 🙂


I would never have guessed that a closet could make me so happy!
Be sure to go back to the One Room Challenge site to see some more room transformations!
Julie AKA “Jewels”
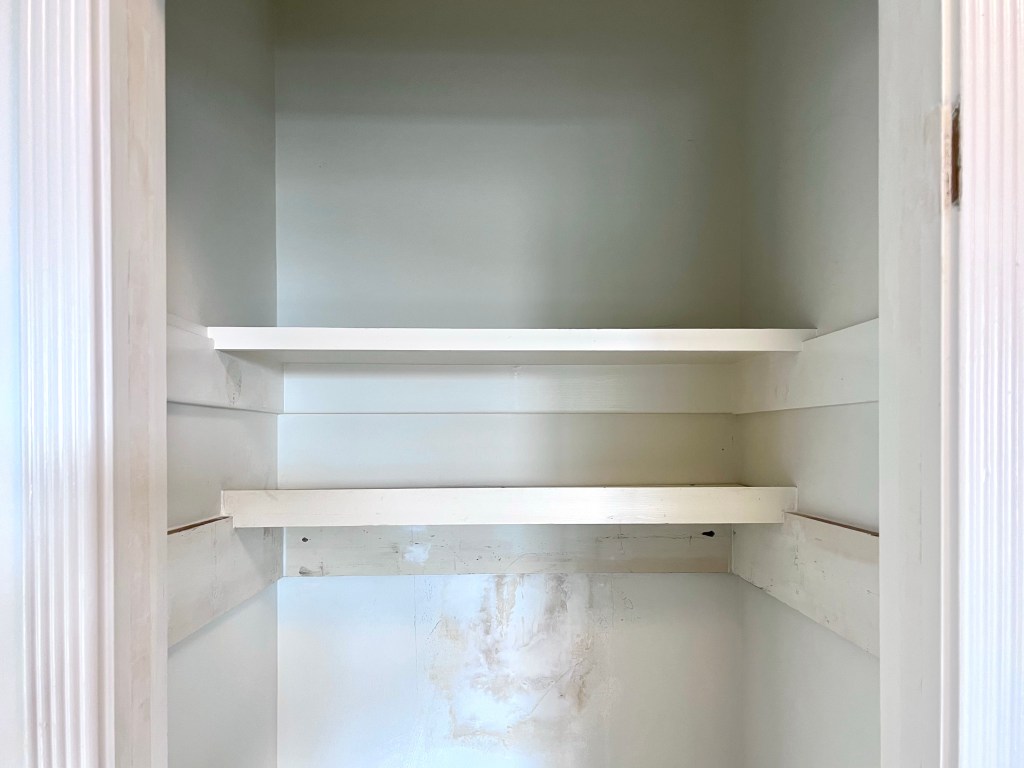
I am so excited to share this build! At our old house, we had a cloakroom-type space, with shoe racks and coat hooks. That space was not directly visible from the living areas, so I did not mind it being a bit more more casual and utilitarian. I was looking for the same functionality in our new home, but I was a bit stumped by how to accomplish this with a small hallway closet that is immediately visible from the entry and living room. I researched various closet conversion ideas, but many of them seemed more casual than what I was looking for. I knew I had finally found my solution when I stumbled on the “California Mudroom” created by Jessica D’Itri Marés of Renovate 108 featured on Real Simple (below right) Can you see ours (below left) coming together? Please say “yes!”


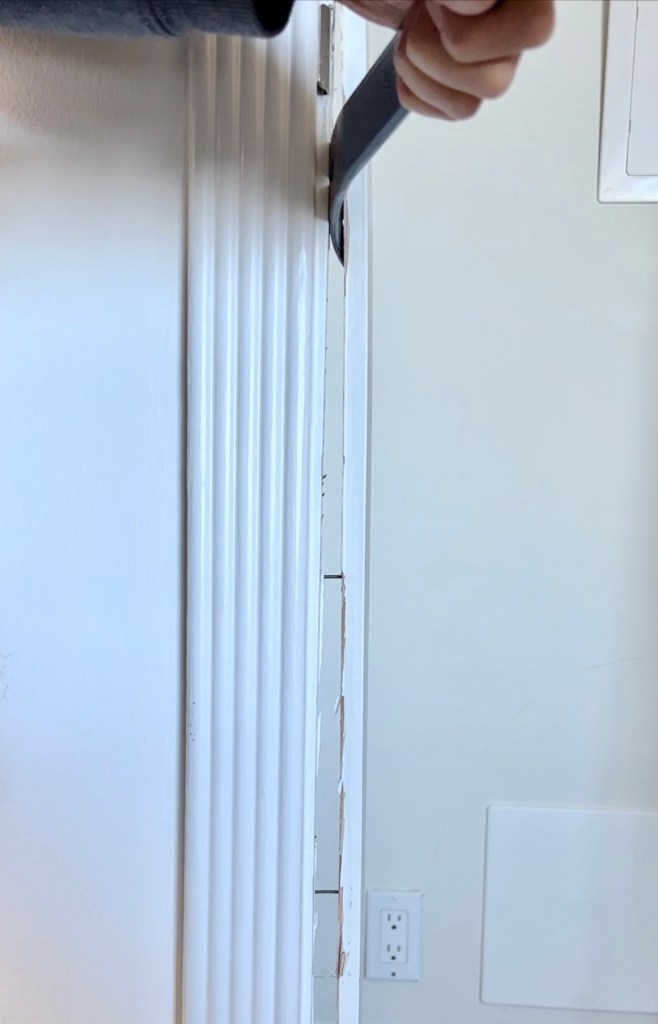
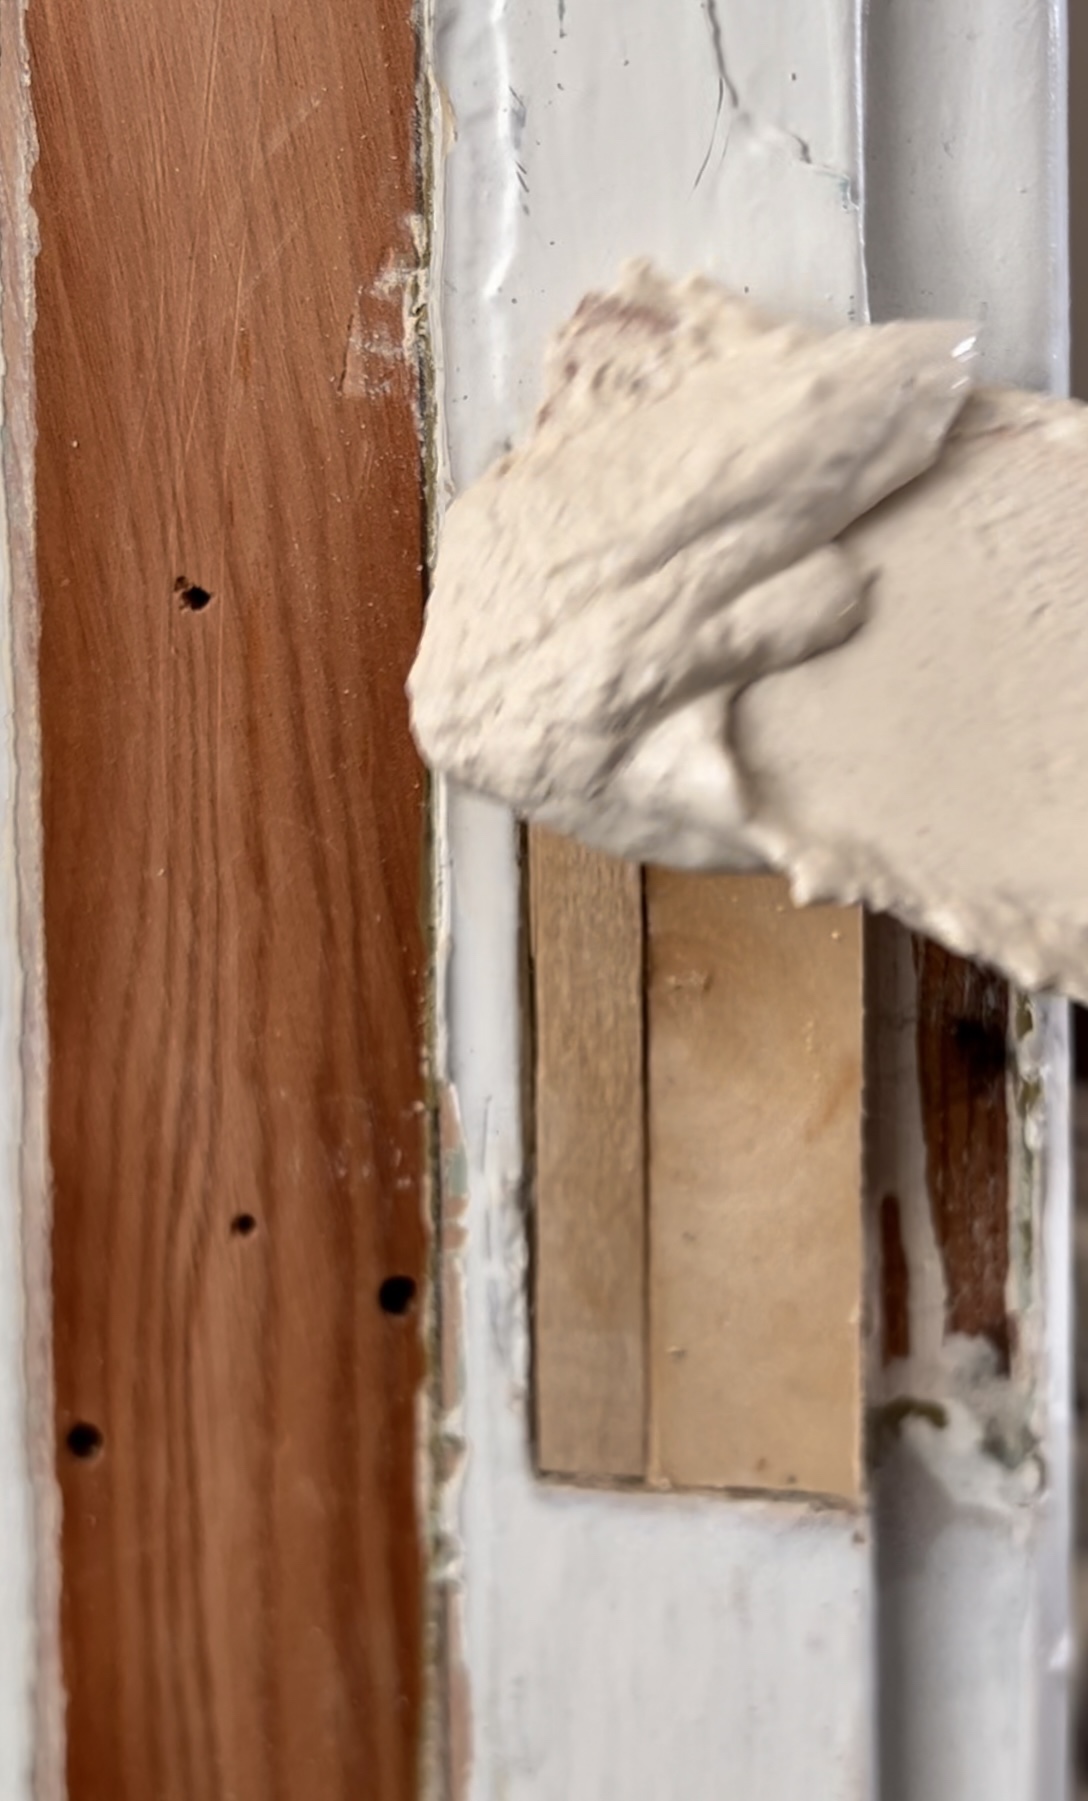
This project involved just the right level of DIY for me – I got to work on my skills but not get too stressed. In this post, I will share the construction steps to convert a standard hall closet into a mini mudroom. I’ve been chipping away on this project for a while (because job! and kids!), and now I am excited to bring you up to speed with where I am!
Here’s how to do it:


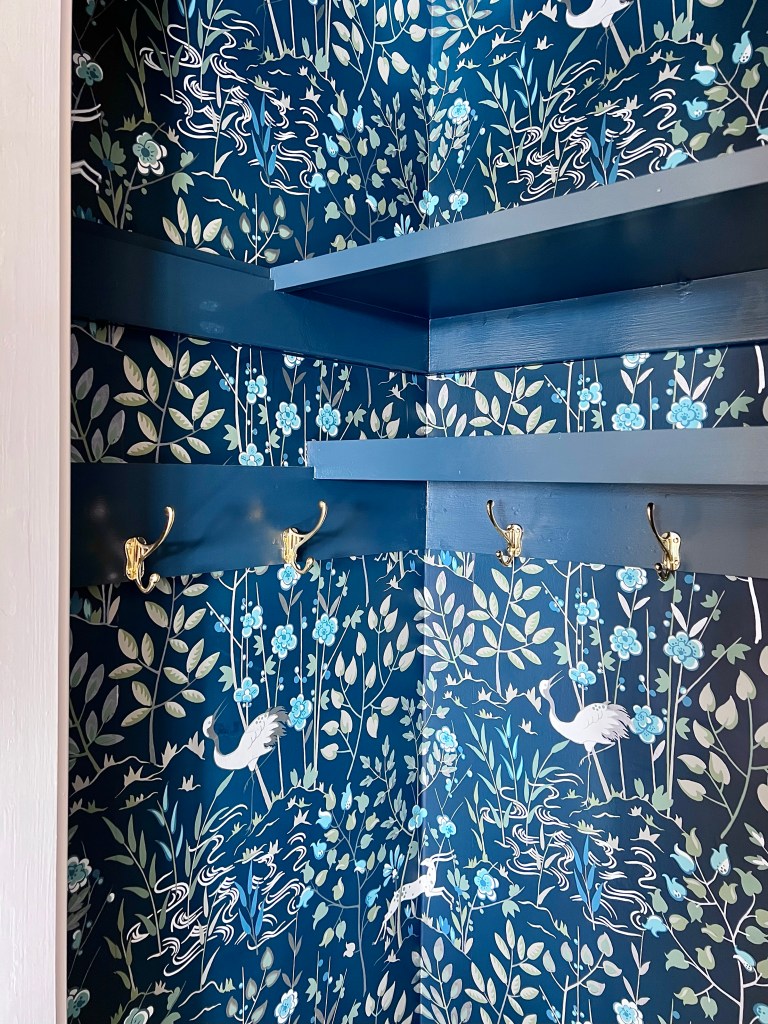
Now that the structure is in place, the fun begins… Actually, the building was very fun! But anyway, next up is painting, wallpaper, and accessories!
Be sure to visit the One Room Challenge page to see more home transformations!
Julie AKA “Jewels”
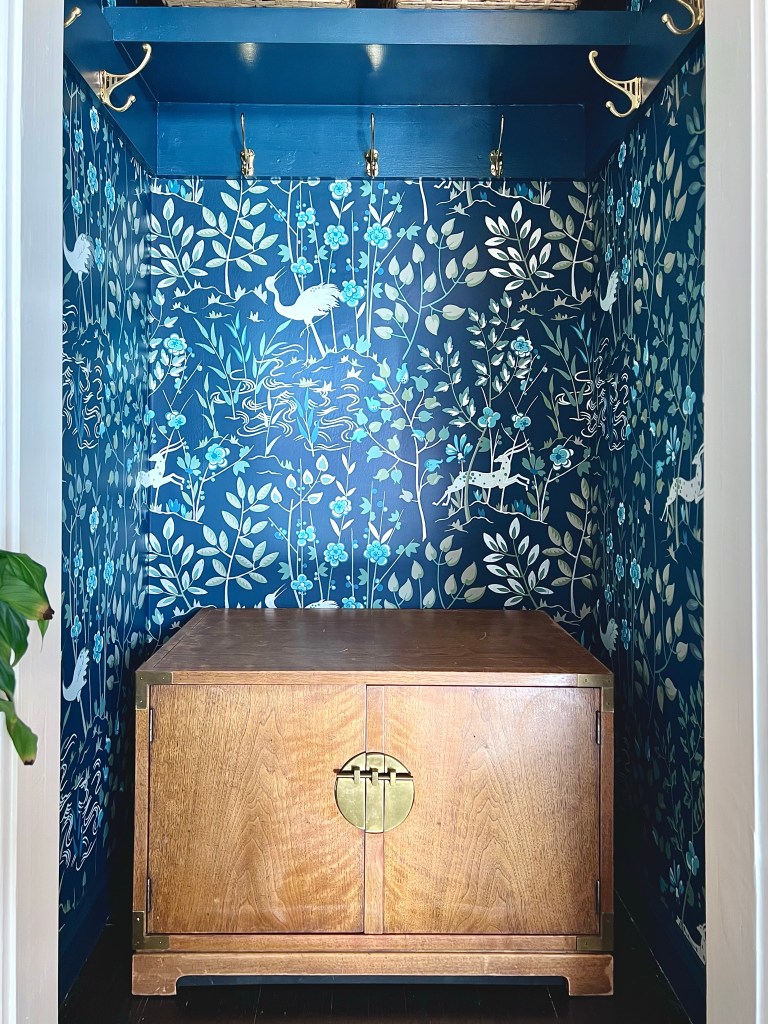
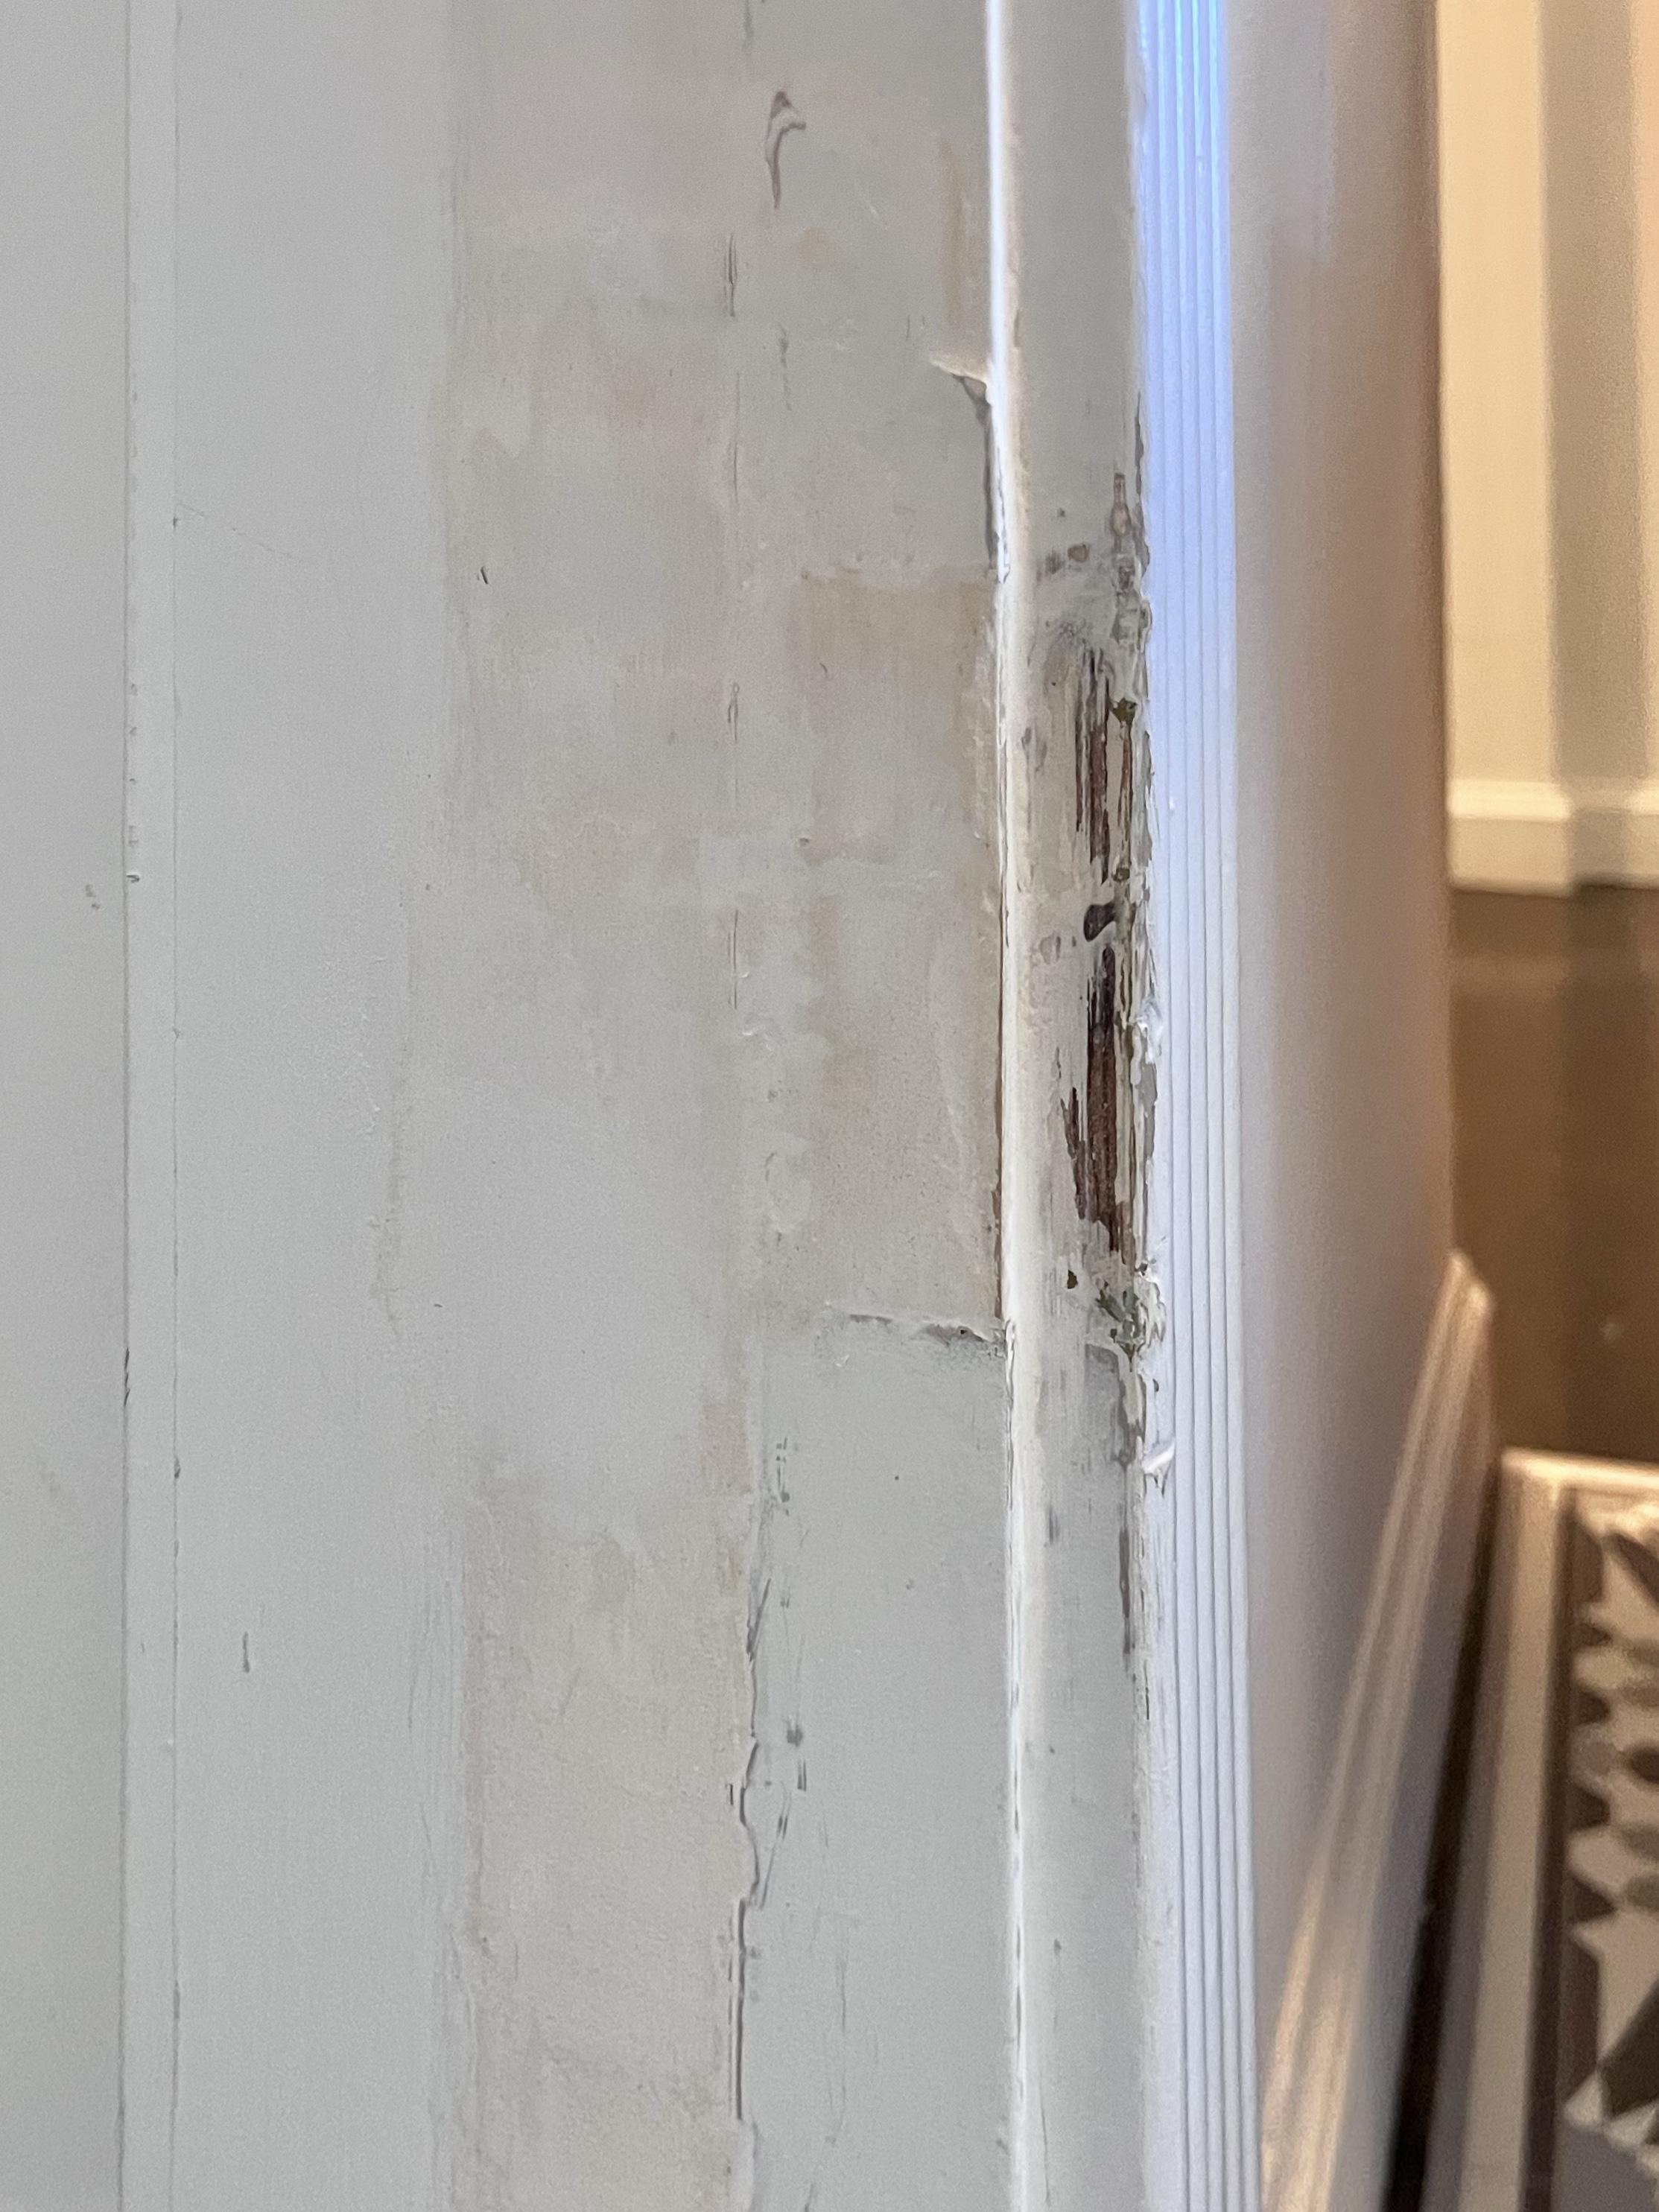
While I get the main project – our mini-mudroom – ready, I’ll show you more of the smaller projects going into our foyer makeover. I wanted closed storage for shoes, and I didn’t want it to look obvious or utilitarian. After spending too much (or just the right amount) of time browsing options for new or thrifted furniture, I found the perfect piece! If there’s anything you know about me, it’s likely my addiction to vintage furniture. Free is best, as is anything mid-century and/or with an Asian influence. Call it a gift, a fatal flaw, or just many hours browsing Craigslist… I spotted this free(!) cabinet and saw that the hardware had a beautiful mix of campaign and Asian details.
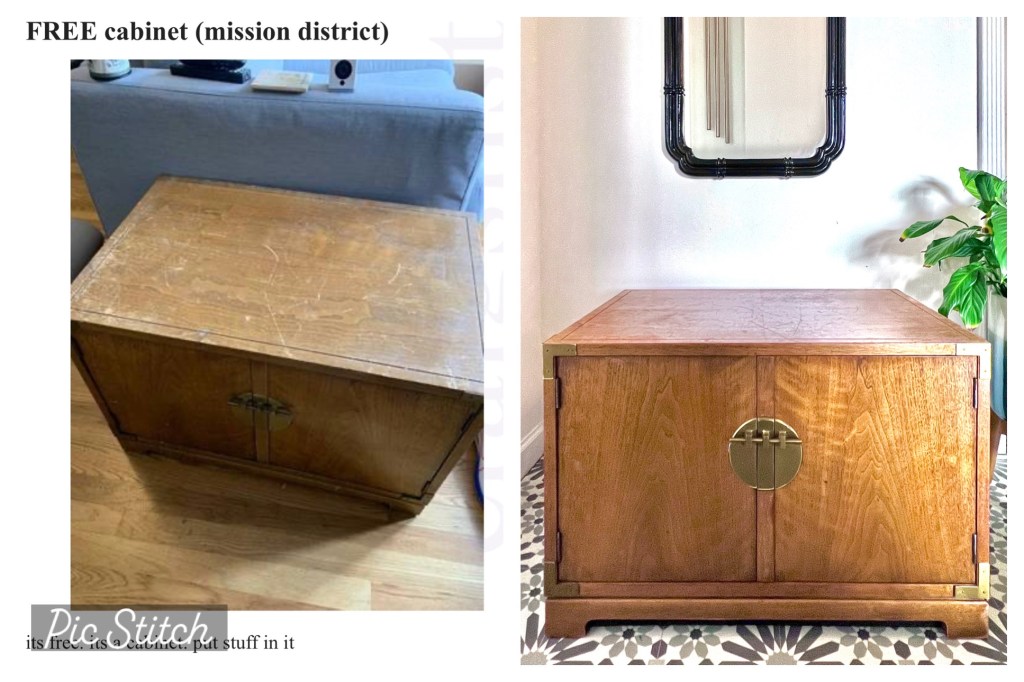
When I first saw it, I assumed it was too big for our space. But I couldn’t stop thinking about it, and I when I asked for dimensions, it turns out this is a petite cabinet that fits perfectly inside of our closet!
The wood finish was too pretty to paint, but it had a lot of scratches and marks on it, especially on top. I briefly thought about trying to refinish it, but it is veneer, and I’ve never done that before. I decided to try sanding it lightly and then using furniture polish – I’m happy to report that it worked!


I made some other modifications, because we are using this as a shoe cabinet. I painted a strip of wood block and installed it behind the front legs, so that we would not get too much dust and other stuff stuck underneath. I also lined the inside with clear, contact paper, and drilled some holes in the back, so that we can store shoes inside.

Next week, I’ll show you the mini-mudroom build, and we’ll see some big changes in this small space. In the meantime, head over to the One Room Challenge page to see more fun projects!
Julie AKA “Jewels”
I’m really excited to take on our foyer for this One Room Challenge. It’s the first space you see coming into the house, and it’s visible from our living room, so I wanted to give it some style! This is a small area – basically a hallway and a closet, so the project feels very doable, but as the title says, I have big plans!
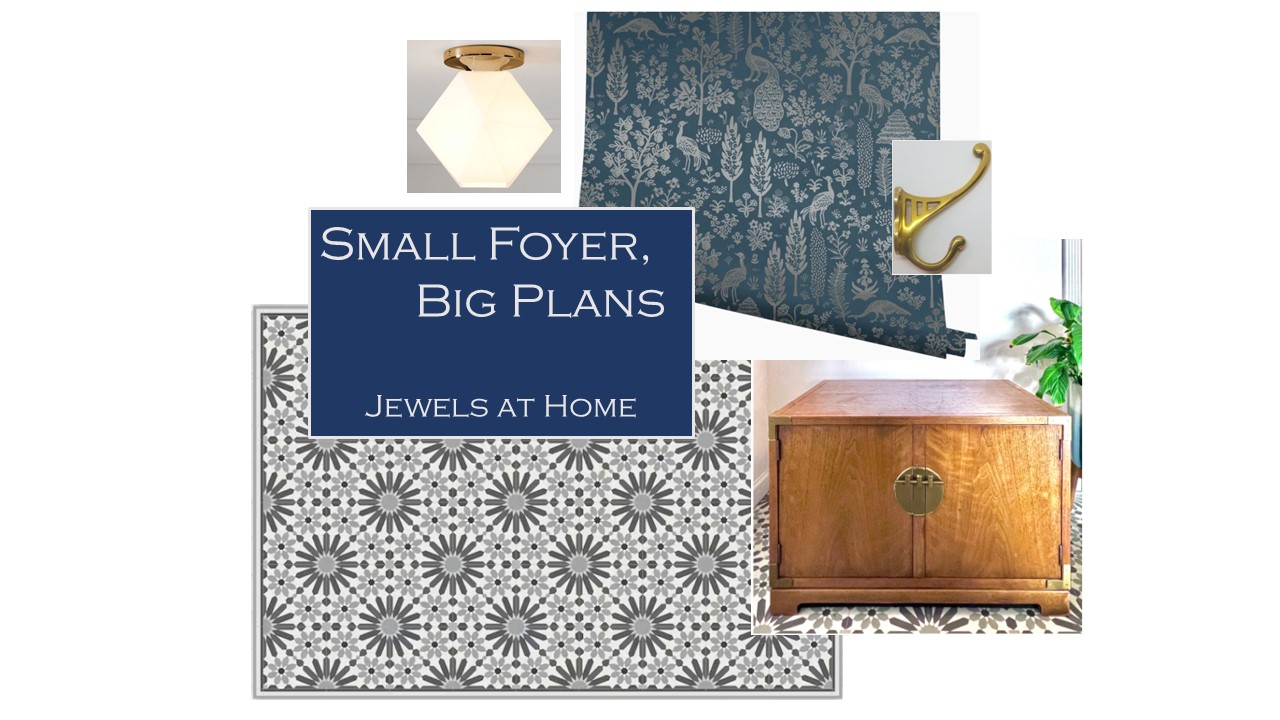
The biggest part of this challenge will be converting our closet to a “mini mudroom.” I’m also sharing our flooring, which always gets lots of comments, a fabulous free furniture makeover, and a new ceiling light fixture. Here are some inspiration pictures for our “new” foyer. I’m so excited to share the process and results!
I knew I wanted to transform our hall closet into some kind of attractive open storage, and it took me a while to land on a design. The closet conversion that best matched my vision is this gem by designer Jessica D’Itri Marés of Renovate 108 featured on Real Simple.

I also love this closet makeover by Jeweled Interiors.


Definitely go back to the One Room Challenge page to see all the other participants’ projects!
I’m looking forward to sharing this project! Here we go!
Julie AKA “Jewels”
Our powder room facelift is going slowly… but surely! Unfortunately, I started taking apart the space and then developed some inertia about getting the wallpaper up, as I hadn’t done wallpaper in a long time, so the sad state of this space got sadder before it started getting better. Today, I put our toddler in daycare for an extra day, so I could go to Kindergarten Spring Sing at kids’ school without distraction. After the performance – which was adorable! I took full advantage of the rare stretch of several hours “off” from both my office job and my mom job by having a lunch date with hubby and pledging to get this wallpaper up!

BEFORE: The whole room was very white – blah – with dated gold-tone fixtures and a pedestal sink that has no room for storage or even the soap!
A powder room is a perfect place to use wallpaper – it makes a beautiful statement, without overwhelming you visually, financially, or logistically, as you only need a small amount. I splurged big-time on the Imperial Trellis wallpaper in silver. It was pricey, but I had enough to do the powder room, as well as line the backs of our living room bookcases. I love the glow of the silver to brighten up our dark spaces.

Imperial Trellis wallpaper in silver by Schumacher. Click the picture to go their website for more information and colors.
I hung wallpaper once many years ago, so I remembered the basics, but I quickly refreshed myself with these instructions from This Old House. Some of the planning steps did not apply to me, since I was doing such a small area. I’m only hanging it above the (future) chair rail on one wall, because the ceiling slopes on the other walls (the powder room is under the stairs), and I thought the wallpaper on those walls would just draw attention to the changing ceiling line.
Here’s an overview of what I did:

TOOLS: From left, you’ll need
1. Squeegee: they make ones specifically for wallpapering, but a regular shower squeegee worked well for me.
2. Ruler or putty knife: to keep a straight line when trimming
3. Utility knife: for trimming paper at corners. Make sure it’s very sharp!
4. Pencil: for marking a plumb line.
5. Brush or roller: for applying wallpaper paste.
5. Wallpaper paste: mixed from a dry powder.
6. Sponge: for smoothing paper and wiping off excess paste.
Not shown: level or plumb line to mark a plumb starting line.

After spreading the wallpaper pasted with a brush or roller, fold the paper as shown (called “booking”) for the adhesive to set.

Line the first piece up with a plumb line. Then, using first a damp sponge and then the squeegee, gently smooth the wallpaper from the center towards the edges to remove bubbles and excess paste.

Wow! I was amazed at how the wallpaper made the room seem brighter and bigger. The silvery glow spread the light around the room, and the lines of the pattern made the space feel wider and taller.
Once the wallpaper was up, I started adding a few accessories: a large mirror which, again, helps with spreading light around the small space, a new chrome towel bar, and some art that I pulled from a calendar (more examples of this great art in an upcoming post) and put into an frame found for a few dollars at Goodwill. Again I used silver, to brighten up the room.

New mirror and towel bar added to the room. The “top” of our top-to-bottom facelift is done!
I am SO happy with the result so far. It’s now a pleasure to enter this room that I had been avoiding! What is the plan for the rest of the makeover? I’m going to add a chair rail and paint the area below in a warm blue-grey, like this inspiring powder room by Sarah Richardson. I’ve also got a new vanity going in to give us a little storage and counter space. Hope to post the finished room here soon!
[UPDATE: The powder room is finished! You can see it here.]

An inspiration for our powder room. Click the image to go to the image on Sarah Richardson’s website.
And on a different note, what projects on the horizon have me all excited? Check out these FREE chairs I am going to make over for my craft room/ office! I can’t wait (though maybe I should finally finish the powder room first…)

Sneak preview: A glamorous makeover is in store for these Queen Anne chairs I got for FREE through Craigslist.
“Jewels”
