
People often comment on the great light we get in our house. A lot of that has to do with the good fortune of having big windows and a bright western exposure. But wherever you live, there are some tricks … Continue reading
People often comment on the great light we get in our house. A lot of that has to do with the good fortune of having big windows and a bright western exposure. But wherever you live, there are some tricks … Continue reading

People often comment on the great light we get in our house. A lot of that has to do with the good fortune of big windows and a bright western exposure. But wherever you live, there are some tricks you … Continue reading
I’ve mentioned before that we use our formal dining room for most of our meals. This was a tradition my mother started when my sister and I lived at home, and I enjoy continuing it with our family.
I’ve posted about durable tablecloths and table runners to give your dining room a more formal look while still holding up to the kids. Recently, I have been debating about adding a dining room rug. I never even entertained (ha) this idea until the last few months, now that the kids are older and (a little) less messy. I really wanted the finished look of a rug, but I need to keep things practical as well.
I’m going to share my inspiration rooms, our current space, and the rugs I’m considering. There are literally thousands of options out there, and I’ve narrowed them down to my favorites.
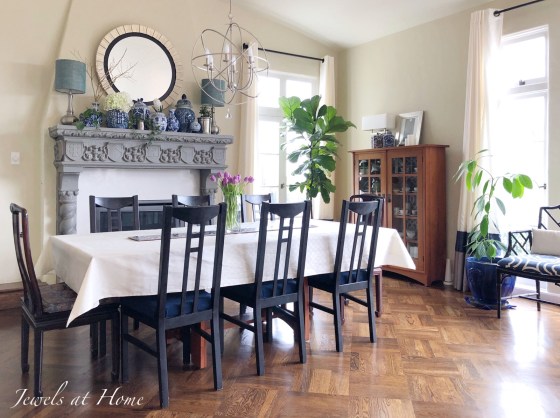
First, here’s how our dining room looks now, without the rug.

So, you know I have a design crush on Amber Interiors. These are a couple of my favorite dining rooms designed by Amber Lewis and her team.


The vintage rugs in these rooms feel accessible, because the complex patterns will hide small stains. This set me on a hunt for a vintage-style Persian rug for our dining space. While part of me would love to find a gorgeous high-quality wool rug, I am just too chicken – or too smart? – to put a few thousand dollars under my table for my kids to drop food on and my dog to lick… so, at least for now, I decided to look for an inexpensive synthetic rug that won’t make me cry every time something falls on it.
Here is my short list of rugs. My color scheme is greys and blues, and I was looking for something that had pattern but was still muted enough to feel neutral.

1 Unique Loom Rockwell Berkshire Area Rug
2 Safavieh Evoke Vintage Oriental Silver/ Ivory Distressed Rug
3 Freetown Distressed Vintage Inspired Gray/Ivory Rug
4 Willoby Vintage Oriental Charcoal Area Rug
And I have more rug ideas and inspiration rooms on my Pinterest board.
So, what do you think? Here’s another picture of the room currently. Our mantel is pretty busy, so I don’t want to add more busy-ness to the room, but I think it would really define the space and also show off the base of the table, which is a lovely Craftsman design.
I haven’t made a final decision yet, and I like all these rugs so much, that I might by more than one and put it in the living room or upstairs hallway…
So, whadya think?
“Jewels”
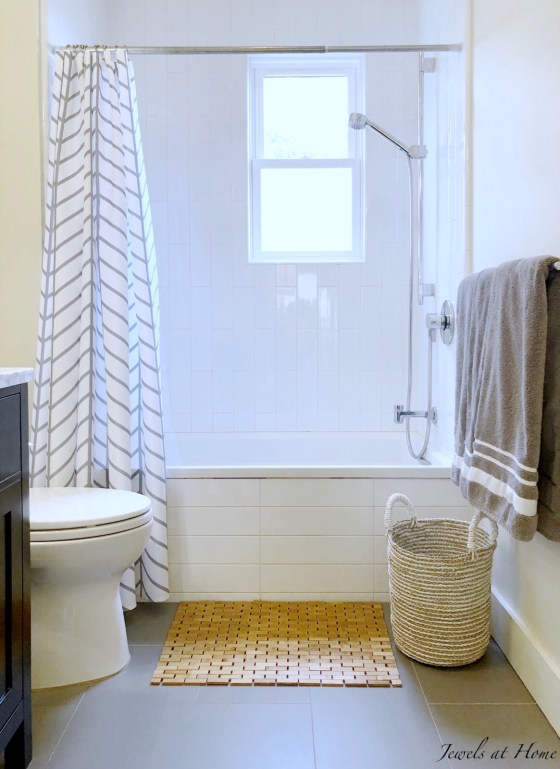
I’m really excited to be a Guest Participant in my first One Room Challenge! This is a great way to get inspiration and motivation for your home. For this challenge, I’ve decided to re-do our kids’ bath. It started out with a cute beach theme that seemed perfect when the boys were little, but now I am ready for it to grow up with them. Our new look features neutral colors, natural touches, and enough personality to stand up to three boys! Thanks for following along!
![]()
Recap:
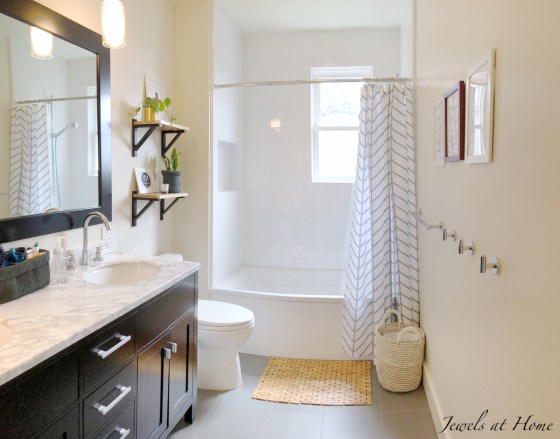
Have you noticed that I’ve only been taking pictures of this bathroom from one side? Yes, it’s a small room, but I’m not too proud to stand in the bathtub or behind the toilet to get a good picture, like when I redecorated our master bath or our powder room! The reason I’ve been taking pictures from just one side is that one of the pendant lights over the vanity was broken, and both of them were originally hung too high. Finally, almost seven years after we renovated this bath, I’m finally really happy with the pendant lights.

As you know, I’m not afraid to use power tools, like when I made the DIY shelves for this project or built these plant stands. But, I am a little afraid of electricity. Steve helped me out and hung the new lights from West Elm. They look great with these LED Edison-style bulbs!

Speaking of that, let’s talk about light bulbs! I wanted the vintage Edison-style light bulbs, but there was a bit of trial and error to get the right ones. These were the third set I ordered… I’m used to looking at the wattage, which tells you how bright the light will be, but I forgot to look at the Kelvin, which tells you how “warm” or “cold” the light will be. I started out with 5000K, which was a very bright white that didn’t feel quite natural in the space. I then (accidentally) bought 2200K bulbs, which are very warm amber-colored. I finally found these bulbs in 3000K, and the light is just right (I am feeling a bit like Goldilocks, here!).
This chart from the LED Exchange is helpful for understanding Kelvin:
Links to the products and DIY projects I used in this room are at the bottom of the post.
And without further ado, here are some more pictures of our finished space!


A huge thank you to Linda for creating the One Room Challenge community, and high fives to all my fellow bloggers whose hard work and creativity were great inspirations! Be sure to go back to the One Room Challenge page to check out all the other projects!
I’m already thinking about the fall challenge and wondering what room I will redecorate!
“Jewels”
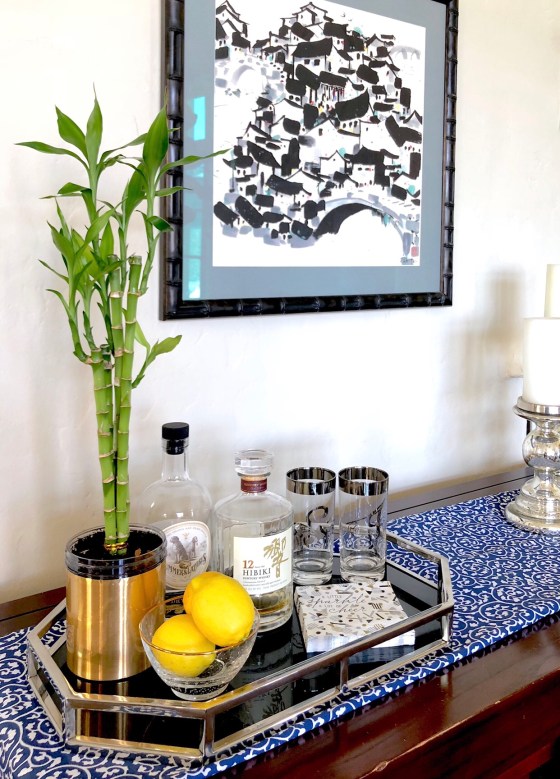
Today’s project is a great way to reuse – or “upcycle” items around your house, while creating something beautiful to feed your plant problem… I mean plant addiction… I mean plant projects! If you are a crazy plant lady like me, you are always looking for new ways to display your plants. I’m definitely not opposed to going shopping for some pretty planters, but it’s also amazing what you can do with things around your house.
A while ago, I showed you the faux marble planters I made from empty yogurt containers. The marble paper works well for sloped containers, because the pattern is random. But if you can find some containers that have straight sides (hint, eat a lot of Talenti Gelato- you know, for the cause!), then you have got to try out the same trick with metallic contact paper!
Here’s what you will need:
Here’s how to make the planters:
You can put in drainage holes, if you want. If you use the containers without drainage holes, make sure to put a layer of rocks and some agricultural charcoal at the bottom and be careful not to overwater.
I think these pictures prove that being green can be completely golden!


“Jewels”
I’m really excited to be a Guest Participant in my first One Room Challenge! This is a great way to get inspiration and motivation for your home. For this challenge, I’ve decided to re-do our kids’ bath. It started out with a cute beach theme that seemed perfect when the boys were little, but now I am ready for it to grow up with them. Our new look features neutral colors, natural touches, and enough personality to stand up to three boys! Thanks for following along!
![]()
Recap:
For week five, I am personalizing towels for the boys. I wanted the look of matching towels, but I still wanted to be able to tell their towels apart, because there are some things that even the closest family doesn’t want to share…
Fortunately, I remembered how I had added trim to our master bath towels, so I adapted that project for the boys. I started with solid grey towels and white grosgrain ribbon in 1.5 inch and 5/8 inch widths. I sewed on one stripe for our oldest, two for our middle boy, and three for our youngest.


I’m showing the towels folded nicely, but I actually have robe hooks for the boys to make it easier for them to hang up their towels.
![]()
Time to head back to the One Room Challenge link-up page to check out the progress on all the other exciting projects!
Final stretch this week! Hint: I am enlisting Steve to do play with electricity!
“Jewels”
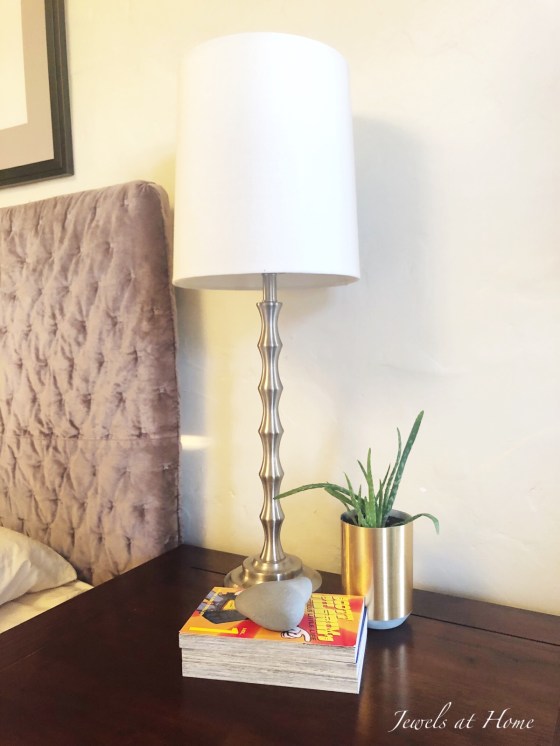
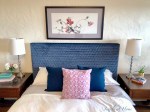
This is a great idea for a compact DIY headboard you can use in a small space – or anywhere you want! This idea first caught my eye when Emily Henderson featured Shwa Style’s version of this pillow headboard. A Pair and a Spare DIY also has a lovely version of this idea. And now, for my own take on this easy and stylishly funky headboard!

When I first created our tween boy’s room a few years ago, I made a DIY bed from Ikea bookcases, and the headboard was an Ikea floating shelf mounted on its side. These days, this room is home to different tween boy, and it was time for a cozy upgrade to his bed! I was thinking of buying leather straps for this project, but when I was at the Flea Market with my friend Ariana of Act 2 Decor, I saw these vintage belts and loved the idea of doing a twist on this project!
Upholstered headboards are really popular, but there’s part of me that just isn’t quite sure how to keep a fabric headboard clean. If you’re with me, then you should like this project, and you should also check out the washable quilted headboard slipcovers I made for our master bedroom in grey velvet and navy velvet!
What you’ll need:
Here’s how to make it:


Our tween loves to read in bed, and he is really enjoying the comfy new addition to his bedroom!
“Jewels”
I’m really excited to be a Guest Participant in my first One Room Challenge! This is a great way to get inspiration and motivation for your home. For this challenge, I’ve decided to re-do our kids’ bath. It started out with a cute beach theme that seemed perfect when the boys were little, but now I am ready for it to grow up with them. Our new look features neutral colors, natural touches, and enough personality to stand up to three boys! Thanks for following along!
![]()
Recap:
Now that we are over the hump and into week four, it seemed like a great time to add some art. I though about creating something myself. And then I remembered I can’t draw… Etsy to the rescue! I bought downloadable files and printed and framed them for our space.
It’s amazing how art makes a room! These pieces add so much character and polish to our bathroom. Since this room has a neutral design, I like how these whimsical signs make it feel like it is still a kids’ bathroom.

Here are links (some affiliate links) for our new accessories:
![]()
There’s tons more inspiration back at the One Room Challenge link-up page. Go check it out!
“Jewels”
I love little changes that make a big difference! No, this is not a new bed – just an easy-to-sew slipcover for our headboard. I have been creating a light and neutral look in our bedroom, but something wasn’t quite … Continue reading
I’m really excited to be a Guest Participant in my first One Room Challenge! This is a great way to get inspiration and motivation for your home. For this challenge, I’ve decided to re-do our kids’ bath. It started out with a cute beach theme that seemed perfect when the boys were little, but now I am ready for it to grow up with them. Our new look features neutral colors, natural touches, and enough personality to stand up to three boys! Thanks for following along!
![]()
Recap:
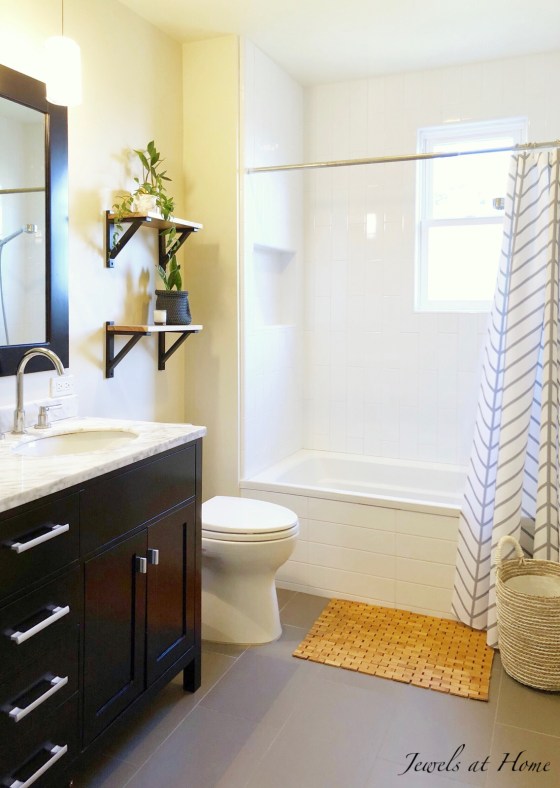
For week three, I created wall shelves using Ikea Ekby Valter wall brackets and some wood that I had left over from another project. I cut the wood to 7.5″ x 16.5″ and finished it with clear polyurethane.

If you’re looking for ready-made shelves, here is an option with a similar look..
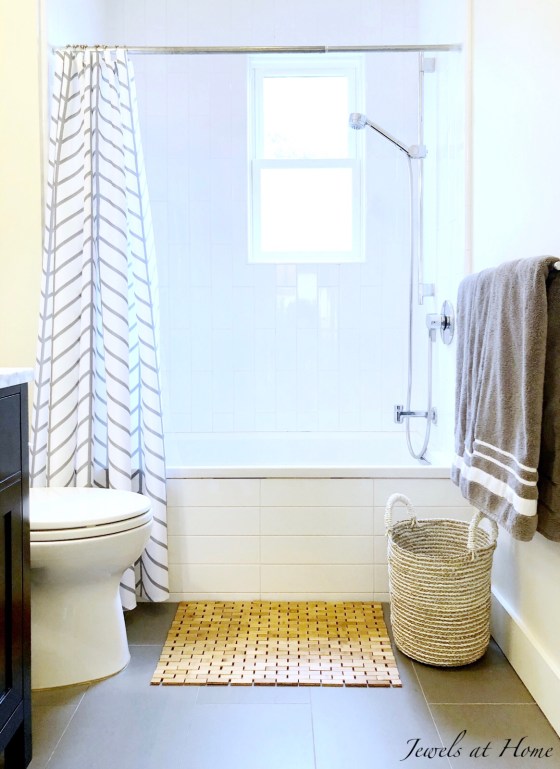
I mentioned how I really wanted to bring natural wood into this space, and these shelves help tie things together with the bamboo bathmat and seagrass basket.
I have used these wall brackets before to hang macrame planters, and I was excited to find them in this black finish, which coordinates with our existing vanity.


Here are links (some affiliate links) for our new accessories:
![]()
Head over to the One Room Challenge link-up page to see more inspiring ideas!
“Jewels”
