It’s officially winter and a good time to bundle up in style.

I knit these Hudson Bay-inspired caps in chunky wool yarn which makes them quick and cozy!

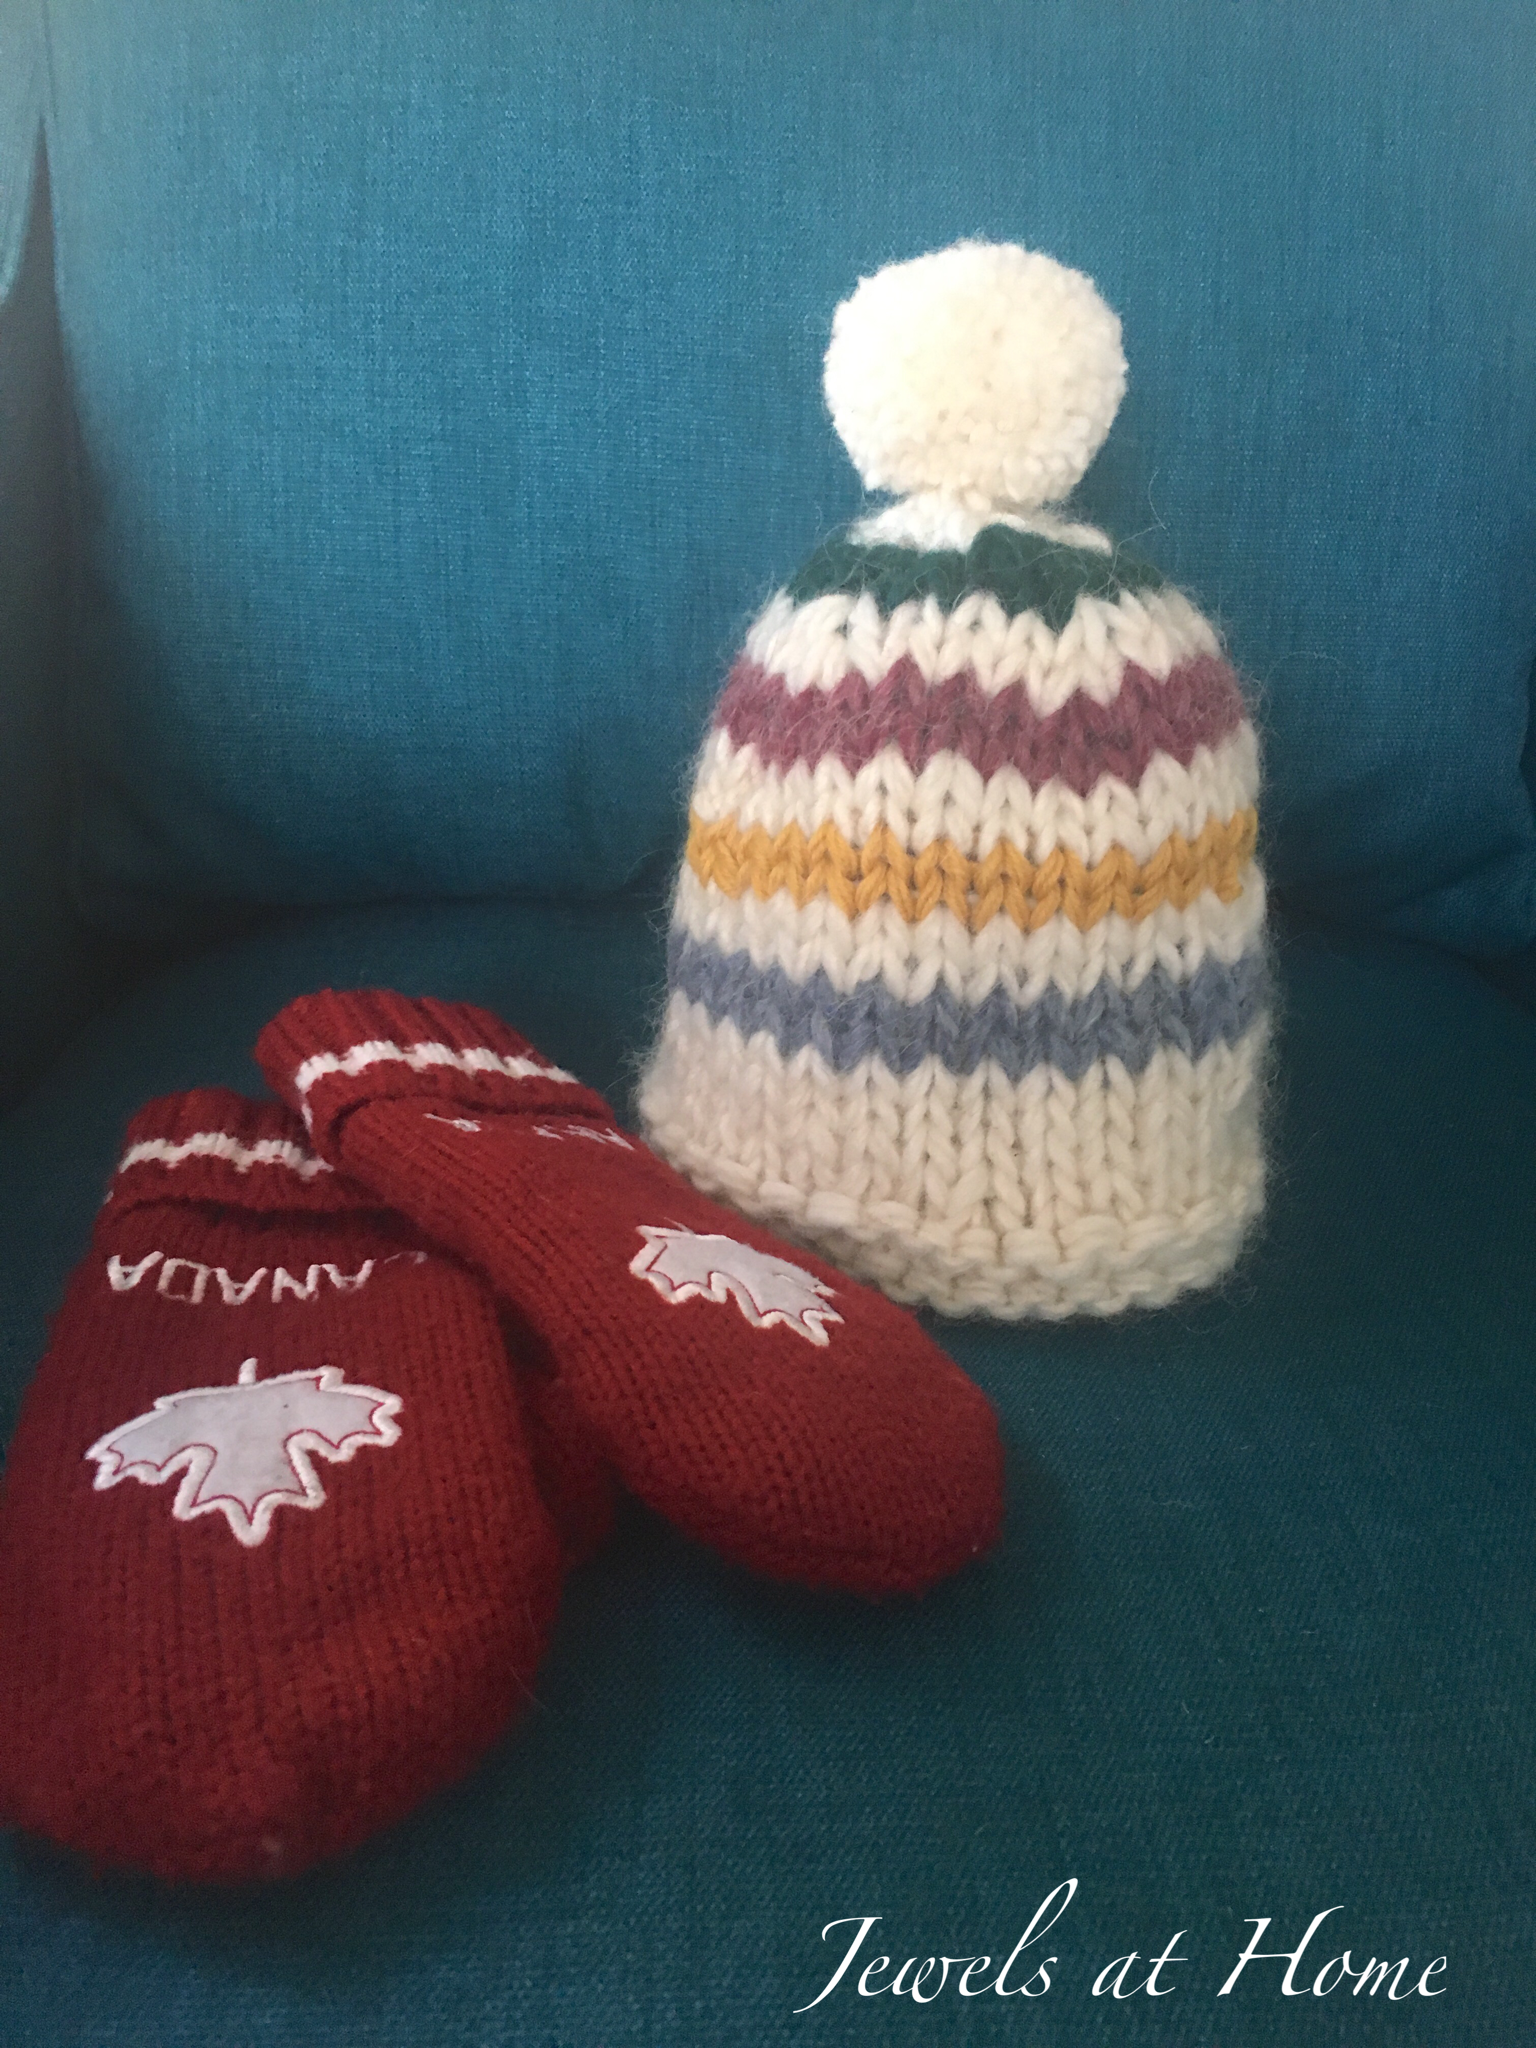
Stay warm out there, eh?!
“Jewels”
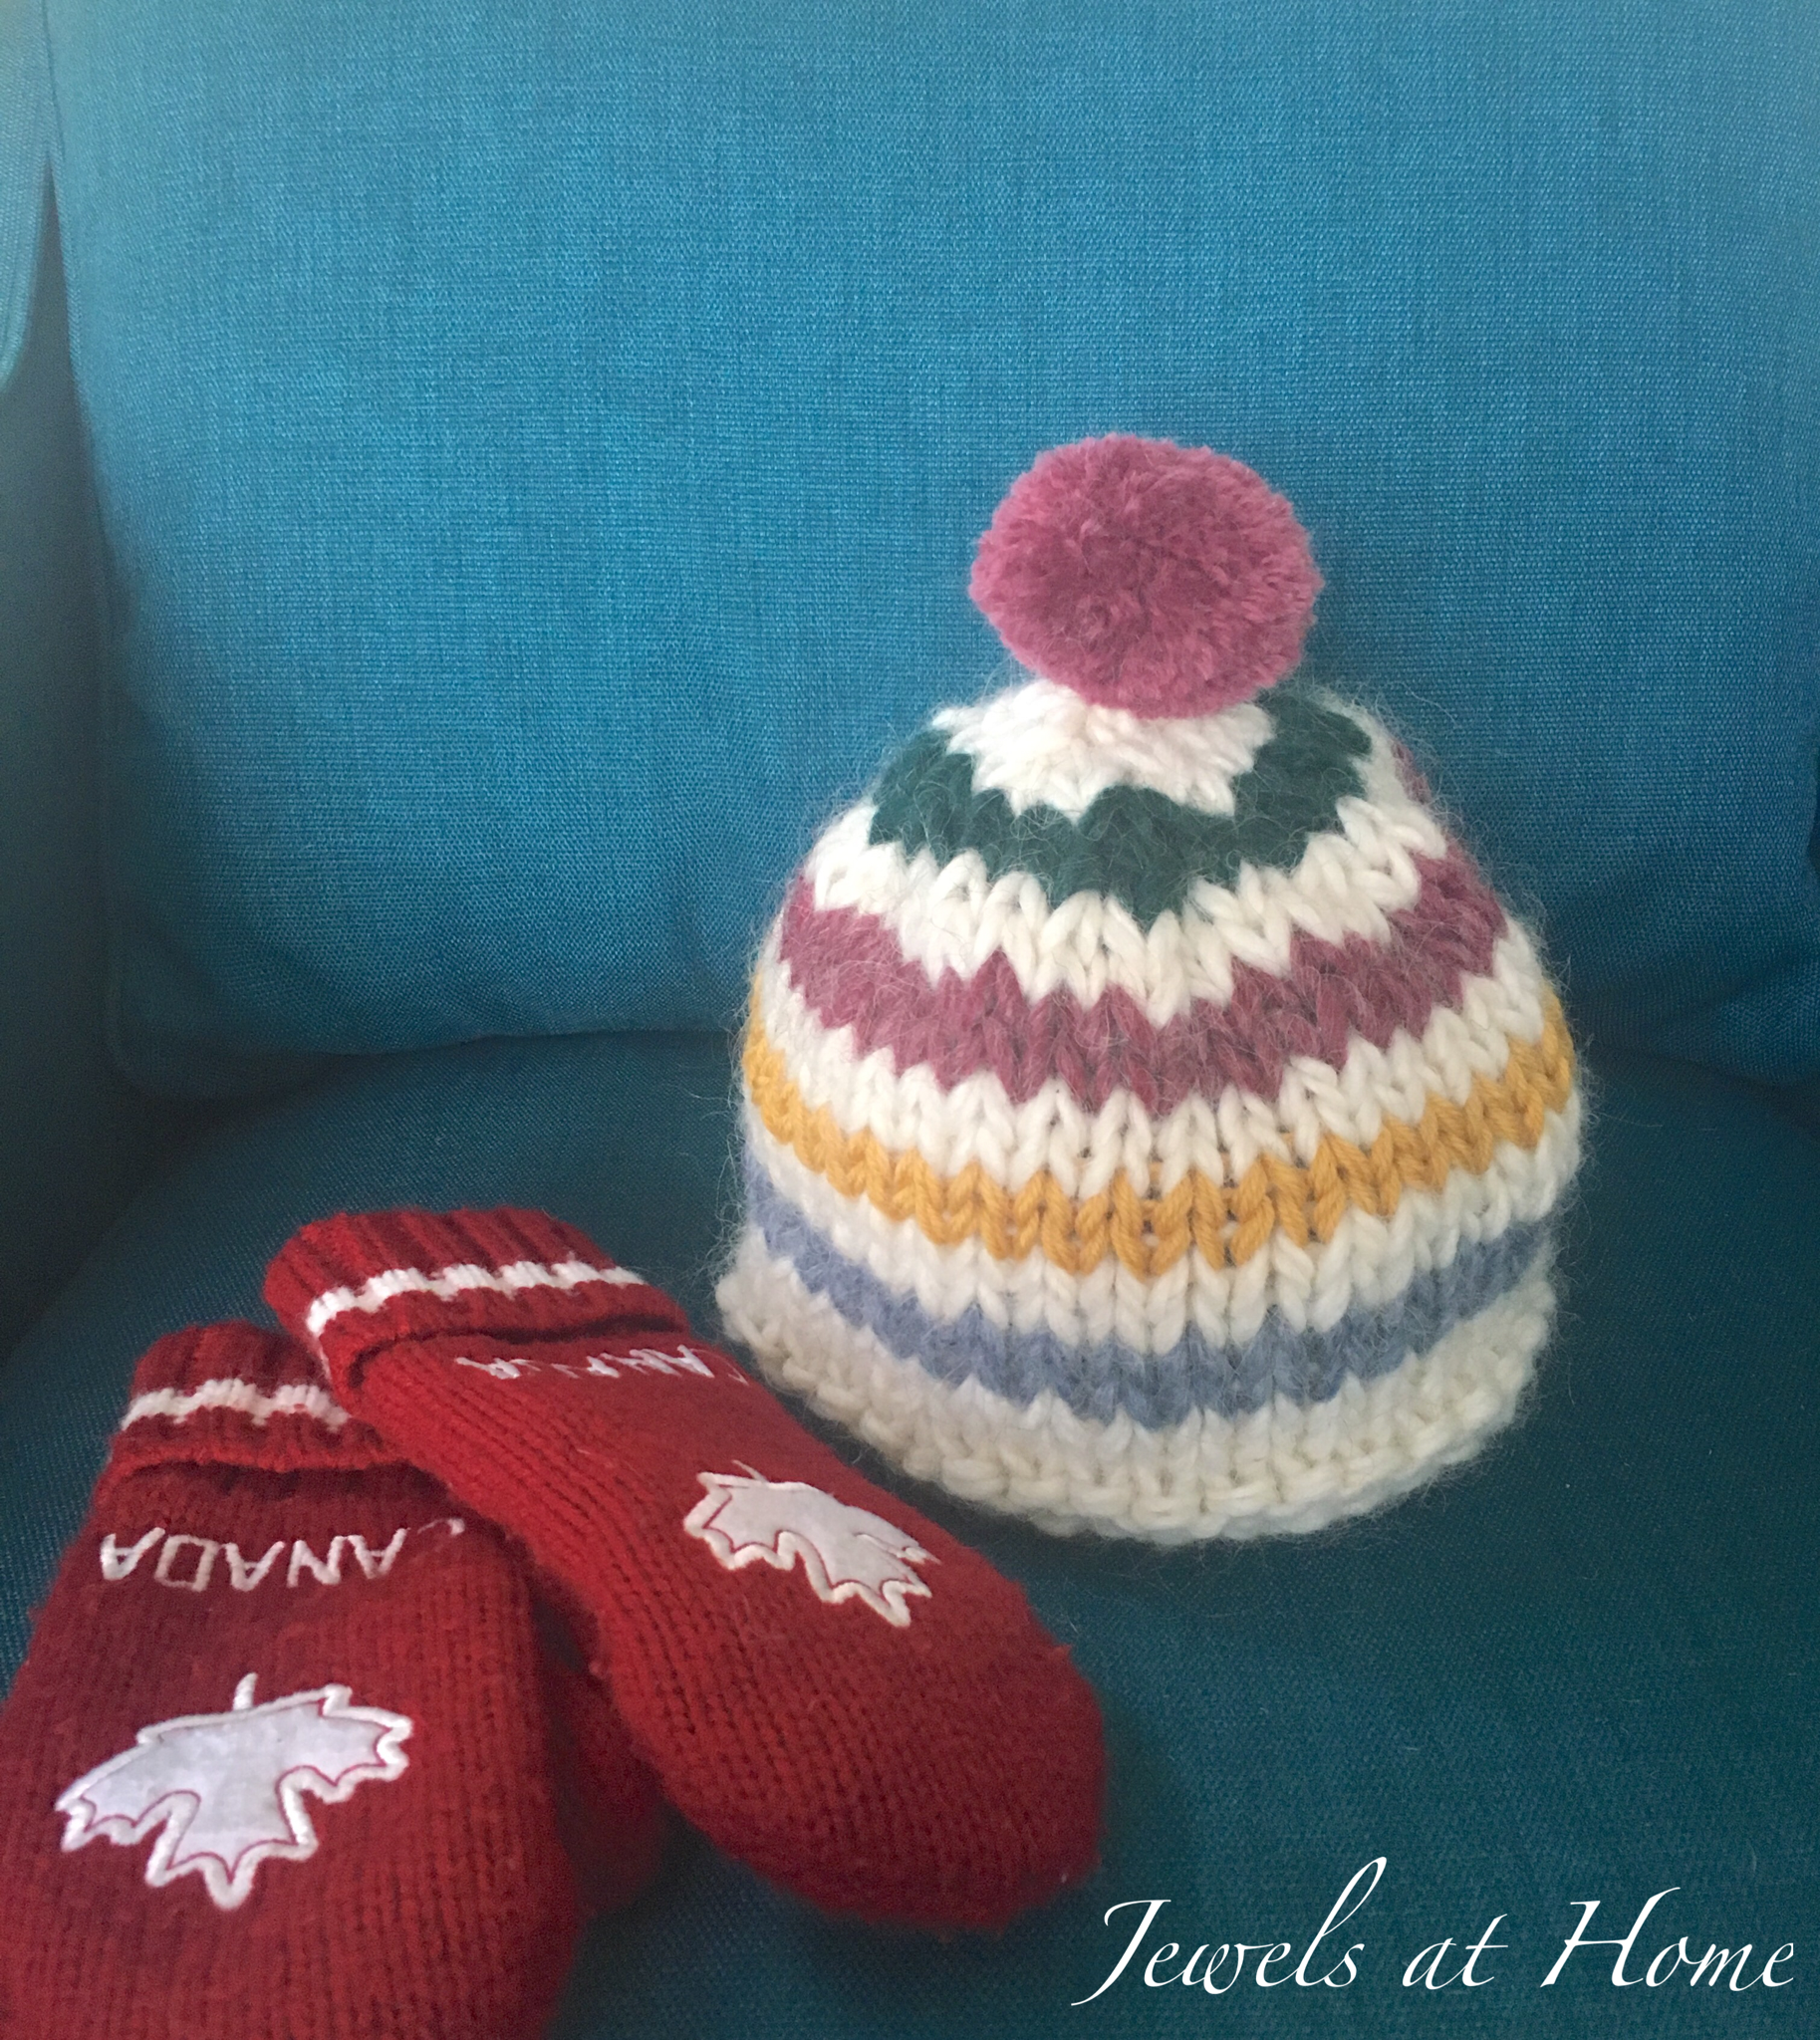
It’s officially winter and a good time to bundle up in style.
I knit these Hudson Bay-inspired caps in chunky wool yarn which makes them quick and cozy!
Stay warm out there, eh?!
“Jewels”
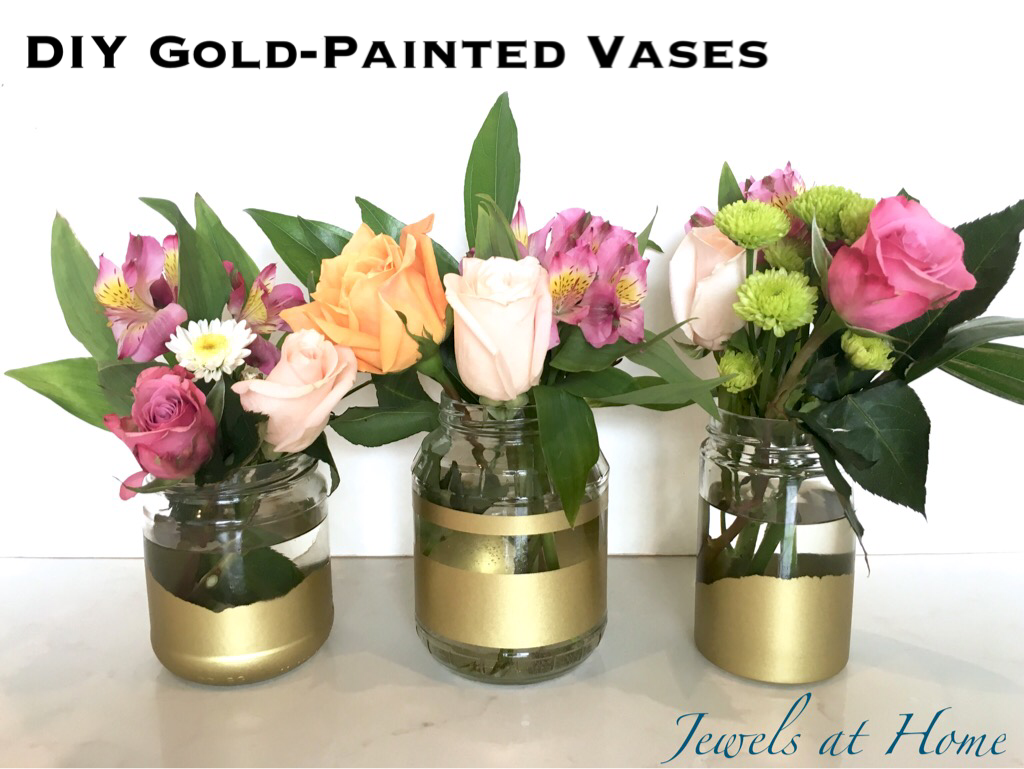
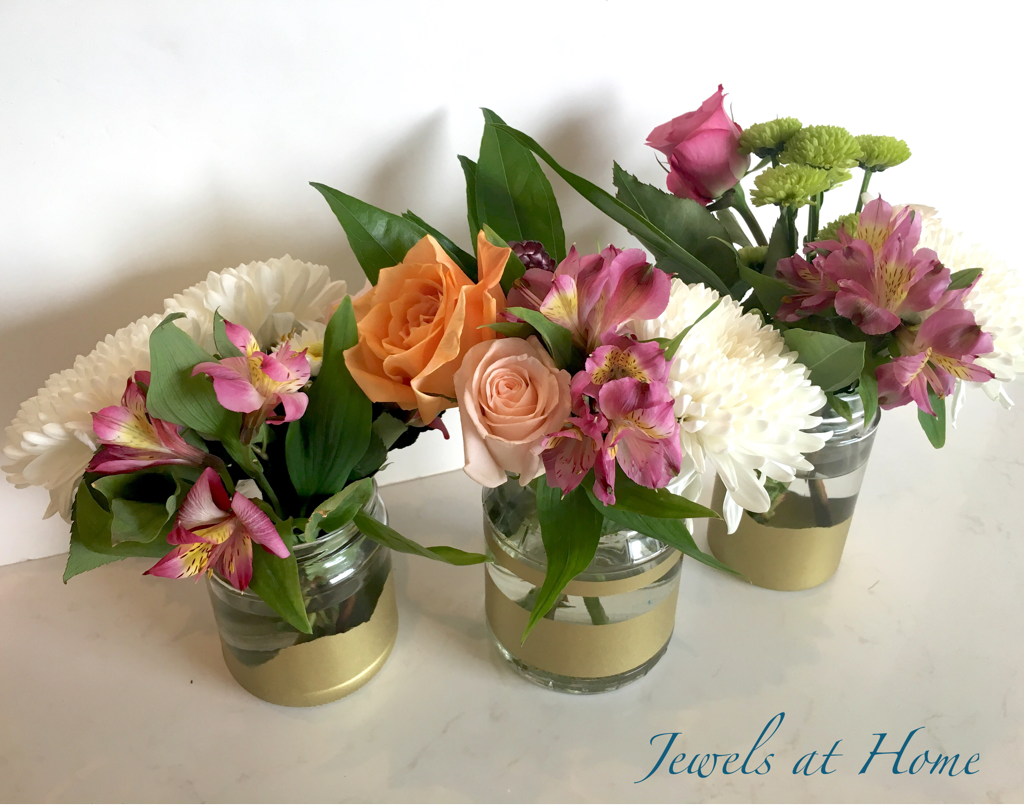
One of my favorite partners in craft-crime recently hosted a bridal shower for one of our coworkers, and I offered to make some decorations. First, I made giant paper flowers for a photo backdrop, and next up were these gold-painted vases.
Materials:
Instructions:

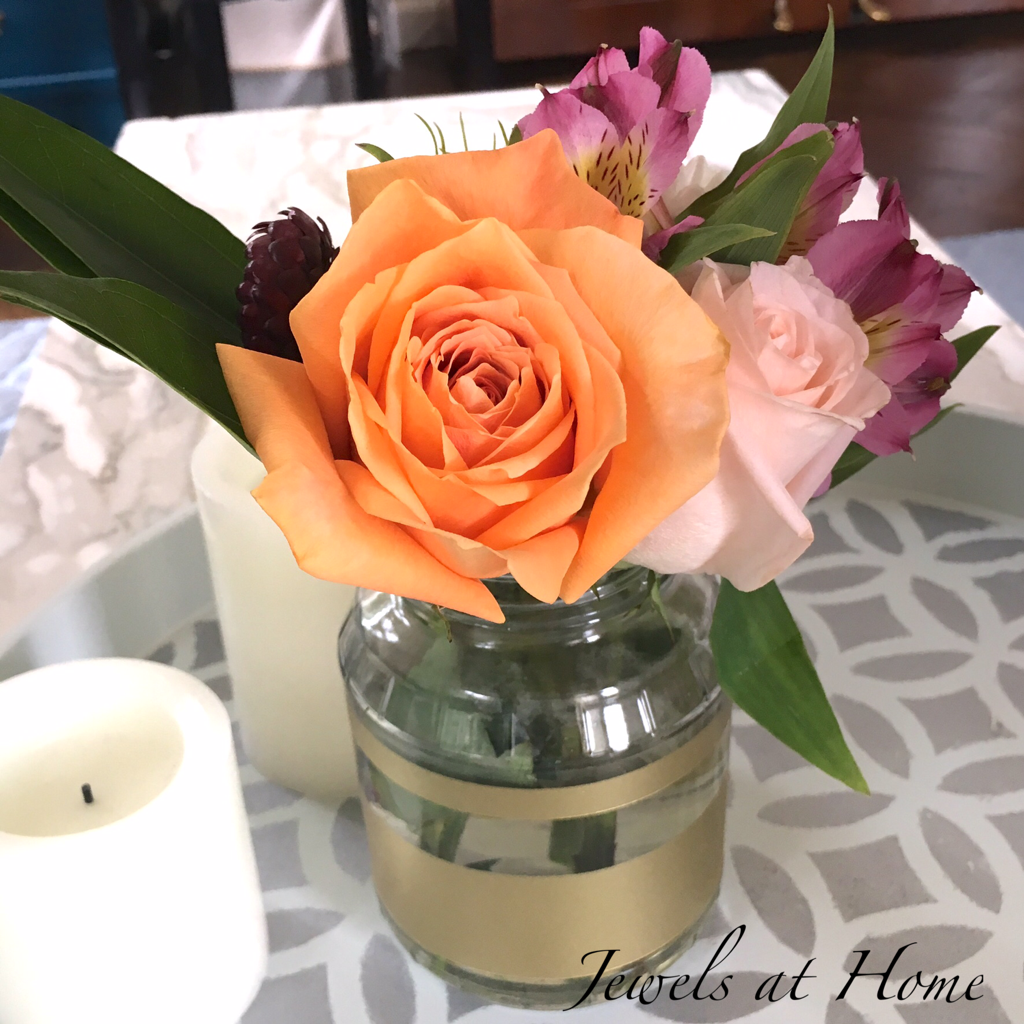
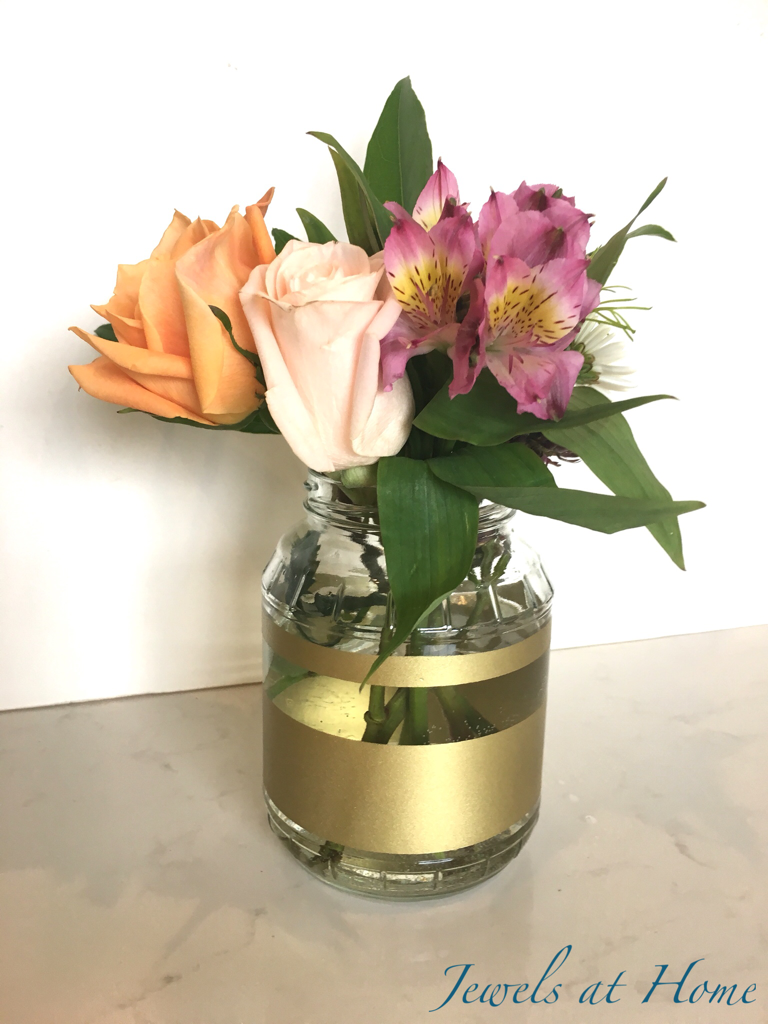
I love how this textured jar turned out. I think it was a sauerkraut jar.

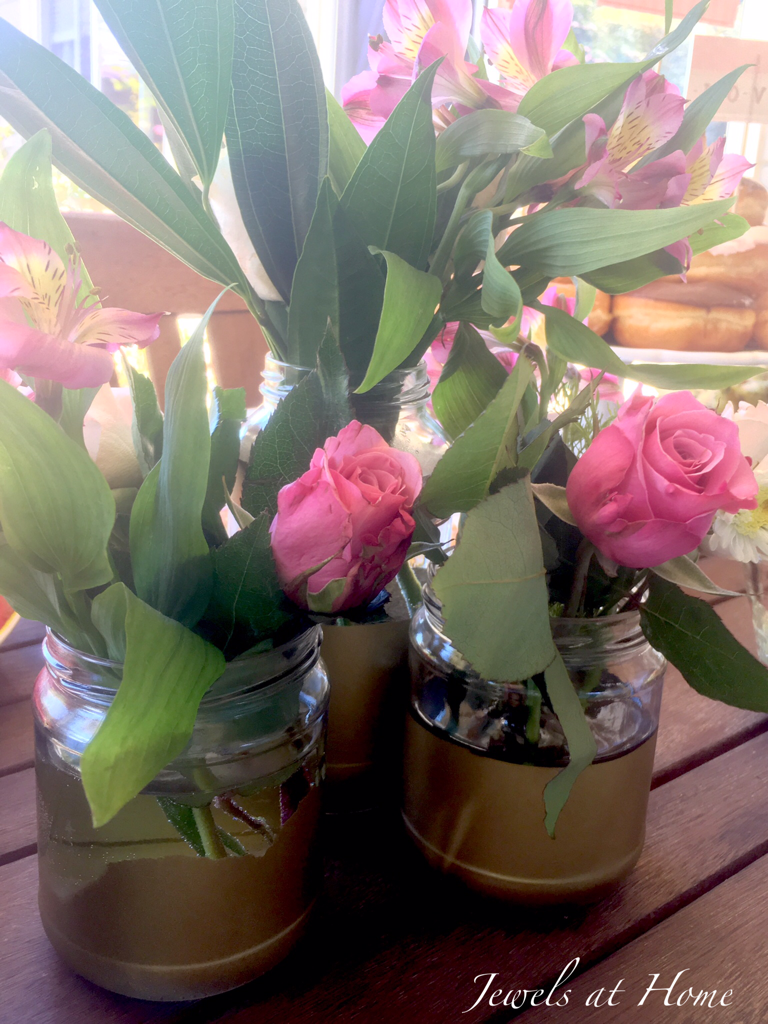
At the shower, I grouped vases together, so these small arrangements made a big impact.


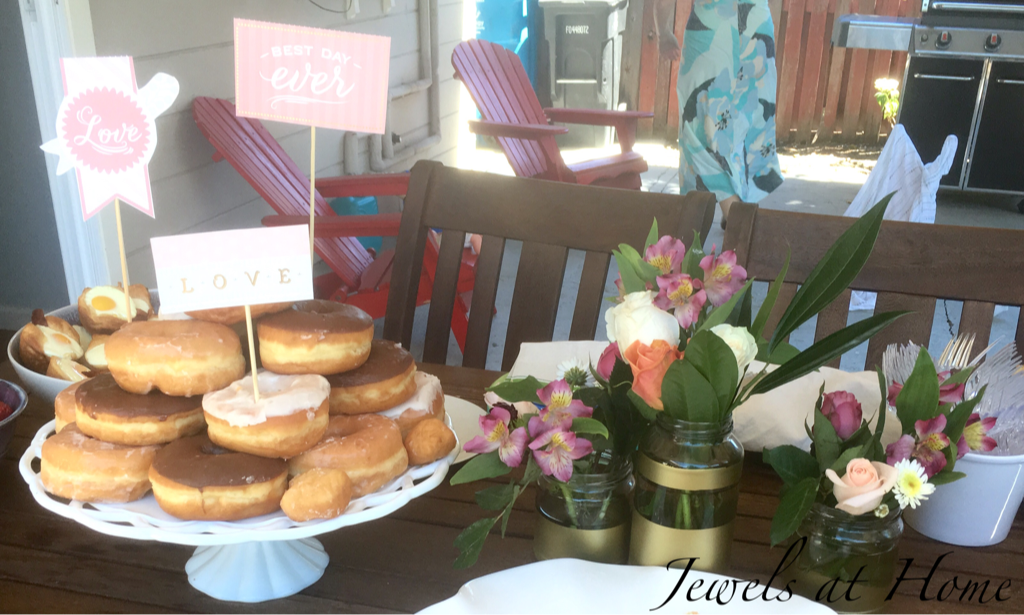
From “trash” to treasures!
I gave most of the vases away as party favors, so the is the only picture I have of one of the diagonal geometric designs (far right).
Of course, now I am seeing beauty throughout my pantry and already have plans for another set of vases!
“Jewels”
Here’s a fun DIY art project that you can customize so many ways. I added names to ours.
And for my sister-in-law’s wedding, I put the bride and groom and their wedding date:
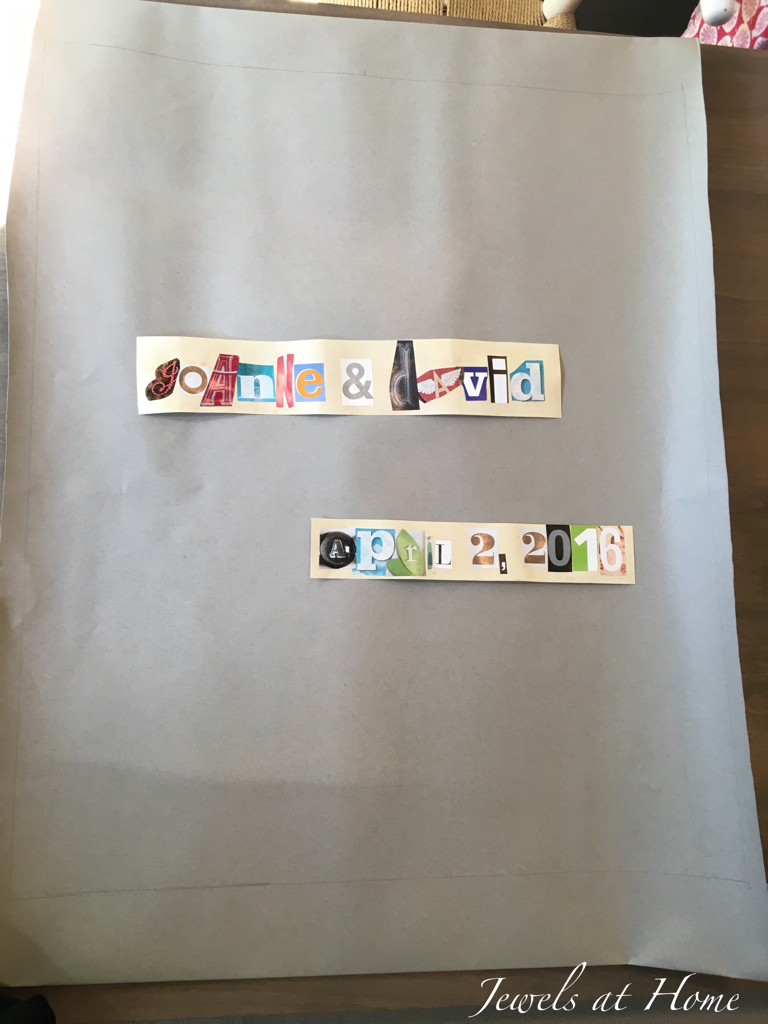
You can get creative and use not just letters but pictures of objects or patterns. Can you spot the keys I used for the letter “I” or the clock for the letter “o”? Depending on the space, I switched up the wording. Variations include:


What other ways would you customize this?
“Jewels”
So, it was just Valentine’s Day and we’re going to Steve’s sister’s wedding in a few weeks, so I’ve been busy searching for the perfect romantic gifts with a handmade touch.
Here are my favorite ideas. I’ve tried some of them and can’t wait to try the rest!

1. Printed pillowcases

I love this and all the other whimsical designs from ZCreate on Etsy, and how perfect that this business is run by a couple!
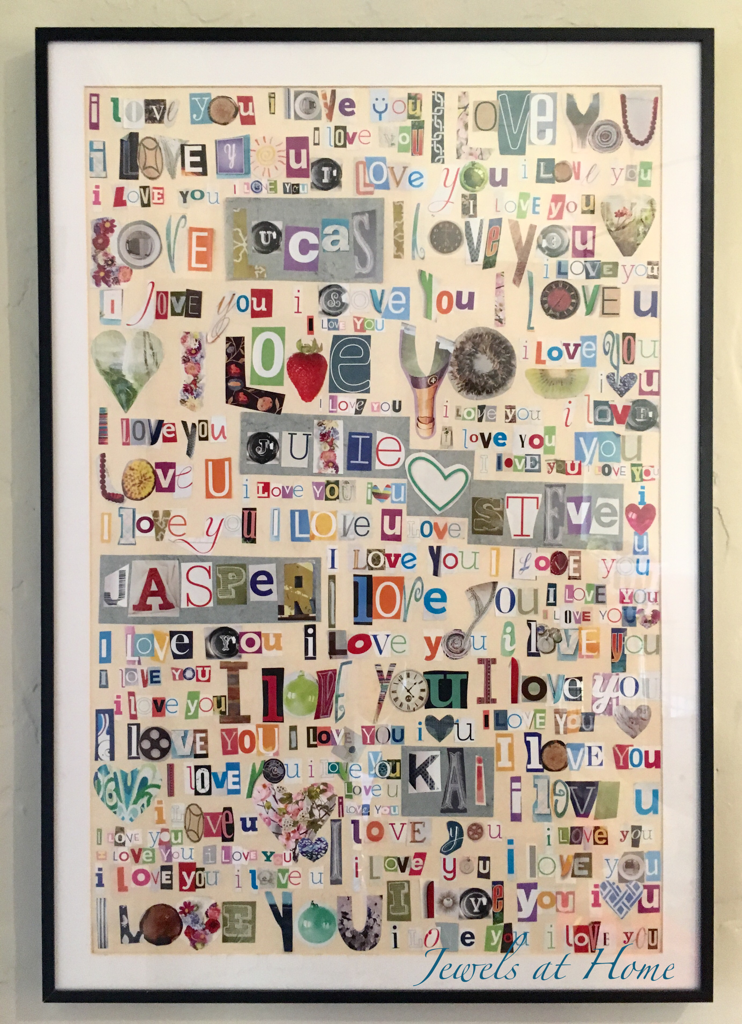
2. “I love you” collage

I made this collage for our family a few years ago. It took a lot of time and work, but it’s not technically difficult, and it’s almost free! You could customize this with a wedding date or other details.
3. A year of dates
 This is what I actually ended up giving Steve for Valentine’s. One activity for each month, some at home and some out on the town, including some local adventures I have been waiting to try!
4. Personalized wine or bar glasses
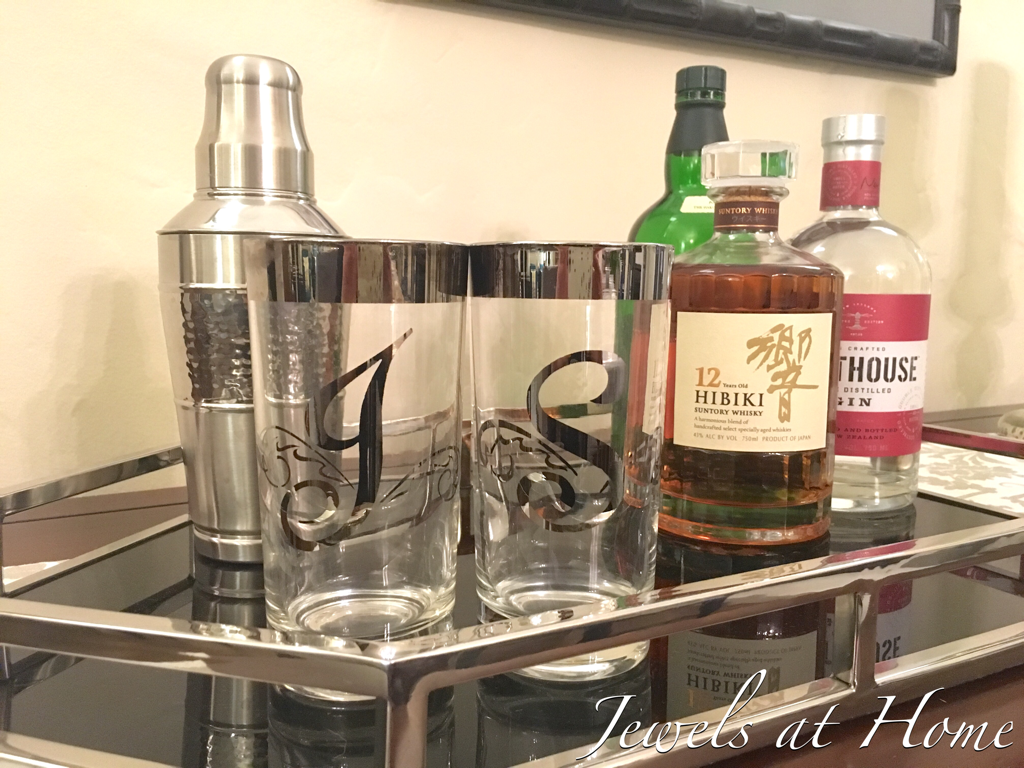
I love these vintage monogrammed glasses I found for our Mad Men party a few years ago. You could also make your own with Glass Etching Cream.
5. Personalized wine labels

What a fun way to personalize a gift of wine, with these milestone labels available from Label the Occasion and other sellers on Etsy. Or design your own and print on blank labels.
7. Message written with paper mosaic
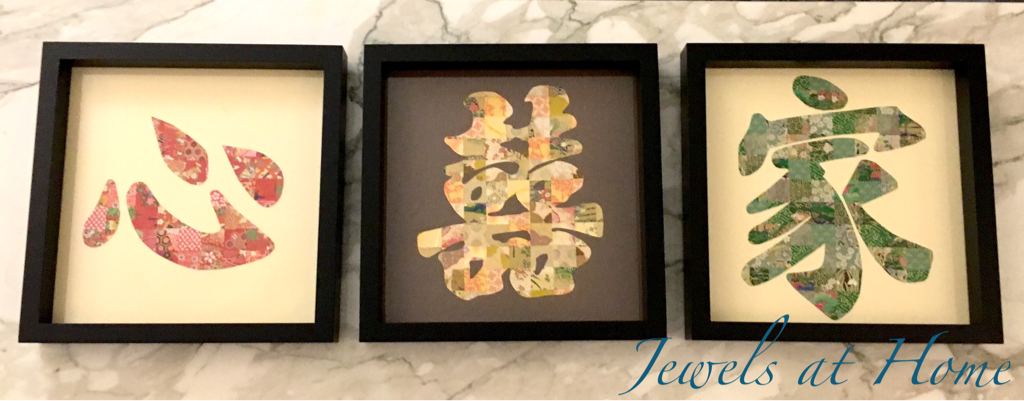
I used Chinese characters (love, double happiness, and family), but you could do this with an English phrase, too. I printed out the template in reverse, glued one inch squares onto the back side of the paper, then cut out the template and glued it on a background.
8. String art heart

You can buy this from Etsy or make your own with some wood, nails, and red embroidery floss. I’ve been wanting to try this for a while!
9. Personalized luggage tags

I made these luggage tags and other art projects out of wedding invitations. I found the self-laminating tags here.
10. Framed wedding invitation art

You could also do this with a birth announcement. It’s special way to preserve your friends’ favorite images.
Hope you’re in the mood to create something special for the ones you love!
“Jewels”


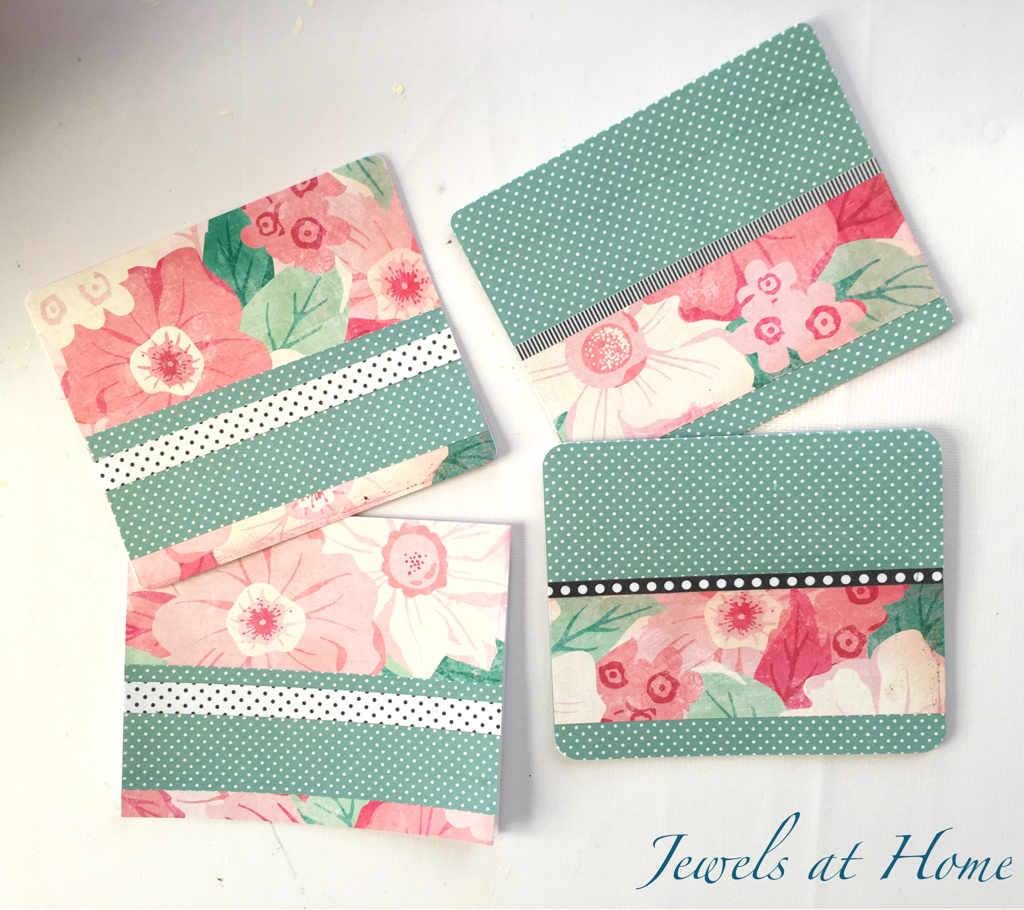
Here’s a short post where the pictures speak for themselves. I love playing around with pretty papers, and I put these together recently as a gift for a friend.
I used the same basic idea I shared in this post on quick DIY cards, but I varied the papers and added some fun washi tape as well. The other addition to these cards was using a corner rounder to add some interest. Still a straightforward project, and I love how each card turned out so unique!


“Jewels”
Happy New Year!
I am feel super-stoked about work this year. I have my long-time work “family,” and we have added some strong new staff as well. We are moving to new offices, and I am part of building a new clinic, which is a bit daunting but mostly exciting. To help kick off the new year at work, I decided to make myself a cute laptop sleeve.
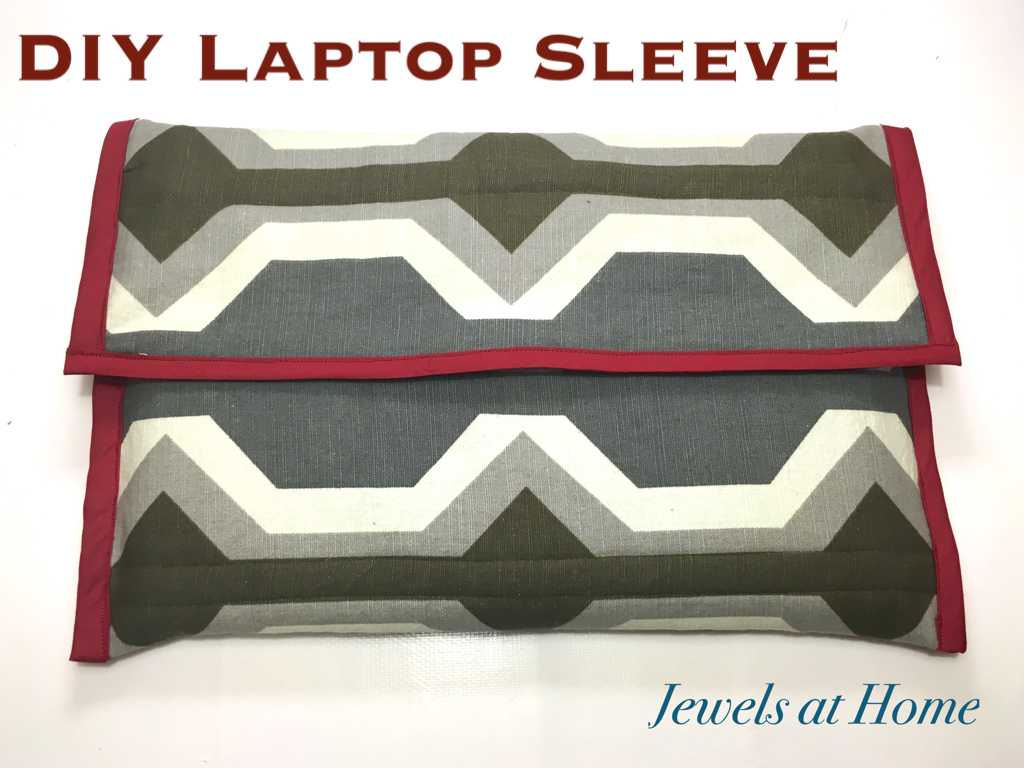
I was inspired by this pattern from Mandi at A Beautiful Mess. I made a few adaptations, like a velcro closure, a sewn-in name tag, and a rectangular flap.
To make your laptop sleeve, you’ll need
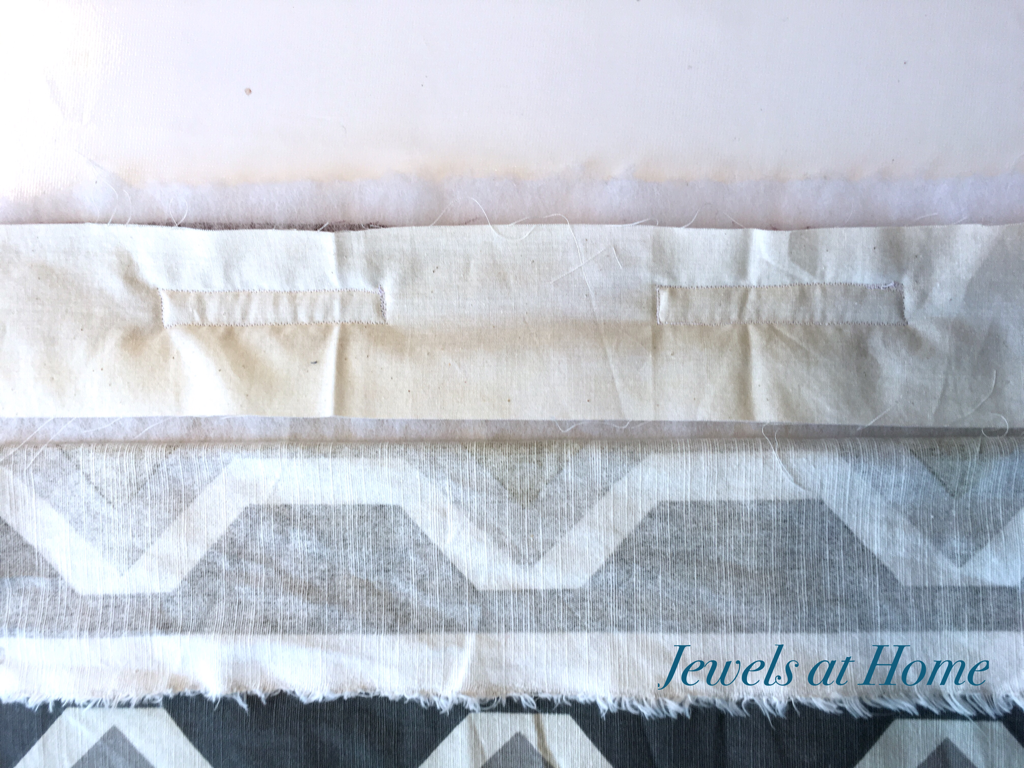
Start by cutting rectangles out of all three materials. For the width, the fabric should be 1 3/4 inches wider than your laptop on either side. For the length, wrap the fabric around your laptop and add about 6 inches for the flap. I’m lucky the print on my fabric worked out perfectly to line up… I mean I carefully planned and lined up the pattern on my fabric!
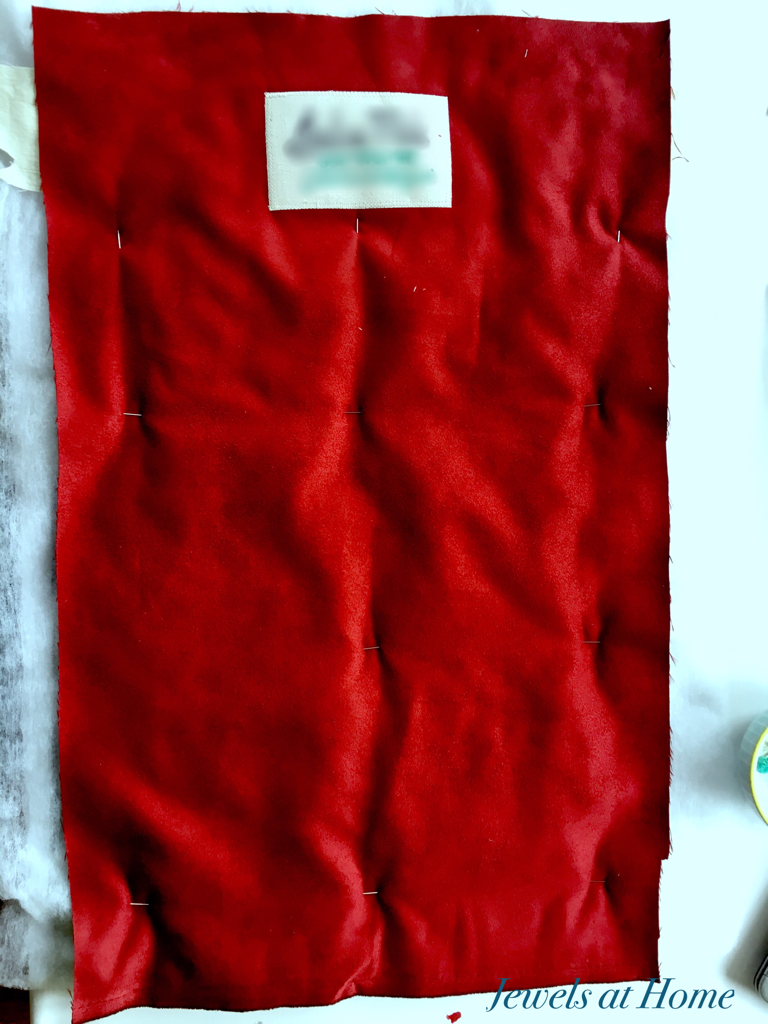
I made a label out of scrap muslin and put my name and contact information on it, in case I should ever be so unfortunate as to lose my laptop by fortunate enough to have someone host find it… I sewed this onto the lining fabric, as show below.

Next, I laid all three layers together and pinned them to keep them in place. I sewed quilting lines through all three fabrics for most of the sleeve, but I did want to sew across my name tag, so for the top section, I used some scrap fabric for backing and just sewed the outside fabric and batting to the scrap fabric, also shown below (folded over).

Next, I added the velcro. For the velcro on the body of the bag, I sewed all the way through, since the velcro is on the outside fabric, and I didn’t mind having stitching on the inside. However, for the velcro on the inside of the flap, I didn’t want the stitching to show on the outside, so I used more scrap fabric for backing, and I sewed the velcro to the inside fabric, batting, and scrap fabric, as shown below.
You can see the sleeve taking shape now! I finished one short end of the rectangle with bias binding (shown bel0w) and folded the entire piece to make the sleeve and trimmed some excess from the sides for a snug fit. I pinned the fabric in place to form the shape of the sleeve.

I sewed the sides together with a zig zag stitch and then added bias binding to the sides of the sleeve and top of the flap.
This was a pretty quick and easy project, and I love how it turned out. I think Steve is eyeing the laptop sleeve, and I offered to make one for him, but he does work from home most days and so he has turned me down so far…
Here are some pictures of the finished product!
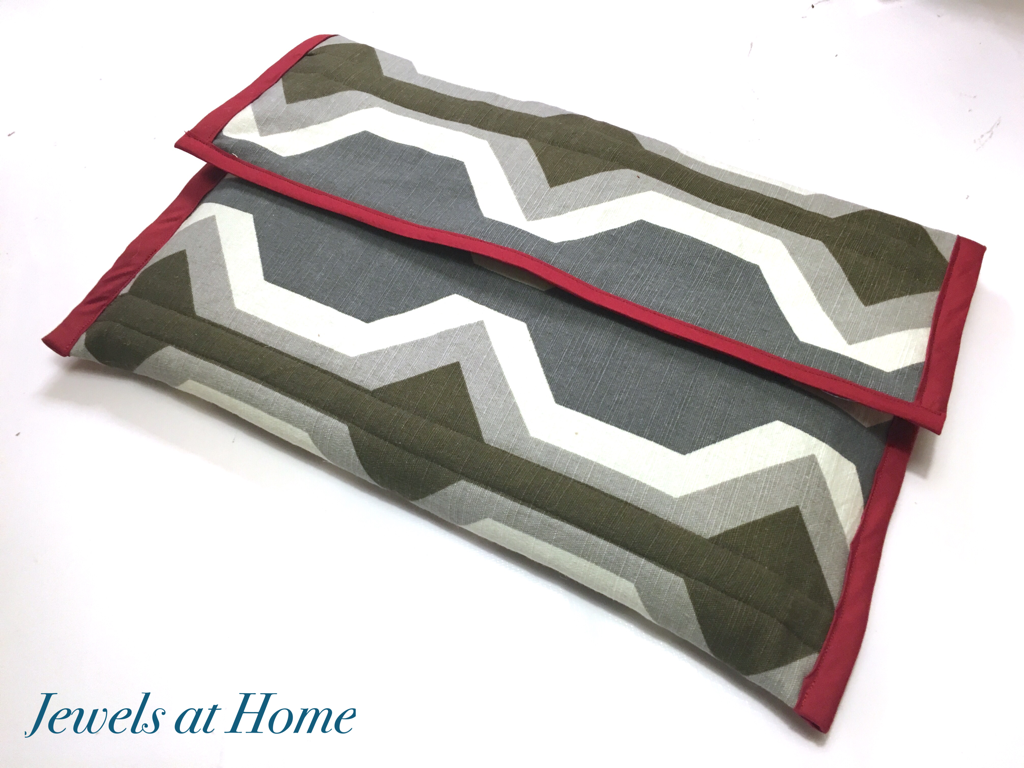
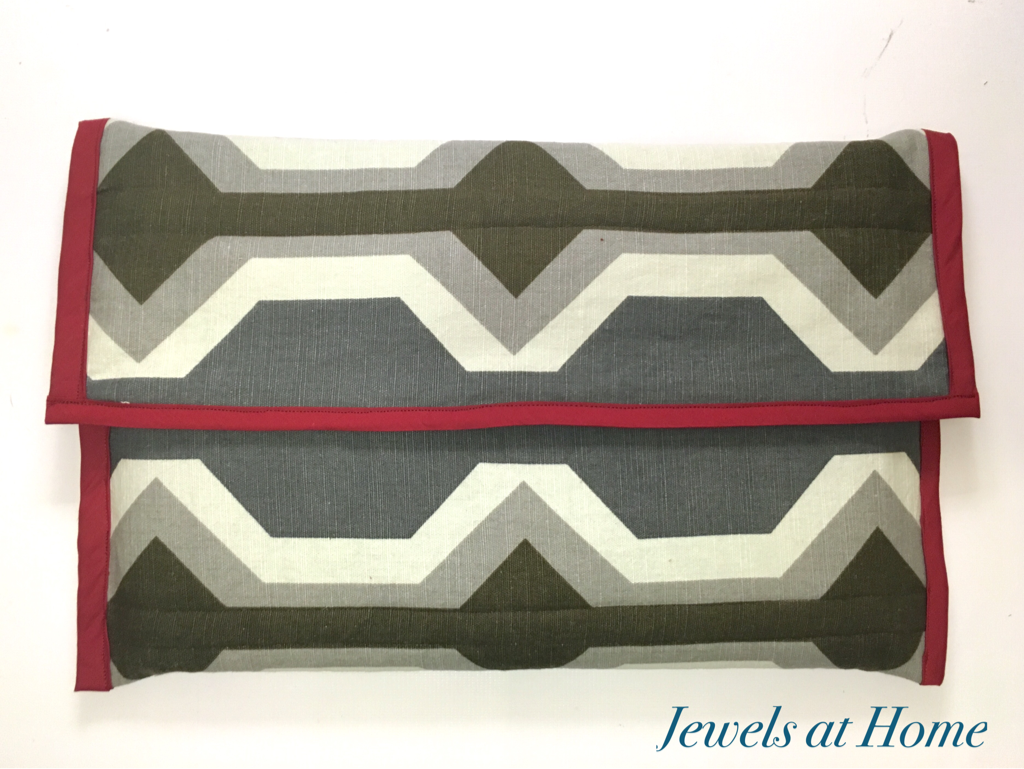
Looking forward to many adventures both at work and “at home” in 2016!
“Jewels”
Sometimes I get into little craft obsessions. For a while, I couldn’t stop sewing appliqués on things, and then there was felting… Ever since I made the pom-pom wreath for our retro mid-century Christmas, I’ve been obsessed with pom-poms. It feels like there isn’t anything that wouldn’t be improved by some pom-poms!
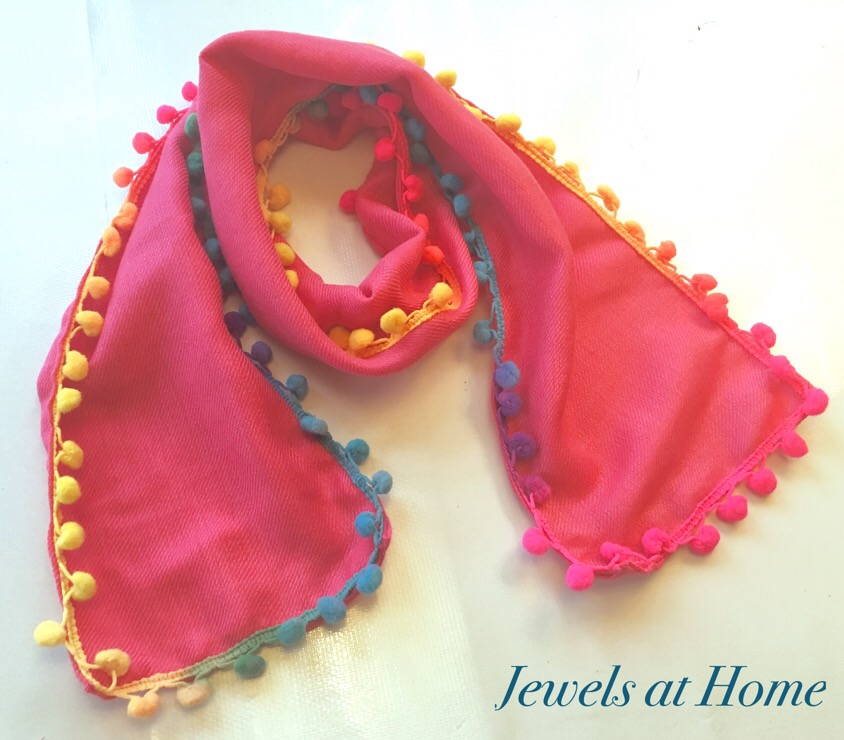
At K’s soccer game, I saw one of our friends had a cute scarf with pom-pom trim, and I thought it would be fun to make my own! Of course, it would not be a true obsession if I made just one… The first set of scarves I made were for my nieces for Christmas. These are pink wooly scarves with rainbow pom-pom trim. So cute! I have enough trim left over to make myself an infinity scarf after Christmas, if I’m feeling bold enough for these colors.
Living in California, I don’t need a lot of warm scarves, but the girls live on the East Coast, so I wanted to find them something cozy. After looking at a lot of different fabrics, I decided to buy these inexpensive solid-colored scarves to use as a base for this project.
The scarves are much bigger than I needed, and they’re also very thin, so I cut off the fringe and doubled the thickness. For the girls, the finished size is 6.5″x49″. Adding the fringe was pretty quick. I recommend using the zipper foot for your sewing machine. 
Off to add pom poms to something else!
“Jewels”
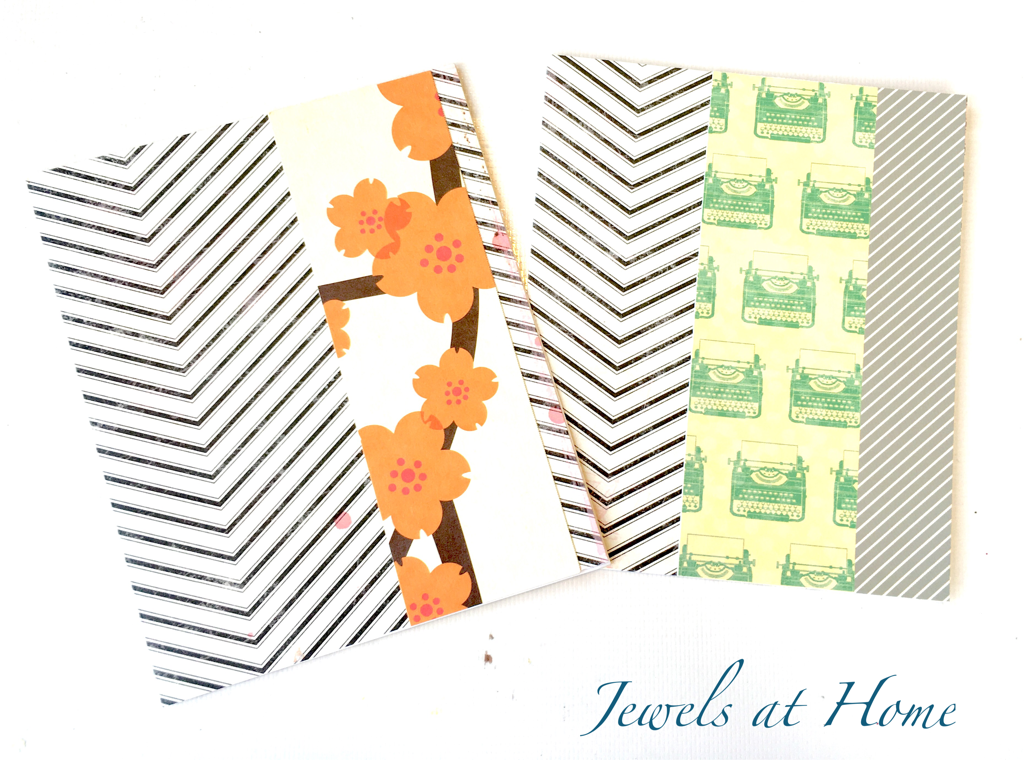
My passion for pretty papers goes way back, but I confess that when washi tape first became popular, I didn’t immediately fall in love – it’s not too late, though! I had so much fun combining patterns and colors to make these pretty ornaments. These lovely decorations are quick to make, and I will be bringing this project to work for our holiday party. I also made a personalized version of these ornaments with kids’ names inside.

To make these ornaments, I used
The process is very simple:
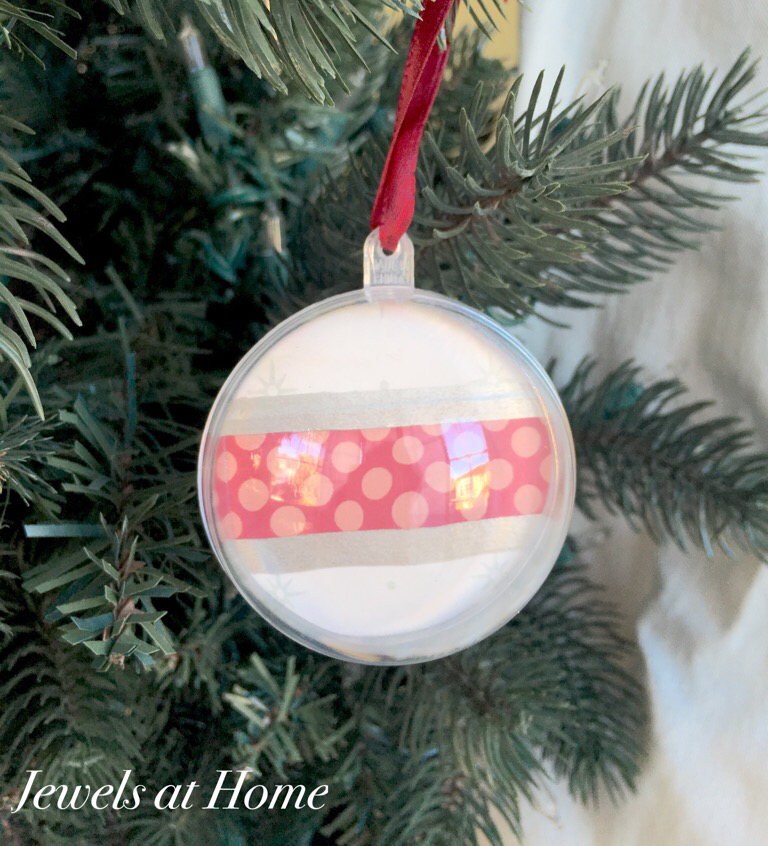


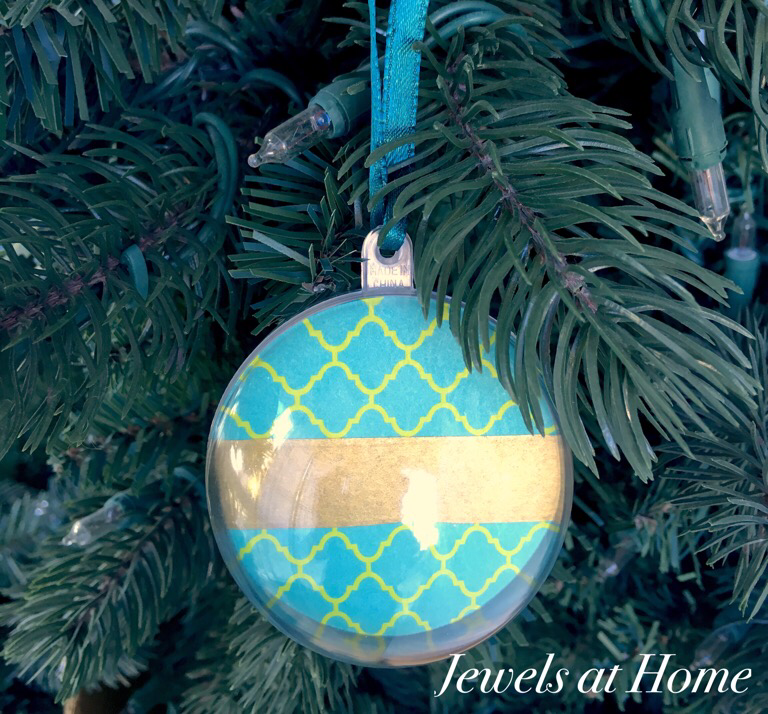
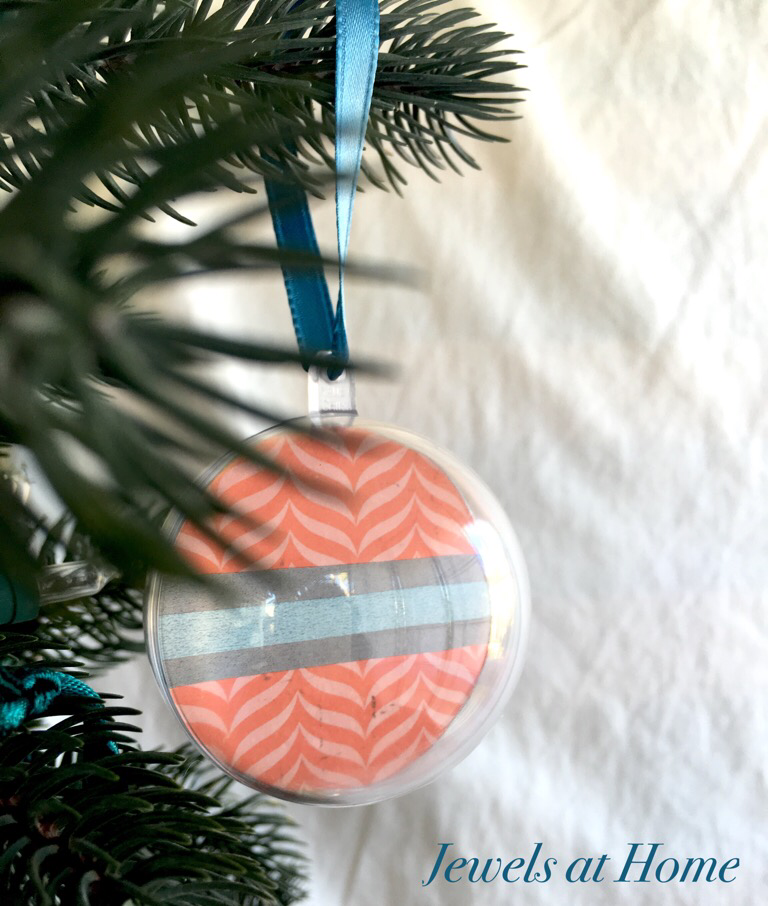


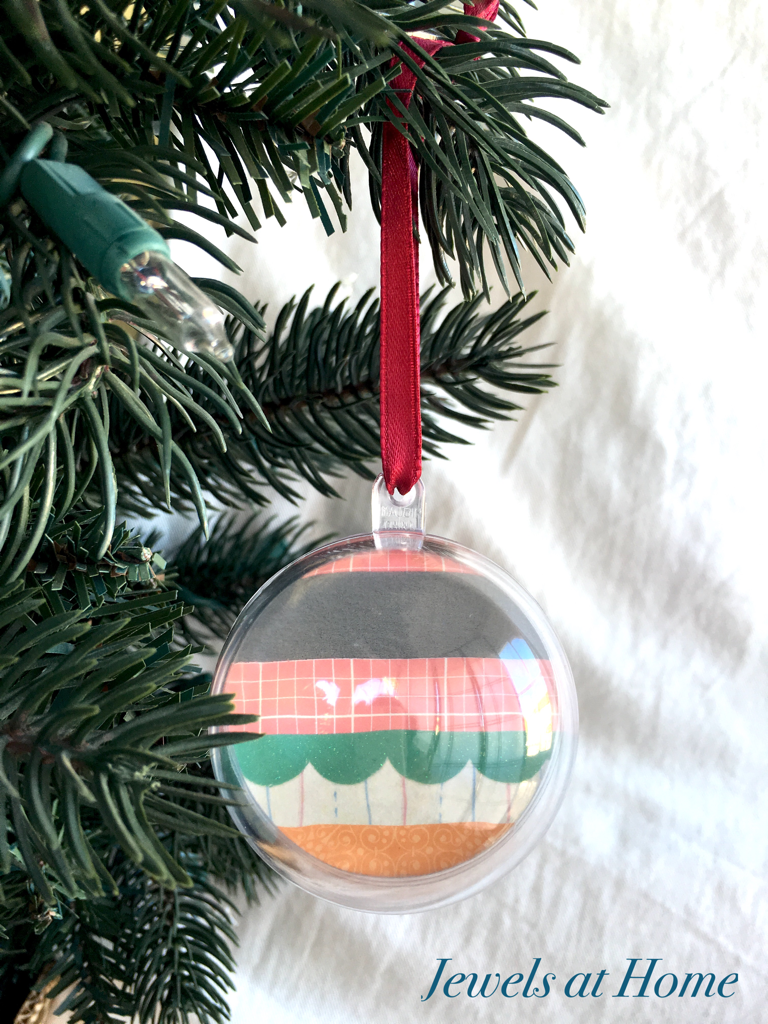
Go crazy with the paper (I did!) and have fun!!
“Jewels”
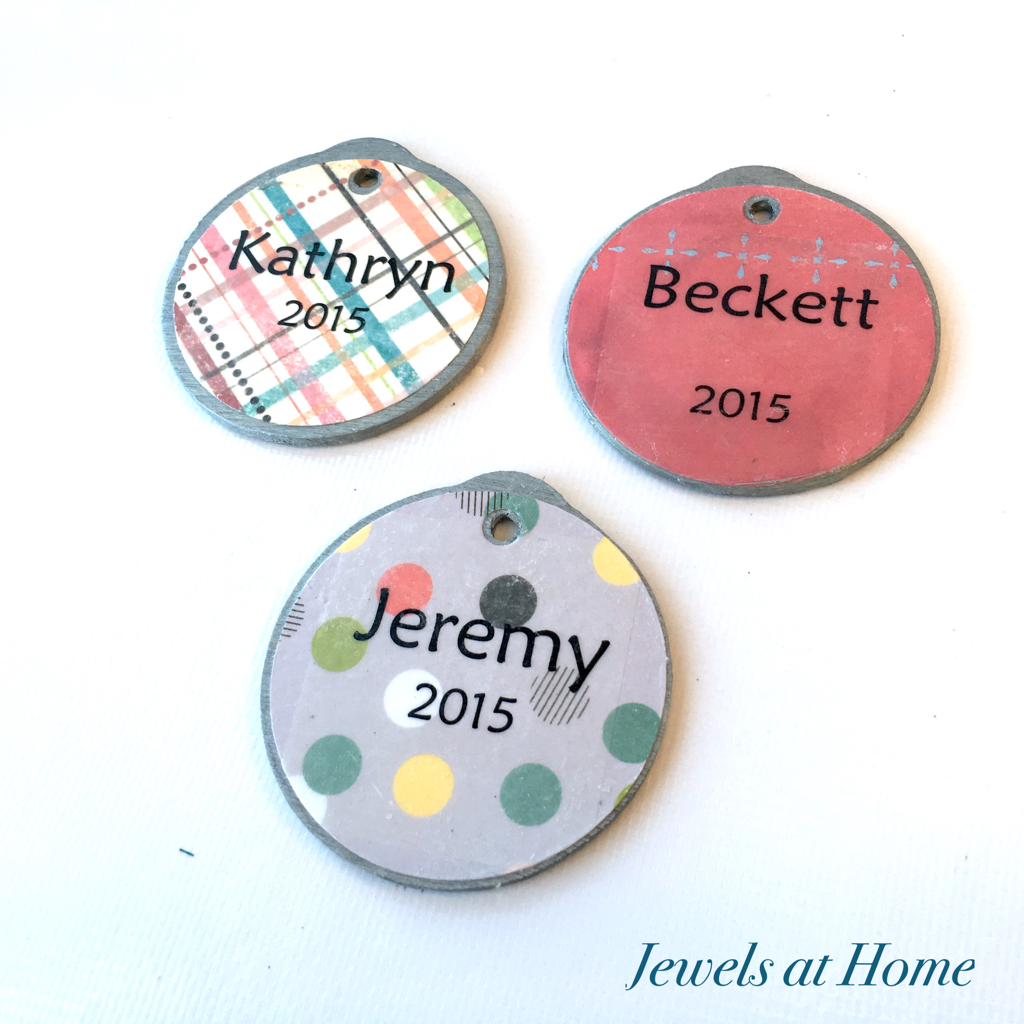
Every year, I make personalized Christmas ornaments for our family and friends. This is usually a simple project with store-bought ornaments. This year, I’m doing a little DIY, because I didn’t find anything quite right for our retro mid-century Christmas.
I’m making some clear globe ornaments to give to our local friends. For those that live further away, I wanted something easy to mail, so I was excited to find this inspiration for ornaments covered in scrapbook paper. Besides being pretty, these ornaments are lightweight, flat, and sturdy, so they’re perfect for sending to friends!

Here’s how to do this cute project:
 To finish off, I added ribbons for hanging.
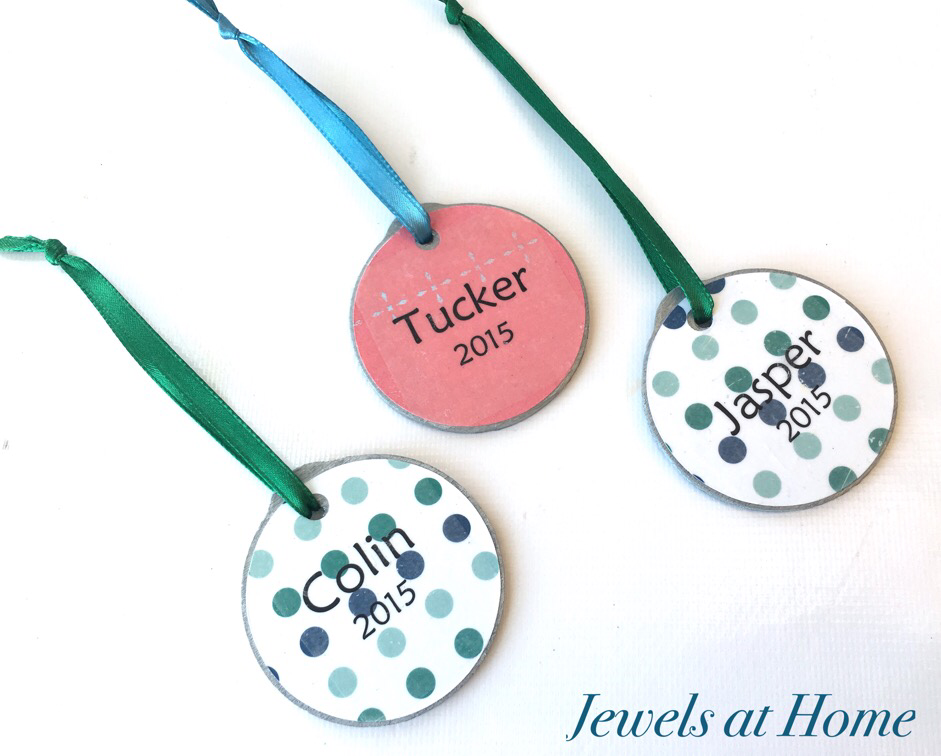


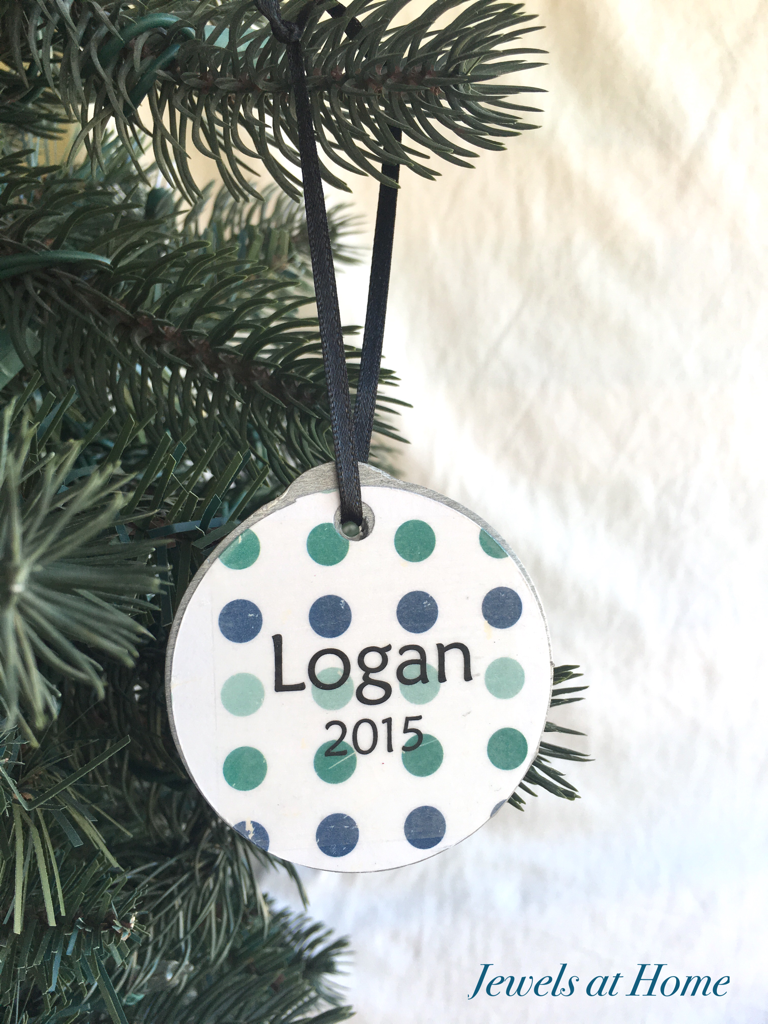
What fun to be able to send a bit of holiday cheer!
“Jewels”
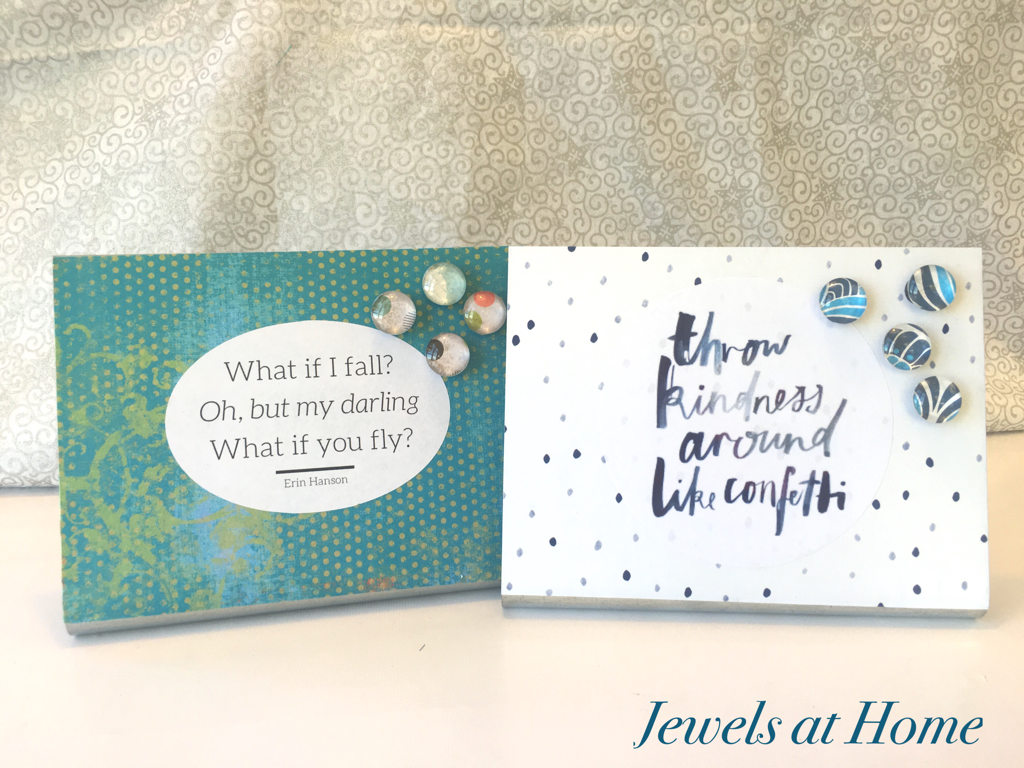
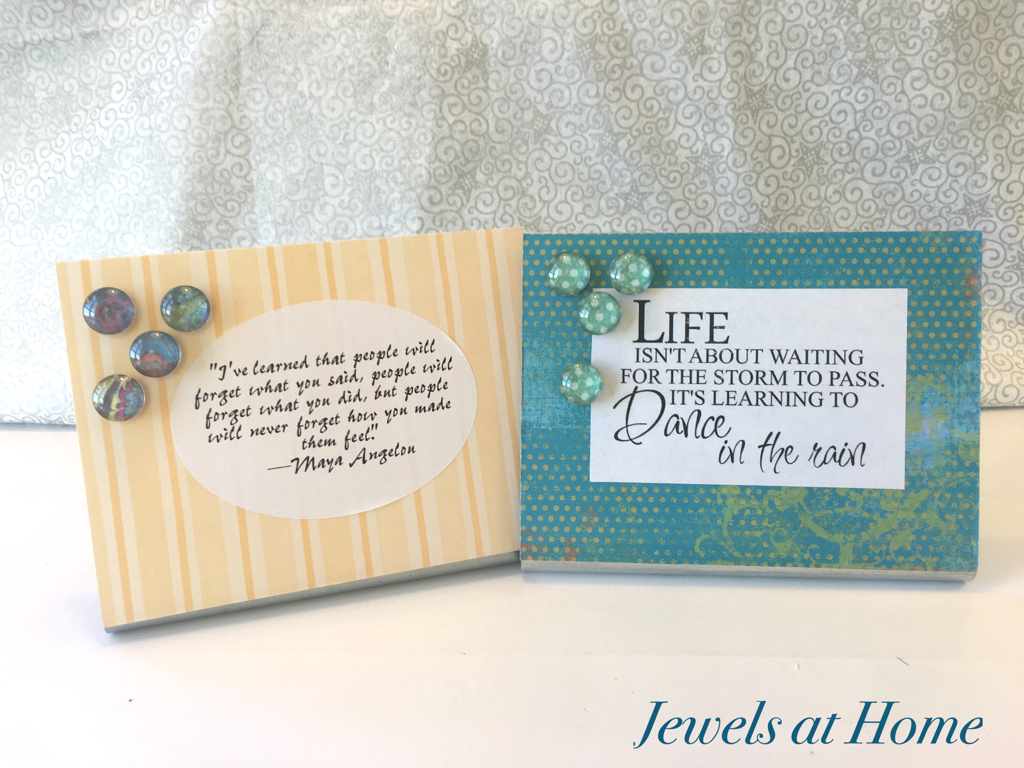
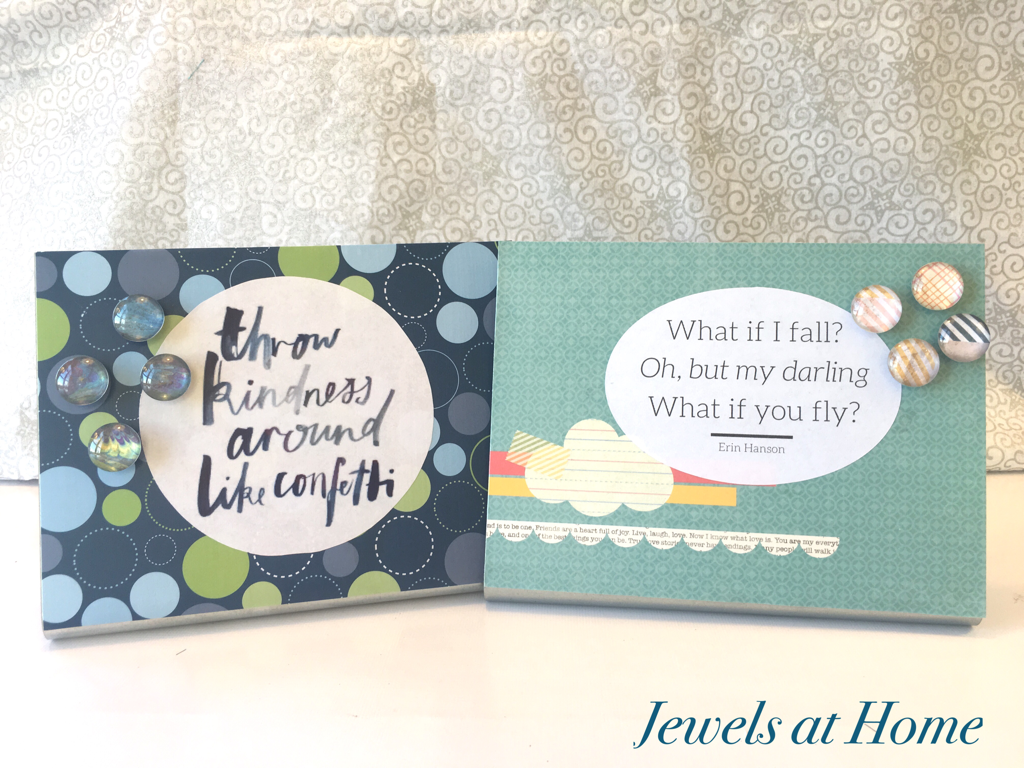
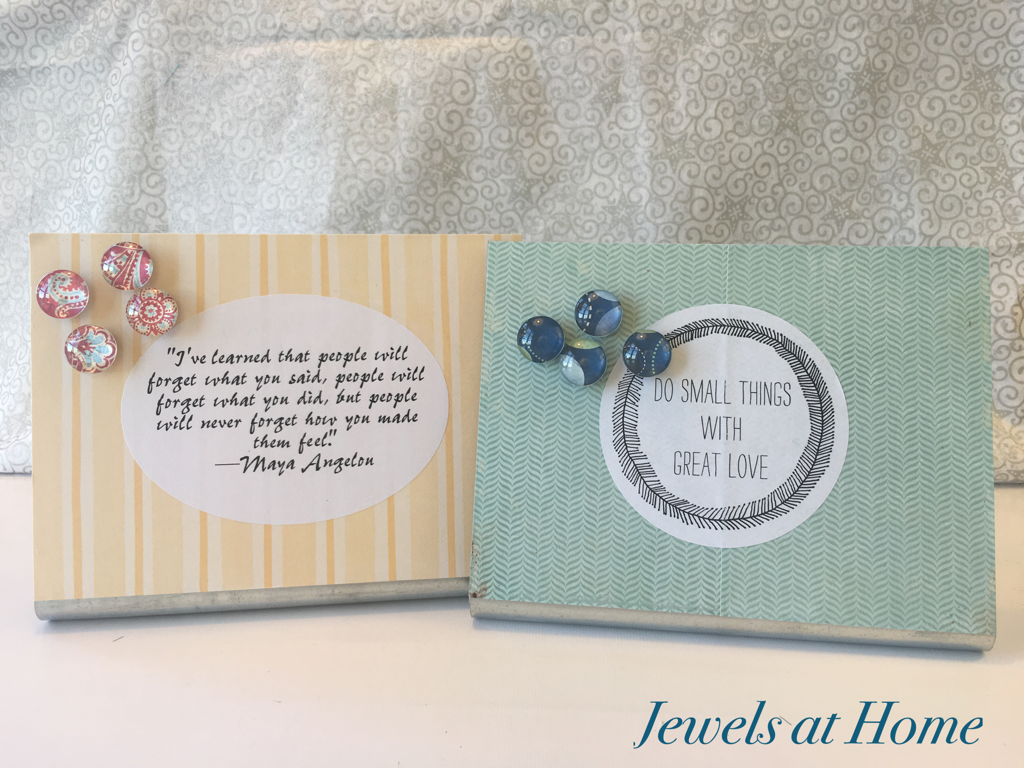
This year’s holiday gifts for our teachers and friends are these desktop magnet boards with coordinating glass cabochon magnets. I love seeing all the colors and patterns come together with the inspirational quotes. You can find the supply list and instructions in the first post. There are so many ways to combine the papers and quotes that I wanted to show you some more in this post!
Hope you are settling into a lovely holiday season!


“Jewels”
