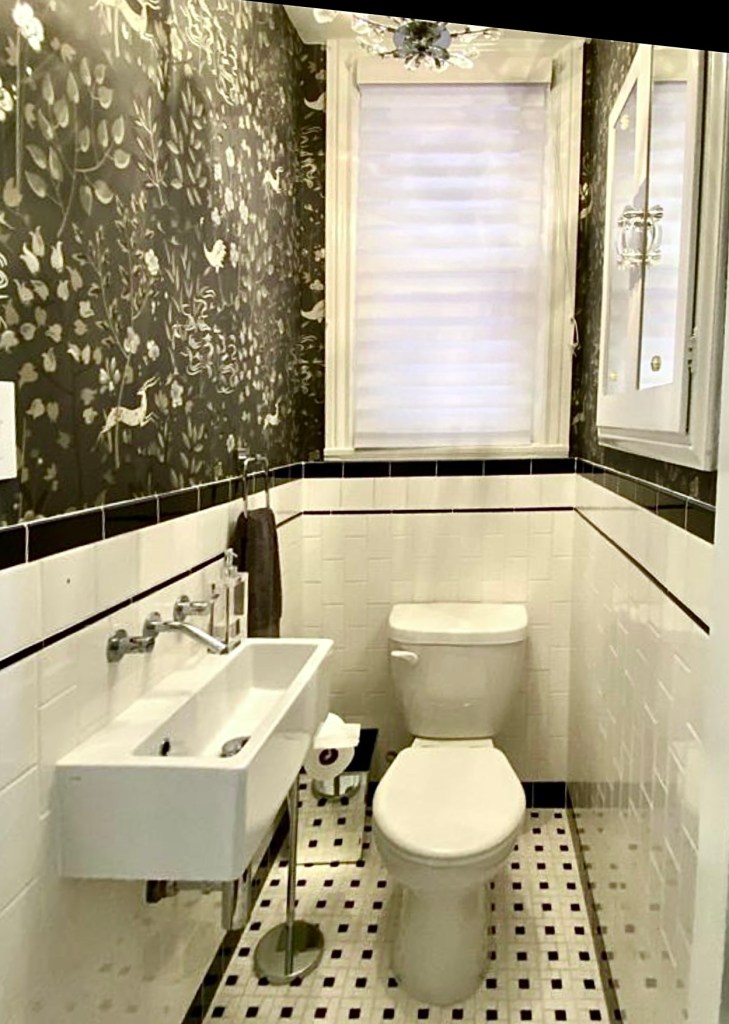
We’re waiting on permits to do a renovation adding a small guest bedroom and bathroom to our home. I’m getting excited and working on the design plans. I already shared the plan for the classic blue and white bathroom! Next up, here’s the design for the guest room. It’s going to be compact and on our lower level, so I wanted to keep the look airy and light. Of course, there’s plenty of my favorite blue and white, but I’m also really into the color green right now, so it’s fun to introduce that as well!
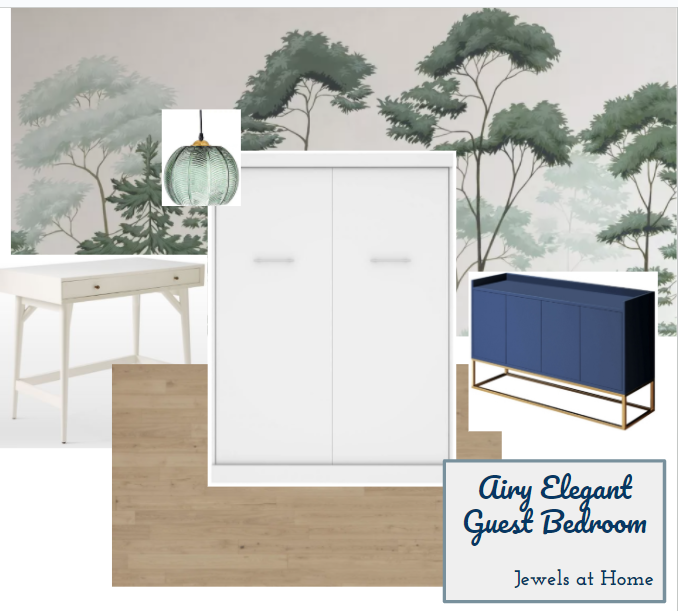
- Bed: Bestar full murphy bed
- Wall mural: Scandinavian Woodland from Photowall
- Flooring: Mannington White Oak flooring
- Desk: West Elm Mid-Century Mini Desk (already own this!)
- Pendant light: Modern green ribbed glass pendant
- Console: Hernest sideboard (previously gifted)
I think the look will coordinate well with the bathroom plan!

Some links are affiliate links. Let me know what you think, and keep your fingers crossed for our permits to be approved soon!
Julie AKA “Jewels”