“I Love You” Collage

Here’s a fun DIY art project that you can customize so many ways. I added names to ours.

And for my sister-in-law’s wedding, I put the bride and groom and their wedding date:

You can get creative and use not just letters but pictures of objects or patterns. Can you spot the keys I used for the letter “I” or the clock for the letter “o”? Depending on the space, I switched up the wording. Variations include:

  • I love you
  • Love you
  • Love
  • I love u
  • etc.

What other ways would you customize this?

“Jewels”

Kids’ Upcycled Easter Garland

We had a great time celebrating Easter with my sister’s family last year. I had wanted to make a garland with the kids, and a stack of drawings was the perfect starting point! Why leave all those creations hidden in a pile when we could hang them up to enjoy?

Kids' Upcycled Easter Garland | Jewels at Home

I made two templates out of cardboard: an egg and a bunny face. With older kids, you could add more shapes, but our three- and four- year olds barely managed with the egg, so this was perfect for us.

J and his cousins chose drawings and created some new ones. We traced the shapes and then cut them out. I made two small vertical slits at the top of each egg or bunny, and we threaded some ribbon through.

It was great to see these preschoolers practicing their fine motor skills and helping each other to put together our Easter decorations.

Kids' Upcycled Easter Garland | Jewels at Home  Kids' Upcycled Easter Garland | Jewels at Home

Hoppy Easter!

“Jewels”

Ideas for Handmade Romantic Gifts

So, it was just Valentine’s Day and we’re going to Steve’s sister’s wedding in a few weeks, so I’ve been busy searching for the perfect romantic gifts with a handmade touch.

Here are my favorite ideas. I’ve tried some of them and can’t wait to try the rest!

1. Printed pillowcases

pillowcases

I love this and all the other whimsical designs from ZCreate on Etsy, and how perfect that this business is run by a couple!
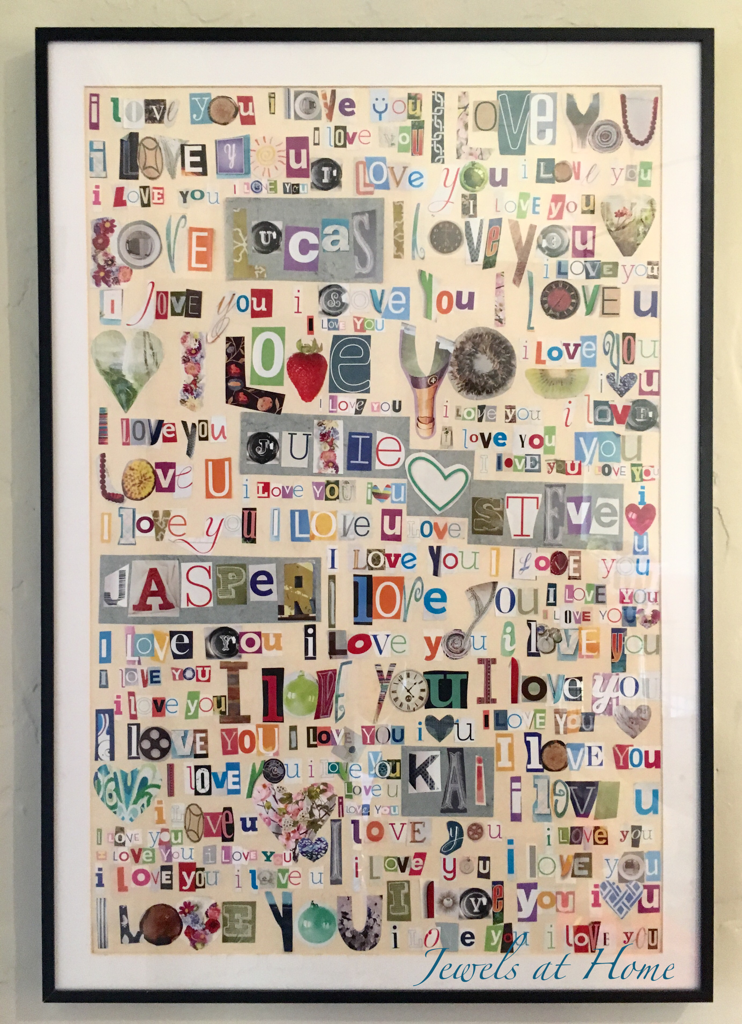
2. “I love you” collage

img_0211

I made this collage for our family a few years ago. It took a lot of time and work, but it’s not technically difficult, and it’s almost free! You could customize this with a wedding date or other details.
3. A year of dates
This is what I actually ended up giving Steve for Valentine’s. One activity for each month, some at home and some out on the town, including some local adventures I have been waiting to try!

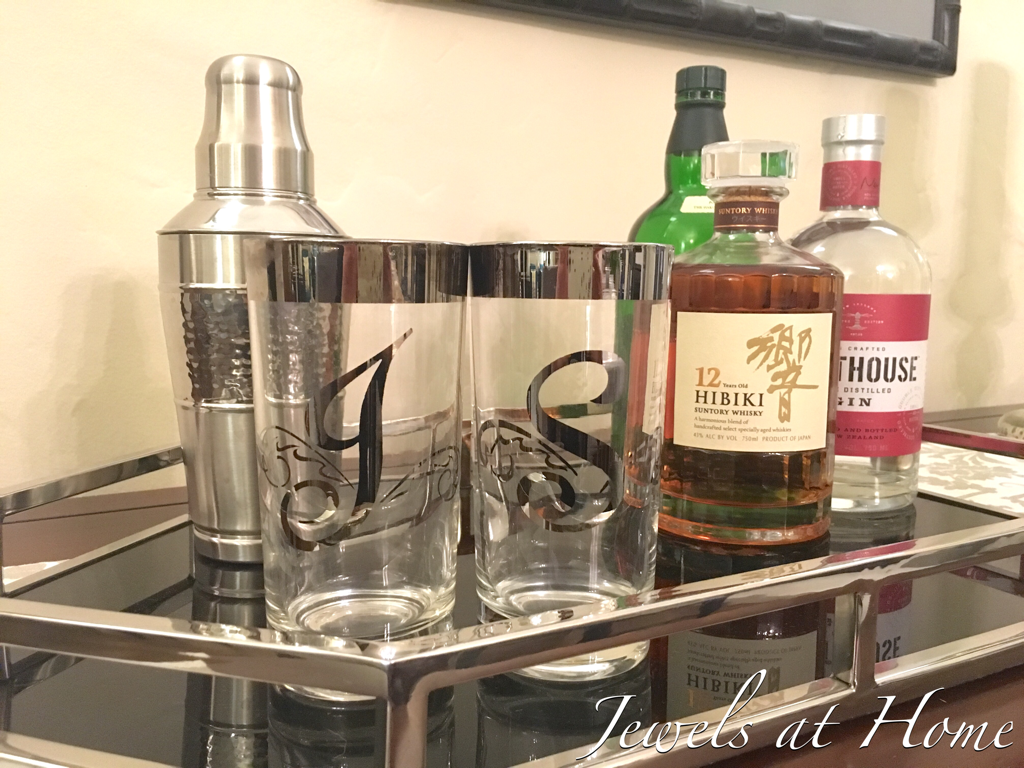
4. Personalized wine or bar glasses


I love these vintage monogrammed glasses I found for our Mad Men party a few years ago. You could also make your own with Glass Etching Cream.

5. Personalized wine labels

winelabels

What a fun way to personalize a gift of wine, with these milestone labels available from Label the Occasion and other sellers on Etsy. Or design your own and print on blank labels.

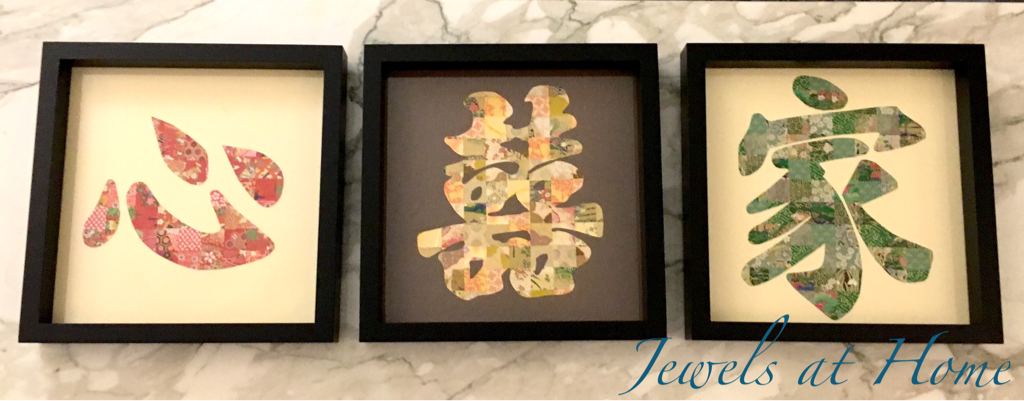
7. Message written with paper mosaic


I used Chinese characters (love, double happiness, and family), but you could do this with an English phrase, too. I printed out the template in reverse, glued one inch squares onto the back side of the paper, then cut out the template and glued it on a background.

8. String art heart

string art heart

You can buy this from Etsy or make your own with some wood, nails, and red embroidery floss. I’ve been wanting to try this for a while!

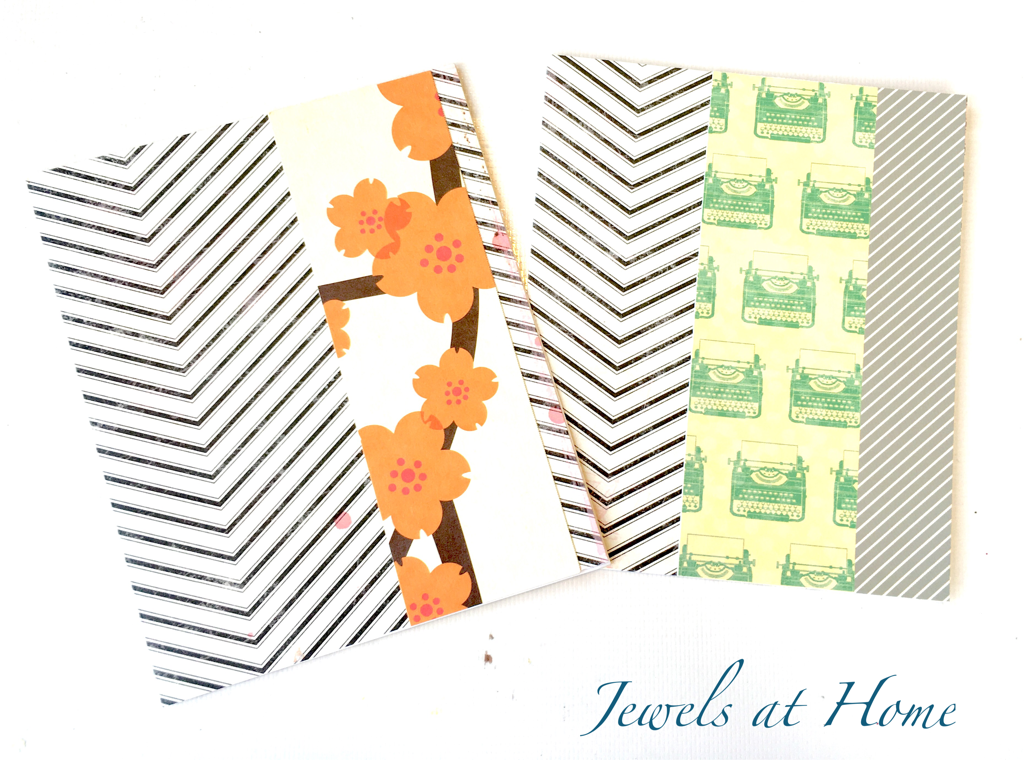
9. Personalized luggage tags

IMG_6234

I made these luggage tags and other art projects out of wedding invitations. I found the self-laminating tags here.

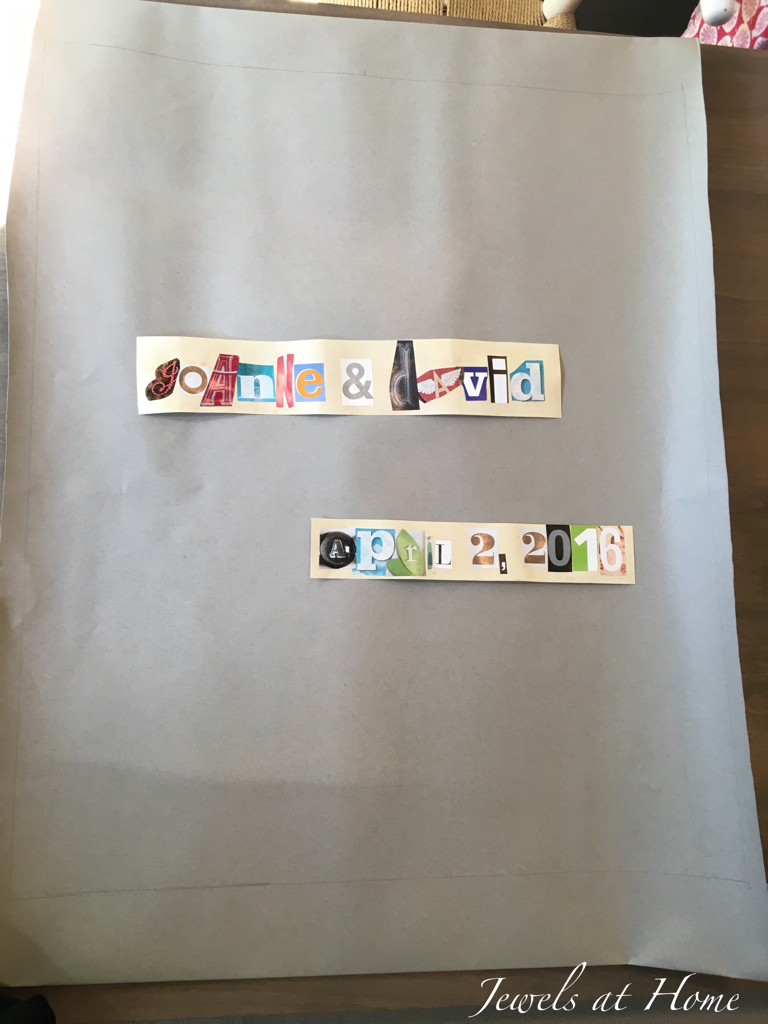
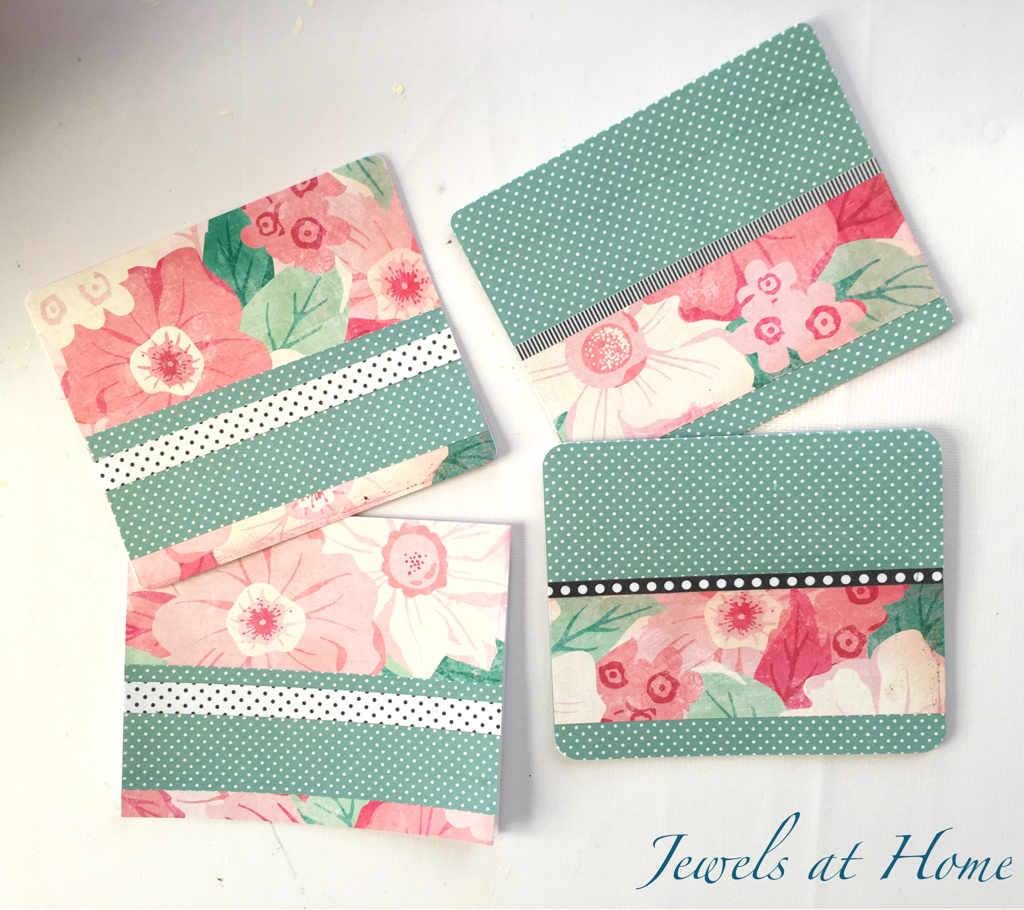
10. Framed wedding invitation art

IMG_6194
You could also do this with a birth announcement. It’s  special way to preserve your friends’ favorite images.


Hope you’re in the mood to create something special for the ones you love!

“Jewels”

Playing with Paper: Custom Greeting Cards

Here’s a short post where the pictures speak for themselves. I love playing around with pretty papers, and I put these together recently as a gift for a friend.

I used the same basic idea I shared in this post on quick DIY cards, but I varied the papers and added some fun washi tape as well. The other addition to these cards was using a corner rounder to add some interest. Still a straightforward project, and I love how each card turned out so unique!

Playing with Paper: Custom Greeting Cards | Jewels at Home

Playing with Paper: Custom Greeting Cards | Jewels at Home

Playing with Paper: Custom Greeting Cards | Jewels at Home

“Jewels”

Paper and Washi Tape Globe Ornaments

My passion for pretty papers goes way back, but I confess that when washi tape first became popular, I didn’t immediately fall in love – it’s not too late, though! I had so much fun combining patterns and colors to make these pretty ornaments. These lovely decorations are quick to make, and I will be bringing this project to work for our holiday party. I also made a personalized version of these ornaments with kids’ names inside.

Paper and Washi Tape Globe Ornaments | Jewels at Home
To make these ornaments, I used

The process is very simple:

  • I then cut out two circles in matching paper and glued then back-to-back
  • I then added washi tape or other paper scraps to decorate the ornament
  • These circles fit perfectly into the ornaments, which snap together
  • Add a ribbon for hanging and you’re done!

Paper and Washi Tape Globe Ornaments | Jewels at Home
Paper and Washi Tape Globe Ornaments | Jewels at Home  Paper and Washi Tape Globe Ornaments | Jewels at Home
Paper and Washi Tape Globe Ornaments | Jewels at Home

Go crazy with the paper (I did!) and have fun!!

“Jewels”

Scrapbook Paper Christmas Ornaments

Every year, I make personalized Christmas ornaments for our family and friends. This is usually a simple project with store-bought ornaments. This year, I’m doing a little DIY, because I didn’t find anything quite right for our retro mid-century Christmas.

I’m making some clear globe ornaments to give to our local friends. For those that live further away, I wanted something easy to mail, so I was excited to find this inspiration for ornaments covered in scrapbook paper. Besides being pretty, these ornaments are lightweight, flat, and sturdy, so they’re perfect for sending to friends!

Scrapbook Paper Christmas Ornaments | Jewels at Home

Here’s how to do this cute project:

  • Paint the edges of the Unfinished Wood Ornaments with silver craft paint. The center will be covered in paper.
  • Print out names and the year on Clear Shipping Labels and then stick them in craft paper and cut them out. I cut matching circles for the back.
  • Use regular hole punch to cut the paper around the hole in the ornament.
  • Use Yes All-Purpose Stik Flat Glueto glue the paper to the ornaments
  • I used some very fine sandpaper to clean up the ornaments after the glue dried.

Scrapbook Paper Christmas Ornaments | Jewels at Home
Scrapbook Paper Christmas Ornaments | Jewels at Home To finish off, I added ribbons for hanging.

Scrapbook Paper Christmas Ornaments | Jewels at Home
Scrapbook Paper Christmas Ornaments | Jewels at Home  Scrapbook Paper Christmas Ornaments | Jewels at Home
Scrapbook Paper Christmas Ornaments | Jewels at Home

What fun to be able to send a bit of holiday cheer!

“Jewels”

Desktop Magnet Board Frames Part Two

This year’s holiday gifts for our teachers and friends are these desktop magnet boards with coordinating glass cabochon magnets. I love seeing all the colors and patterns come together with the inspirational quotes. You can find the supply list and instructions in the first post. There are so many ways to combine the papers and quotes that I wanted to show you some more in this post!

Hope you are settling into a lovely holiday season!

Desktop magnet boards with coordinating glass cabochon magnets | Jewels at Home
Desktop magnet boards with coordinating glass cabochon magnets | Jewels at Home  Desktop magnet boards with coordinating glass cabochon magnets | Jewels at Home
Desktop magnet boards with coordinating glass cabochon magnets | Jewels at Home

“Jewels”

Personalized Globe Christmas Ornaments 2015

Every year, I create personalized ornaments for our family and friends. Usually, I keep it simple with some store-bought ornaments that I personalize with markets or fabric paint. Tip: the felt ornaments are great for mailing!

This year, I wanted to make globe ornaments that would fit with our retro mid-century theme and colors of red, pink, and turquoise.

Personalized Globe Christmas Ornaments | Jewels at Home
To make these ornaments, I used

The process is very simple:

  • I started by printing labels with the kids’ names and the year on them. I was able to fit two names on each label and then cut the labels into 2″x 2″ squares.
  • I then cut out and stuck each label onto scrapbook paper and punched out a circle around it. I punched a second blank circle in matching paper and glued them two pieces together.
  • These circles fit perfectly into the ornaments!
  • Add a ribbon for hanging and you’re done!

Personalized Globe Christmas Ornaments | Jewels at Home
Personalized Globe Christmas Ornaments | Jewels at Home  Personalized Globe Christmas Ornaments | Jewels at Home

Personalized Globe Christmas Ornaments | Jewels at Home
Personalized Globe Christmas Ornaments | Jewels at Home Since these ornaments would have been hard to mail, I also made some similar ones that are flat, for our friends who live out-of-town.

Scrapbook Paper Christmas Ornaments | Jewels at Home
“Jewels”

Come Out On Top: Desktop Magnet Boards with Glass Magnets

After a few years of pretty much running out of holiday spirit by the holidays, I have slowly learned to plan early with my holiday crafts. This year, I’ve started getting in the mood by putting together these projects so far:

Holiday preparations always include gifts for our teachers and my “work family.” I love creating something handmade to show our appreciation, and I try to make a few extra for hostess gifts throughout the year. A round-up of past holiday gifts/ hostess gifts is at the bottom of this post.

For this year’s gift, I knew that I wanted to do a project using scrapbook paper. I have a little (tiny, really) bit of an addiction to pretty papers, and I wanted a way to share them. After looking through lots of ideas on Pinterest, I decided to make these desktop magnet boards with coordinating glass cabochon magnets. My inspiration included similar boards from Papemelroti in the Philippines and Leanne from Organize and Decorate Everything.

These magnet boards can be used for notes or as picture frames, and they even make lovely decorations on their own. I added some favorite quotes as appreciation and inspiration for the hard-working teachers and friends in our lives.

Materials:

Instructions:

  • Cover the magnet board with scrapbook paper using a glue stick. Cynthia shared a helpful tip, which was using a plastic card (I used an expired gift card) to smooth the paper.
  • Add a quote or piece of art to the center
  • I’m not sure if I’d recommend this step… I brushed on a coat of clear polyurethane. I wanted to protect the paper, but the moisture made some of the edges peel. I managed to glue them back, but it was a bit of a pain. Maybe
  • Cut circles of paper and glue to back of cabochons.
  • Add magnet to back of cabochons using the E6000

Desktop Magnet Boards with Glass Magnets | Jewels at Home

This is a simple project, but I love that there are infinite ways to personalize it. There were so many variations on the boards that I will include some more in a second post!

Desktop Magnet Boards with Glass Magnets | Jewels at Home
Desktop Magnet Boards with Glass Magnets | Jewels at Home  

Desktop Magnet Boards with Glass Magnets | Jewels at Home  Desktop Magnet Boards with Glass Magnets | Jewels at Home
Desktop Magnet Boards with Glass Magnets | Jewels at Home

Looking for more ideas of great gifts to make? Check out these from years past:

Hope you are getting into the spirit of the holidays!

“Jewels”

Vintage Photo Garland

As you know, this year’s Christmas has a vintage theme, and I thought it would be great fun to share some old Christmas pictures with this simple and pretty photo garland.

To start, I collected old pictures, including some of from my childhood and from my parents before I was born! Once I got into the project, I added some more recent pictures of our kids. I edited all of the pictures using an iPhone app called Instants, which makes them look like vintage Polaroids.

I used ric rac ribbon from my mom’s stash to make the garland, so this is authentic vintage! I hung the photos from the ric rac using clothes pins decorated with scrapbook paper in this year’s colors of pink, turquoise, and red.

This was an easy project, and it’s simple enough that I’m going to leave it up, even though I won’t be decorating the rest of the house until after Thanksgiving.