You may know that doing the Avon 39 Walk for Breast Cancer is an annual tradition for me. The two-day walk gives lots of time for long talks with my friends. Last year, an old friend asked our group to think about what our “dream job” would be. I already have my dream job, but I took the opportunity to reflect on what an alternate or next career could be… something I love doing, but which is not so practical… the easy answer was that I’d love to refinish old furniture with fresh looks.
It makes me so happy when I can take a piece of furniture with great classic style but a little (or a lot of) wear and turn it into something beautiful and full of personality. I’ll list some of my favorite past projects at the bottom of this post.
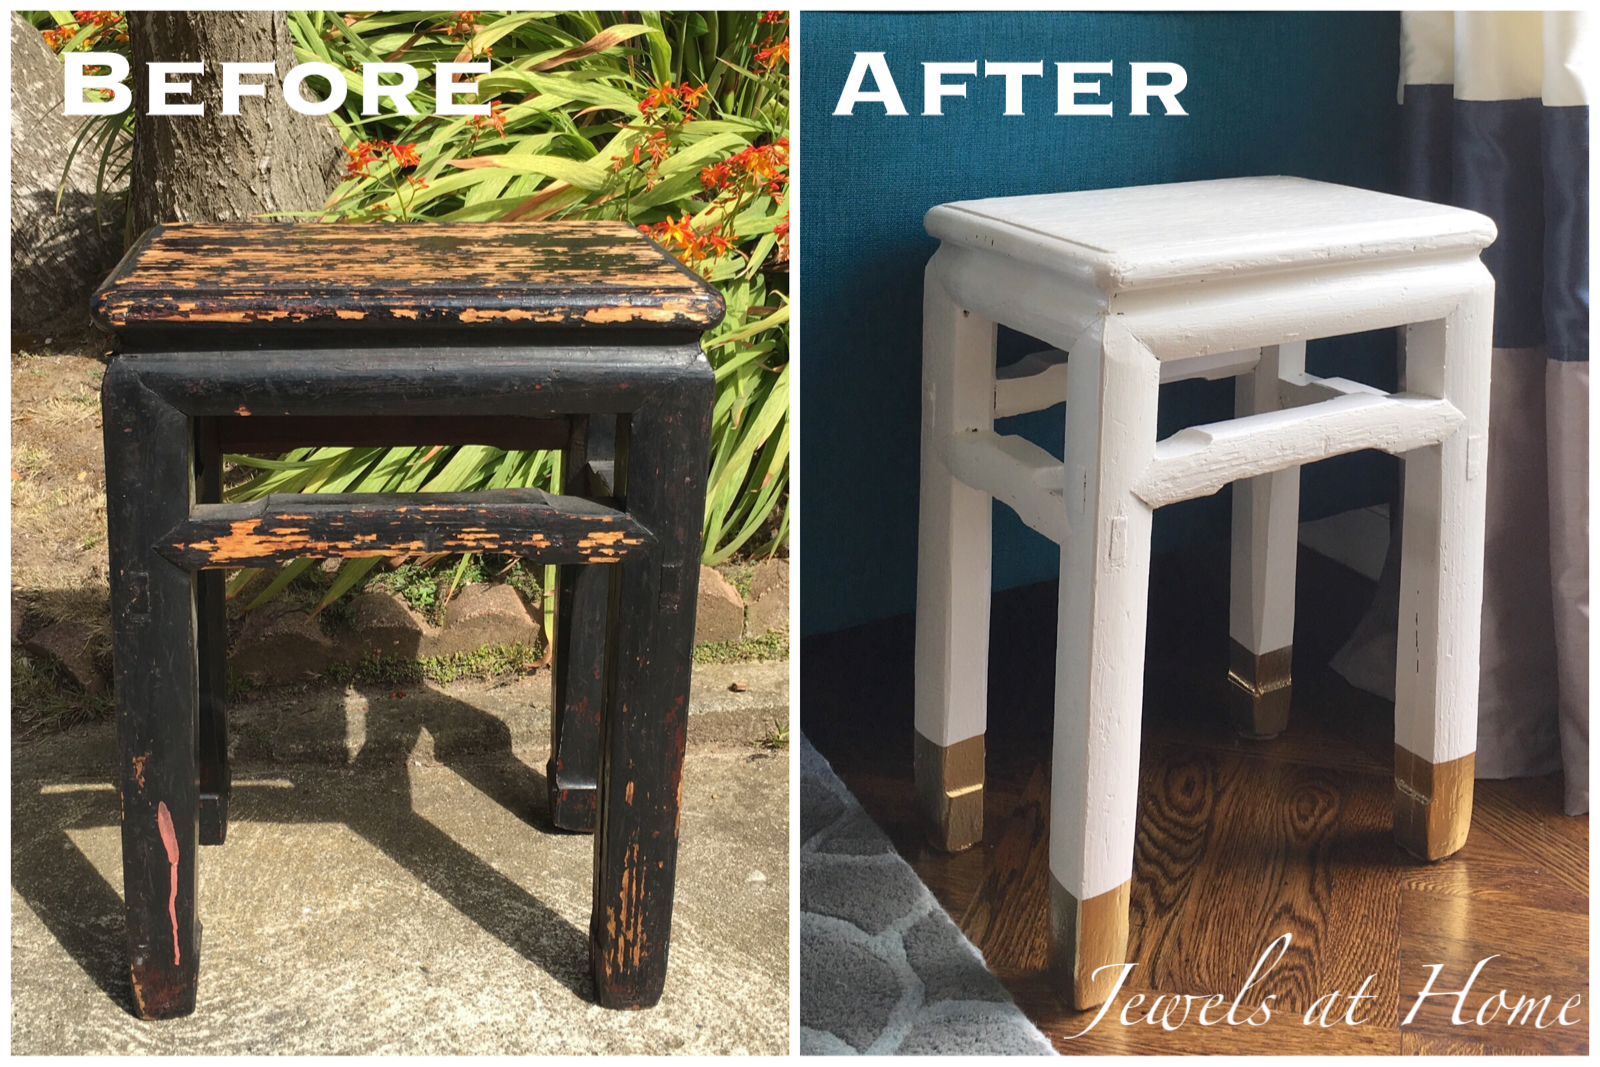
Now on to today’s post… It has been a while since I picked this little end table up off the side of the road. My oldest was with me and remarked, “There’s mom being mom” in the affectionate way you talk about a lovable, quirky relative.
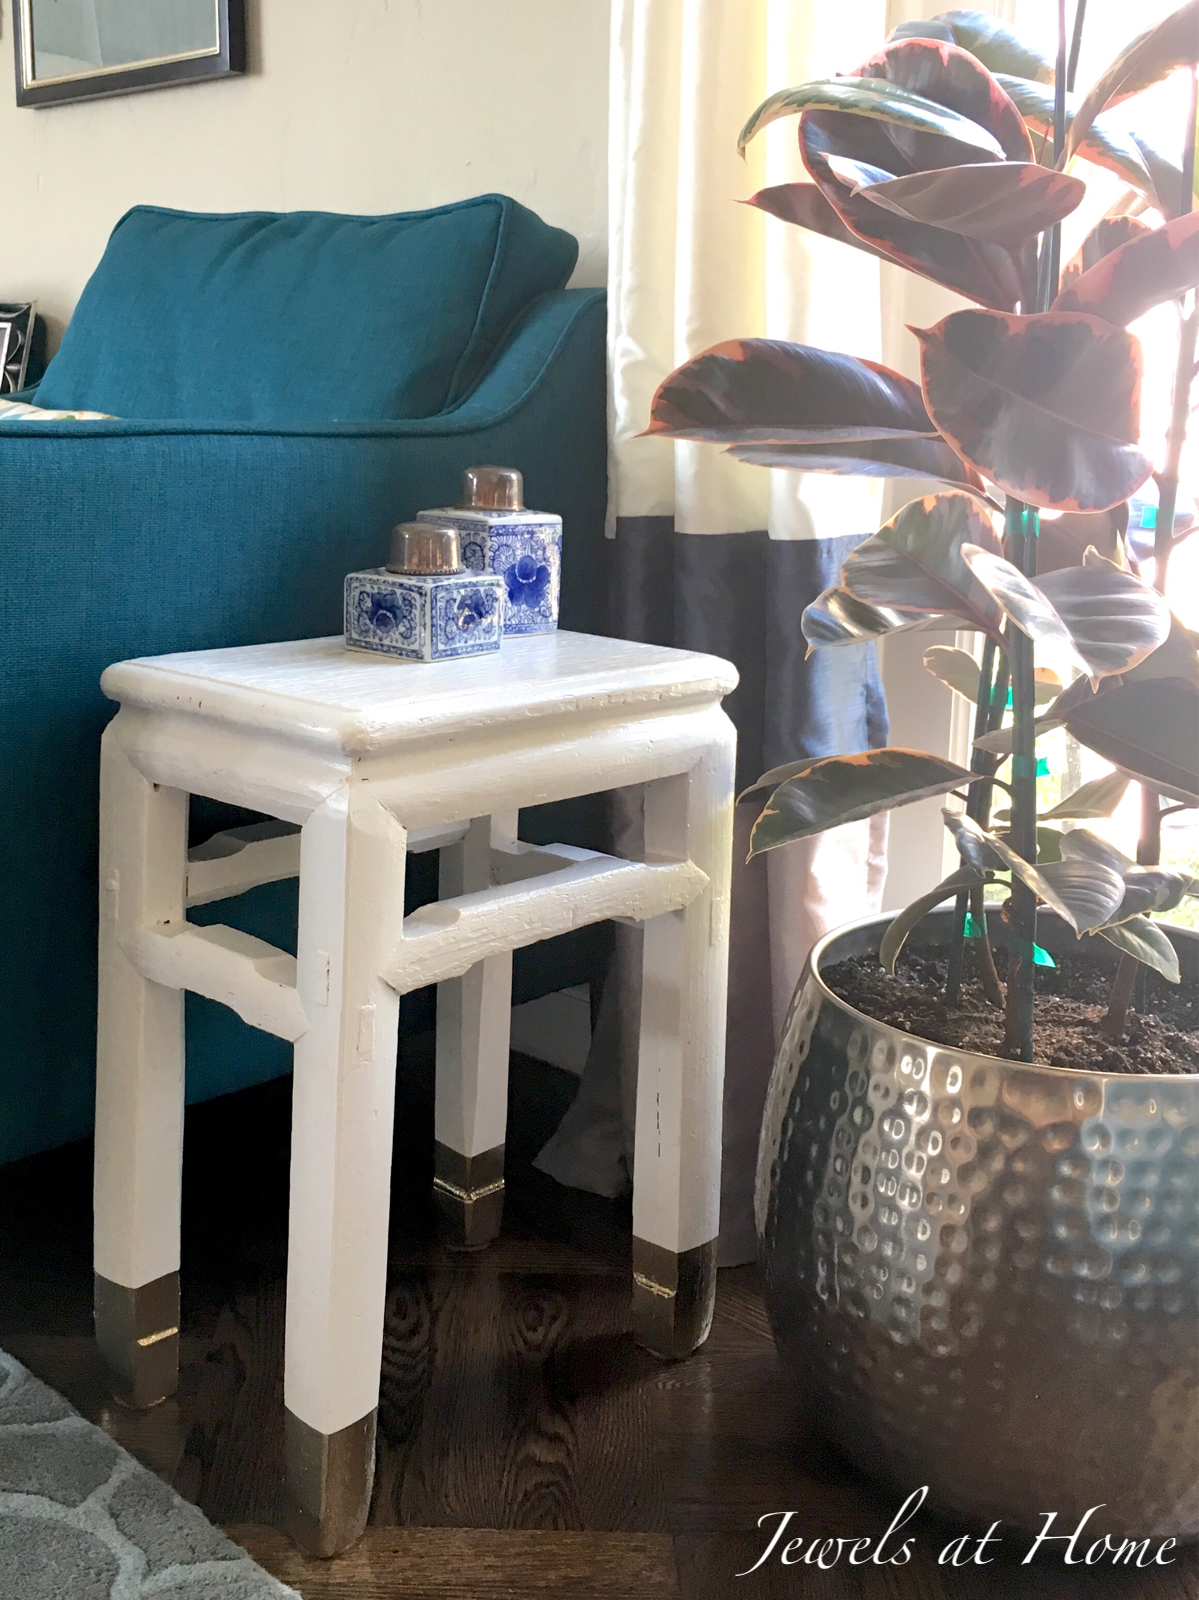
While I loved the Chinese/ Chinoiserie style of this little table, I was a bit intimidated by its poor condition. You can’t really appreciate in the picture how water-damaged, chipped, and uneven the wood was. Still, it was sturdy enough, and with my newfound love of gardening and greenery, I thought it would make a great plant stand.
I sanded the table aggressively, used wood glue on one of the legs that was cracked, and then painted it with three coats of white latex enamel (leftover from the interior trim of our house). I didn’t even try to fully even out and fix the surface, letting a lot of the dents and scratches show and add character.
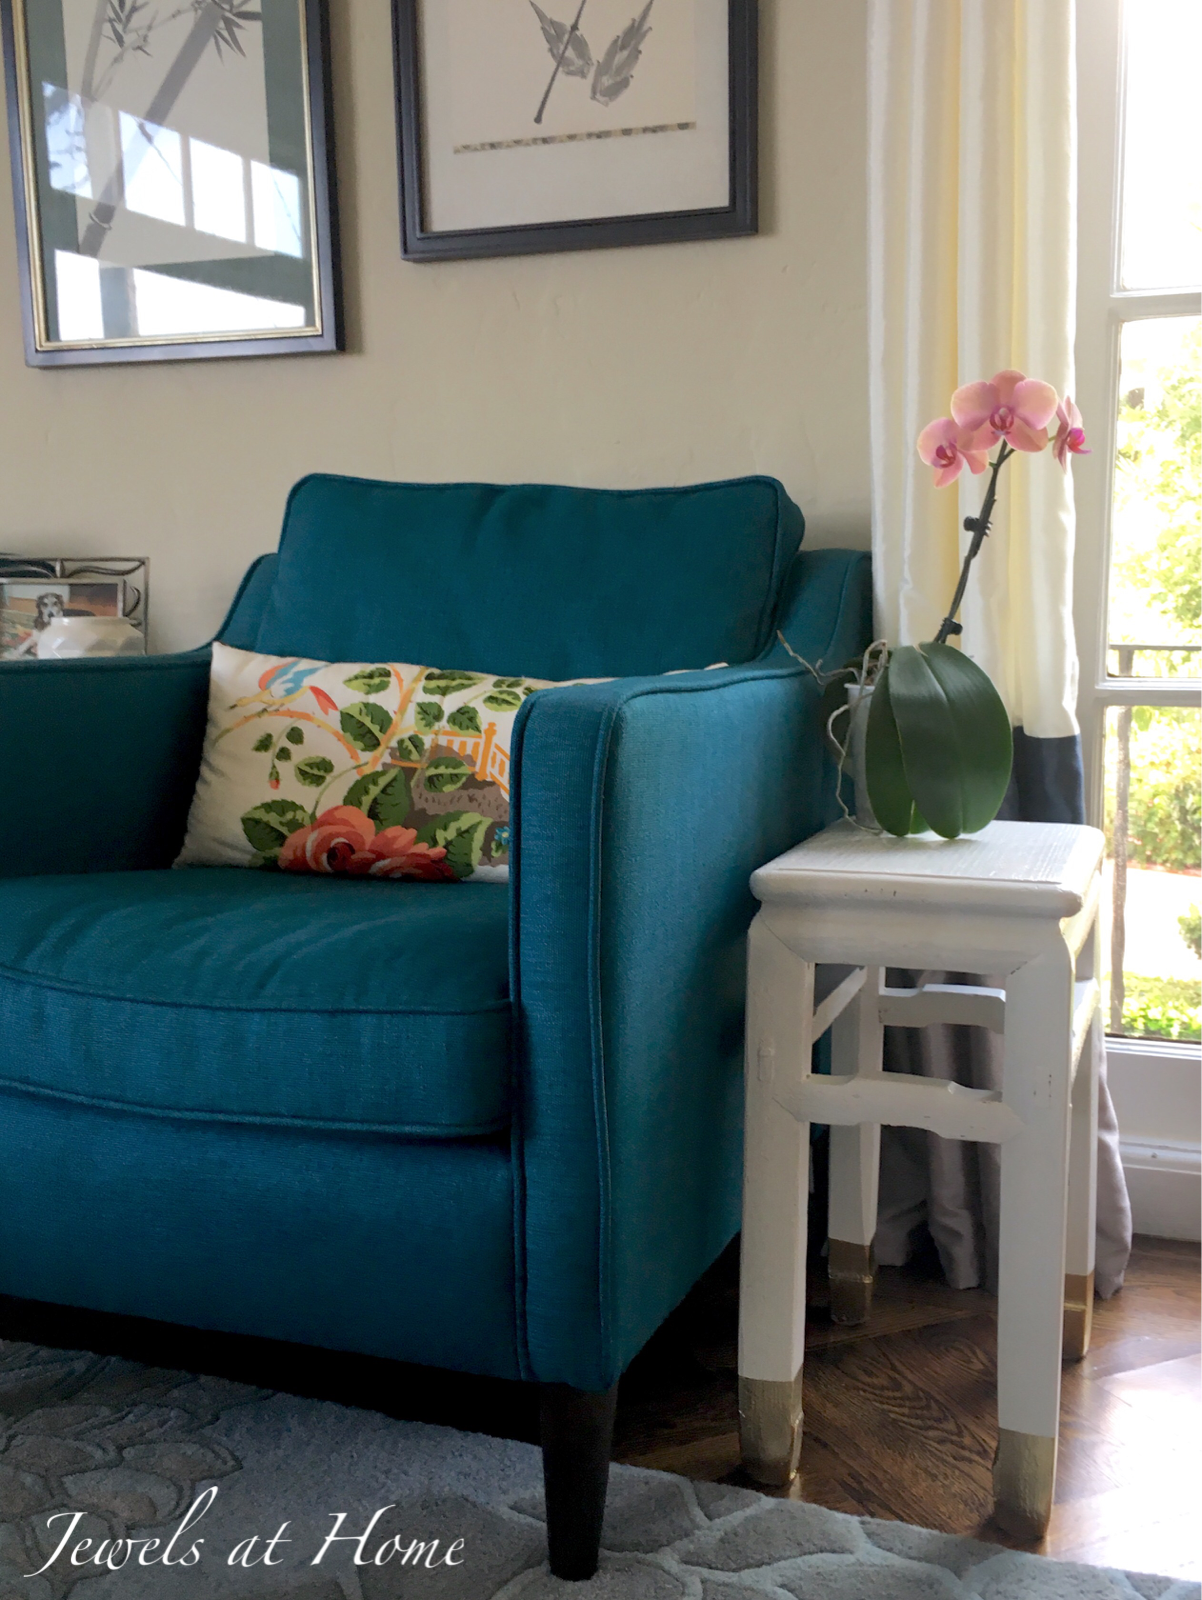
The white paint did a good job brightening up the table and made it look more finished, but it was kind of plain… time for a touch of gold spray paint to cap the legs, and I love the finished product!
Here is my new old table in our living room. I think I’ll probably move it up to my bedroom later, but I’m still experimenting with how to use this handsome accent piece!
If you like this project, check out some of past “fabulous furniture makeovers”:
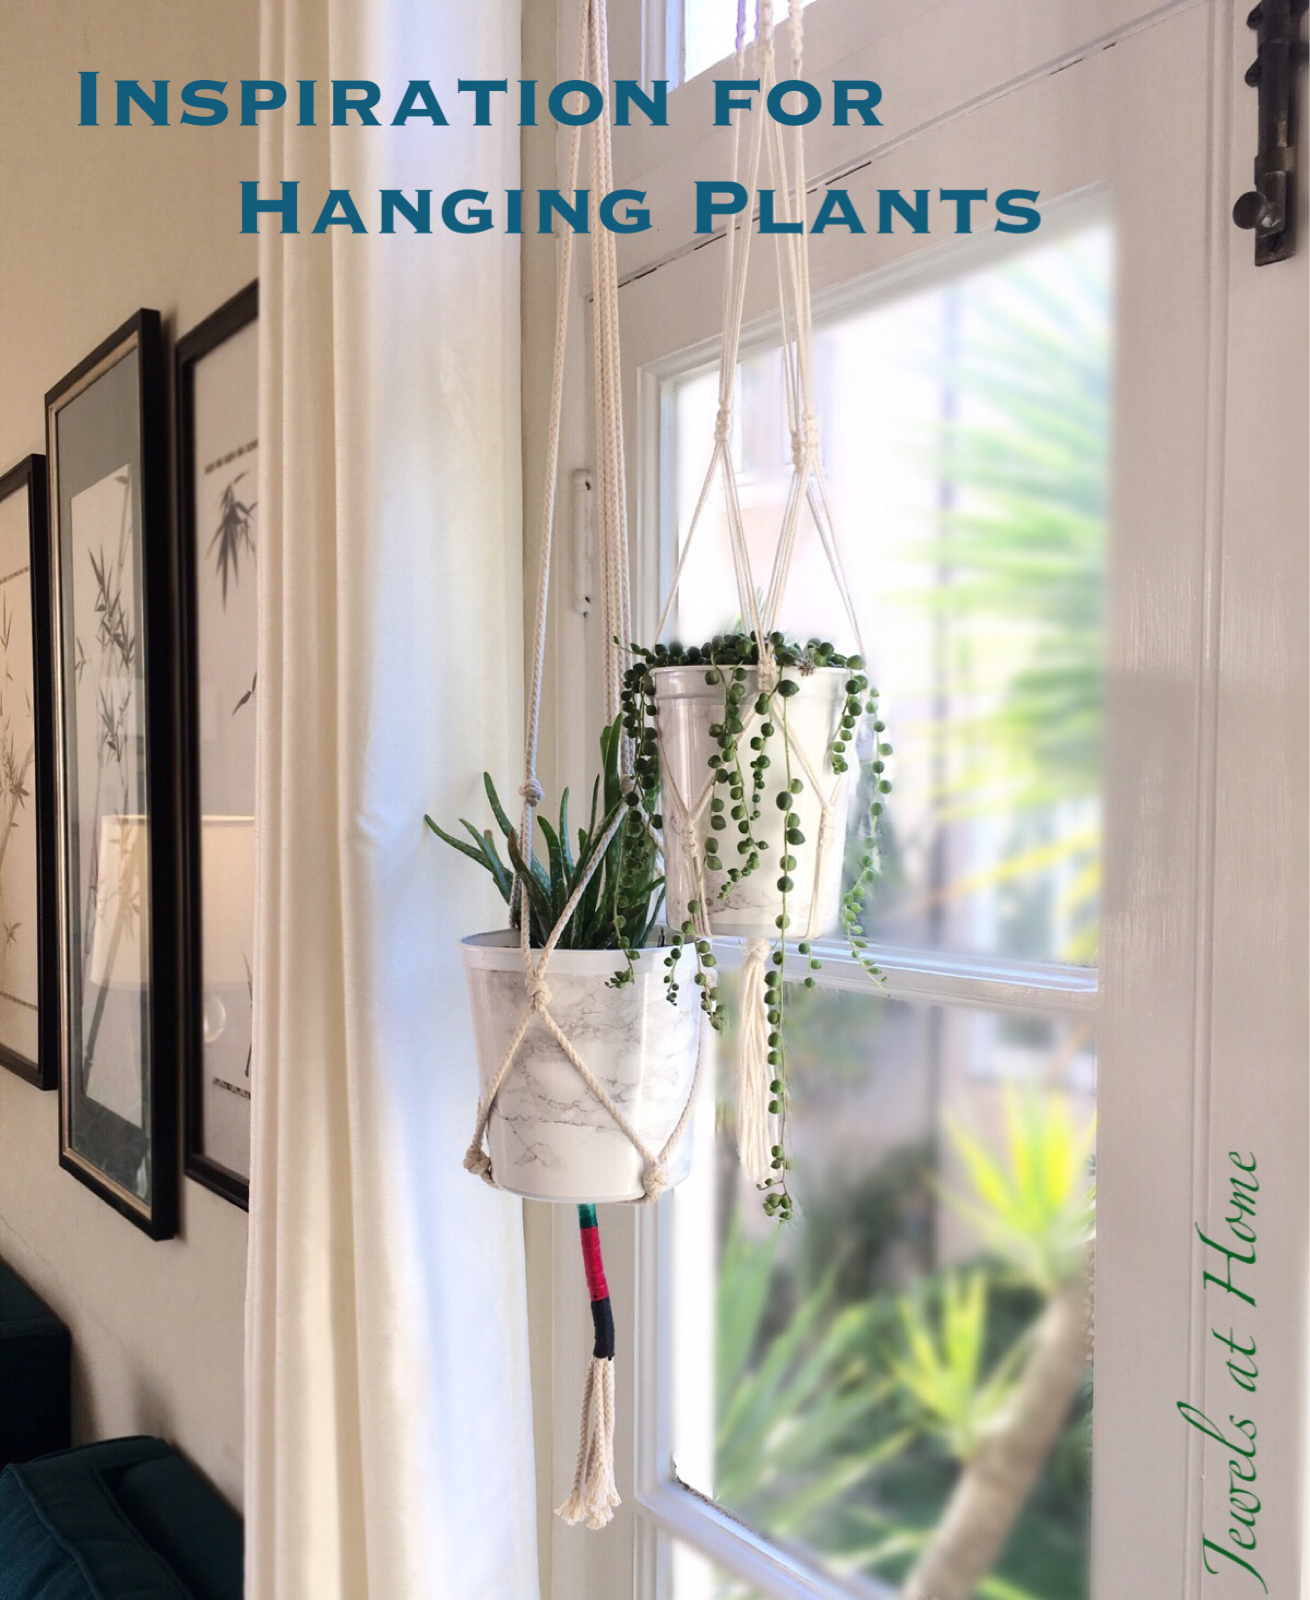
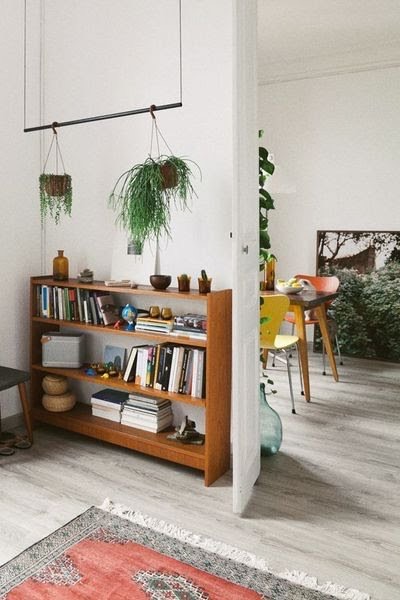
My good friend, Nicola, asked me to share more about how I’m installing my macrame plant hangers (see this post and this post for the details on the hangers).
There are lots of creative ideas for creating hanging plant displays. I’ve started with some easy methods, including hanging my plants from
Wooden beams
Curtain rods
Wall brackets
I’ll give you those details and also include some more ambitious ideas that I still fantasize about!
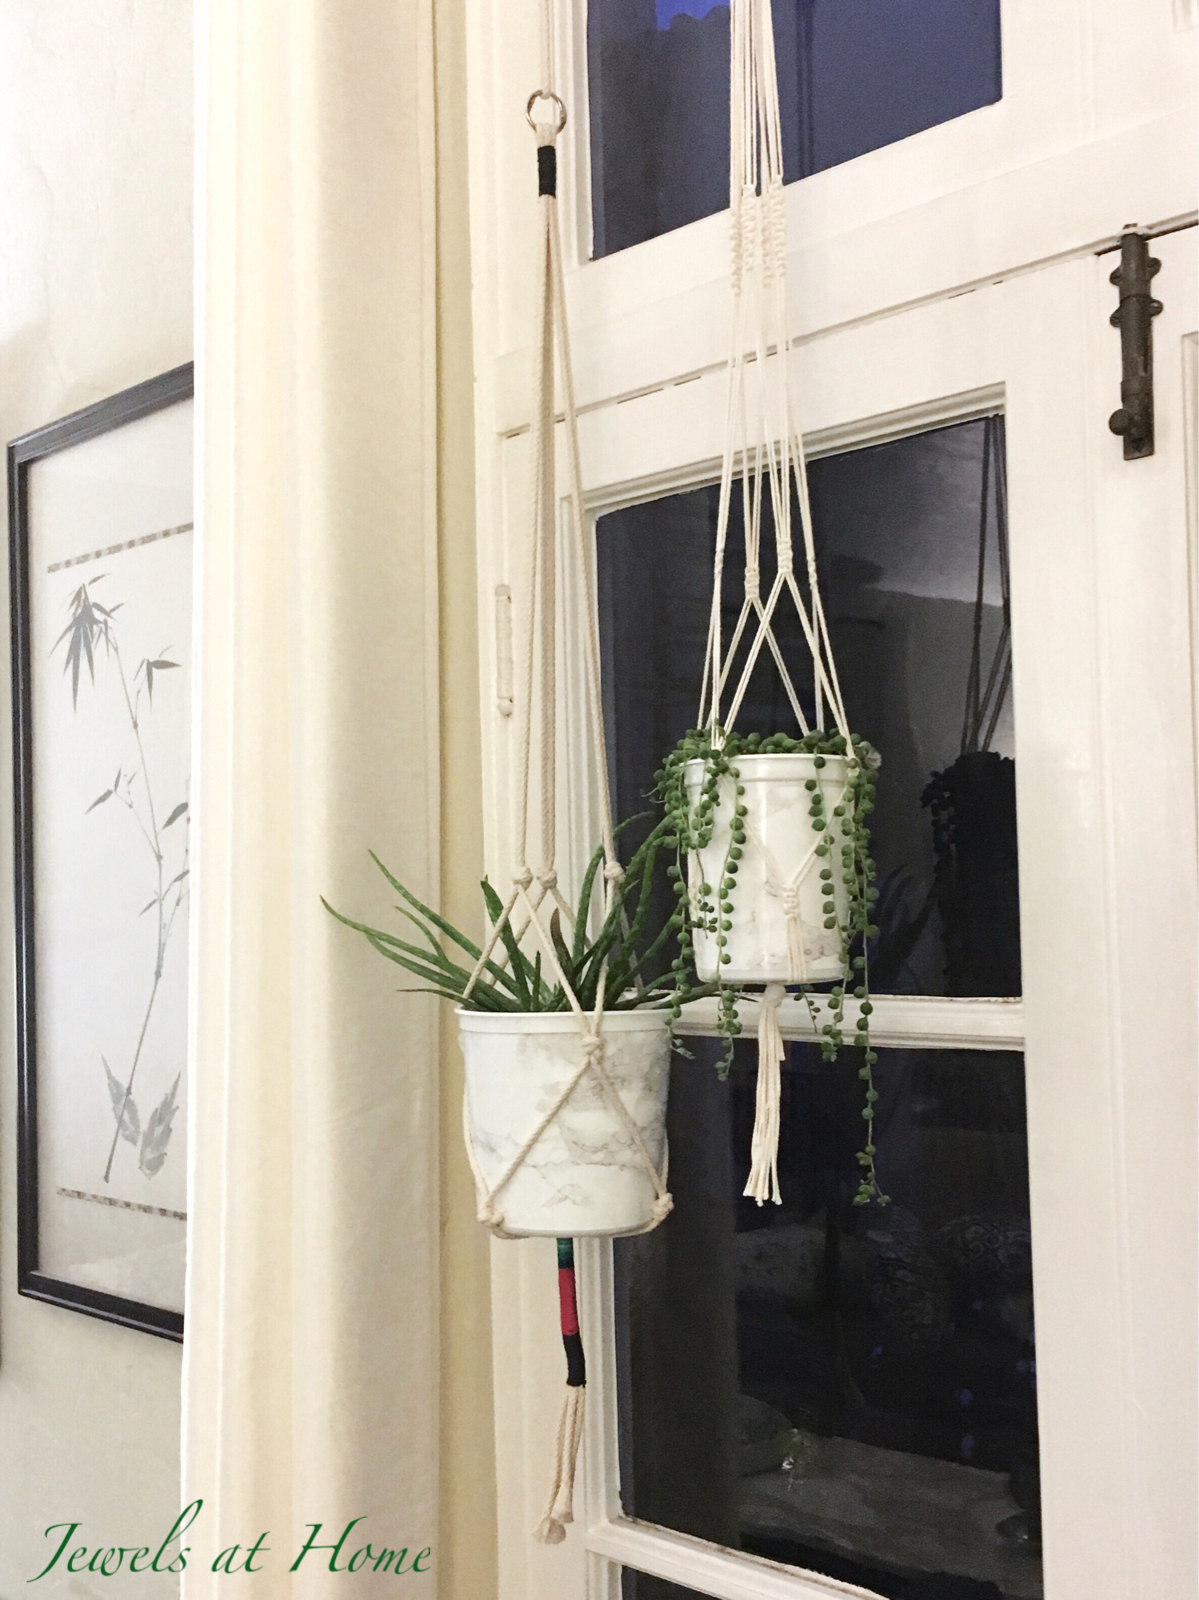
One general tip is that I chose lighter weight planters. Some of my plants are hanging in my made-over yogurt containers, and others are in glass jars or vases, some painted with metallic spray paint.
Wooden Beams
I lucked out to have these beams running in our family room, so I screwed in coat hooks for my plants. Obviously, not every house has wooden beams, but if you do, this is easy, and to display more, you can screw in two hooks and run a rod between them.
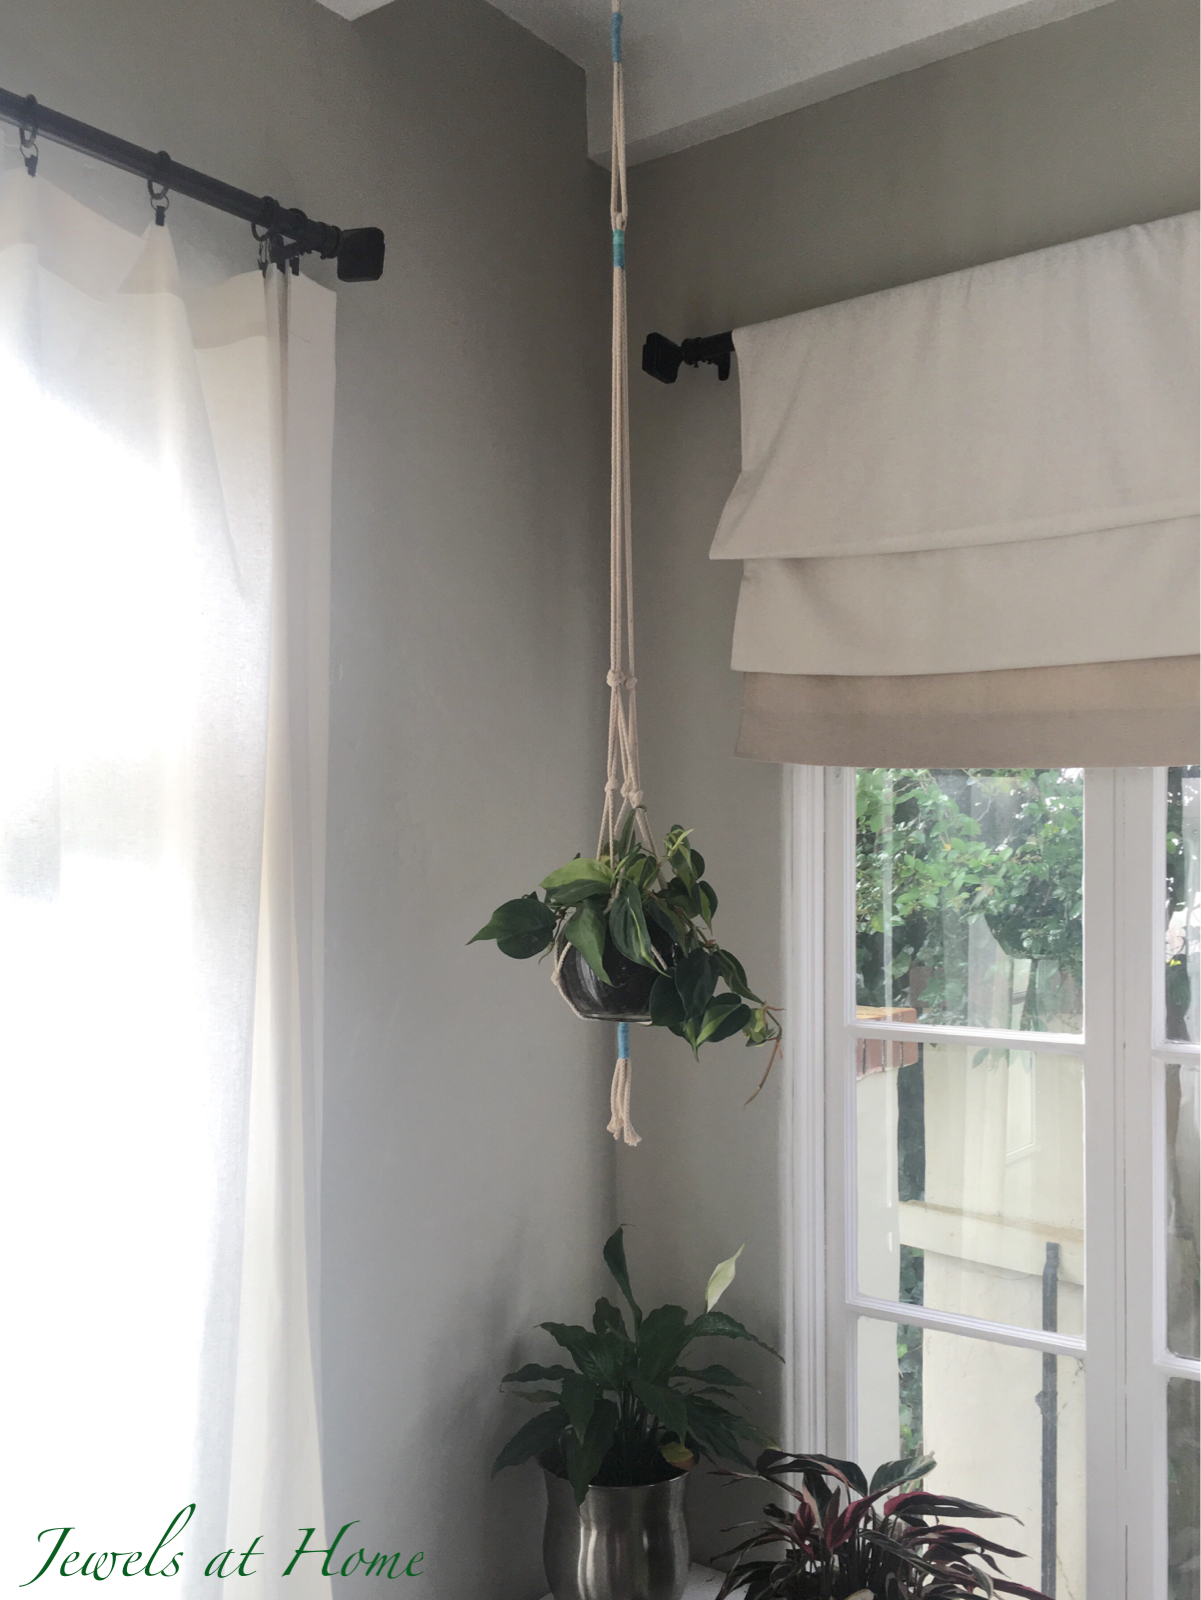
Curtain Rods
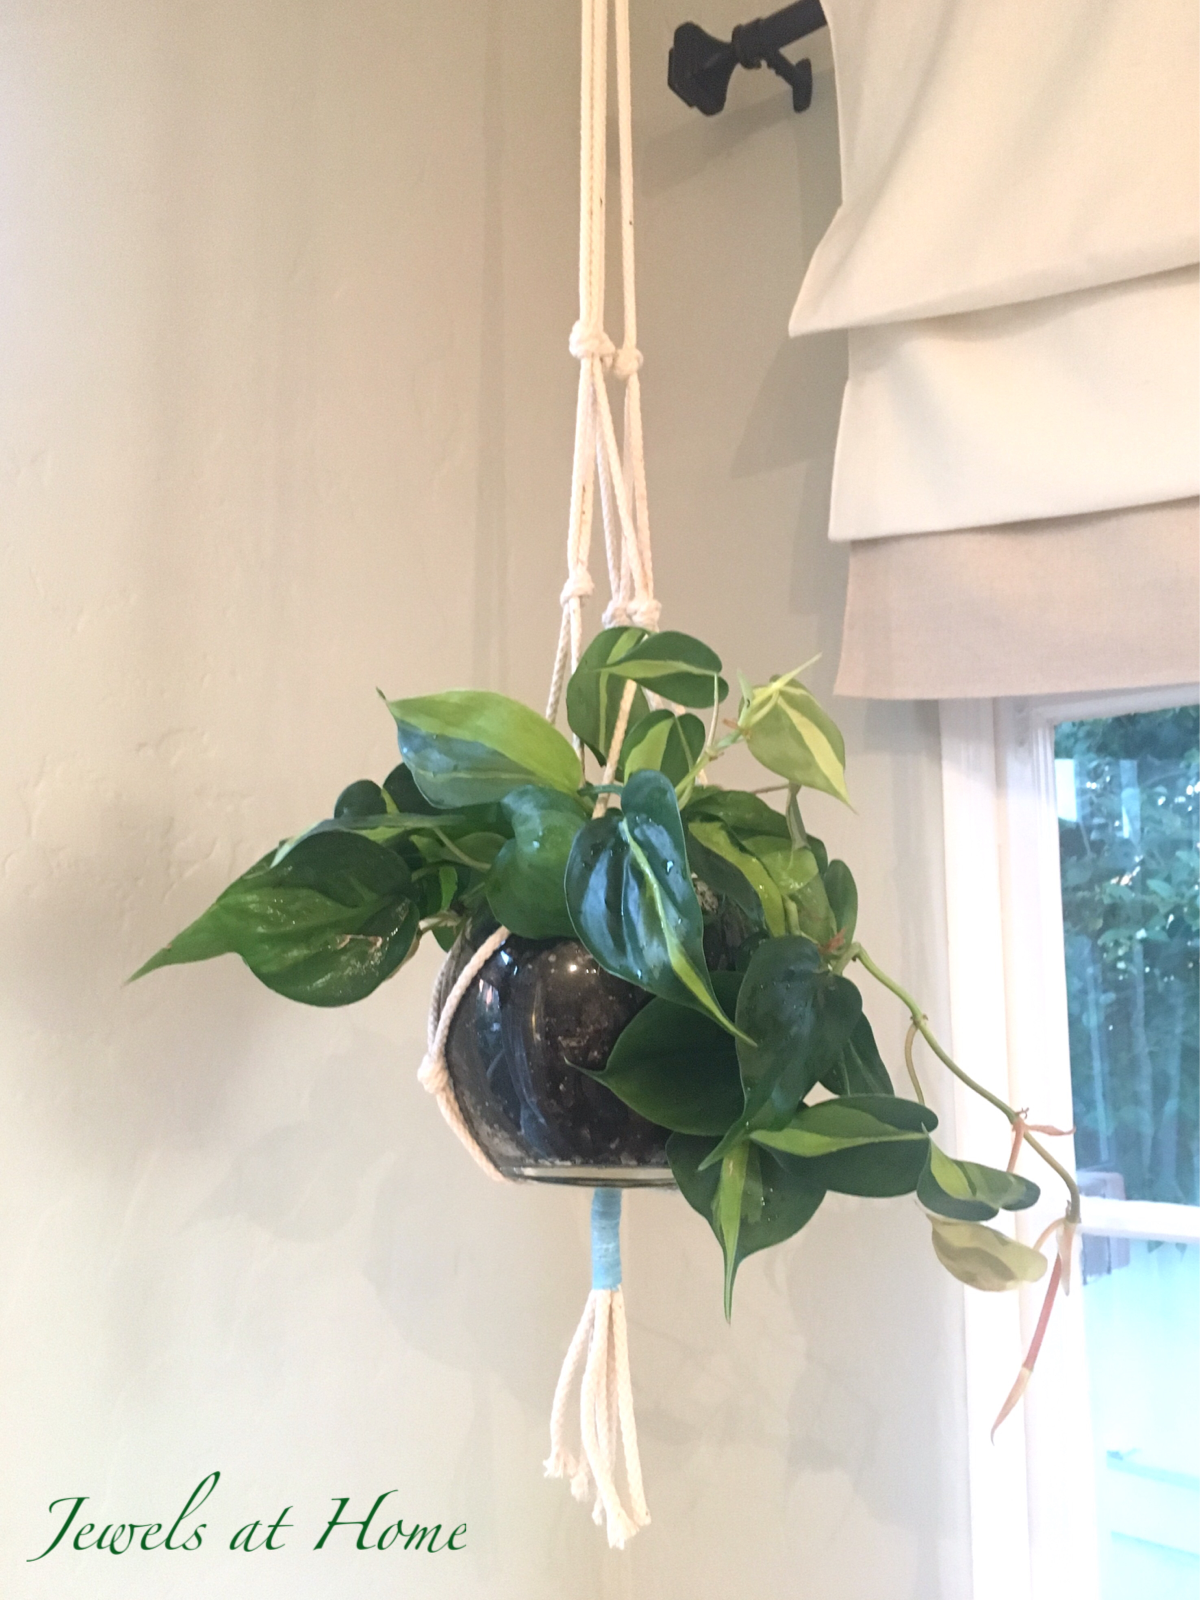
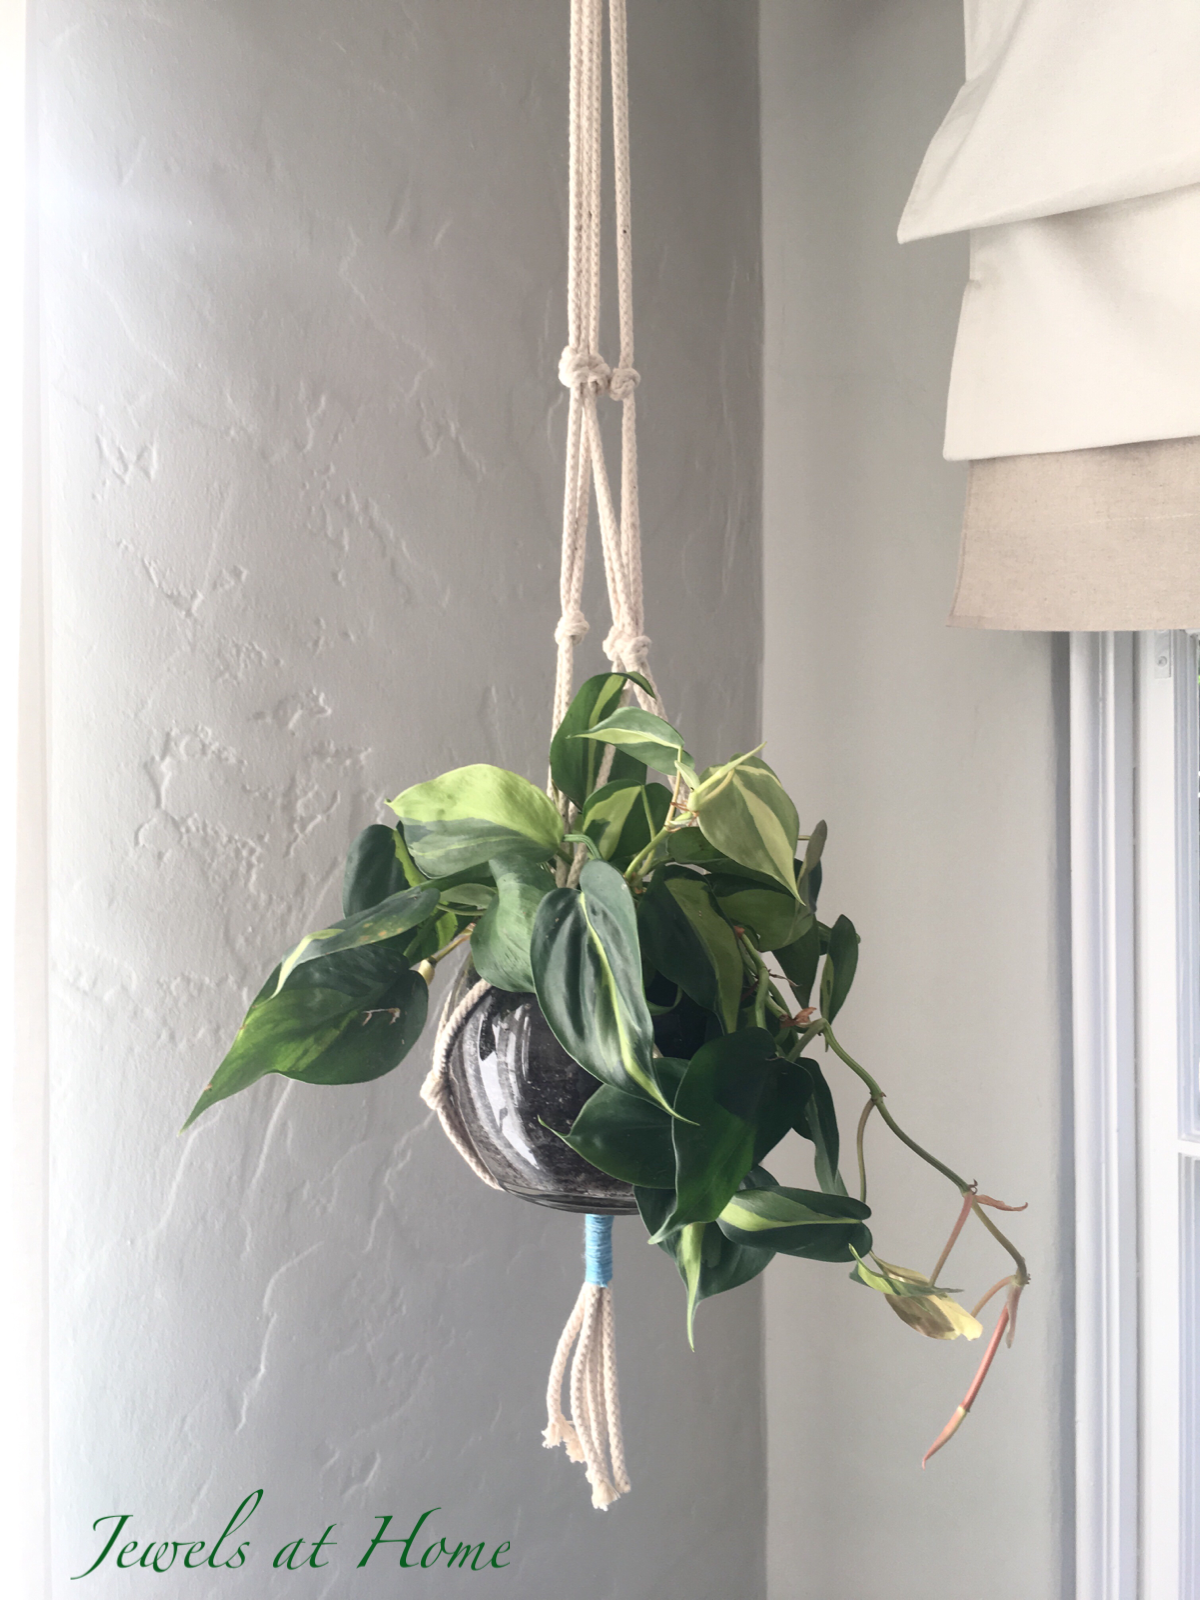
Plants need light, so it makes sense to hang them in front of a window! It wouldn’t be the most convenient idea for curtains that you open and close often, but it’s great for windows where the curtains can stay open most of the time. I used shower curtain hooks to hang several plants this way. The rollers on the curtain hooks make it easy to move the plants, if you want to close the curtains.
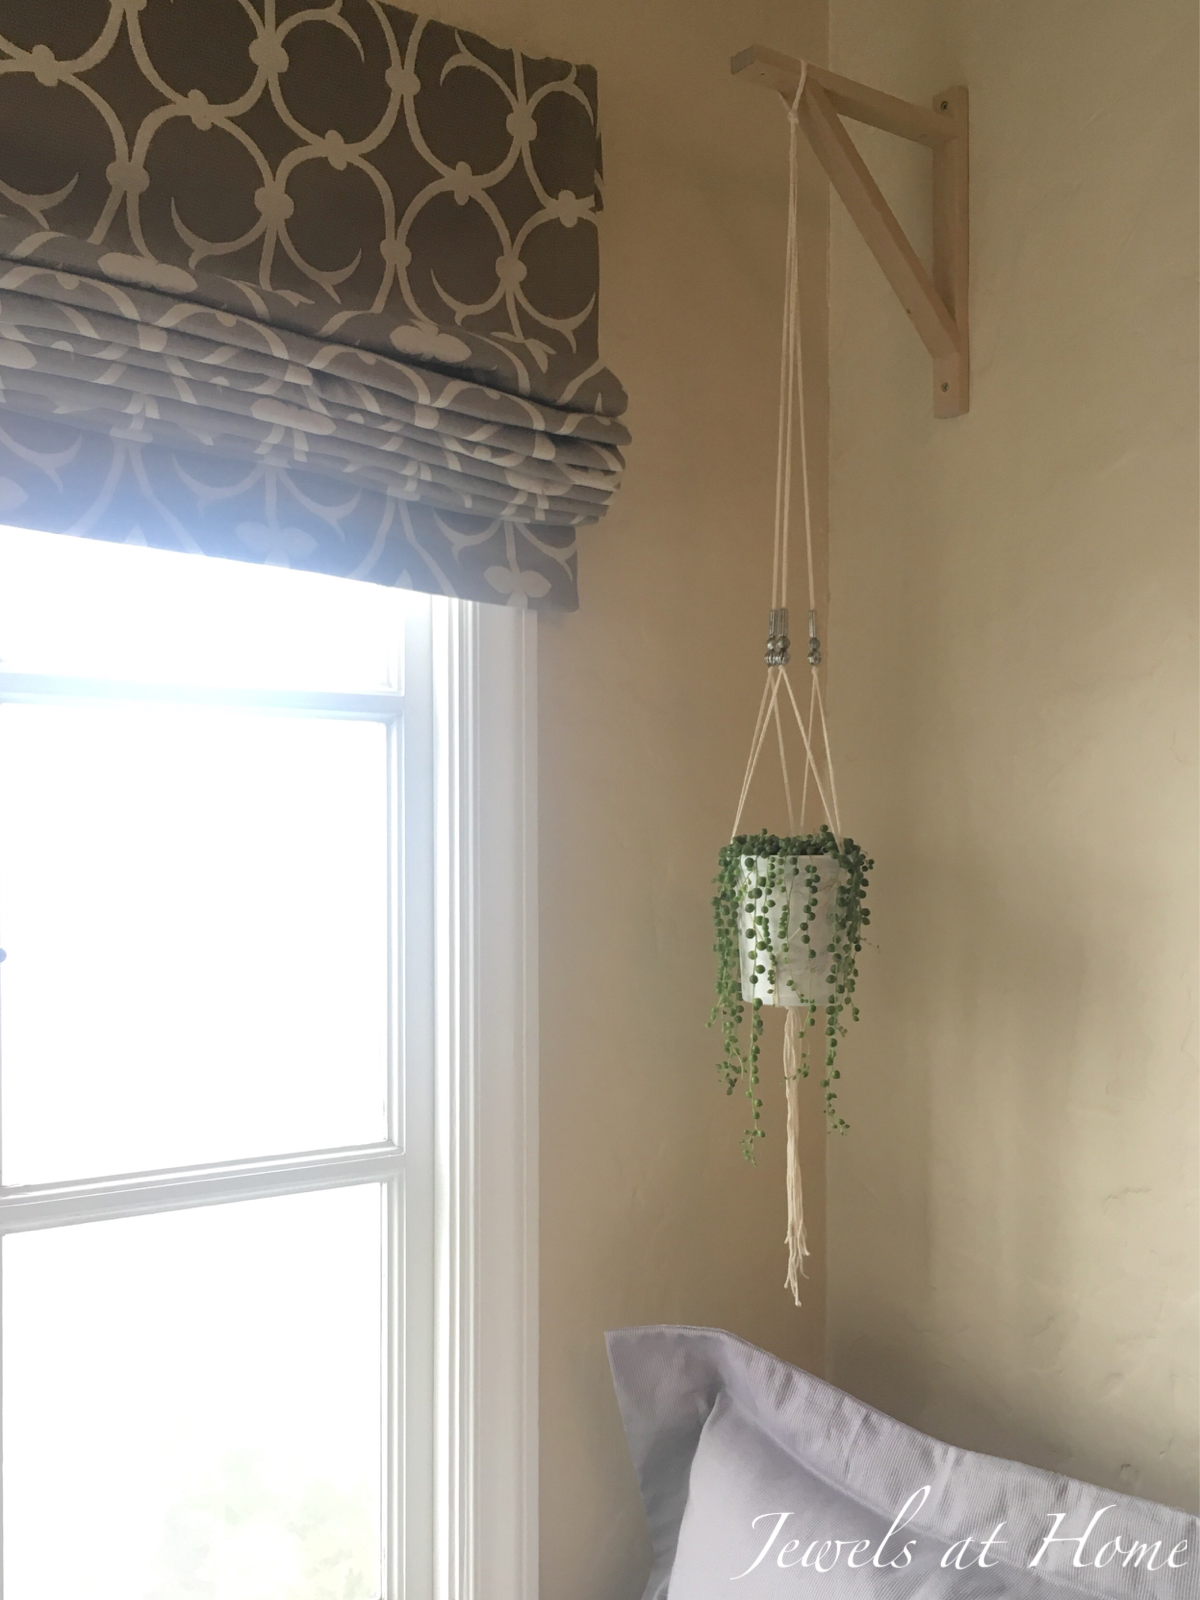
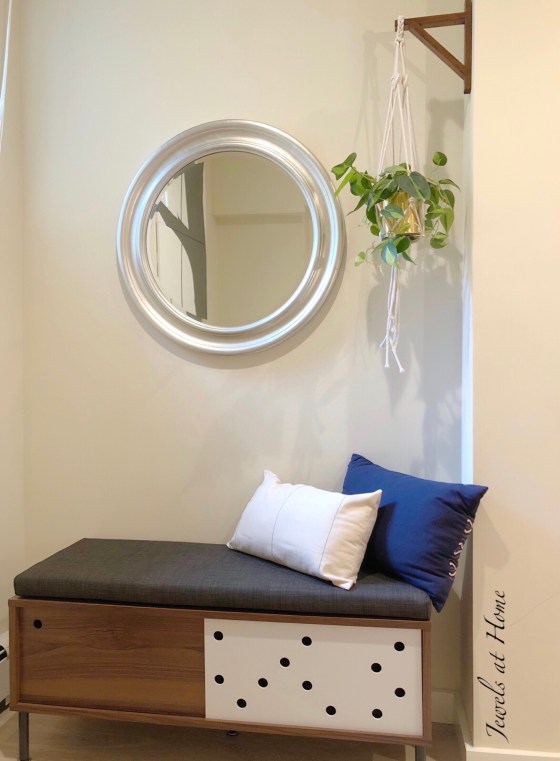
Wall Brackets
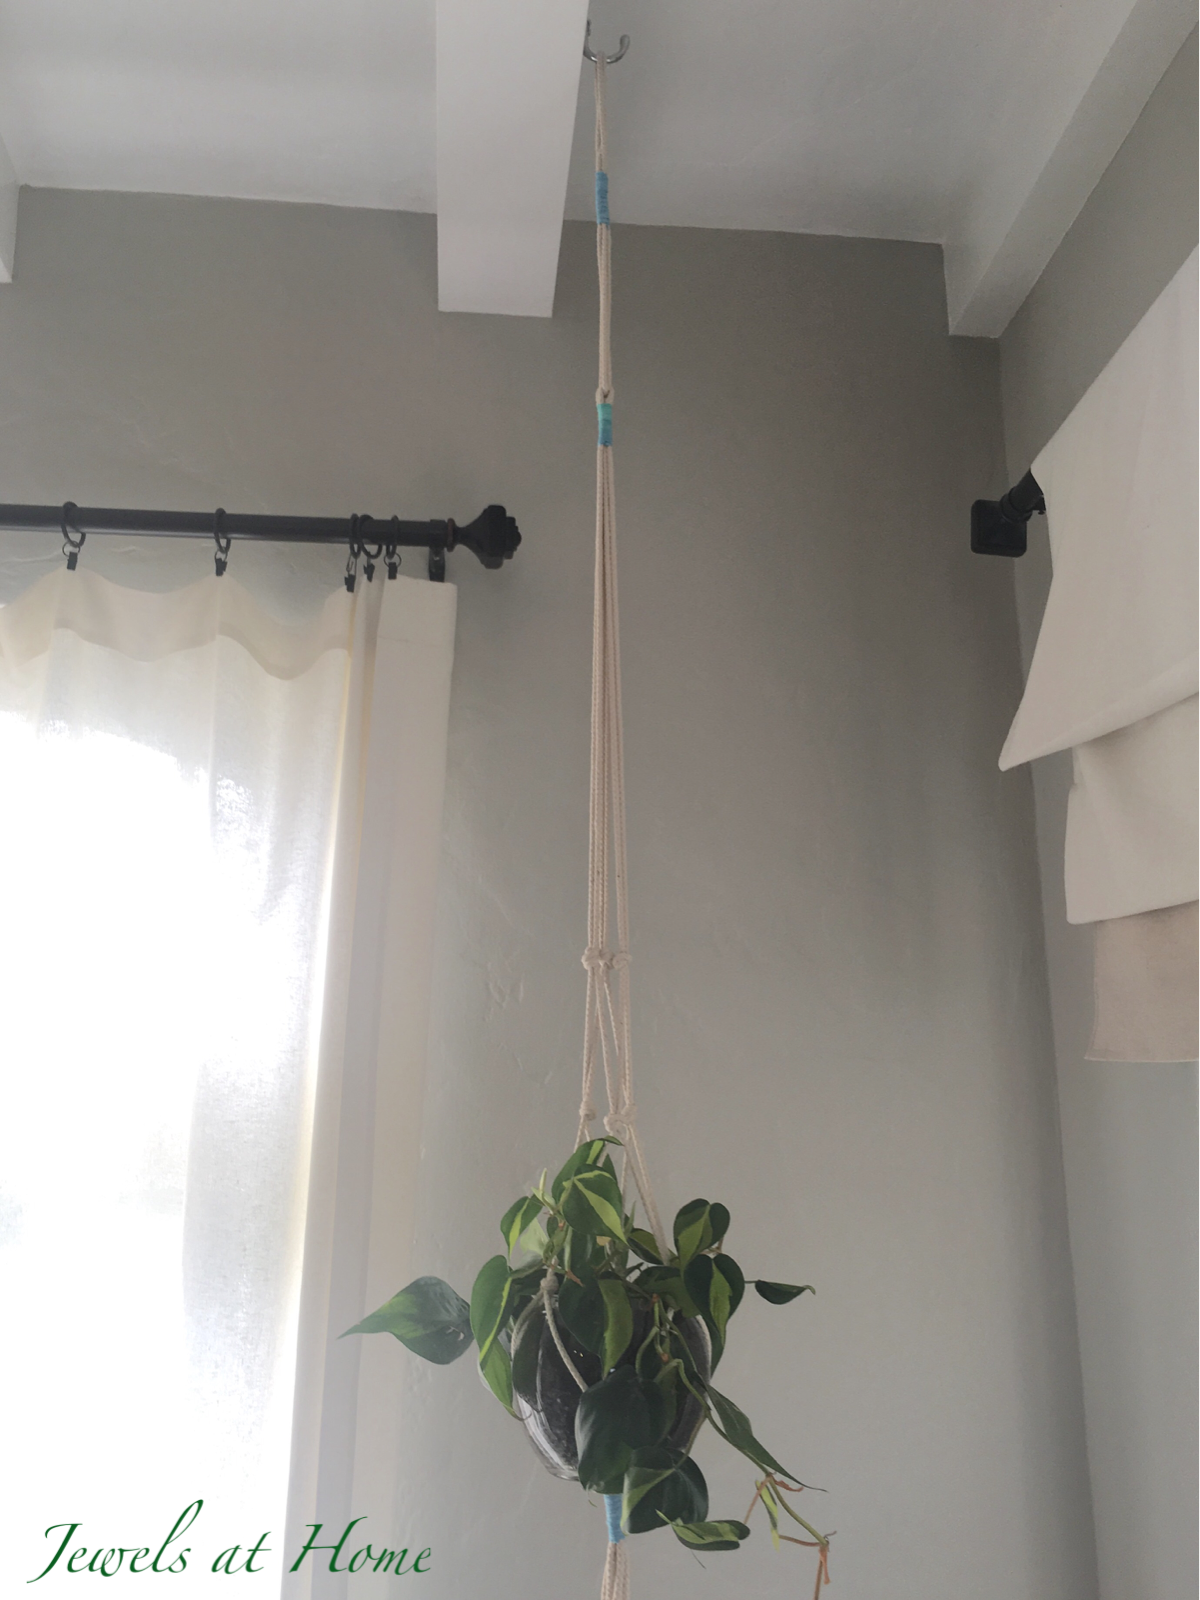
I was honestly too nervous to hang plants from our ceilings. The house is about 90 years old, and the walls and ceilings are plaster and lathe. I had visions of the giant patches of plaster crumbling down on me, so I decided to use wall brackets. This method also gives you more flexibility about hanging heights.
These are the brackets I used. (The link is to Amazon, but they’re cheaper at IKEA, if you can get to a store).
If you’re feeling more courageous, here are some more ideas I’d like to try!
Hanging a ladder from the ceiling. This is just so peaceful and gorgeous!
Thanks for coming with me into the world of macrame and plants. I am clearly a little obsessed. I’ve got more new ideas coming up to share with you soon(ish)!
Does bleach scare you? It scares me! Now that you were brave enough to get past the title of this post, I’m excited to tell you about my adventures dyeing fabric with bleach. The effect is similar to the Japanese shibori … Continue reading →
“At first I was afraid… I was petrified…” and now I’m totally obsessed with macrame! With apologies to Gloria Gaynor… once you learn a few basic knots, there are so many possible macrame projects!
You might remember that for my first plant hanger, I used heavy rope and simple overhand knots. I added gathering knots in colored yarn. For my next projects, I learned the square knot and added some beads.
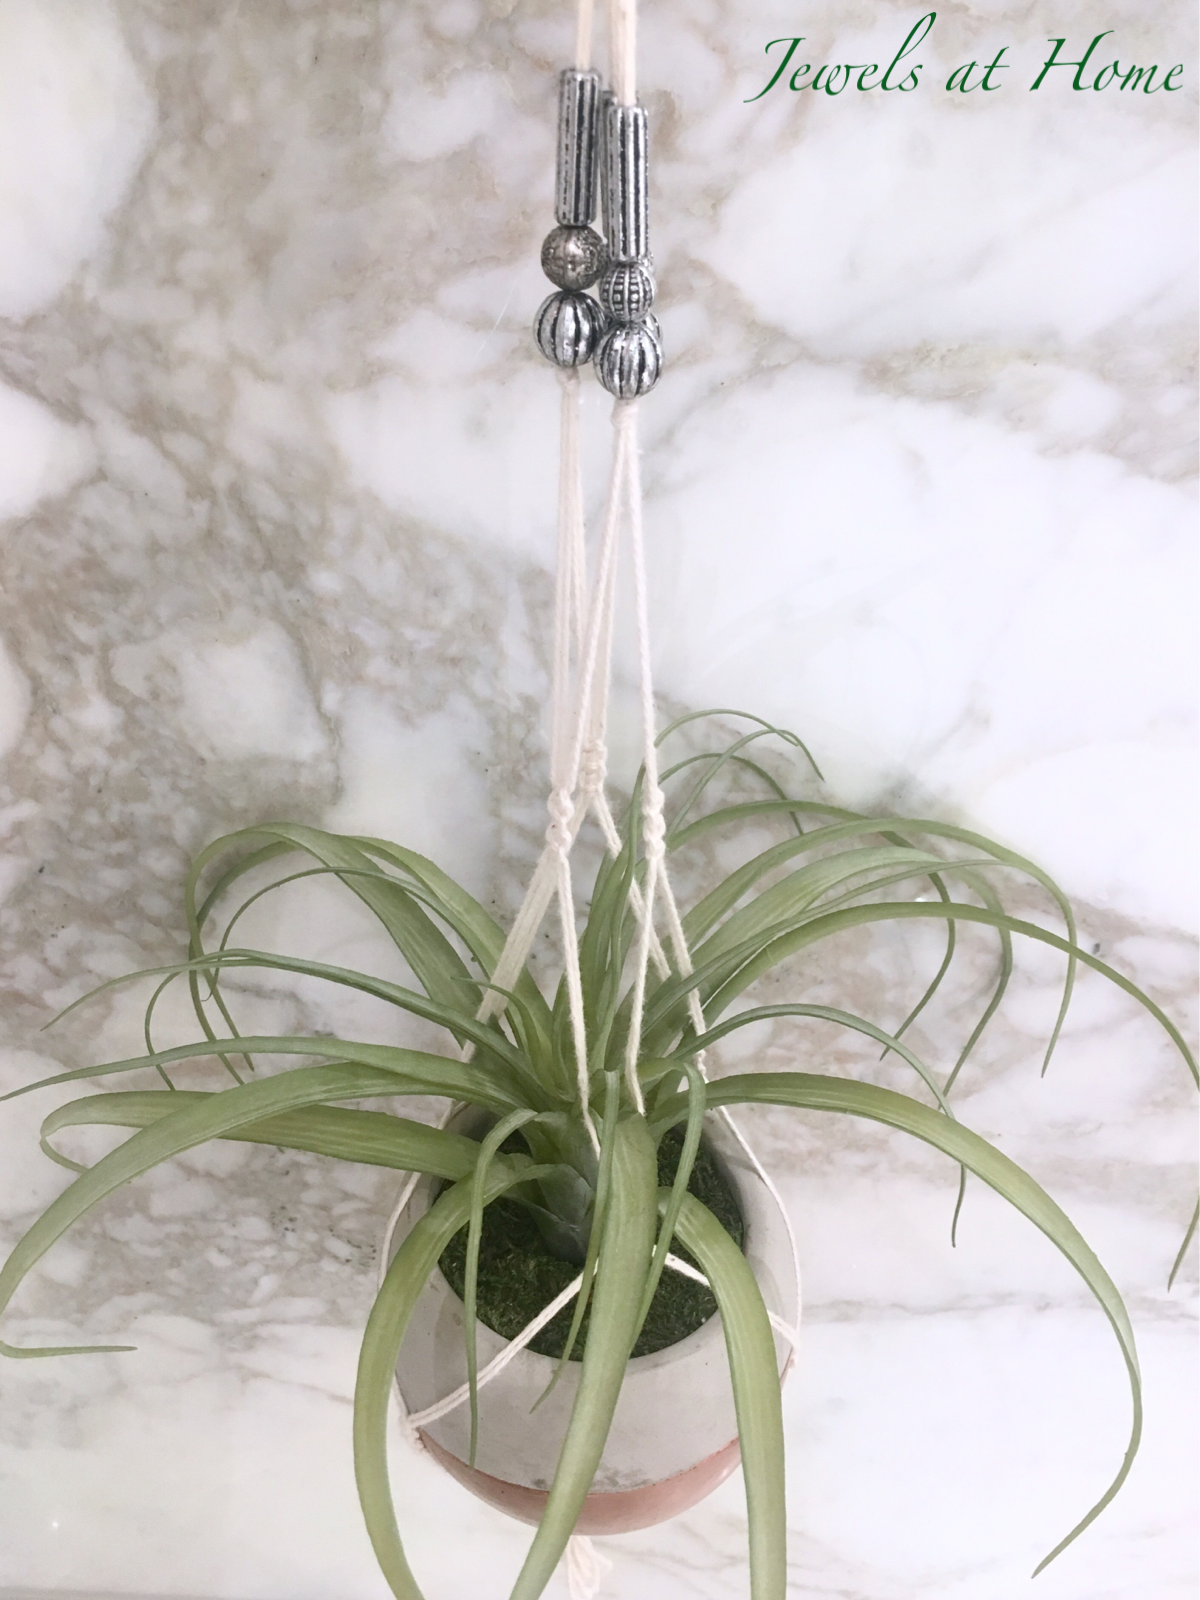
This project uses some silver-colored beads, and the hanger is formed with short stretches of three square knots. I used sport weight cotton yarn (similar to this yarn) which I already had. The advantage is that it’s thin enough to thread the beads onto, but the result is quite thin, so it will be best for a smaller plant.
This next project uses some braided candle wick. It lies flat, which makes the square knots much easier and neater. I did two longer stretches of square knots at the top and then shorter stretches to form the hanger. The twine is heavier than the cotton yarn, and I really like how it lies flat. I’ll definitely be doing more projects with this string!
By the way, you may have noticed the same (fake) plant in both these hangers. We’re on vacation in Toronto, and I ended up buying a “plant model” to help with my projects. 😂
Next macrame projects coming up: wave knots, colored string, and dip-dyeing (I think I will save that for when I get home…)! I always need to have a project to work on, and this has turned out to be a great one for traveling, because it is so compact. Hope you will give it a try.
Everything old is new again! I’m visiting my dad and fantasizing about magically unearthing some old macrame projects from the 70s. Meanwhile, I’m trying my hand at making some plant hangers. This macrame obsession pairs perfectly with my newfound love of plants!
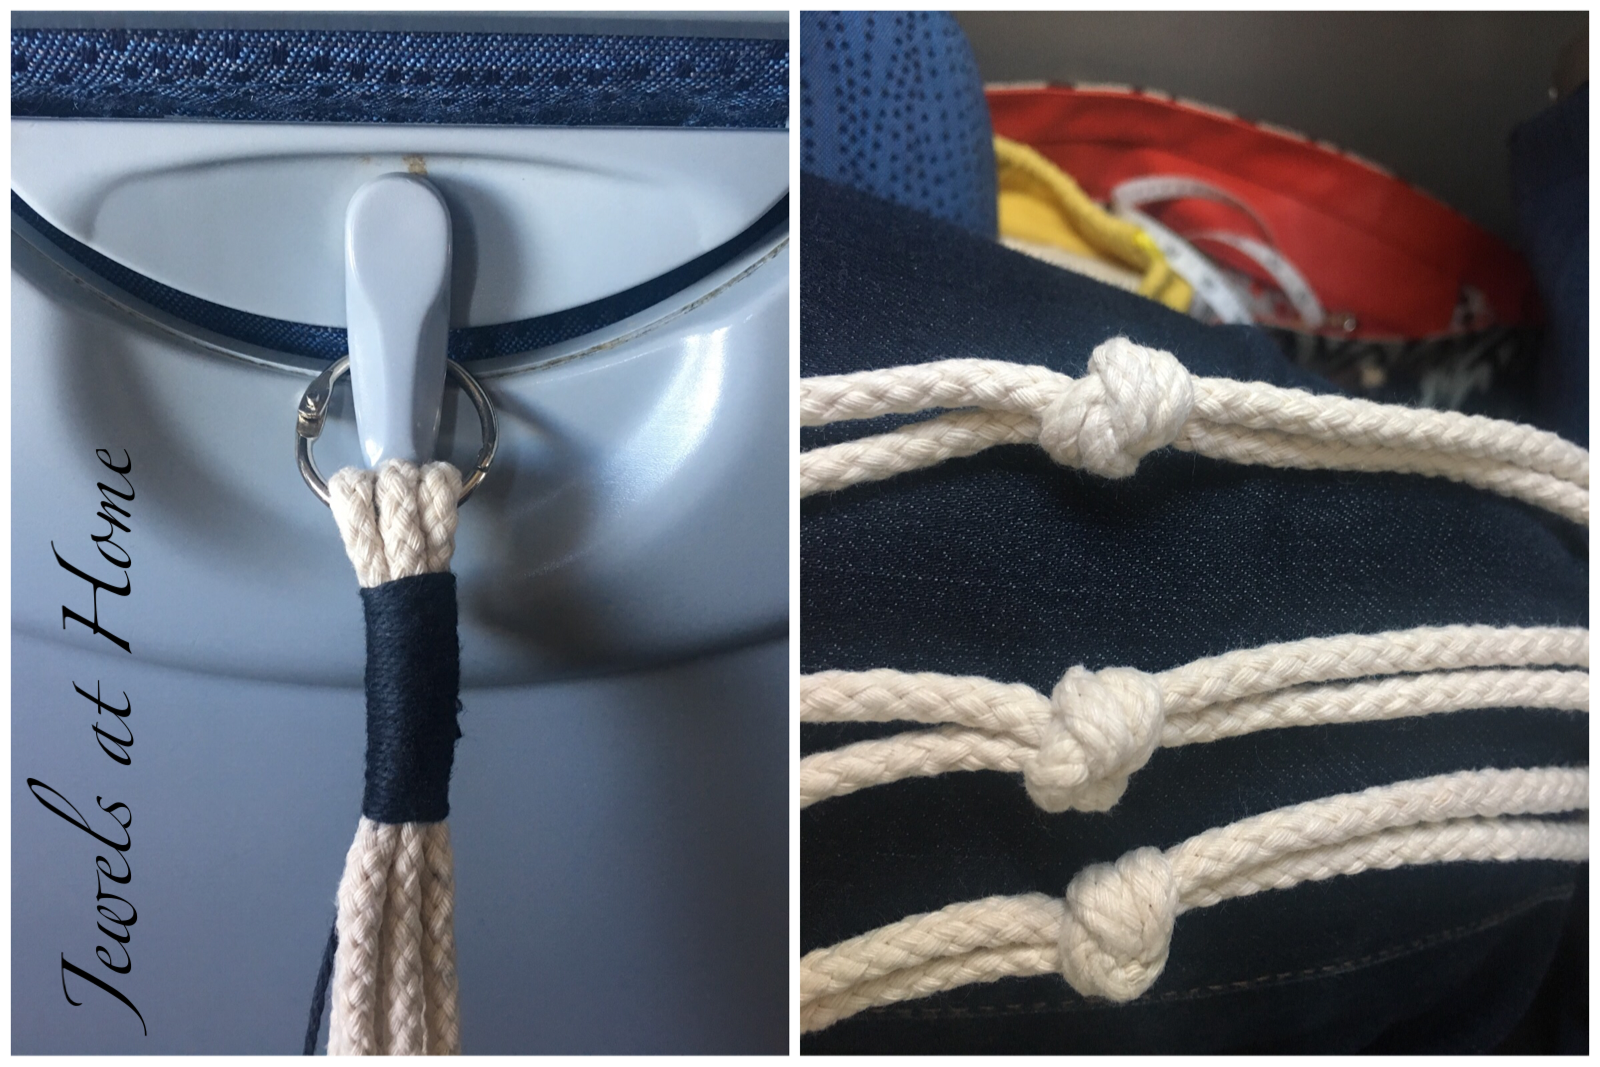
Tying knots in string shouldn’t be that complicated, but I was nervous getting started, so I chose the simplest project I could. Using some heavy cotton rope leftover from hanging a birthday piñata, I based my plant hanger off of these instructions.
Because the rope was so thick, I chose to use a gathering knot in blue cotton yarn rather than tie a heavy knot with the rope at the top and bottom.
Being a busy mom, the first chance I had to work on this project was on a plane! Luckily, the tab that holds up the tray table works perfectly for attaching the loop at the top;)
Here’s how the plant hanger looks empty:
And here’s how it looks planted with Golden Pothos.
Don’t say you can’t teach an old dog new tricks! After years of joking about my “brown thumb,” I’m getting really excited about gardening and plants. It’s so rewarding to watch things grow, not to mention how plants freshen up any space both visually and literally.
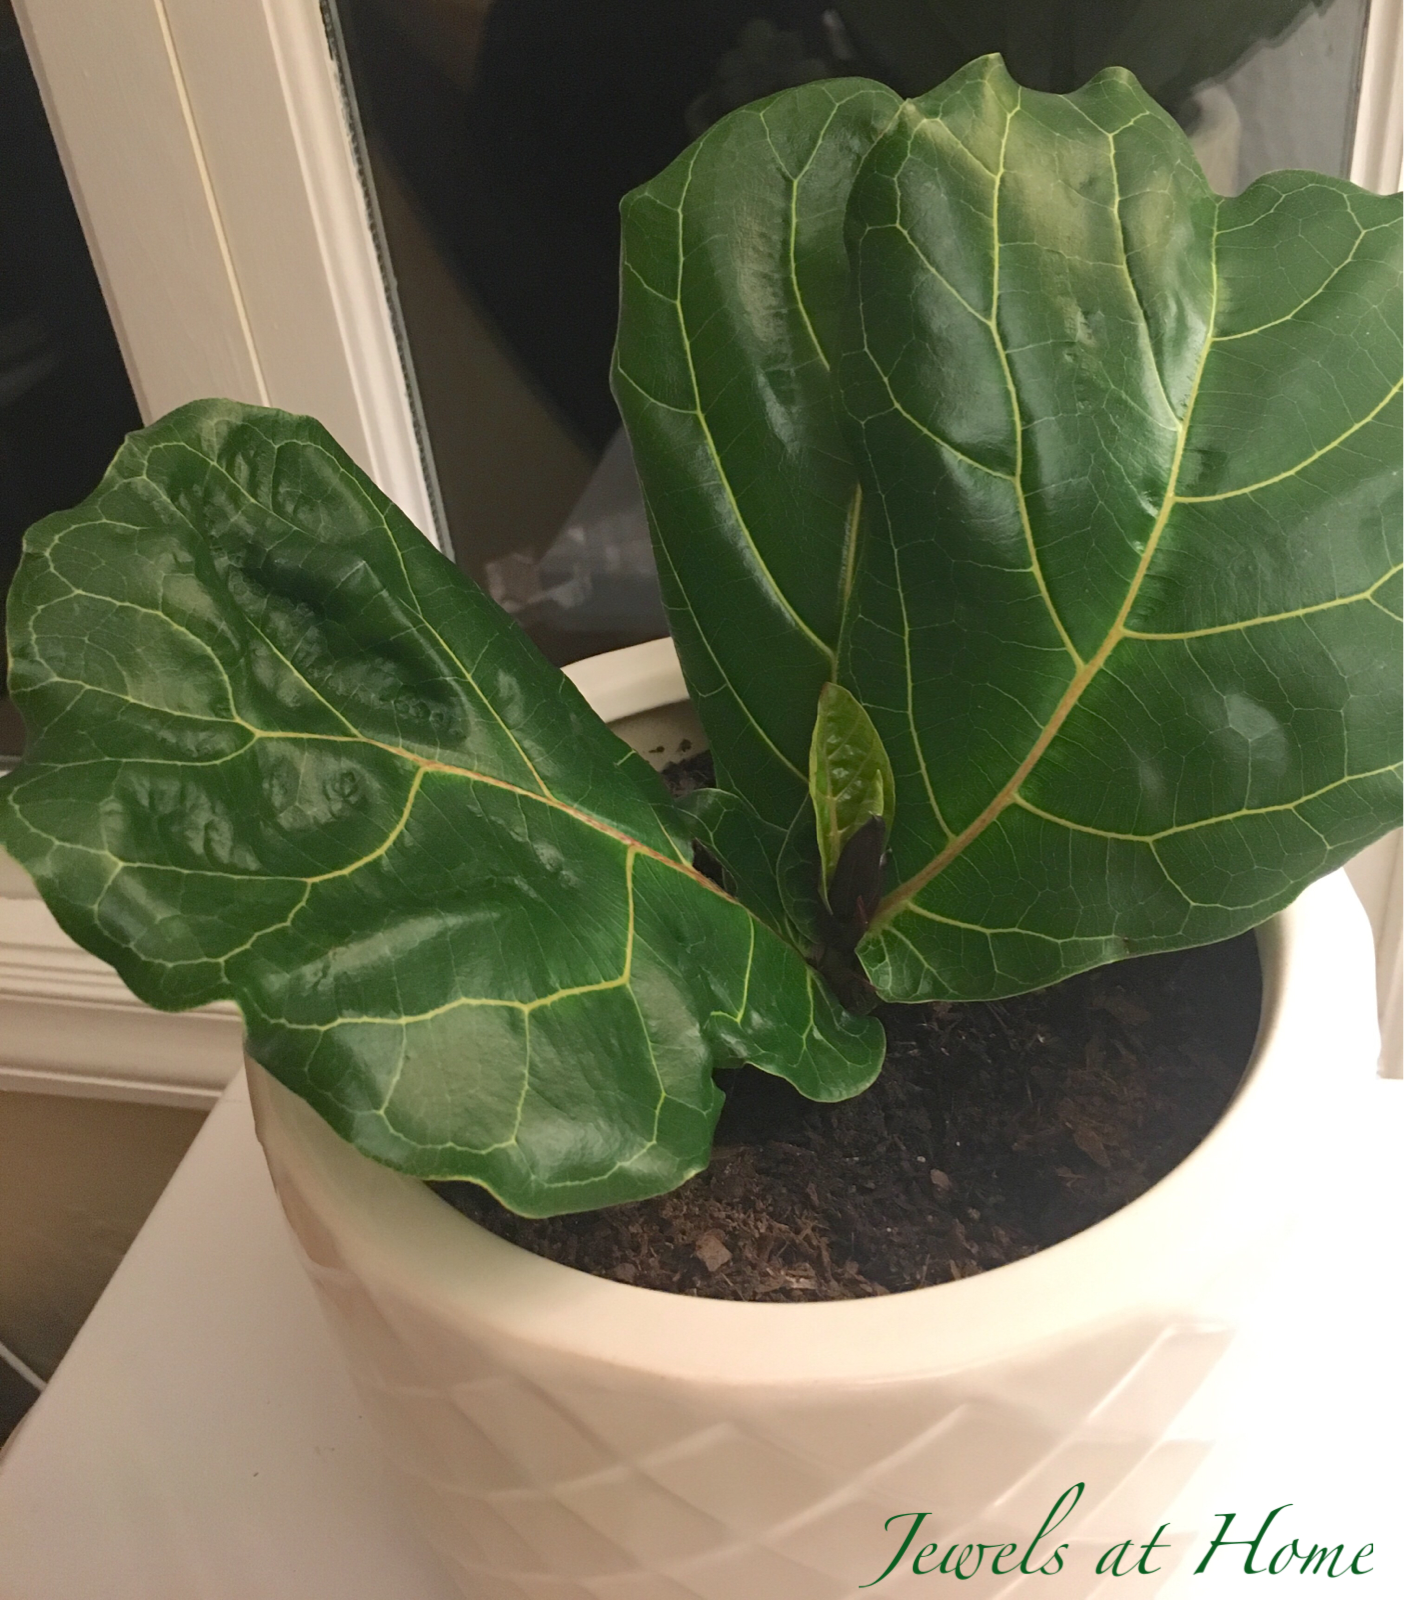
I’m growing all kinds of plants, but one of my greatest loves is the Ficus Lyrata, the fiddle leaf fig, and I’m so grateful that they seem to thrive in our conditions. I originally bought three plants, which have all at least tripled in size, and I’ve successfully started about 10 plants from cuttings. Here is a list of all my fiddle leaf fig-related posts:
How to propagate plants from cuttings (this post!)
I mentioned I originally bought three plants. I’ve heard that some people have found these at big box hardware stores, but I had no luck. I ended up buying one online (really!) but eventually acquired two more at local nurseries Sloat Garden Center and Flowercraft. The one I got online is fine, but the ones from the nursery are much bigger, so I’d definitely recommend looking around locally, if you can.
After just a few months, two of my trees needed trimming already, so I decided to try to propagate new plants from the cuttings. I have done this several times now, so I have updated this post with all the tips – get it? tips!
When and where to propagate?
Plants grow fastest in spring and summer, so you’ll have the best success between March and September
For more tips on when and how to prune your tree, check out this post
Place your cuttings in a bright location, to help them grow, but avoid direct sun that could scorch the leaves. The cuttings are more delicate than an established plant
What type of cutting can you propagate?
Newest lesson: the cuttings from more mature branches seem to work better. I tried propagating brand new growth (about a month old), and those cuttings failed to grow 😦
Using a clean knife or scissors, take a cutting that includes a section of stem and one to three leaves. If you want to trim more than three leaves, separate the cutting, so each section has no more than three. A bigger cutting can’t get enough water to survive while it’s forming new roots
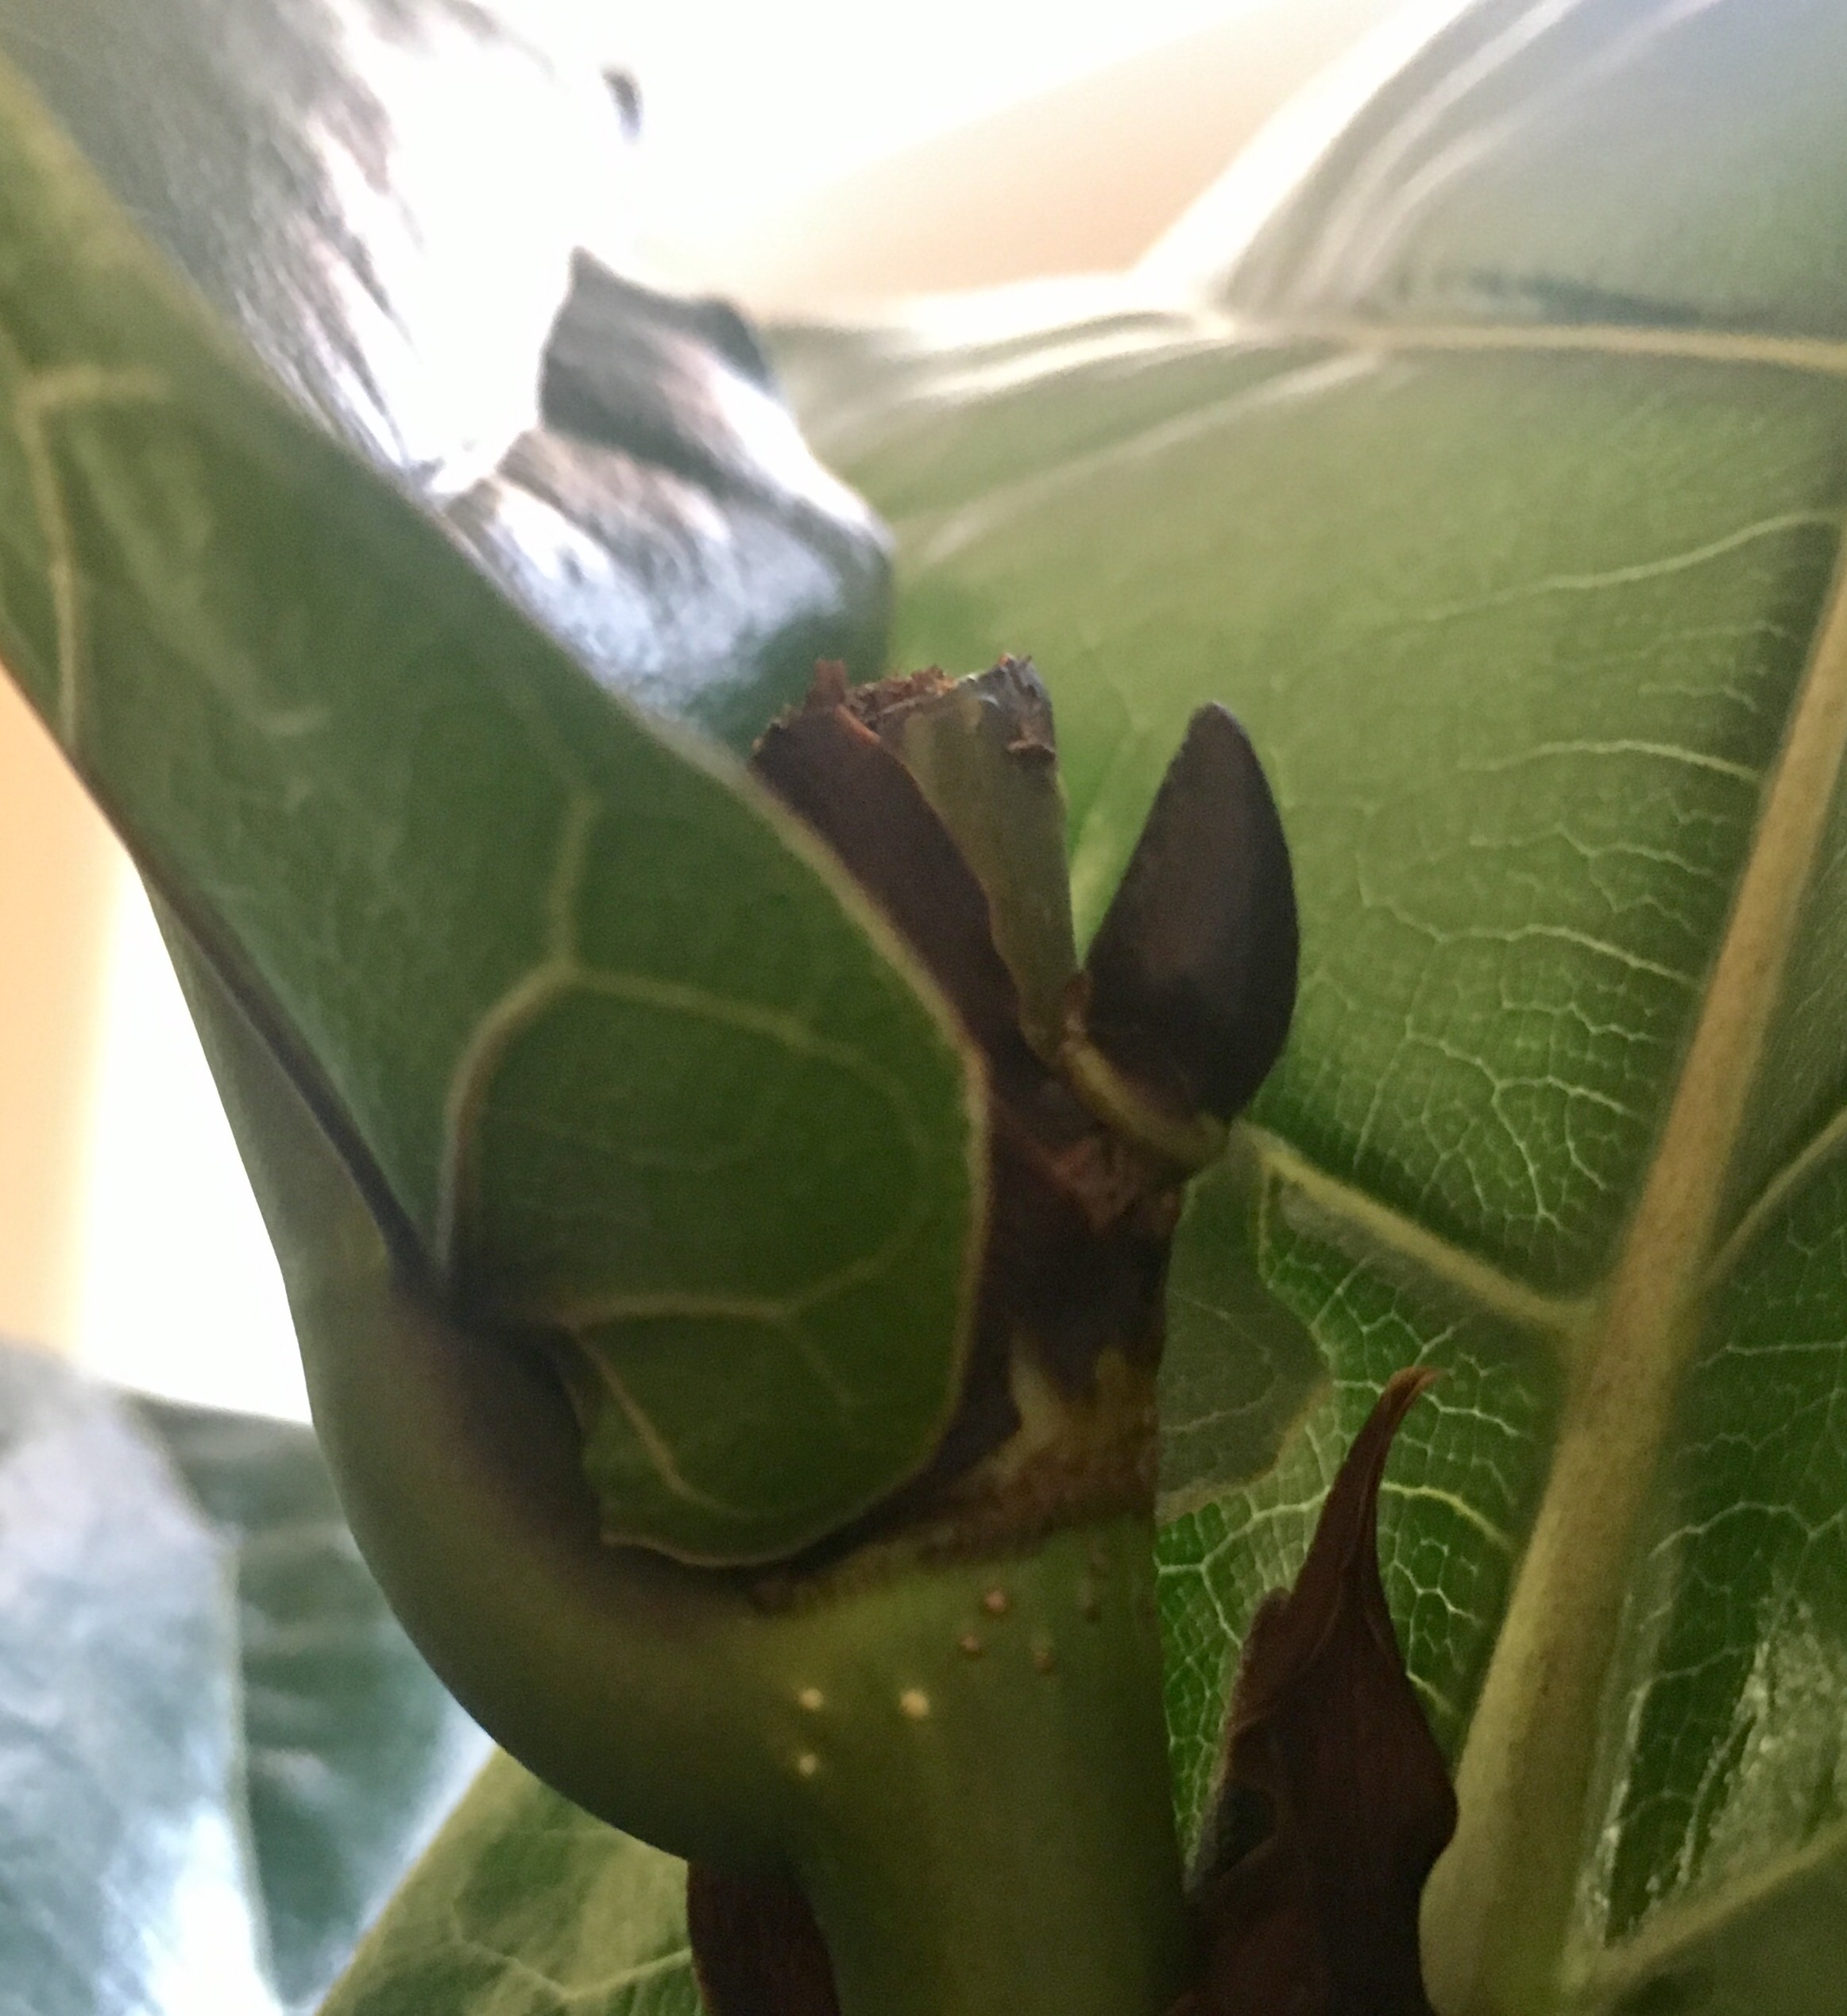
If you cut the tip of a branch, which includes a bud, the cutting will continue to grow from the bud
If you cut a section of stem from the middle of a branch, a new bud will form on the side of the stem and will grow upwards
I have heard lore of being able to propagate a leaf without a stem section, but the one I tried did not work. I will probably try again, but I don’t have first-hand experience seeing this work.
Update: I just got an exciting new tip from Candice on Instagram (@cee_marie923) She accidentally stripped the outer layer off the stem, and the roots grew much better and faster! I can’t wait to try this out myself. Meanwhile, here’s a picture of her cutting – thanks, Candice!
What supplies do you need?
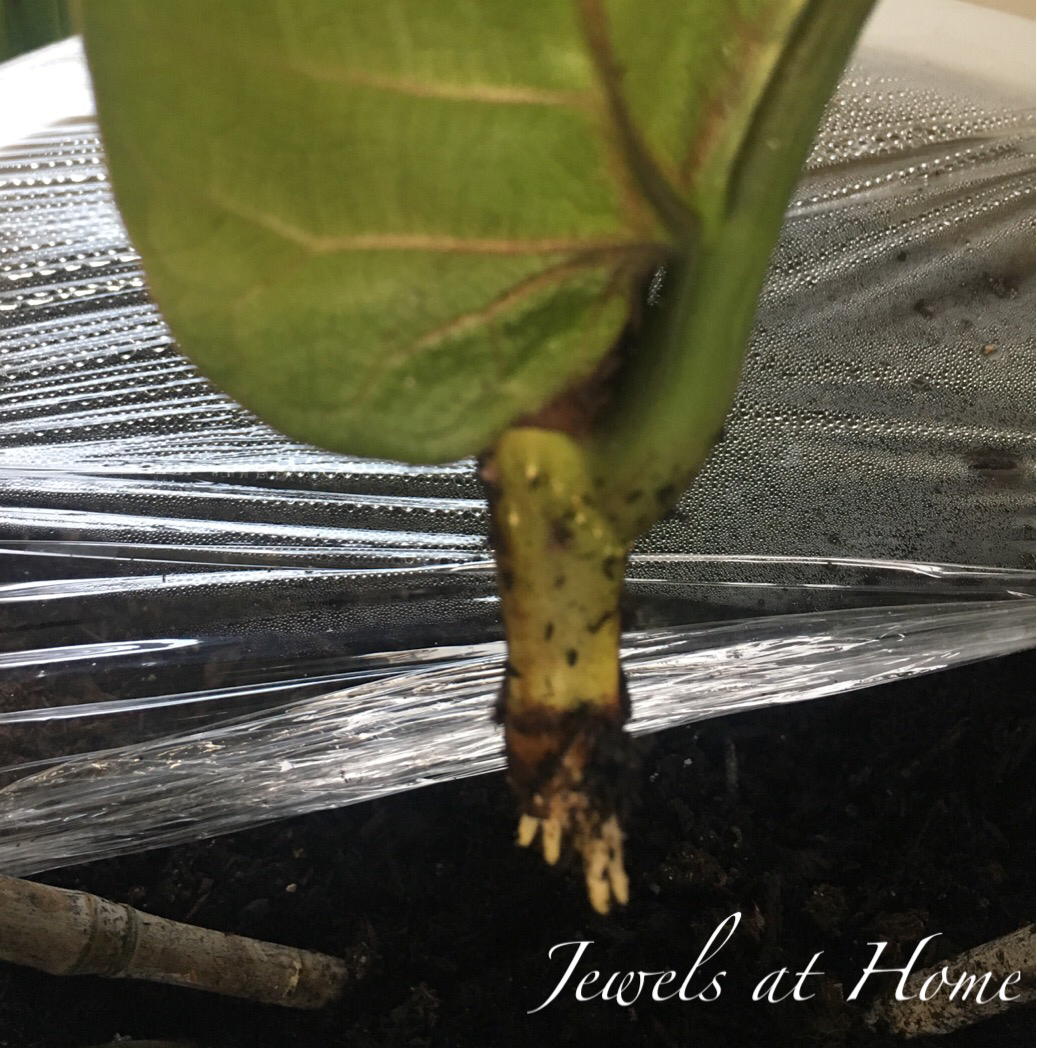
You can place your cutting in water, soil, or an inert medium like vermiculite. The bottom tip of the cutting needs to stay very moist, which is easy in water. If you use soil or vermiculite, wrap the container in plastic wrap to keep moisture in and check it every few days, adding water when it starts drying out
I applied rooting hormone to the bottom end of the cutting to help encourage new root growth. Apply this just once. If you over-use the rooting hormone, it actually hardens the tip and makes it more difficult for roots to grow – yes, I learned the hard way!
Here are some pictures to show what you can expect over time:
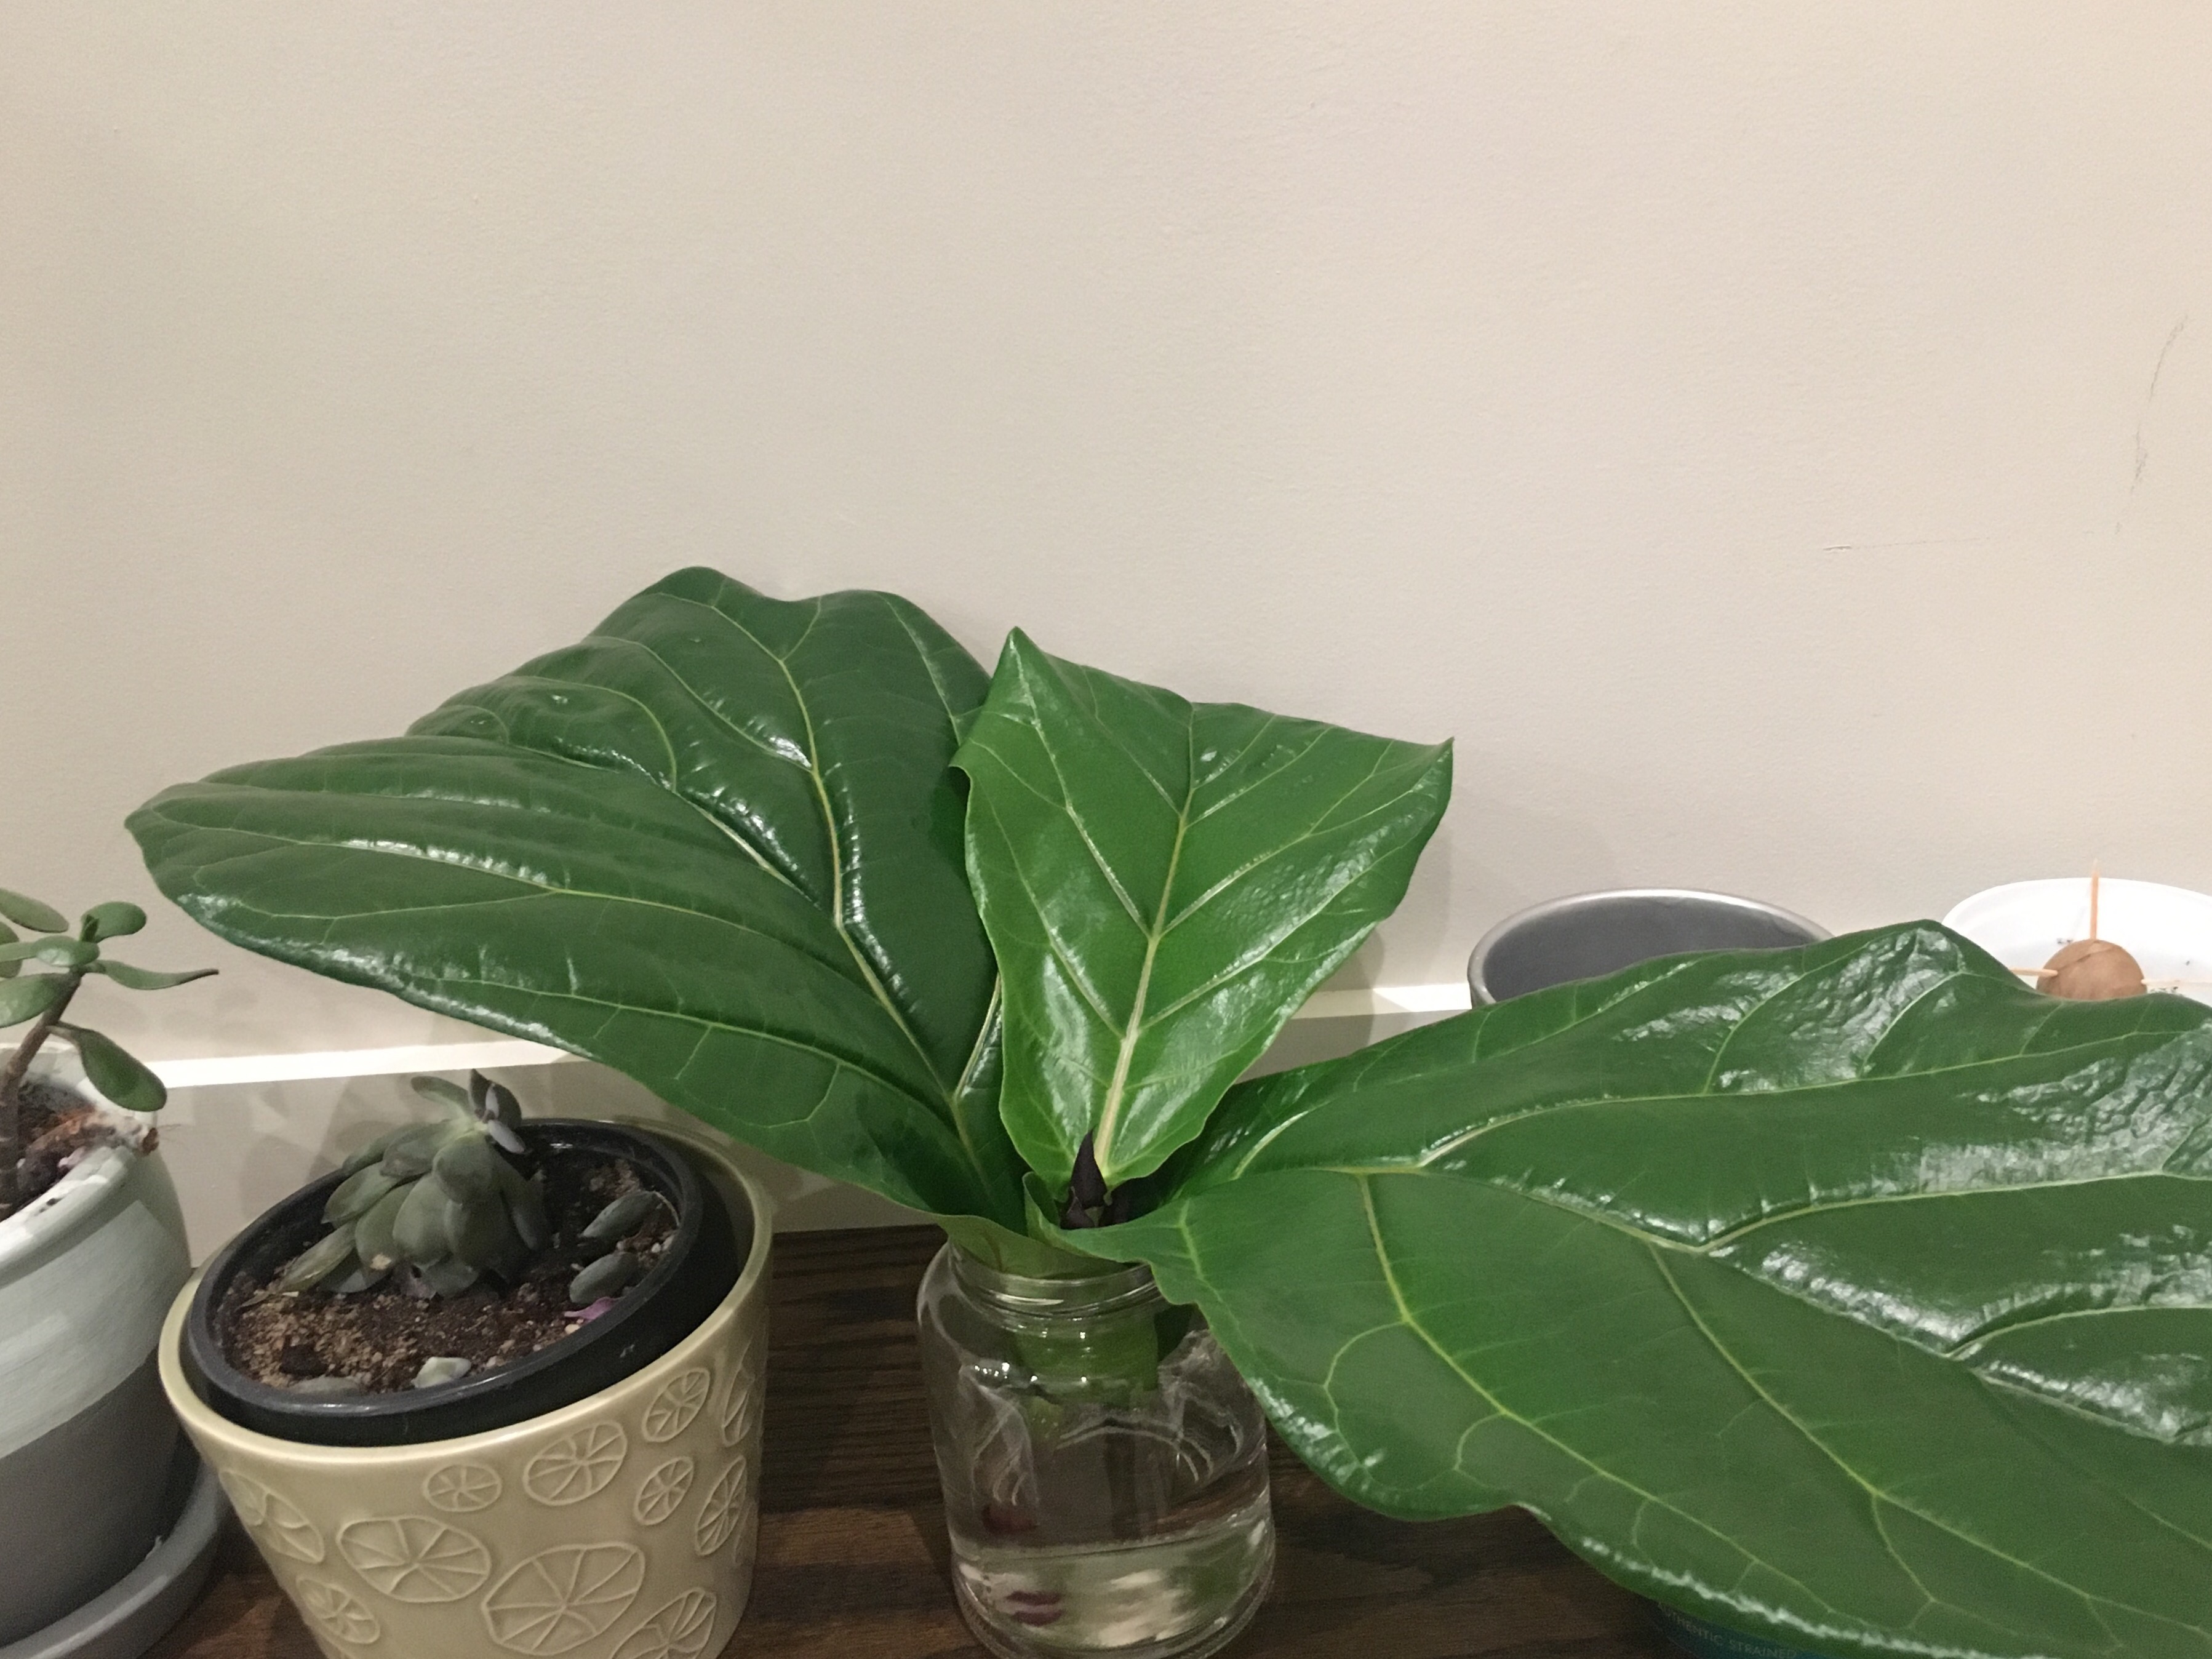
0 weeks
Three leaves rooting in water. Two leaves rooting in soil. I covered the pot in plastic wrap to keep a moist environment for new roots to form.
3 Weeks
You may see some new roots around this time!
And your original plant should be growing a new bud (or two, or three) where you took the cutting:
4 weeks
You can see more robust root growth taking off!
The original tree where I cut off the top three leaves also looks great. There’s a good-sized bud forming!
5 weeks
Exciting news! The single top leaf has grown so many roots that I transferred it to a pot today!
The tree where I cut off three leaves also grew a ton with three buds on it!
6 weeks
Crazy! This is where I cut off three leaves from the top of a plant. It went from buds to tons of new branches and leaves in just one week. So exciting!
2-2.5 months
I started to see new leaves growing out of the top of the stem cuttings. (Photo credit here goes to Nicola, who adopted one of the plants and kindly keeps me updated!)
3 months:
I came back from vacation to find that the stem cutting which started with a single leaf had two new leaves!
3.5 months:
This was the stem with a single leaf. It now has three new leaves and a promising looking bud pushing out the top. Yay!
If you take a cutting from the center section of a stem, with no bud attached, it may take even longer for a new bud to form, but it can definitely work!
9 months
For real! The plant in front was a section of stem with a single leaf off the top of the plant in back. It grew like gangbusters!
Thanks for reading and please share your questions and tips!
Can’t draw? Good! Neither can I. This is project for people like us! We created a basement guest room with our renovation a couple of years ago, and with my sister coming to visit soon, I wanted to put some … Continue reading →
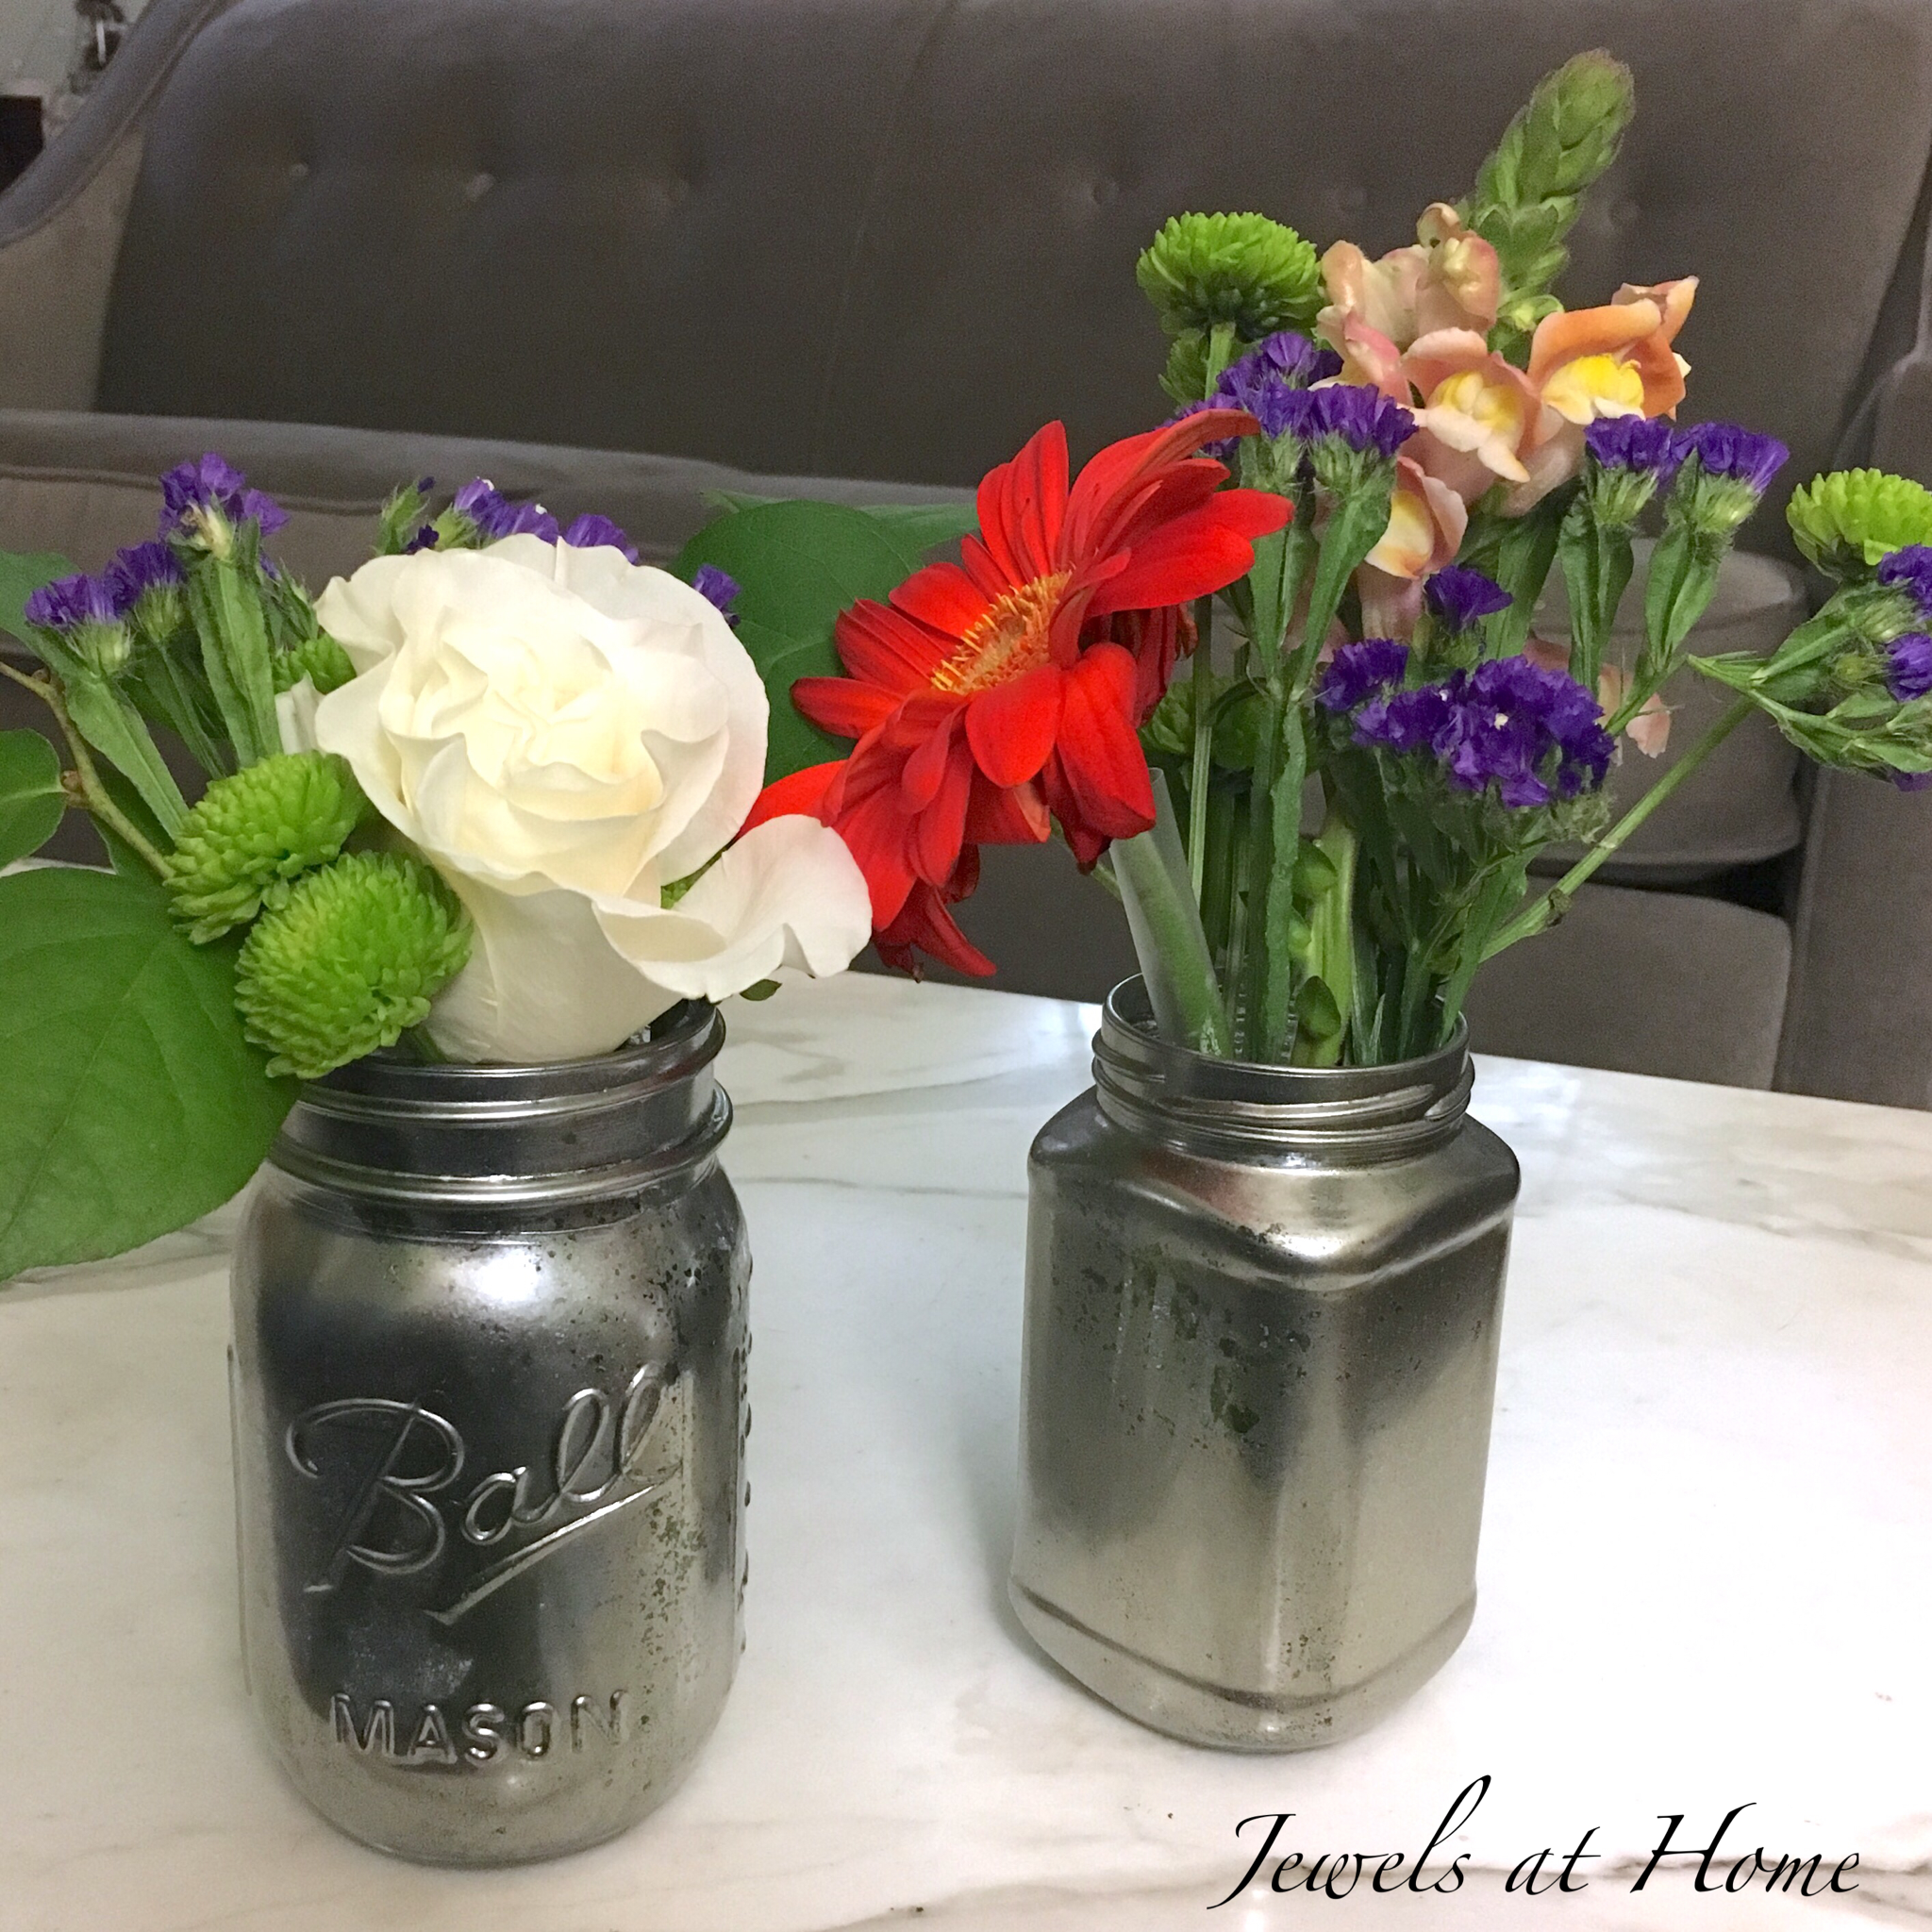
You’ve probably seen the popular mercury glass accessories out there as well as the DIY tutorials. I have been waiting to try this out, and it was really fun!
I made these for a party we have coming up, and – excitement!! – I am also helping a friend plan wedding decorations, so there will be more to come. Enjoy some tips and pictures:
I found quite a few different variations in instructions, which I will discuss a bit.
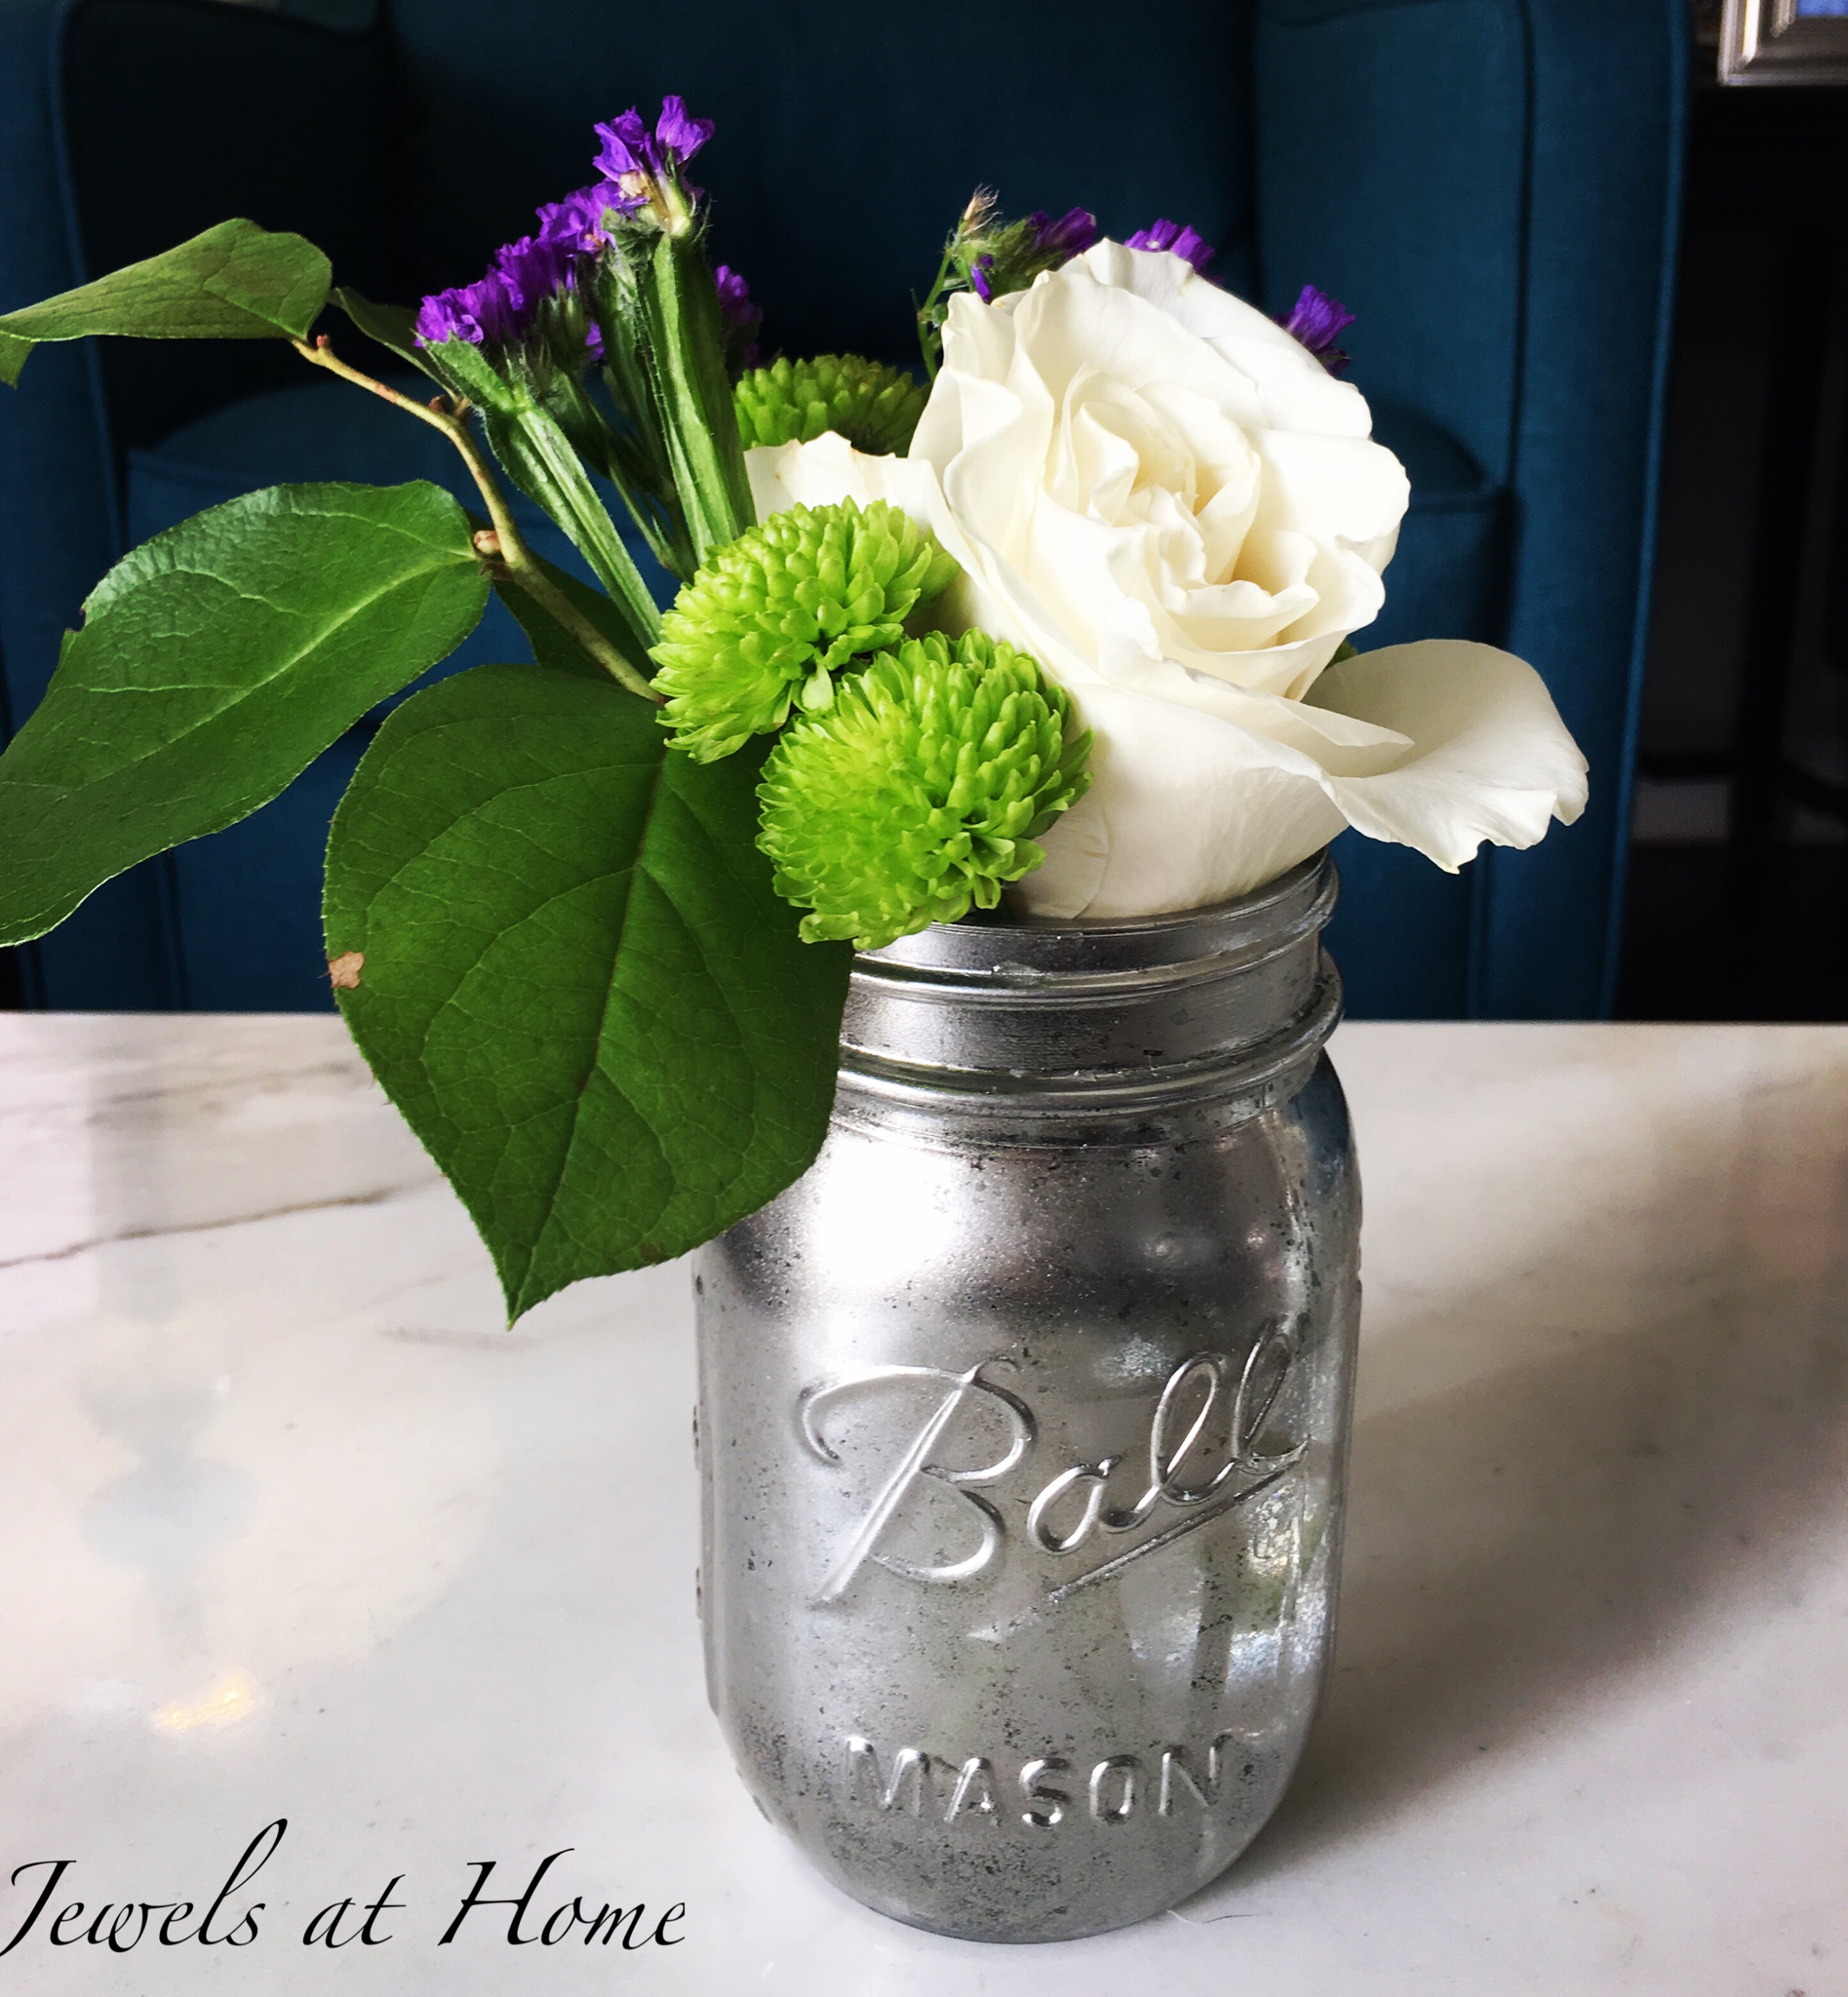
Types of paint: the most popular seems to be Krylon Looking Glass. It took several coats to get this finish, and I think I could actually have done even more, but I want to be able to put votive candles inside and still have some light shine through. I also added one coat of gold paint in the middle to warm up the color a bit.
Spraying water-vinegar mix before painting or after painting: I preferred to spray the water-vinegar mix on before spraying, which blocks the paint from sticking to the glass. I did still rub it off a little after, but I think you would have to rub a lot harder, if you sprayed the water on after the paint.
Spraying inside or outside: Looking Glass paint is intended to be sprayed on the inside, so the glass itself adds to the reflective finish. However, to make the vases more useful (ie able to hold things inside), I chose to paint on the outside.
Here’s how one of my vases looks in front of some mercury glass candlesticks I bought from Pier 1. It makes me want to warm up my colors more next time by adding more layers of gold paint.
I’d also like to try again with some rose gold or copper paint!
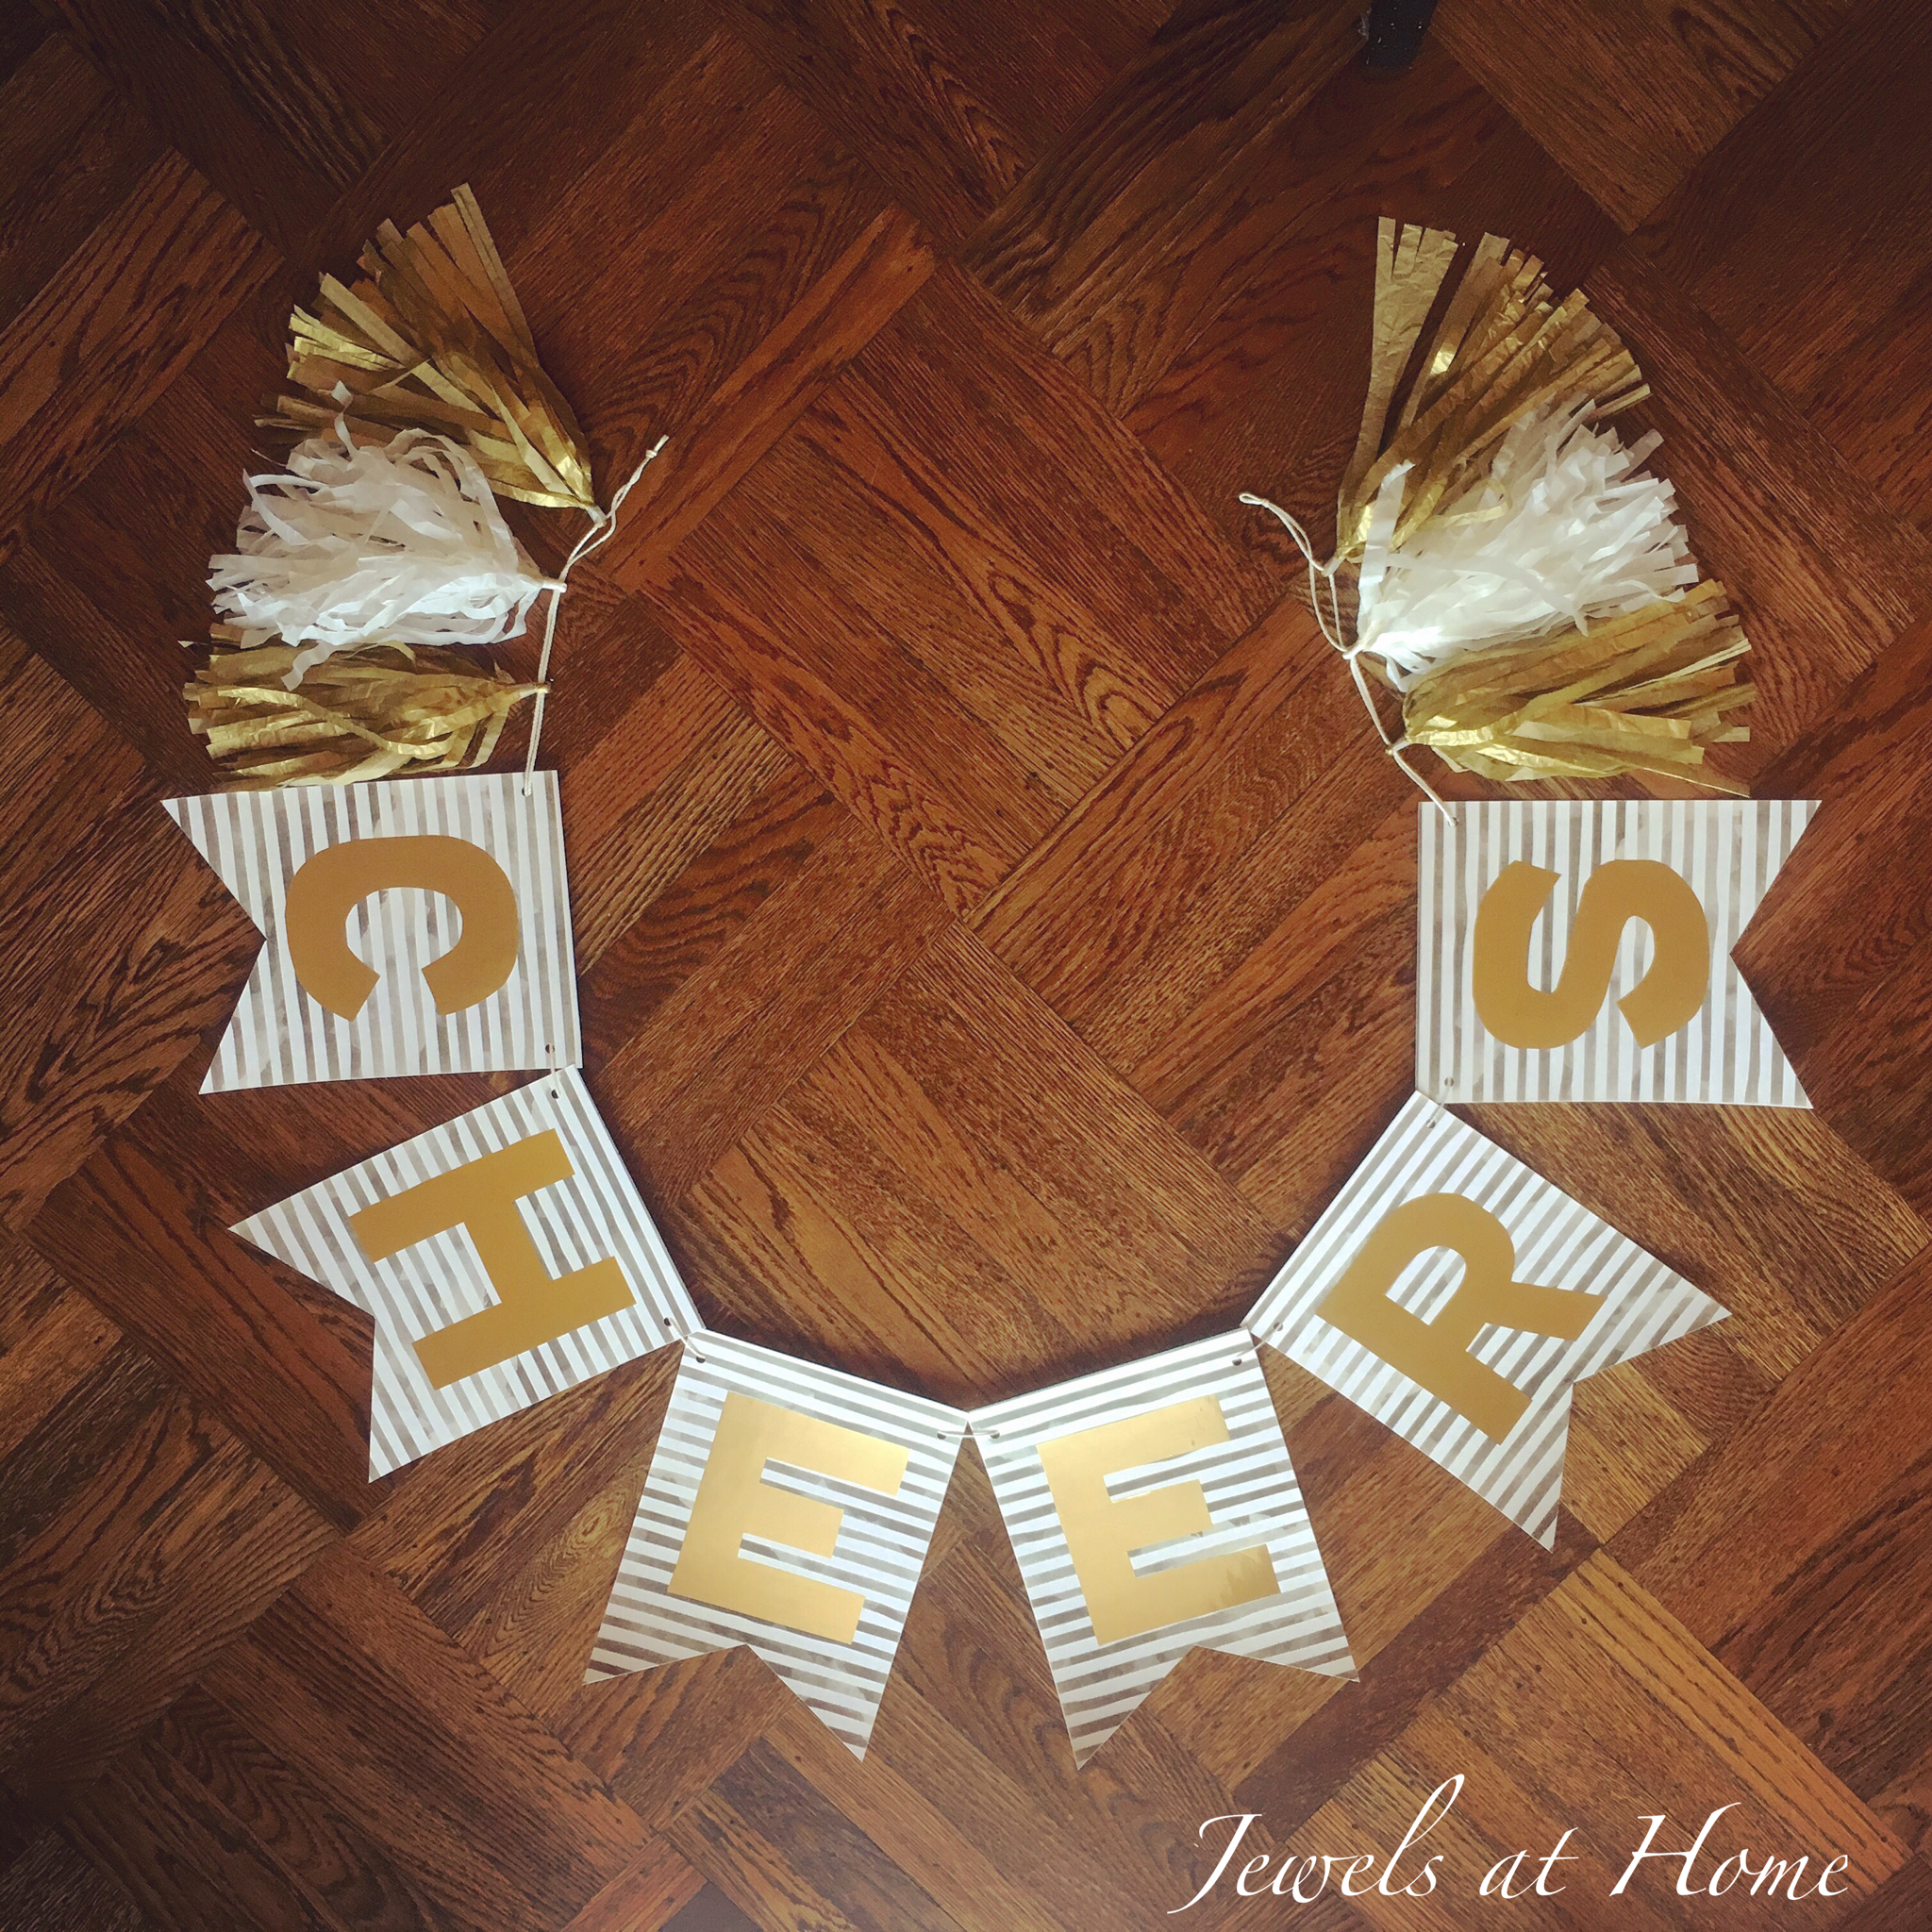
I love hosting parties because of the great food and company. And, to be honest, entertaining is also exactly the kick in the behind I need to work on fun projects around the house. We’re hosting a parent social in a few weeks, and I’m working on some decorations that will be festive and a touch glamorous, to help us all escape for a few hours from the daily routine.
One project I was excited to do was this “CHEERS” party banner. You could use this idea with any saying for all kinds of occasions, like weddings or birthdays. If you want to make one for your next shindig, here’s how I did it.
“Sometimes when you win, you really lose, and sometimes when you lose, you really win, and sometimes when you win or lose, you actually tie, and sometimes when you tie, you actually win or lose.” Rosie Perez as Gloria in White Men Can’t Jump.
Does this happen to you? Sometimes I see something I really like from one of my favorite stores, and I think to myself, “I’ll wait for it to go on sale,” only to find that it’s sold out when I go look for it. Such a bummer! If it’s something I really love, I can often manage to find it on eBay or craigslist (win!)… but sometimes, I don’t (lose!).
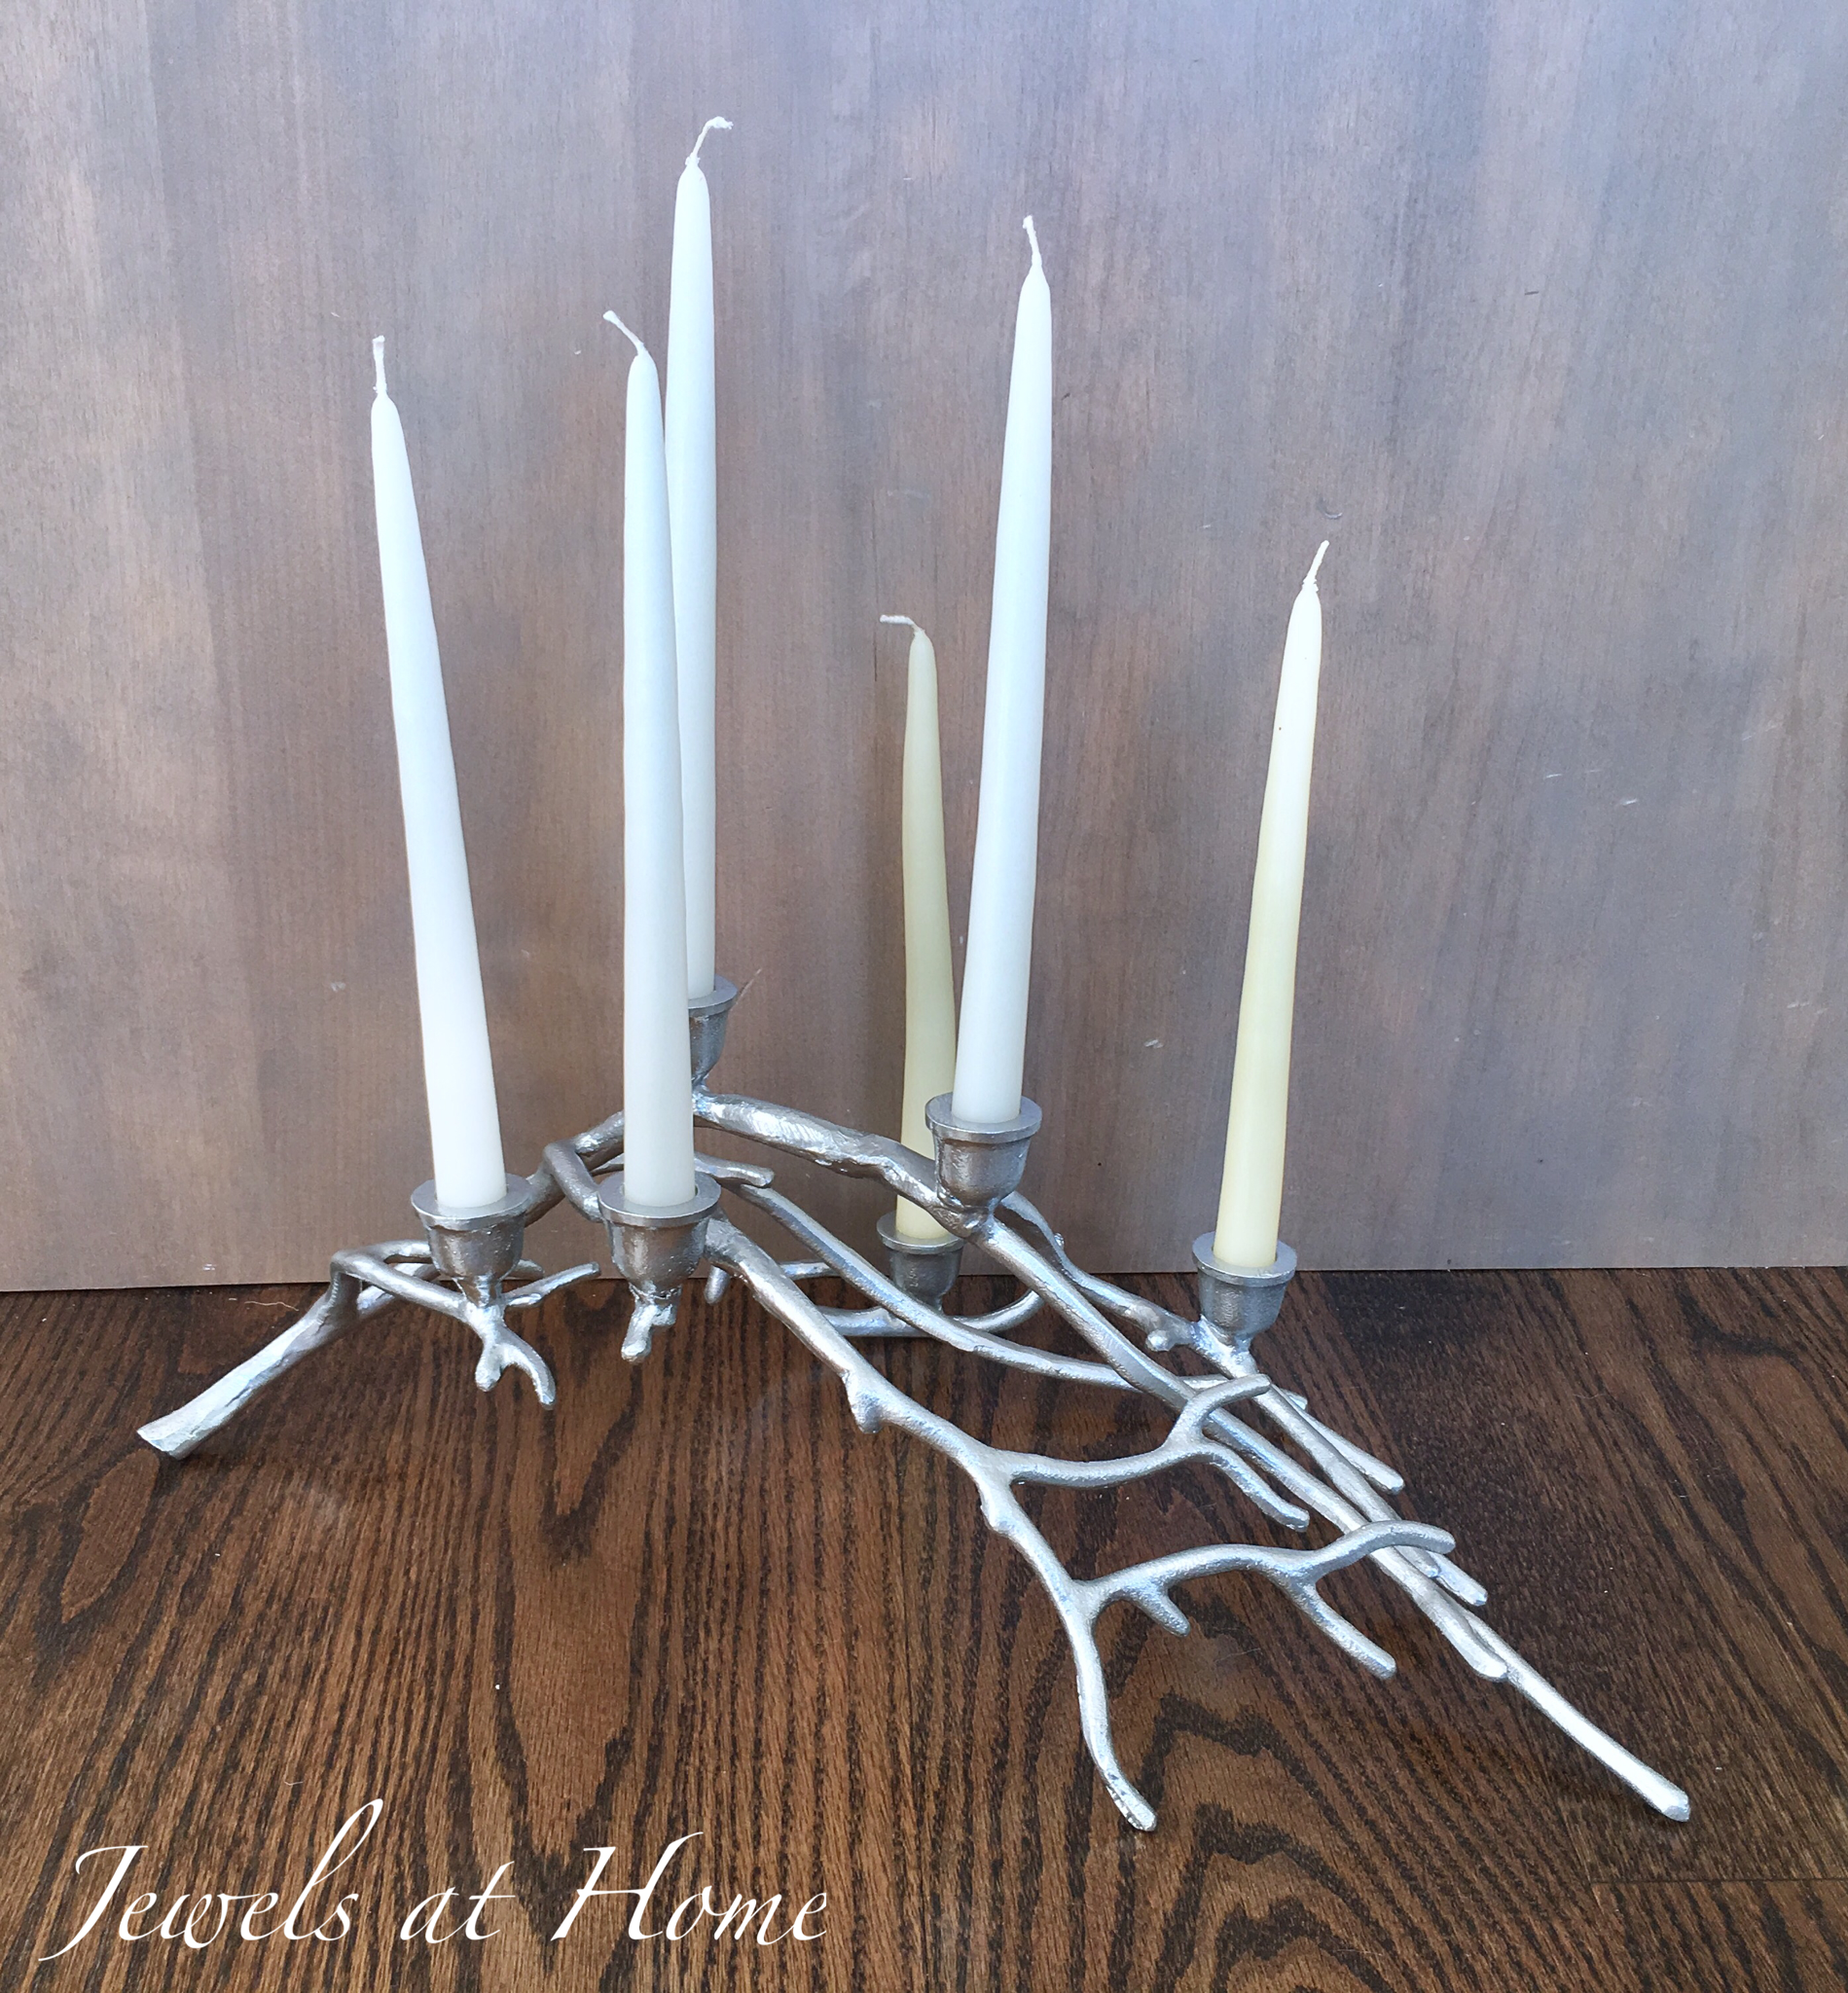
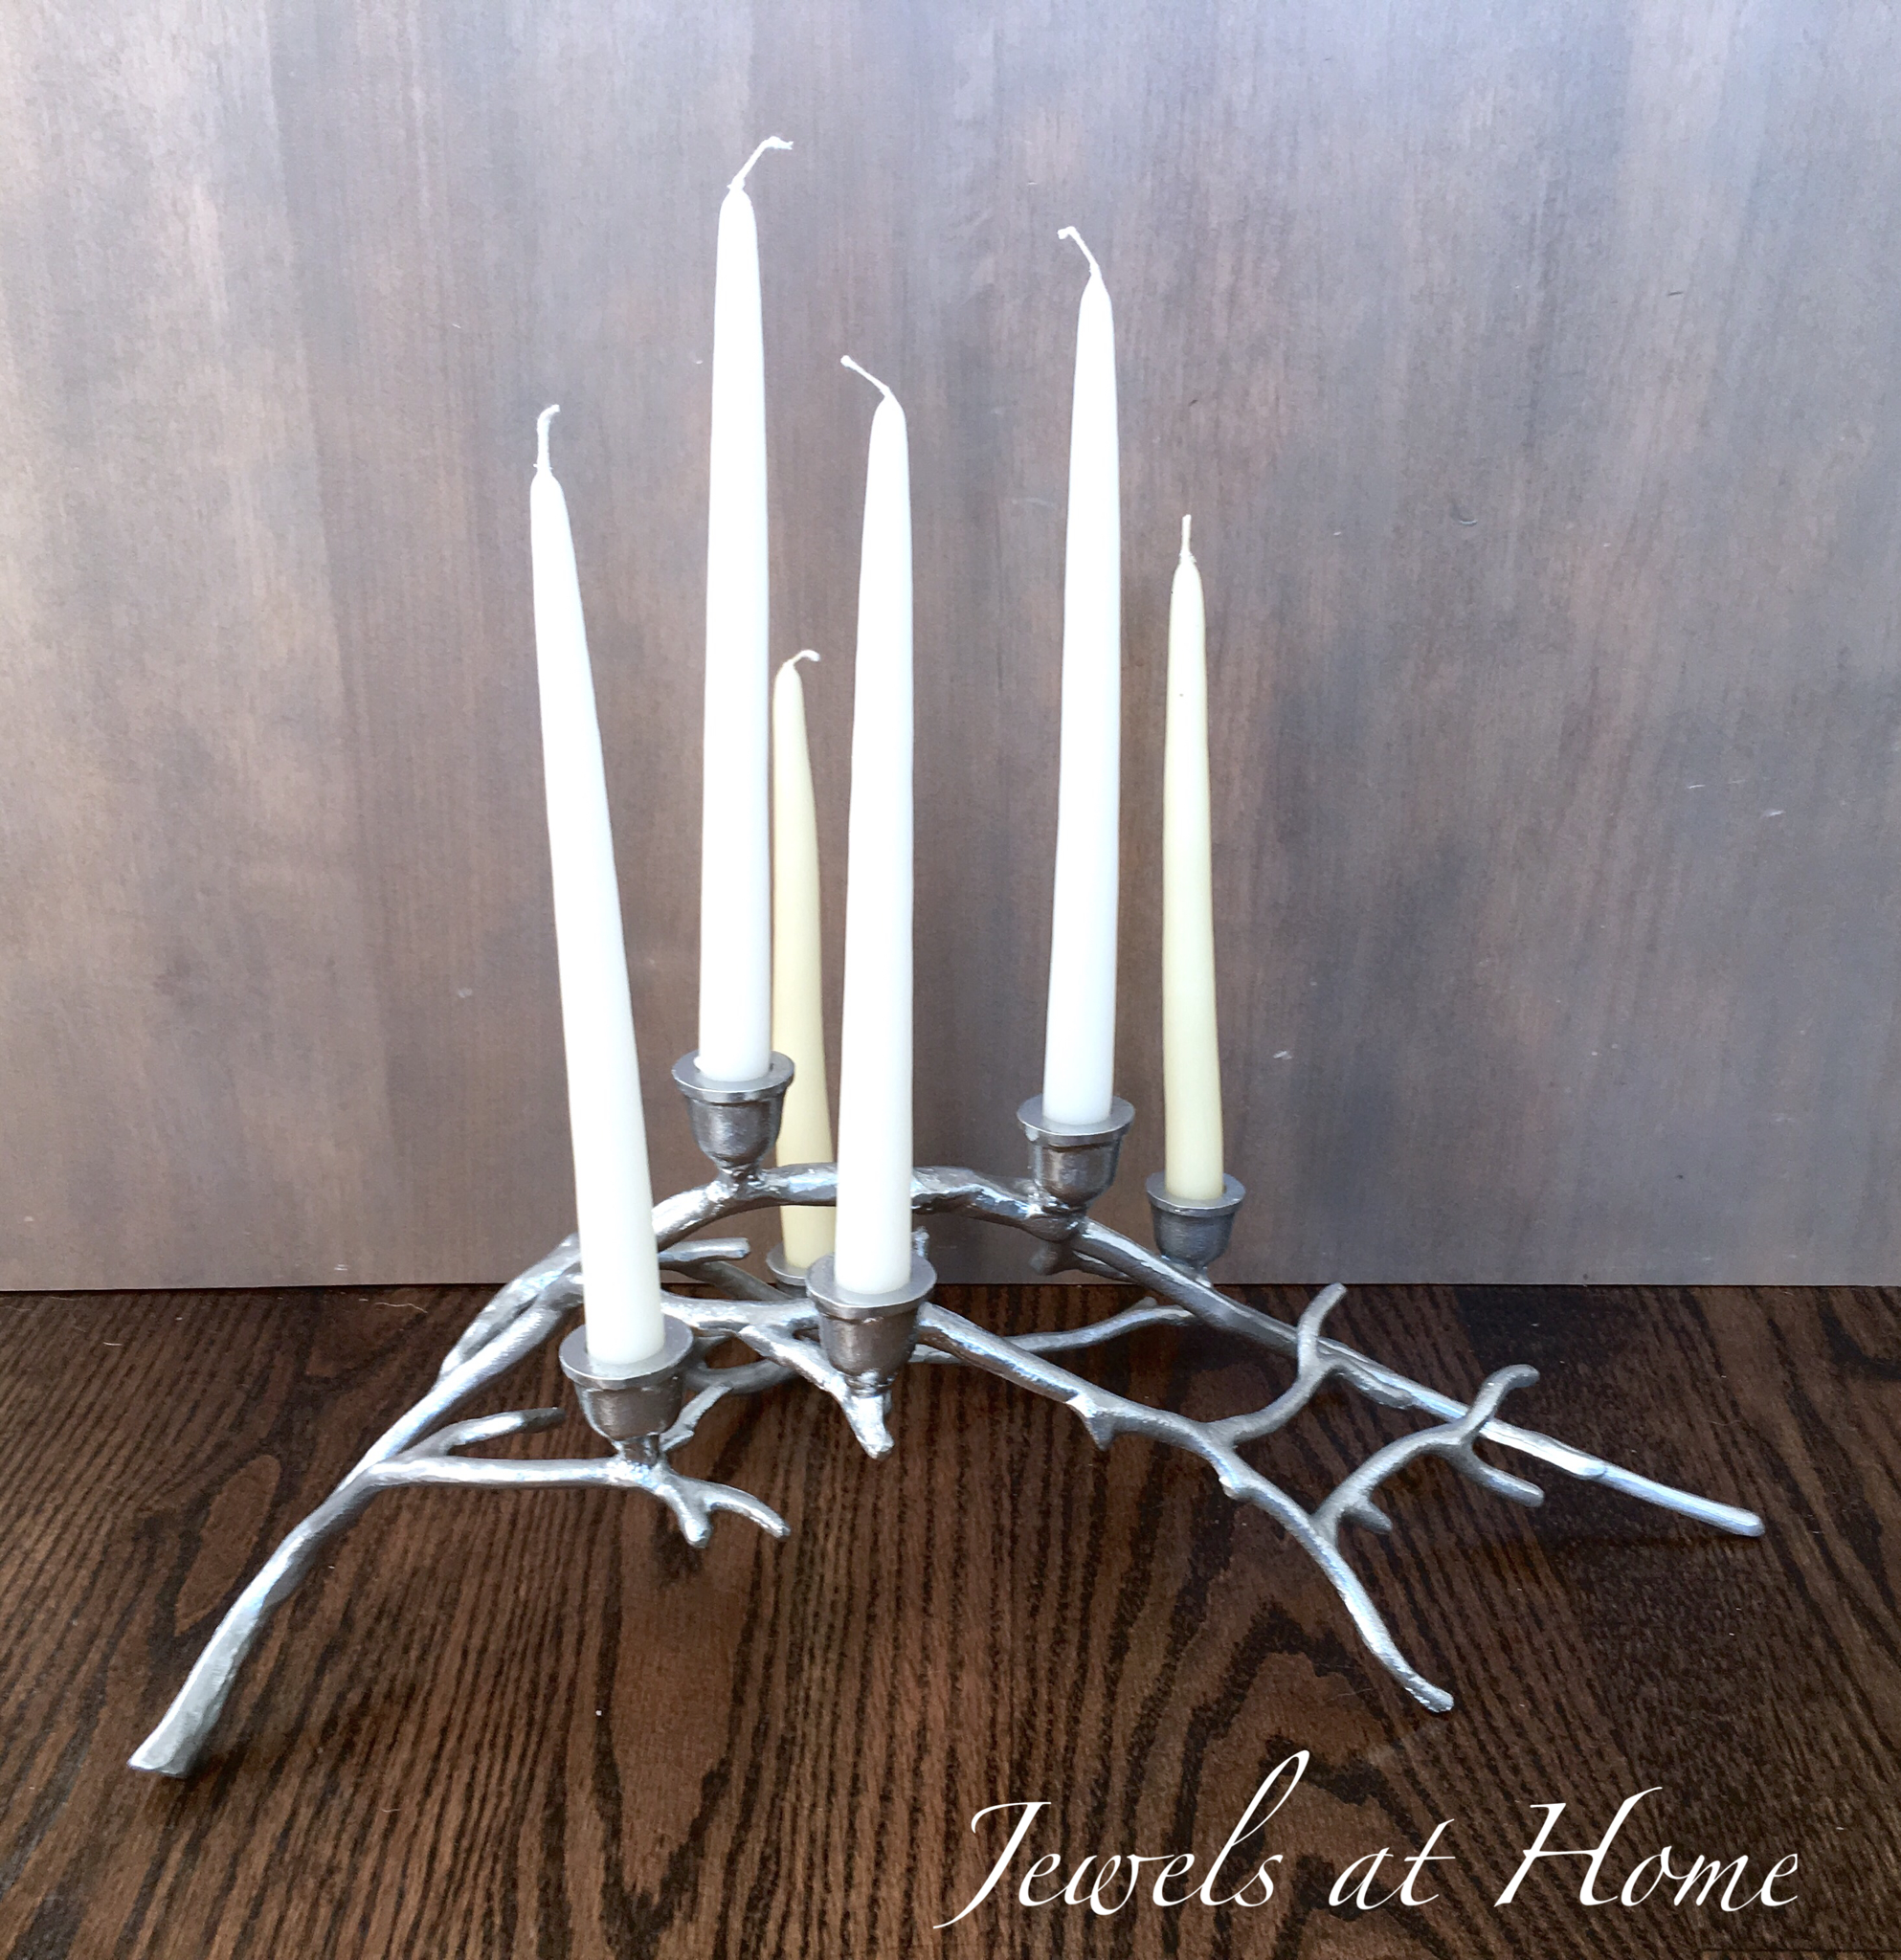
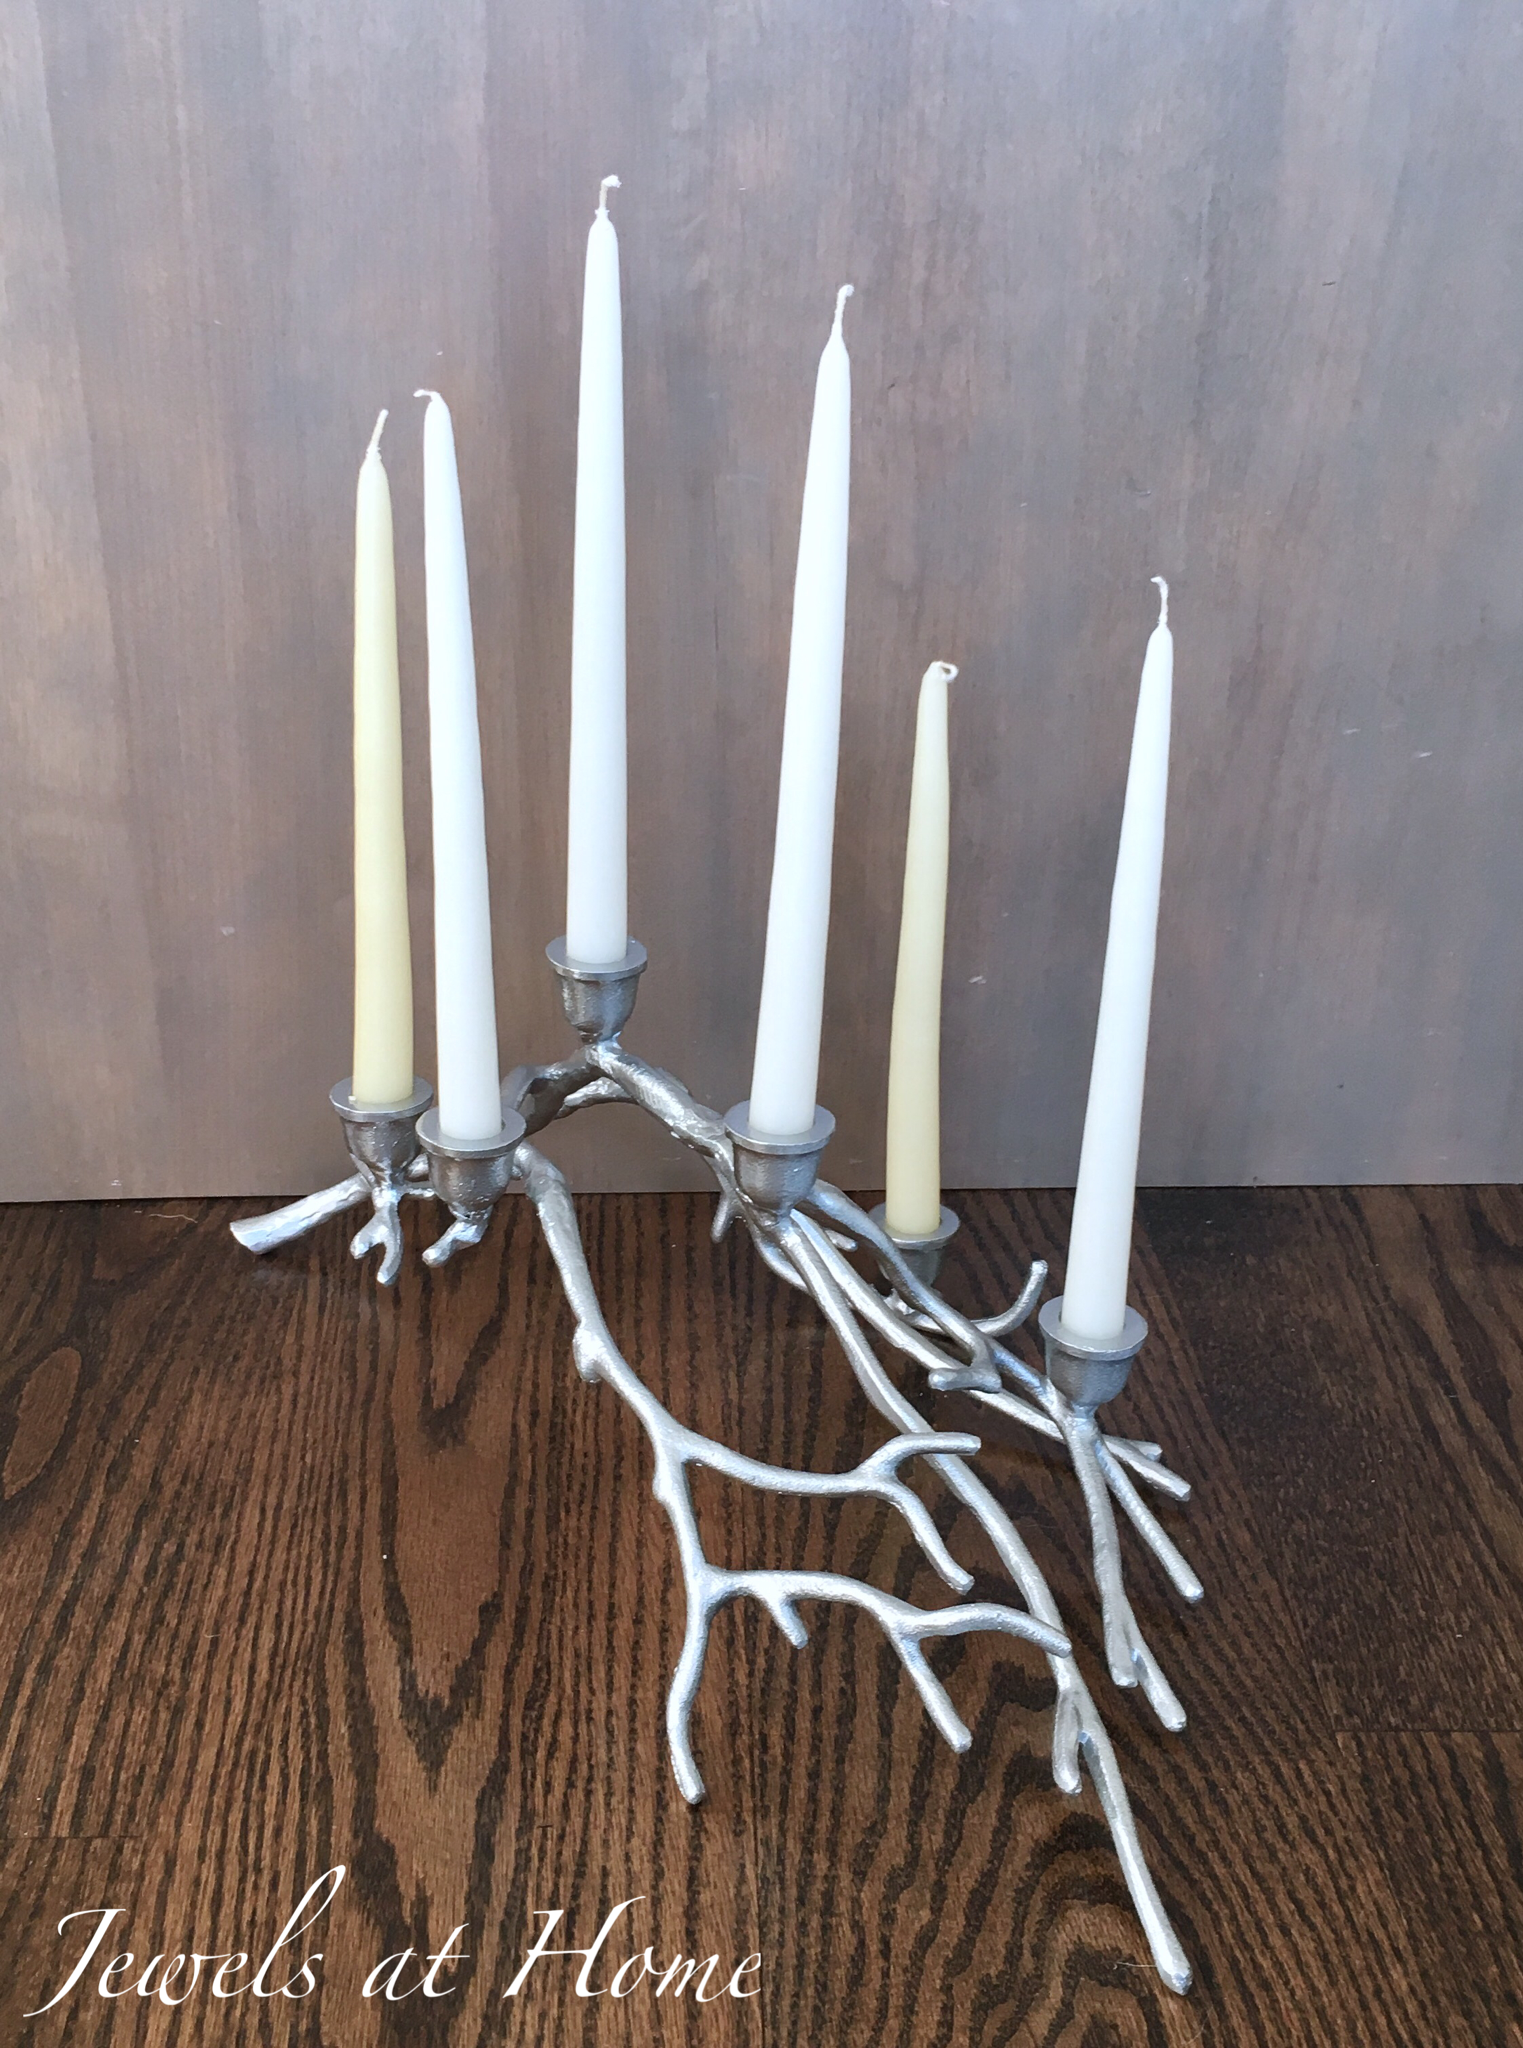
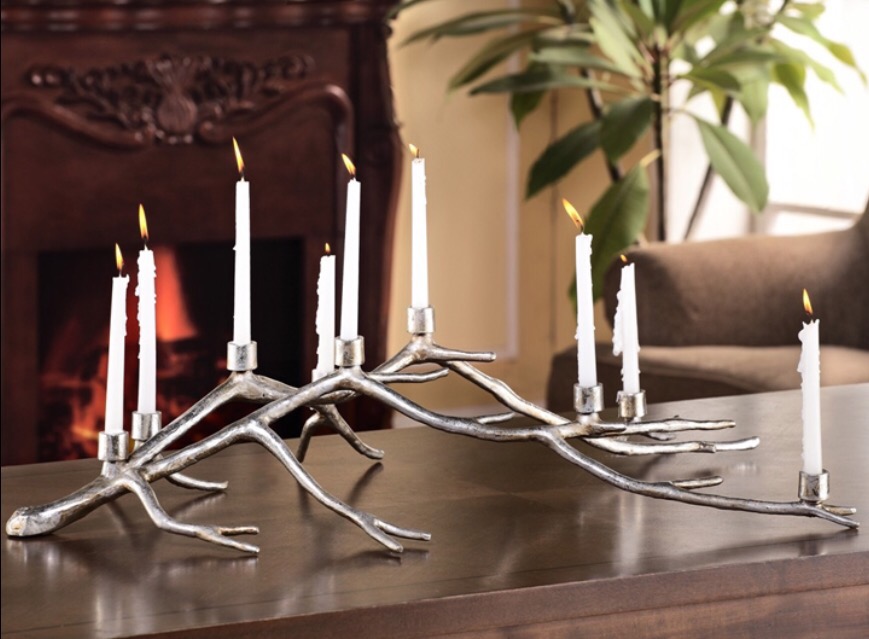
Today’s post is kind of a “tie.” I immediately fell in love when I saw the Manzanita candelabra from West Elm a couple of years ago. But since I didn’t really have a use in mind, I procrastinated. Now, I’d really love to have this for our winter decor, and it’s all sold out. No luck on eBay either.
West Elm Manzanita Candelabra
So off I went on a copycat chic, high/low adventure!
I did find this one which looks very close but costs a bit more than I want to pay.
I used silver spray paint on mine, and I actually love how it turned out! The silver color makes the chunky metal look sleeker, and it’s going to be perfect!


 I used silver spray paint on mine, and I actually love how it turned out! The silver color makes the chunky metal look sleeker, and it’s going to be perfect!