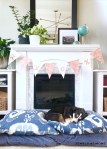
I’m not usually a big Valentine’s Day person, but then again, a holiday built around chocolate can’t be all bad! Anyway, a couple of weekends ago, I got the urge to make something – anything! – and I put together … Continue reading
I’m not usually a big Valentine’s Day person, but then again, a holiday built around chocolate can’t be all bad! Anyway, a couple of weekends ago, I got the urge to make something – anything! – and I put together … Continue reading
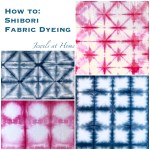
I love the look of shibori – which is hardly surprising, since I love all things blue and white, and fabric. I finally overcame my skittishness about dye and tried this technique… now, I am 100% addicted! I’ve got lots … Continue reading
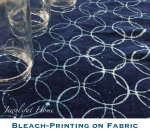
Does bleach scare you? It scares me! Now that you were brave enough to get past the title of this post, I’m excited to tell you about my adventures dyeing fabric with bleach. The effect is similar to the Japanese shibori … Continue reading
Happy New Year!
I am feel super-stoked about work this year. I have my long-time work “family,” and we have added some strong new staff as well. We are moving to new offices, and I am part of building a new clinic, which is a bit daunting but mostly exciting. To help kick off the new year at work, I decided to make myself a cute laptop sleeve.
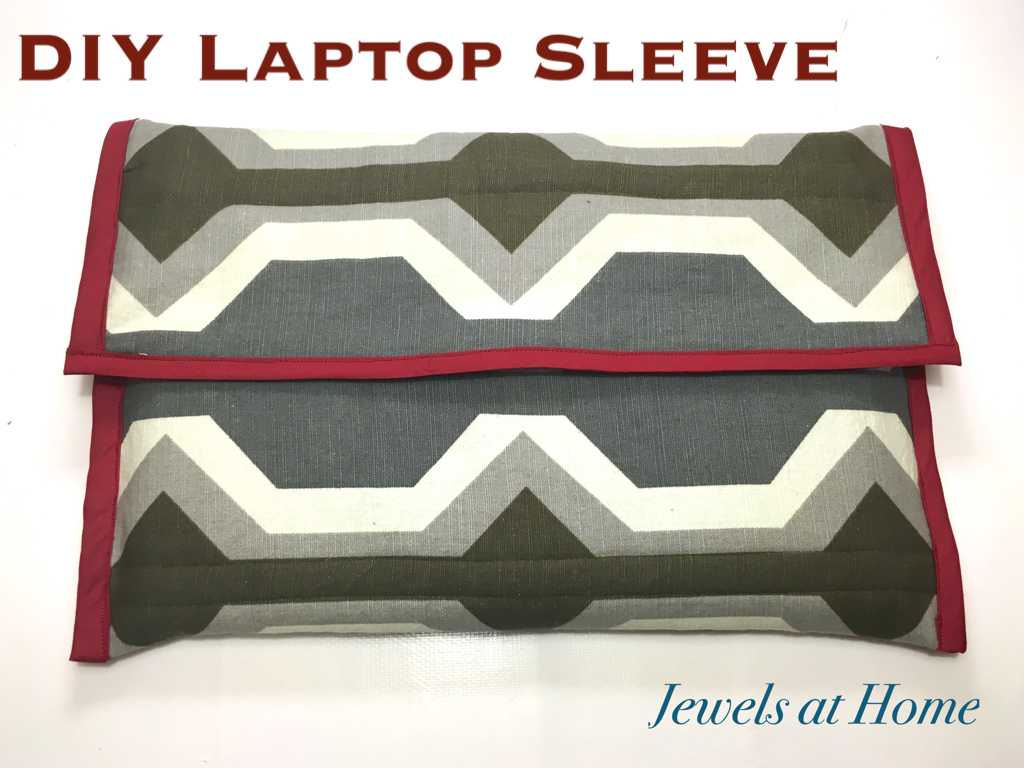
I was inspired by this pattern from Mandi at A Beautiful Mess. I made a few adaptations, like a velcro closure, a sewn-in name tag, and a rectangular flap.
To make your laptop sleeve, you’ll need
Start by cutting rectangles out of all three materials. For the width, the fabric should be 1 3/4 inches wider than your laptop on either side. For the length, wrap the fabric around your laptop and add about 6 inches for the flap. I’m lucky the print on my fabric worked out perfectly to line up… I mean I carefully planned and lined up the pattern on my fabric!
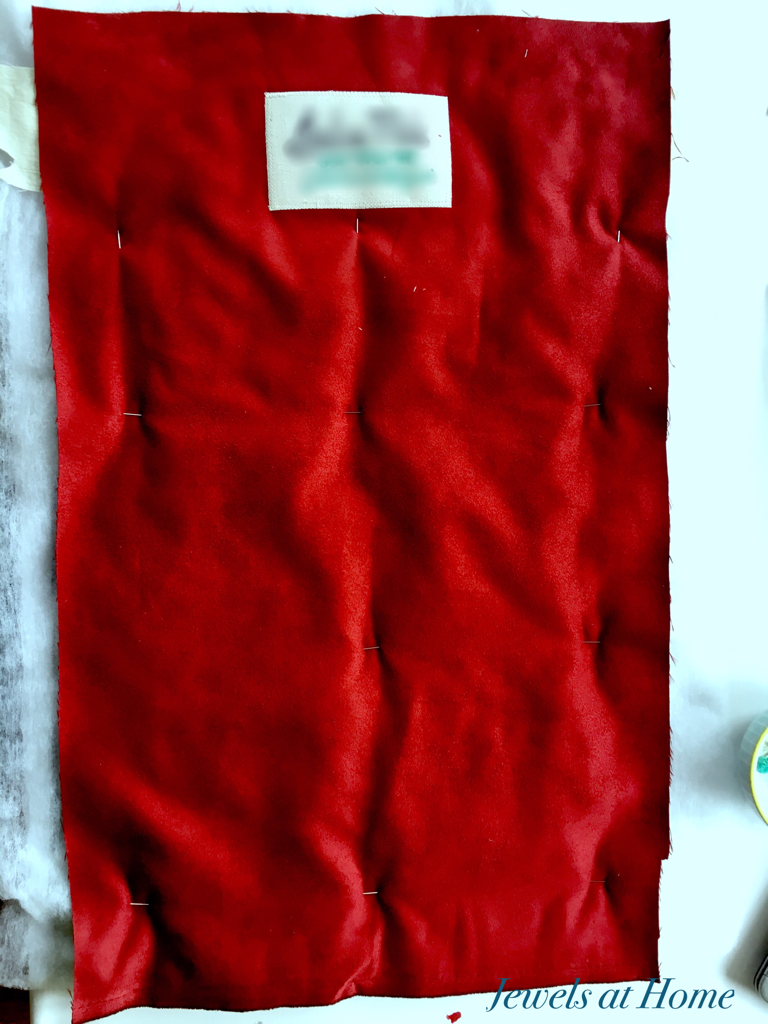
I made a label out of scrap muslin and put my name and contact information on it, in case I should ever be so unfortunate as to lose my laptop by fortunate enough to have someone host find it… I sewed this onto the lining fabric, as show below.

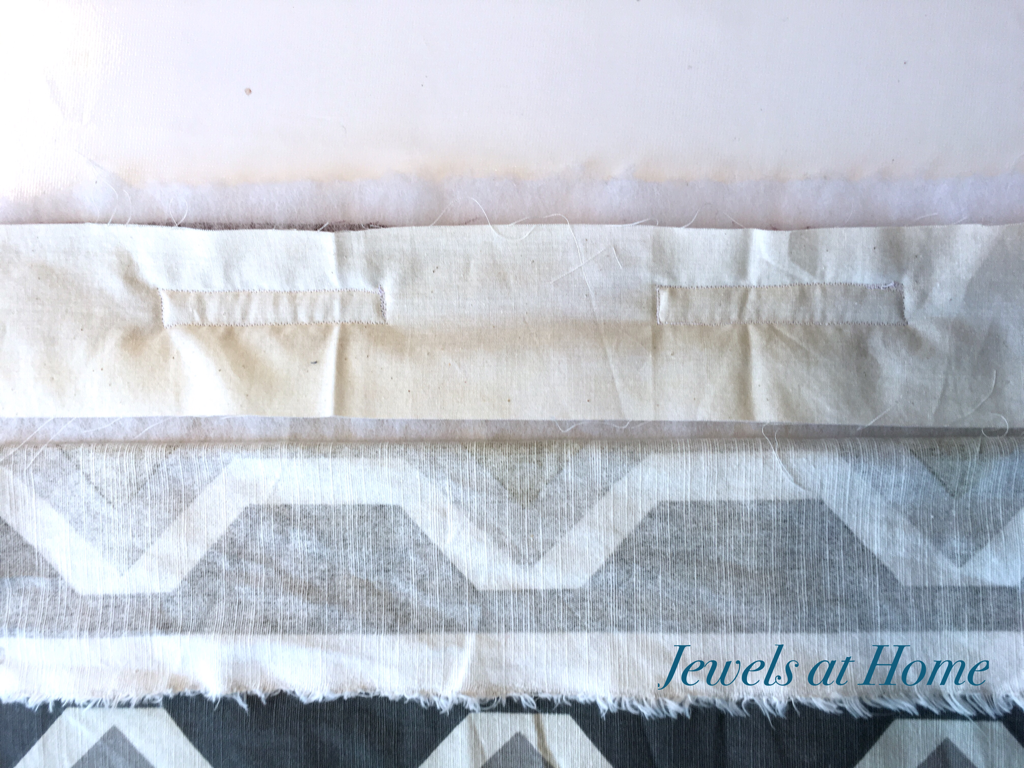
Next, I laid all three layers together and pinned them to keep them in place. I sewed quilting lines through all three fabrics for most of the sleeve, but I did want to sew across my name tag, so for the top section, I used some scrap fabric for backing and just sewed the outside fabric and batting to the scrap fabric, also shown below (folded over).

Next, I added the velcro. For the velcro on the body of the bag, I sewed all the way through, since the velcro is on the outside fabric, and I didn’t mind having stitching on the inside. However, for the velcro on the inside of the flap, I didn’t want the stitching to show on the outside, so I used more scrap fabric for backing, and I sewed the velcro to the inside fabric, batting, and scrap fabric, as shown below.
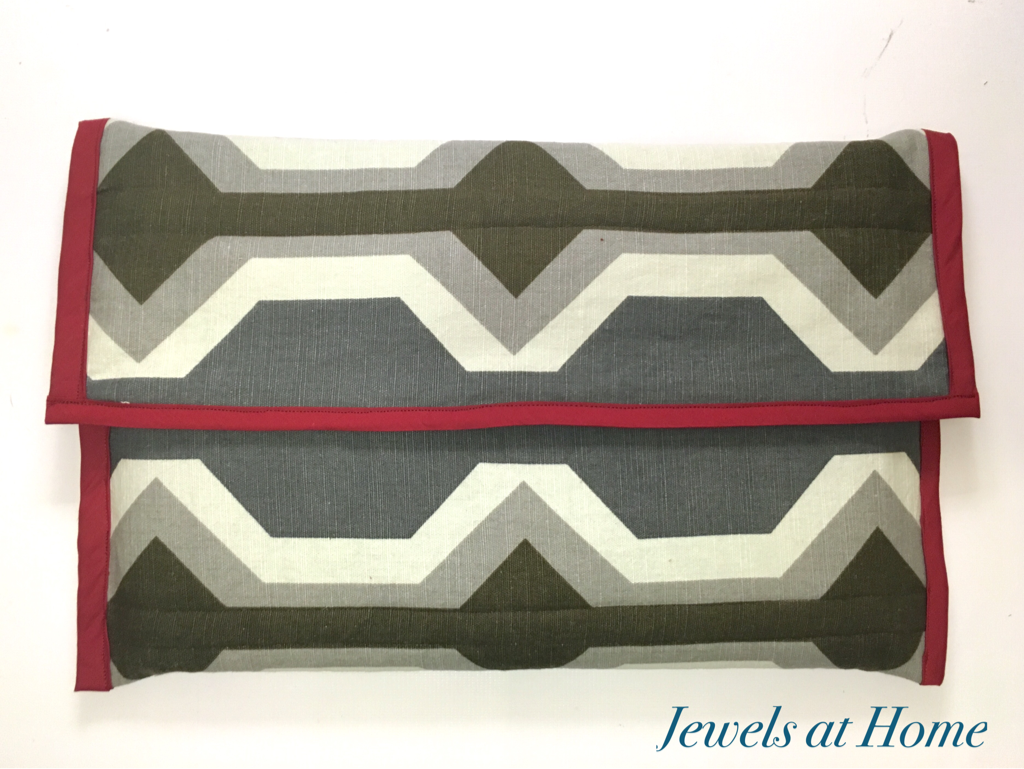
You can see the sleeve taking shape now! I finished one short end of the rectangle with bias binding (shown bel0w) and folded the entire piece to make the sleeve and trimmed some excess from the sides for a snug fit. I pinned the fabric in place to form the shape of the sleeve.

I sewed the sides together with a zig zag stitch and then added bias binding to the sides of the sleeve and top of the flap.
This was a pretty quick and easy project, and I love how it turned out. I think Steve is eyeing the laptop sleeve, and I offered to make one for him, but he does work from home most days and so he has turned me down so far…
Here are some pictures of the finished product!
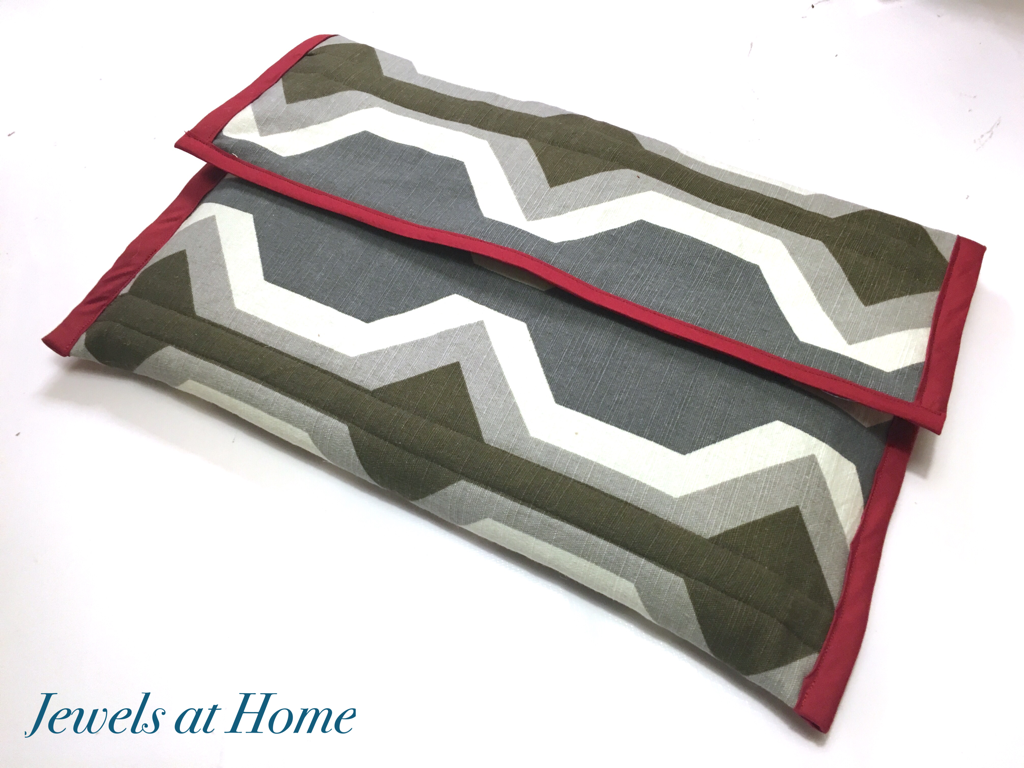
Looking forward to many adventures both at work and “at home” in 2016!
“Jewels”
I recently picked up some beautiful wrapping paper at Lavish in Hayes Valley. This is the same store where I found the perfect red and white graphic paper for lining our nursery bookcase. The new paper I found is for my craft room. It’s called Hydrangeas by Kate & Birdie. This company has lots of very sweet original prints – my six year old bought himself a sheet of pirate ship paper while we were in the store. They started in Winnipeg, Canada, so even dearer to my Canadian ex-pat heart.

Hydrangeas (WP02) wrapping paper by Kate & Birdie. Click the picture to see their site.
The blue, green, and grey color scheme of this paper fits my craft studio perfectly! The blue is just the same as the great print on my newly upholstered Queen Anne chairs, and all the colors are found in the stenciled lampshade I made for that room.
I’m amazed what a long way this one sheet can go. For $4, I have enough paper to create several great accessories and accents for my room. I started a clothespin wreath and moved on to these pencil tins – and I still have more projects planned!
I love reusing old items, though it’s always a fine line between clever frugality and looking like a preschool art project. I’ve definitely seen more “primitive” versions of these pencil tins, but I like to think that mine fit into the feminine, elegant, slightly funky studio I am creating.

Turn used cans into beautiful pencil tins for your office.
This is a very simple and quick project that needs very little explanation. I started by using pliers to flatten any sharp edges along the inside of the can. To cut the paper neatly, I used the quilting ruler and mat I showed in the fabric growth chart tutorial.

Flatten the sharp edged on your can. Cut out paper and glue with a glue stick.
I used a glue stick to affix the paper to the tin. For my kids’ tins, I also added a layer of clear contact paper to make the tins more durable. Finally, I use tacky glue to attach bias ribbon to the top of the tin, for a polished look. (I tried hot glue, but it cools very fast on the metal and gets lumpy.)

Beautiful pencil tins made from old cans, decorative paper, and bias tape.

Craft room desk set: DIY pencil tins fit in with ceramics on a vintage tray.

DIY pencil tins.
While I was making these tins, I added some for the boys’ homework area. These have a layer of clear contact paper over the scrapbook paper, since I know they will get more (ab)use.

Pencil tins for the boys’ homework area.
What else do I want to decorate with my beautiful Hydrangeas paper? A pennant banner, some magnets, magazine files, and some storage boxes for the craft studio. Hope to share those projects soon. Meanwhile, go raid your recycling bin and make some new accessories for your own office!
“Jewels”
Do you have some plain towels calling out for a bit of interest? Adding some ribbon or a beautiful fabric – or both – to some towels is an easy way to transform them. The finished products make great accents for your home and would be great housewarming gifts! The sewing is all straight lines, so a forgiving and doable project. These plush towels were lovely already, but I felt like dressing them up a bit. I used a band of fabric and some bias tape.
Before you start this project, prewash the towels and fabric, so they won’t pucker later, if they shrink unevenly.
I started by cutting strips of each fabric to the width I wanted and joined pieces end to end to make a long strip.

Make long strips of the fabrics you want for the towels
Then, I joined the strips of different fabric to each other and ironed down a seam allowance on the top and bottom.

Sew together the different fabric strips
Finally, I cut sections a bit wider than each towel and pinned it onto the towels, folding a seam allowance on the ends before sewing the fabric to the towel.

Pin the fabric in place, turning under the raw edges.
This was really an easy project, and I think it makes a big impact! I used a little bit of the green and white fabric to decorate a basket in the vanity, to tie the room together.

Finished towels with new fabric border in our master bathroom.

New fabric border on master bath towels.
A funny story along the way: ever wonder what the kids think of all these craft projects? Our six year-old saw the fabric pinned to the towels in my sewing room and asked, “But won’t the pins hurt?” It reminds me that all my great ideas might seem a little crazy to others.
Now that I’ve decorated these towels for our master bathroom, I’d love to try some more. I’ve seen some very pretty versions of this idea on tea towels or burp cloths, all of which would make great and special handmade gifts.
And with these towels, our master bathroom is pretty much done, do that room tour will be coming up soon!
“Jewels”

Happy Mother’s Day! (Well, for many years, I didn’t find this day happy at all, because it made me feel my mother’s absence even more, but with three little ones of my own, it is happy again, and I celebrate the many wonderful memories of my own mom, whose creativity and talent are constant inspiration for me. So, if this is a hard day for you, hugs! And I hope it will get better.)
I’m making some throw or accent pillows for our home. Sewing straight lines is a doable project for me, and I like to make pillows using some of the same fabrics that are in other parts of a room (such as the upholstered chairs in our dining room and my craft room), to tie the space together.
With a beautiful fabric, a very simple pillow design will work well. There are also many ways to add interest and details to your pillows, and I’ve been collecting some of those ideas to try:
Embellish with Ribbon:

By Caitlin Wilson Textiles. Click the picture for details.

I like this pattern shown at Better Homes and Gardens. They used fusible web to attach the ribbon. Click the picture for more pillow ideas on their website.
These ribbon details on simple pillows gives a classic and elegant feel. You could also do a simple square.
Use Contrasting Fabric on Back:

I love the look of a different color on the front and back. This picture is from Grosgrain, where Kathleen has some tips on making a quick pillow cover.
Embellish with Buttons:

Add a letter or other pattern with buttons. This is a beautiful example by Peggy at Letter Perfect Designs on Etsy. (And I’m not just saying that, because it’s a “J”!) Click the picture to see more beautiful button art!
3-D Felt Embellishments:

These three dimensional felt butterflies are so sweet! Click the picture to see the tutorial from Better Homes and Gardens.
Piping/ Welting:

This pillow is made by Weego Home. Click on the picture to see their stunning collection.
A stunning print like this would be beautiful on its own, but I love the piping detail. Here’s a tutorial on eHow for applying store-bought welting or piping. I’d love to learn how to do that!
Silhouette:

This incredible pillow by Weego Home is cut velvet appliqued on linen. I think you could get a similar look with painting on fabric, though obviously, it won’t have the rich feel of this original. Click to see their collection.
Pieced Pillow:

I like the use of panels made from two fabrics, especially the way it is asymmetrical. This pillow is from Anthropologie, though it is no longer sold.
These are some of my favorite ideas – what are some of yours?
Hope to post my new pillows soon!
P.S. Don’t forget that there’s a May Giveaway. Comment on any post by May 15, and I’ll select a winner to receive a custom wall initial.
“Jewels”
Re-inventing an old chair is one of the easiest furniture makeovers, and it is so rewarding to create a one-of-a-kind gem like this!

Free Queen Anne chairs found through Craigslist: from worn and boring to fresh and elegant!
When I debuted my Queen Anne chair makeover, I provided some tips for painting. Today, I’ll cover the basics of reupholstering a chair seat. I had also mentioned in the earlier post that I had discovered a great fabric choice for seats, so let’s start there.
Choosing Fabric:
The secret is that this beautiful fabric, with its bold graphic pattern and textured weave, is not a standard decorator upholstery fabric but an outdoor fabric! It won’t stain, fade, or wear out. You can wipe or even scrub it clean! These days, the options for colors, patterns, and textures in outdoor fabrics are immense. I’ve used outdoor fabrics on several projects, and the results have been great!

“Muse” by P. Kaufmann in Aqua. A colorful outdoor polyester fabric with a linen texture.

“Lake Paradise” by Robert Allen in Spa. Another outdoor polyester with a whimsical print. These are our dining room chairs. More about them soon!

“Dupione” by Sunbrella in Sand. This acrylic weave indoor/outdoor fabric was on a built-in bench in our old house and was clearly toddler- and sippy cup- friendly. I’d love to recreate that bench in our current home. It was great for lounging and had lots of storage in those drawers underneath.
I bought the Lake Paradise and Muse fabrics from fabricguru.com. This is definitely my favorite source for online fabric shopping. They have good prices and selection, and they make it easy to search, which can be overwhelming with some of the other sites. I bought the Sunbrella Dupione from a marine supply store online.
A couple of caveats: the polyester outdoor fabrics are stiffer than cotton upholstery fabric, so they don’t feel as soft or wrap as neatly around corners as a cotton. Also, while fine for the upholstery, they would feel stiff on a cushion, so if you want to create coordinating pillows or other items, you might want to look for the same print in a regular decorator cotton. I found the acrylic was much softer to the touch, though I did not do the sewing on those fabulous bench cushions. I also have noticed some slight piling on our dining chairs, but it’s very minor, and I am sure that they would be in much worse shape by now, if I had used a standard cotton fabric, because we eat there every day.
Upholstering a Seat:
You will need:
1. Use a flat head screwdriver and pliers to remove all the old staples. Argh! Look at all those staples. This took a long time!

2. If you aren’t reusing the old foam, cut a new cushion from a sheet of foam from the craft store. I used two pieces of 1/2″ foam, one cut to fit the seat exactly and the other a bit wider, to wrap around the outside of the seat.

3. Center the fabric under the foam and seat bottom. For a large print, like the “Muse” on my Queen Anne chairs, pin the fabric in place, to make sure the pattern is centered.

4. Using the staple gun, tack the fabric onto the seat bottom on the center of each side. (Apparently, I forgot to take a picture of this!)
5. Next, staple from the center of each side towards the corners, stopping about two inches from the corner. Fold up the fabric at the corner and tack it to the bottom of the seat:

6. Now finish stapling the fabric on the sides. Depending on the angle, sometimes you need an extra fold in the fabric.

7. Repeat for all sides and corners, and you’re done!

Let me know if you have any questions!
“Jewels”
Bad news: I’m blogging and sewing tonight while sitting on a step stool. Good news: it’s because I am in the middle of making over my free Craigslist Queen Anne chairs for the sewing room. They are already repainted, and I just need to re-do the seats, which I hope to do this weekend. Wait! What was I supposed to be talking about… oh yes…
In a recent post, I brainstormed ways to help my friend preserve the record of her children’s heights marked on a door jamb in their house. I loved looking at all the great ideas out there, as well as coming up with some of my own.
At the end of that post, I included a picture of the hanging fabric growth charts I made for my kids. In case you want to make one for your family or as a gift (I first designed this as a baby shower gift!), I’ve broken down the steps here. Let me know if you have any questions!
As I mentioned last time, I’m sure there are similar growth charts out there, but I designed this one myself, keeping in mind that I wanted it to be
The finished size of this growth chart is approximately 11.5″ wide x 54.5″ high.
For each chart, you will need:
1) On a strip of white fabric that is 8.5″ wide for each growth chart, mark out inches from 1’6″ to 6’2″ (or whatever you like) by laying a tape measure on the fabric and using a ruler to draw lines with a fabric marker or Sharpie. I used a different color and longer marking every six inches. The short lines are 1.5″ and the long lines are 2″. Remember that lines on the finished product will be shorter, because a 1/2″ will be in the seam allowance.
If you are making more than one growth chart, you can be efficient and mark lines for two at a time, as shown below. You will need a slightly longer fabric strip and want to number from both ends, so the marks are on the left of each chart.

Inches marked on white fabric using fabric markers.
2) Cut out strips for a border. The side strips are 2.5″ wide. The chart should be 58″ long, but cut your strips about an inch longer, in case you are like me, and straight lines magically transform into uneven ones… For preparing the border, I used a rotary cutter with quilting ruler and mat. These tools are designed for quilting, where you have to piece together very precise lines and angles, but they work well for lots of other projects.

Quilting tools: rotary cutter, quilting ruler, and mat. These are so useful for getting straight lines and square angles on all sorts of projects. I even use the mat and ruler for cutting paper.
3) Sew the side strips onto the white center, using a half inch seam allowance. Iron flat, with the seam toward the border. Trim the border pieces so they are flush with the white section. Again, the quilting tools are great for getting things straight and square.
4) Next, cut strips for the top and bottom border. These are 5.75″tall, and they should be 11.5″ wide. Again, I cut the pieces a bit wider, to compensate for the nasty elves in the sewing machine. Sew these on to the top and bottom, using a half inch seam allowance. Iron with the seam toward the border. Now that the front is complete, trim where necessary to make sure it’s even (square at the corners, same height on both sides, same width at top and bottom).

After trimming the center piece, join the top and bottom borders.
You could add any decorations you want to the front at this point. I put each child’s name at the top, piecing together letters from a fun teddy bear alphabet print. I also added a “Made with love by ‘Jewels'” tag to the bottom.

I put each child’s name on his growth chart using letters from this cute teddy bear print.
5) Cut a piece of backing that is the full size of the front (should be about 11.5″ wide and 69″ long, but measure your actual piece).
6) With RIGHT sides together, pin, then sew the front and back pieces together, using a half inch seam allowance, leaving one of the short ends open, so you can turn the piece.
7) Cut diagonal triangles from the corners, so they turn neatly. Then, turn the growth chart right side out and tuck a half inch seam allowance under on the open end. Iron the whole piece flat.

Cutting across the diagonal at the corner will give a neater finished appearance.
8) Cut two pieces of doweling that are the same length or a tiny bit shorter than the finished width of your growth chart. Attach the screw eyes to both ends of one piece.
9) Fold towards the back and sew down a 1.25″ flap on the top and bottom to create a pocket for the dowels. This will also close the end you left open.
10) Insert the plain dowel in the bottom pocket and the one with the screw eyes in the top. Thread a ribbon through the screw eyes to hang the chart.

Finish: Sew 1.25″ flaps on the top and bottom to hold the dowels. Insert screw eyes in the top piece and thread a ribbon through for hanging.
Tada! The finished growth charts are hanging in the hallway outside our kids’ bath, opposite the newly organized laundry area.

Finished growth charts
Hope I made that clear. I’d love to see pictures, if you make one of these yourself!
“Jewels”
This project is shared at:

… a very good place to start!
Art that features initials is so versatile. It looks great as part of a wall display, on a shelf, or on a door. It could make a great gift for a baby or child – it makes a kids – and the parents – feel so special to see their name on things!
There are lots of great ideas for projects featuring artistic initials, and I want to try them all! I decided to start with a simple 3-dimensional cut-out initial wrapped in paper or fabric. Here’s how I did it!
1) Buy or make a base letter: I’ve seen oversize wooden and cardboard letters at craft stores, so you could definitely start with one of those. In this case, I was feeling lazy and cheap – not to mention I do my projects when the kids are either napping or in bed at night, which makes trips to the craft store hard! So, I decided to cut out my own letters from cardboard. I had some extra-thick cardboard leftover from “dish pack” boxes from our move. These are great for lots of cardboard projects, because they are made from a double layer of corrugated cardboard and thus stronger and warp less.
You can find endless fonts by searching on the internet. I settled on Archive Garfield for a classic feel:

Archive Garfield upper case letters example from Myfonts.com
You could print out the letters you want, enlarge and then trace them, but I decided to wing it freehand. First, I decided on the overall dimensions I wanted – nine inches high – and marked that area on the cardboard. Then, I sketched the letters inside the space, using a ruler to make the straight lines. I also made some of the areas a little thicker than they are in the original font, so they would not be too fragile when cut out. I ended up using a popsicle stick to reinforce the thin part of the “K.” Also try to avoid narrow gaps – the inside curve of that “J” turned out to be tricky to wrap around. I used white glue on the very short tabs of paper and held them in place by wedging some bubble wrap in the gap until the glue dried. It turned out fine.

Sketch or trace the letters onto cardboard using a ruler to help. Make sure the lines are not too thin and also try to avoid narrow gaps.
2) Apply paper or fabric: This is where you could get creative and use scrapbook paper, wrapping paper, maps, photos, fabric, whatever! I would recommend cutting leaving a one inch margin around your letter – I didn’t have that much, because I was using a scrap leftover from decorating the back of our little guy’s bookcase, which made it harder. Also, if you are using corrugated cardboard, I would just put a couple of spots of glue from a glue stick on the front, because if you glue it down thoroughly, the corrugation will show.
Cut tabs to help ease the paper around curves and corners and then glue down the tabs. Because I had a small margin, I needed to use some tape to help. Once I had the paper wrapped around, I used a popsicle stick with a little white glue on it to help smooth any areas where you could see the tabs, like around the curves.

Lightly glue your letter to the back side of your paper or fabric. Cut out with a one inch margin (more than I had!) and cut tabs for the corners and curves. Glue!
3) Voila! and Finish! You could clear coat your letter with clear spray paint or Modge Podge. I wouldn’t do it with the corrugated, because, again, it would make the corrugation show through. It would be a nice finish for wooden letters, though.

Finished product! A 3-D initial wrapped in beautiful paper.
4) Hang and enjoy! I’m using 3M Command Picture Hanging Strips. These are very easy to use and have the additional benefit of adding more dimension to the letter, so it really stands out from the wall.

3M Command (TM) Picture Hanging Strip – easy and removable!

The “J” in its place on the nursery wall.
And now, here’s a sneak peek at the other kids’ initials! I let them pick their own paper. I was thinking stripes, but I love how the stars turned out.

DIY paper-wrapped wall initials for my boys’ rooms!
