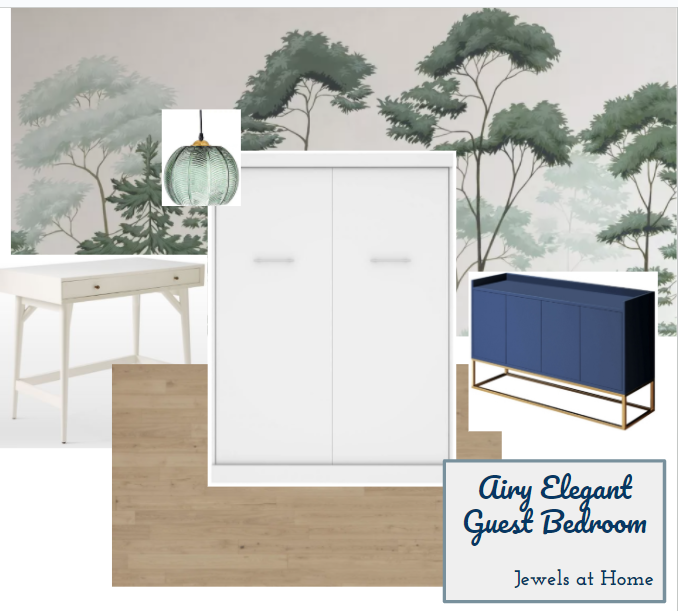
We’re waiting on permits to do a renovation adding a small guest bedroom and bathroom to our home. I’m getting excited and working on the design plans. I already shared the plan for the classic blue and white bathroom! Next up, here’s the design for the guest room. It’s going to be compact and on our lower level, so I wanted to keep the look airy and light. Of course, there’s plenty of my favorite blue and white, but I’m also really into the color green right now, so it’s fun to introduce that as well!
So, the wheels of the planning department are turning, and we are hoping to be able to do a renovation to add a small guest bedroom and bathroom to our home. I’m getting excited and working on the design plan. The colors will be blue and white – of course! And the style will be classic, with a nod towards mid-century design.
Wall tile: Fireclay 3×9″ subway tile in Slate Blue and Frost
I’m going to keep researching, but I like this direction! Let me know what you think, and keep your fingers crossed for our permits to be approved soon!
Julie AKA “Jewels”
This post includes some affiliate and paid links. There is no additional cost to you to shop through those links, but I may receive a small commission.
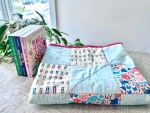
We are having a real baby boom in my “work family”! I started a tradition of making quilts for the new babies on our team, and there are a lot! I’ll share some of the past designs at the end … Continue reading →
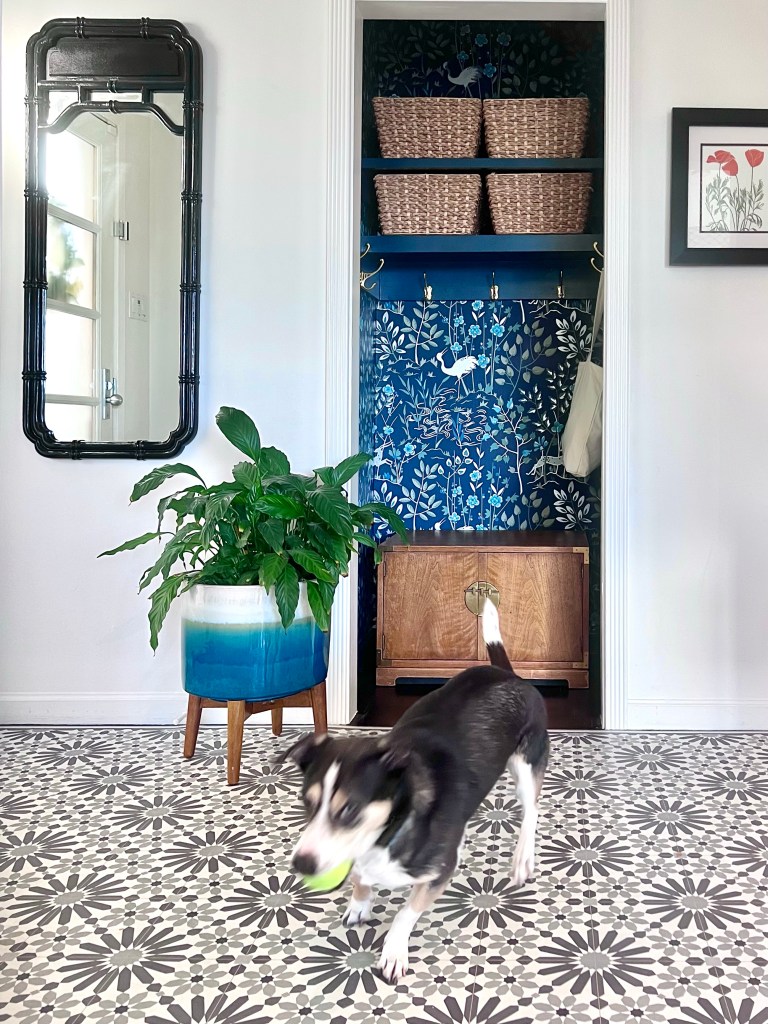
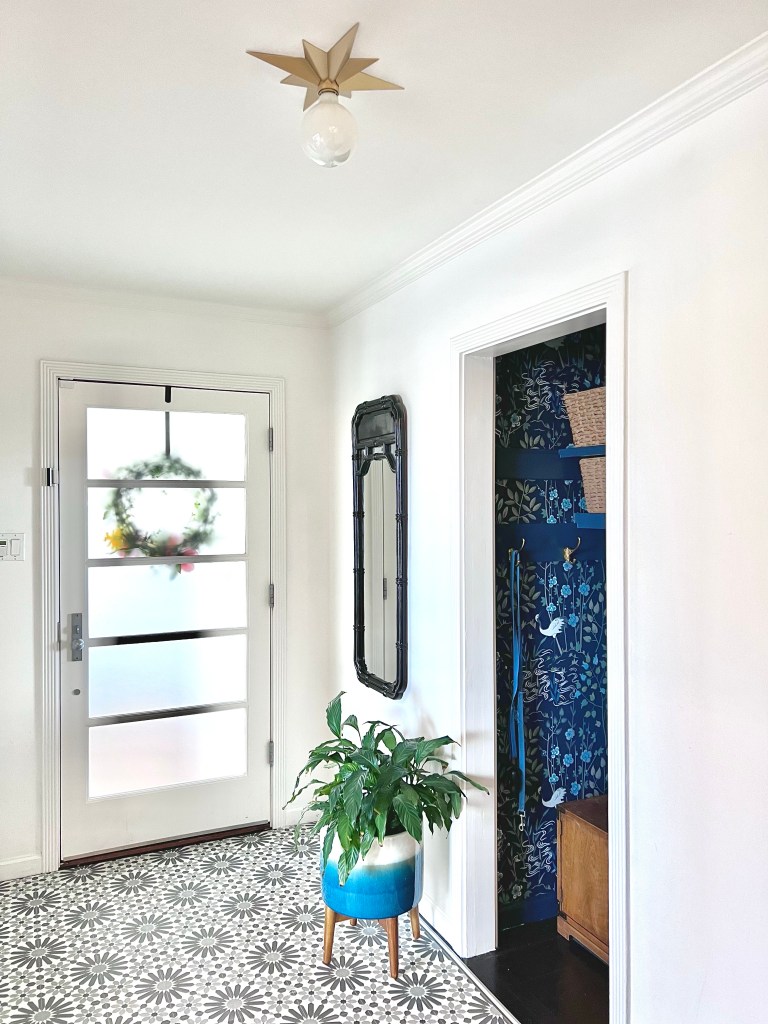
I’m excited to wrap up the One Room Challenge. It’s such a great way to motivate yourself to work on projects, and the community is already inspiring and positive. To remind you, I took this opportunity to turn our small, plain entry into a welcoming space that added function and style. I’m happy to say, mission accomplished!
You can see details on my choices and process in the posts from previous weeks. Here are some more pictures of the finished space!
Thank you so much to the One Room Challenge team and Apartment Therapy for a great event! It’s a great motivator and the most positive community. I’m already considering a project for the fall challenge…
It’s hard to top last week’s Mini Mudroom reveal. The conversion of our standard entry closet in to an eye-catching and functional focal point was a real thrill (True, I don’t get out much!). This week’s project for our foyer makeover was changing out the bland ceiling fixture for something that makes a statement!
Our space is small, and the ceilings are only 8.5′ high, so I was looking for a modest flush mount fixture that would add some character to our entry. Here are the beauties that made the short list:
I ended up choosing the simple Gold Star Light Fixture, and I paired it with an oversized bulb (affiliate links). It’s not quite as elegant as the inspiration from Ballard Designs, but it’s definitely added style to our little entry way!
I’m going to add some finishing touches and take some more pictures to share for next week’s grand finale! In the meantime, head on back to the One Room Challenge site to see some more room transformations!
I dressed up this wooden desk organizer to create some pretty storage in my kitchen. You could use it for a bathroom, office or craft space also! I love tea – and throwing tea parties – so this is perfect … Continue reading →
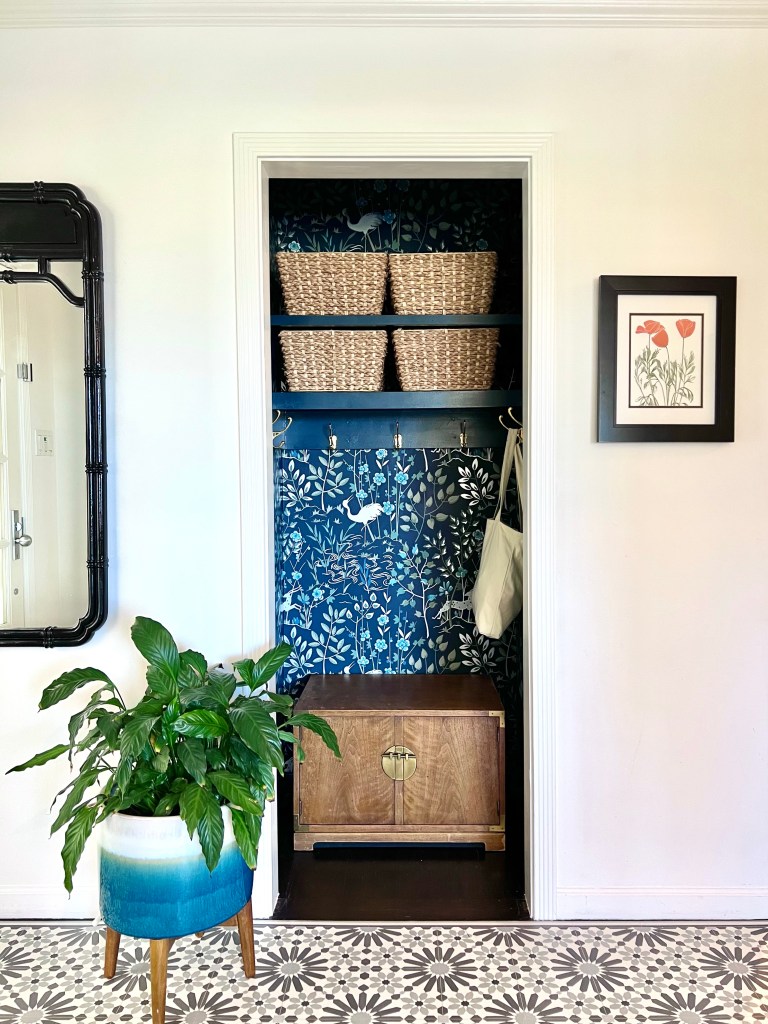
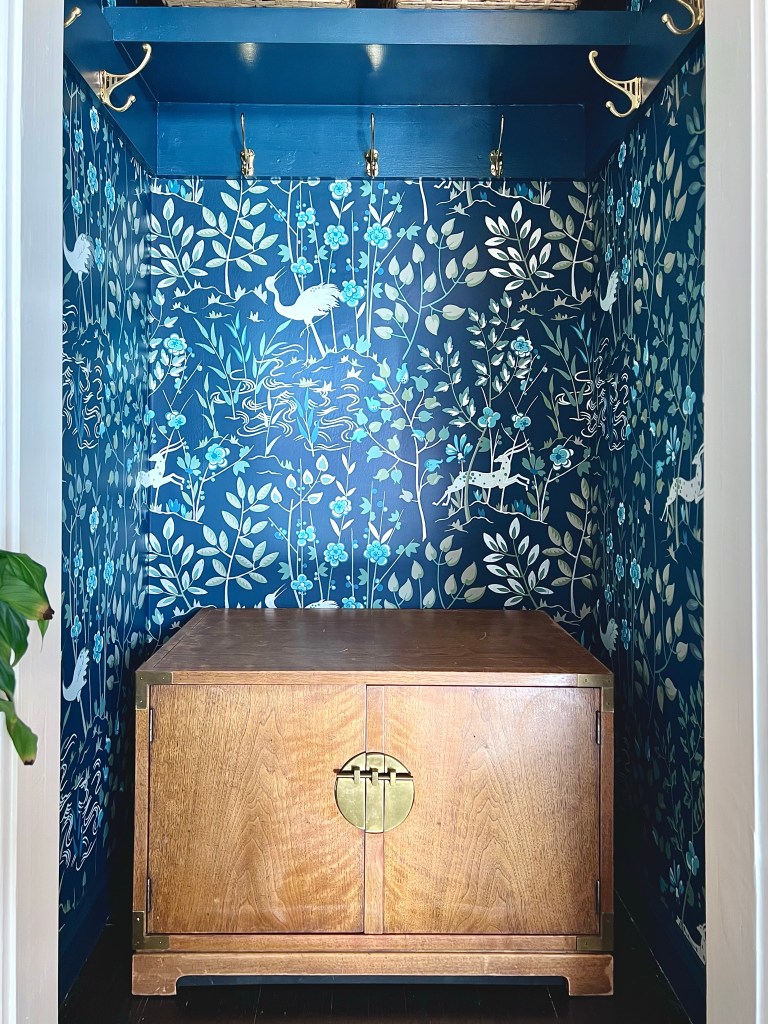
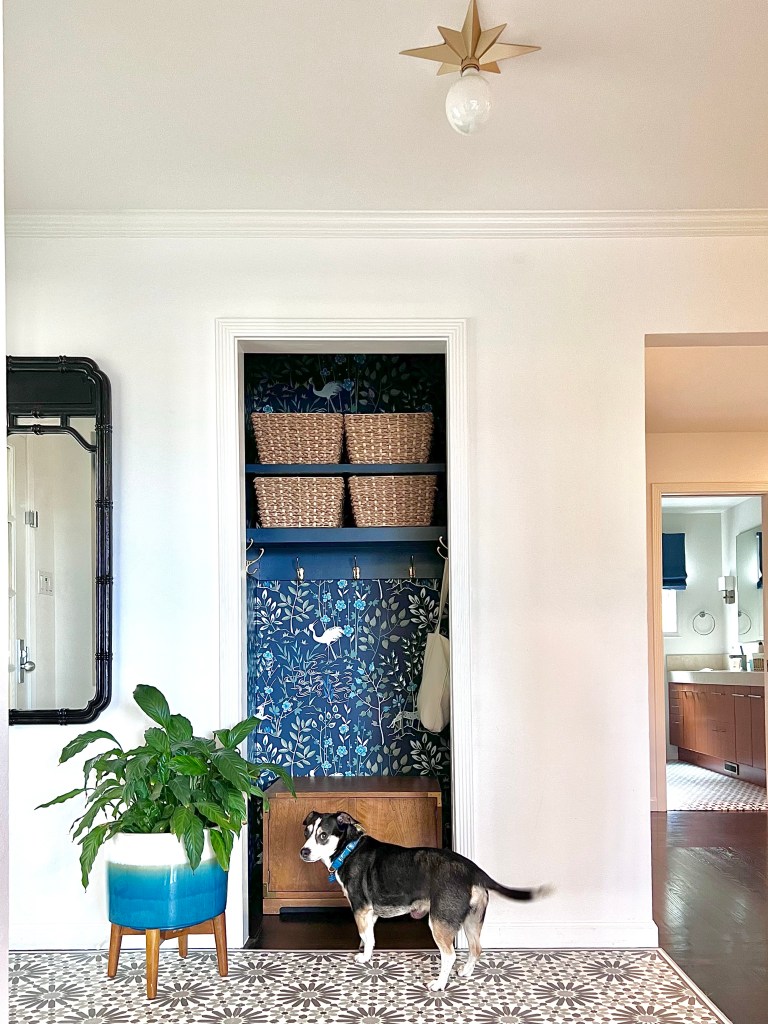
It’s so satisfying when a space comes together! I knew the hall closet was not working for our family, and now we have a mini mudroom that is functional and also beautiful – I am so happy with the result!
After building the space,
I painted the shelves, trim, and ceiling in a semi-gloss paint that I had color-matched to the wallpaper.
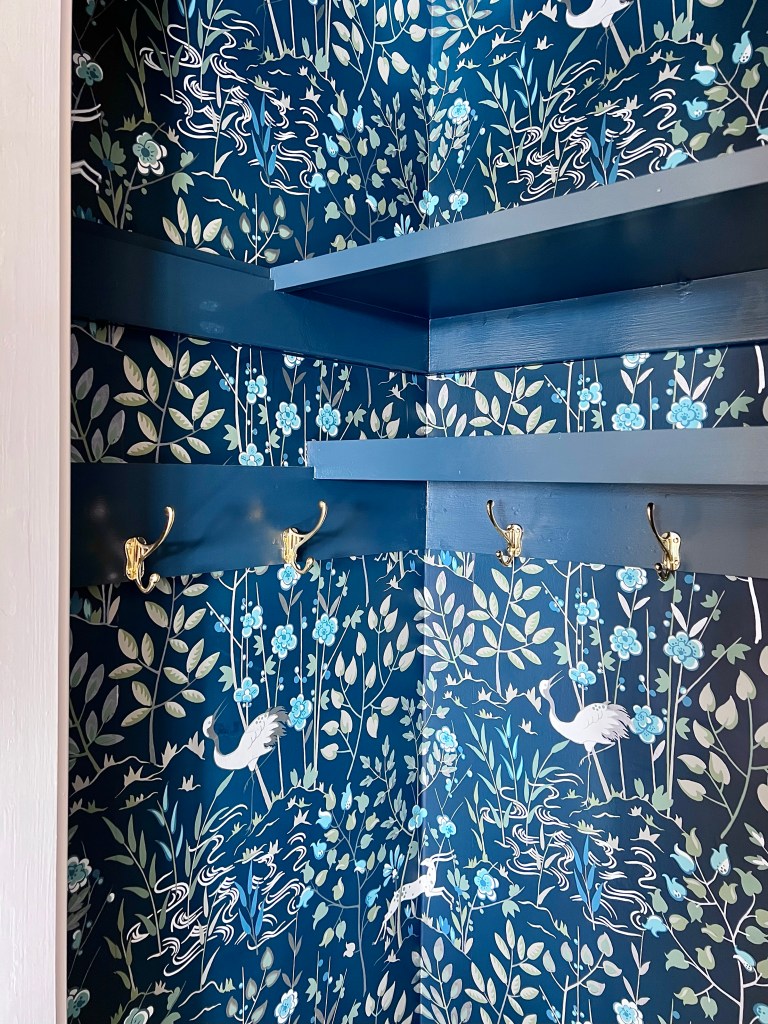
Next, I hung the beautiful Ronald Redding Aspen wallpaper. If you’re hanging wallpaper that contrasts with your walls, prime the wall (or, if you are lazy like me, paint stripes of primer where the seams will be), so the wall color doesn’t show through at the seams.
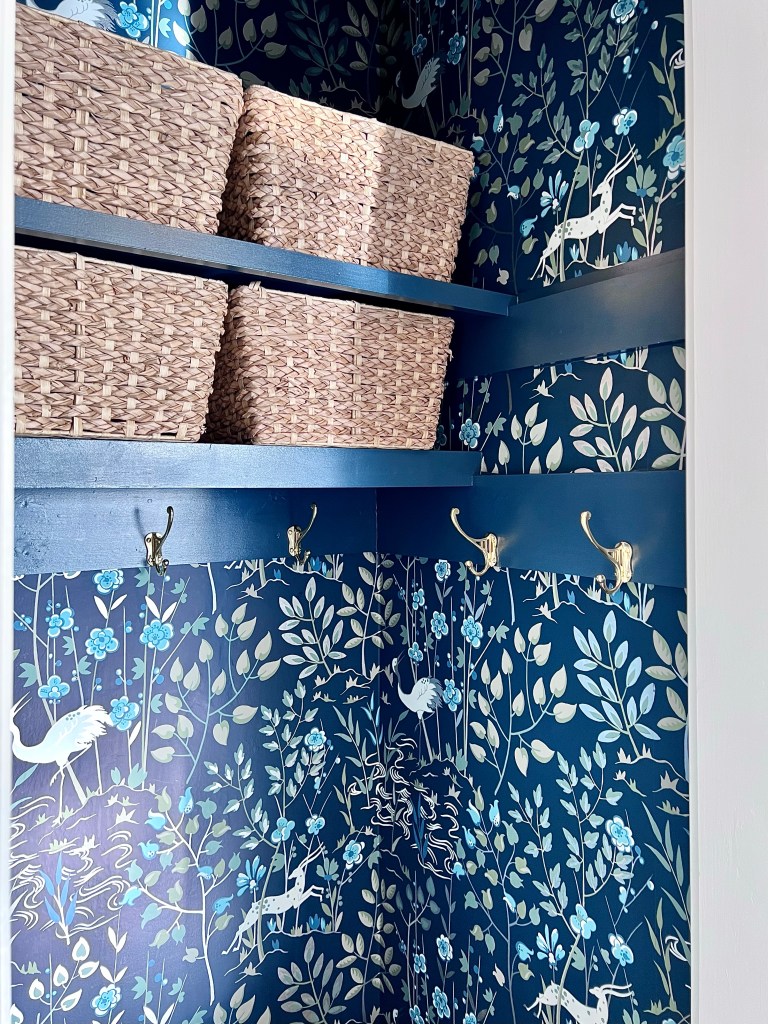
Finally, I installed these brass coat hooks I found on Etsy. I wanted double hooks for more storage and was looking for something that felt traditional but not too antique, and these turned out great! I did curse the matching flat head screws a few times, because they’re much trickier than a Phillips head, but I managed to install the screws using bigger pilot holes and hand-screwing them in. Now that it’s done, I do like the more clean traditional look of the screws.
Enjoy these photos of all the details!
There’s something so luxurious about a glossy dark painted ceiling… even if it is in a closet 🙂
In
I would never have guessed that a closet could make me so happy!
A few years ago, I made an accordion album to hold photos for my dad. Now, here’s a more dressed-up version that I made as wedding cards from our work for two coworkers who are both getting married this summer. … Continue reading →
Since I chose a smaller project for this challenge, I have some time to show you all the details! Wallpaper is a really popular right now, and I’m loving this new-again trend! Ever since I wallpapered an accent wall in our bedroom, I’ve been looking for my next project. The choices are nearly endless, which made picking a pattern for our mini-mudroom both daunting and fun! Here are some of my favorites, including high vs. budget options.
My criteria were:
Blue or green, of course!
A bold print – a small space is the perfect spot to try something brave!
A modern twist on a traditional pattern, with a nod to chinoiserie
First, I was really drawn to these patterns with metallic branches on a dark background. The “high” option on the left is Nutcracker by Juliet Travers. It’s so elegant, and the little squirrel adds a whimsical touch! The “budget” version on the right is Colby Floral wallpaper. I think either of these would be beautiful, but I decided I wanted something a littler bolder for this project.
I was really considering these next two favorites: a “budget” version is Crown Sherwood Woodland in Dark Blue on the left, and the “high” version is Rifle Paper Co. Menagerie Toile in Navy and Metallic Silver. They have a bit of a chinoiserie feel to them, and I really like how the patterns are very elaborate, but they don’t feel too busy, because of being two-toned. I was definitely tempted by the metallic finish of the Rifle Paper one, also!
I was also very drawn to this Toile pattern by Borastapeter in green or blue. Ultimately, I think the scale would be better for a bigger space. I would love this in a dining room!
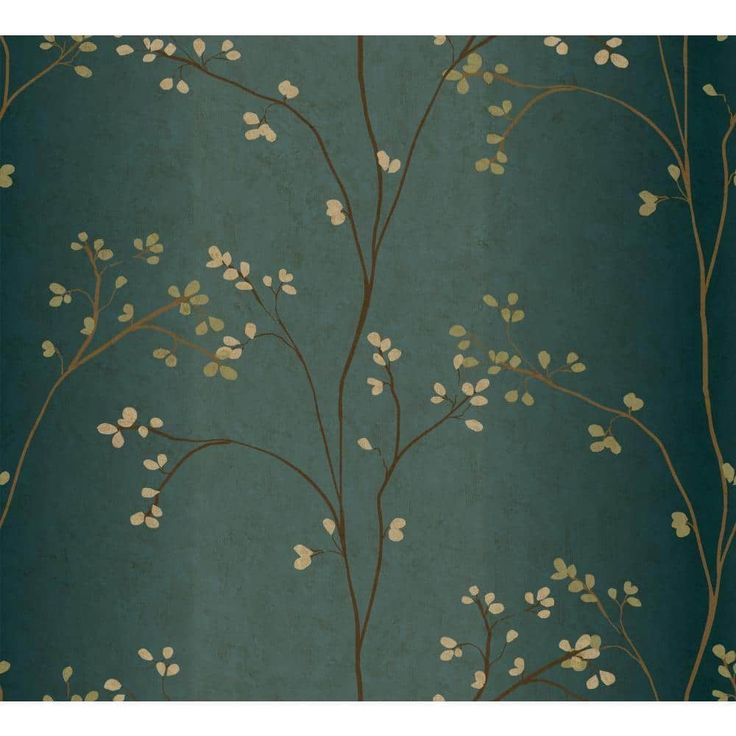
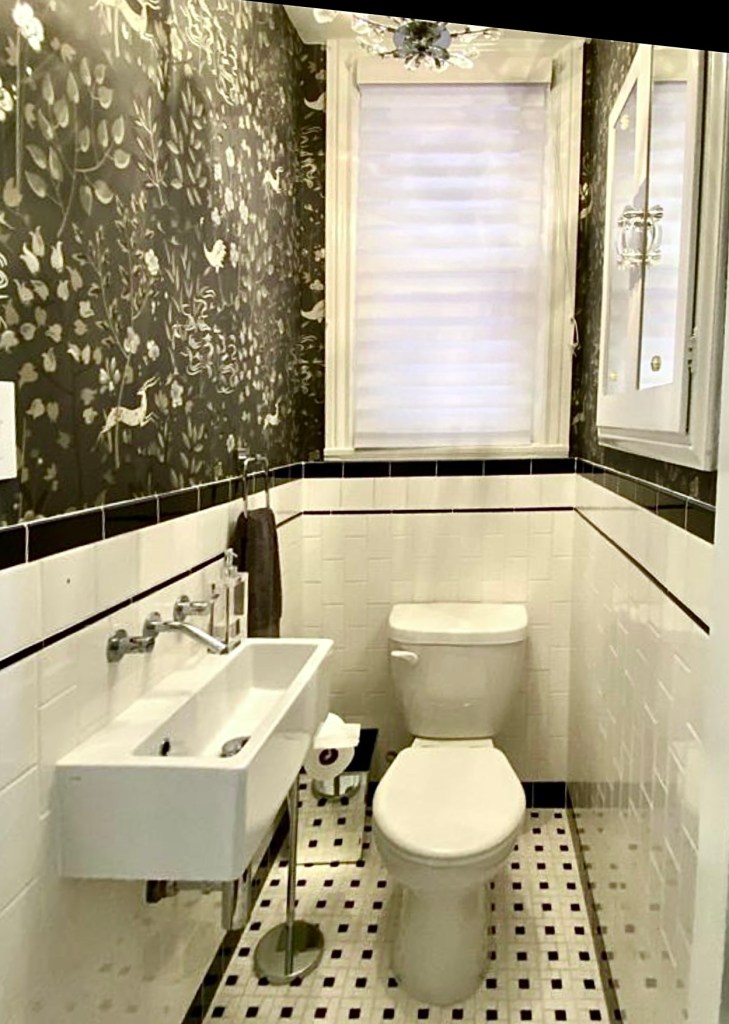
Finally, I decided to go with this beautiful print, the Ronald Redding Aspen wallpaper in dark blue. I love the mix of classic and whimsical and the dark teal blue color with light brown accents that will be brought out by the wood cabinet and the brass coat hooks. I knew it was meant to be when I realized that this is the same pattern that was in the powder room of our rental house. I always loved it, and I am very sentimental , so it makes me really happy to have that connection between the two homes.
Stay tuned to see the wallpaper installed in the mini mudroom next week! In the meantime, head on back to the One Room Challenge site to see some more room transformations!
I am so excited to share this build! At our old house, we had a cloakroom-type space, with shoe racks and coat hooks. That space was not directly visible from the living areas, so I did not mind it being a bit more more casual and utilitarian. I was looking for the same functionality in our new home, but I was a bit stumped by how to accomplish this with a small hallway closet that is immediately visible from the entry and living room. I researched various closet conversion ideas, but many of them seemed more casual than what I was looking for. I knew I had finally found my solution when I stumbled on the “California Mudroom” created by Jessica D’Itri Marés of Renovate 108 featured on Real Simple (below right) Can you see ours (below left) coming together? Please say “yes!”
This project involved just the right level of DIY for me – I got to work on my skills but not get too stressed. In this post, I will share the construction steps to convert a standard hall closet into a mini mudroom. I’ve been chipping away on this project for a while (because job! and kids!), and now I am excited to bring you up to speed with where I am!
Here’s how to do it:
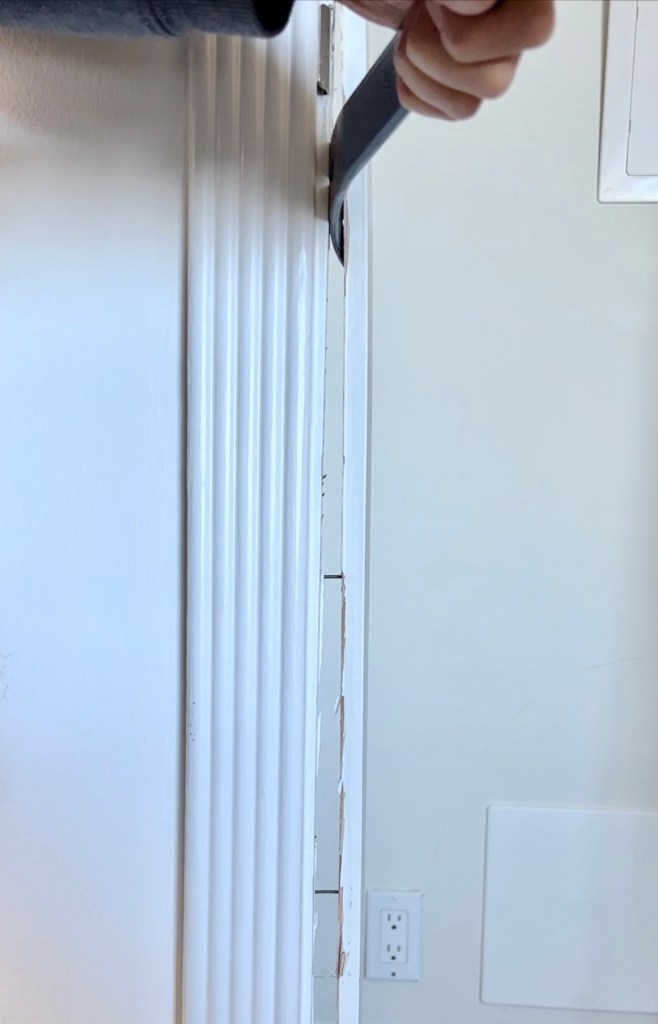
Remove the door and door hardware
Use a pry bar to remove the door stop trim, so the opening looks more like a framed entry than a doorway
Remove the hanging rod
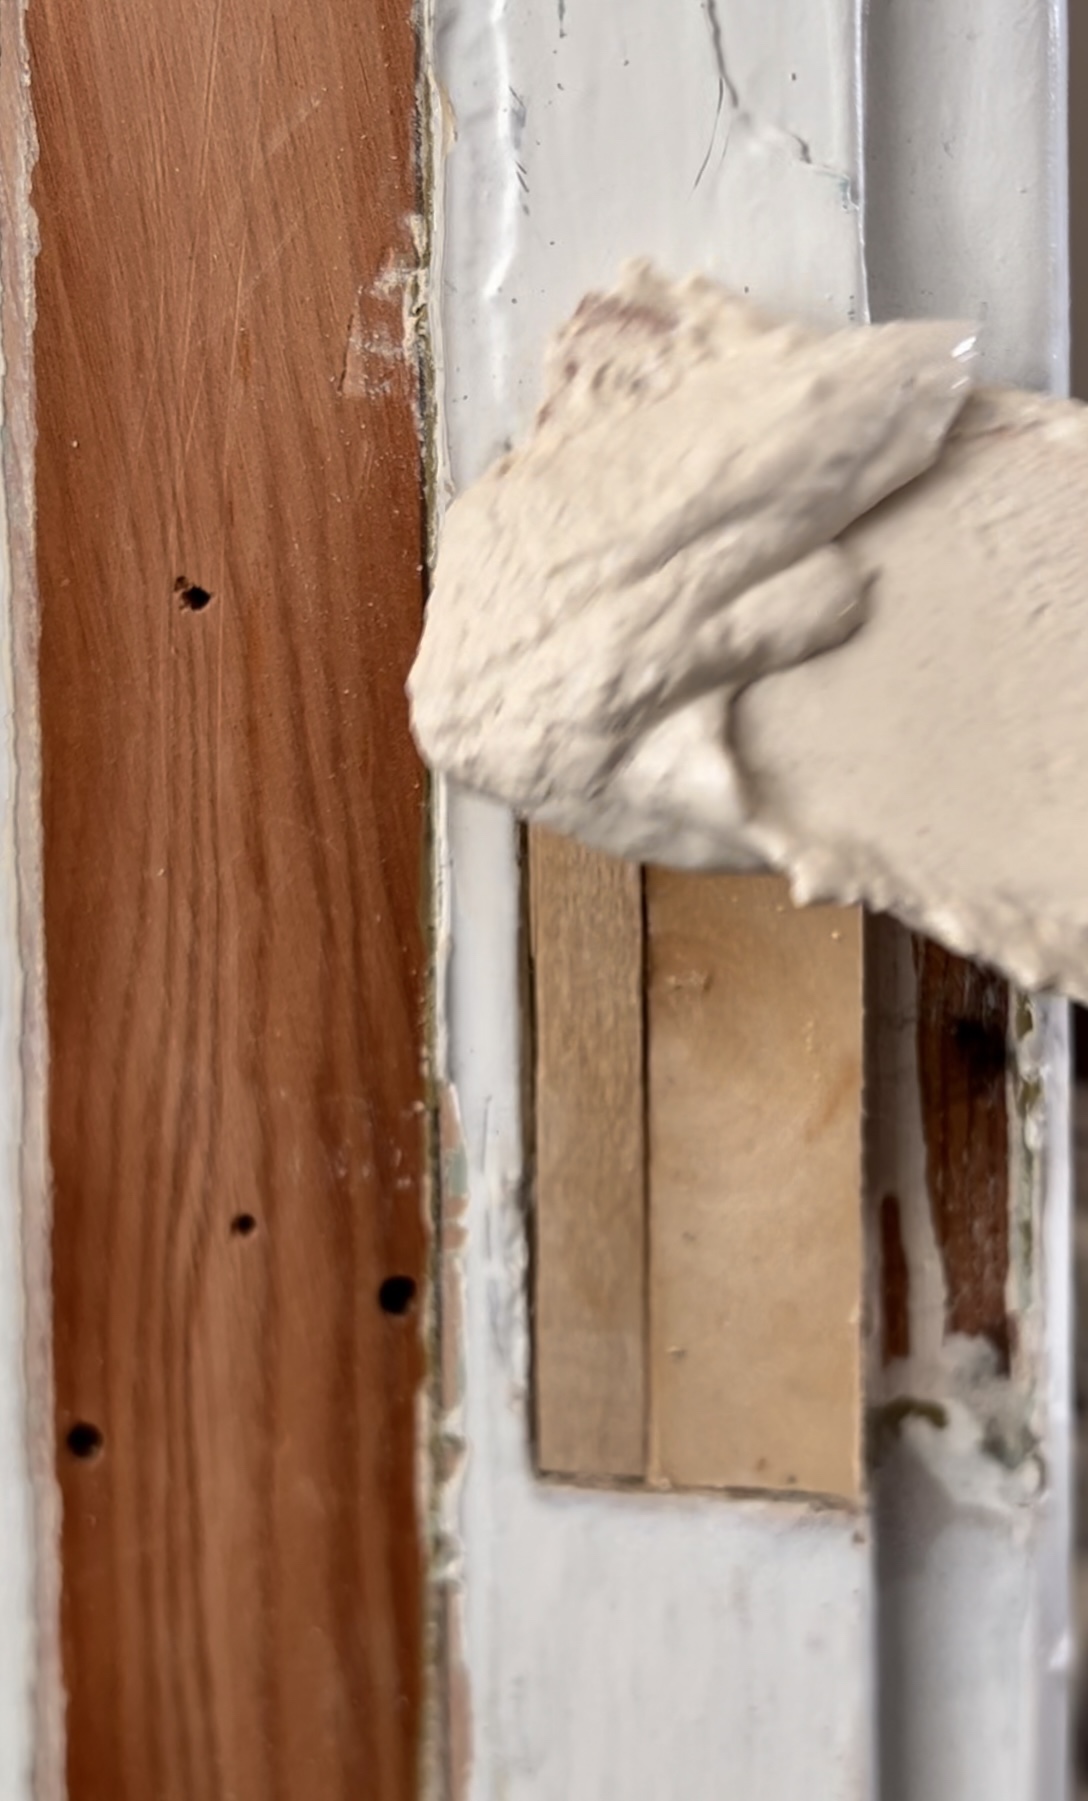
Patch holes – in addition to spackle and caulk, I used some craft sticks and wood glue to fill in the areas where the door hardware was attached. I’m sure that’s just what the professionals do!
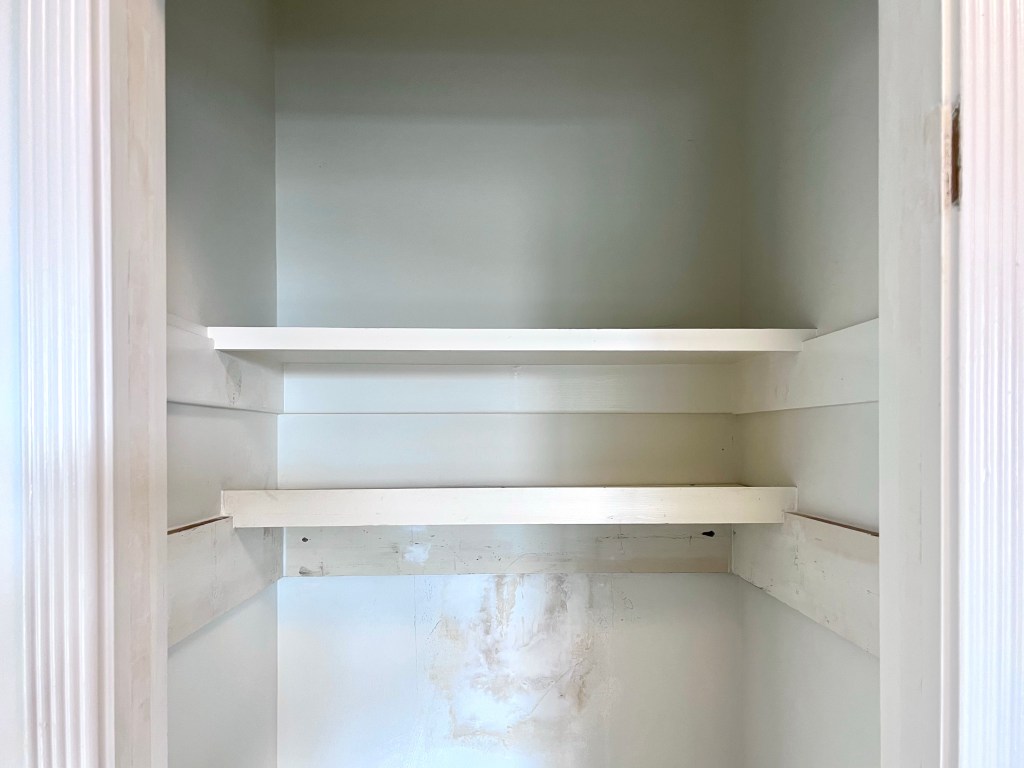
Add shelves to the top. Mine already had one shelf, and I wanted to add a second. Both shelves are supported on wide trim, mounted into the studs.
The wide trim will be perfect for installing hooks
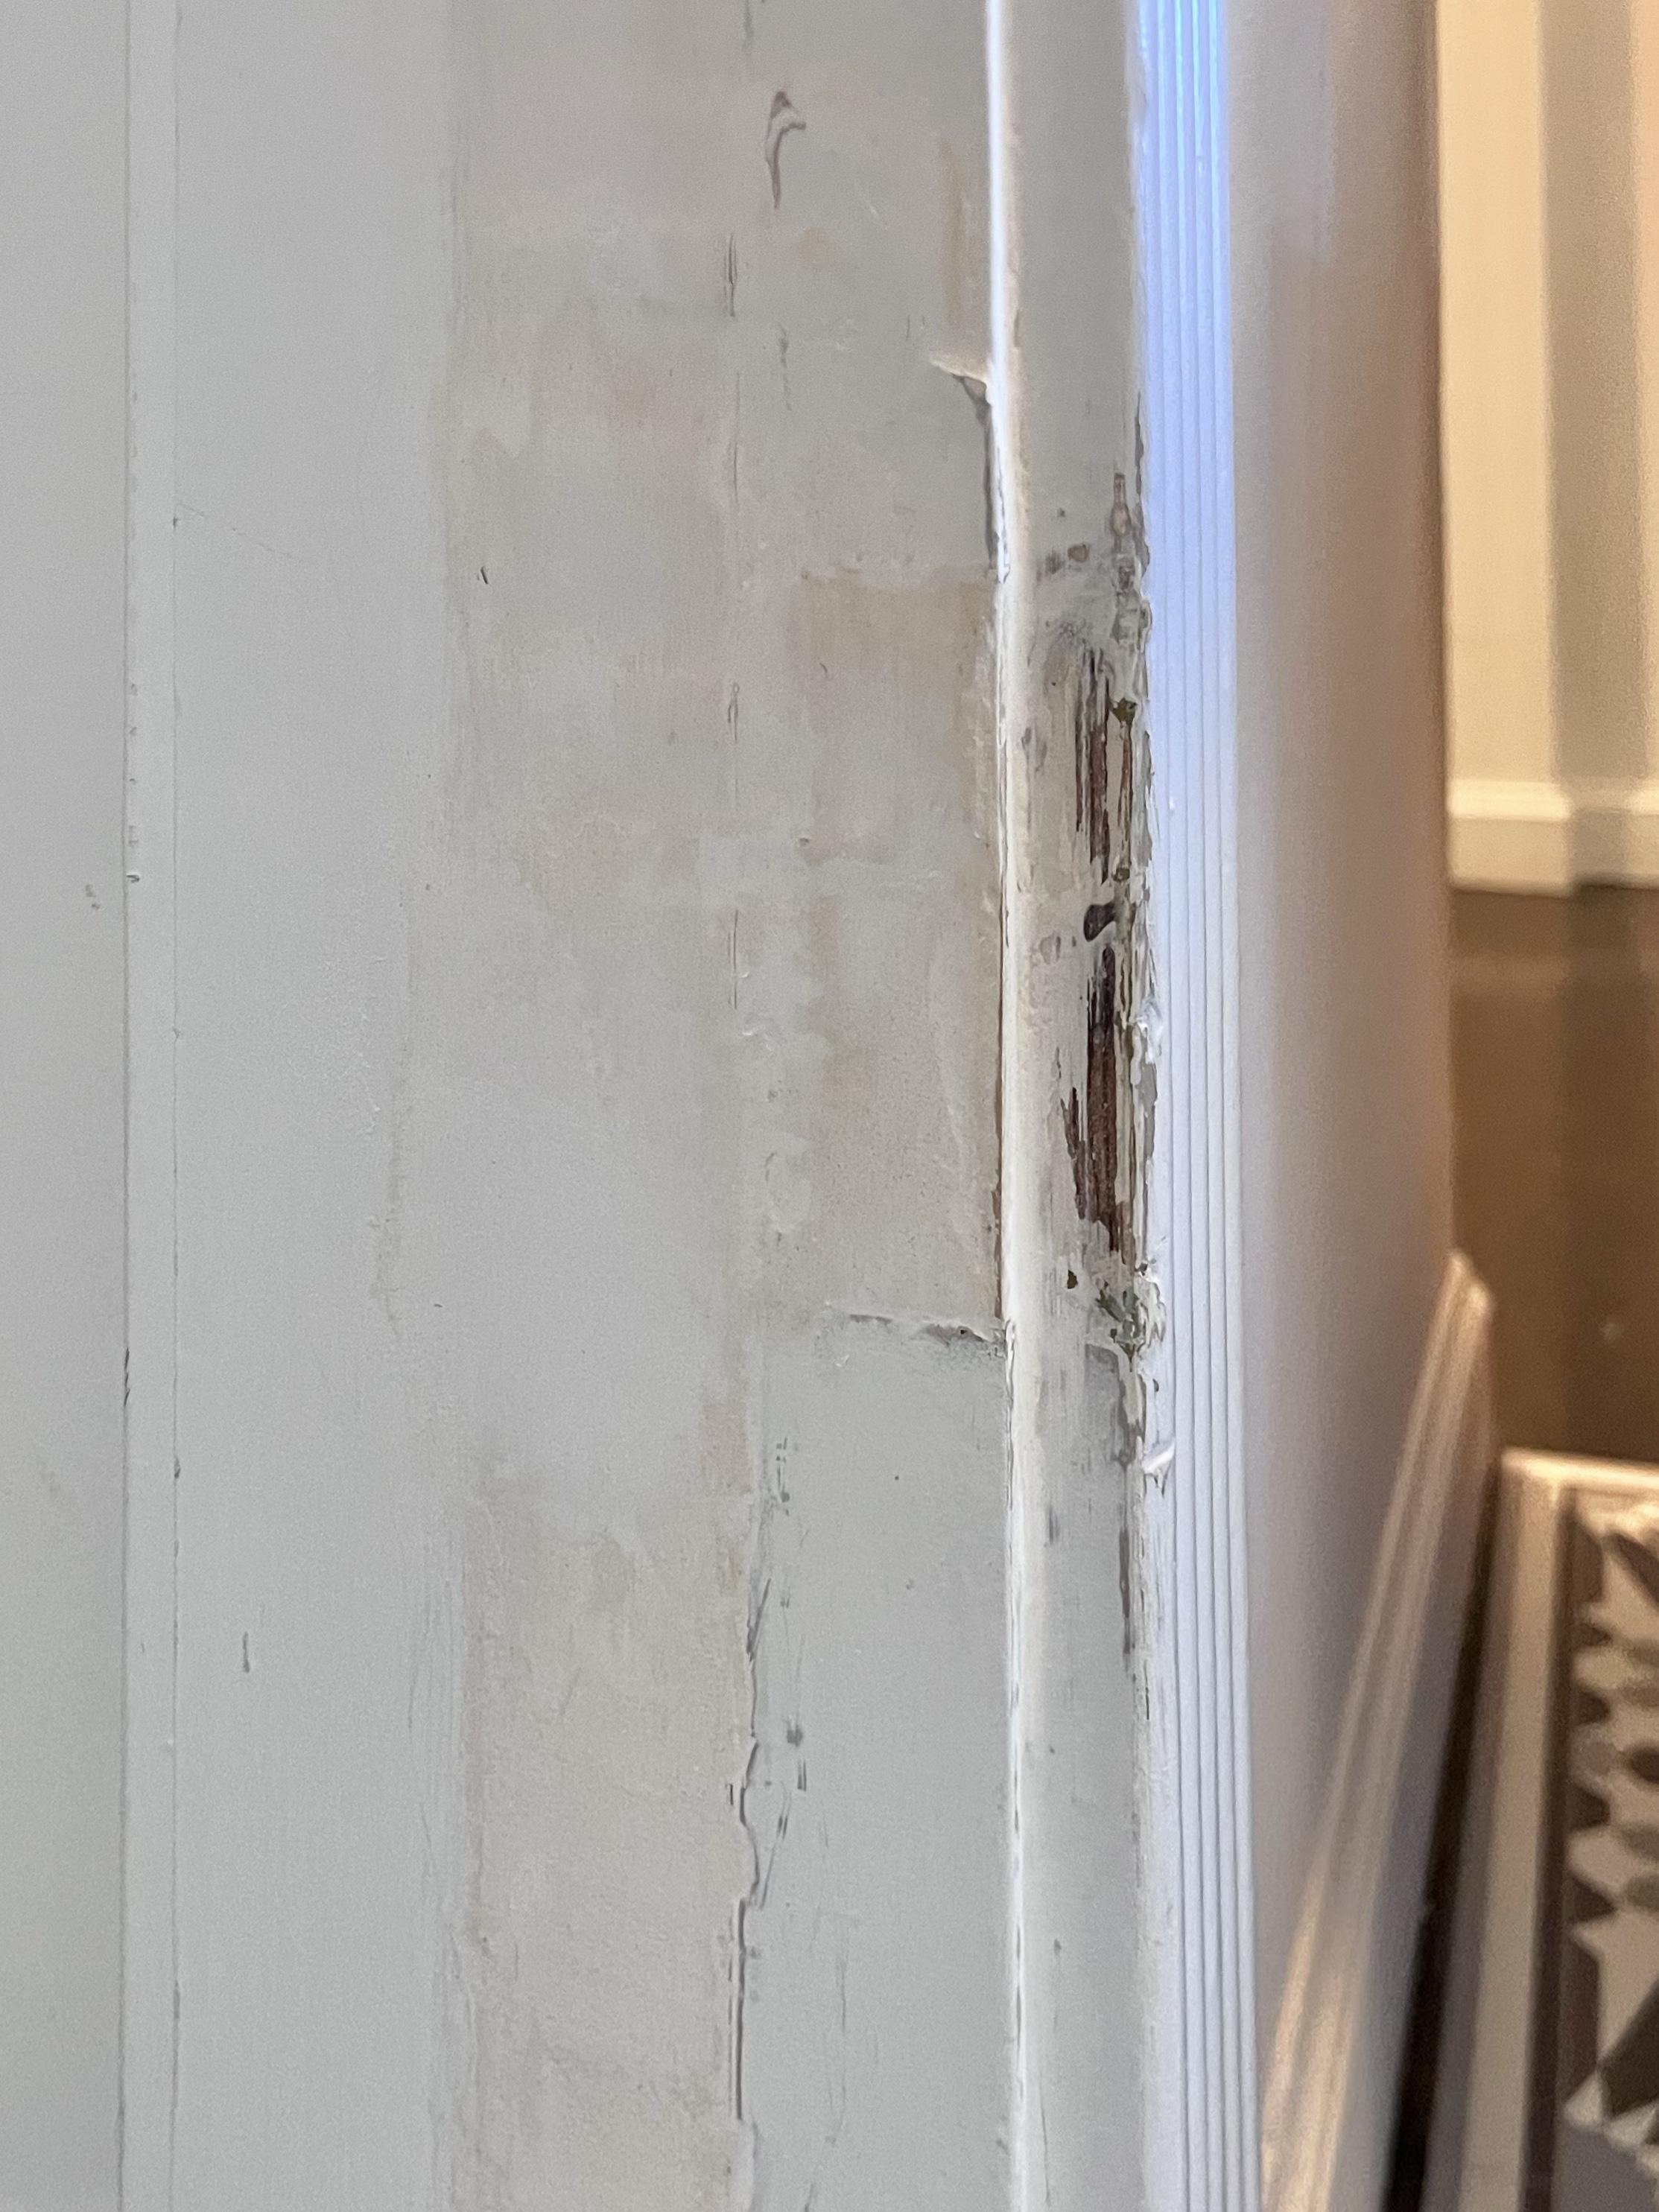
Patch and caulk
Prime all the surfaces
Now that the structure is in place, the fun begins… Actually, the building was very fun! But anyway, next up is painting, wallpaper, and accessories!
Be sure to visit the One Room Challenge page to see more home transformations!