Does bleach scare you? It scares me! Now that you were brave enough to get past the title of this post, I’m excited to tell you about my adventures dyeing fabric with bleach. The effect is similar to the Japanese shibori … Continue reading
Does bleach scare you? It scares me! Now that you were brave enough to get past the title of this post, I’m excited to tell you about my adventures dyeing fabric with bleach. The effect is similar to the Japanese shibori … Continue reading
My kids are so happy in the water, and yet I’ve missed pictures of many of those moments, because I needed to keep my phone high and dry.
So, for this year’s summer vacation, I decided to buy a waterproof phone pouch. Even though I tested it according to the instructions, it was still scary to put my phone in the water the first time. After I got the hang of it, though, it has been a lot of fun.
Although you can control the phone buttons through the case, I found it to be hard to do. My husband came up with the idea of setting the timer for the pictures. The timer on the iPhone takes a burst of ten photos, so you can usually capture some good moments and delete the rest. Another note is that the water cuts down on light, so taking your underwater pictures at the brightest spot possible helps.
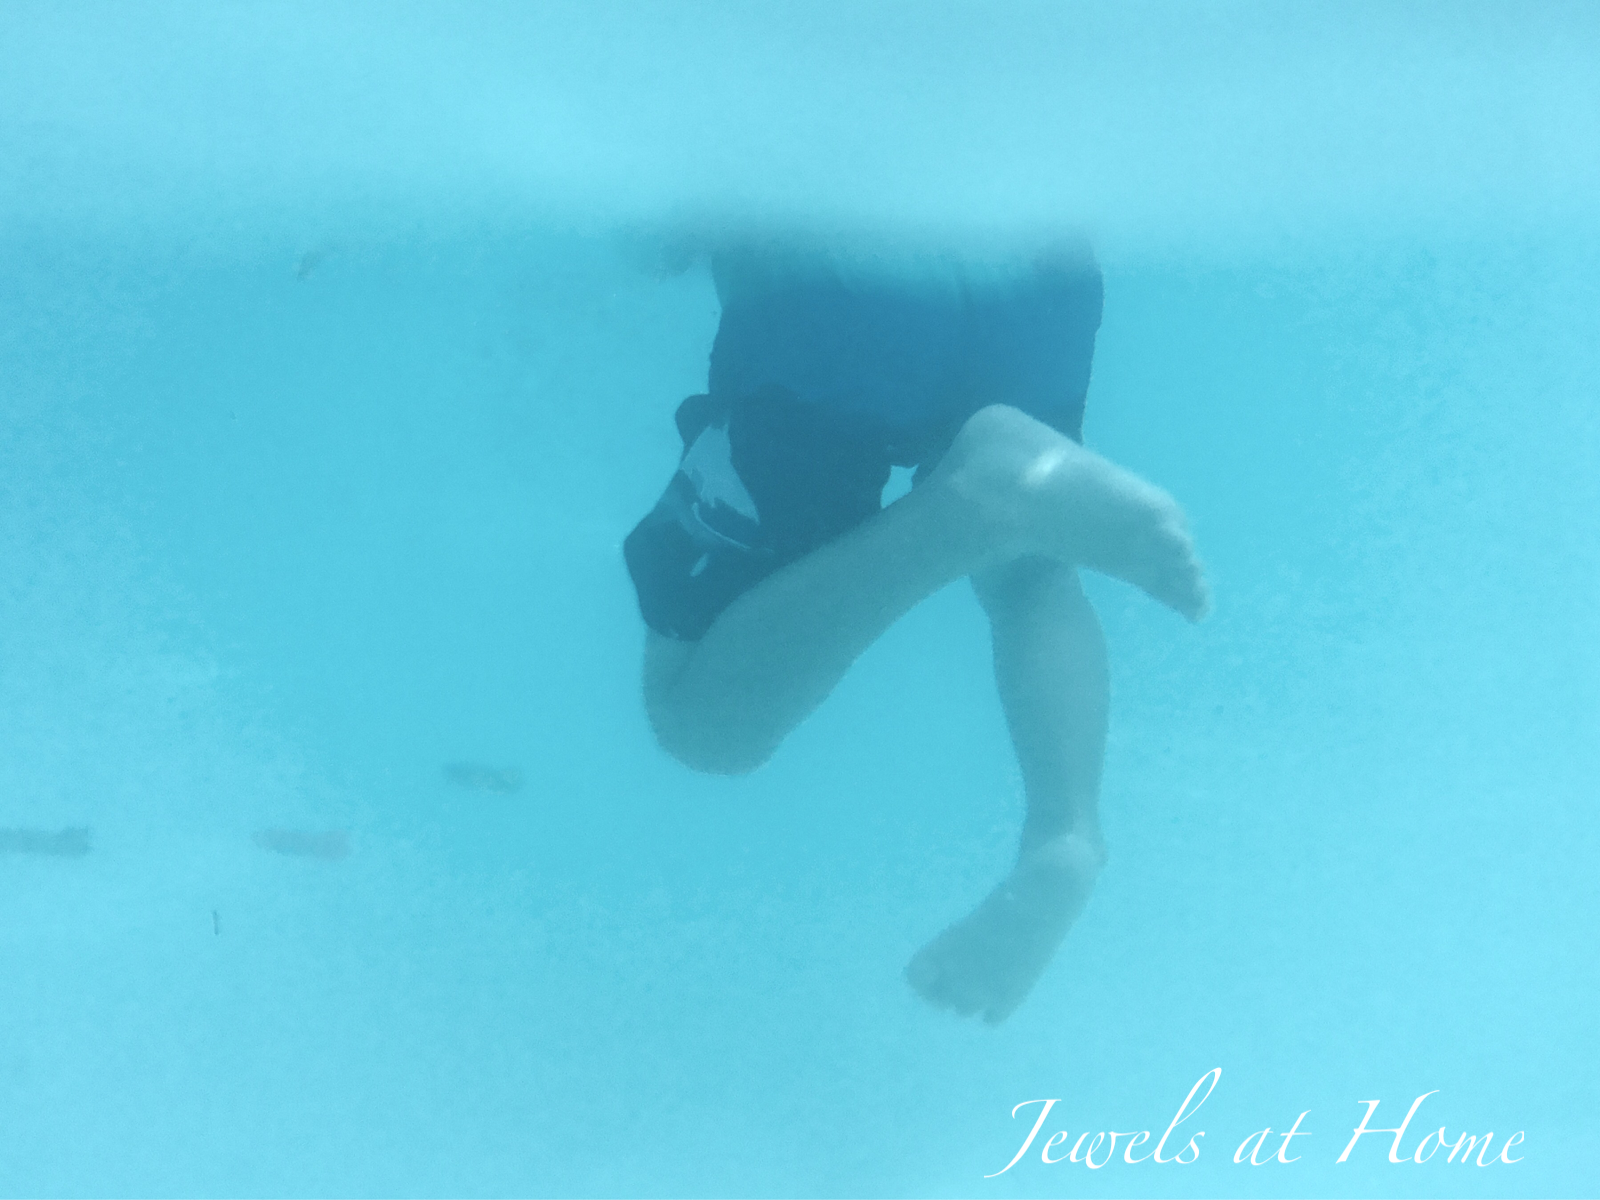
These are some of my first experiments. JJ loves the diving weights, and it was fun to capture him playing with them.


This is my favorite – the little imp actually posed underwater and flashed me a smile!


And look at these little feet in action!
We have a river rafting trip planned for next week, and I look forward to bringing the waterproof pouch along to capture some more wet adventures.
Have fun and stay dry!
“Jewels”
“At first I was afraid… I was petrified…” and now I’m totally obsessed with macrame! With apologies to Gloria Gaynor… once you learn a few basic knots, there are so many possible macrame projects!

You might remember that for my first plant hanger, I used heavy rope and simple overhand knots. I added gathering knots in colored yarn. For my next projects, I learned the square knot and added some beads.
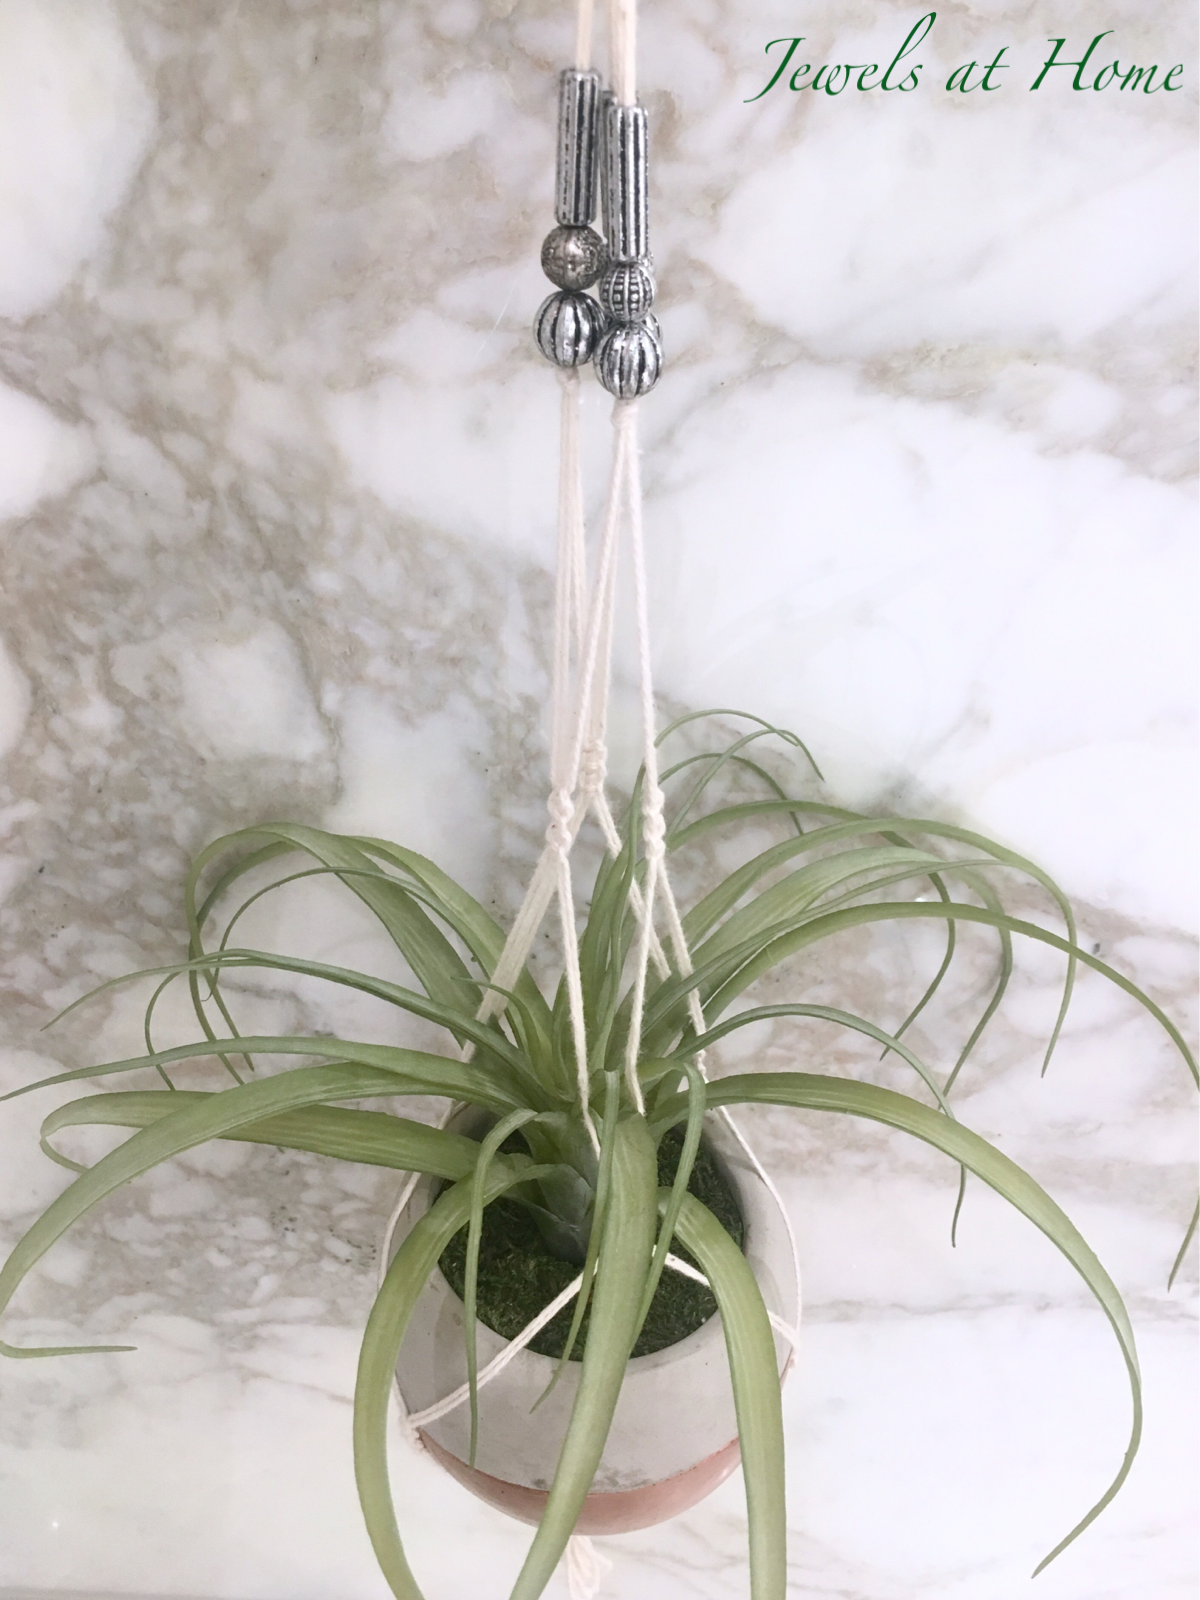
This project uses some silver-colored beads, and the hanger is formed with short stretches of three square knots. I used sport weight cotton yarn (similar to this yarn) which I already had. The advantage is that it’s thin enough to thread the beads onto, but the result is quite thin, so it will be best for a smaller plant.


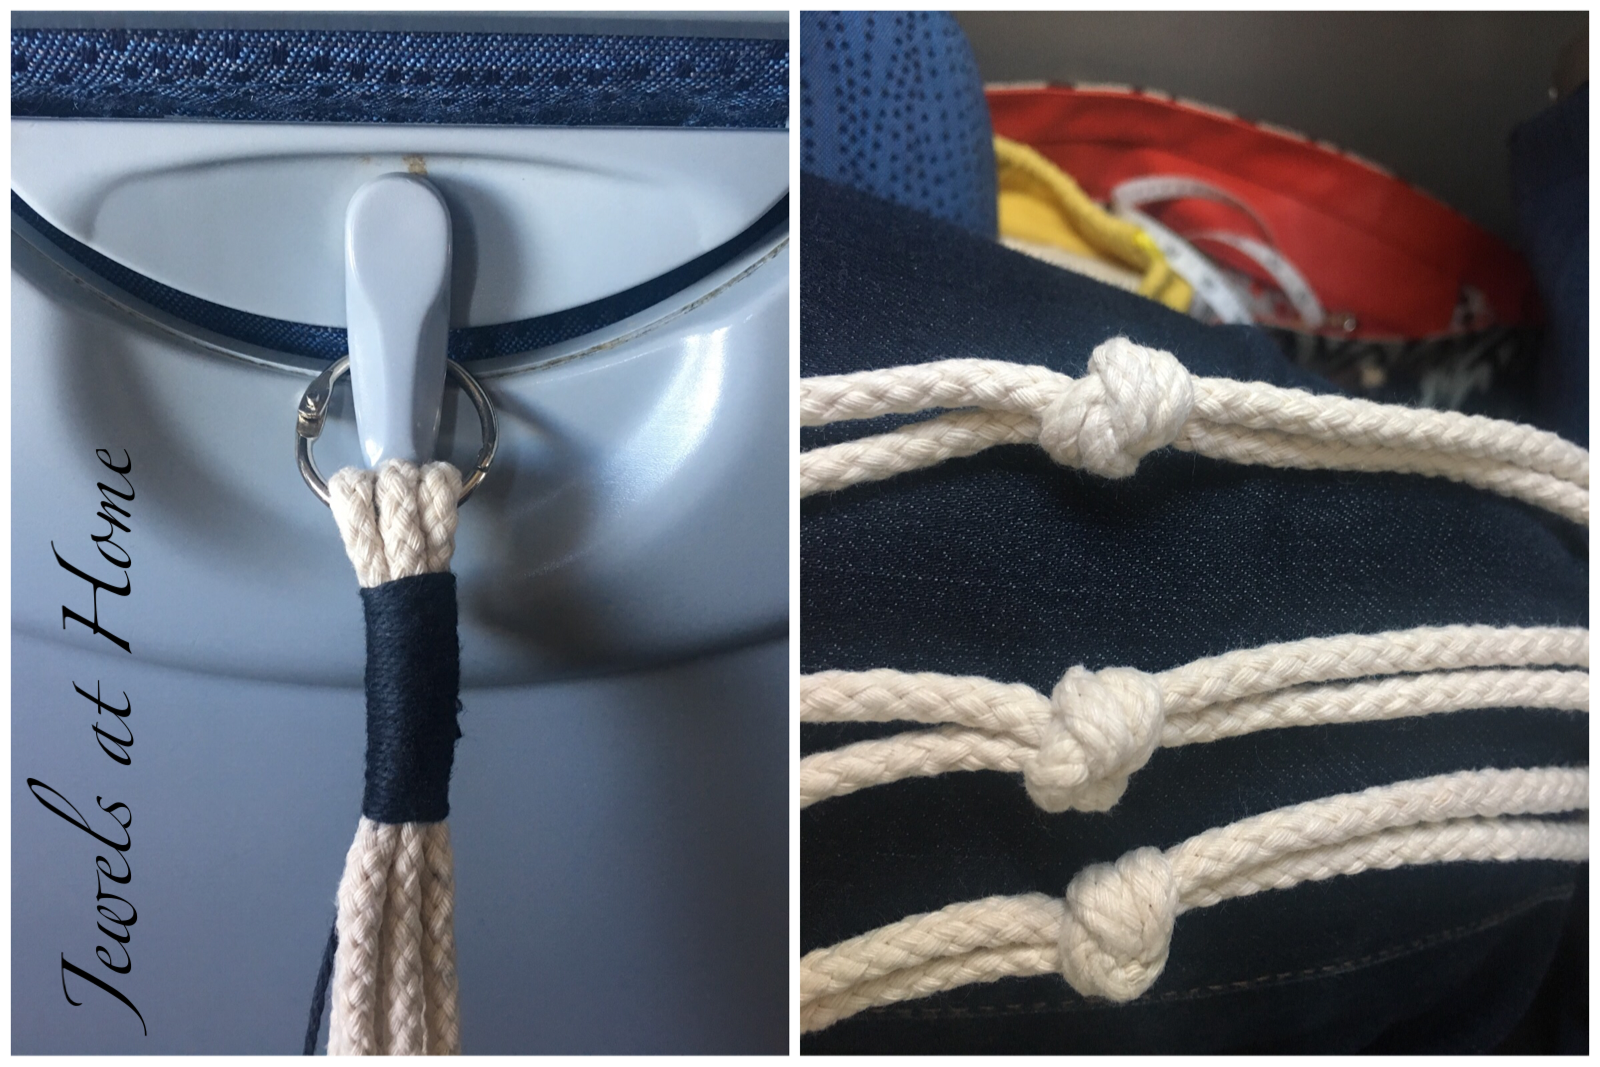
This next project uses some braided candle wick. It lies flat, which makes the square knots much easier and neater. I did two longer stretches of square knots at the top and then shorter stretches to form the hanger. The twine is heavier than the cotton yarn, and I really like how it lies flat. I’ll definitely be doing more projects with this string!


By the way, you may have noticed the same (fake) plant in both these hangers. We’re on vacation in Toronto, and I ended up buying a “plant model” to help with my projects. 😂

Next macrame projects coming up: wave knots, colored string, and dip-dyeing (I think I will save that for when I get home…)! I always need to have a project to work on, and this has turned out to be a great one for traveling, because it is so compact. Hope you will give it a try.
“Jewels”
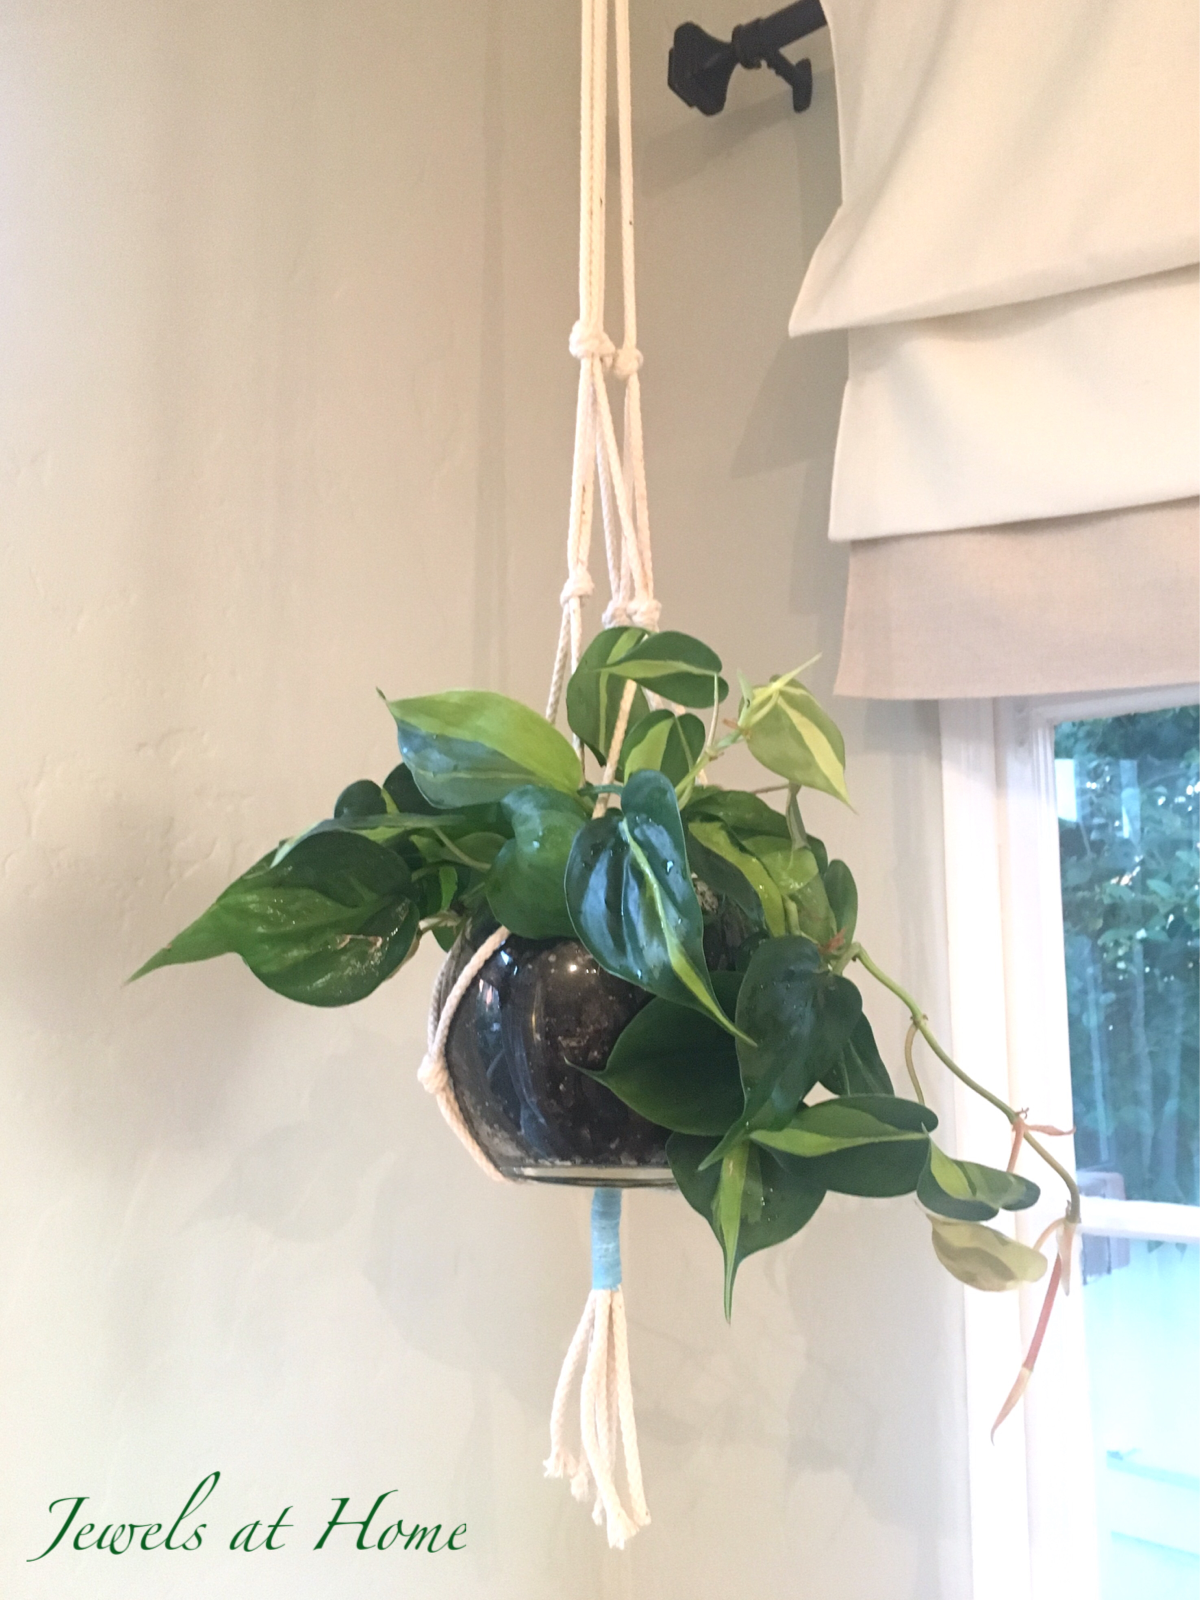
Everything old is new again! I’m visiting my dad and fantasizing about magically unearthing some old macrame projects from the 70s. Meanwhile, I’m trying my hand at making some plant hangers. This macrame obsession pairs perfectly with my newfound love of plants!

Tying knots in string shouldn’t be that complicated, but I was nervous getting started, so I chose the simplest project I could. Using some heavy cotton rope leftover from hanging a birthday piñata, I based my plant hanger off of these instructions.
Because the rope was so thick, I chose to use a gathering knot in blue cotton yarn rather than tie a heavy knot with the rope at the top and bottom.
Being a busy mom, the first chance I had to work on this project was on a plane! Luckily, the tab that holds up the tray table works perfectly for attaching the loop at the top;)
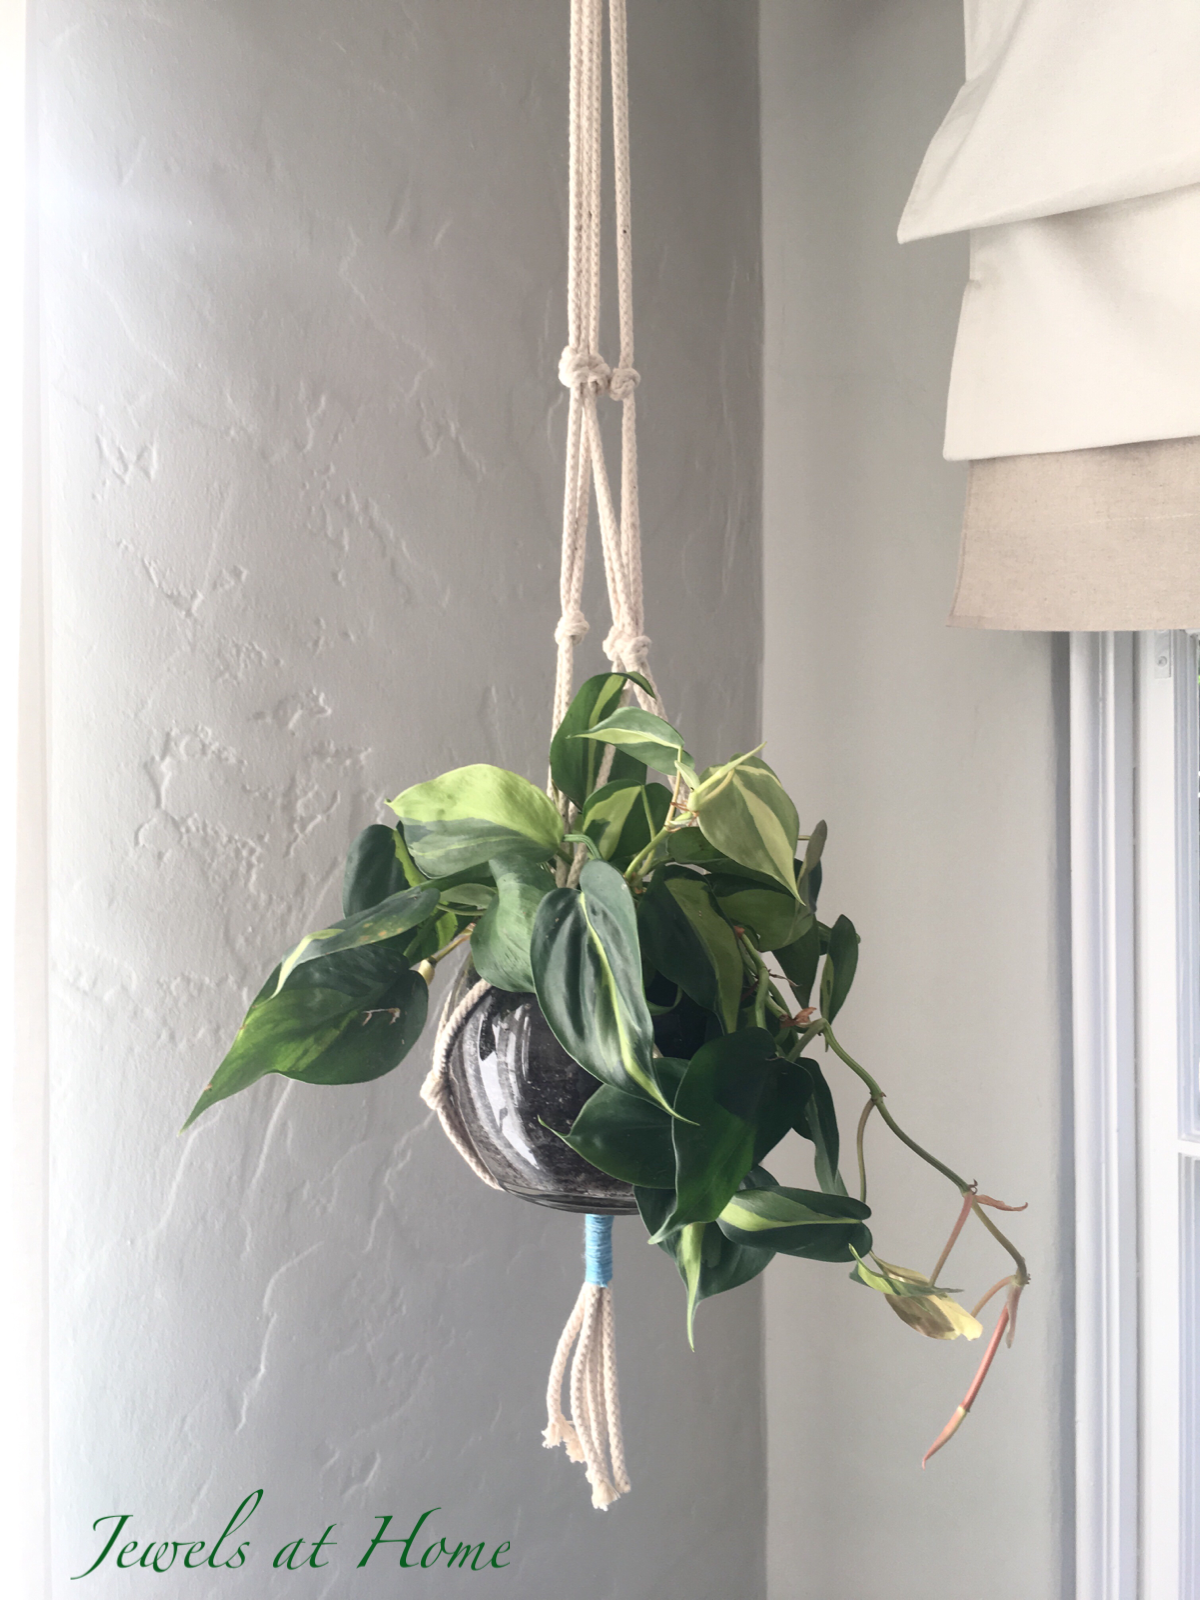
Here’s how the plant hanger looks empty:

And here’s how it looks planted with Golden Pothos.

Stay groovy and green!
“Jewels”
Don’t say you can’t teach an old dog new tricks! After years of joking about my “brown thumb,” I’m getting really excited about gardening and plants. It’s so rewarding to watch things grow, not to mention how plants freshen up any space both visually and literally.
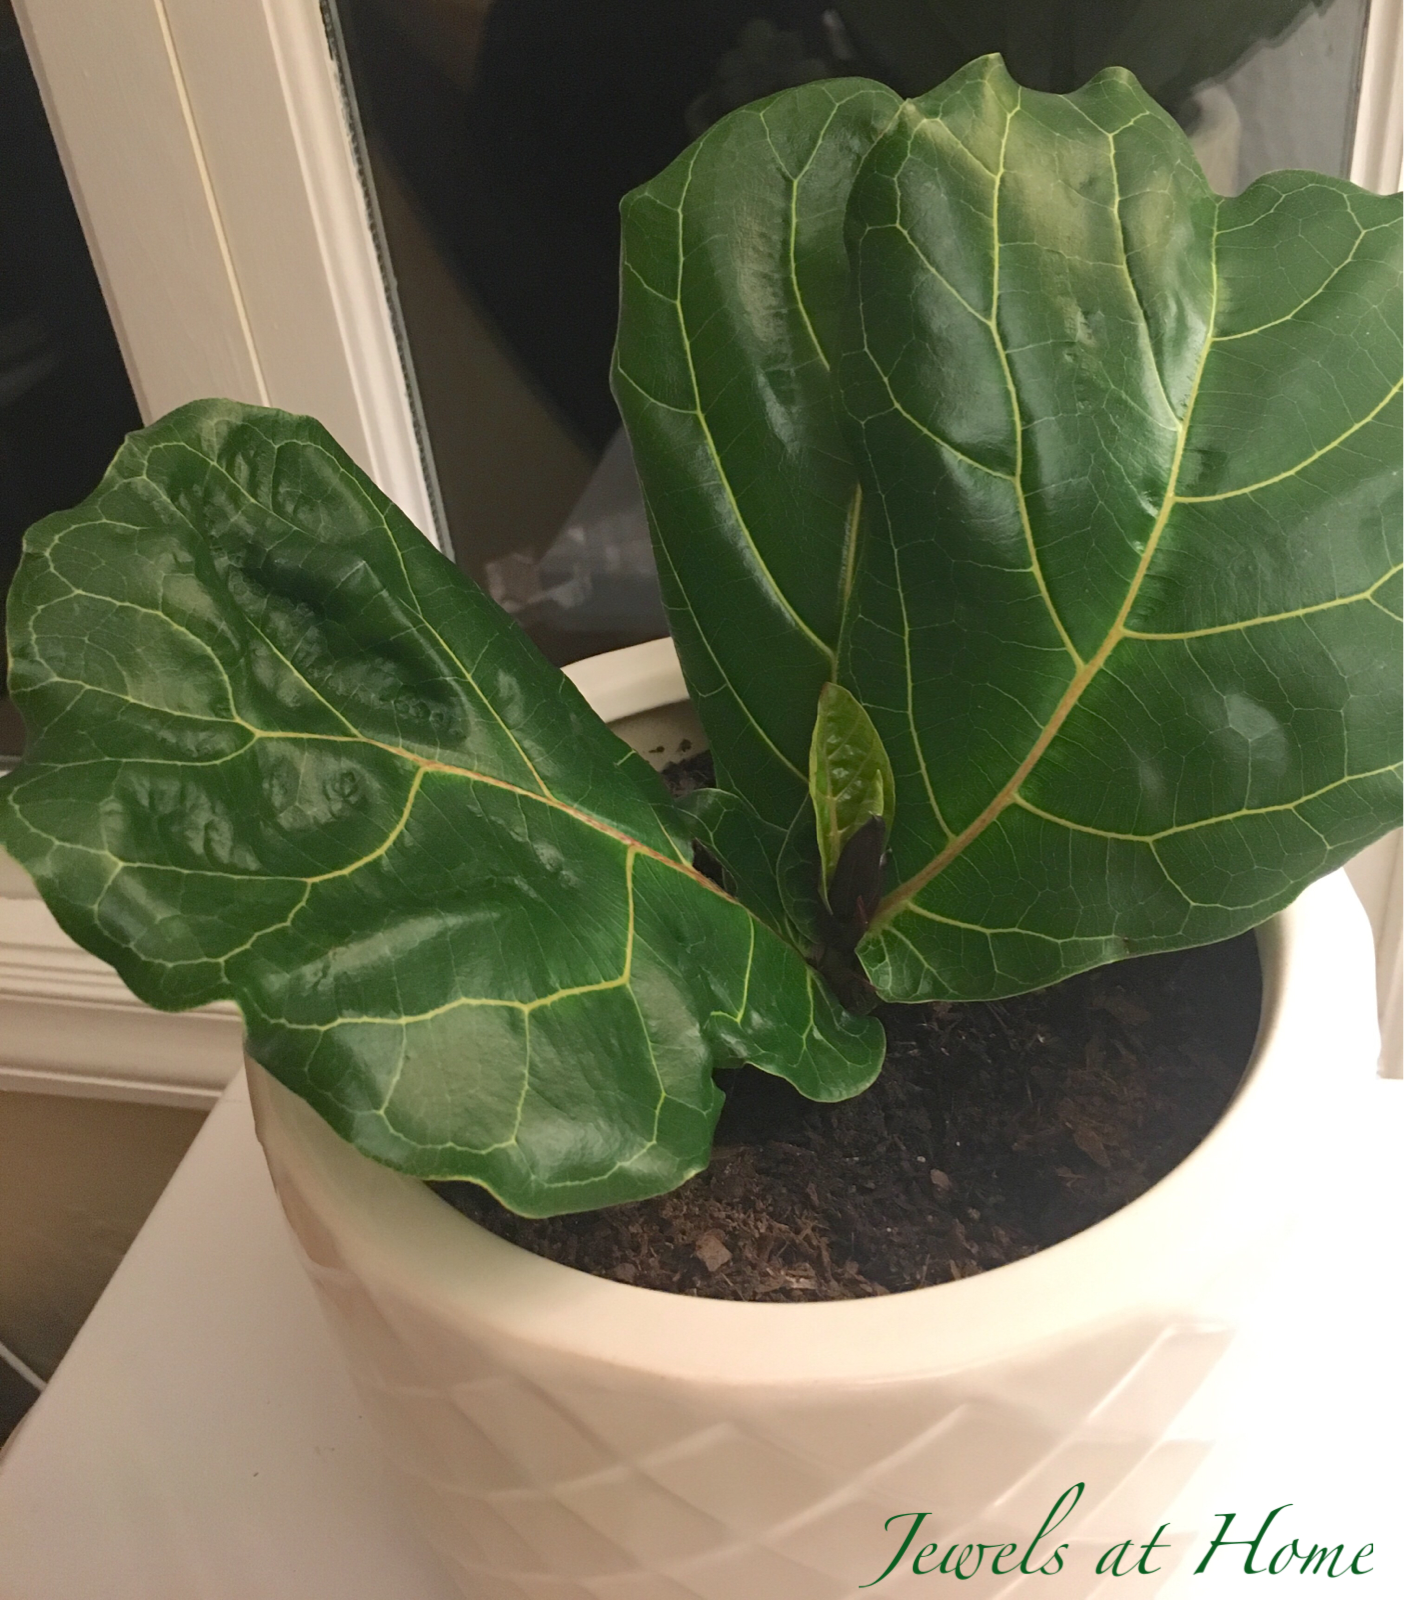
I’m growing all kinds of plants, but one of my greatest loves is the Ficus Lyrata, the fiddle leaf fig, and I’m so grateful that they seem to thrive in our conditions. I originally bought three plants, which have all at least tripled in size, and I’ve successfully started about 10 plants from cuttings. Here is a list of all my fiddle leaf fig-related posts:
I mentioned I originally bought three plants. I’ve heard that some people have found these at big box hardware stores, but I had no luck. I ended up buying one online (really!) but eventually acquired two more at local nurseries Sloat Garden Center and Flowercraft. The one I got online is fine, but the ones from the nursery are much bigger, so I’d definitely recommend looking around locally, if you can.
After just a few months, two of my trees needed trimming already, so I decided to try to propagate new plants from the cuttings. I have done this several times now, so I have updated this post with all the tips – get it? tips!
When and where to propagate?
What type of cutting can you propagate?

What supplies do you need?
Here are some pictures to show what you can expect over time:
0 weeks
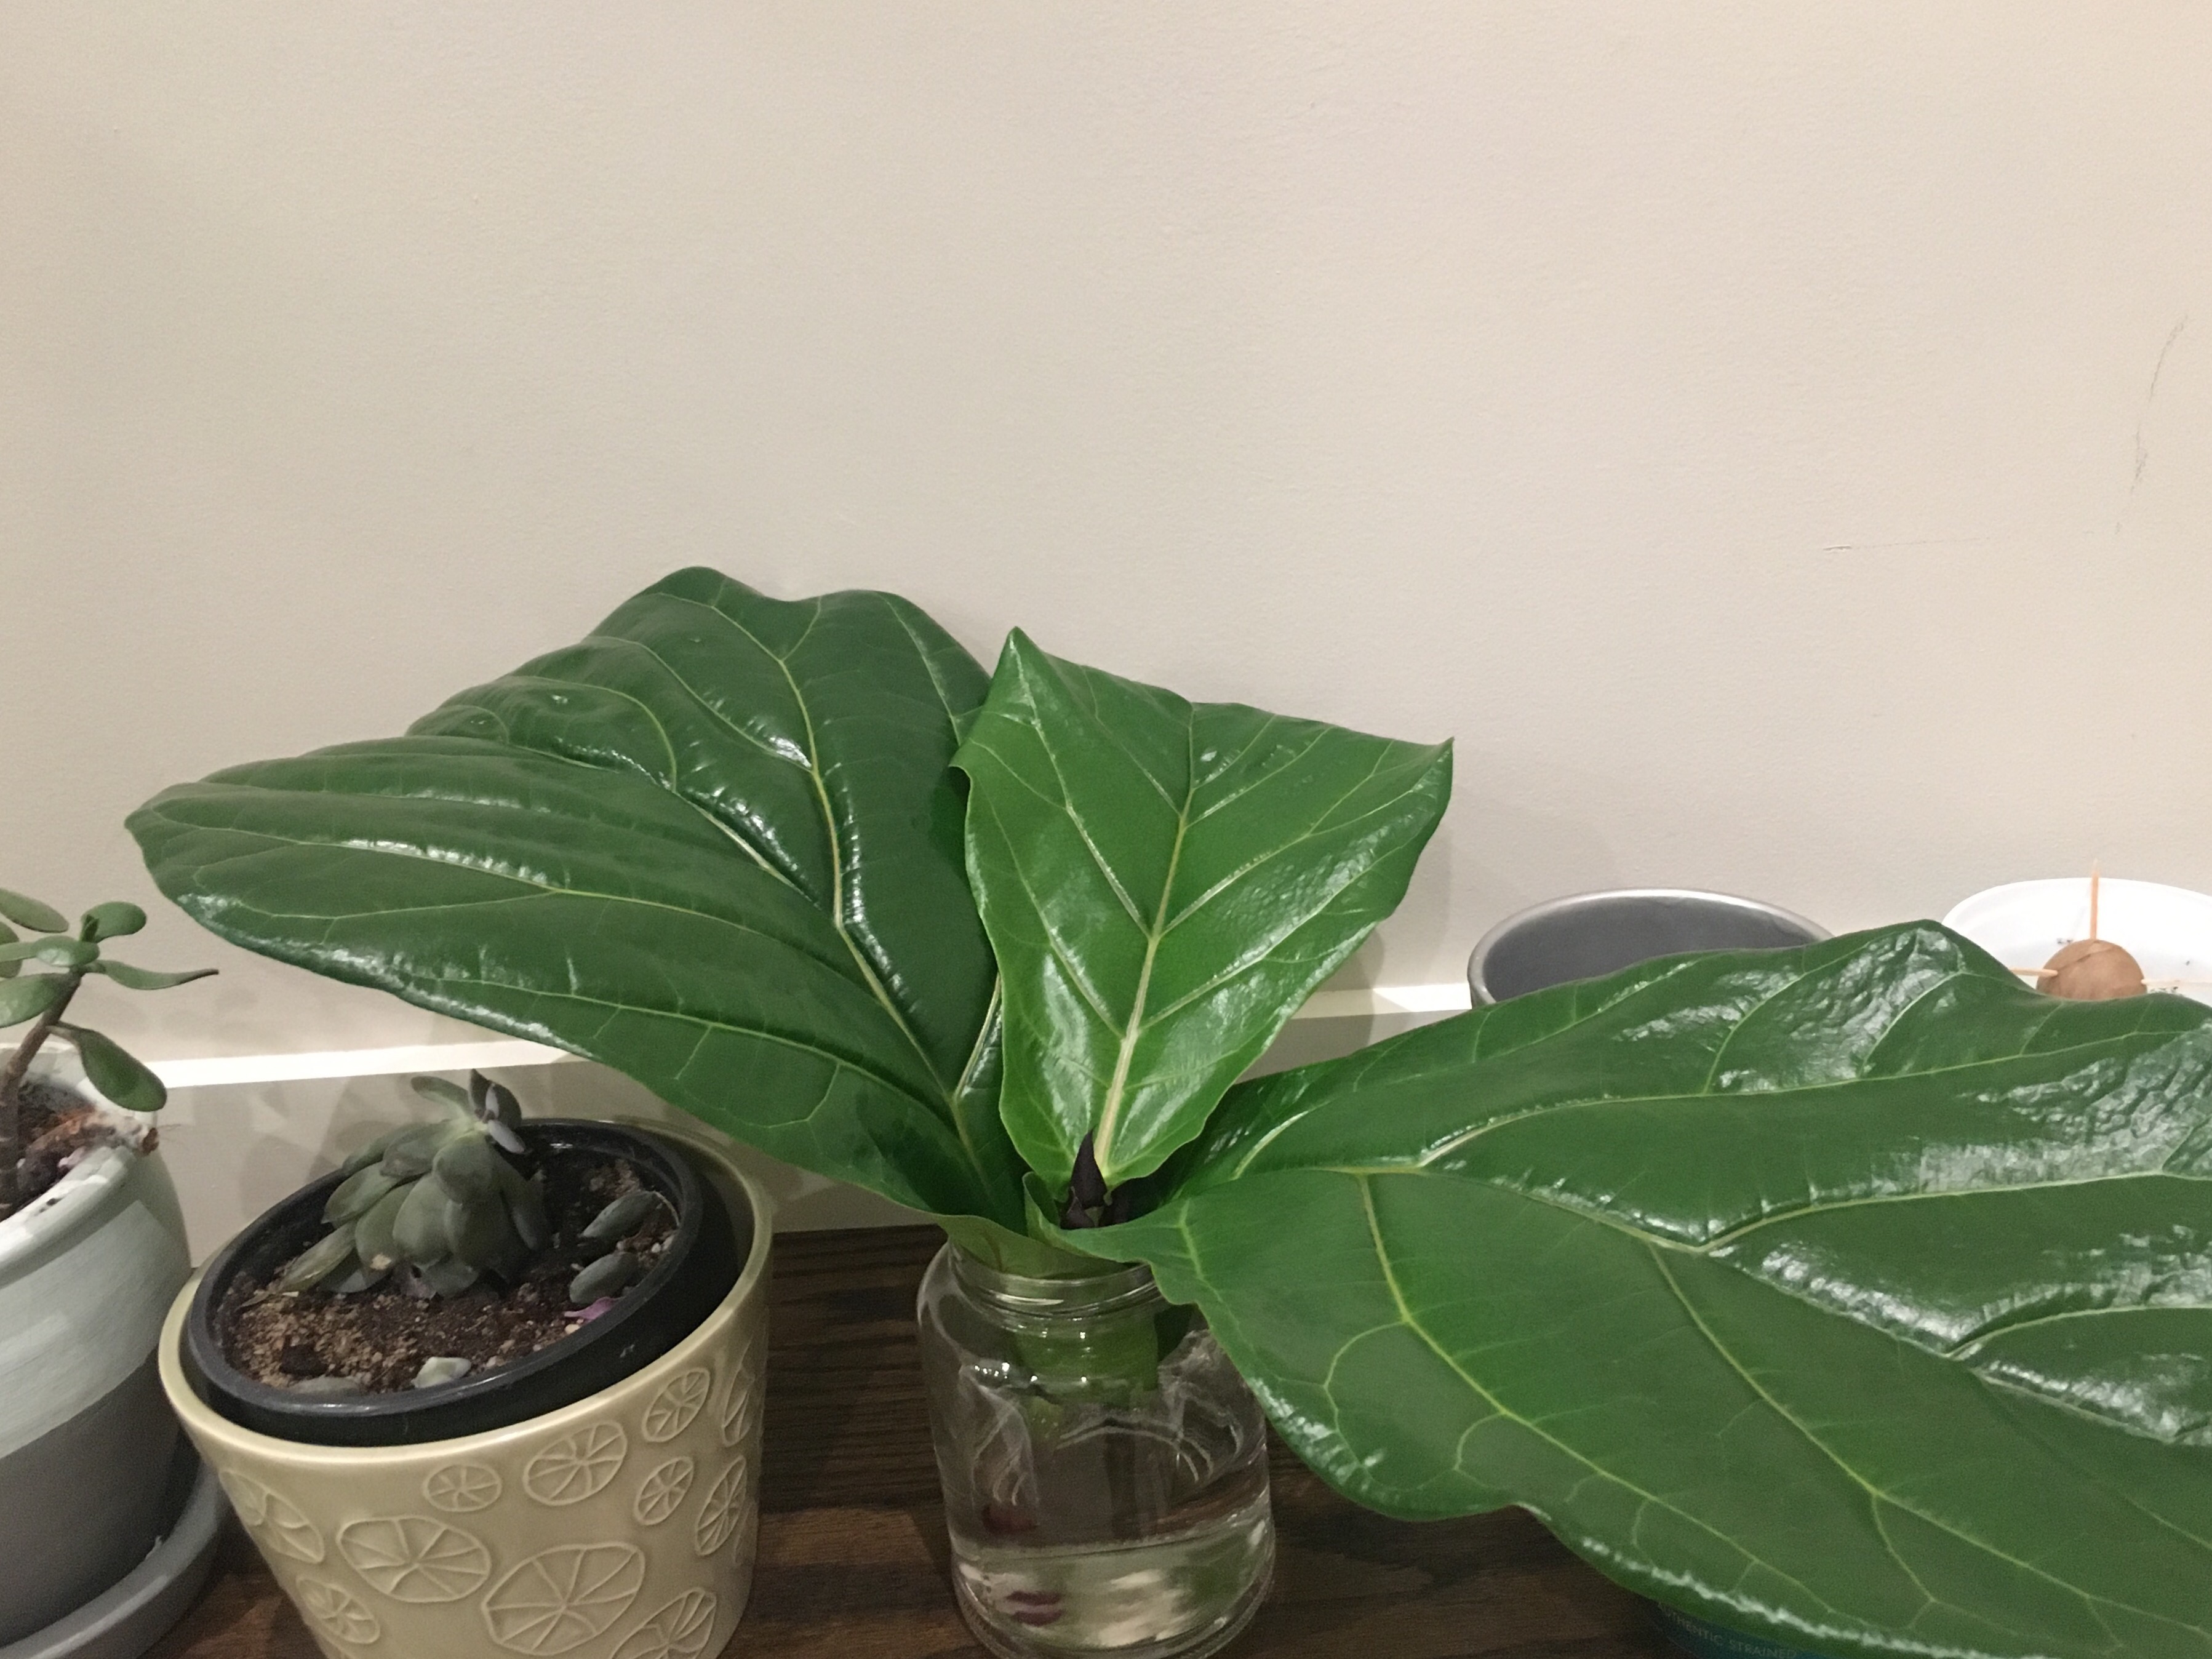 Three leaves rooting in water.
 Two leaves rooting in soil. I covered the pot in plastic wrap to keep a moist environment for new roots to form.
3 Weeks
You may see some new roots around this time!
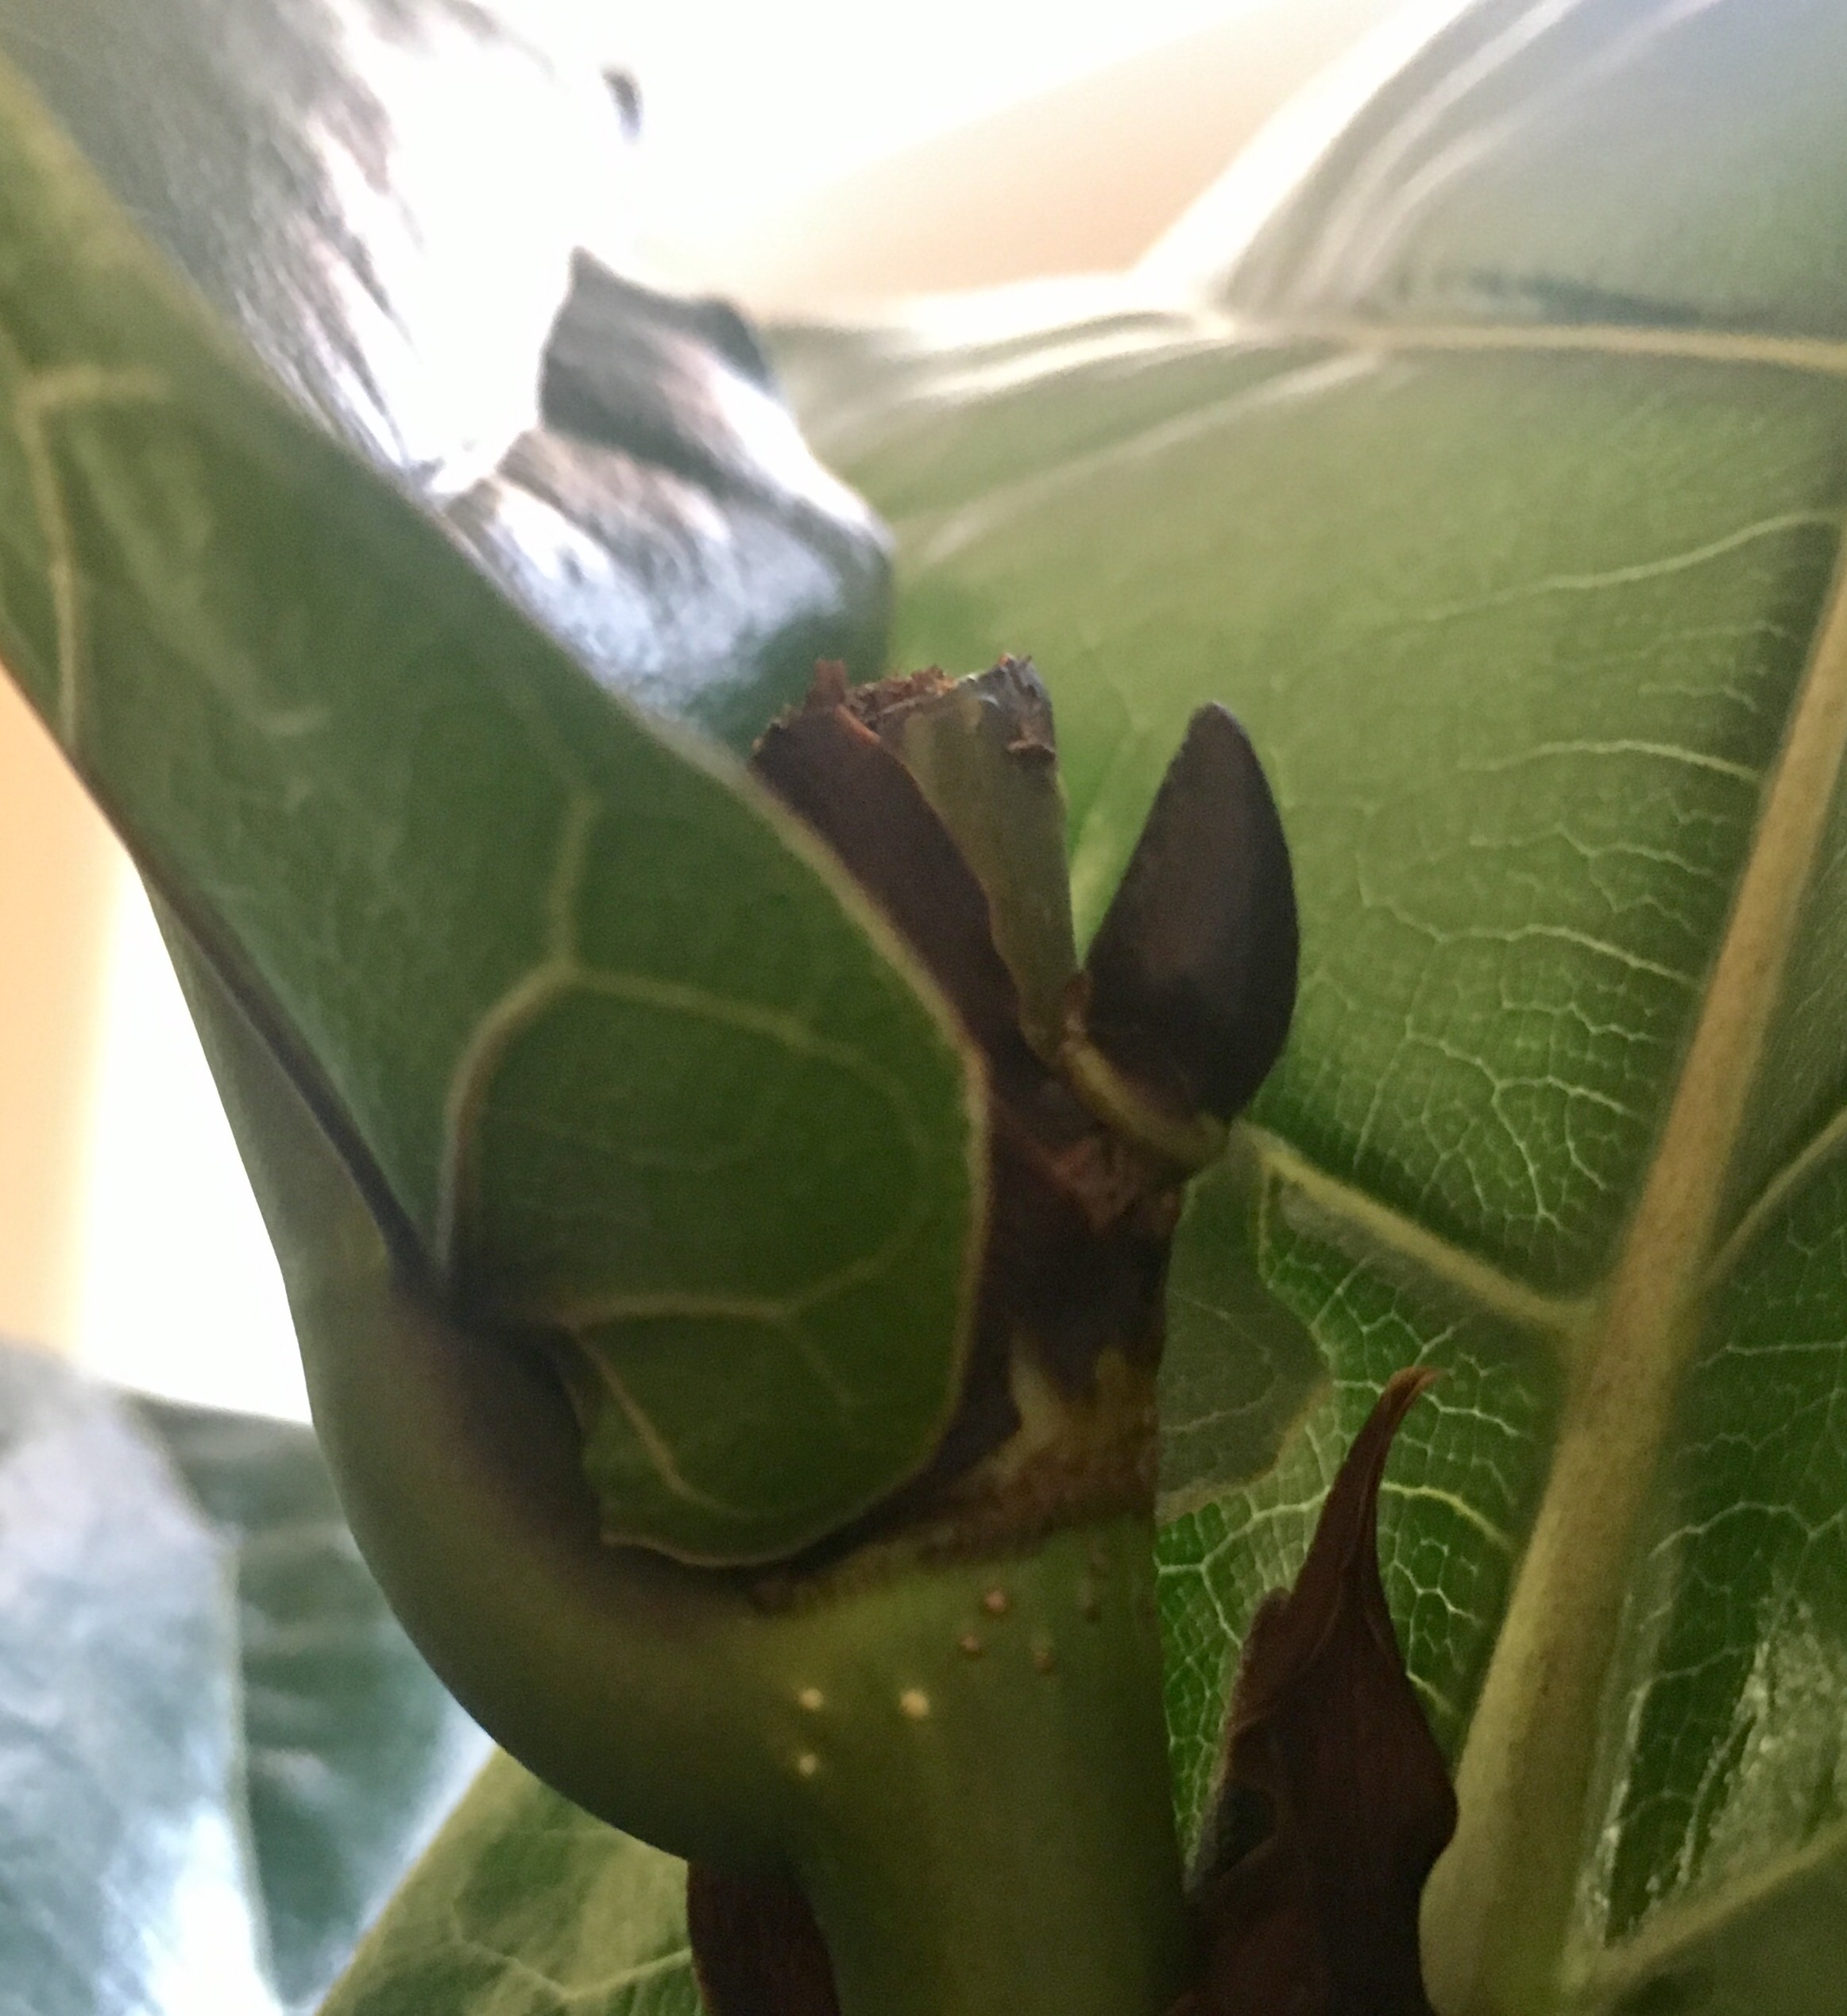
And your original plant should be growing a new bud (or two, or three) where you took the cutting:

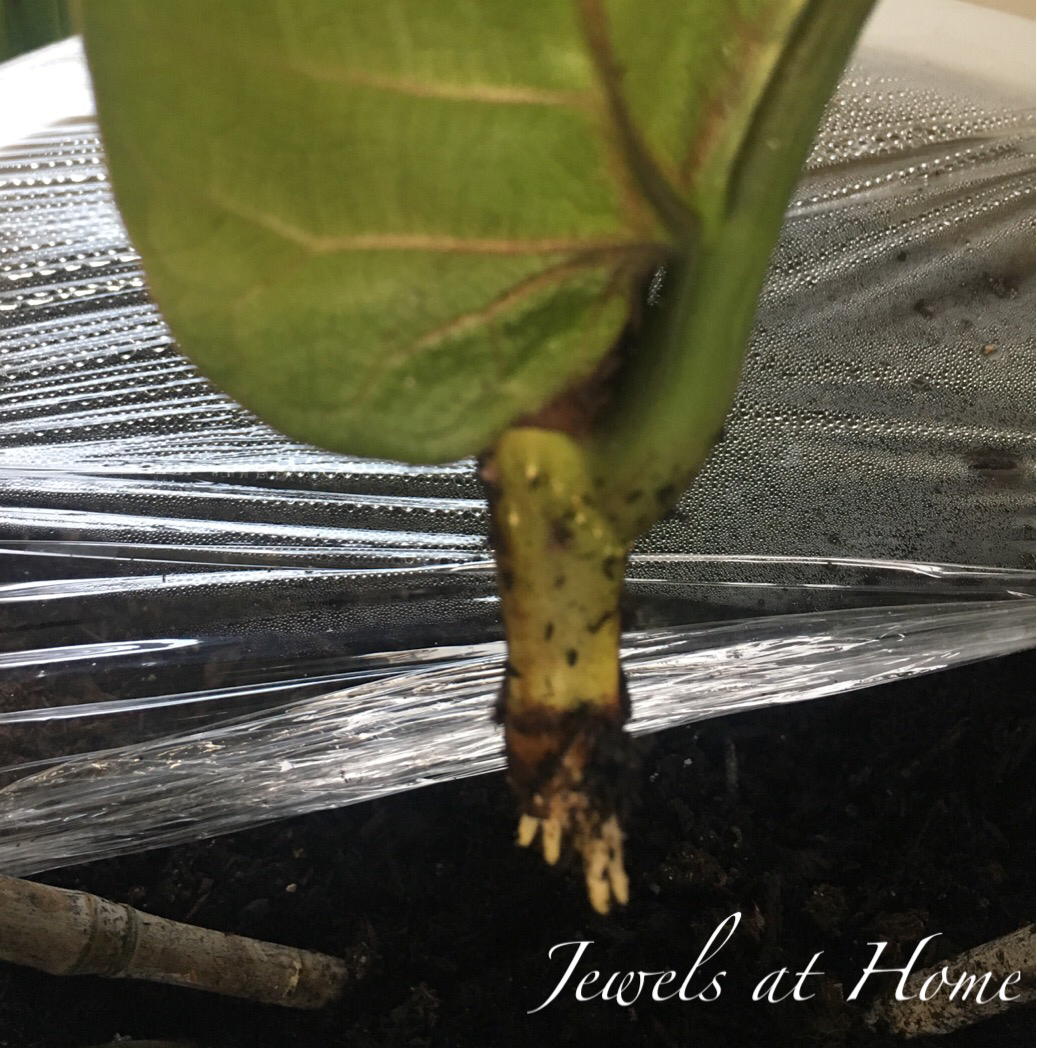
4 weeks
You can see more robust root growth taking off!

The original tree where I cut off the top three leaves also looks great. There’s a good-sized bud forming!
5 weeks
Exciting news! The single top leaf has grown so many roots that I transferred it to a pot today!

The tree where I cut off three leaves also grew a ton with three buds on it!

6 weeks
Crazy! This is where I cut off three leaves from the top of a plant. It went from buds to tons of new branches and leaves in just one week. So exciting!

2-2.5 months
I started to see new leaves growing out of the top of the stem cuttings. (Photo credit here goes to Nicola, who adopted one of the plants and kindly keeps me updated!)
3 months:
I came back from vacation to find that the stem cutting which started with a single leaf had two new leaves!

3.5 months:
This was the stem with a single leaf. It now has three new leaves and a promising looking bud pushing out the top. Yay!
If you take a cutting from the center section of a stem, with no bud attached, it may take even longer for a new bud to form, but it can definitely work!

9 months
For real! The plant in front was a section of stem with a single leaf off the top of the plant in back. It grew like gangbusters!

Thanks for reading and please share your questions and tips!
“Jewels”
It’s so fun to get the boys involved in a creative project for Father’s Day. Remember when we made the mugs and aprons? Or even these simple cards?
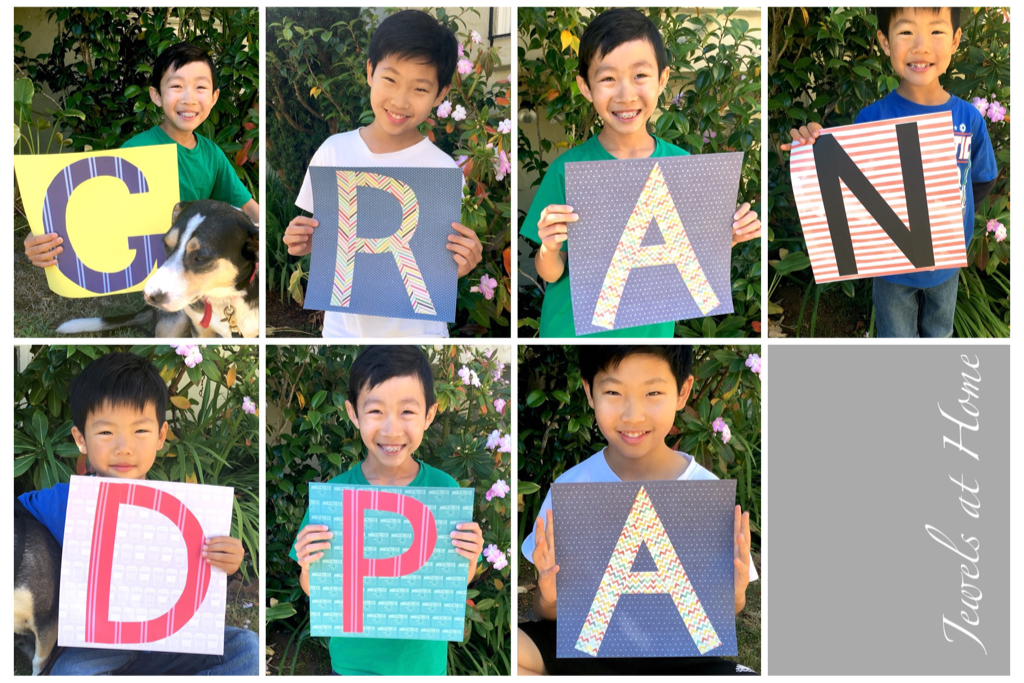
This year, the boys and I created these portraits for Steve and their grandfathers. You know by now that I have an endless supply of scrapbook paper, which I used to create the letters. The boys were really good sports (they aren’t always!) with taking the pictures, and I love the final products.

I printed individual pictures and put them in a frame with three openings and a matte that the boys signed.
And you couldn’t take pictures of three boys and a rascally pup without some outtakes!
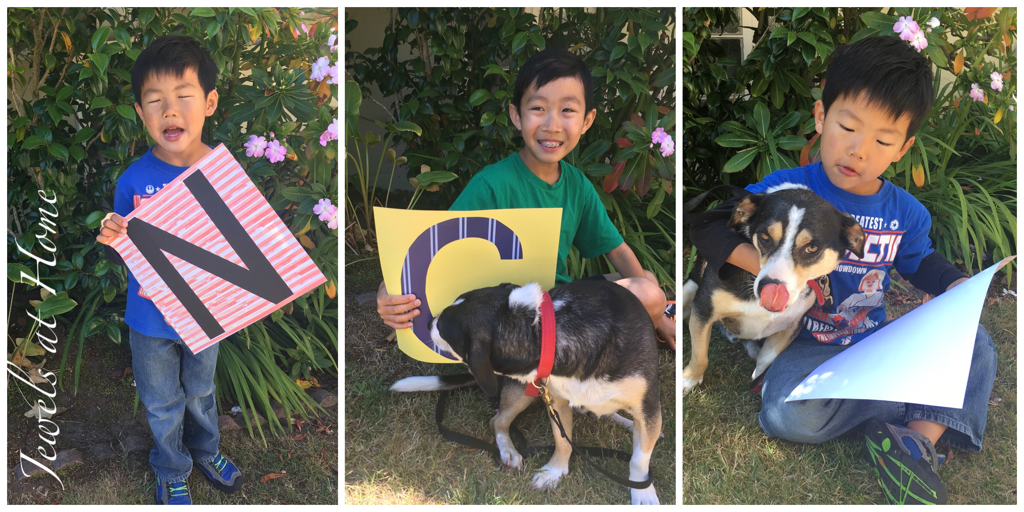
Wishing the best to all the hard-working and loving fathers out there!
“Jewels”
It’s graduation season! Somehow (well, I guess we know how), I ended up with boys graduating from middle school, elementary school, and Kindergarten all in one year. This calls for some crafting. I decided to make graduation leis for the boys and their friends using ribbon.

I researched a ton of ideas, which you can browse on my Pinterest page. Some of those ideas are definitely for the expert level lei-maker, and I am a humble beginner. However, I did find inspiration for something that is both easy and pretty over at Sakacon.com. These spiral ribbon leis don’t require advanced skills, but they do take some time. I modified the method a little, and I love how you can mix and match so many ribbons for infinite ideas!
Materials:
Instructions:
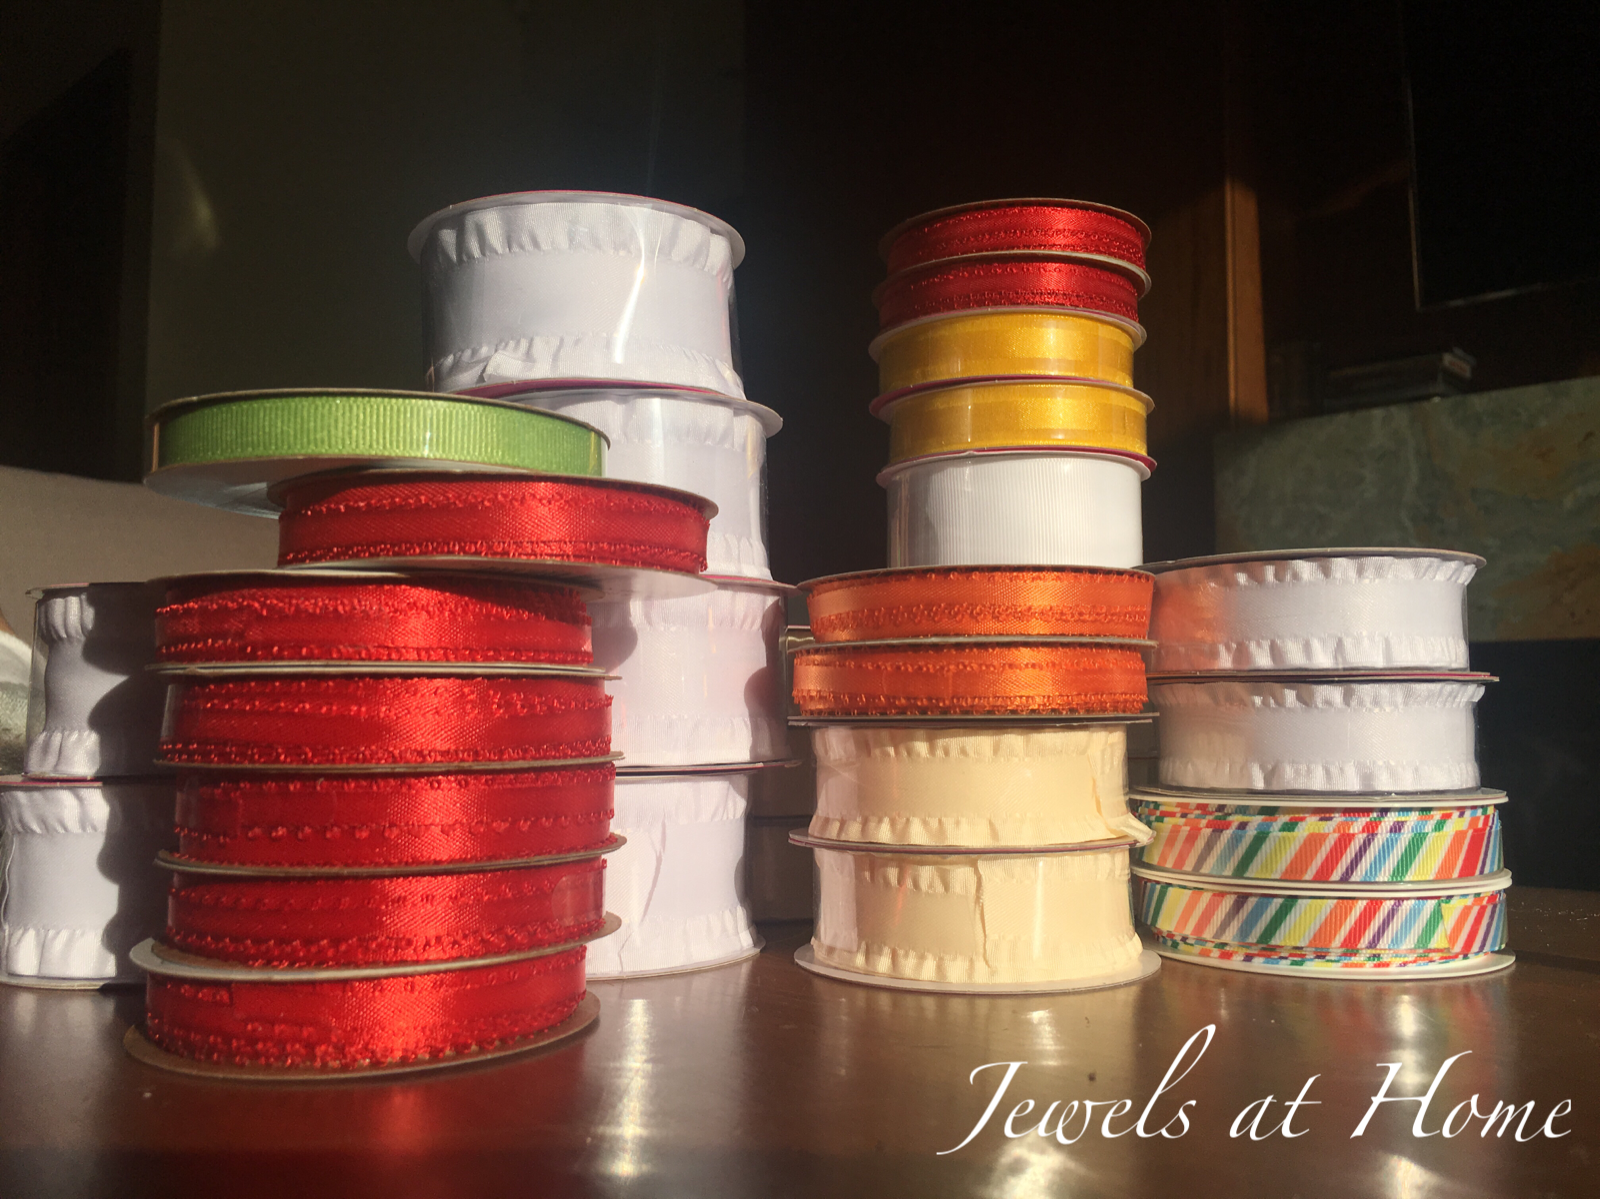
First, go to your local craft store and go crazy! I actually feel like I have accomplished a project just by getting supplies (…but I realize this isn’t quite true). Since the design of the leis is simple, you can add a lot of detail by picking interesting ribbons. You can see i found some ribbons with ruffled edges and picot ribbon (apparently this is what you call the ribbon with the little loops in the side) that really make your “flowers” look more realistic. For fun, I bought some rainbow stripe ribbon, and the possibilities are really endless.
To make the lei, thread three strands of embroidery floss onto your needle. I used about 18″ of floss at a time. Tie a secure knot at the end of your floss.
The Sakacon version has a long tail you can use to tie the lei on with a bow. I decided to make a continuous round lei, because I thought it would be more comfortable for the boys. I still staggered the length of the wide and narrow ribbons – ie left a long tail of the wide ribbon before starting my lei – so there would not be an obvious join in the lei.
I lined up the narrow ribbon to one side of the wide ribbon, folding under the edge to avoid fraying, and sewed a few stitches in place to secure it. I then started doing a long running stitch, with stitches every centimeter (3/8″) or so.

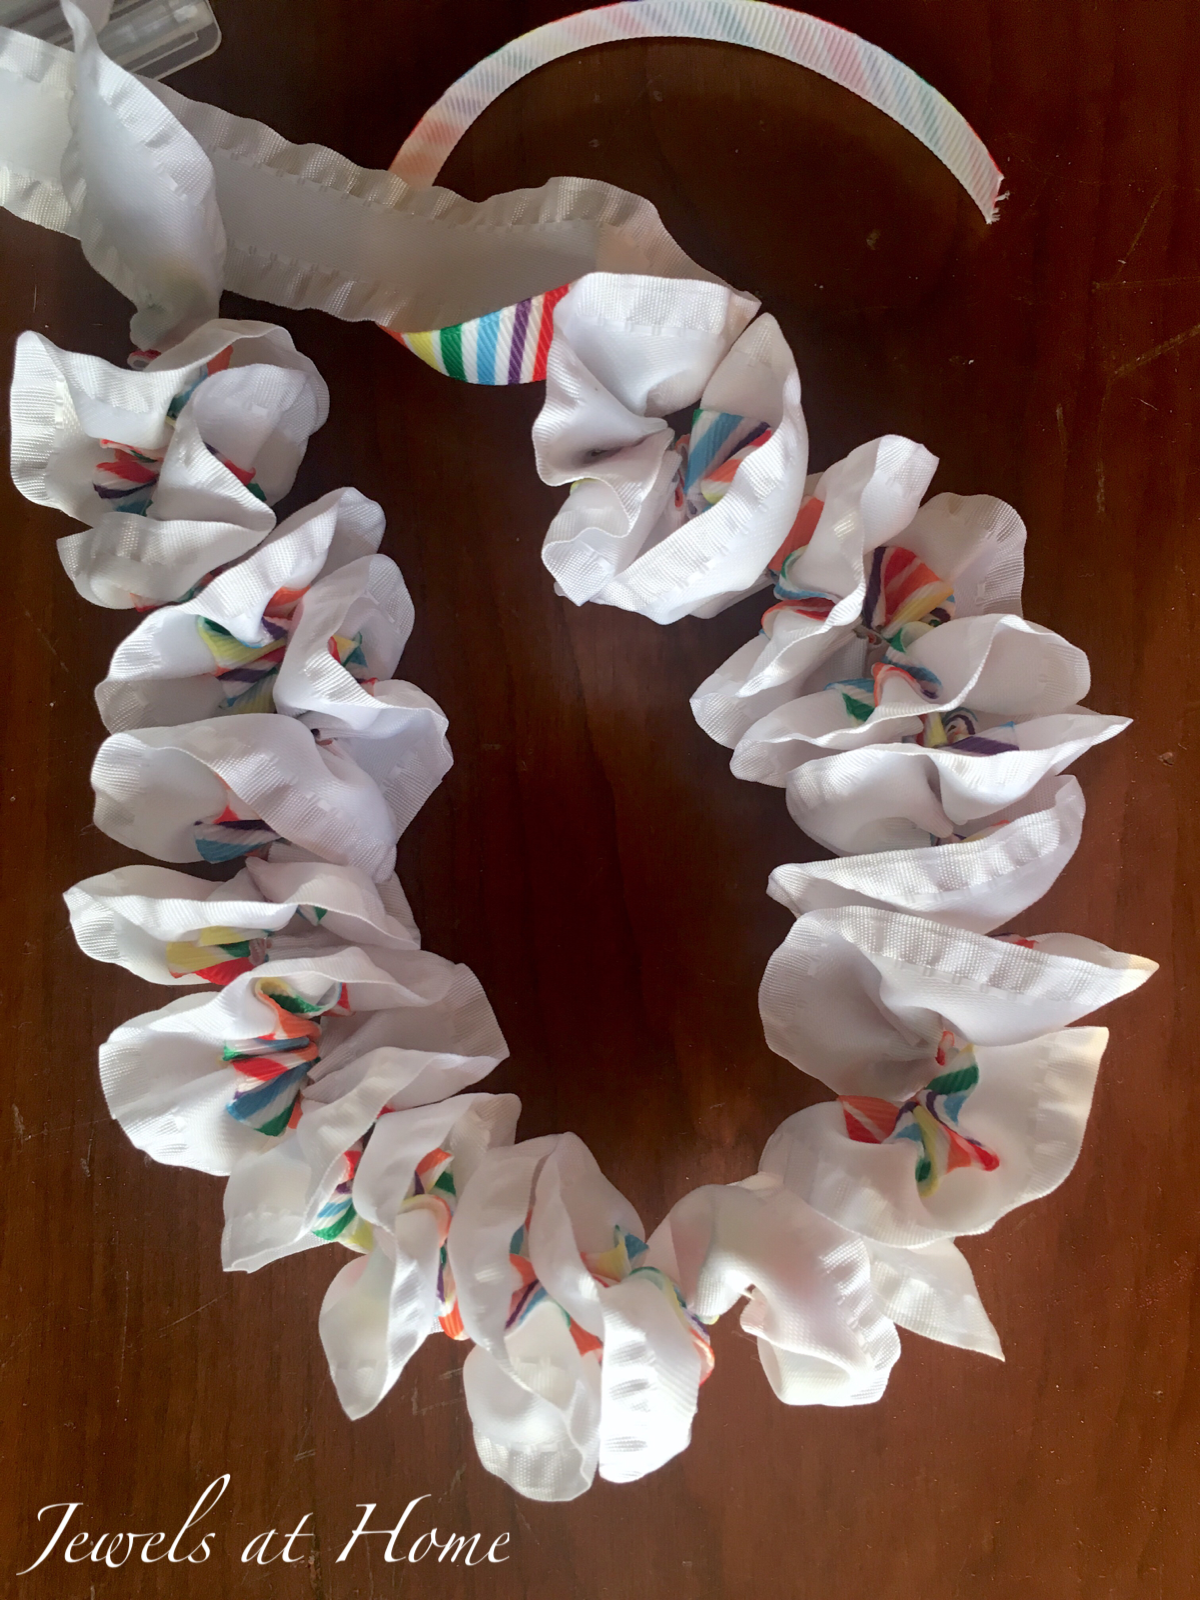
Once you have sewn a few stitches, pull the thread to make the ruffles and guide them into a spiral shape to look like a chain of flowers. This really feels like magic!
You basically continue this for a long, long time. To make the lei a continuous loop, I cut off the wide ribbon first, and picked up the section of wide ribbon I had left as a “tail” at the beginning, continuing I until I reached the start of the narrow ribbon.
I bought spools of craft ribbon, which comes in 3-6 yard sections, so there are several joins in the lei. These aren’t visible, because the ribbons are staggered, and there are so many ruffles. At the ends of the ribbon, I used clear nail polish on the wide ribbon and just folded under the ends of the narrow ribbon. I also changed embroidery floss a few times, being sure to tie secure knots and hide the ends.
Behold! Here are the finished leis. I’m still making more and will add the pictures when they are done, to give you more ideas for ribbon combinations. I can’t wait to share them with my boys and their friends in a few more weeks!


Aloha!
“Jewels”
Can’t draw? Good! Neither can I. This is project for people like us! We created a basement guest room with our renovation a couple of years ago, and with my sister coming to visit soon, I wanted to put some … Continue reading
You’ve probably seen the popular mercury glass accessories out there as well as the DIY tutorials. I have been waiting to try this out, and it was really fun!
I made these for a party we have coming up, and – excitement!! – I am also helping a friend plan wedding decorations, so there will be more to come. Enjoy some tips and pictures:

I found quite a few different variations in instructions, which I will discuss a bit.


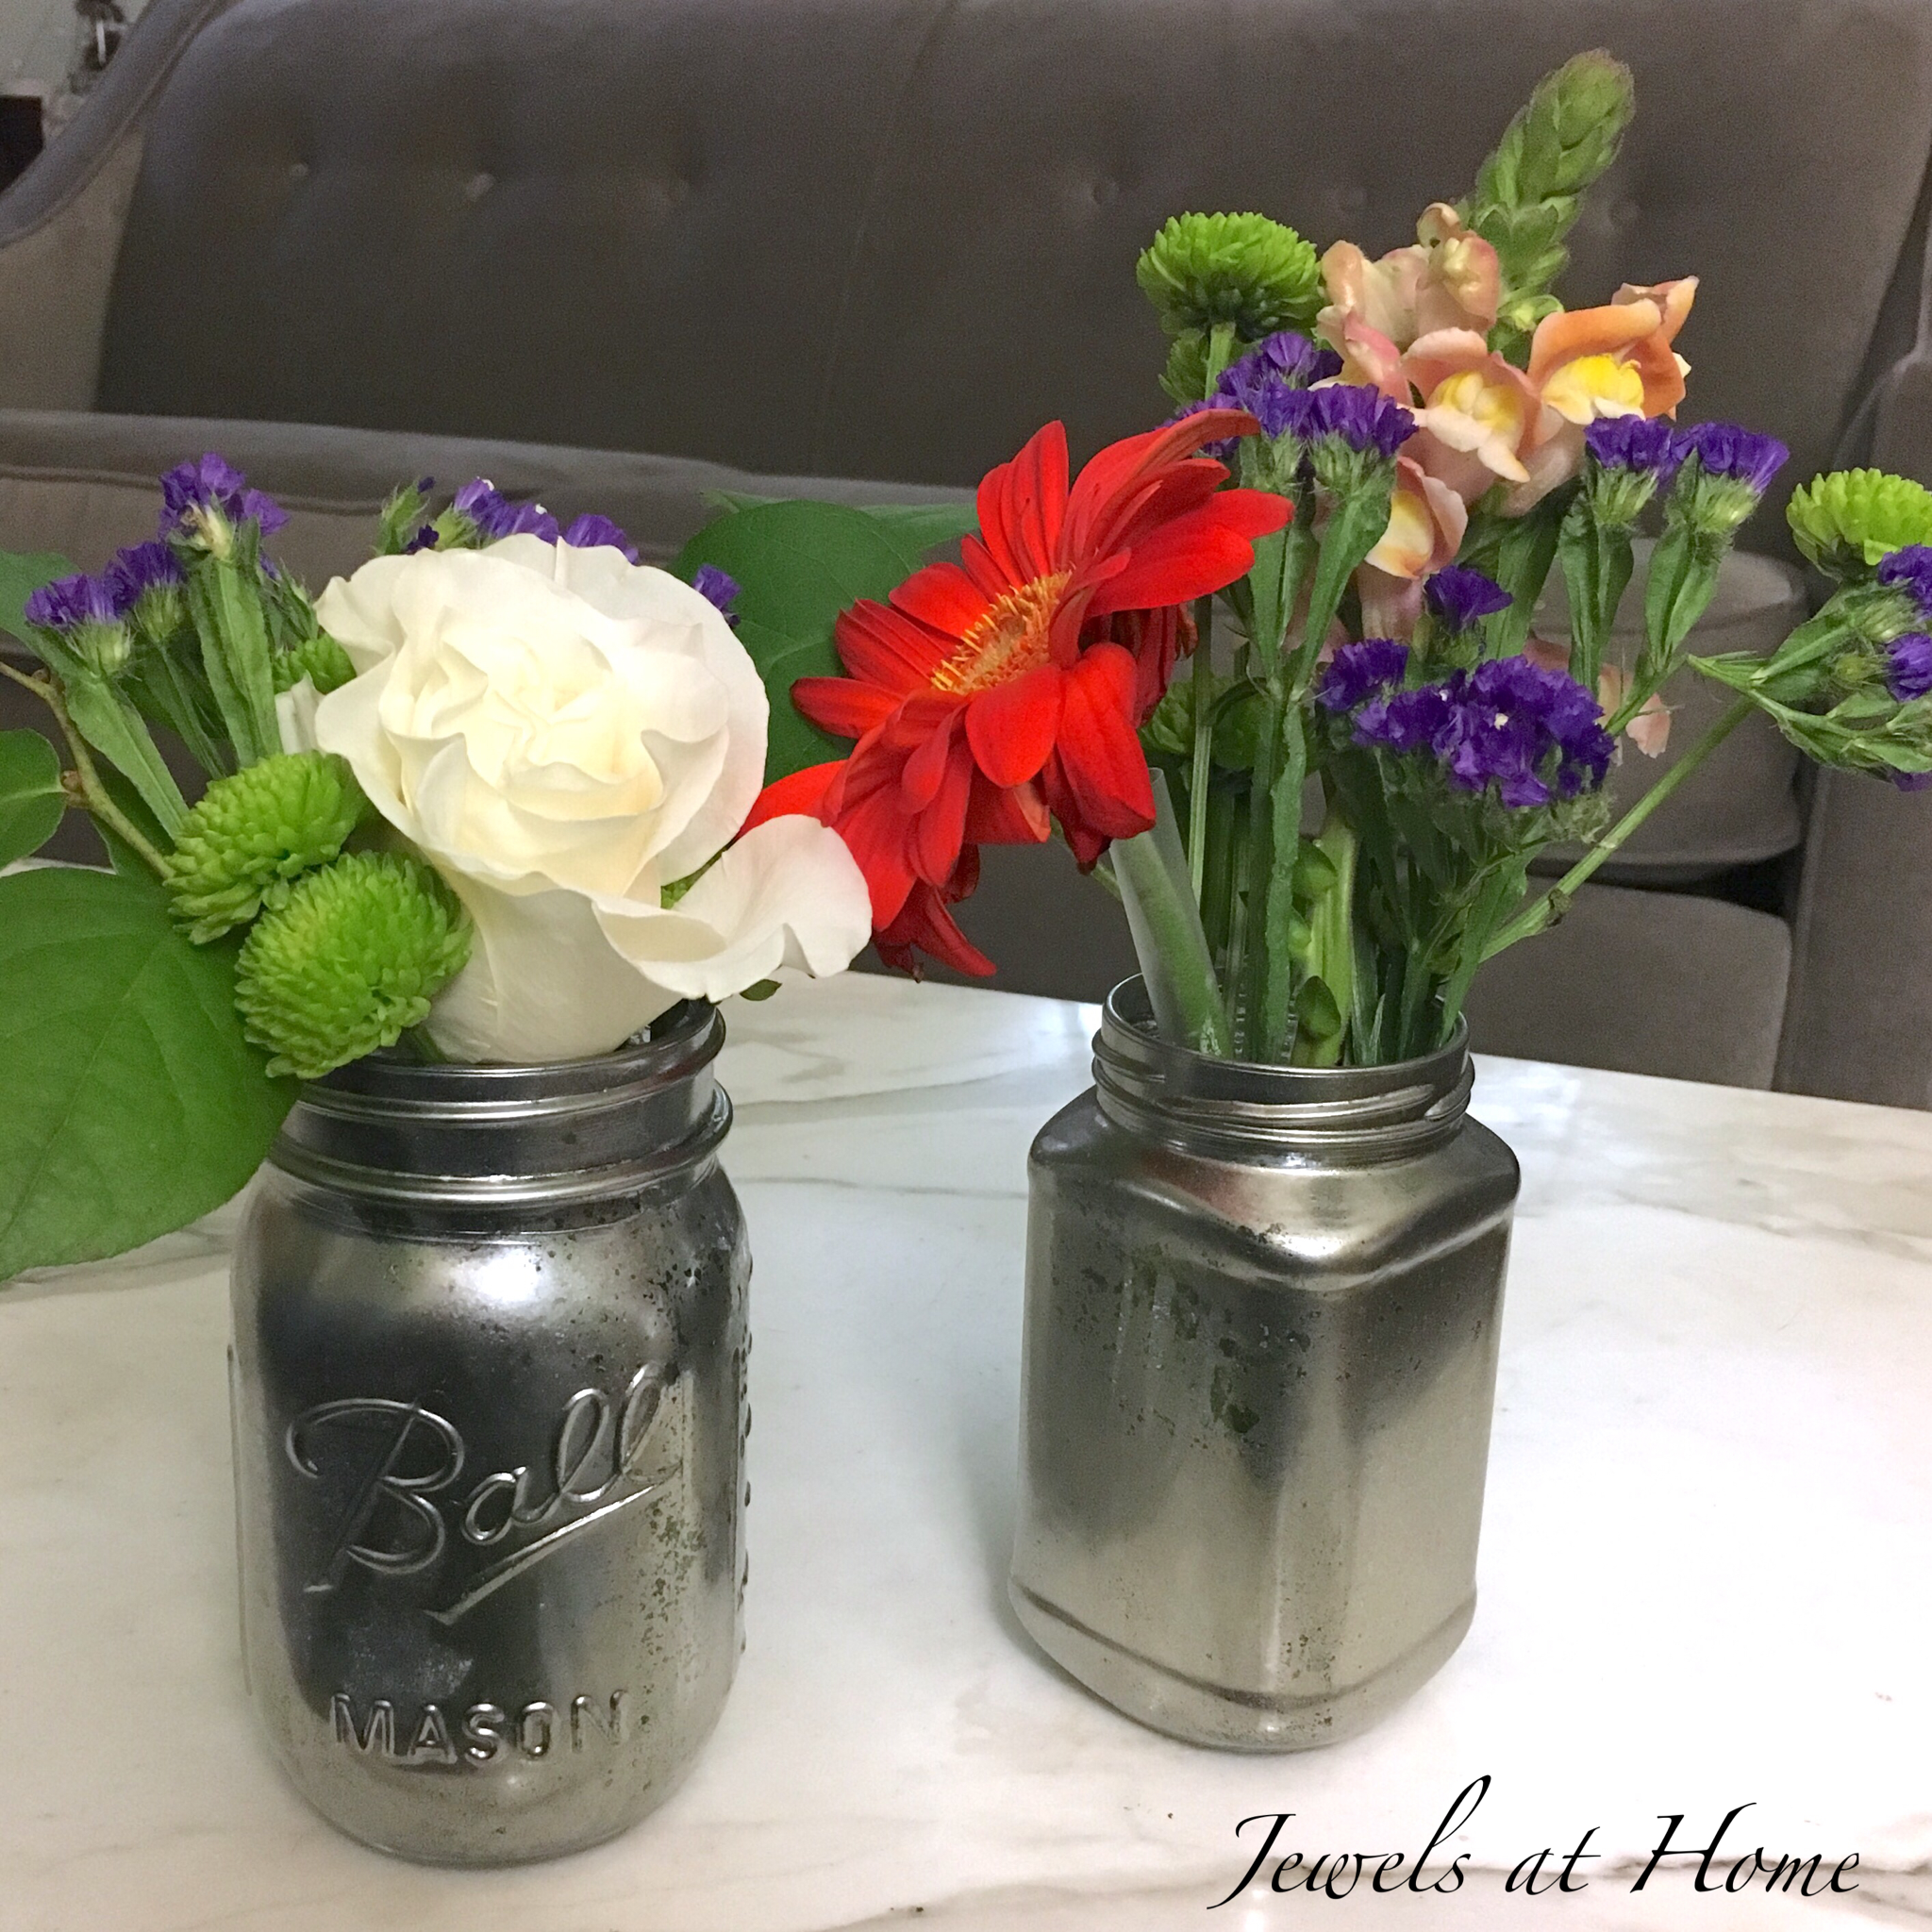
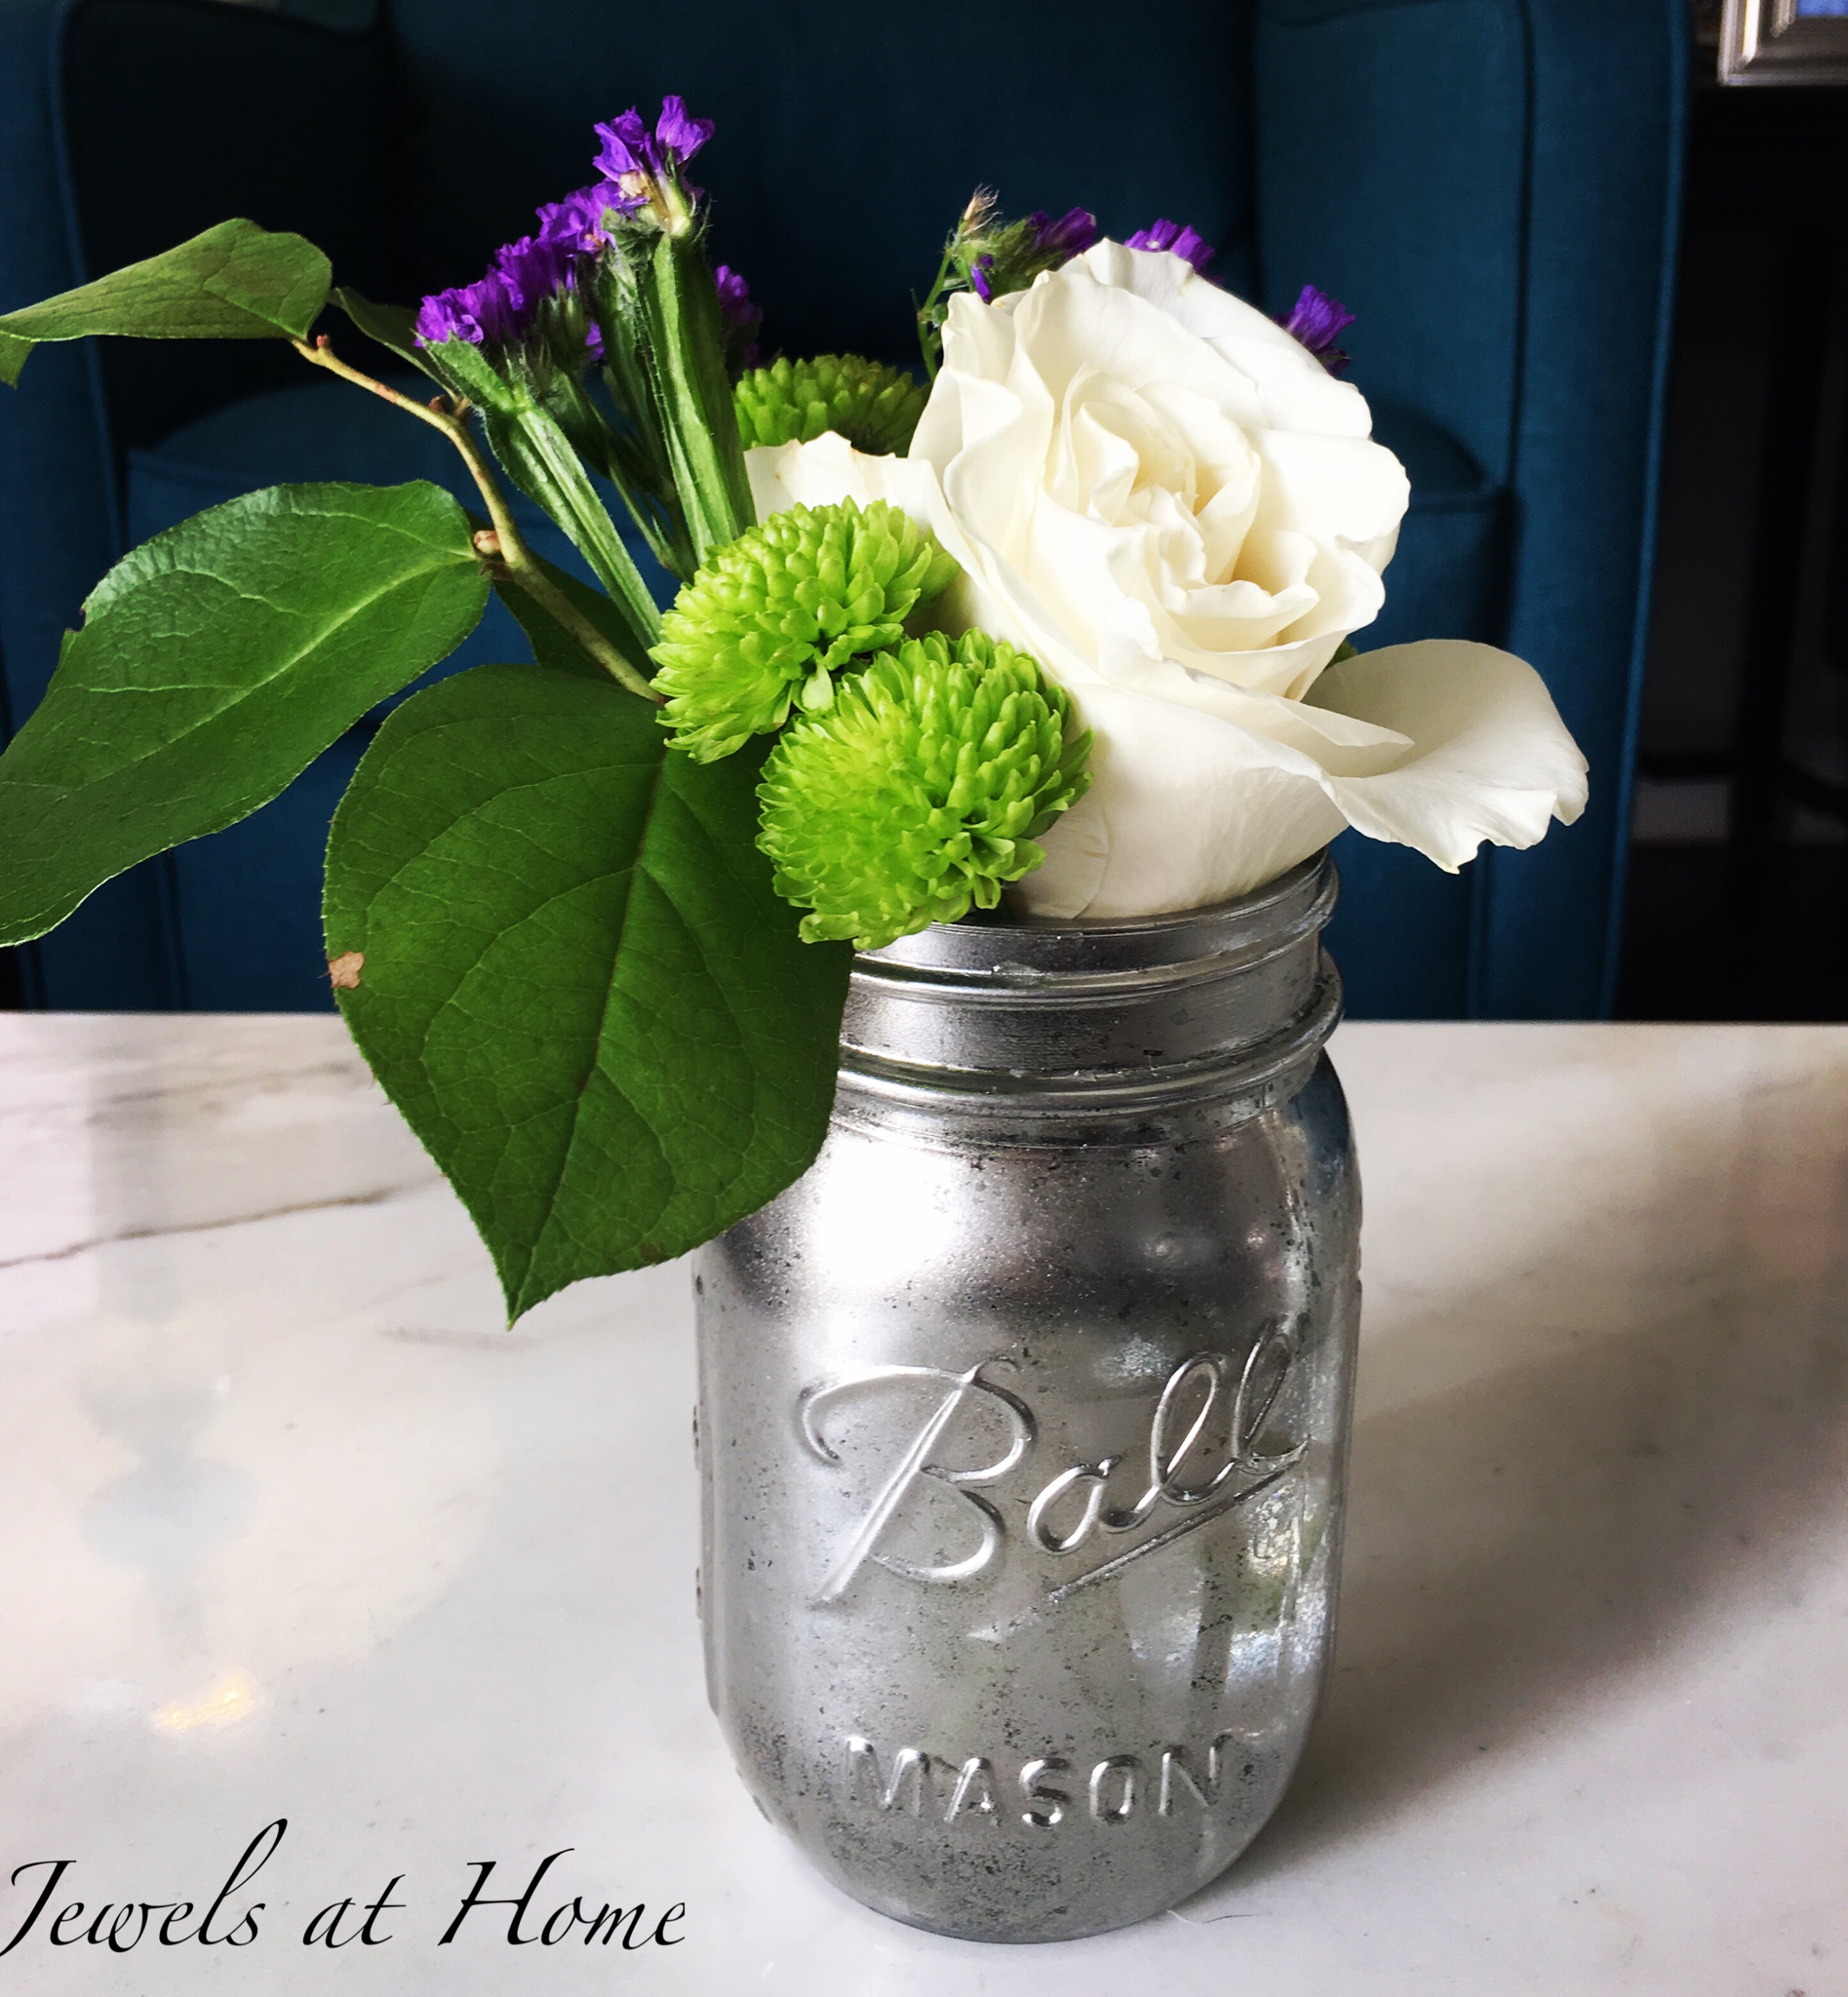


Here’s how one of my vases looks in front of some mercury glass candlesticks I bought from Pier 1. It makes me want to warm up my colors more next time by adding more layers of gold paint.

I’d also like to try again with some rose gold or copper paint!
“Jewels”
I love hosting parties because of the great food and company. And, to be honest, entertaining is also exactly the kick in the behind I need to work on fun projects around the house. We’re hosting a parent social in a few weeks, and I’m working on some decorations that will be festive and a touch glamorous, to help us all escape for a few hours from the daily routine.
One project I was excited to do was this “CHEERS” party banner. You could use this idea with any saying for all kinds of occasions, like weddings or birthdays. If you want to make one for your next shindig, here’s how I did it.

Materials:
Instructions:
Here are a couple more pictures of our fun party banner!

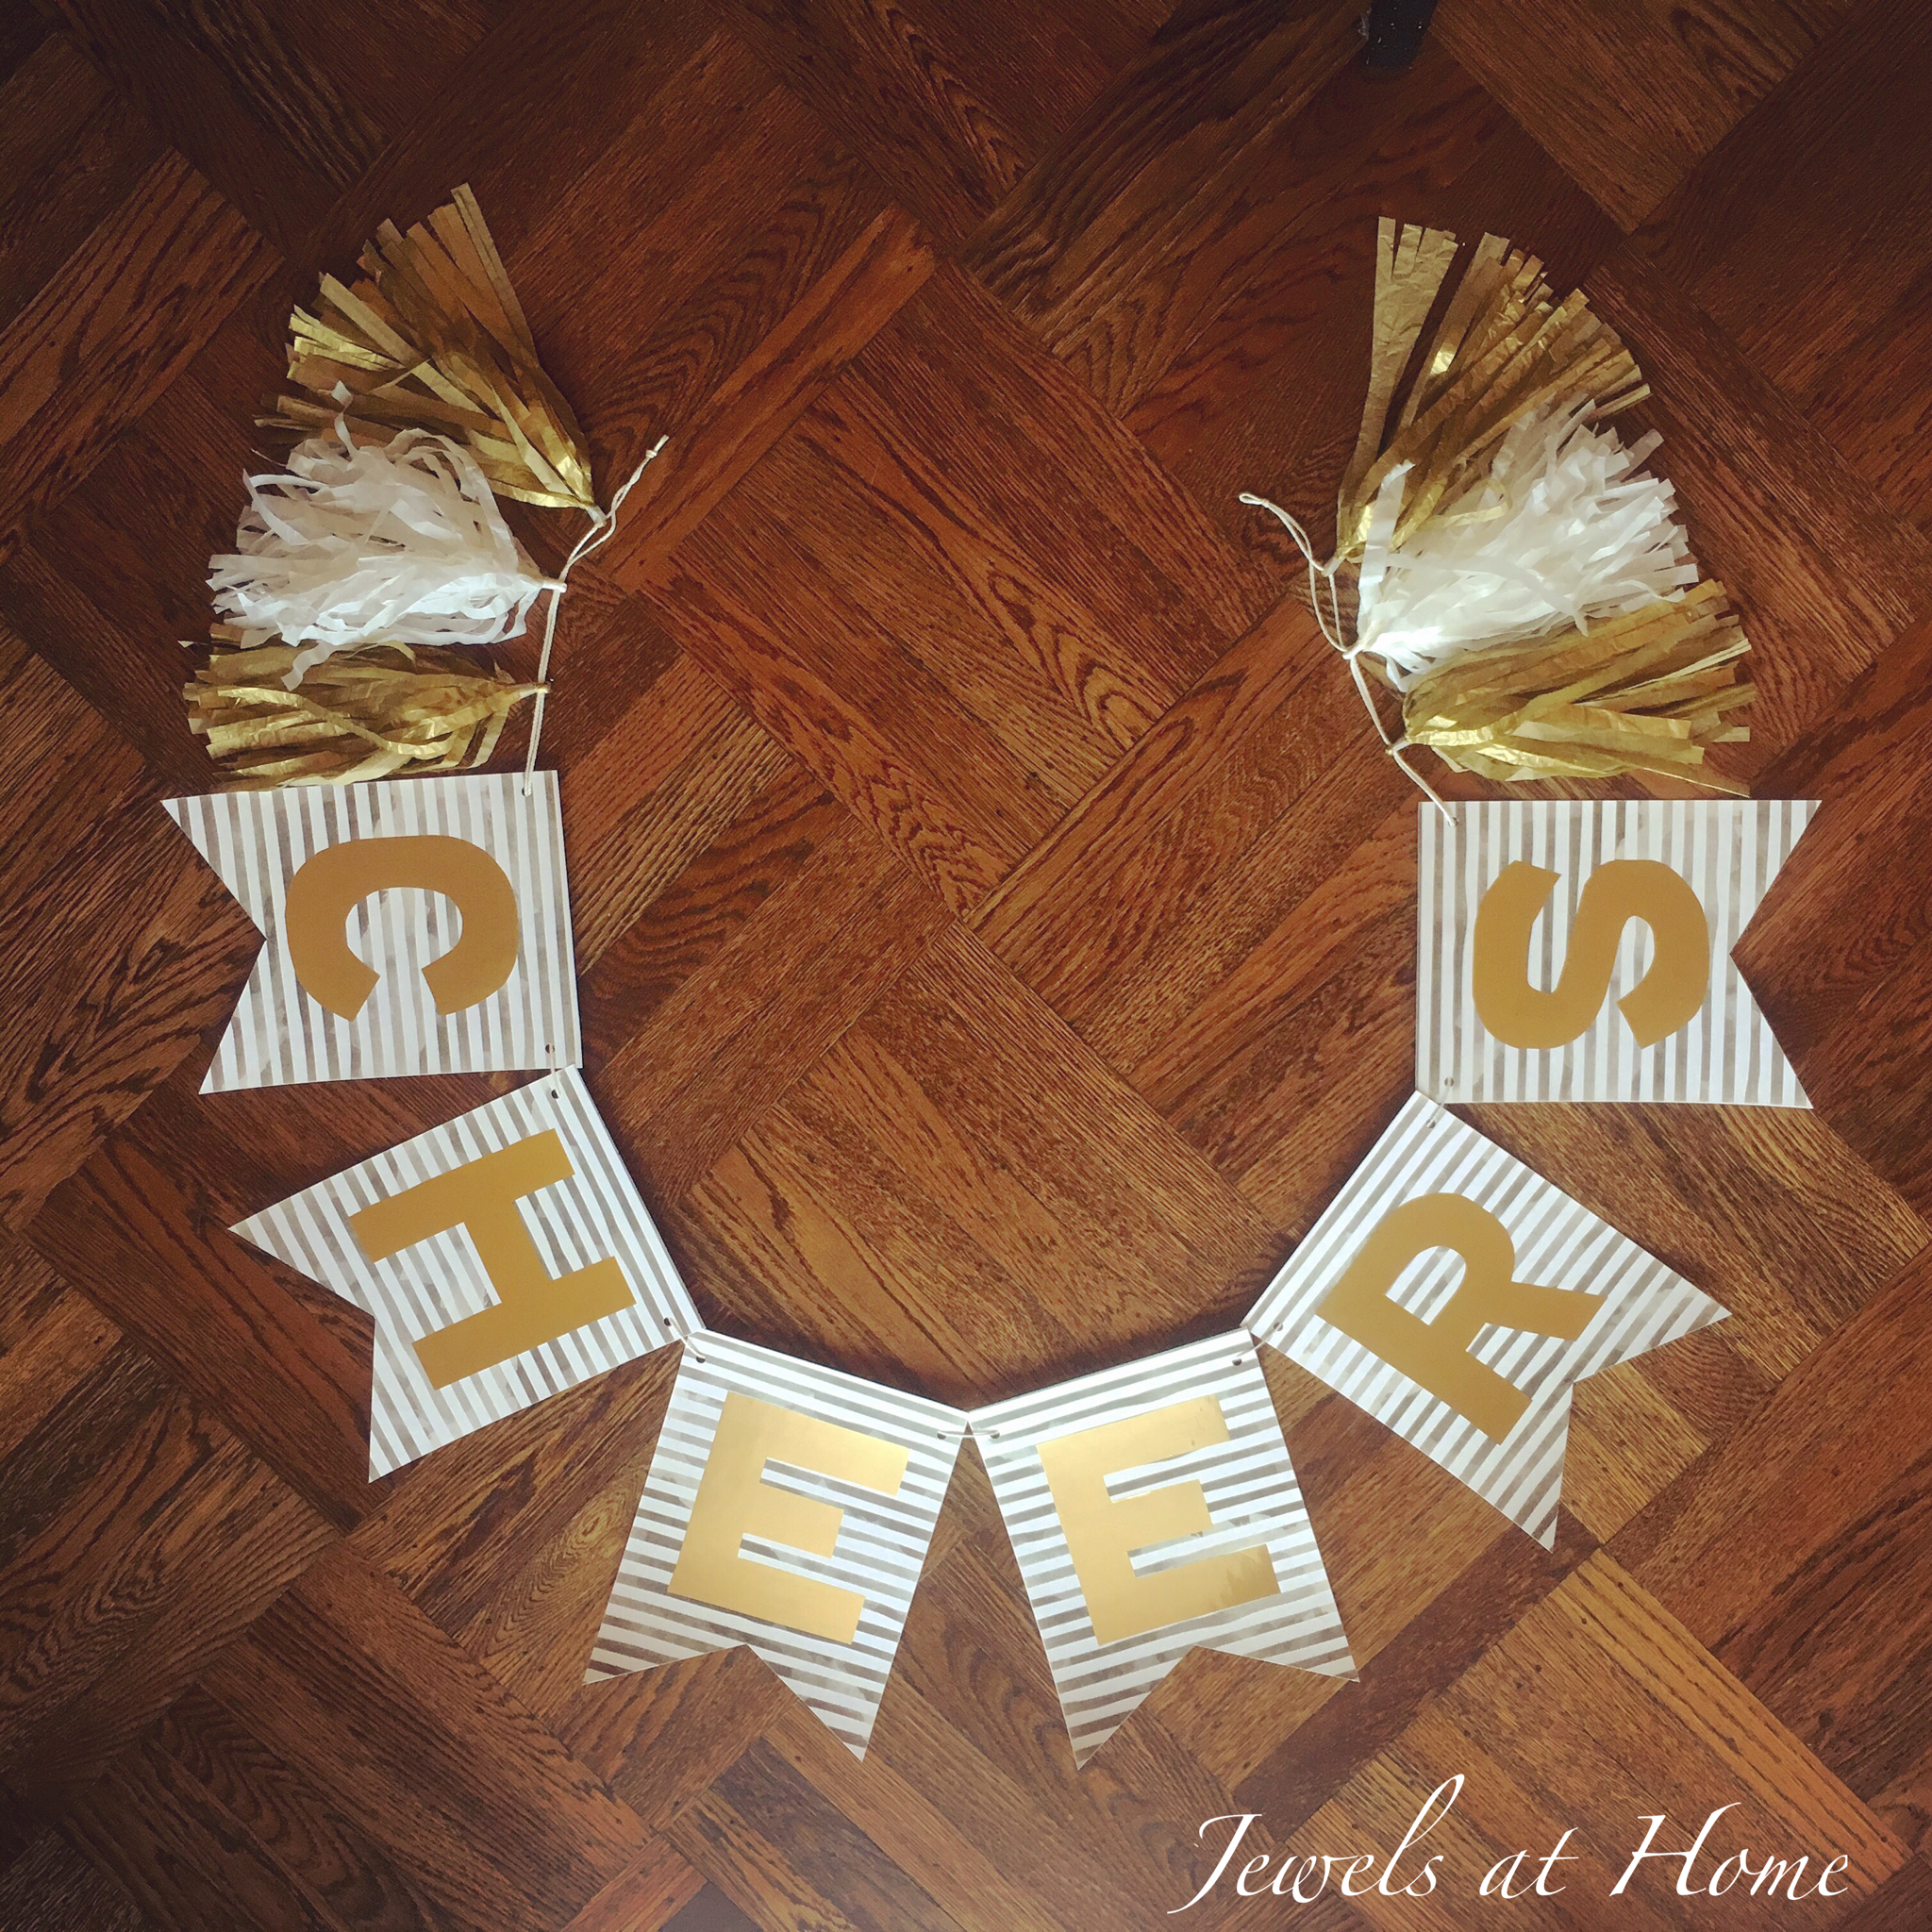
Can’t think of a better way to sign off than saying “Cheers!”
“Jewels”
