This past summer, my sister and I took some time to sort through boxes of things from our mother and two grandmothers. These have accumulated at our family house, and the experience of opening them was nostalgic, sentimental, and at … Continue reading →
Some people are inspired by cooking videos or makeup tutorials. My social media addiction is watching the creative ways people transform tablecloths and other used textiles into clothes. My mom taught me how to sew, but it’s been years since … Continue reading →
I wish I were a better sleeper. Trust me, I really do. I’m sensitive to light when sleeping, so room-darkening window coverings are a must! I’ve found some quick tricks that I’m excited to share for adding lining to existing … Continue reading →
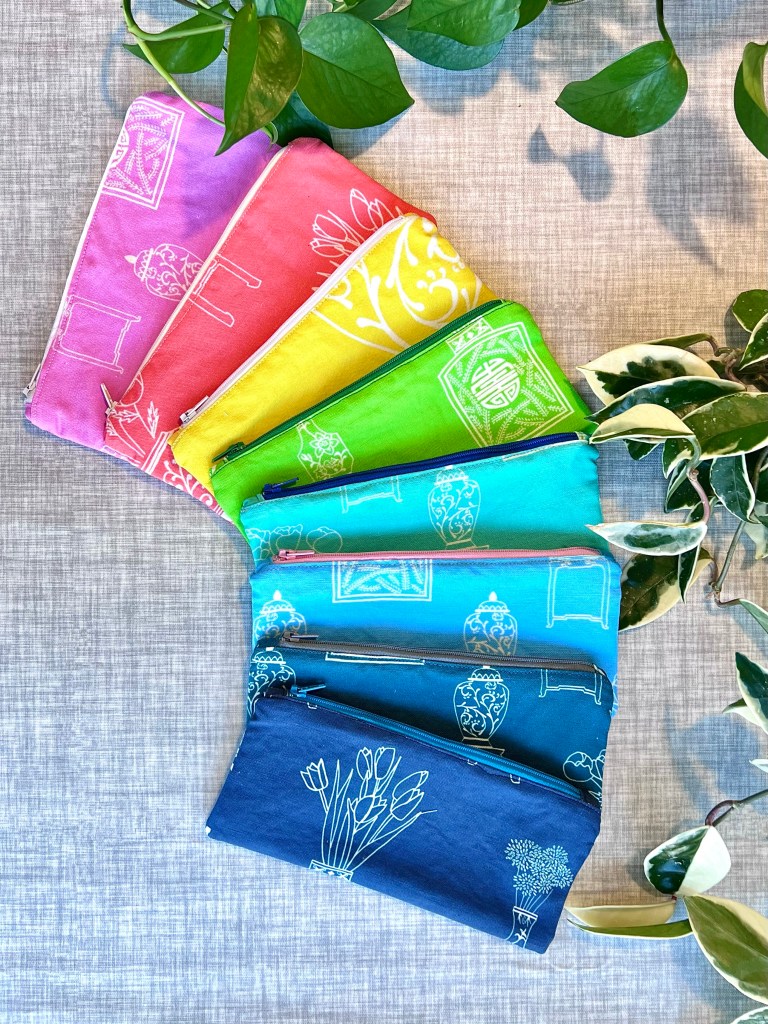
YEARS ago, I bought a cute zipper pouch ages ago at a Signatures craft fair in Toronto. The size is perfect for sunglasses, lip gloss, hair ties, ear buds, or other little items you want to corral in your purse. Since I recently conquered my fear of zippers when I made the box cushion covers for my new chairs, I decided to try making some of these little pouches myself. It’s such a fun project to use small scraps of fabric and combine colors and patterns.
I followed the instructions from icansewthis, which lays out the steps very clearly. The dimensions for this pouch use 4.5″x9″ rectangles to make a finished size of approximately 4″ x 8.5″
Here’s what you’ll need:
2x Outside fabric pieces: 4.5″x9″ each
2x Lining fabric pieces: 4.5″x9″ each
2x zipper tab fabric: 1.5″x2″ each
zipper
Optional: fusible interfacing for outside pieces, if you are using a lighter weight fabric
I made pouches from vintage kimonos, favorite scraps, and also some of fabrics I designed myself. If you want to check out my fabric collection, here’s my shop on Spoonflower. You can have have fun mixing and matching zipper colors and linings!
A couple of years ago, shortly after everything shut down at the beginning of the pandemic, I got back into sewing. A lot. It kept me busy and feeling productive and was a great outlet, while making pretty things for … Continue reading →
A lot of people groan when they think about moving, and while I plan to stay put for many years to come, I actually love the excitement and challenge of arranging a new space. I’ve had a lot of fun … Continue reading →
My work family is getting ready to welcome the fourth baby this year! I decided to change it up from the rainbow scrap quilts, and I thought this Swiss cross pattern would be a great fit for Caitlin’s style. I … Continue reading →
Mixed feelings seem to be the norm these days, so – I am both sad that we need to wear face masks, and happy that I can make them. Now that I have tried a few different variations, it’s gotten pretty quick and easy to put these masks together. They are a satisfying way to use small scraps of fabric, and several have been going out by mail or on the doorstep to my friends. I’ve gotten some lovely chocolate treats in return – it’s a great feeling, when people know you so well!
The original mask pattern I made is in a prior post. Now, I have made a few updates that I think make it more comfortable (nose dart) and practical (opening at the bottom, if you want to add additional filter material).
Here’s what you’ll need:
Cotton fabric – use a tightly-woven material, such as high thread count bed sheets or quilting cottons for better protection (two 8″ squares per mask)
1/4″ wide elastic (12.5″ length per mask)
Cord for ties – I used spare shoelaces and some bias tape stitched closed (I yard per mask)
Basic sewing supplies
Here’s how to do it:
Cut two 8″x8″ squares of cotton
Round the top slightly (see picture below)
Fold the mask in half vertically, with right side facing, and sew small darts at the top center of each piece. My darts are approximately 7/8″ wide and 2 1/4″ high (see picture below)
Zig-zag stitch along the bottom of each piece to stop the hem from fraying, because this side will be left open to insert optional filter material.
Place the two pieces right sides together and pin
In between the two layers, pin the elastic 3/8″ down from the top corners, careful not to twist and pin the ties 3/8” up from the bottom corners
Starting about 1.5″ from a bottom corner, stitch toward the corner and all around the edge of the mask with a 3/8″ seam allowance, ending about 1.5″ from the opposite bottom corner, leaving an opening in the center of the bottom. Backstitch at the beginning, ties, elastic, and end (see picture below)
Clip the corners, clip the top curve, and turn right side out
Iron the seams flat and top stitch around the edges
Pin two or three pleats
Stitch the two sides to secure the pleats
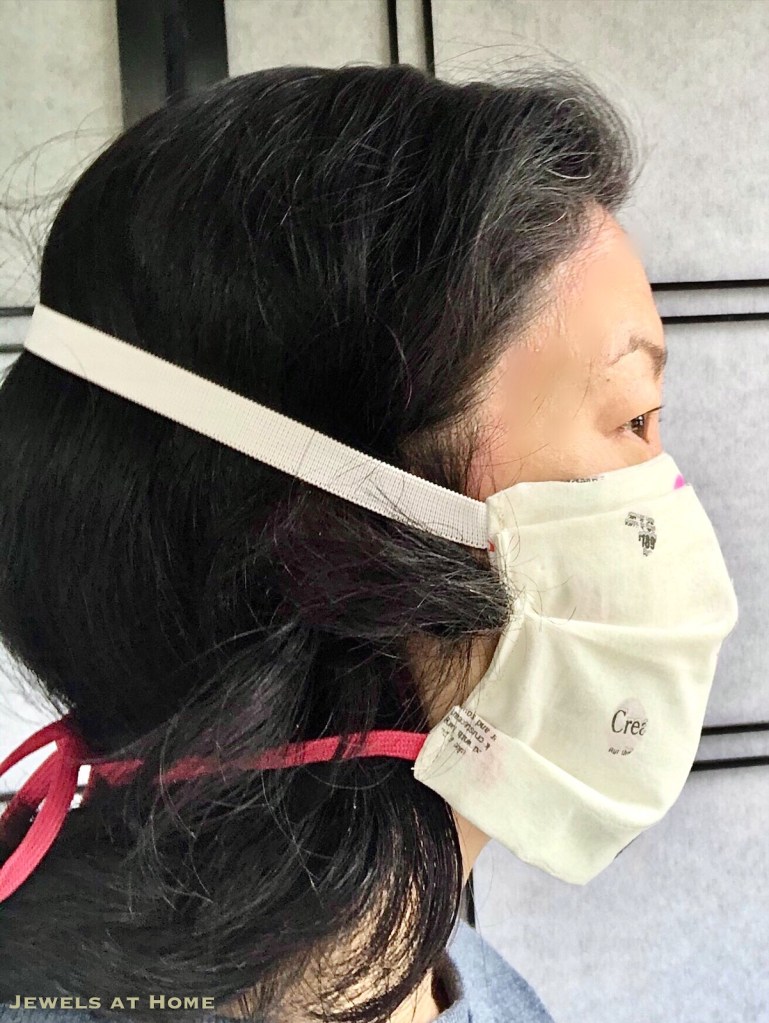
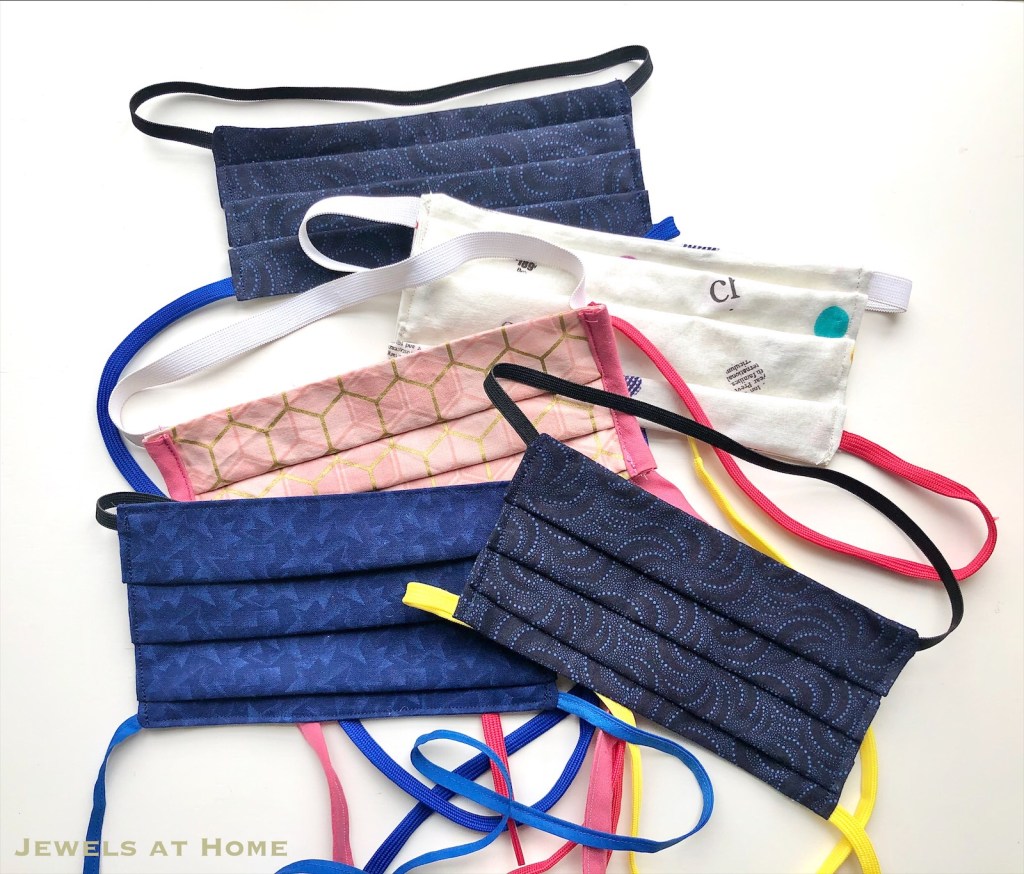
Here’s how I wear these masks and some of the fun fabric and color combinations I tried:
Hope that helps others who are sewing masks. Stay safe, friends!
While we’re staying home to “Shelter in Place” and slow the spread of the novel coronavirus, I’m trying out sewing bags!
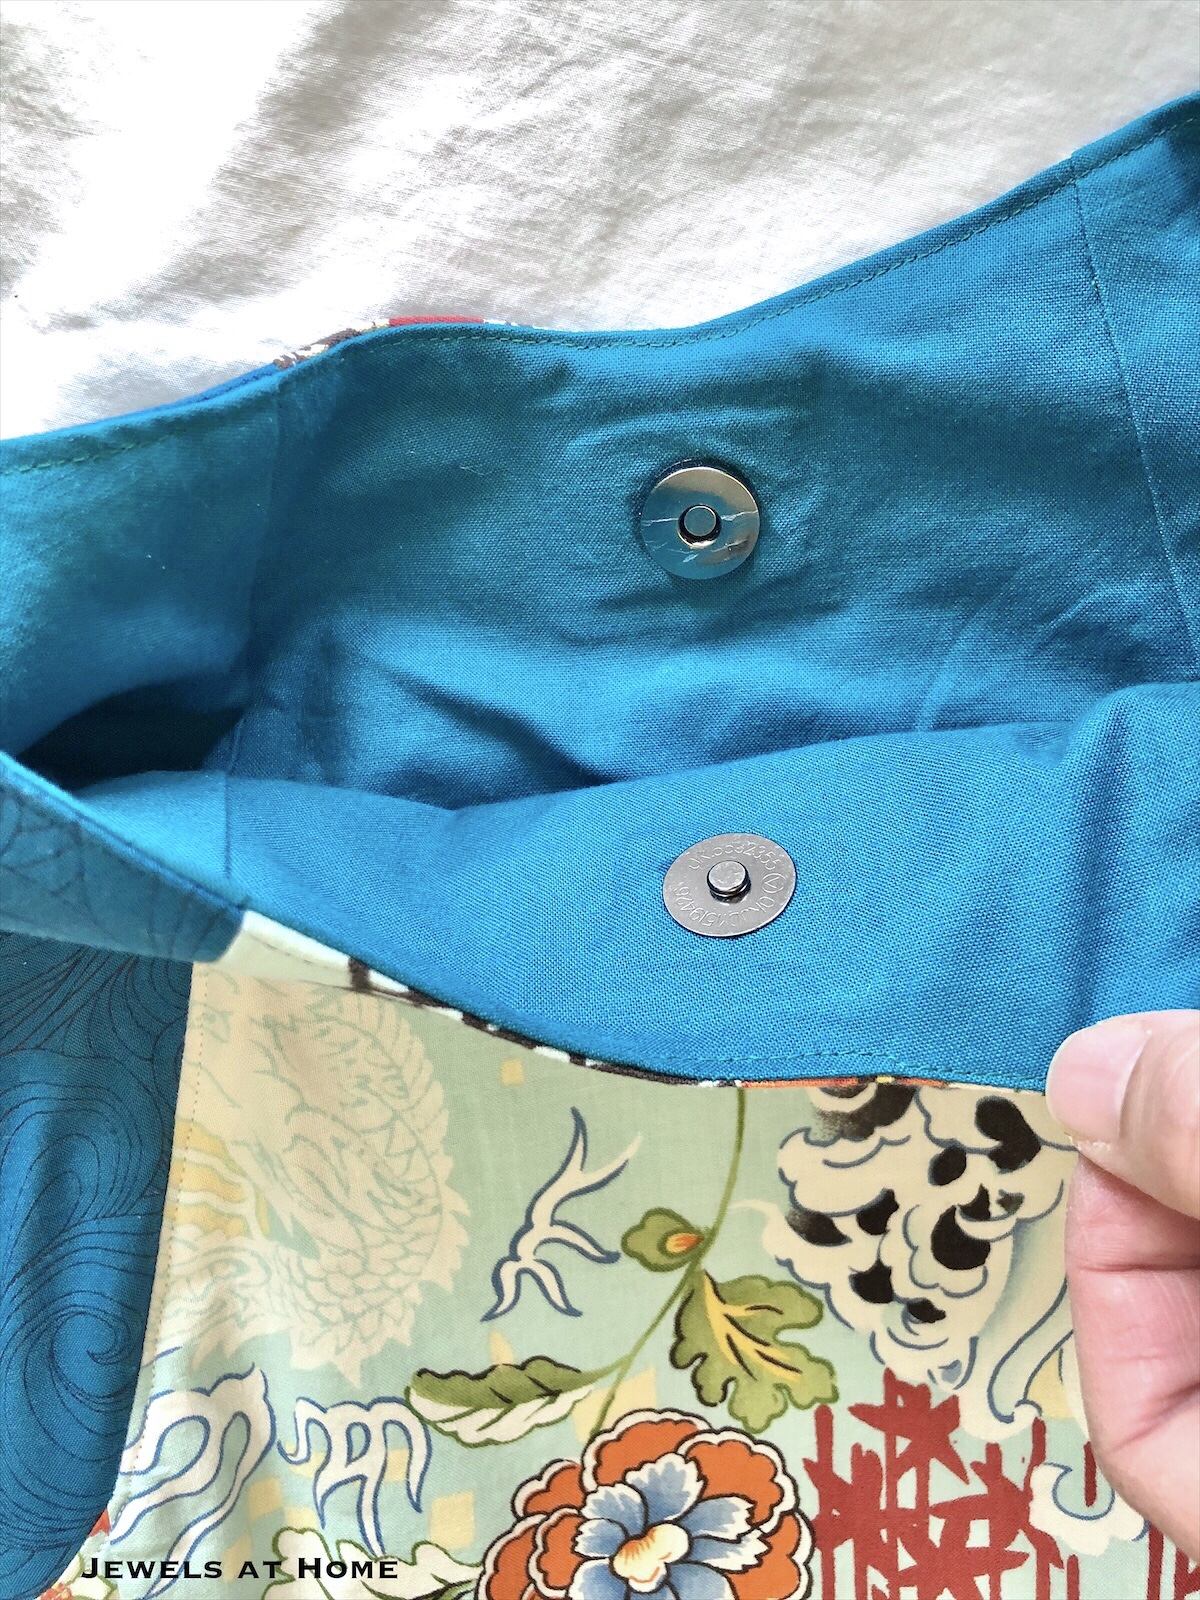
This is the lovely 2-4-1 tote by Anna Graham of Noodlehead. I made it with some leftover fabric from my favorite baby sling and a from my mother’s stash. I’m looking forward to trying it out with more variations!
The pocket and magnetic snap make me happy!
It feels a bit funny to be sewing purses while we’re barely leaving the house, but it’s making me happy!
Sigh, with the novel coronavirus circulating it’s a good idea to have face masks for the times when we go out to get groceries or meals. Some hospitals are also asking for donations of fabric masks. I tried a few different patterns and settled on my own version I’m sharing here.
The features I like about this mask are that it’s easy to make and comfortable to wear, as well as conserving elastic, which is hard to find these days.
Here’s what you’ll need:
Cotton fabric
Elastic
Cord for ties – I used spare shoelaces and some bias tape stitched closed
Sewing machine, thread, scissors
Here’s how to make it:
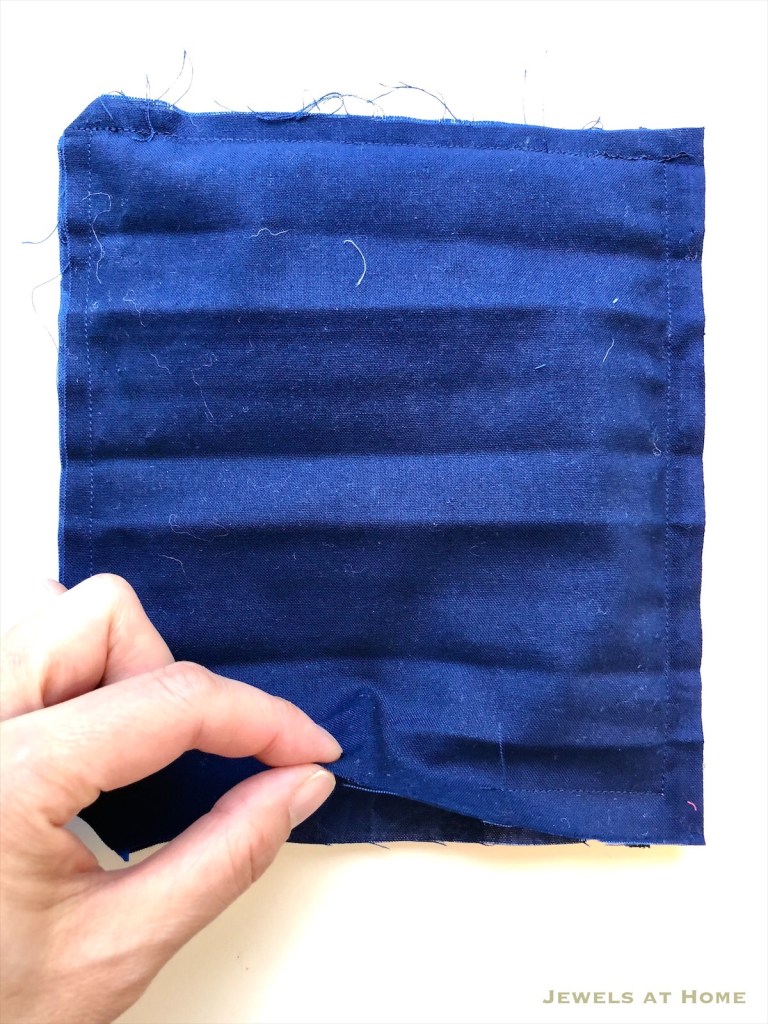
Cut a piece of cotton 8”x 16”
Fold in half lengthwise and mark the middle
Pin the elastic next to the middle on the right side
Pin the ties 3/8” up from the bottom corners
Fold lengthwise with right sides facing
Leaving a 3” opening on one of the edges to turn the mask right side out, stitch around the edges with a 3/8” seam allowance
Using the 3” opening, turn the mask right side out
Iron the seams flat and top stitch around the edges
Pin three pleats
Stitch the two sides to secure the pleats
Here’s how I wear these masks and some of the fun fabric and color combinations I tried:
Hope that helps others who are sewing masks. Stay safe, friends!