
So, I actually did this project in January, being the Christmas decorating nerd that I am. It’s strange to think of all the things that have happened this year since I started planning our Christmas decorations. It will be our … Continue reading
So, I actually did this project in January, being the Christmas decorating nerd that I am. It’s strange to think of all the things that have happened this year since I started planning our Christmas decorations. It will be our … Continue reading

Here is the third and final (for now) installment of my dresser painting trilogy. First was the mid-century dresser; next came the faux campaign dresser; and last but not least is this faux bone inlay project! If you are thinking … Continue reading

This project combines so many of my favorite things: vintage furniture (I have an extra weakness for chairs and mirrors), DIY, and Anthropologie! I’ll link to some of my other favorite mirror projects at the bottom of this post! I … Continue reading

This post is brought to you by this weekend’s fabulous vintage find! If you know me, you know I love finding vintage furniture – it’s even better if it’s mid-century bamboo or rattan – and it’s best if it’s free! … Continue reading
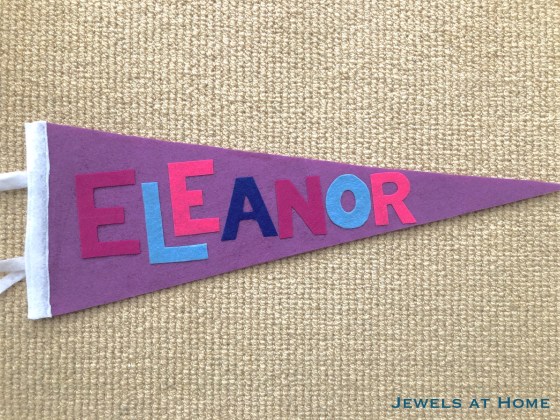
I recently made these vintage-style pennants to celebrate special places in our family. It was so fun that I went on to make personalized name pennants for my nephew and niece.

Here’s what you’ll need:
Here’s how to do it:
Here’s how the pennants turned out. I love all the color variations!

Julie aka “Jewels”

I’m still looking for a good name for this year’s Christmas theme. Woodsy and Warm? I do know that sweaters are a big part of my decorations – like the sweater pillow covers and sweater ornaments I already made. The … Continue reading

I’m here to share my latest project and also ask for your help! Here’s a felt wreath I made for Christmas decorating, and I really, really love it – but I don’t know where to display it, especially since it … Continue reading

Okay, so maybe I shouldn’t be calling them ornaments, because I am pretending that I am being seasonally appropriate and not decorating for Christmas yet, but I think we all know the truth… So, you may have seen that I … Continue reading
About once a year, my friend Ariana (of Act 2 Decor) and I get up early go to the Alameda Point Antiques Fair to browse and look for treasures.
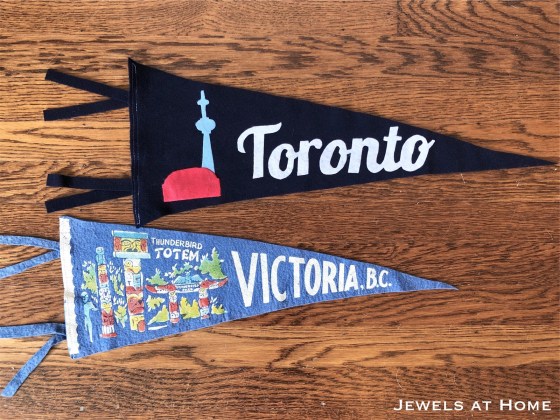
I’ve been working hard to clean out the house this year, so I kept my shopping restrained, but I was looking for a vintage felt pennant to finish up a new gallery wall in JJ’s room. I found the perfect piece, and it was definitely meant to be, because it was sold by the family of a former coworker!
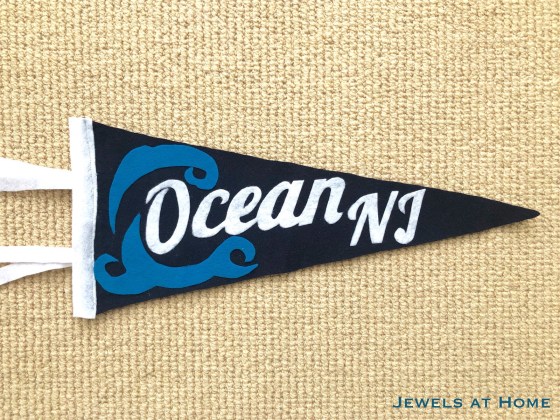
When I got home, I was inspired to make some more pennants of my own. I made one for my home town, Toronto, and one for my sister-in-law’s family in New Jersey.
Here’s what you’ll need:
Here’s how to do it:
Create a template for your pennant – mine is on two sheets of scrap printer paper. It is 7.5″ high x 21″ long.
Cut out the pennant from a large piece of felt
I sketched the images freehand in reverse on the paper side of the Heat ‘n Bond
For the script lettering, create a word processing document, print out the words, and trace them in reverse onto the paper side of the Heat ‘n Bond

Choose your felt colors for the letters and design and fuse Heat ‘n Bond to one side

Cut out your letters and designs
Arrange on the pennant and iron in place
Cut strips of felt for the binding (optional) and ties and sew in place
Here are my finished pennants. I should make one for San Francisco next!

Here’s a picture together with my vintage find:
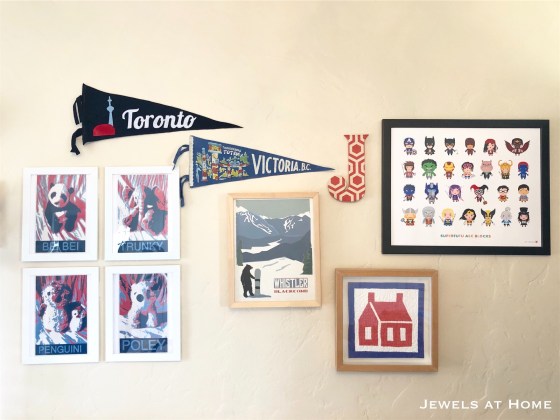
And here’s how JJ’s new gallery wall came together!
I had so much fun! What city do you want to celebrate and what image would you use?
Julie aka “Jewels”
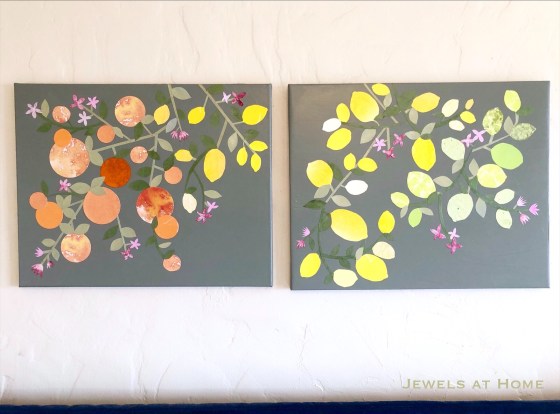
San Francisco’s fog is not the best climate for gardening, but my little lemon tree is getting established, and I wanted to create something citrus-inspired! I had some old canvases lying around (let’s just say that for me, paint-with-wine events are more about the experience than the product!), so I decided to transform them into something new!
Here’s what you’ll need:
Here’s how to do it:
Paint the canvases in your background color:

Cut out your shapes:

Start arranging your citrus into branches:
For ideas on how to arrange your shapes, you can look at these inspiration images I found, as well as my finished product.


I am thinking of eventually putting these canvases in my office at work, but for now, I like the feeling of going to sleep in a garden here!
Julie aka “Jewels”
